I have done a few things ham related in the last three years, but I haven’t really been very active on the air. Bad ham!
In February of 2017, I installed the FTM-100DR in my new Kia Sportage. I did not want to drill the roof for the antenna, so I used a magnetic mount, but I found a clever way to route the cable into the car.
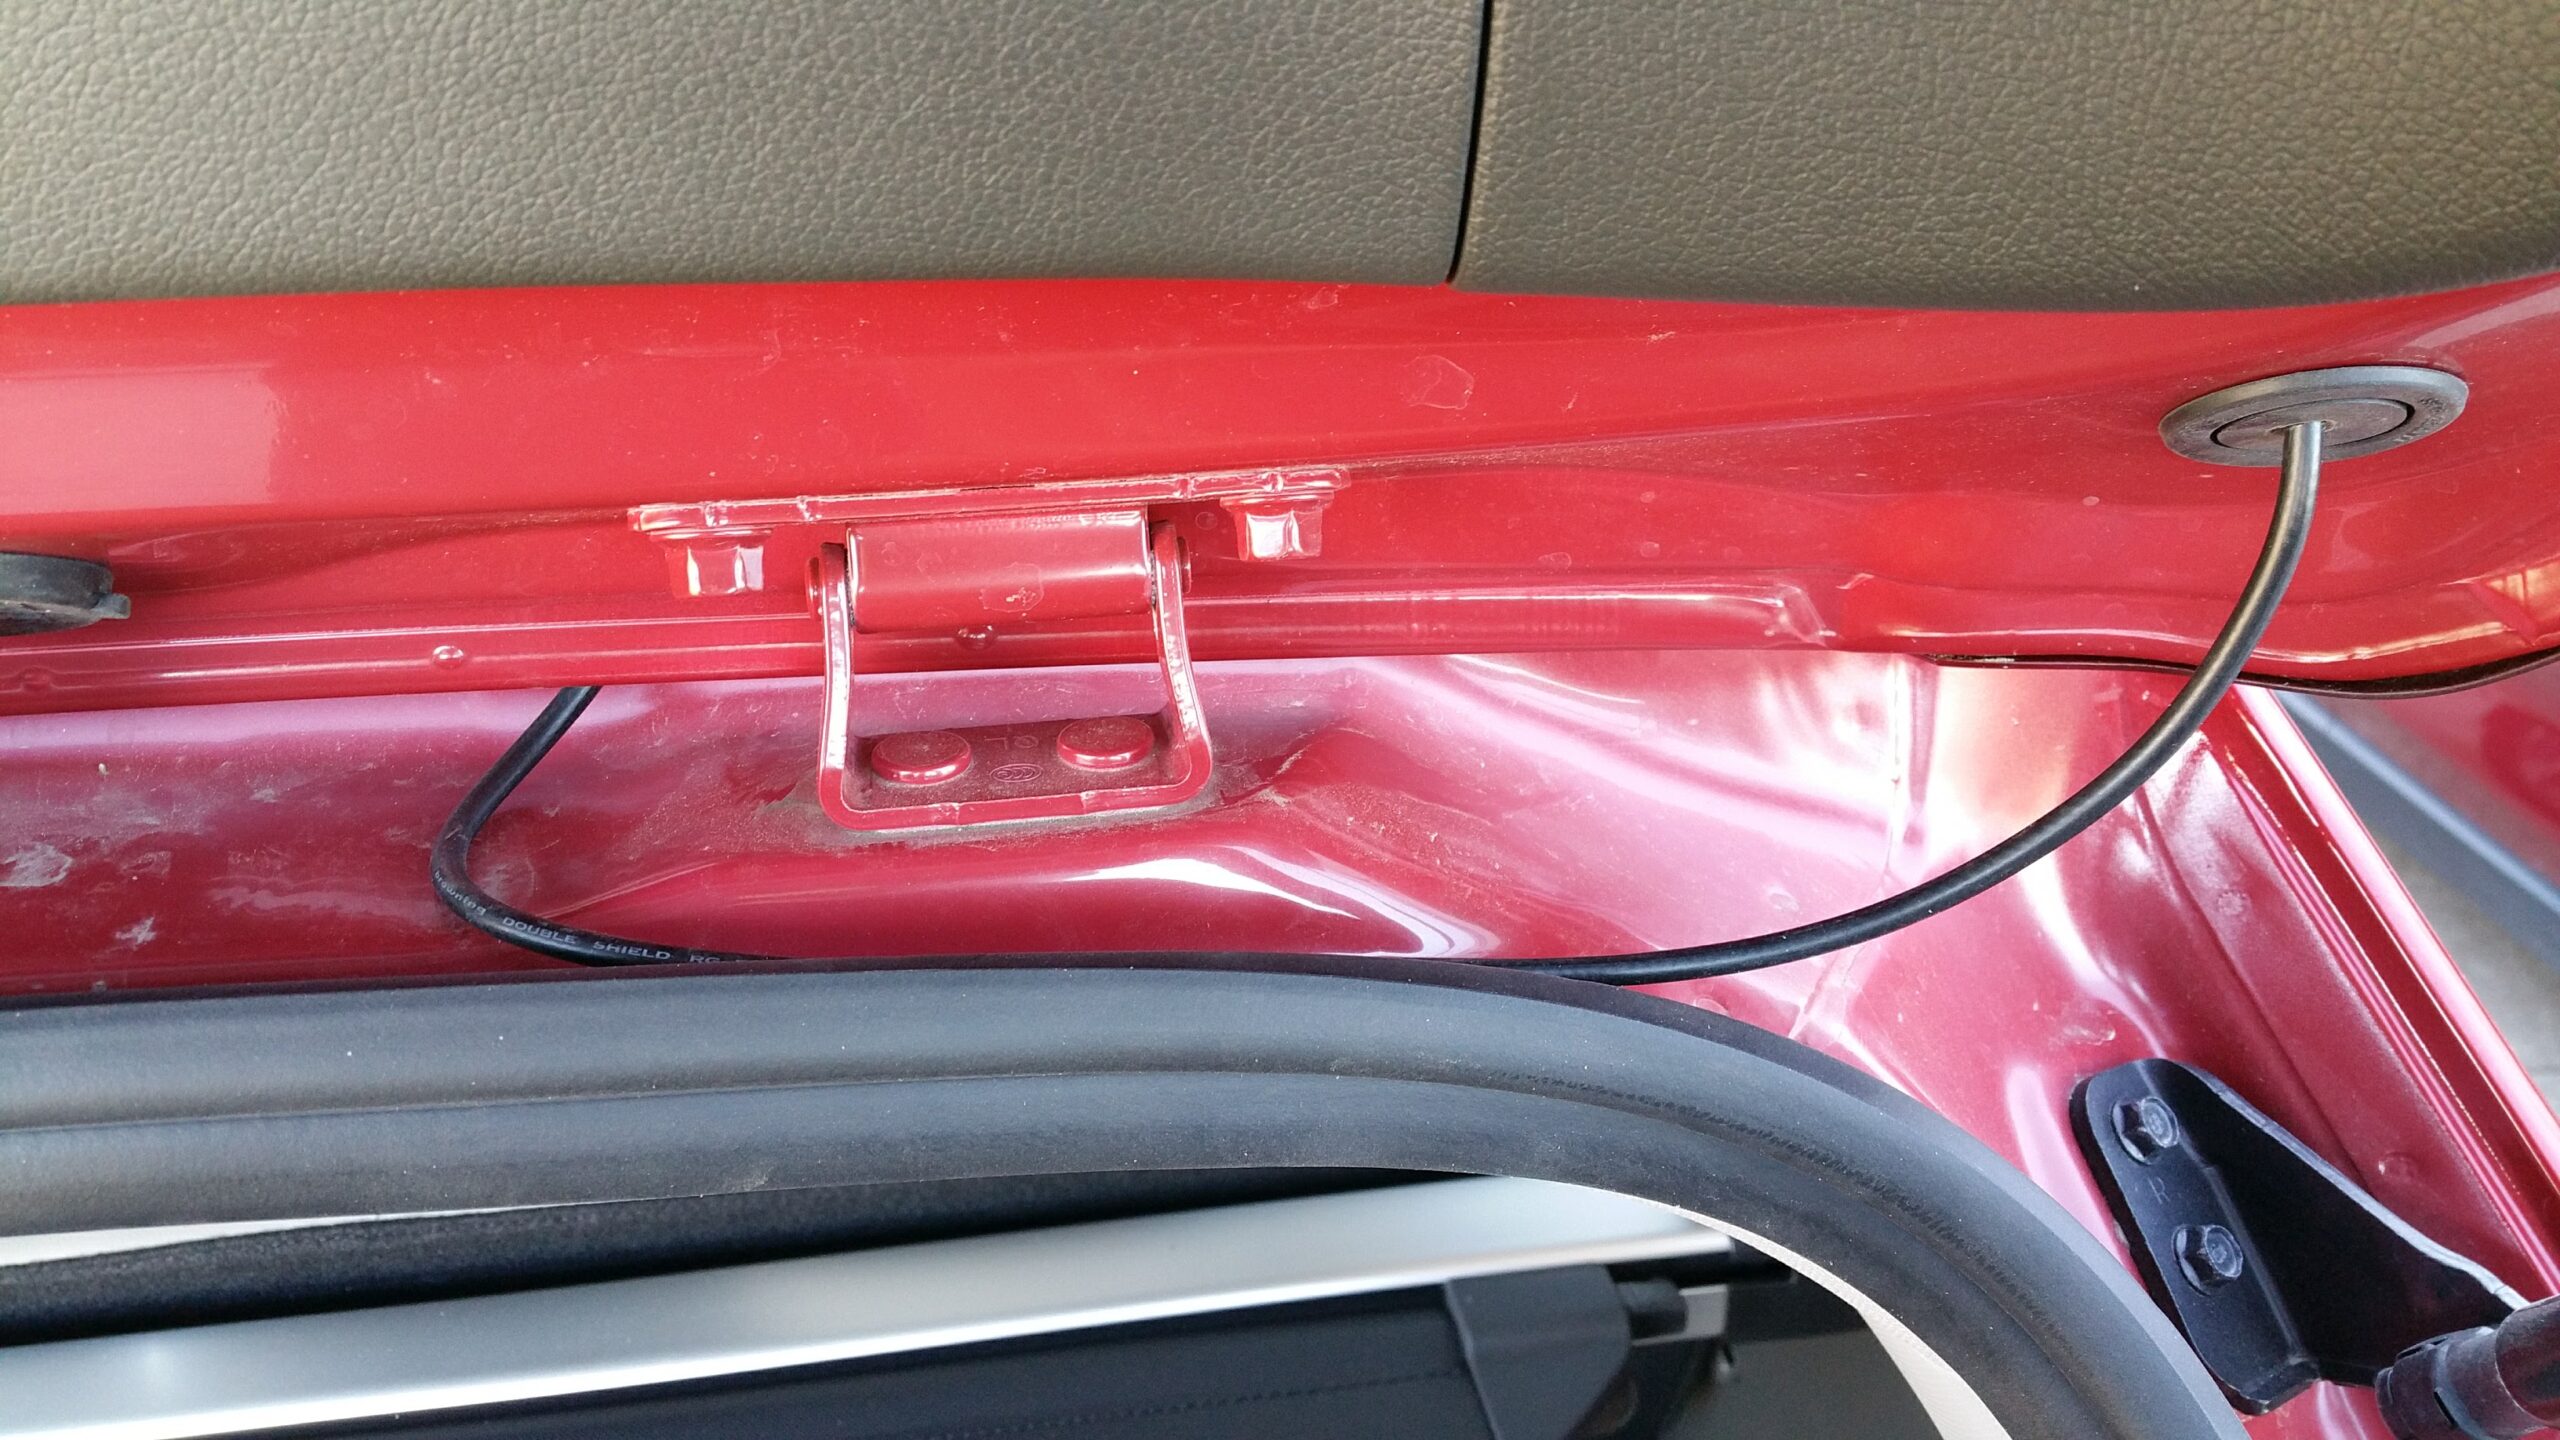
There are rubber plugs on the rear gate.
And a cable passthrough from the gate to the body of the car to fish the cable through…
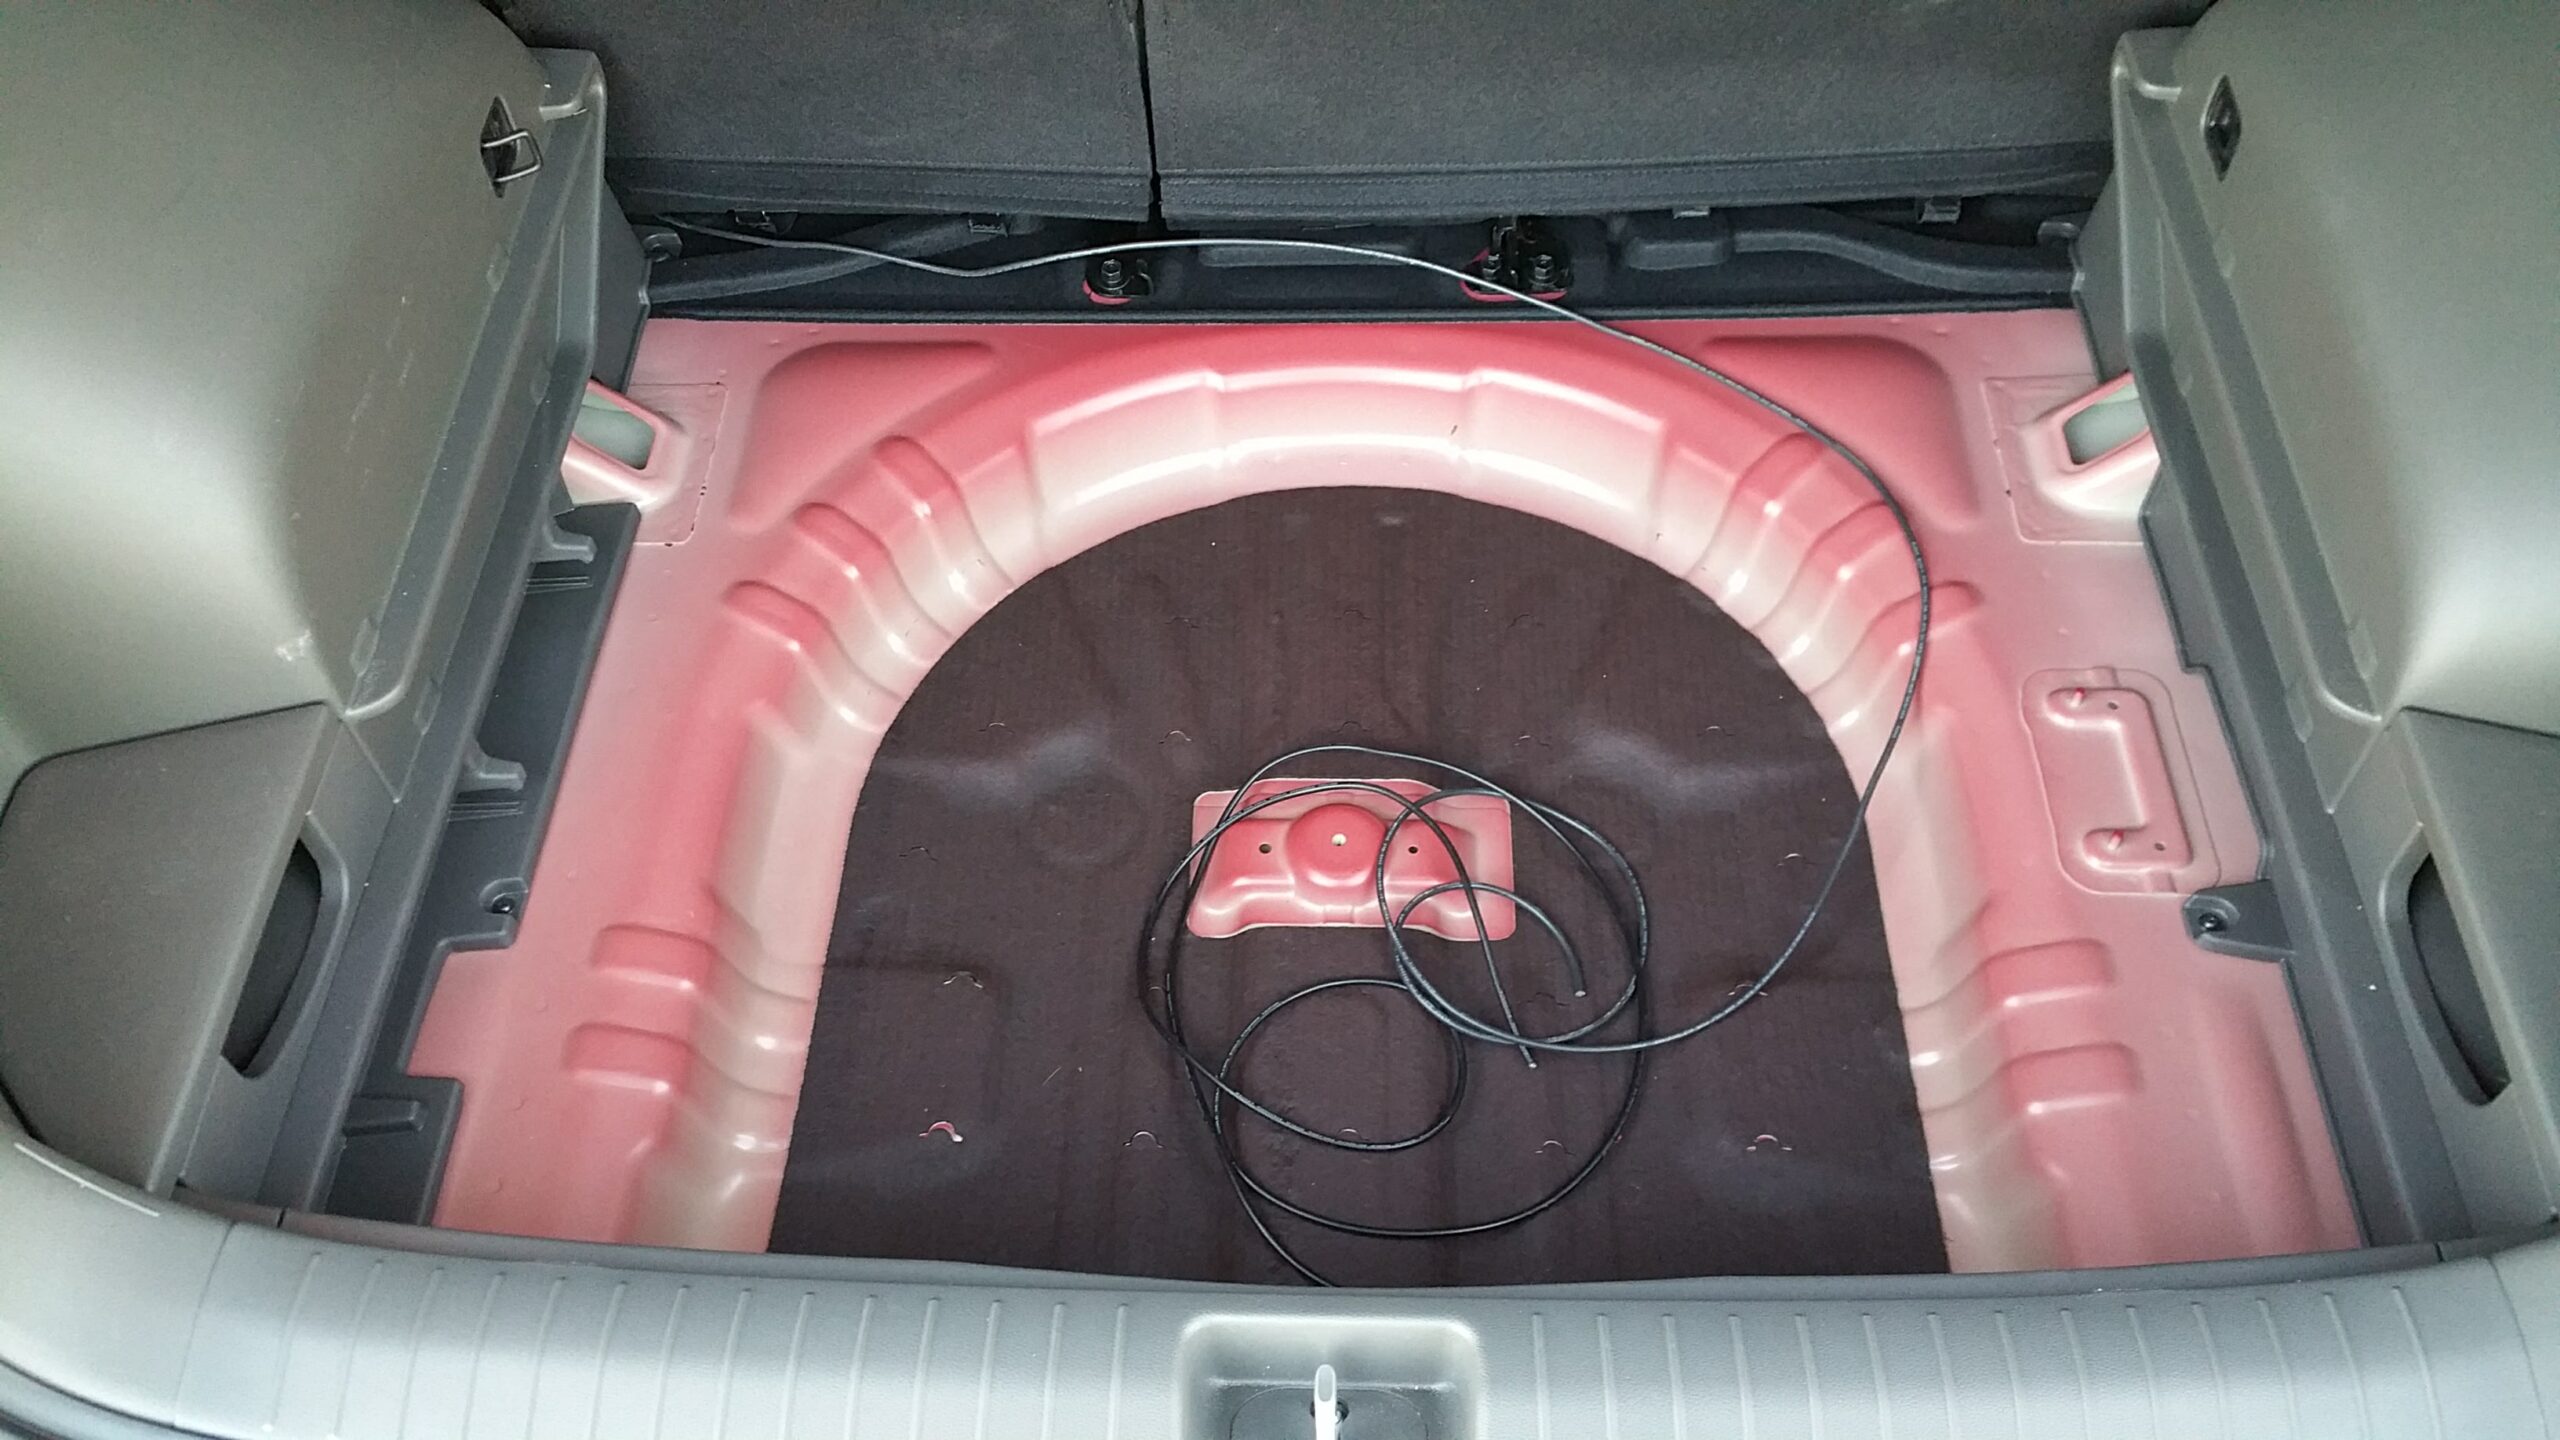
From there, I don’t have any good pictures of it, but I fished the coax from there down to the spare tire well.
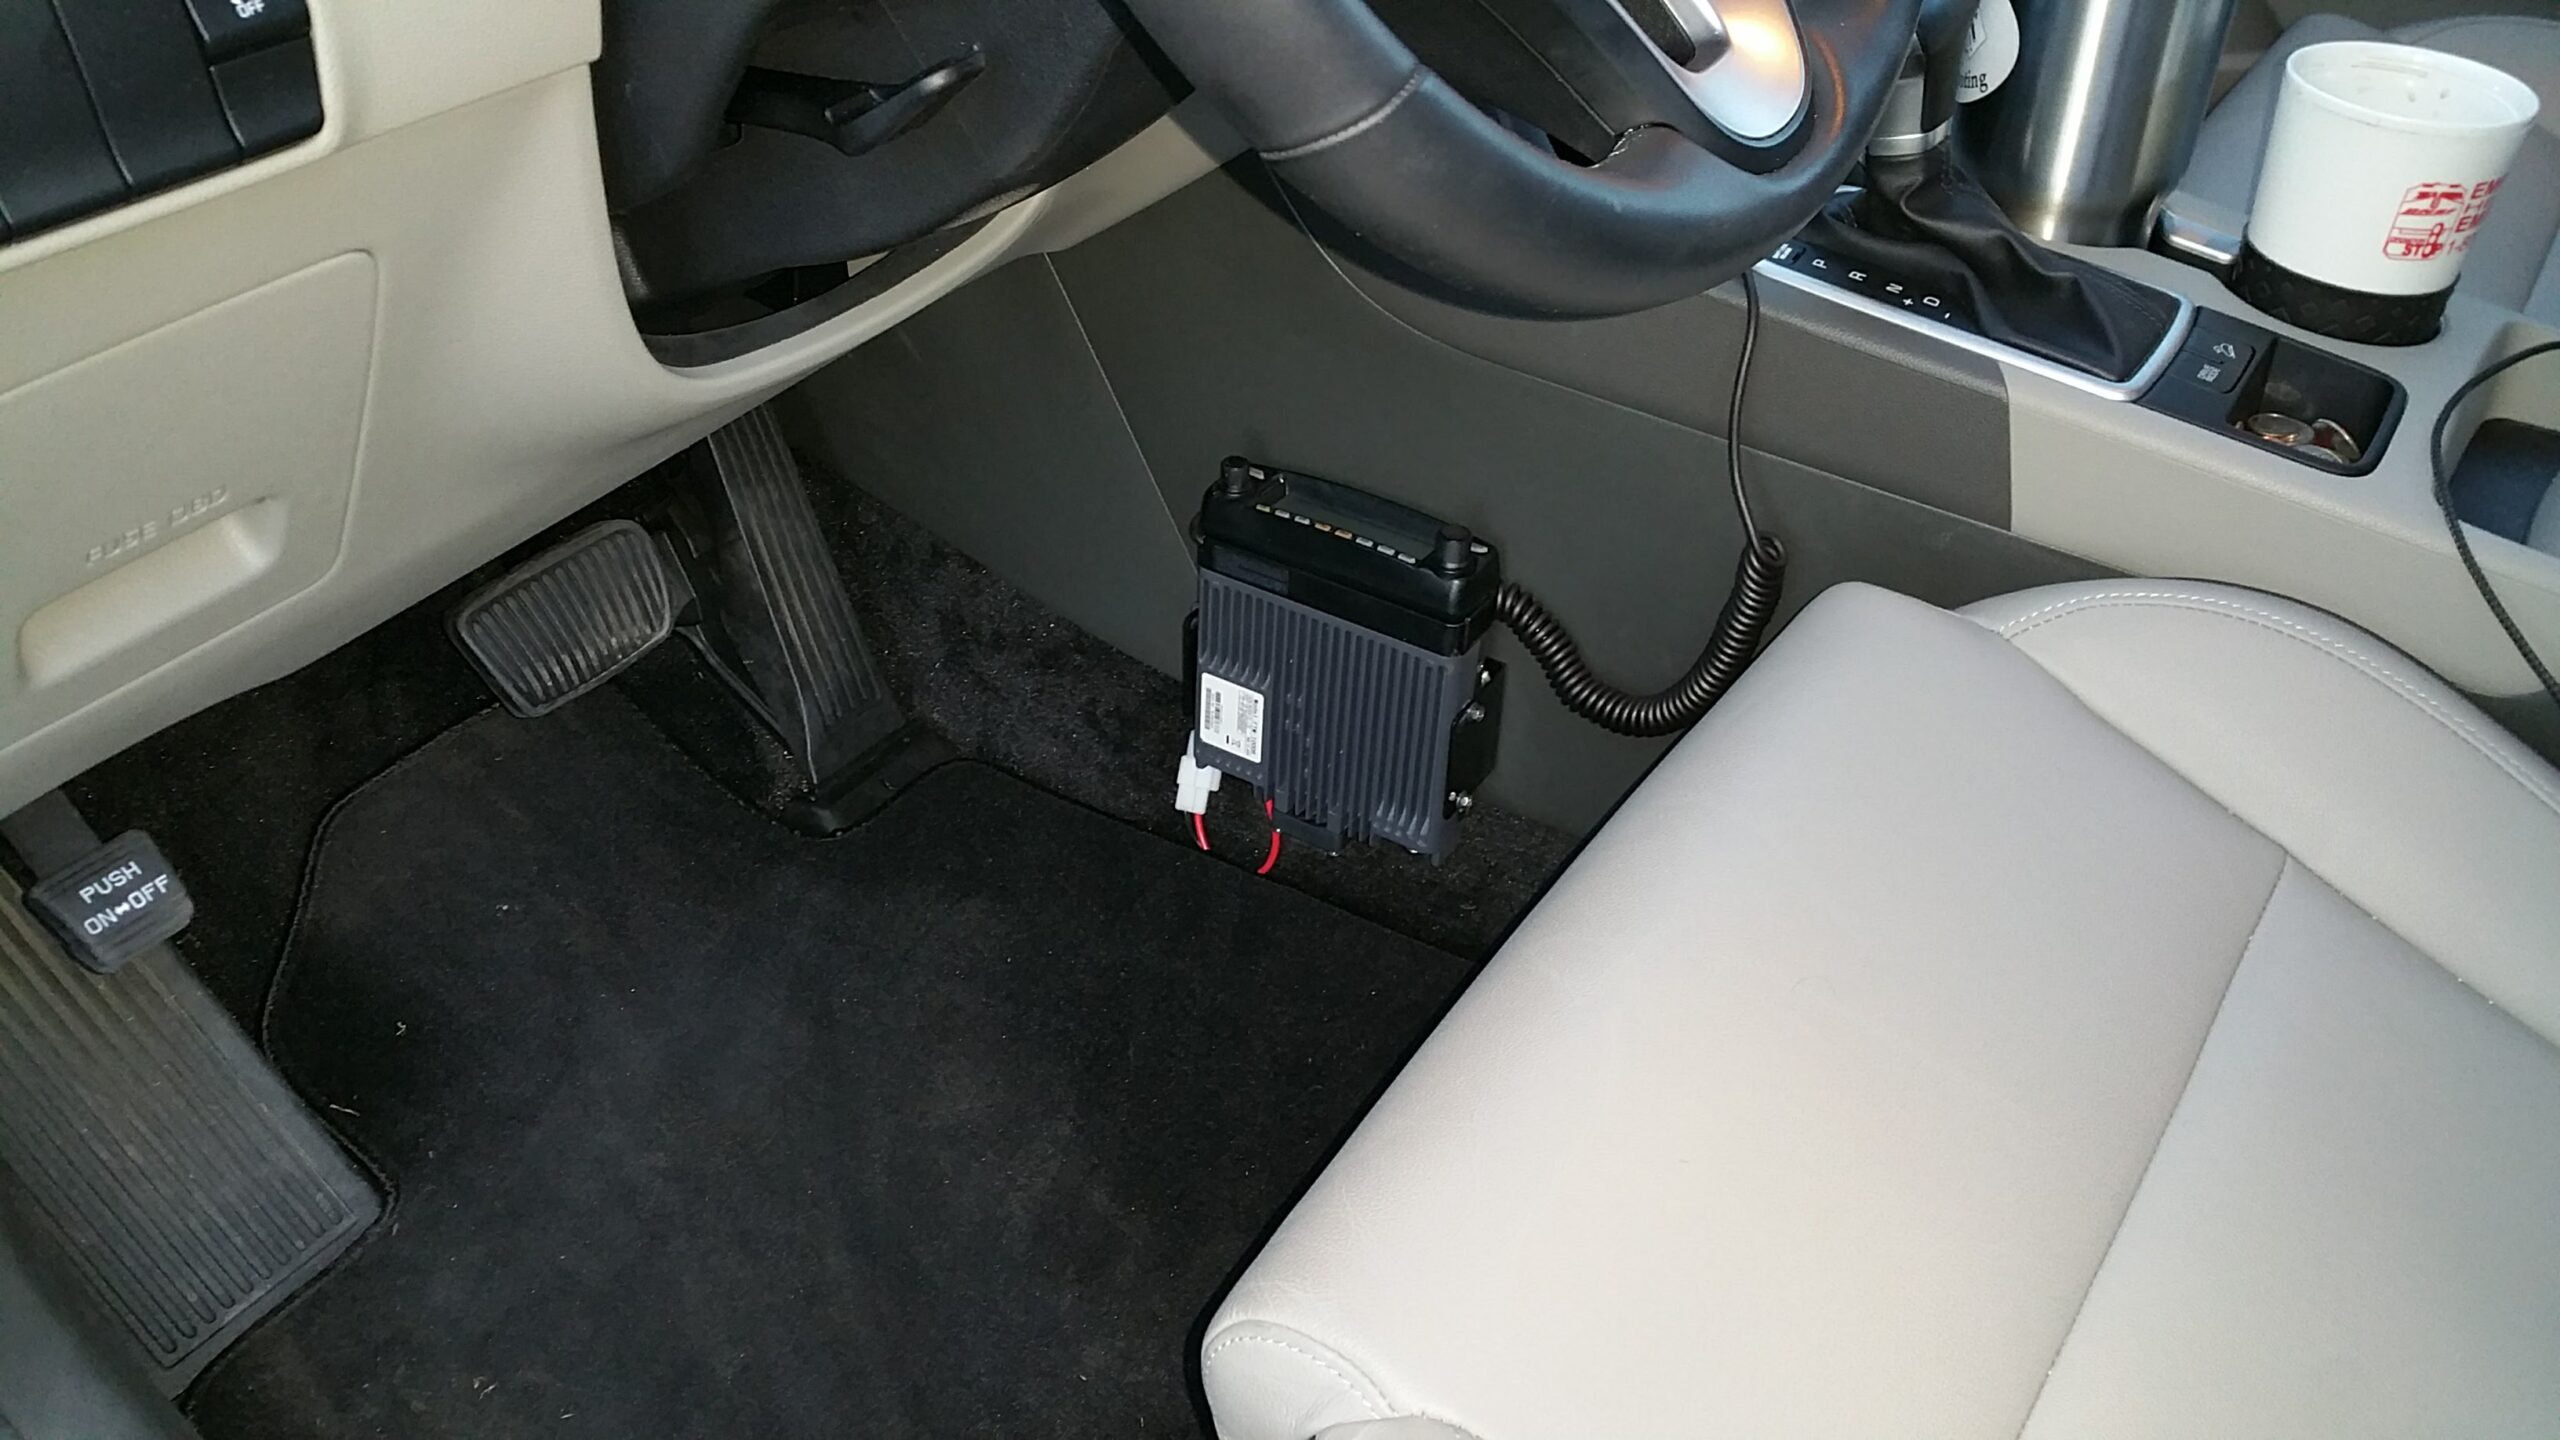
By then, the end of the coax was reached and I had to add a connector and more coax to make it reach the front of the car. From there, it’s a pretty normal tuck under the floor mats to the driver side console.
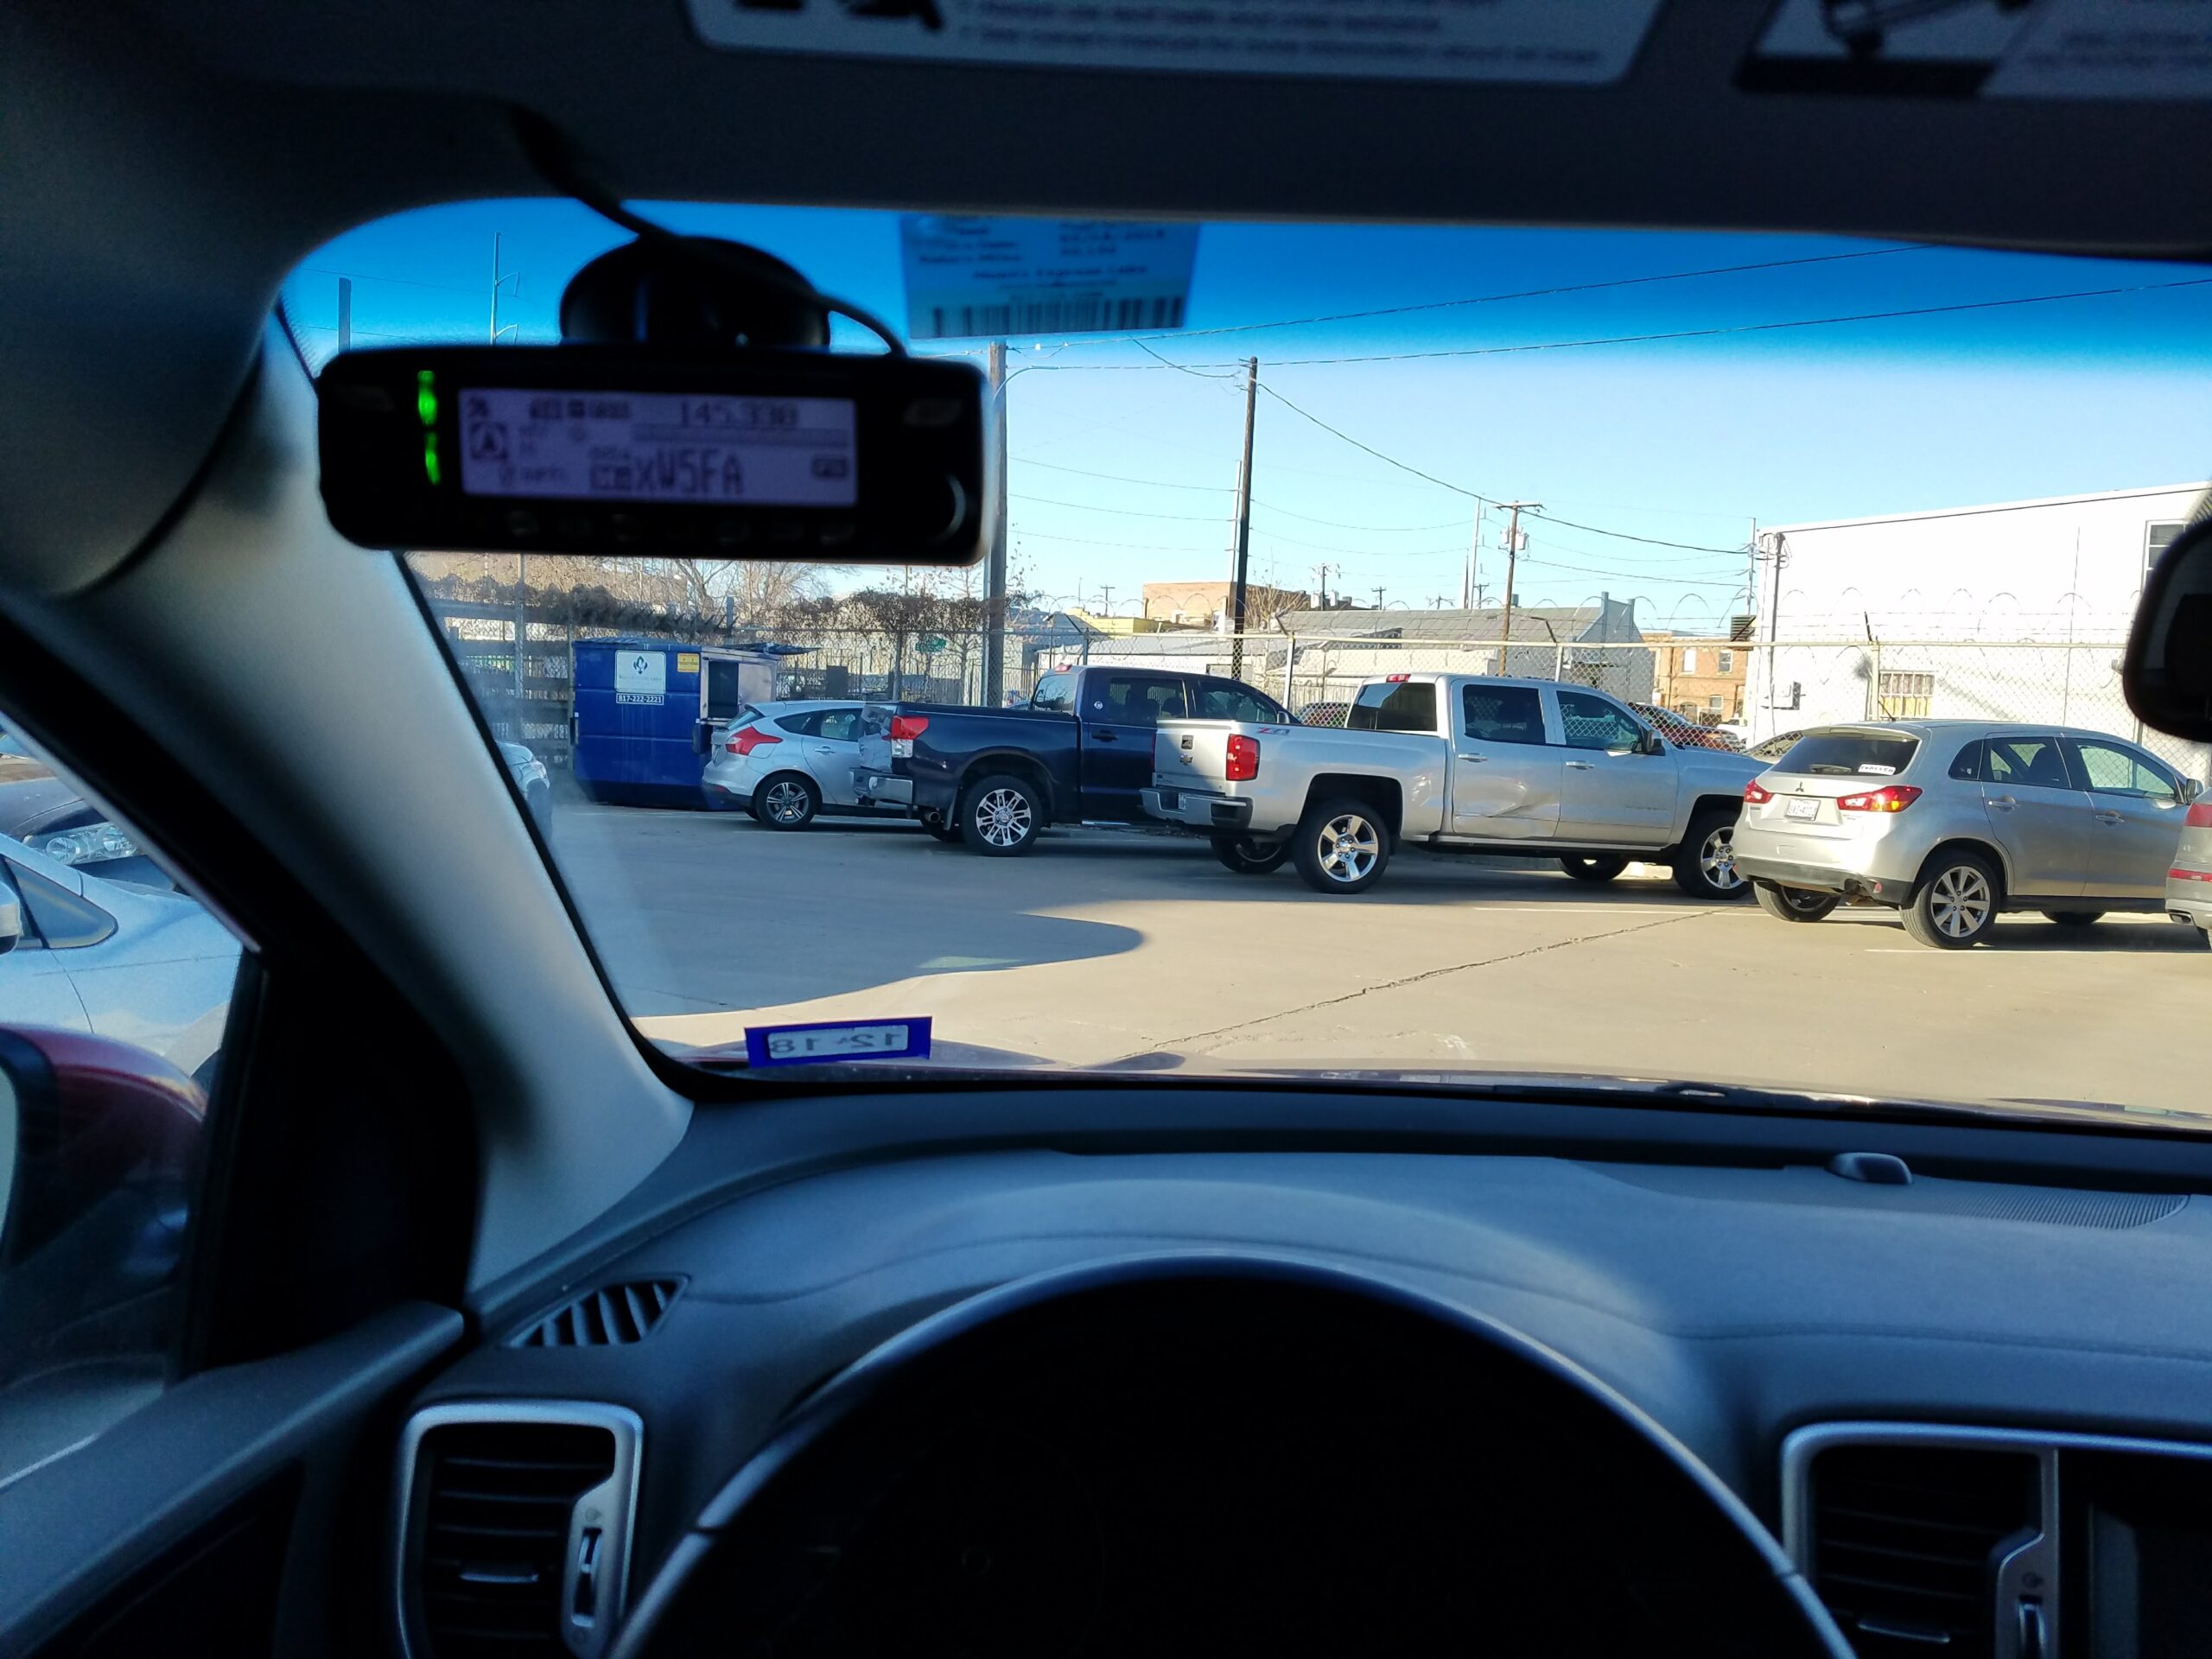
About a year later, I ran the wire to remote mount the control head on the windshield. Sorry about the focus. 🙂
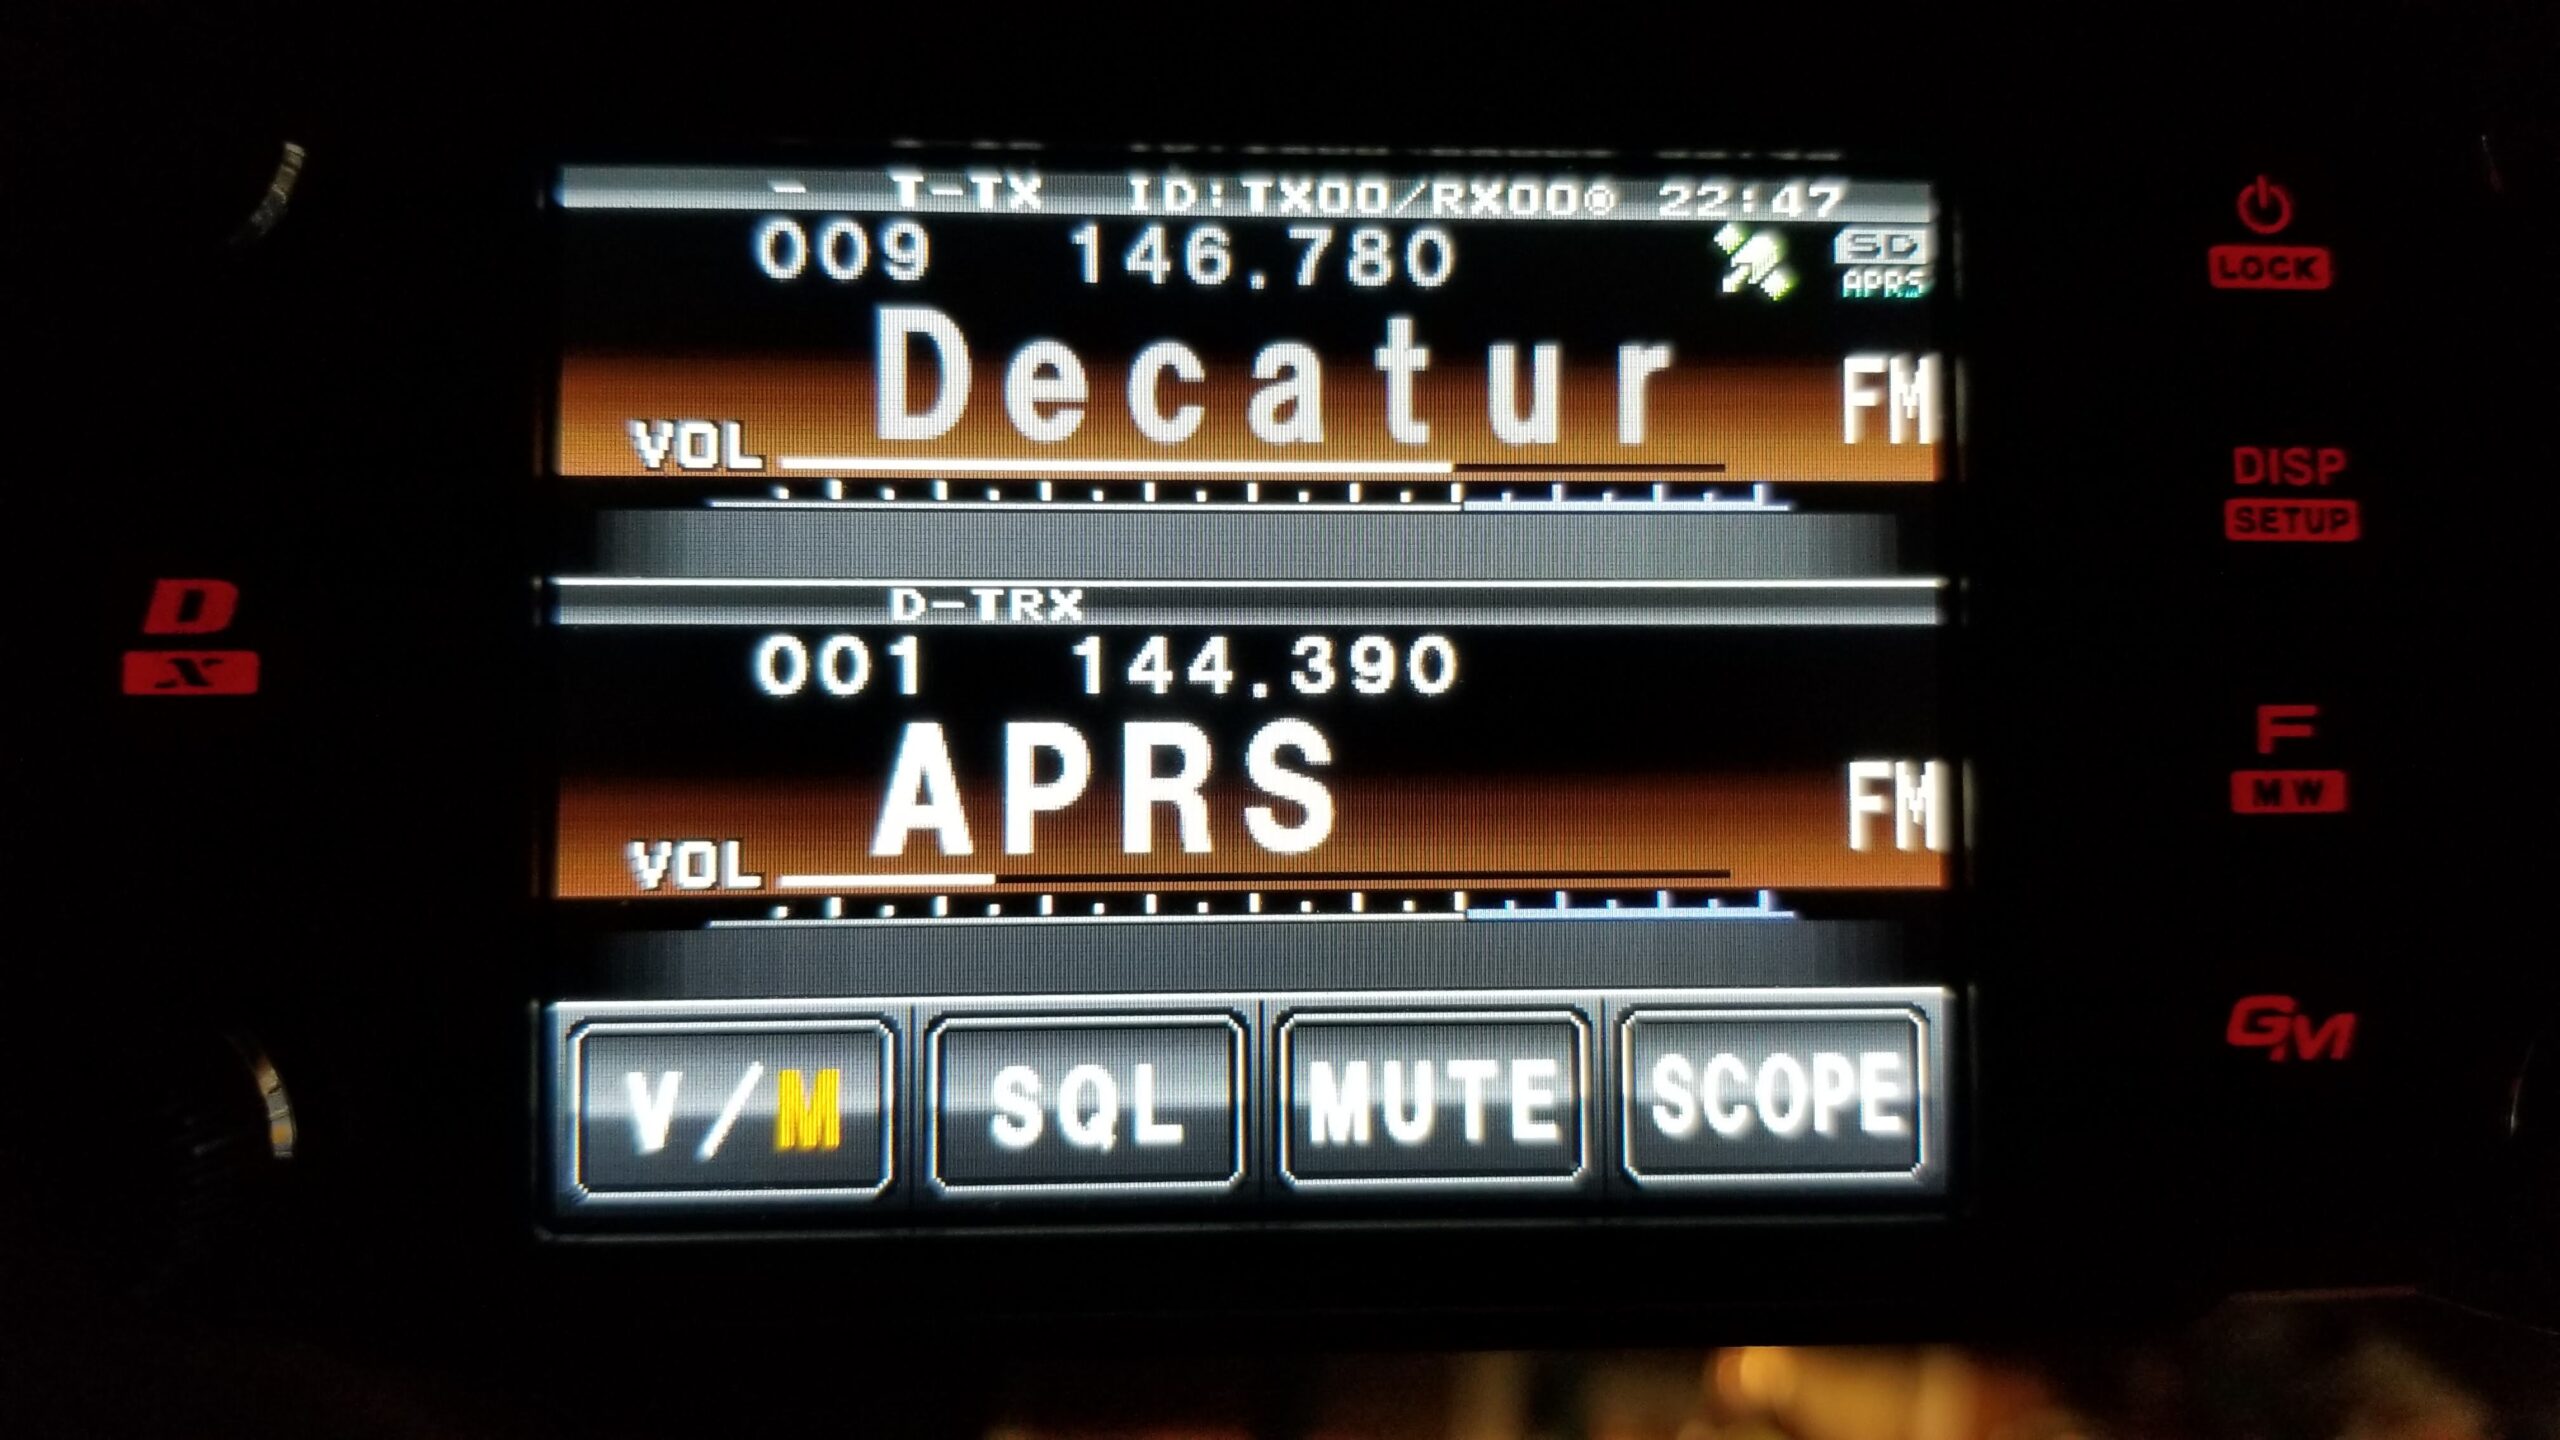
Among the things I enjoyed with the FTM-100DR was playing with APRS. The FTM-100DR can do APRS or something else, but not really both. It can sort of receive APRS messages while being set up to transmit voice, but if it is beaconing APRS data, it’s beaconing data. This was only one factor driving my desire to upgrade, so it was natural to choose the FTM-400XDR. As a side benefit, it was a drop in replacement in the car. Same mounting bracket and power cable for the main unit, same remote cable and suction cup for the control head. And now, APRS is a fully supported feature that can be turned on and off at will with almost no effect on voice operations.
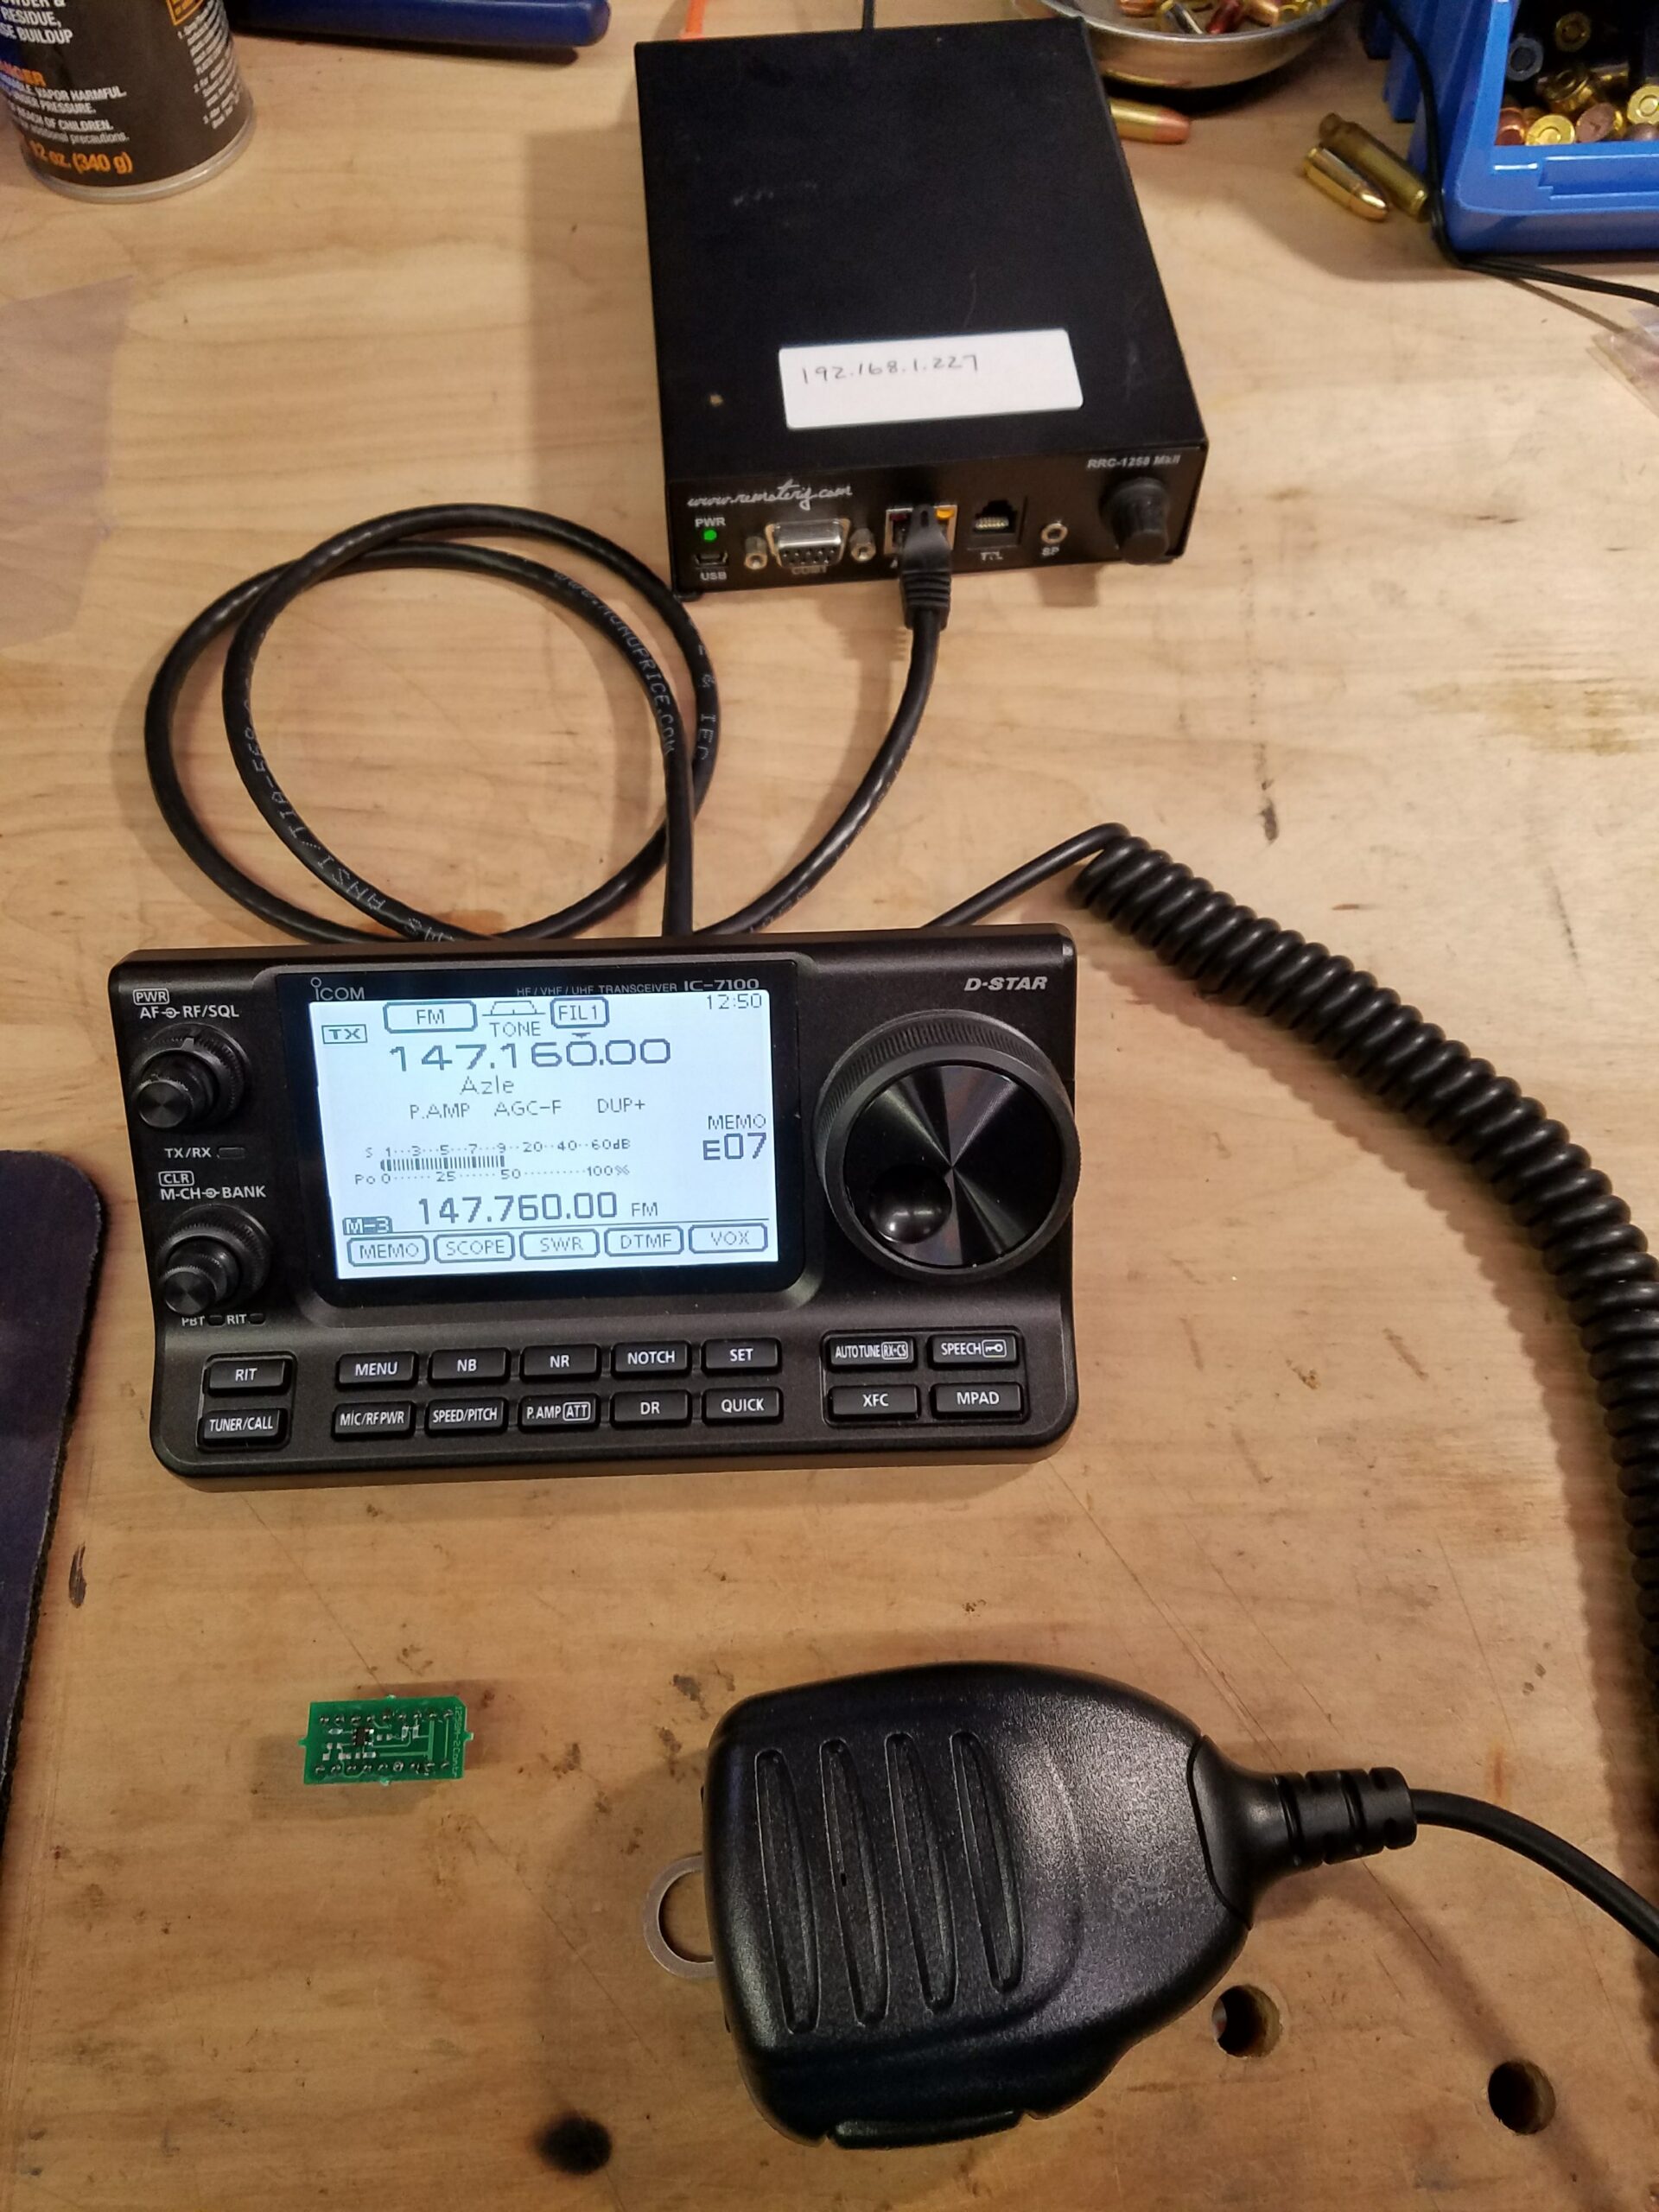
My IC-706MkIIg had been a great rig, but had developed an intermittent transmit problem. Since I generally use it with RemoteRig, I can’t do anything physical to the radio when this issue comes up. I don’t operate often enough to want to deal with a troublesome rig, so I bit the bullet on getting another. I didn’t want a used rig, so I shopped around a bit. I was looking for another rig with with a detachable head for use with RemoteRig; I like that paradigm. I did not have any particular bias for Icom, but I did like the control head for the IC-7100. It seemed well suited to remote operation on a desktop.
Ironically, when I was ready to connect it to the RemoteRig, I found that the radio end unit was non-functional. It had been a while since I’d used it, so I don’t know if it was a storm or long term heat out in the shop that killed it. Long story short, it had no signs of life and the voltage regulator on the board ran super hot, not enough to melt anything, but definitely not right. I contacted Microbit and after a couple of emails and tests back and forth, it was determined to be unrepairable. They sold me a replacement board at a discount price, which was fine with me. It was relatively trivial to get the IC-7100 working over RemoteRig.
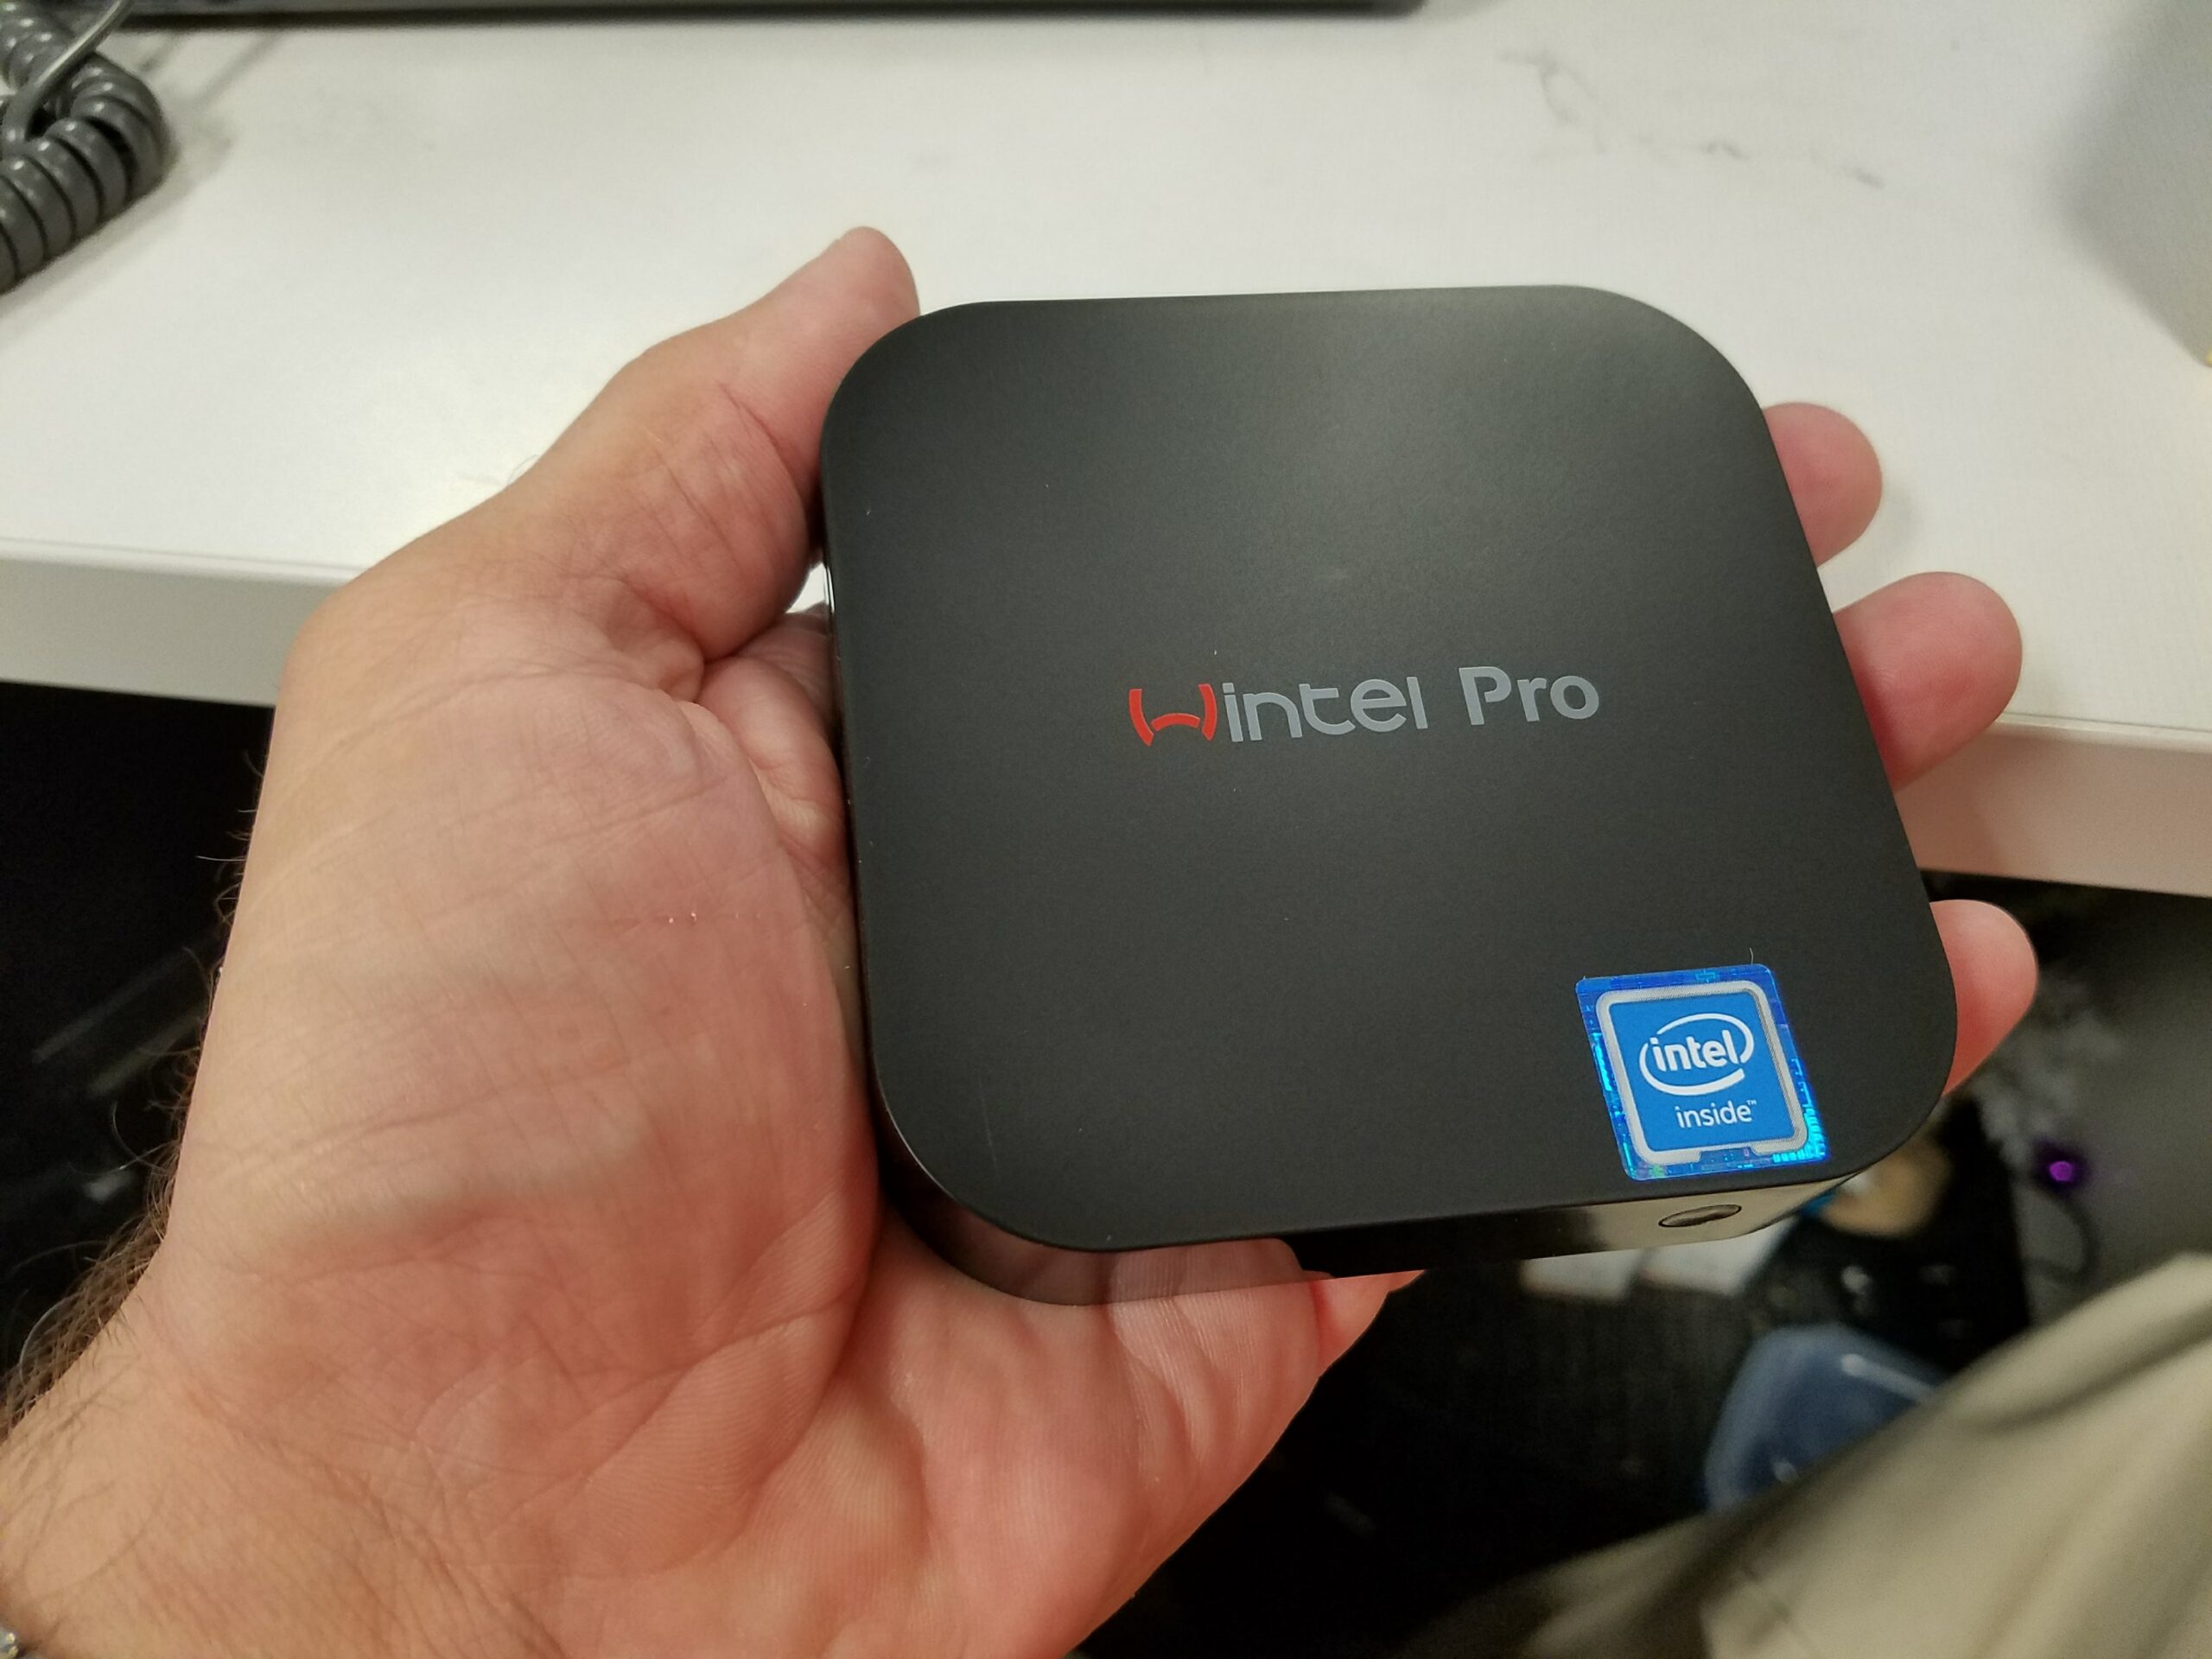
Since the IC-7100 has a built in USB soundcard for digital modes, I wanted to look into that. The connectivity with RemoteRig and the USB port is complicated, so I also looked into Icom’s RS-BA1 remote software. To operate *that* remotely, I needed a PC that was local to the radio and it seemed like a tiny fanless PC would suit the purpose.
It worked mostly, but I had a lot of trouble getting it to stay awake long term, no matter what BIOS settings I use. It would be fine for a couple of days then it would go to sleep. I would have go out there and touch it to wake it up. Within a few months, it went belly up as well. I have not revisited it as yet.
Some time back, I bought a new Icom ID-51 handheld. After a couple of years, I decided to sell it because I just had no real use for one out here in the country. Then around January 2018, I decided to get another for access to D-Star. Shrug. Make up my mind!
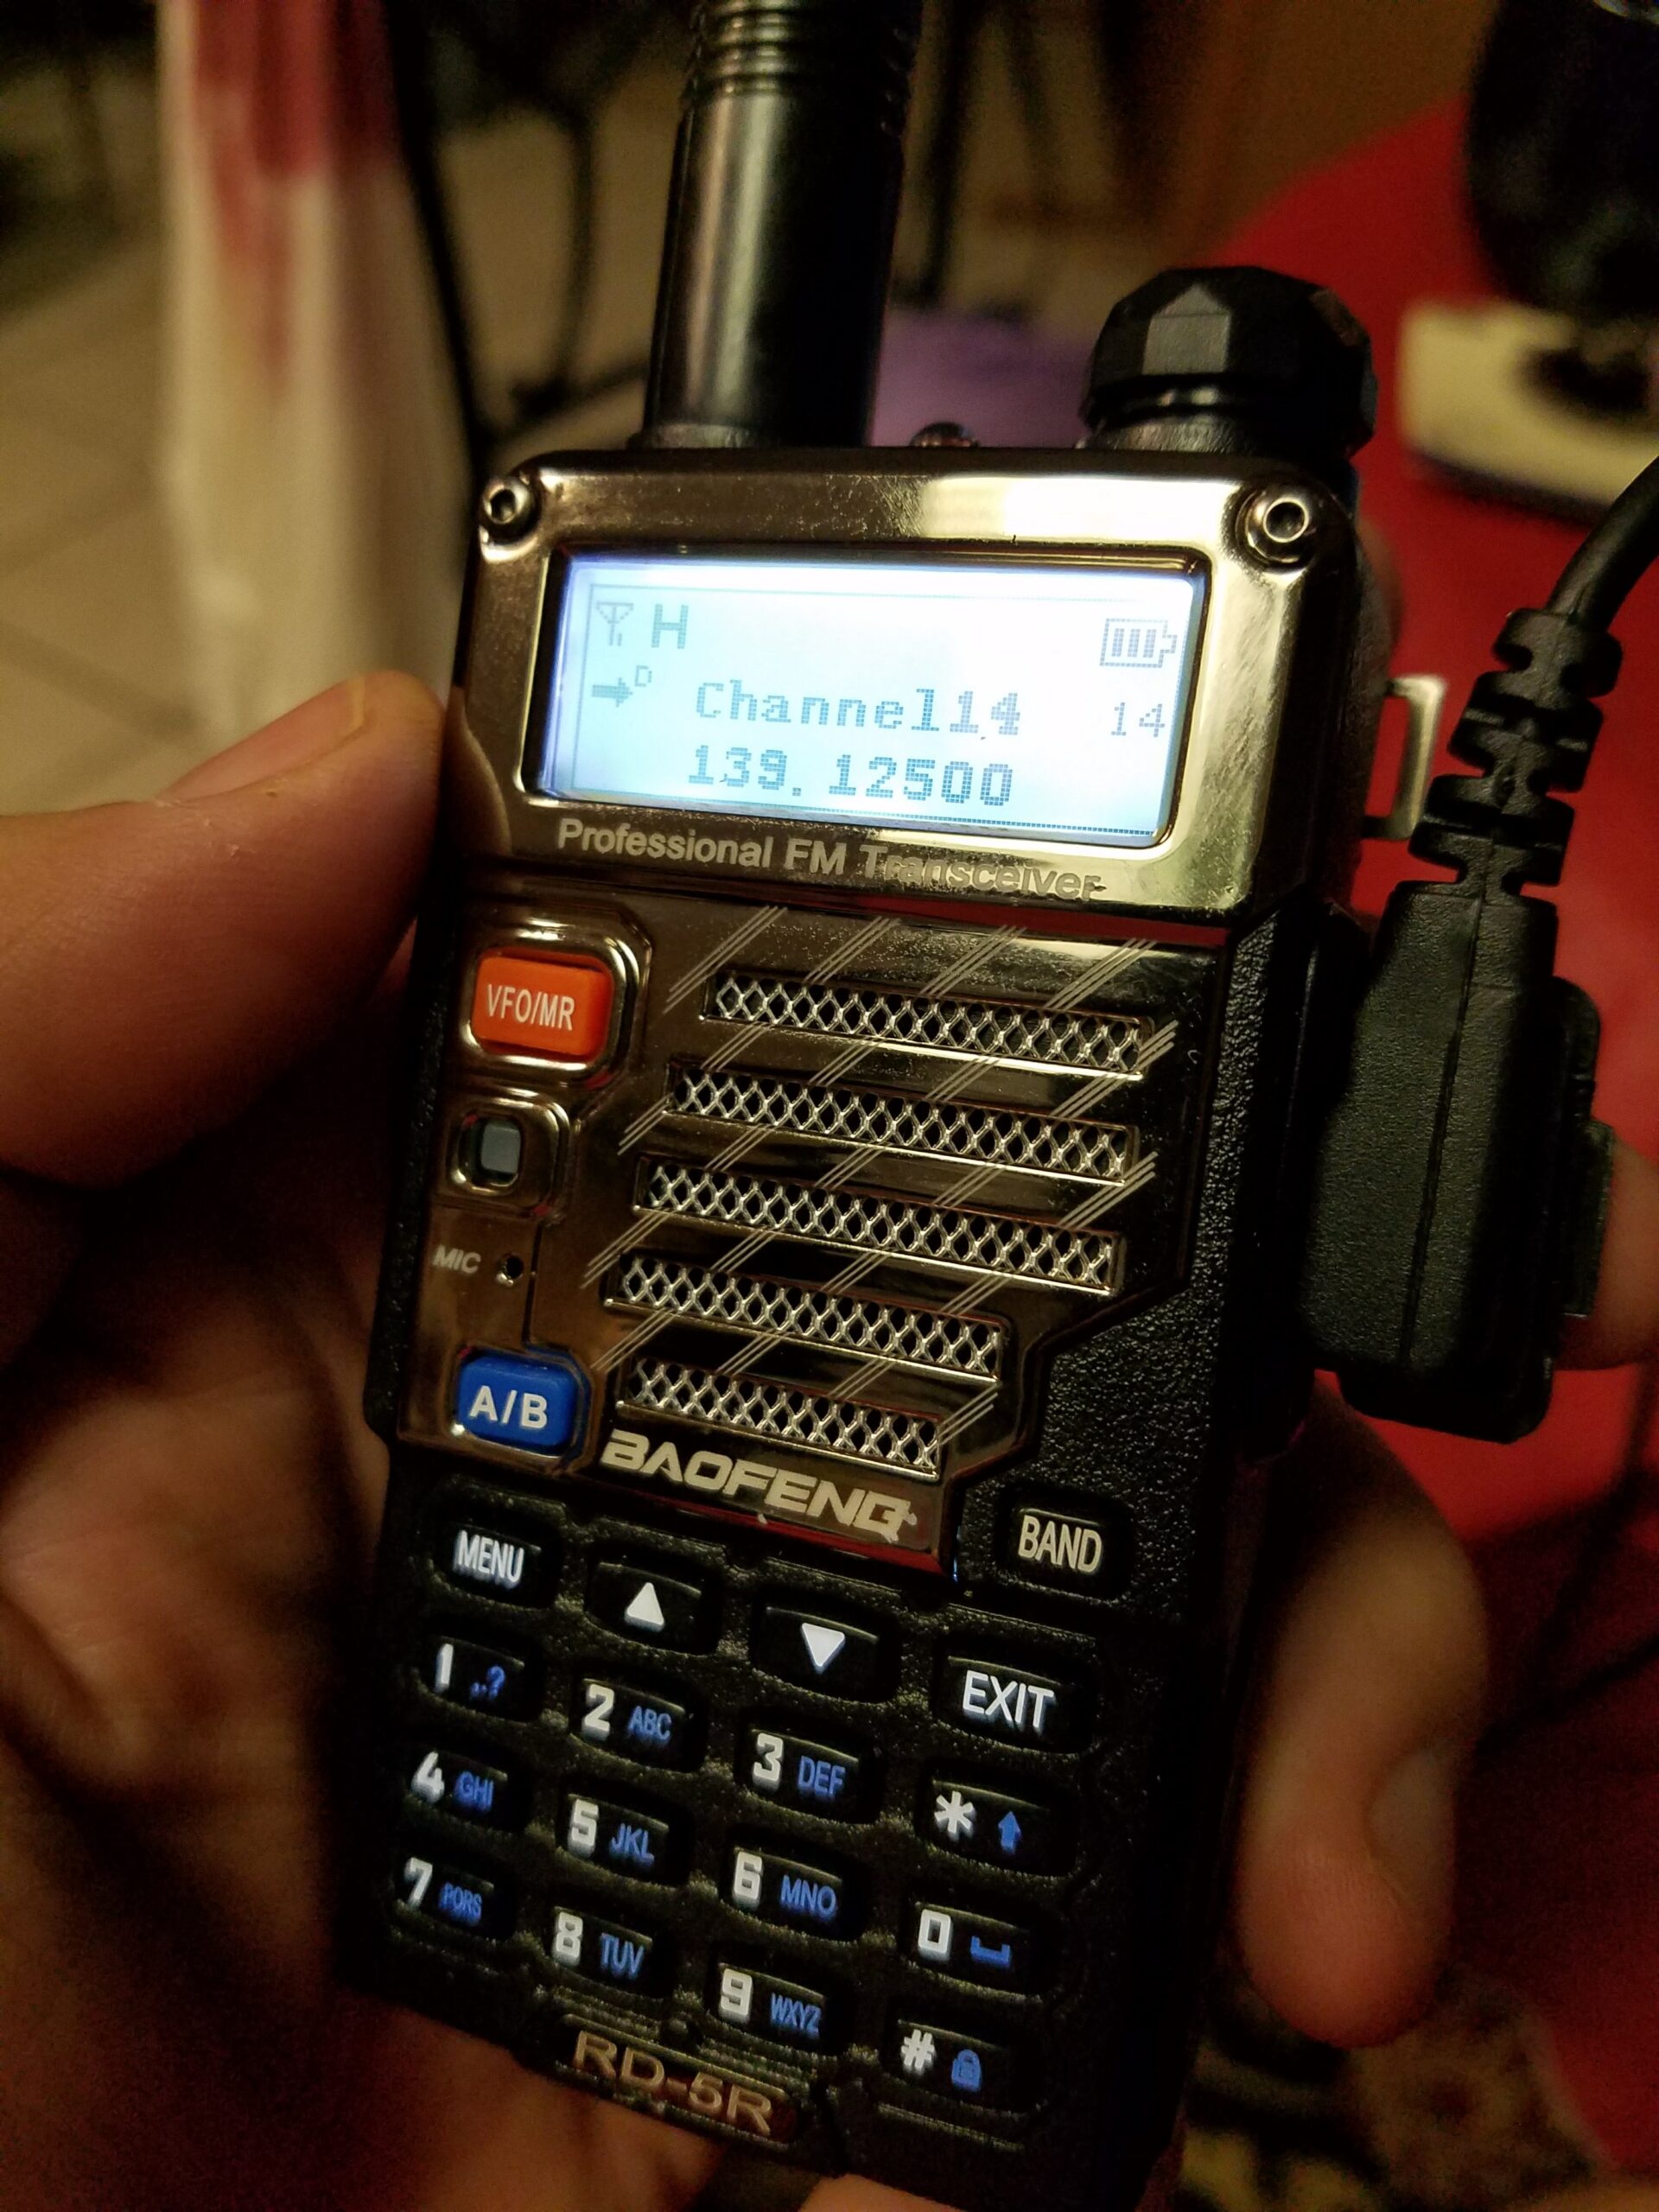
Speaking of handhelds, inspired largely by Radioddity review and tutorial videos from Dave Casler, I got interested in DMR. Of course, no DMR repeaters in handheld range out here, but Radioddity BaoFeng radios are cheap enough to get two and set them up for simplex operation between the two. It works pretty well, so whenever I do find some DMR repeaters somewhere, I should be able to join in. Plus, there’s always the DMR hotspot angle. Pay no attention to whatever that frequency is there. It was in the radio when I turned it on.
I have never been truly active enough to *justify* QSL cards, at least not in my mind, but I still wanted some. I finally had an epiphany and figured out what would be the best QSL card for me. I found a caricature artist service online and had them produce a portrait suitable for QSL cards.
It may seem that forging is a new hobby for me, but it’s not, really. I just haven’t had enough activity to justify it’s own blog.
A million years ago, I started a dagger using a friend’s well equipped shop. Somewhere I have some pictures of that happening. Somewhere, I have that partly completed blade.
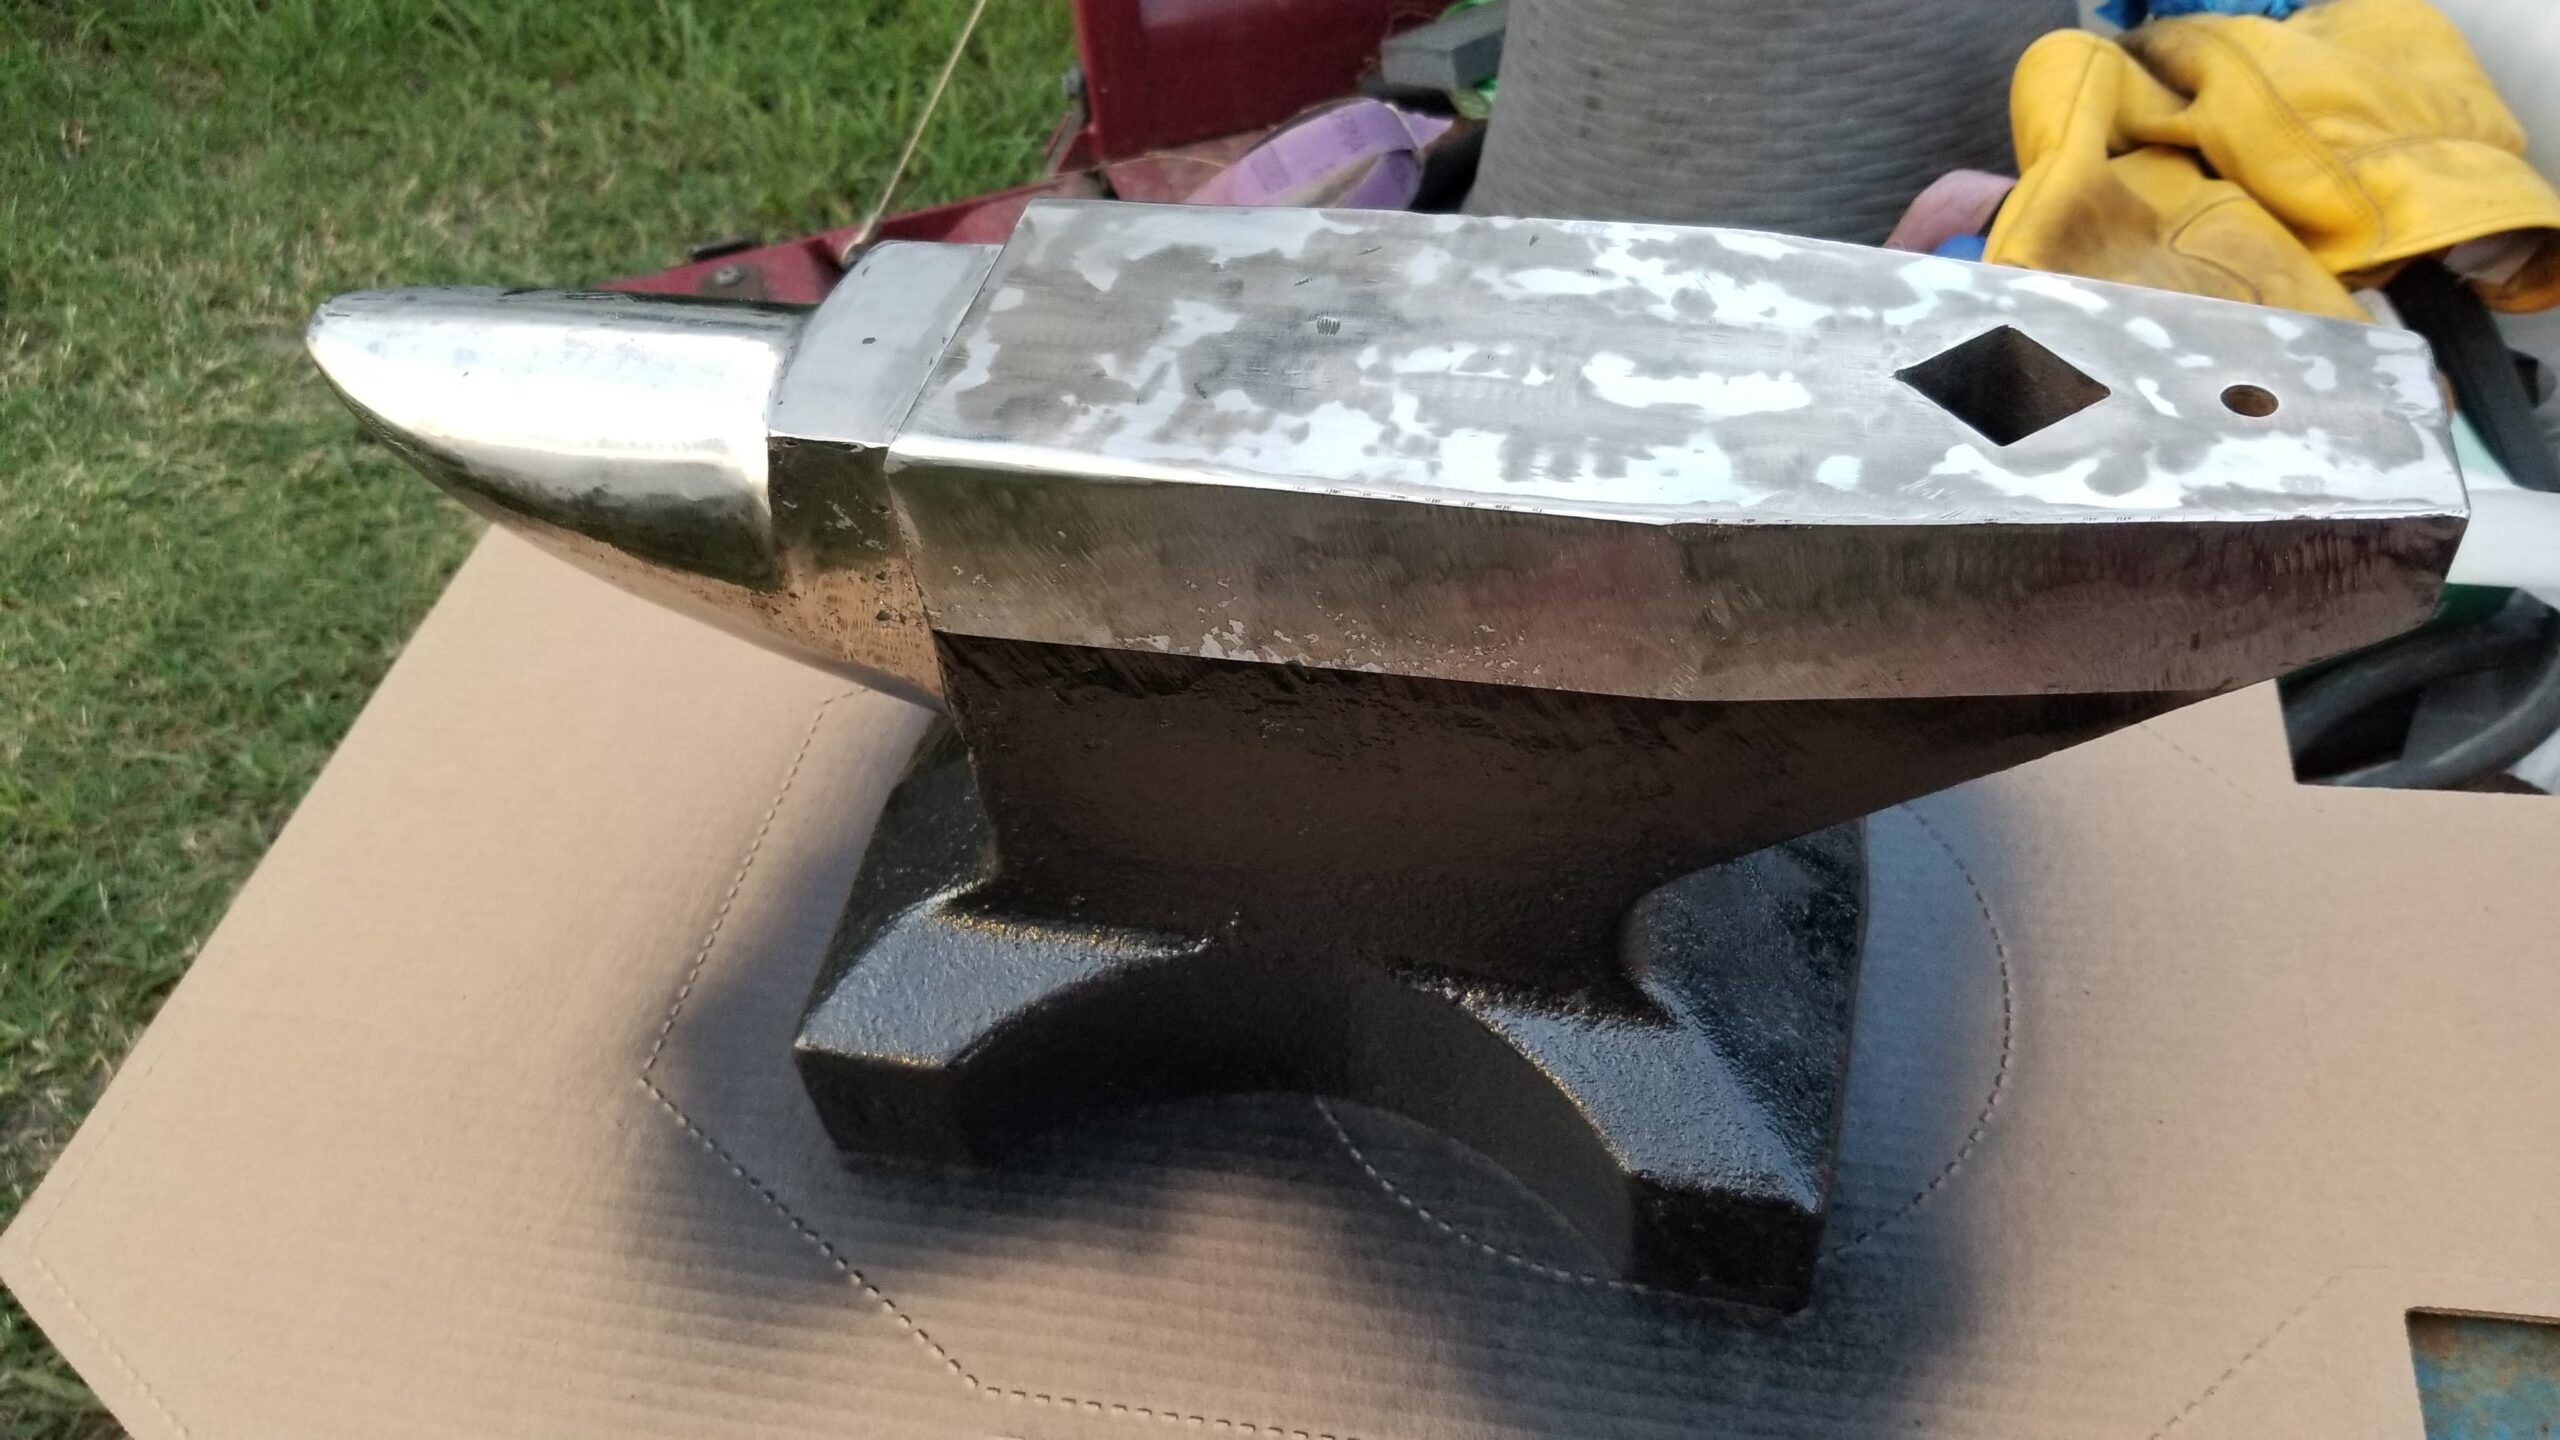
Quite a few years ago, my wife gifted me with a Harbor Freight anvil. For a brief period, they carried a Russian made 110 pound (50 kg, really) anvil that is really decent steel, not the usual anvil shaped objects that are largely much softer cast iron generally available from the Usual Suspects. It rings. Maybe an amount of ring that needs addressing hehehe.
This anvil has been used for all kinds of almost-but-not-quite forging operations over the years. One always needs a heavy chunk of steel for straightening the support rod on your chronograph when it gets shot.
But it had not done proper forging.
In March 2019, I ordered a Majestic Knifemaker propane forge, but it would be mid June 2020 before it would finally be lit.
Leading up to the fire, the anvil had suffered some degree of use and abuse, even serving briefly as extra weight on the front of our tractor when we had to unload some extra heavy round bales.
Even before serving emergency ballast duty, it needed some TLC.
Using mostly flap discs in the angle grinder and a flat stone that was WAY more effort that it seems to have been worth, the light coat of rust and the rough machine marks yielded. I followed up with some masking tape, black paint and finally a coat of CorrosionX.
The mottled coloration is from the difference in finish between the flap disc and the flat stone. It is all smooth to the touch.
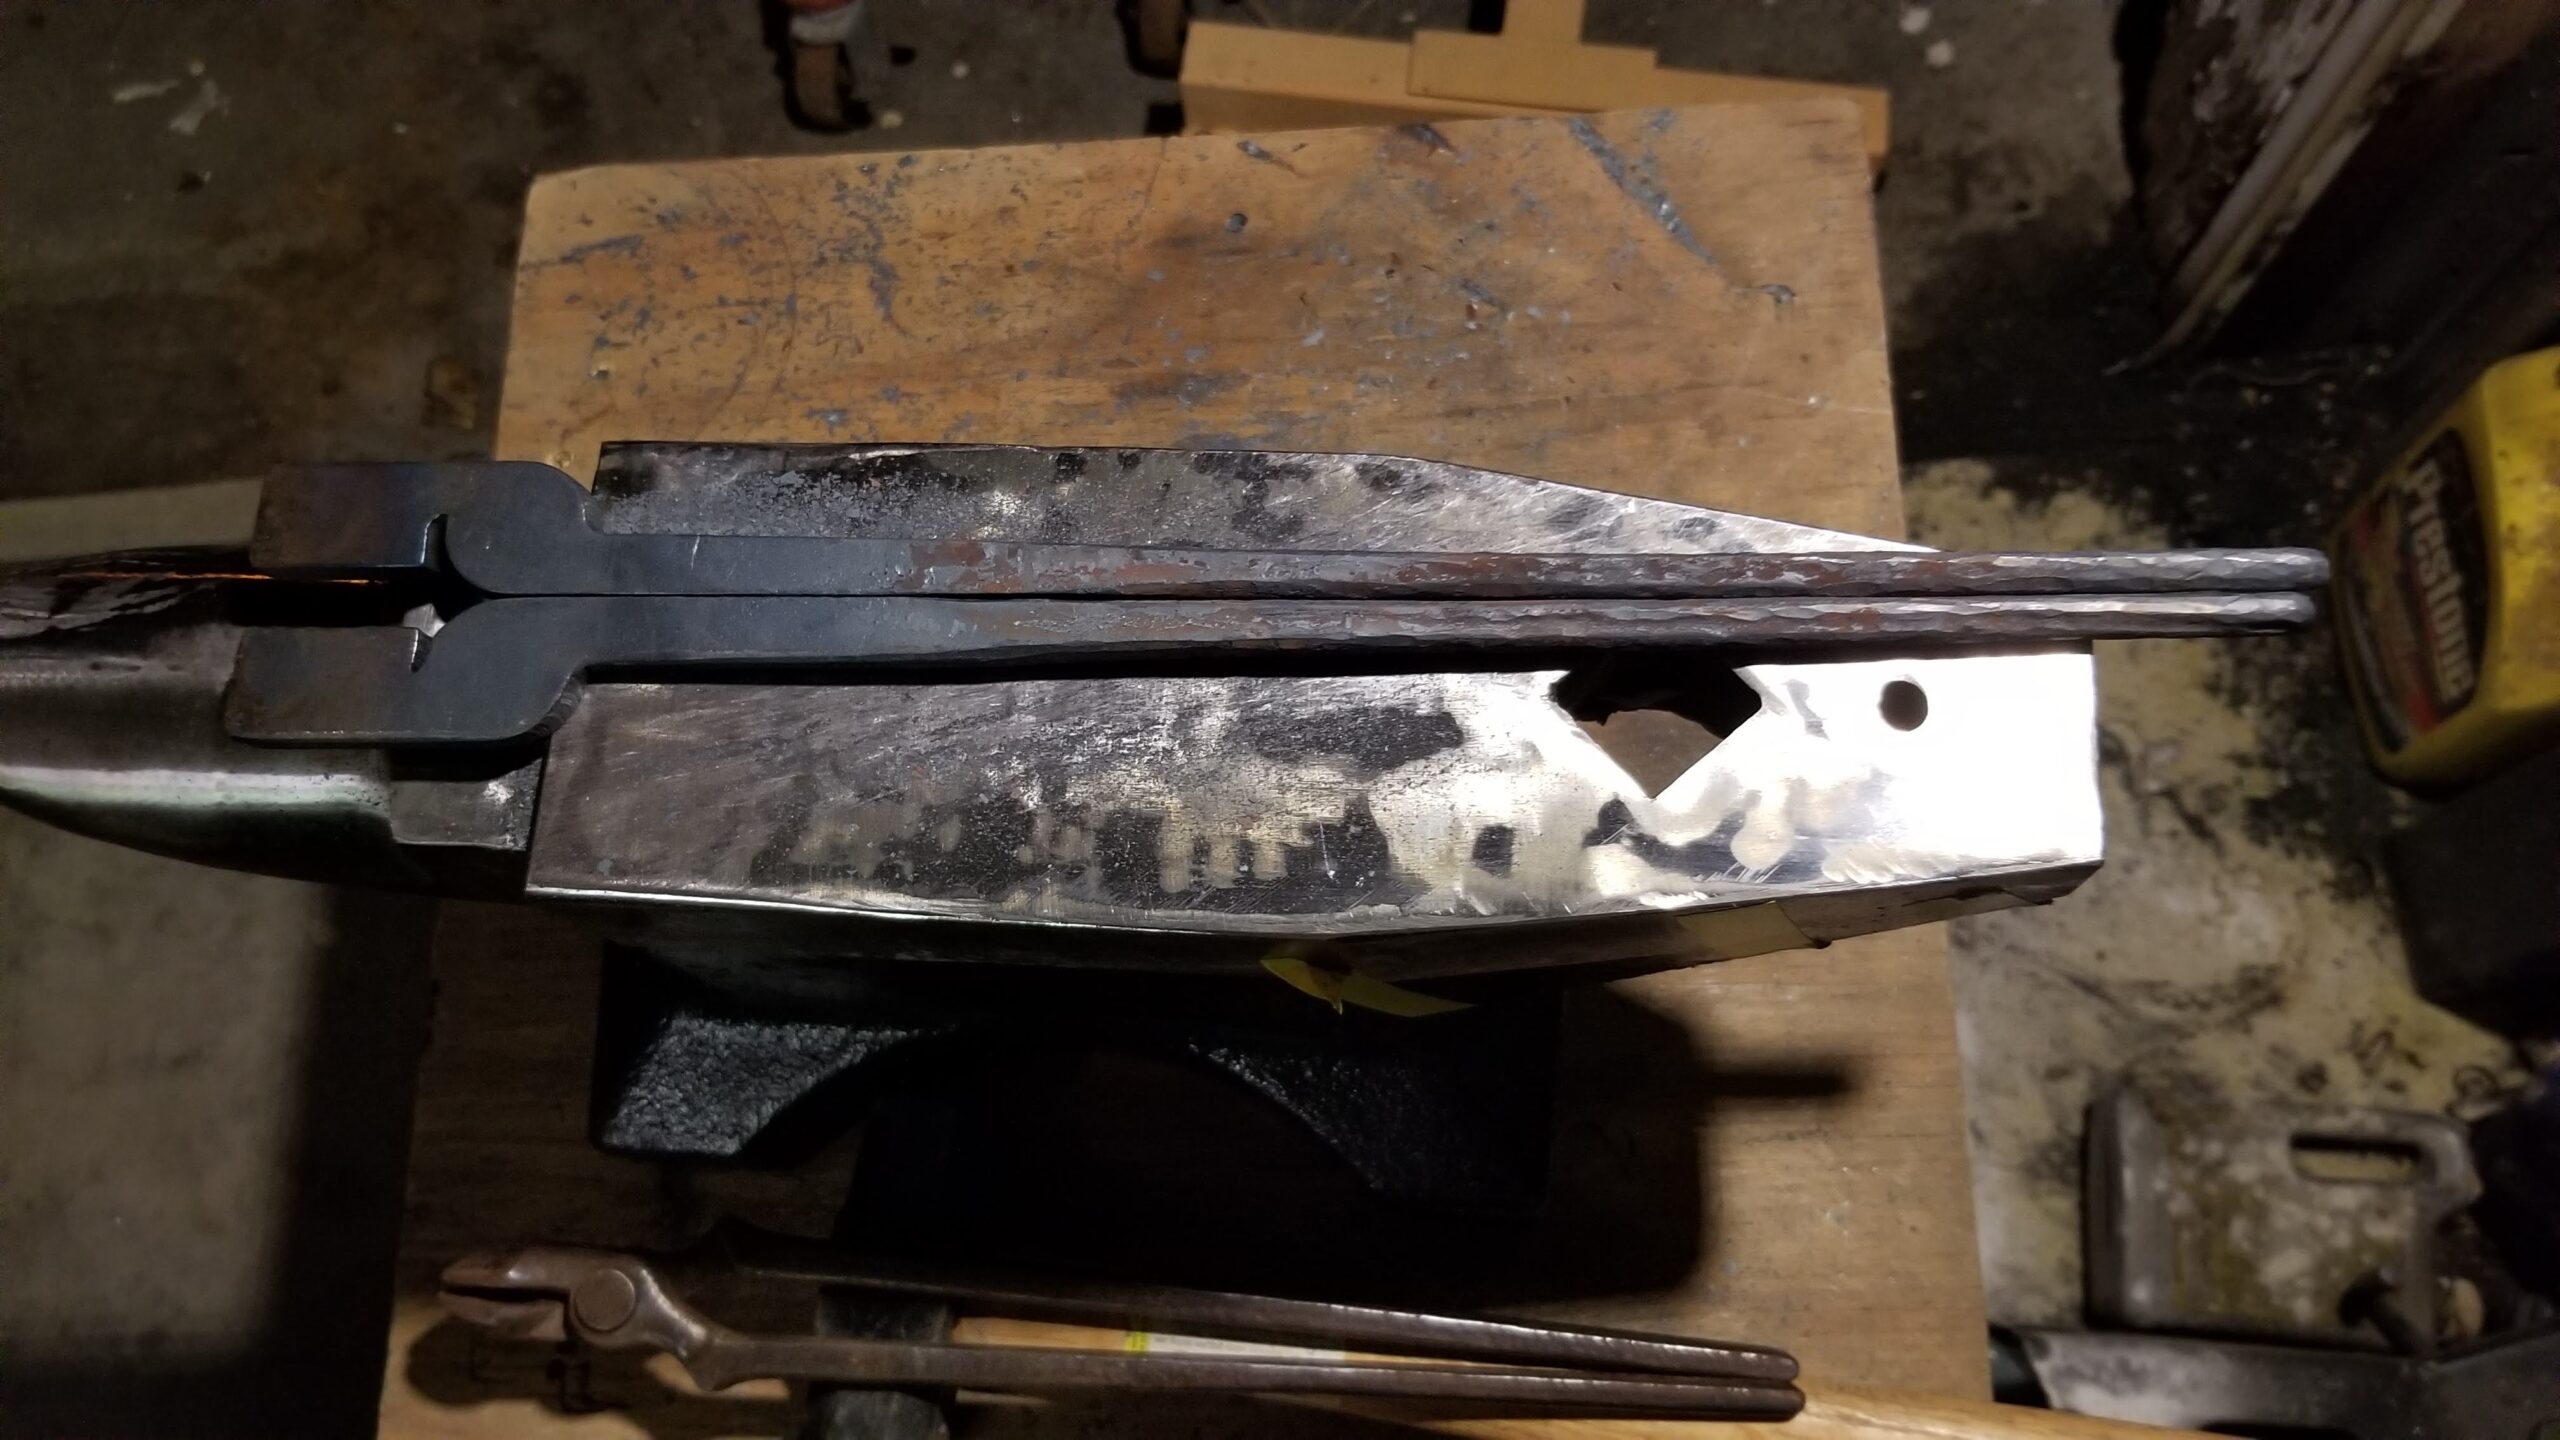
As is often the case, the first thing to make was tongs. My farrier loaned me a couple pair of tongs for the purpose of making tongs, as well as gifting me with a decent stack of discarded rasps.
I chose to start with the Rapid Flat Jaw Tongs from Ken’s Custom Iron, available as an affordable bundle of five pairs. These tongs were among several reviewed and recommended by John at Black Bear Forge.
These start as CNC plasma cut blanks of 5/16 plate steel. You draw out the reins first.
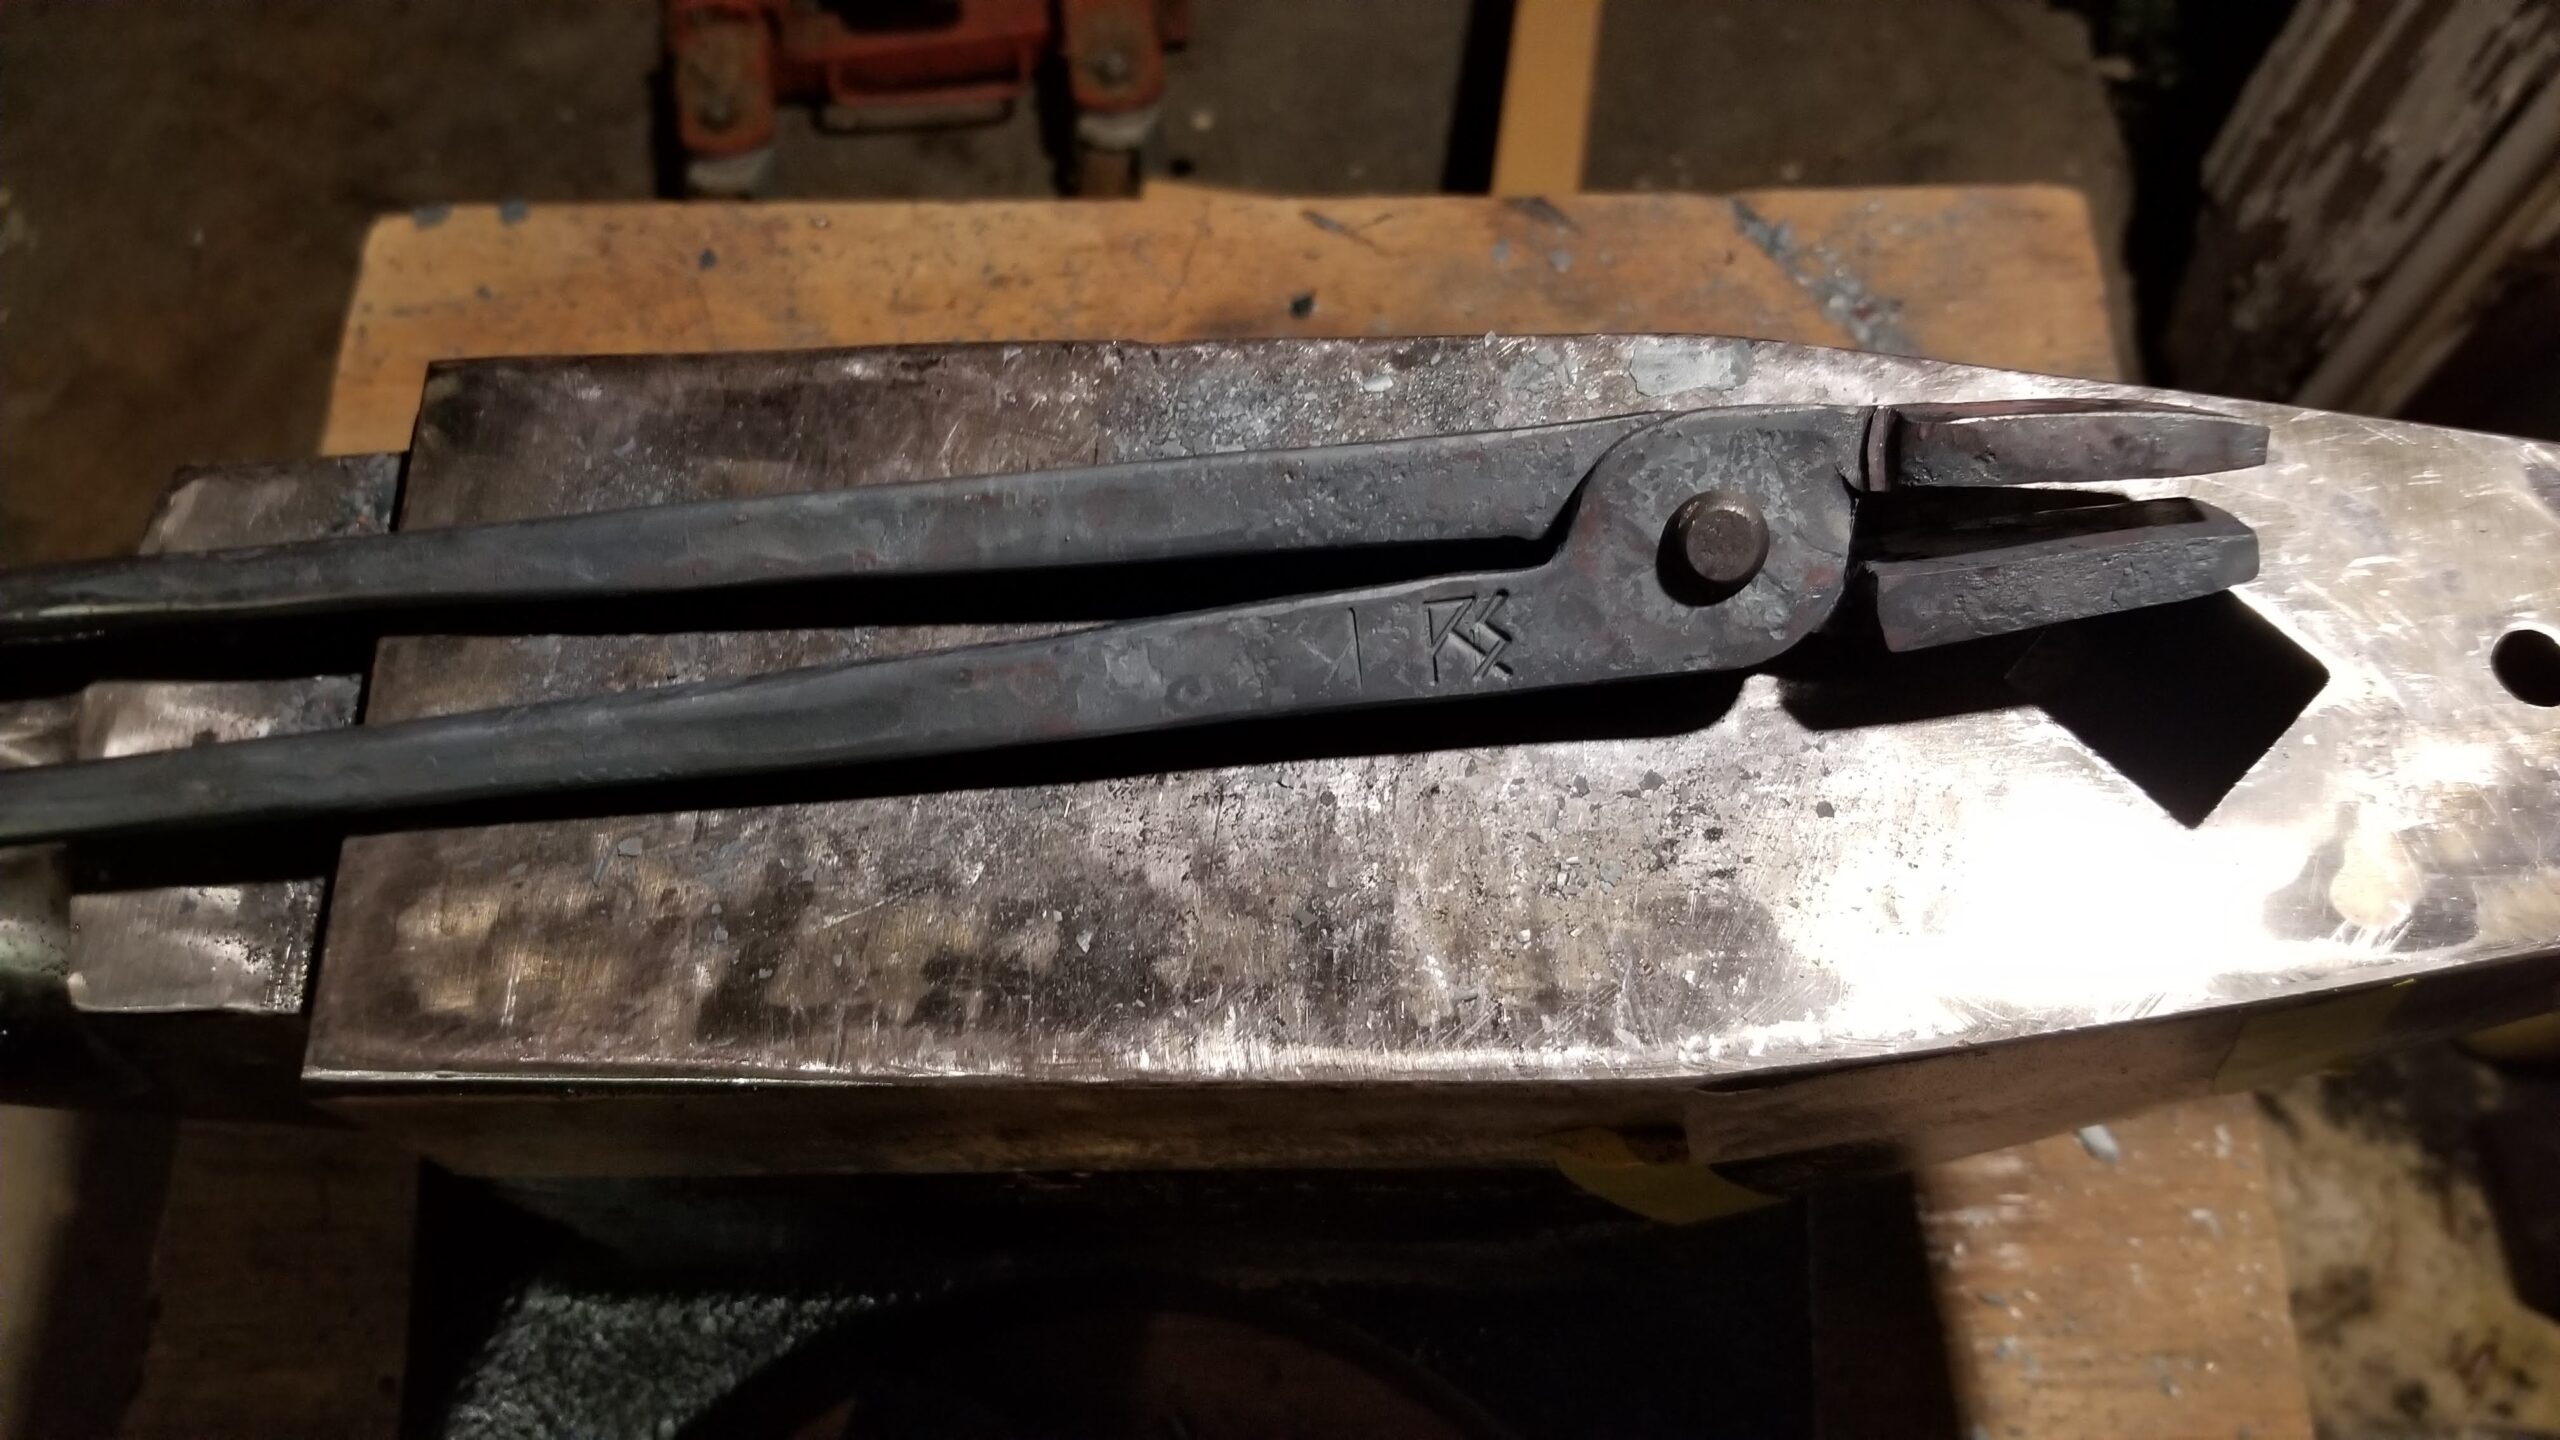
Then turn and shape the jaws
Drill, rivet and fine tune. Somewhere in there, I applied my touchmark. I’m pretty happy with how they turned out.
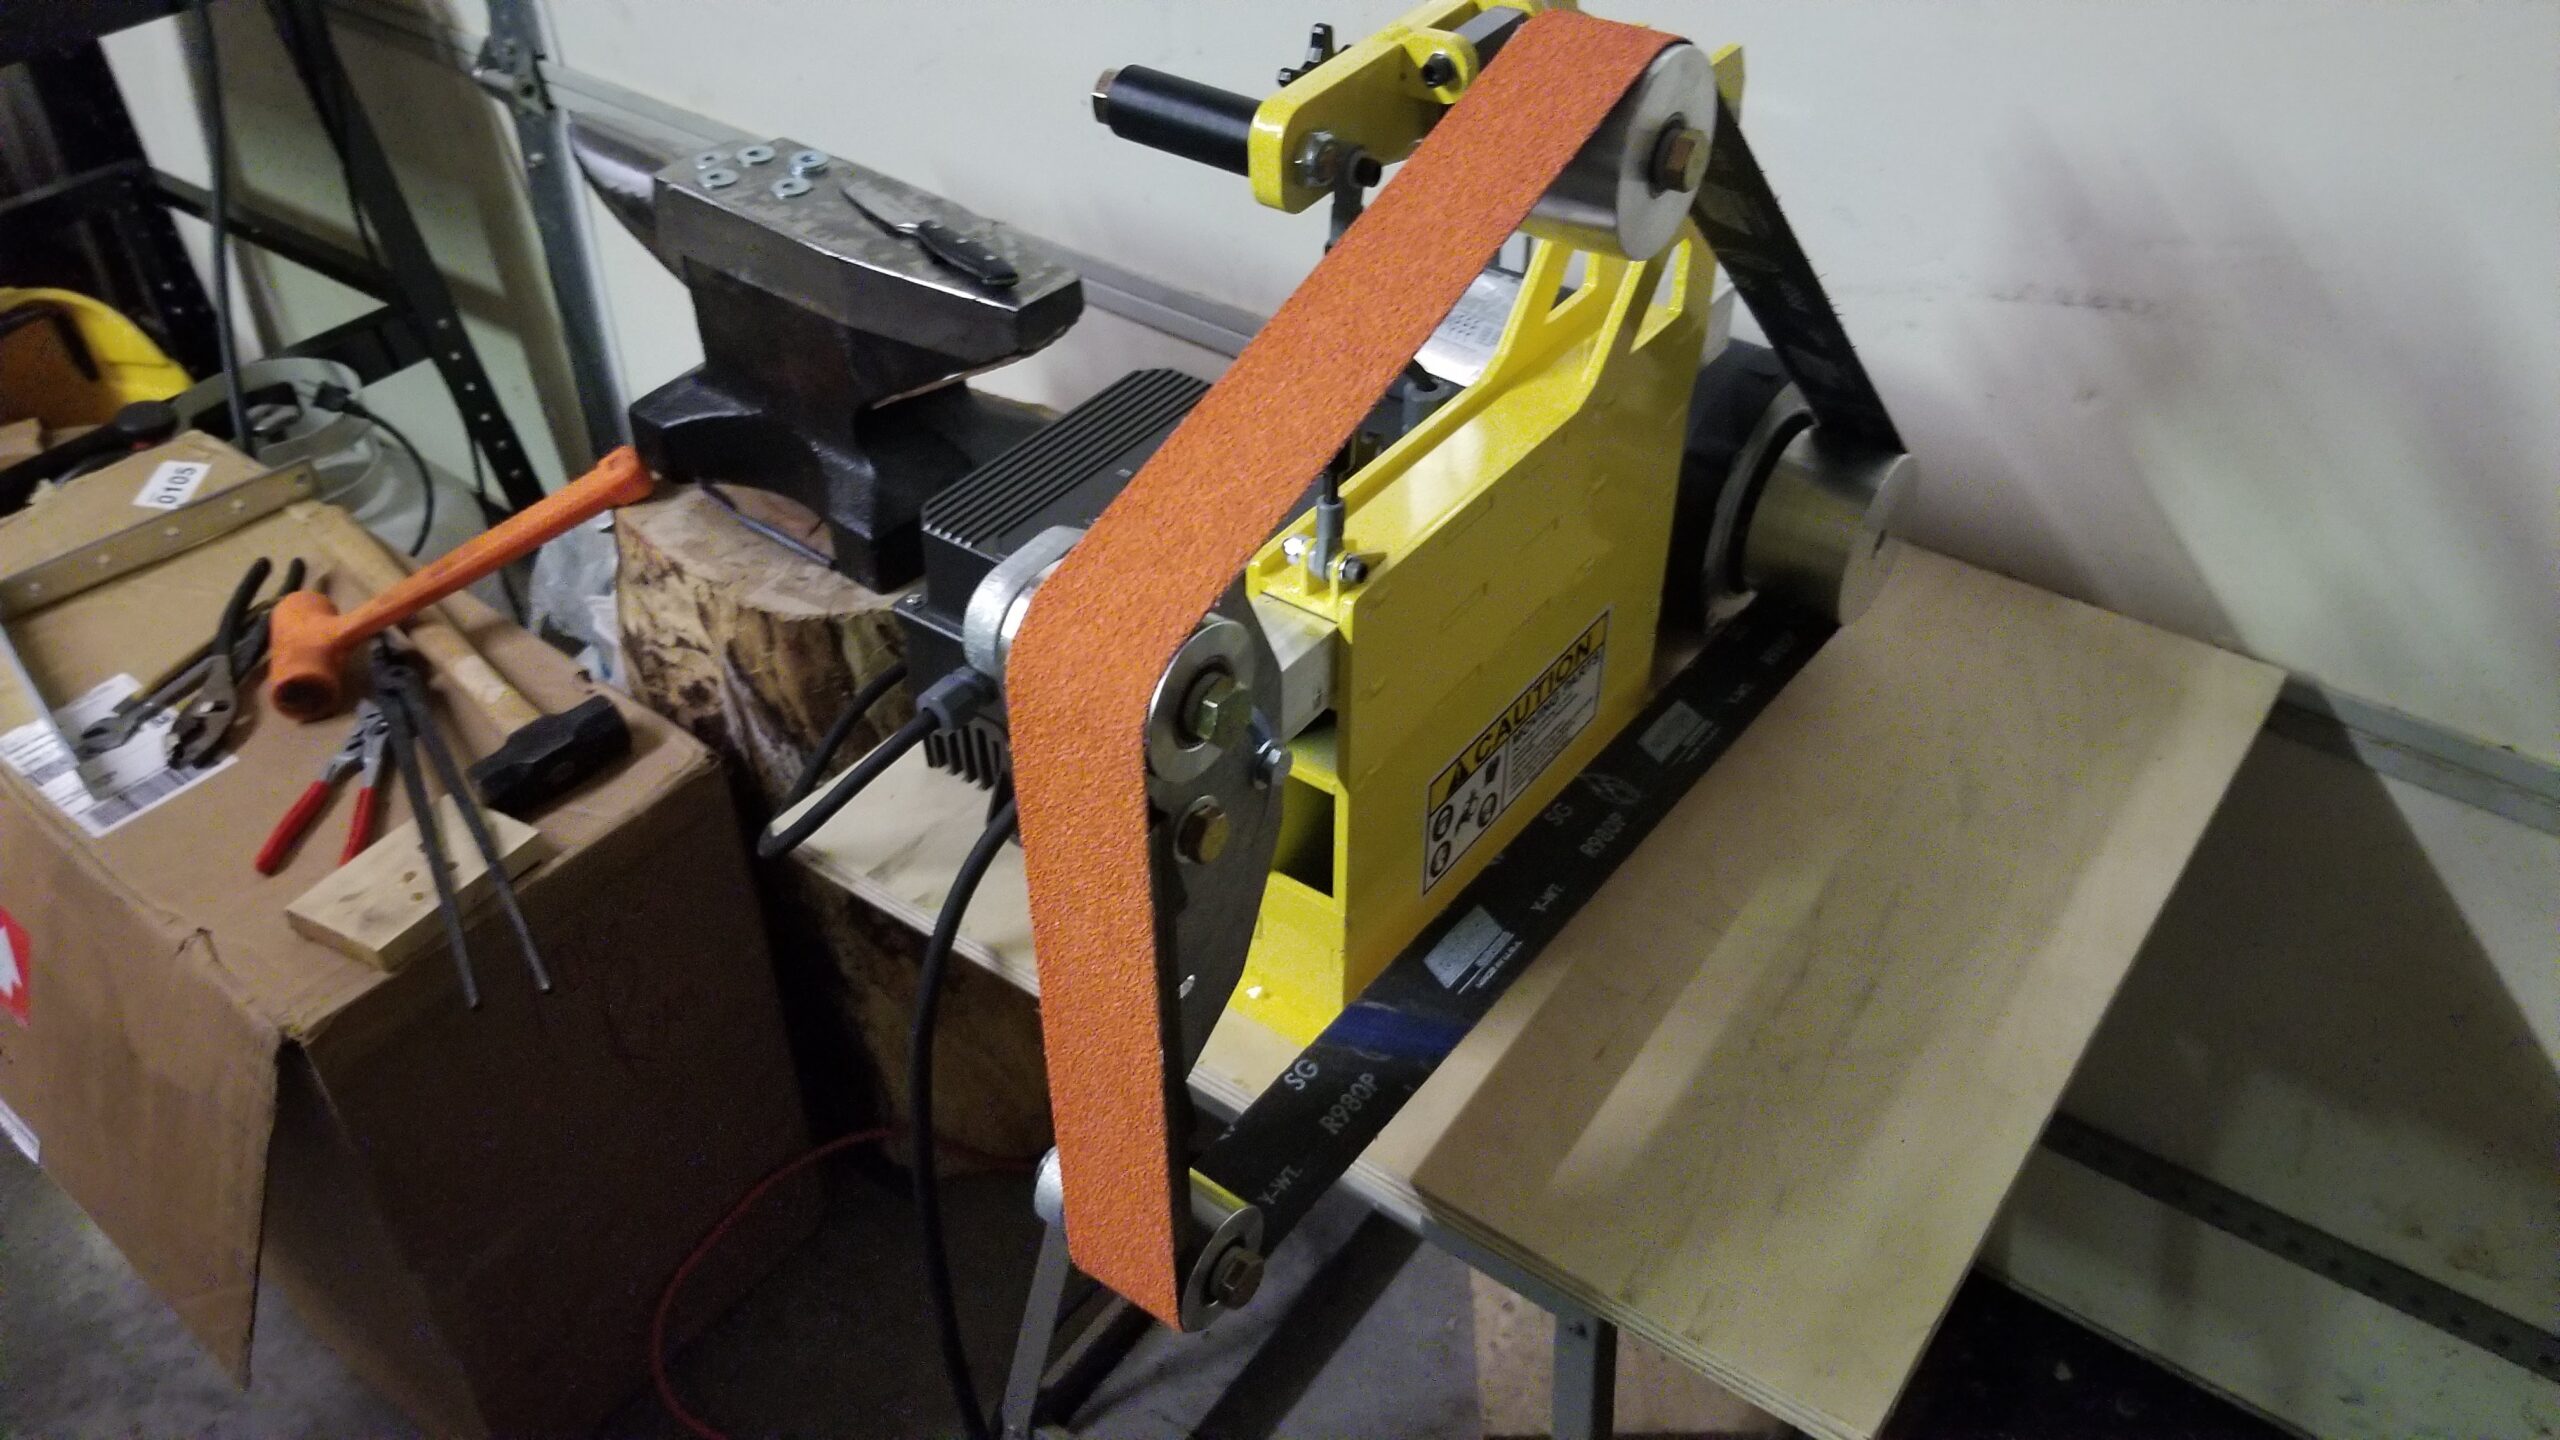
The next major tool needed/wanted was a 2×72 belt grinder. Like almost everything else, there are two basic ways to do these, build or buy. Building is obviously the cheapest. Buying is the fastest. The trick is deciding what your time is worth, how much is too much to pay for someone else to build it for you.
I knew that my welding skills are good *enough* to build one if it comes in a kit form. I’m not really comfortable enough with my fabrication skills to build one straight from scratch. By the time I gather all the right parts, cut, weld, grind, etc., it would have to be really cheap to offset the advantages of unboxing it, plugging it in and turning it on.
I shopped quite a lot. For the most part, bare bones grinders tend to start, in 2020 at least, at about $1800 and generally, that is without a motor, speed control, etc. So, when I found Origin Blade Maker and a package that had a turnkey ready to grind package for $1800, it got my attention. This package has the grinder frame, a 2 horsepower motor with VFD, platen with idler wheels, 10 inch contact wheel and set of small wheels with small wheel holder. Many of the grinders I found are $1800 for just the grinder frame and platen and everything else is extra.
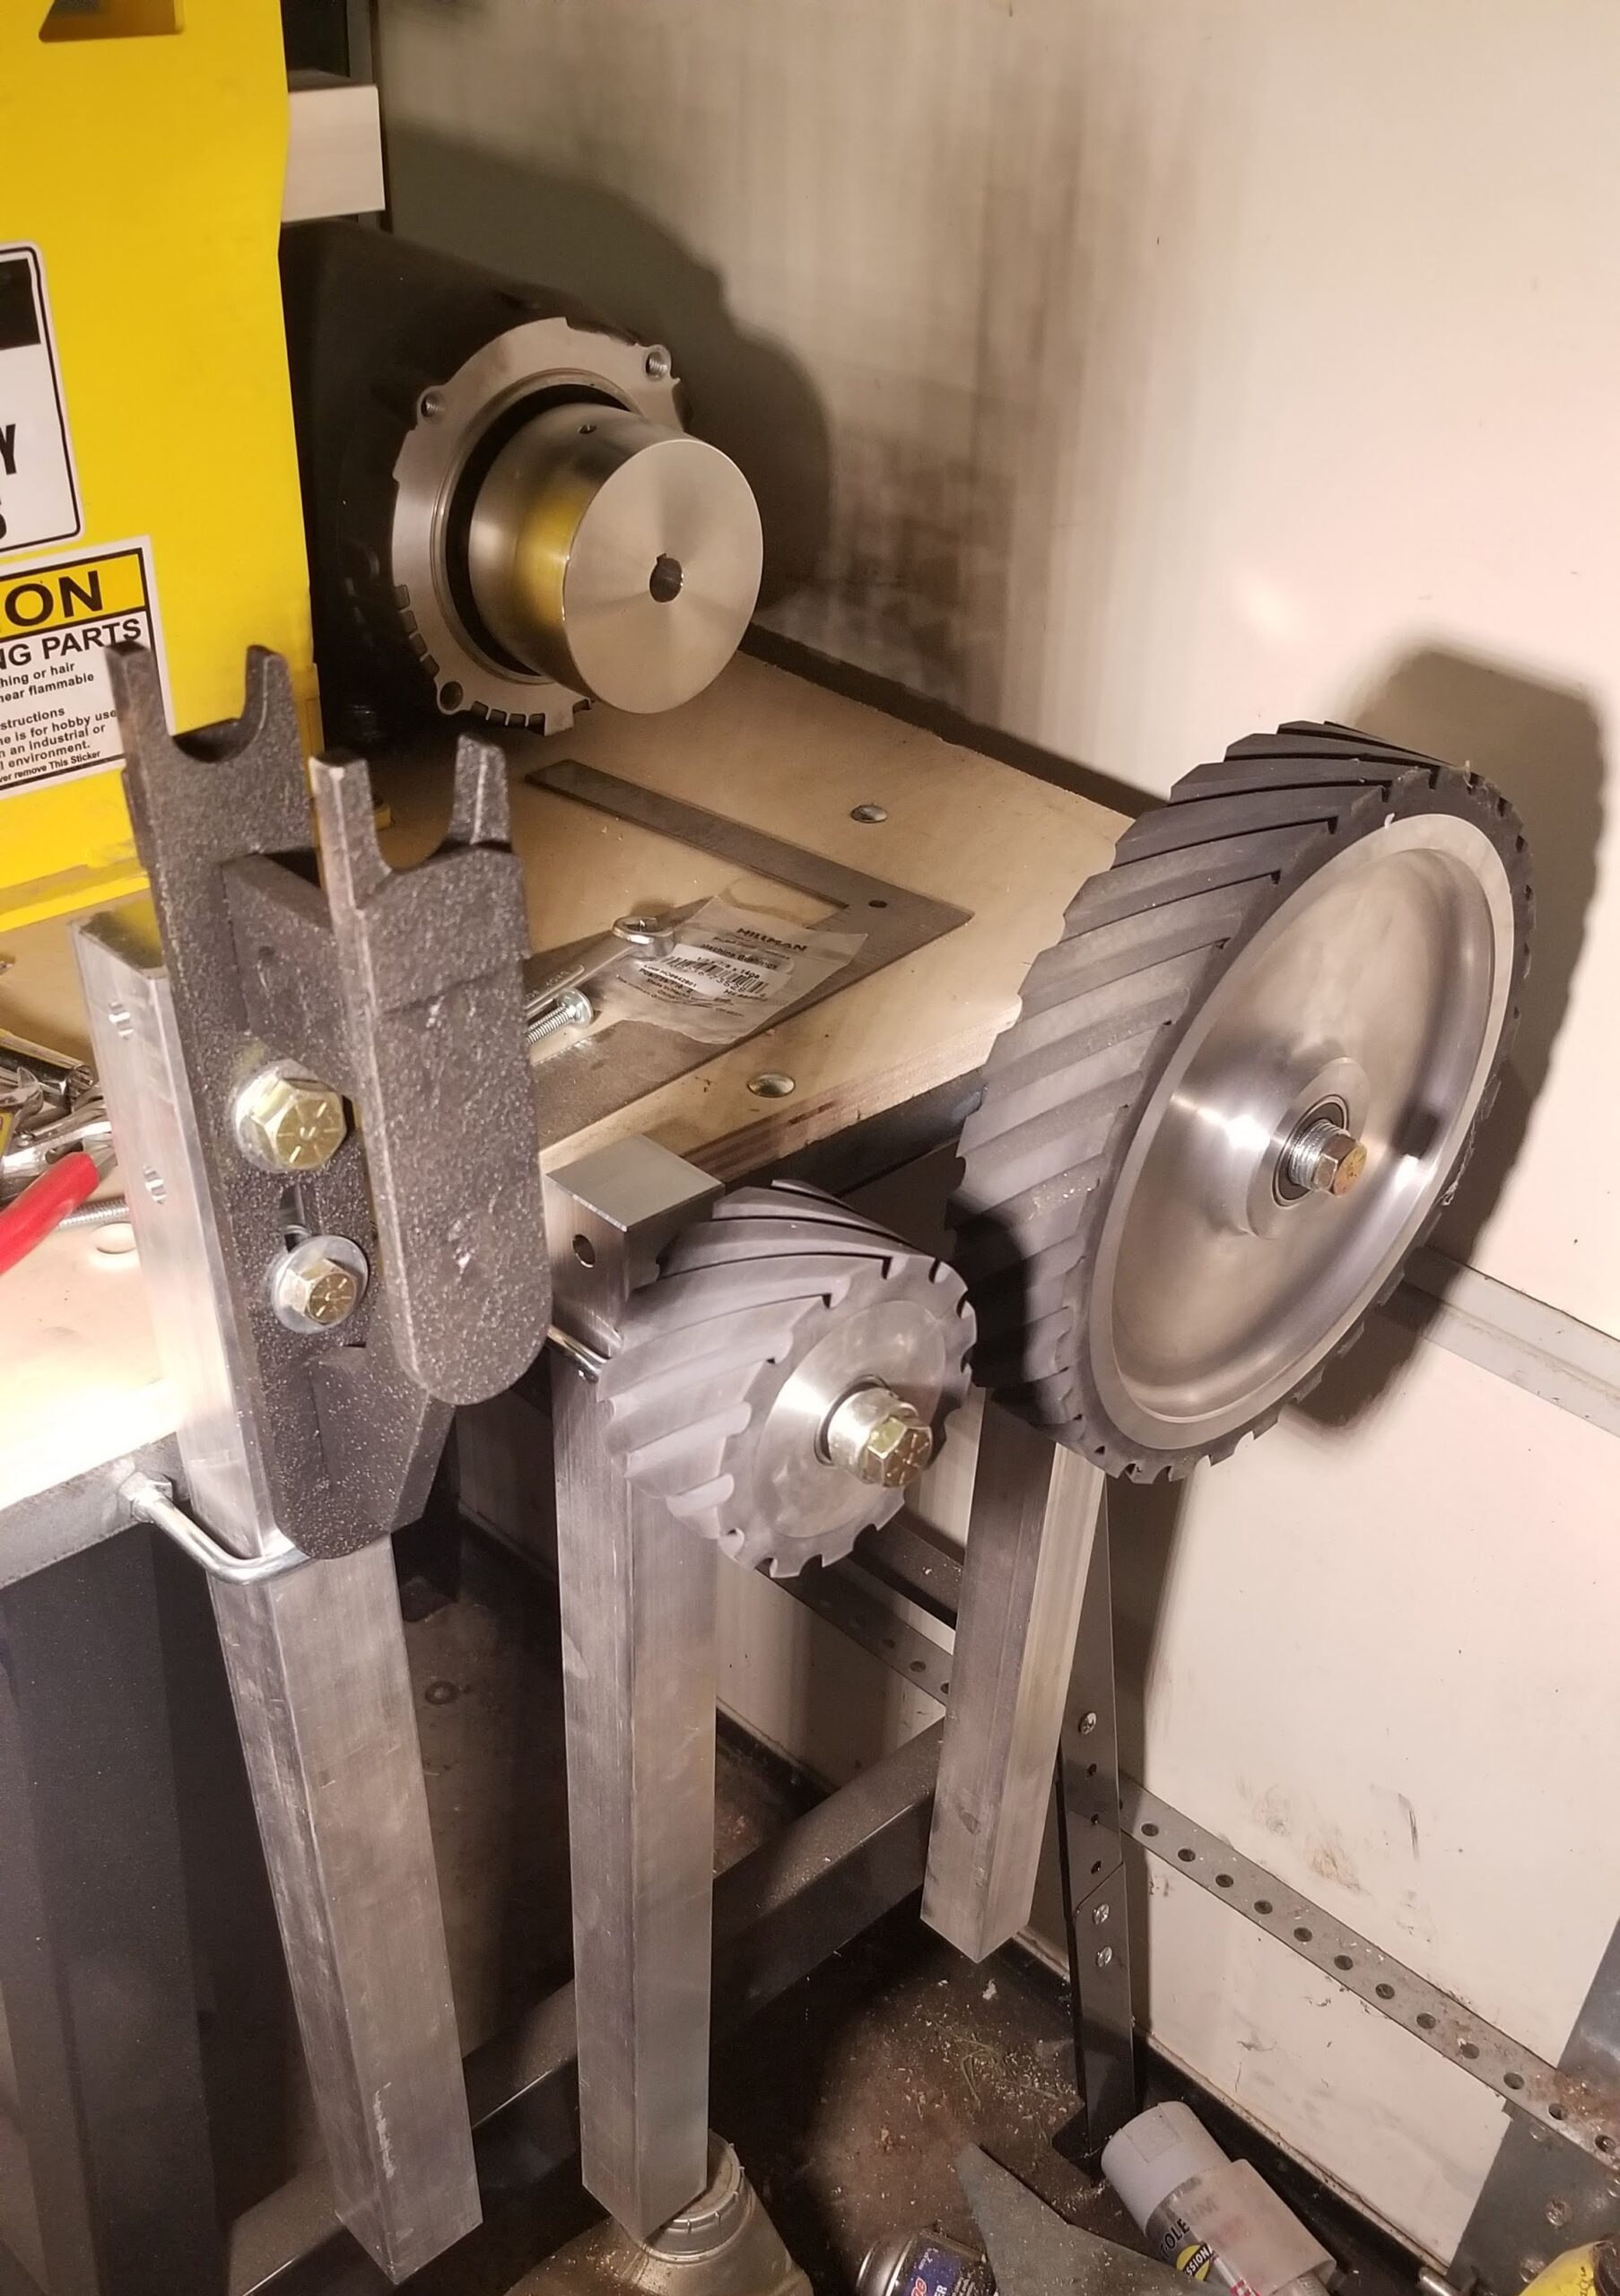
I ordered that package and a few accessories so that in total, I have all that plus 4 inch and 2 inch contact wheels, three tool rests and enough tooling arms for all of them to be quick change.
I mounted it on a dedicated table and mounted ubolts on the edges of the table to hold the tooling arms.
There are similar rings on the other side of the table as well.
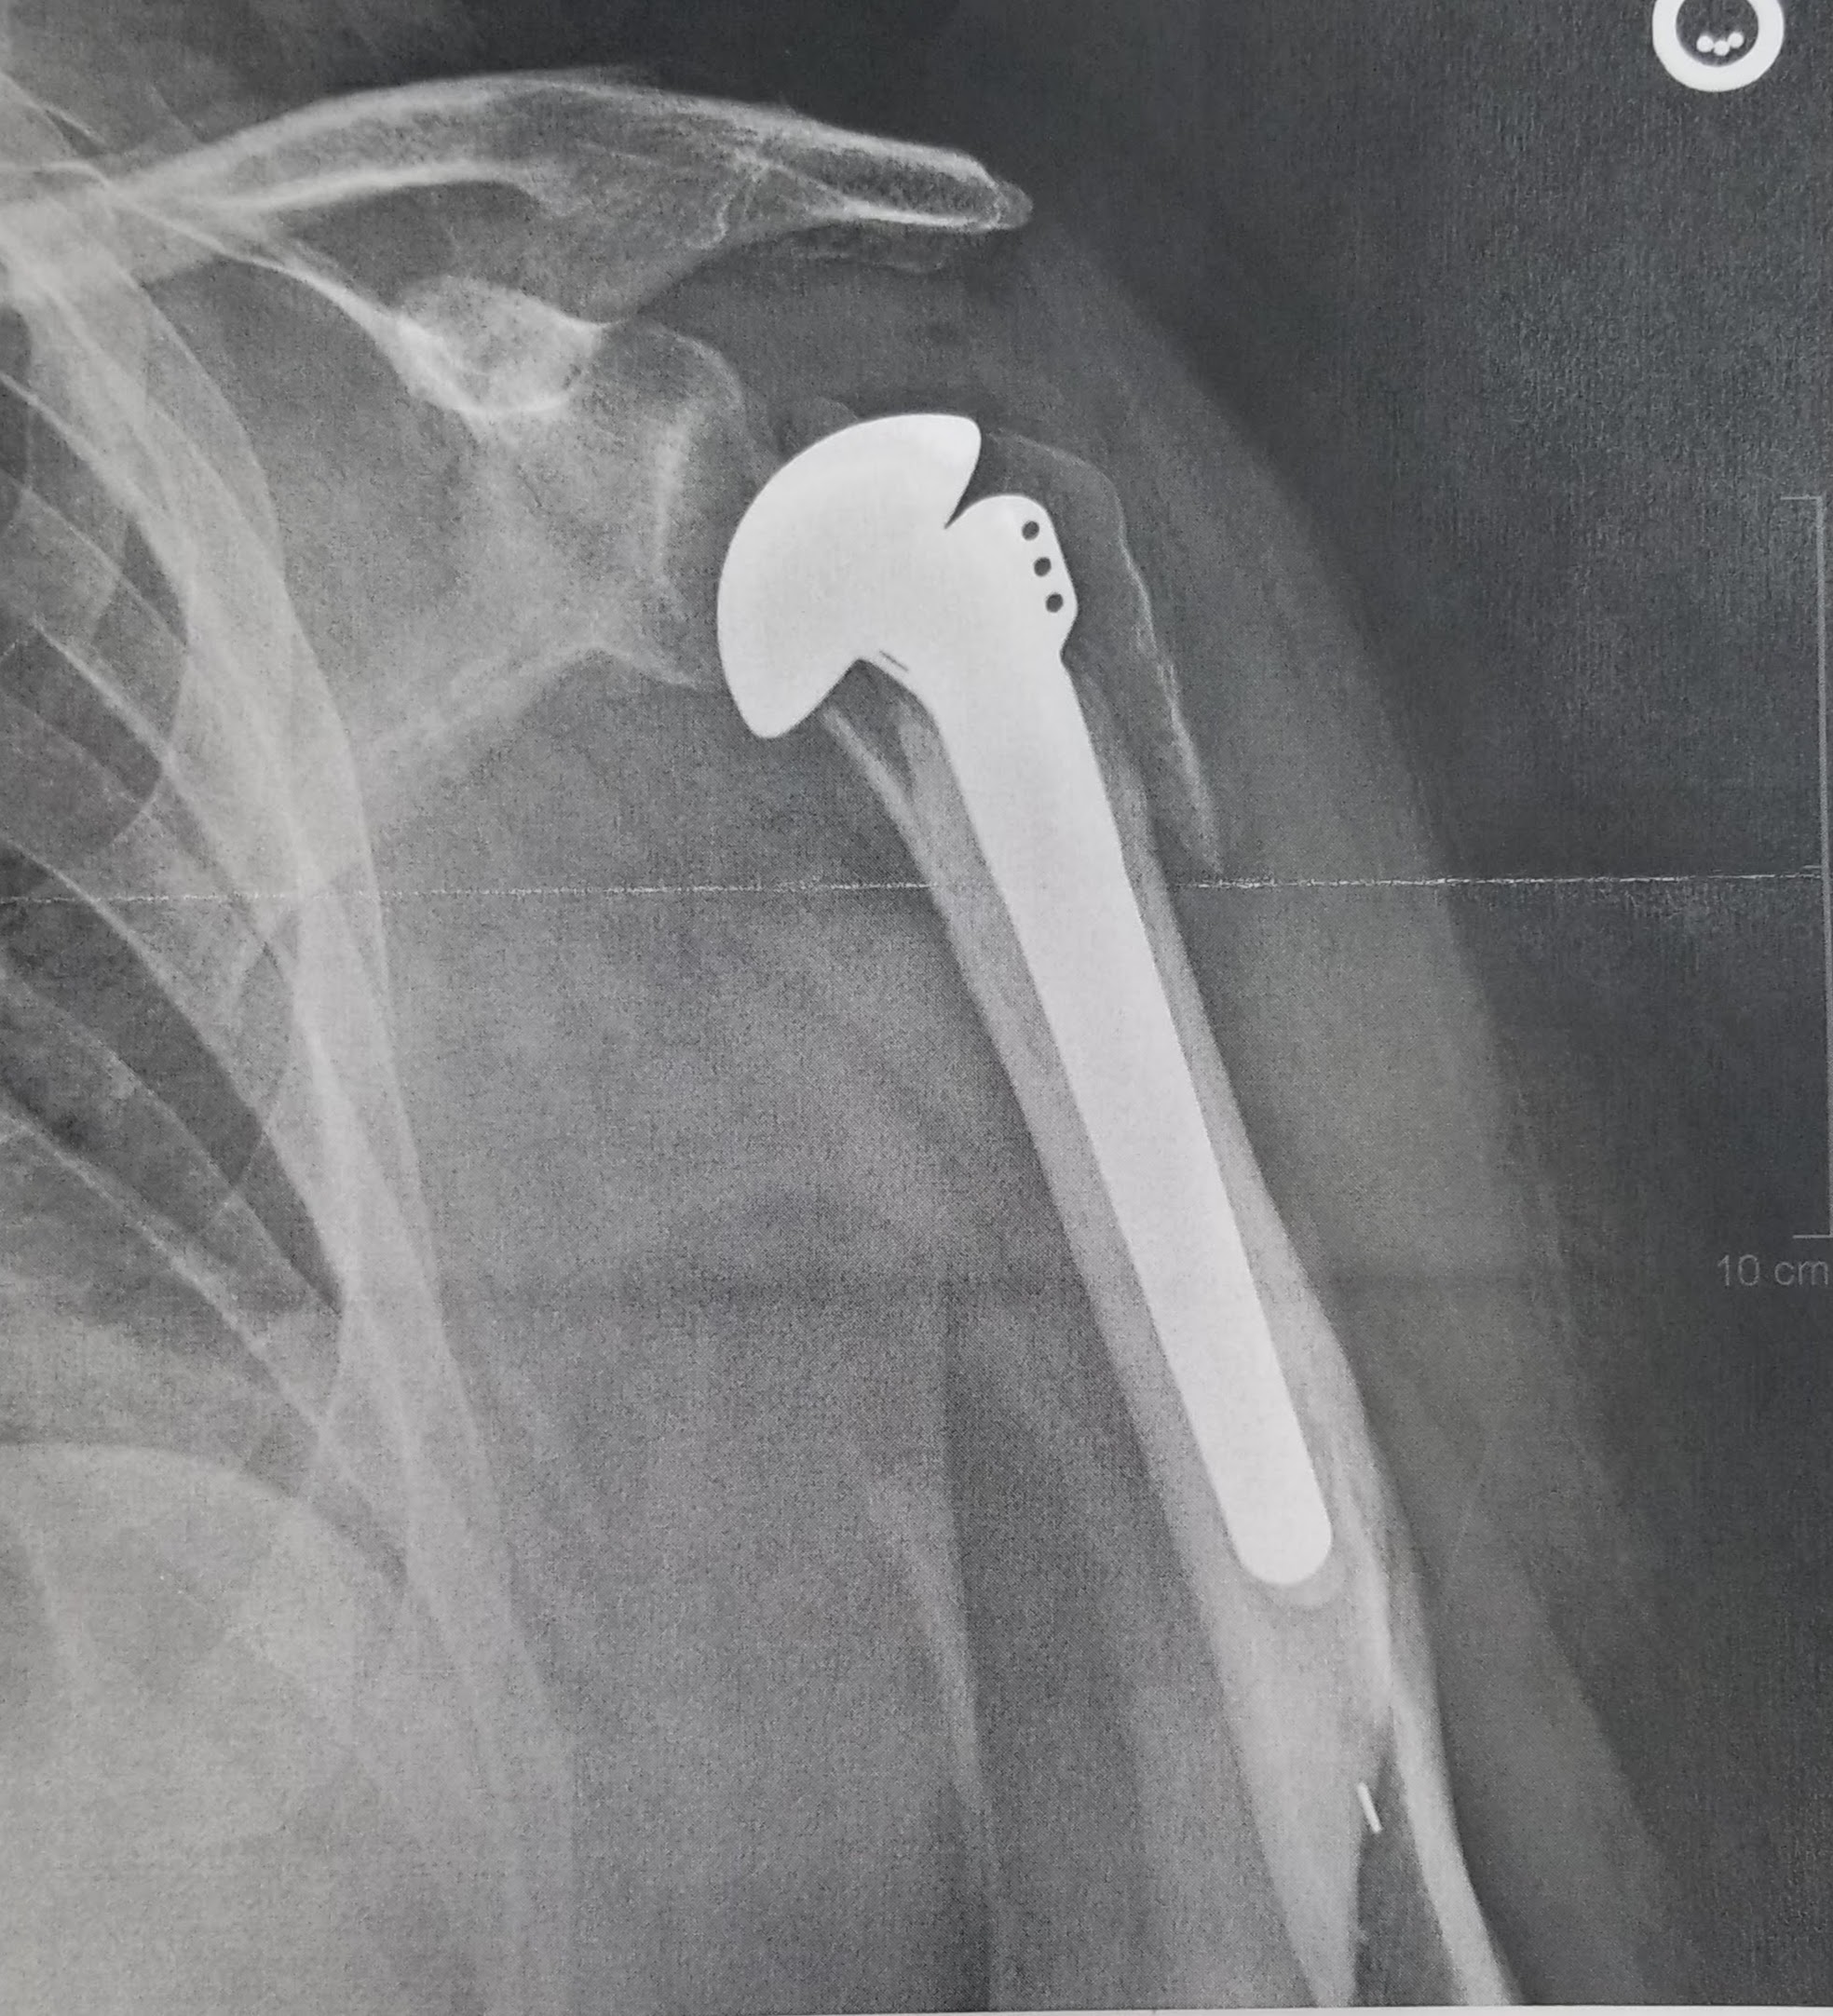
I’ve mentioned this elsewhere, but it bears detailing here as well. In mid November, I slipped and fell HARD on my left side, breaking my shoulder. Specifically, “comminuted fracture of the humeral head and a fracture of the humeral neck” which basically means that not only was the ball joint broken off, but it was split in half as well. I saw an orthopedic surgeon the following week. The surgeon didn’t even need his own imagery; the ER xrays were good enough for him to say, “we’re replacing that.”
This is my left arm, so at least its not my hammering arm, but even so, no forging was going on through the end of 2020. My recovery is marching ahead nicely and I hope to be back at it soon.
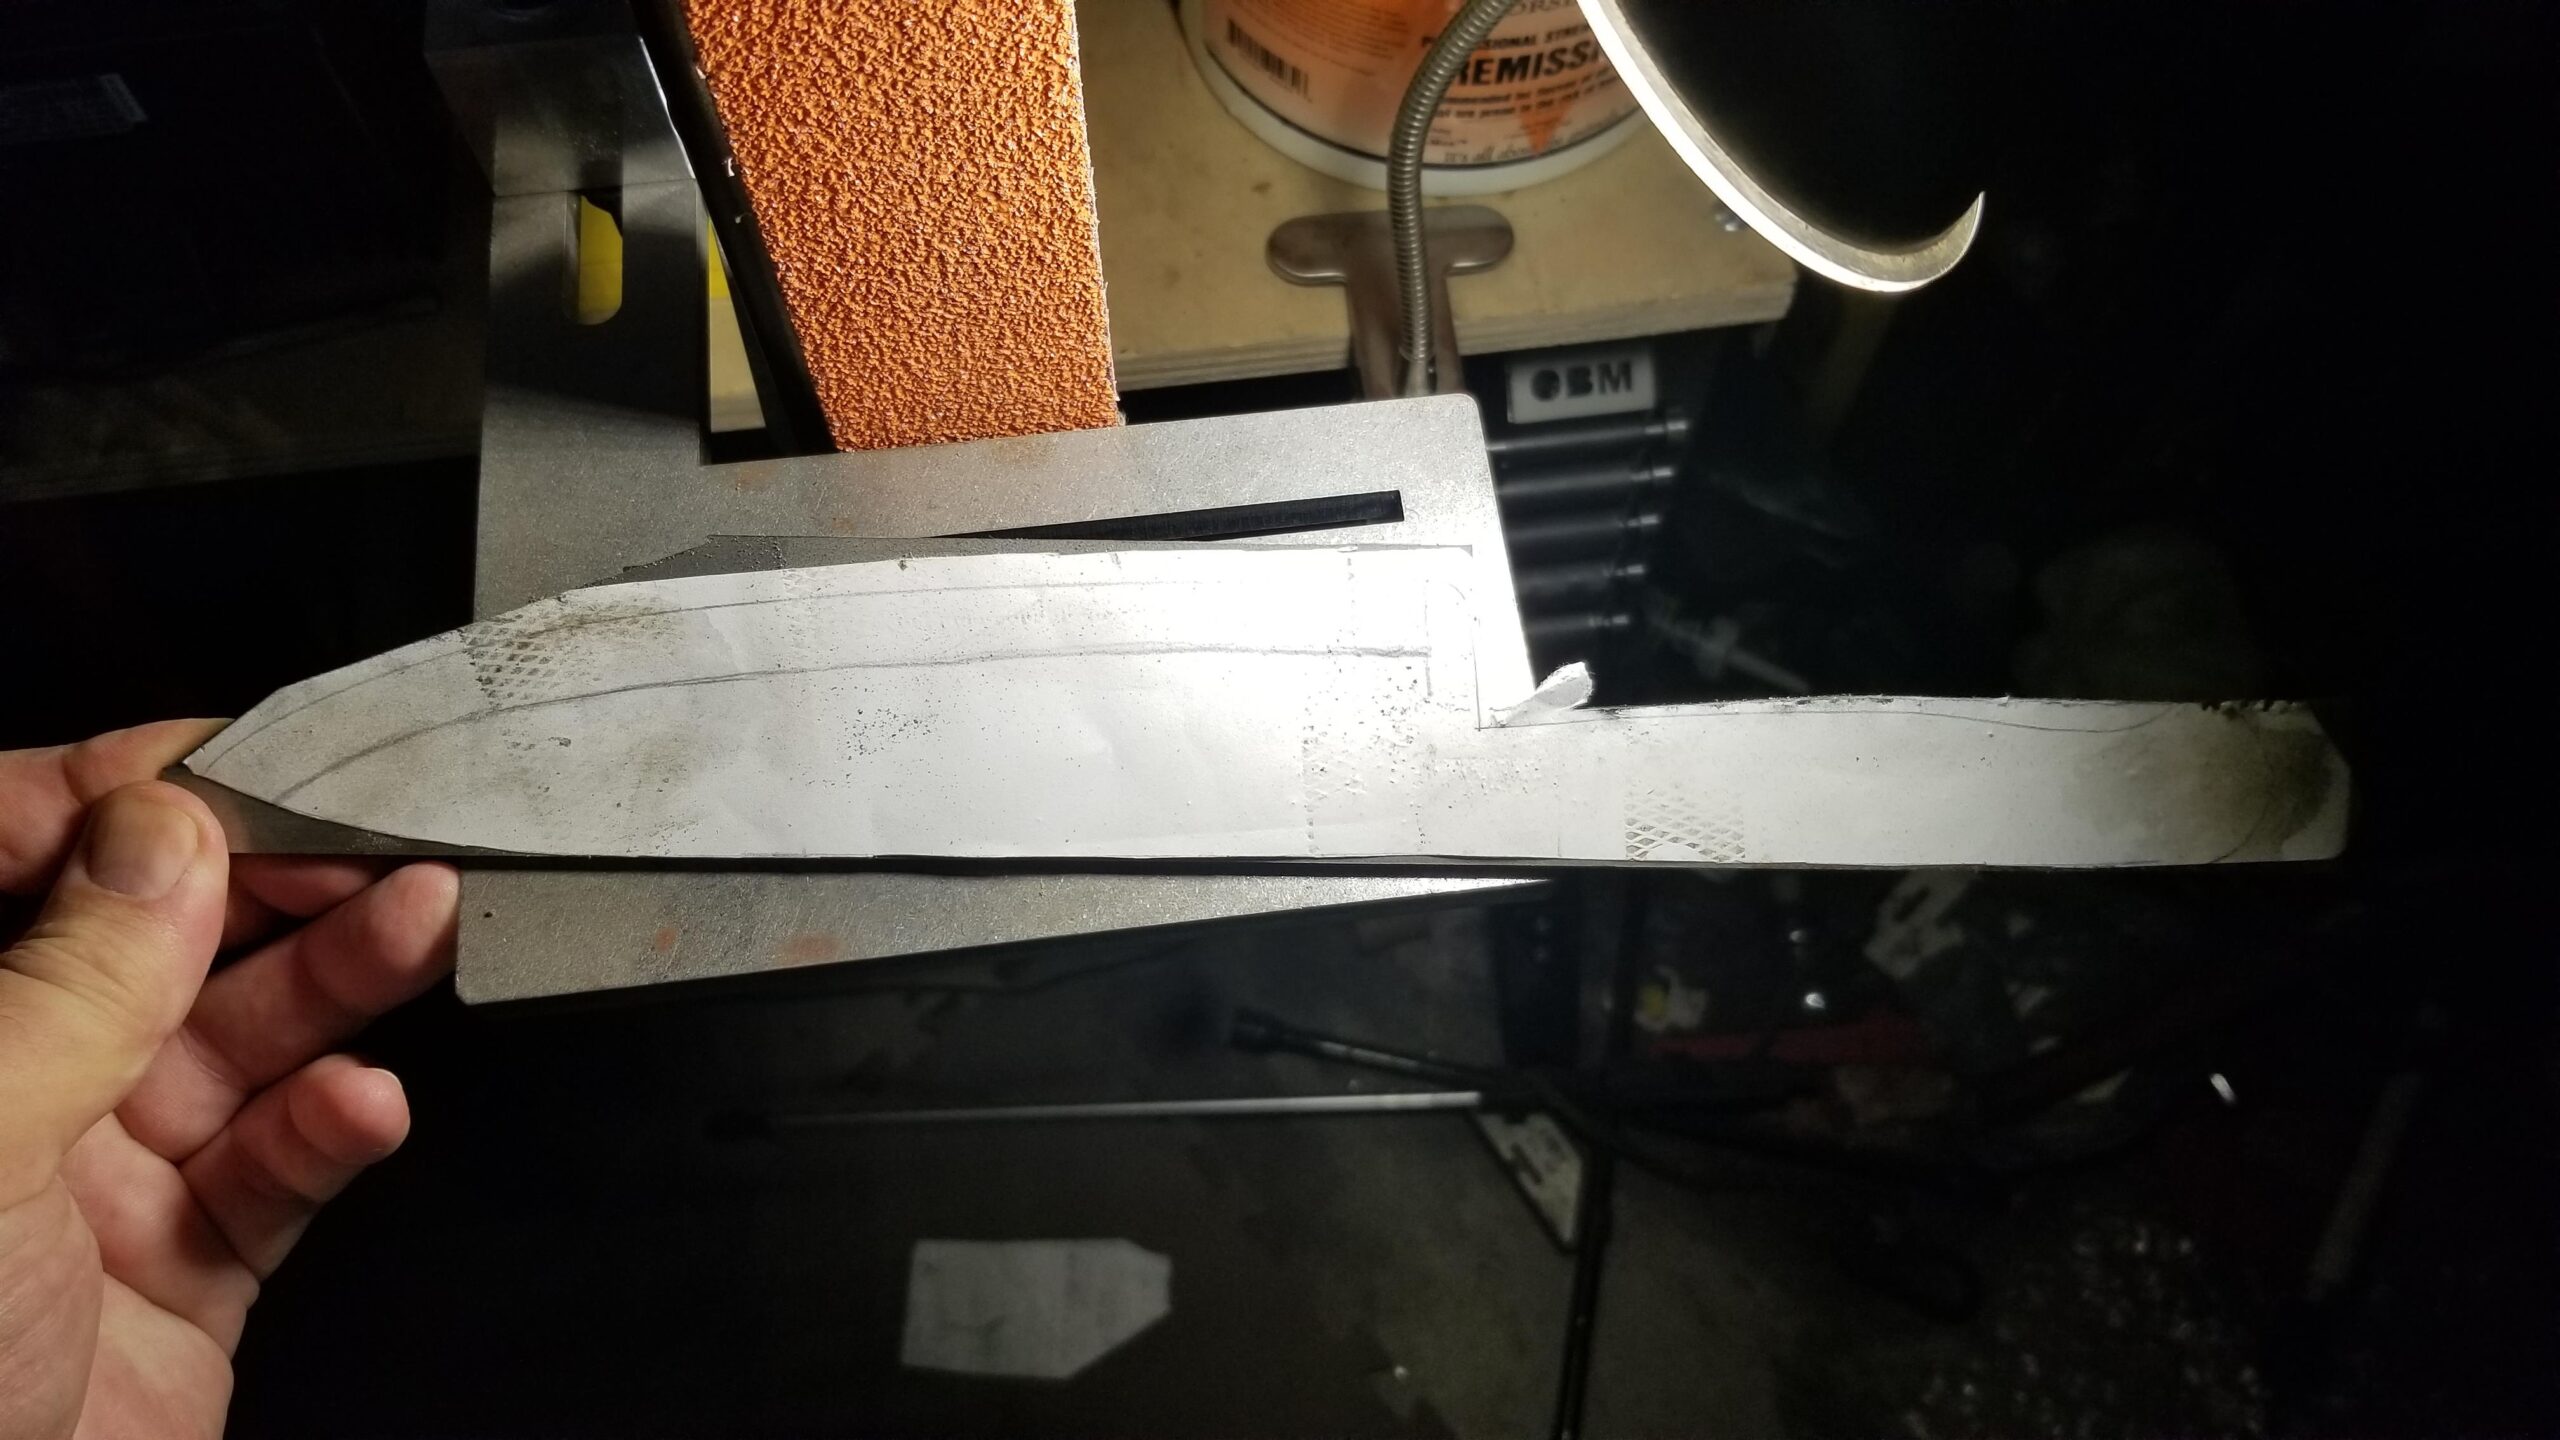
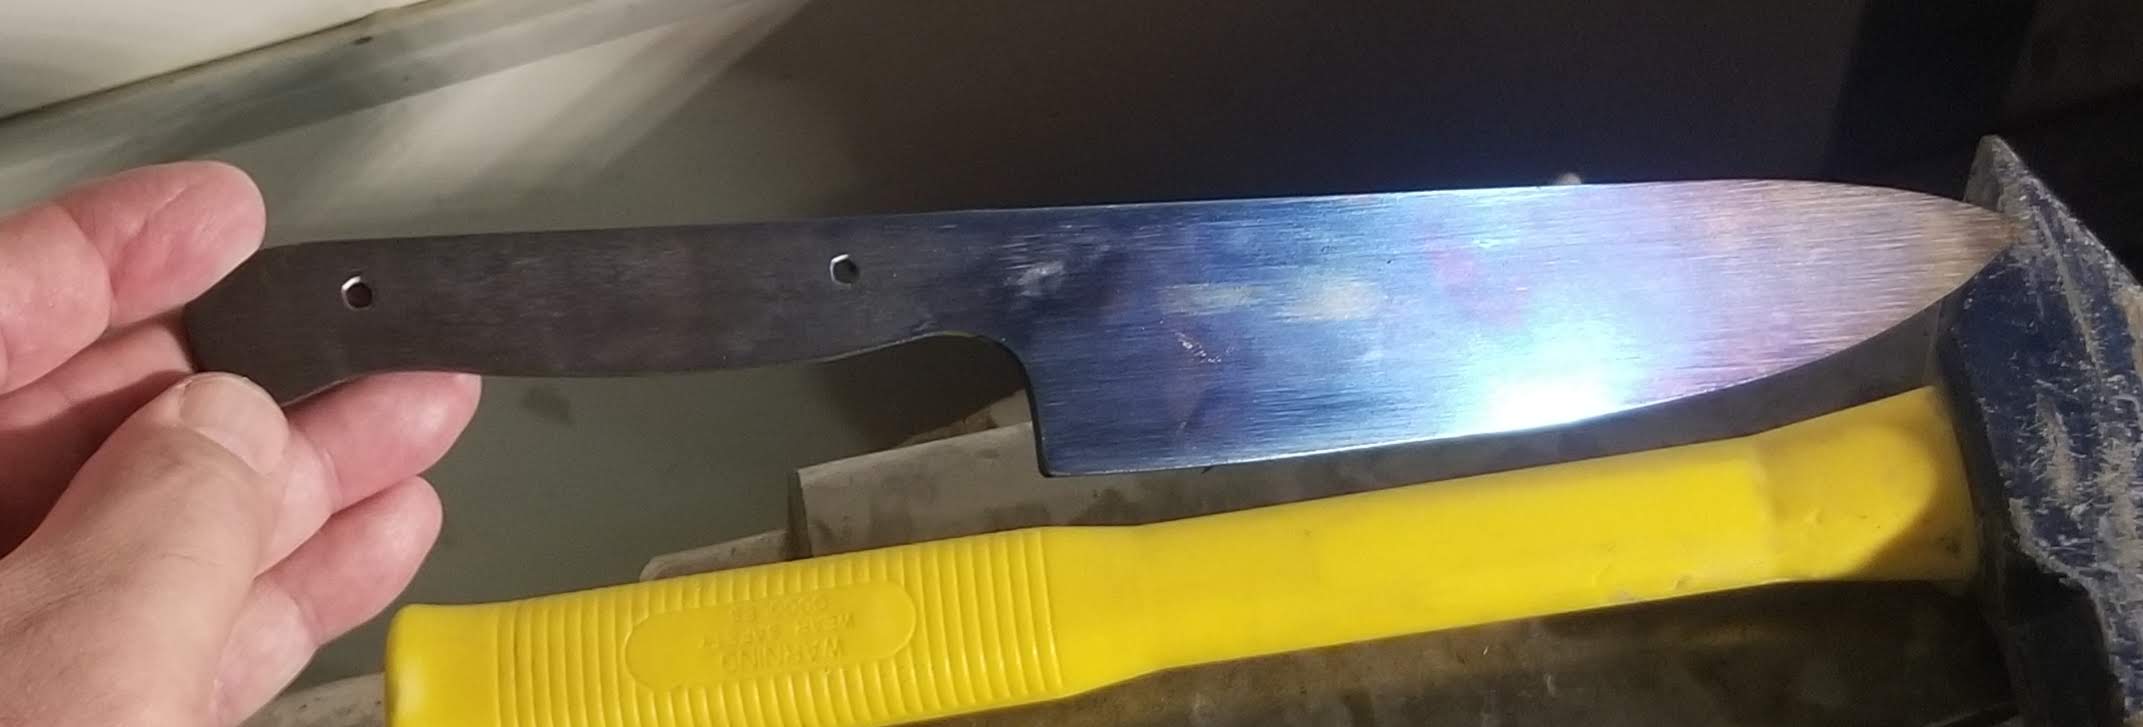
Meanwhile, I have not let it completely stop me and I chose to make a material removal chef’s knife, based on an existing knife we have. Obviously, the grinder figures heavily in that.
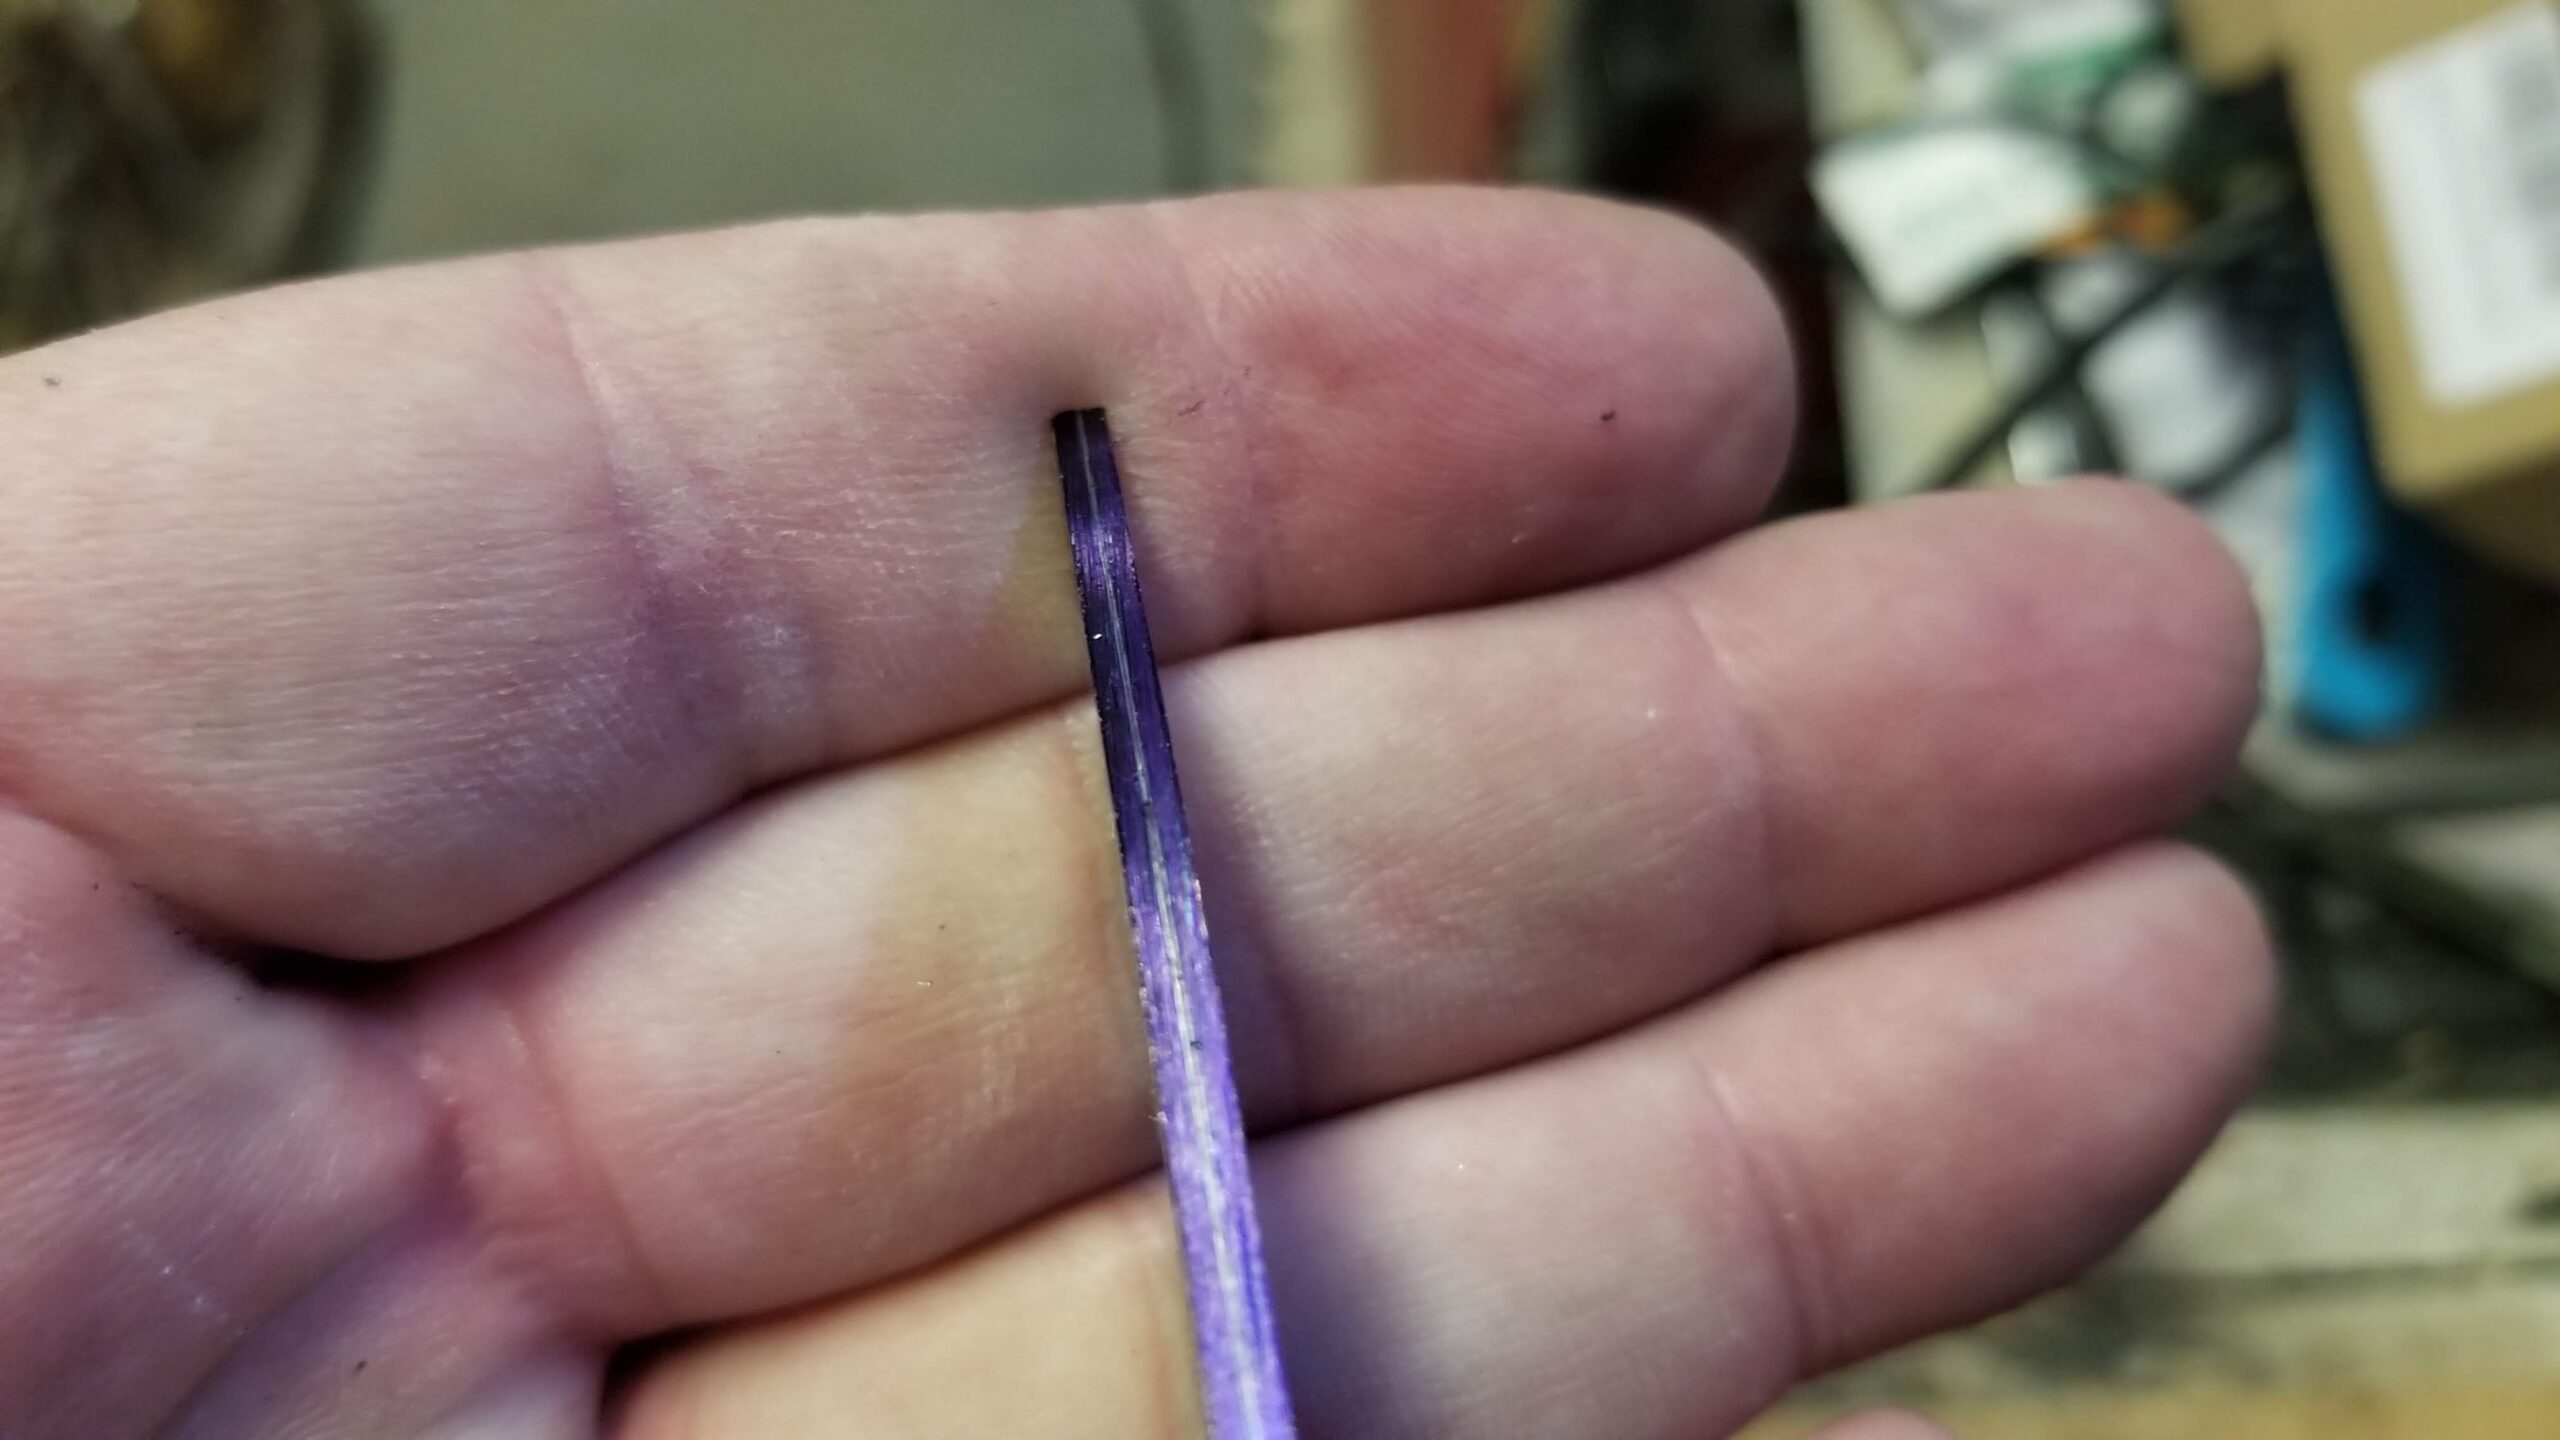
I cut a blank out of 1/8″ 80CRV2.
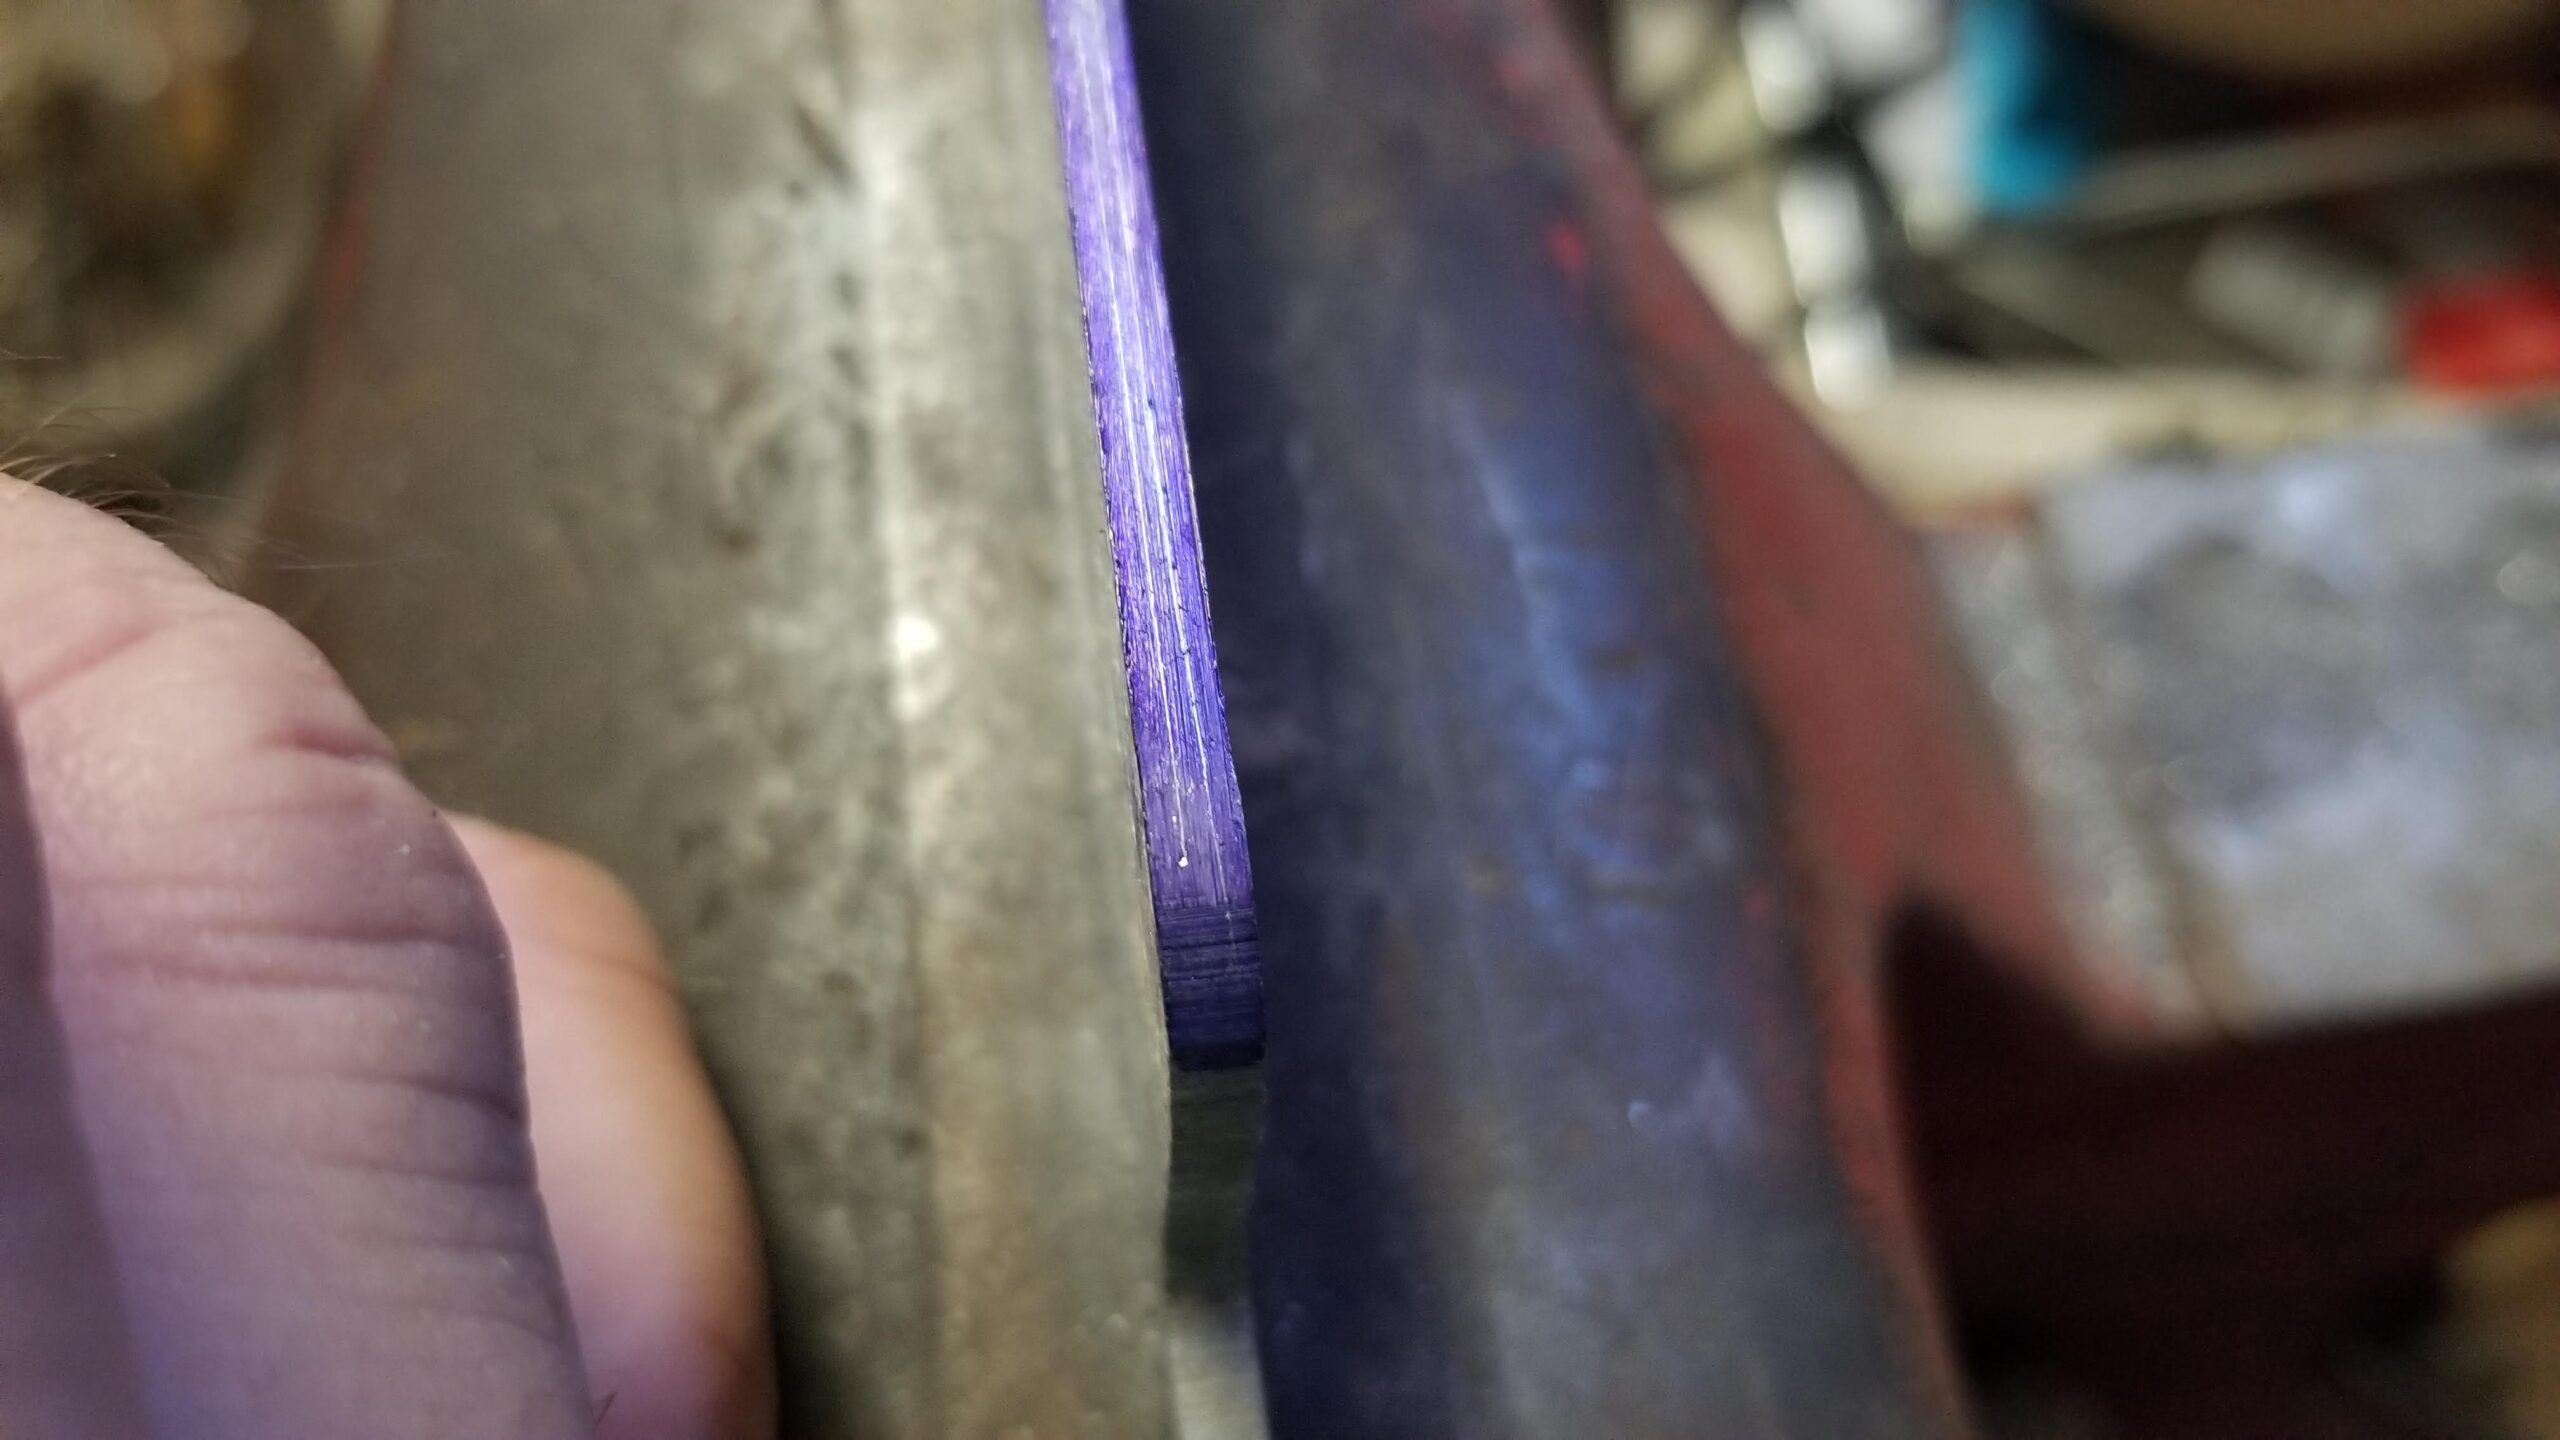
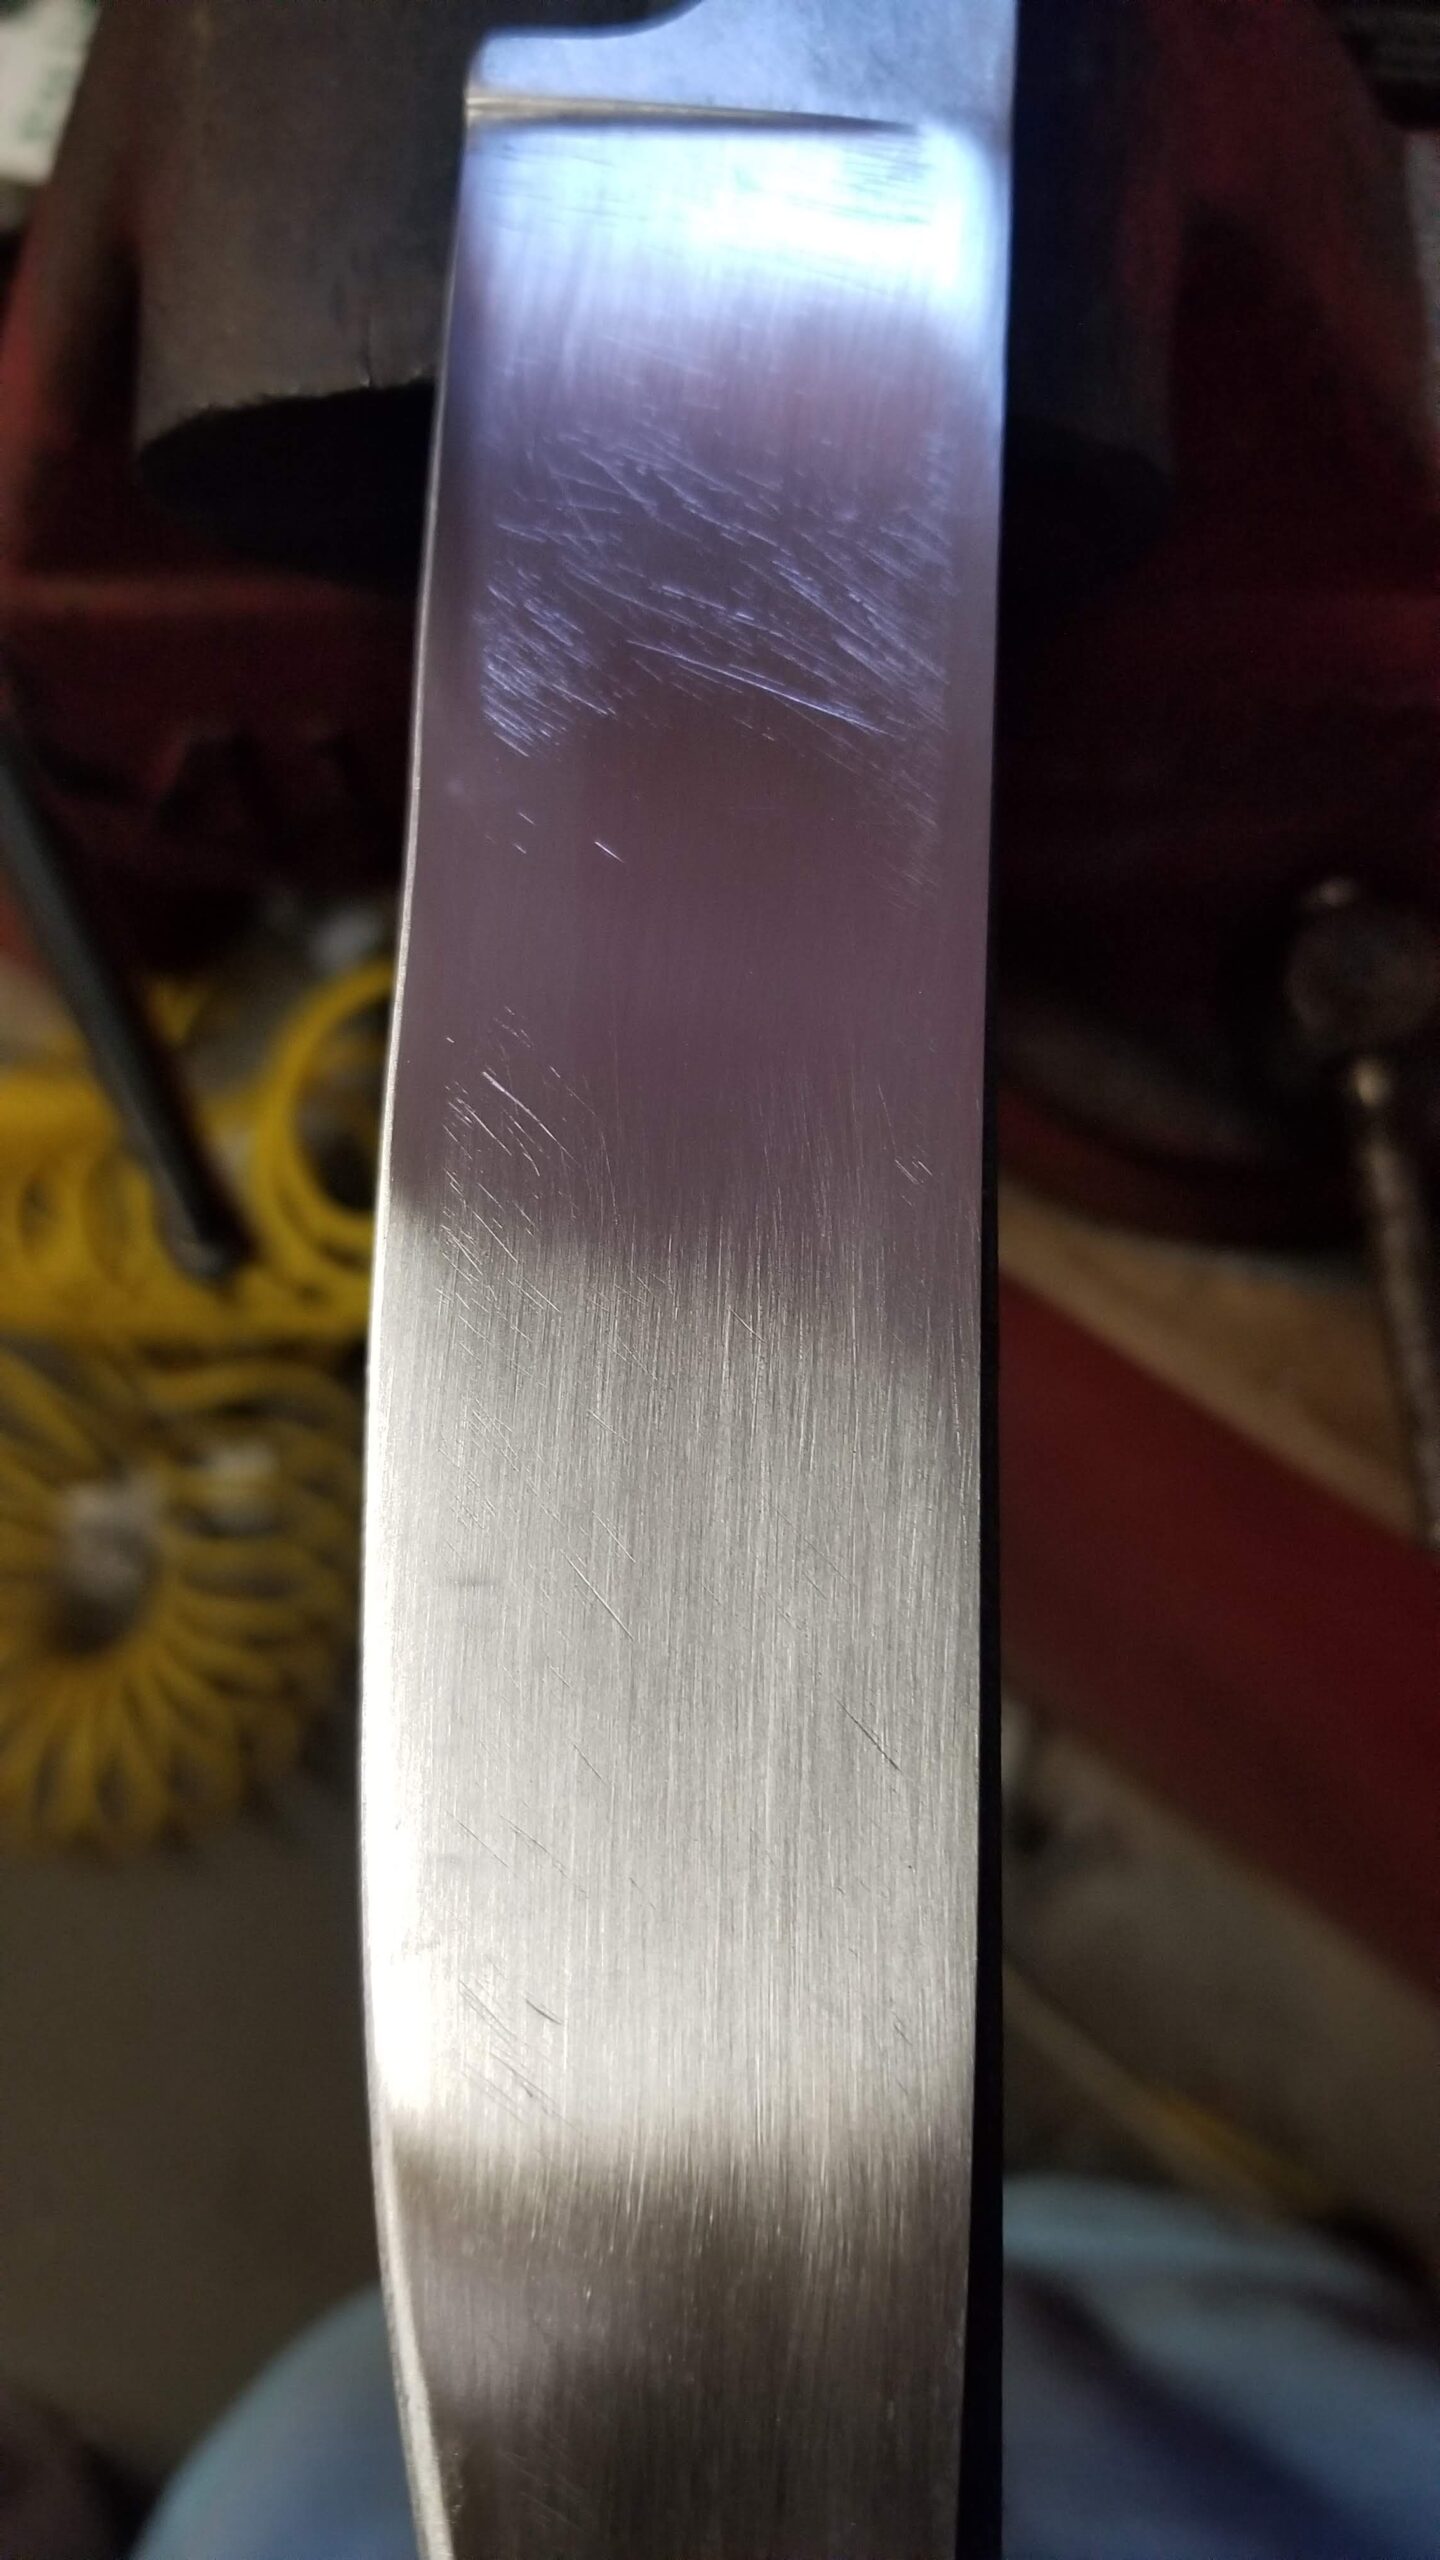
I ground a distal taper into the blank. I didn’t measure the actual taper, but it’s slightly visible here as I am marking the edge.
I marked the edge with this edge scribing tool, one of the extra accessories I picked up from Origin Blade Maker. It is set to bisect the tip.
It makes the distal taper especially obvious. The heel is about 50% thicker than the tip.
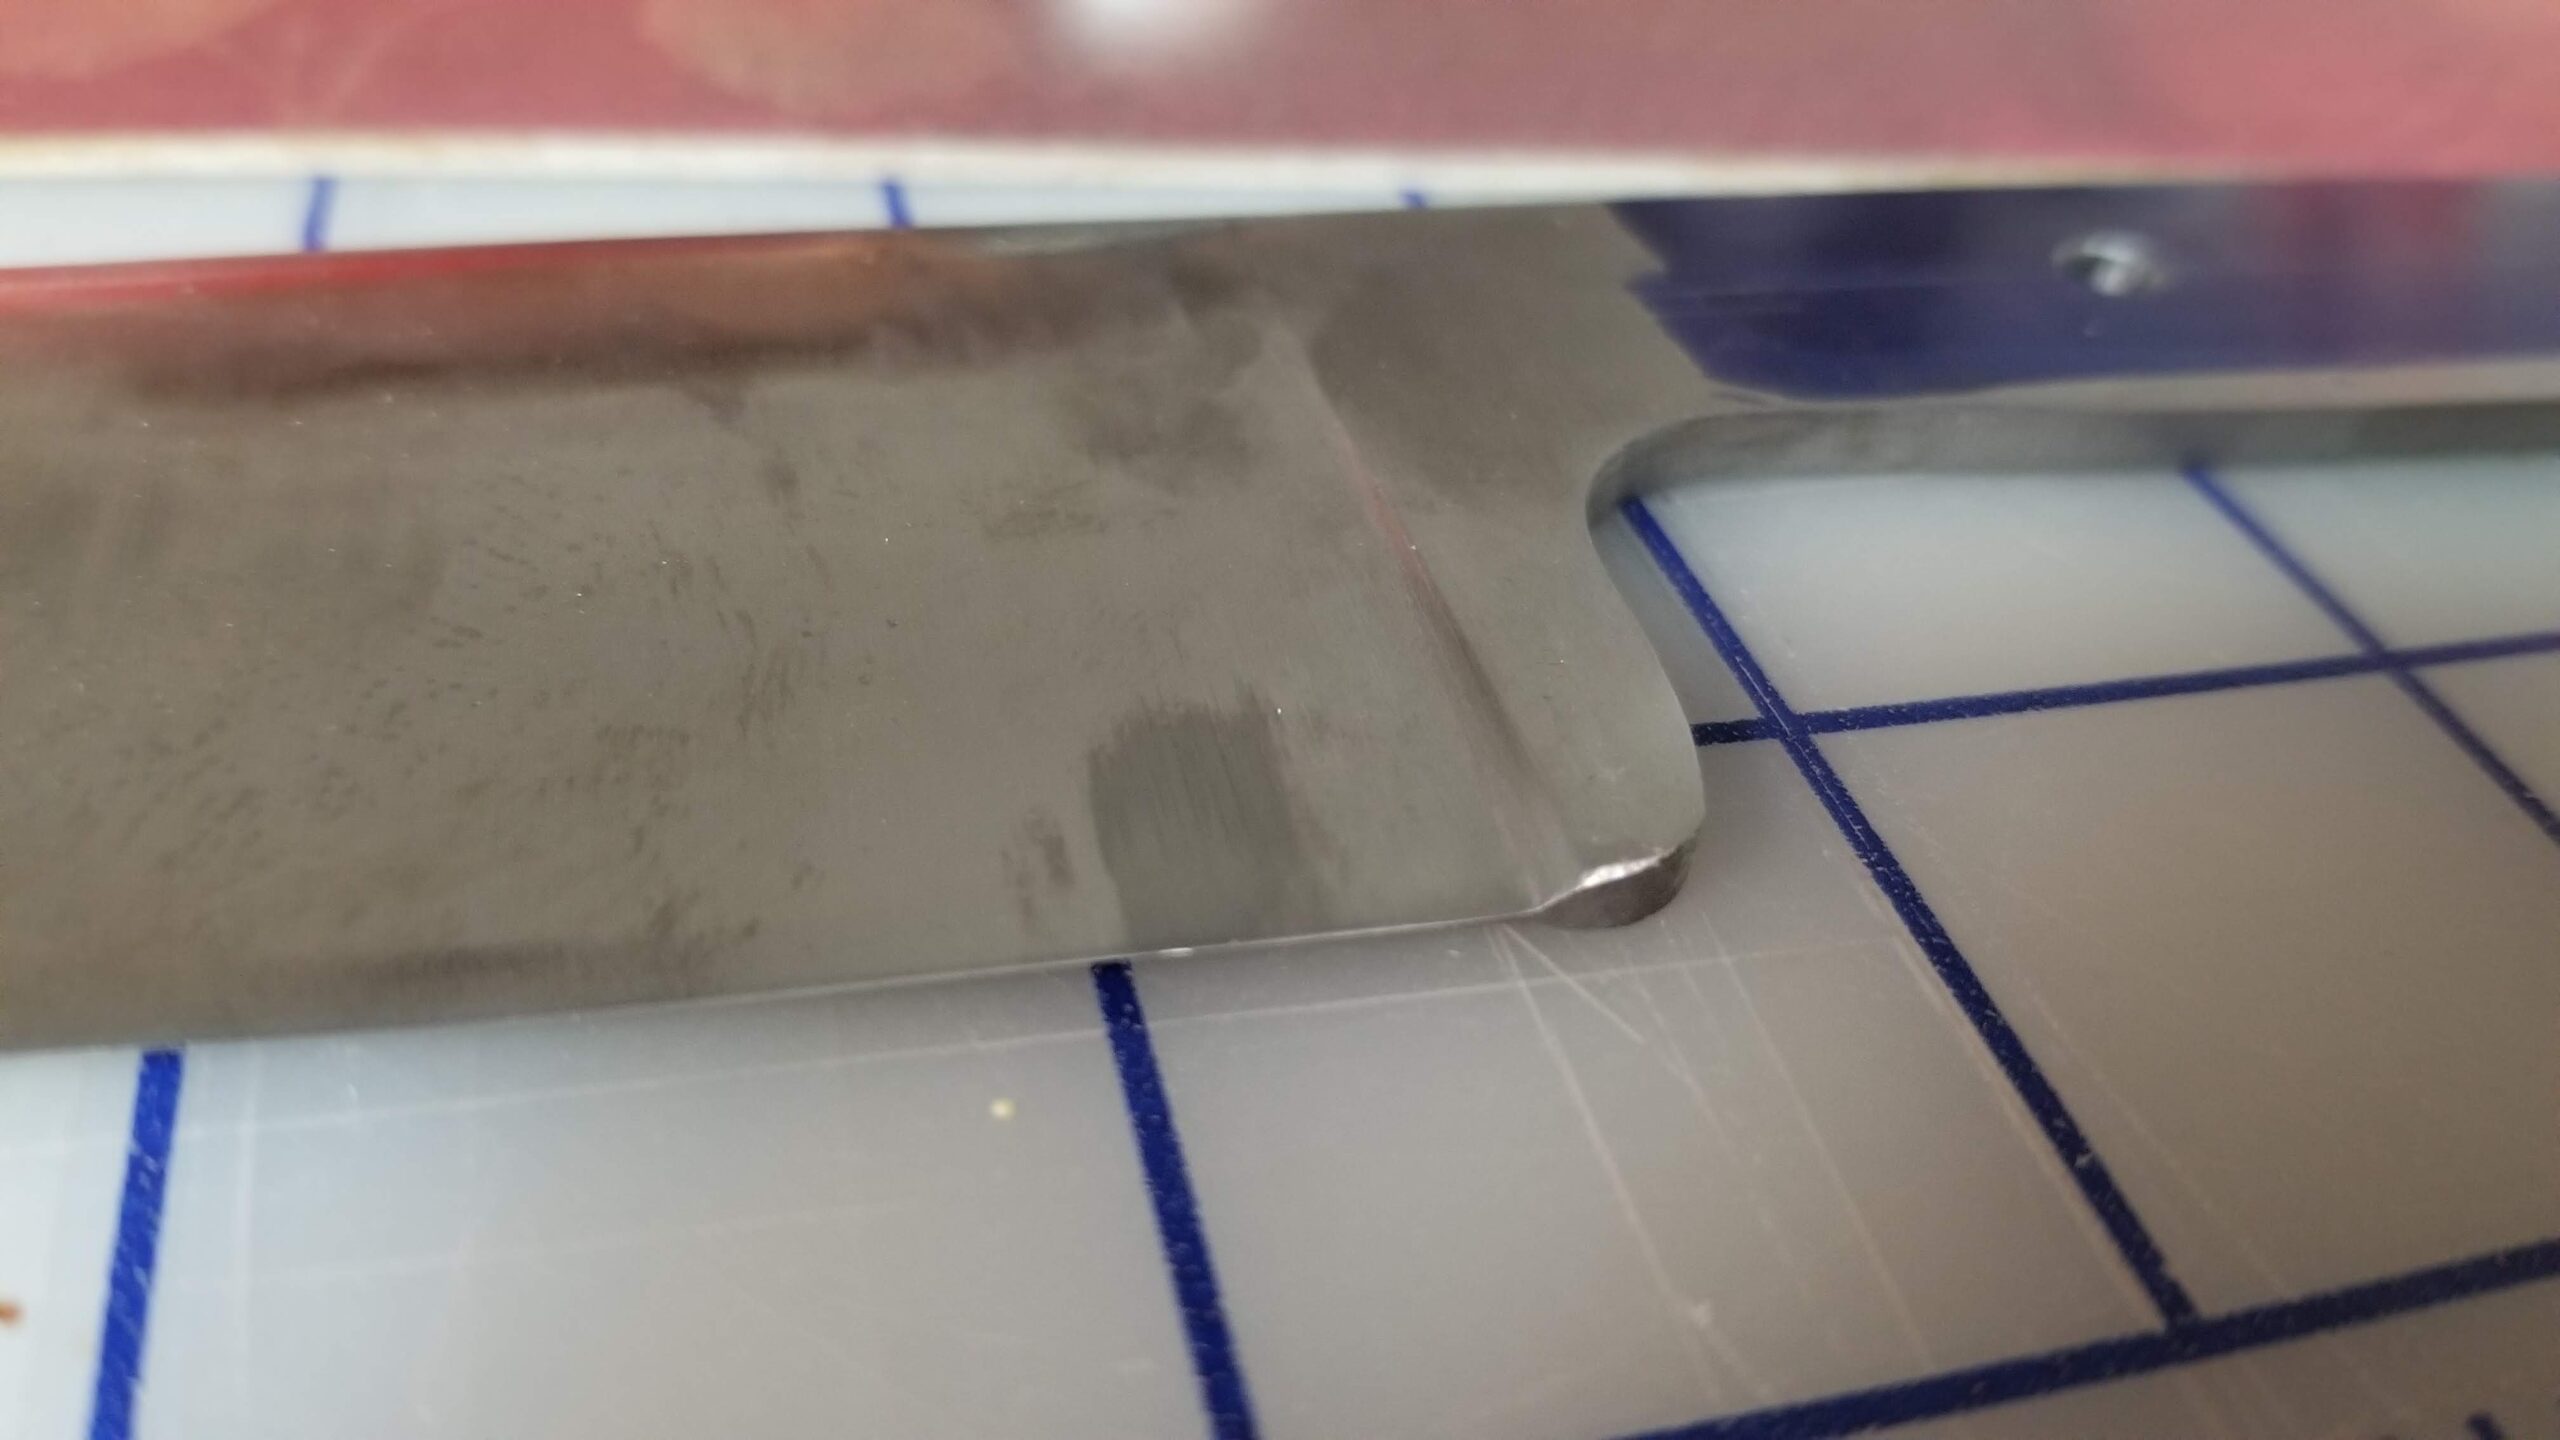
As I was approaching this point in the grinding, it occurred to me that I had ground too far. The edge was going to be too thin for heat treatment!
It was too late anyway, so I drilled the tang and prepared to heat treat in a day or two.
I didn’t get enough pictures of the early parts of the heat treatment process. First, I heated the blade up enough to apply my touchmark. Then I heated to an even orange heat and checked with an IR thermometer for 1600F. I let it soak at that color for about 5 minutes then quenched it in cheap 30W motor oil. Why, yes, that does smell perfectly yummy.
And, as predicted, the really thin edge of the blade came out not just warped but completely wavy.
There’s always a slim chance it might relax some in the temper, so I put it in the toaster oven for a two 60 minute cycles at 450F, cooling to room temperature between.
There was no perceptible reduction in the warping.
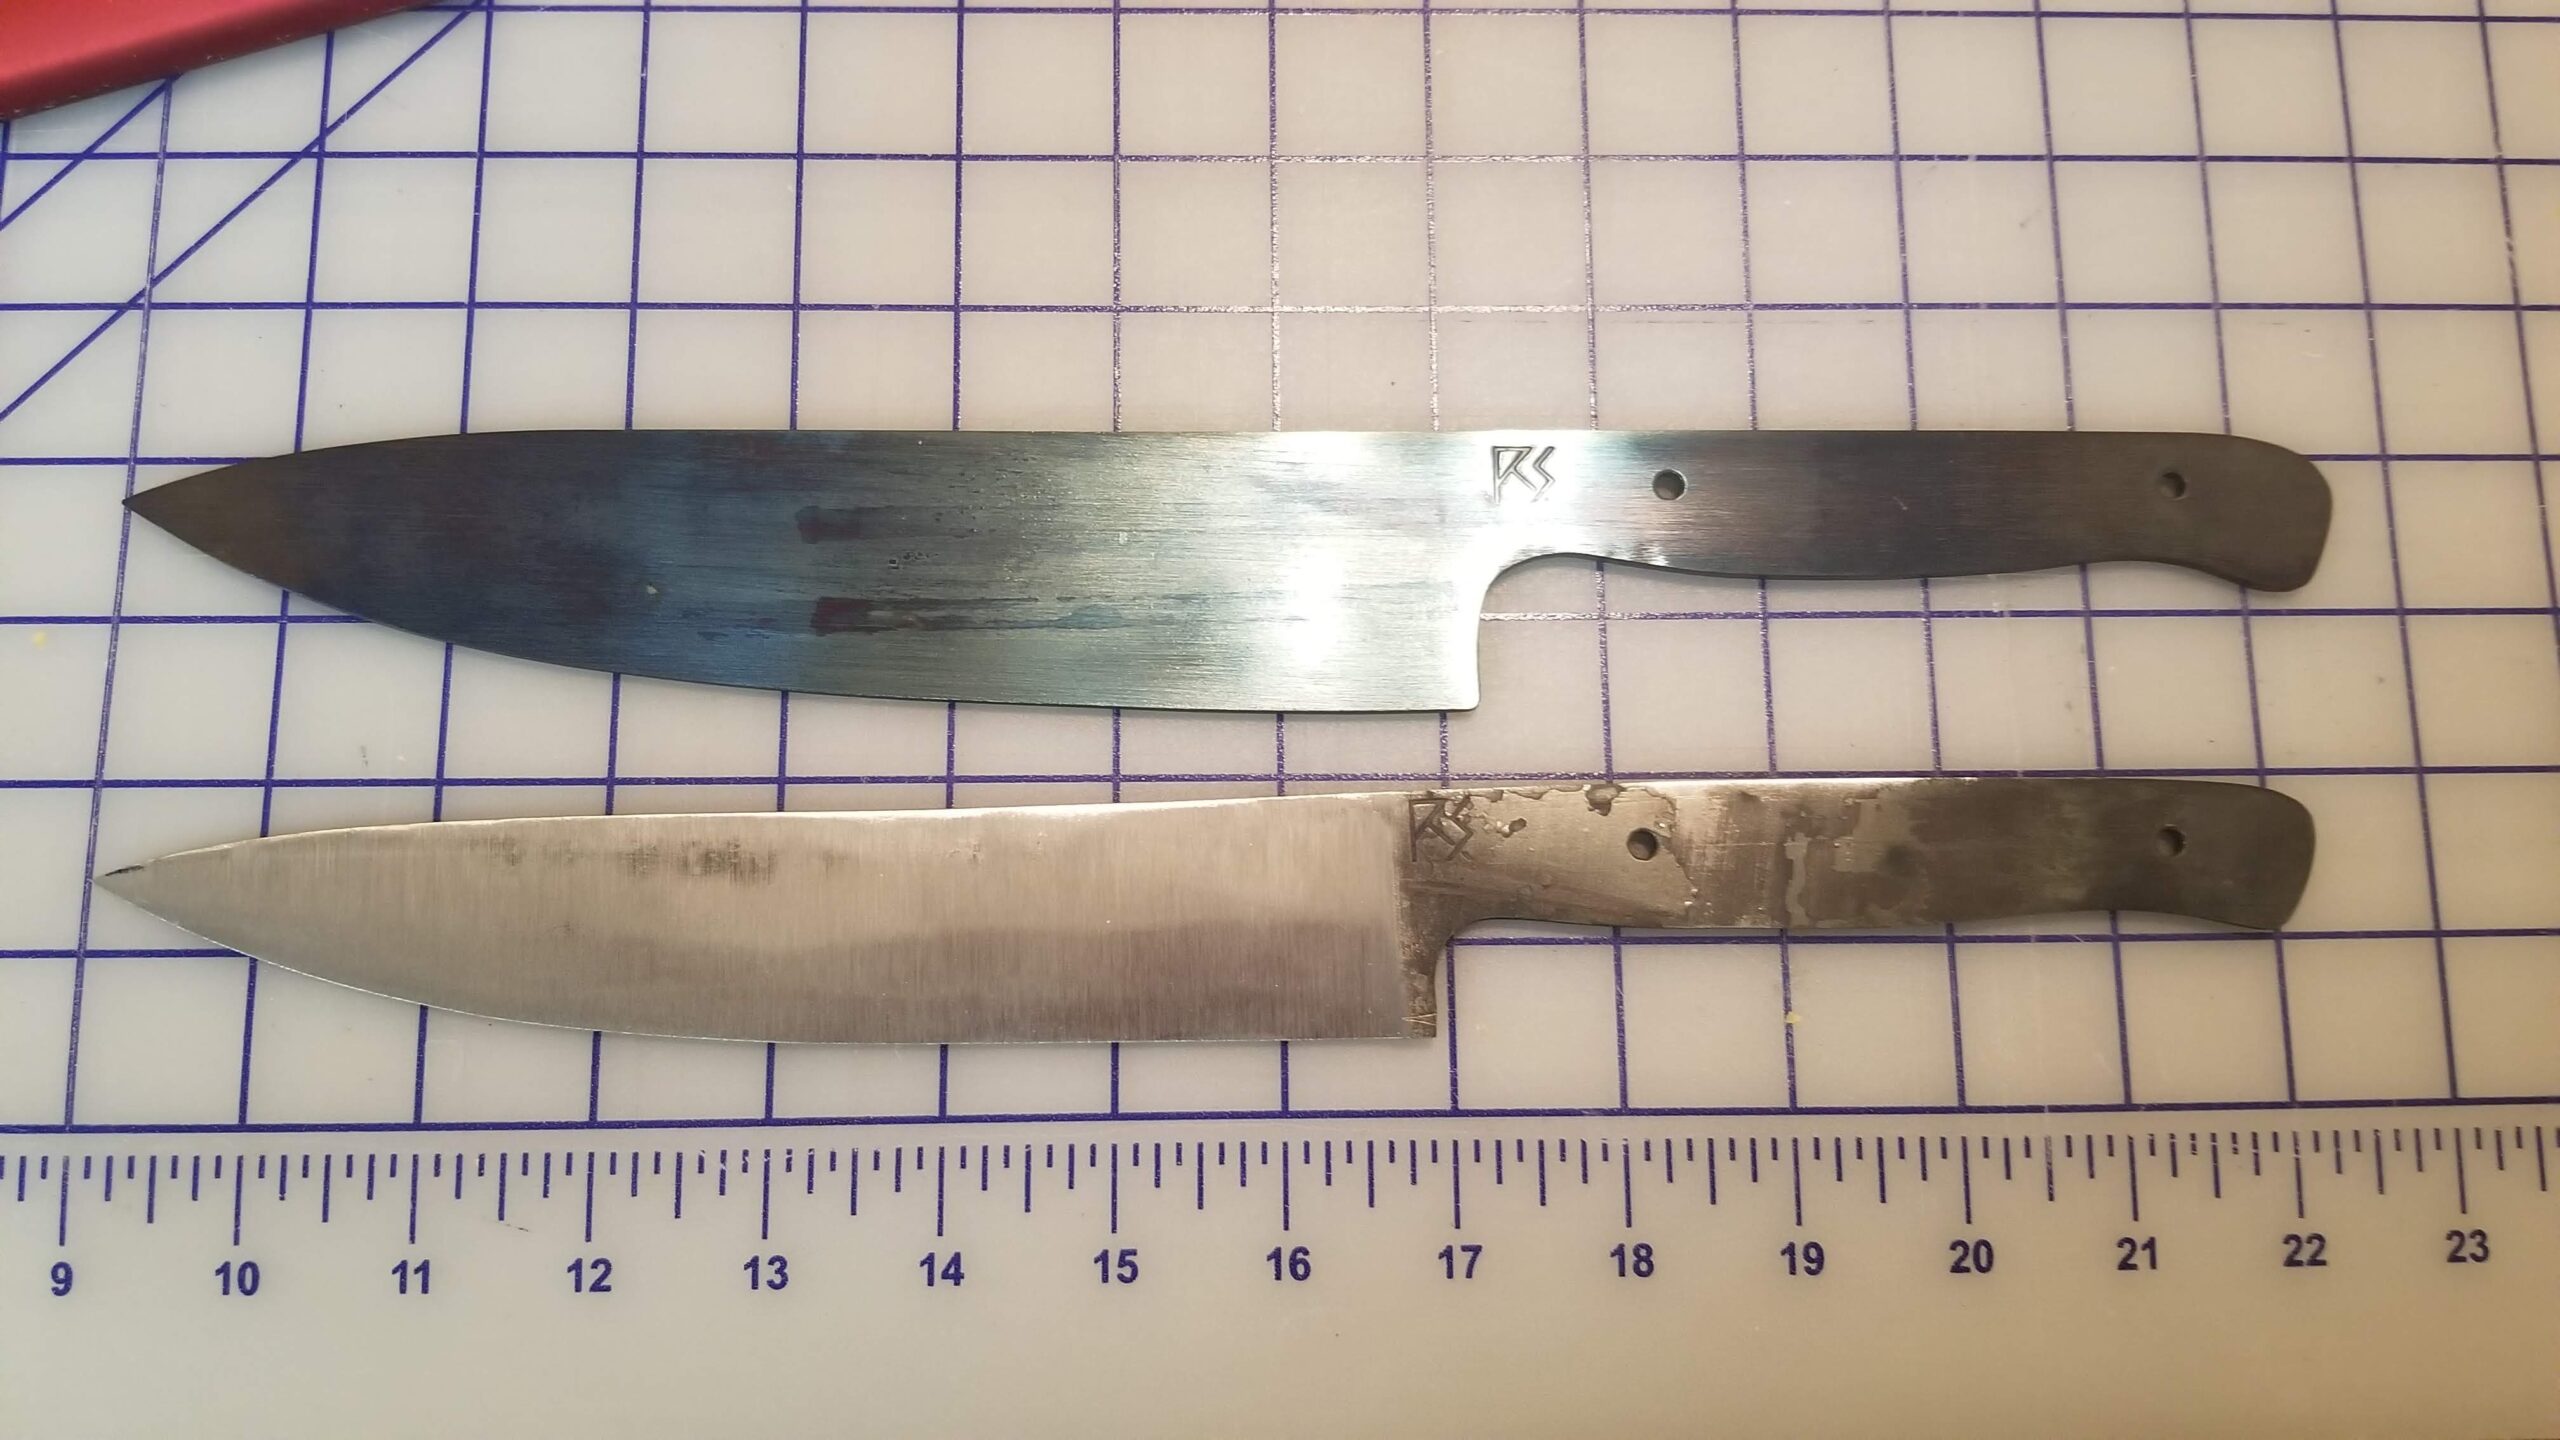
The tempering cycles took the evening and overnight, so I immediately started on another blank that I would not make *that* particular mistake on. This time, I would heat treat the tapered and drilled blank, before grinding the bevels.
Here’s that one, after tempering, ready to grind.
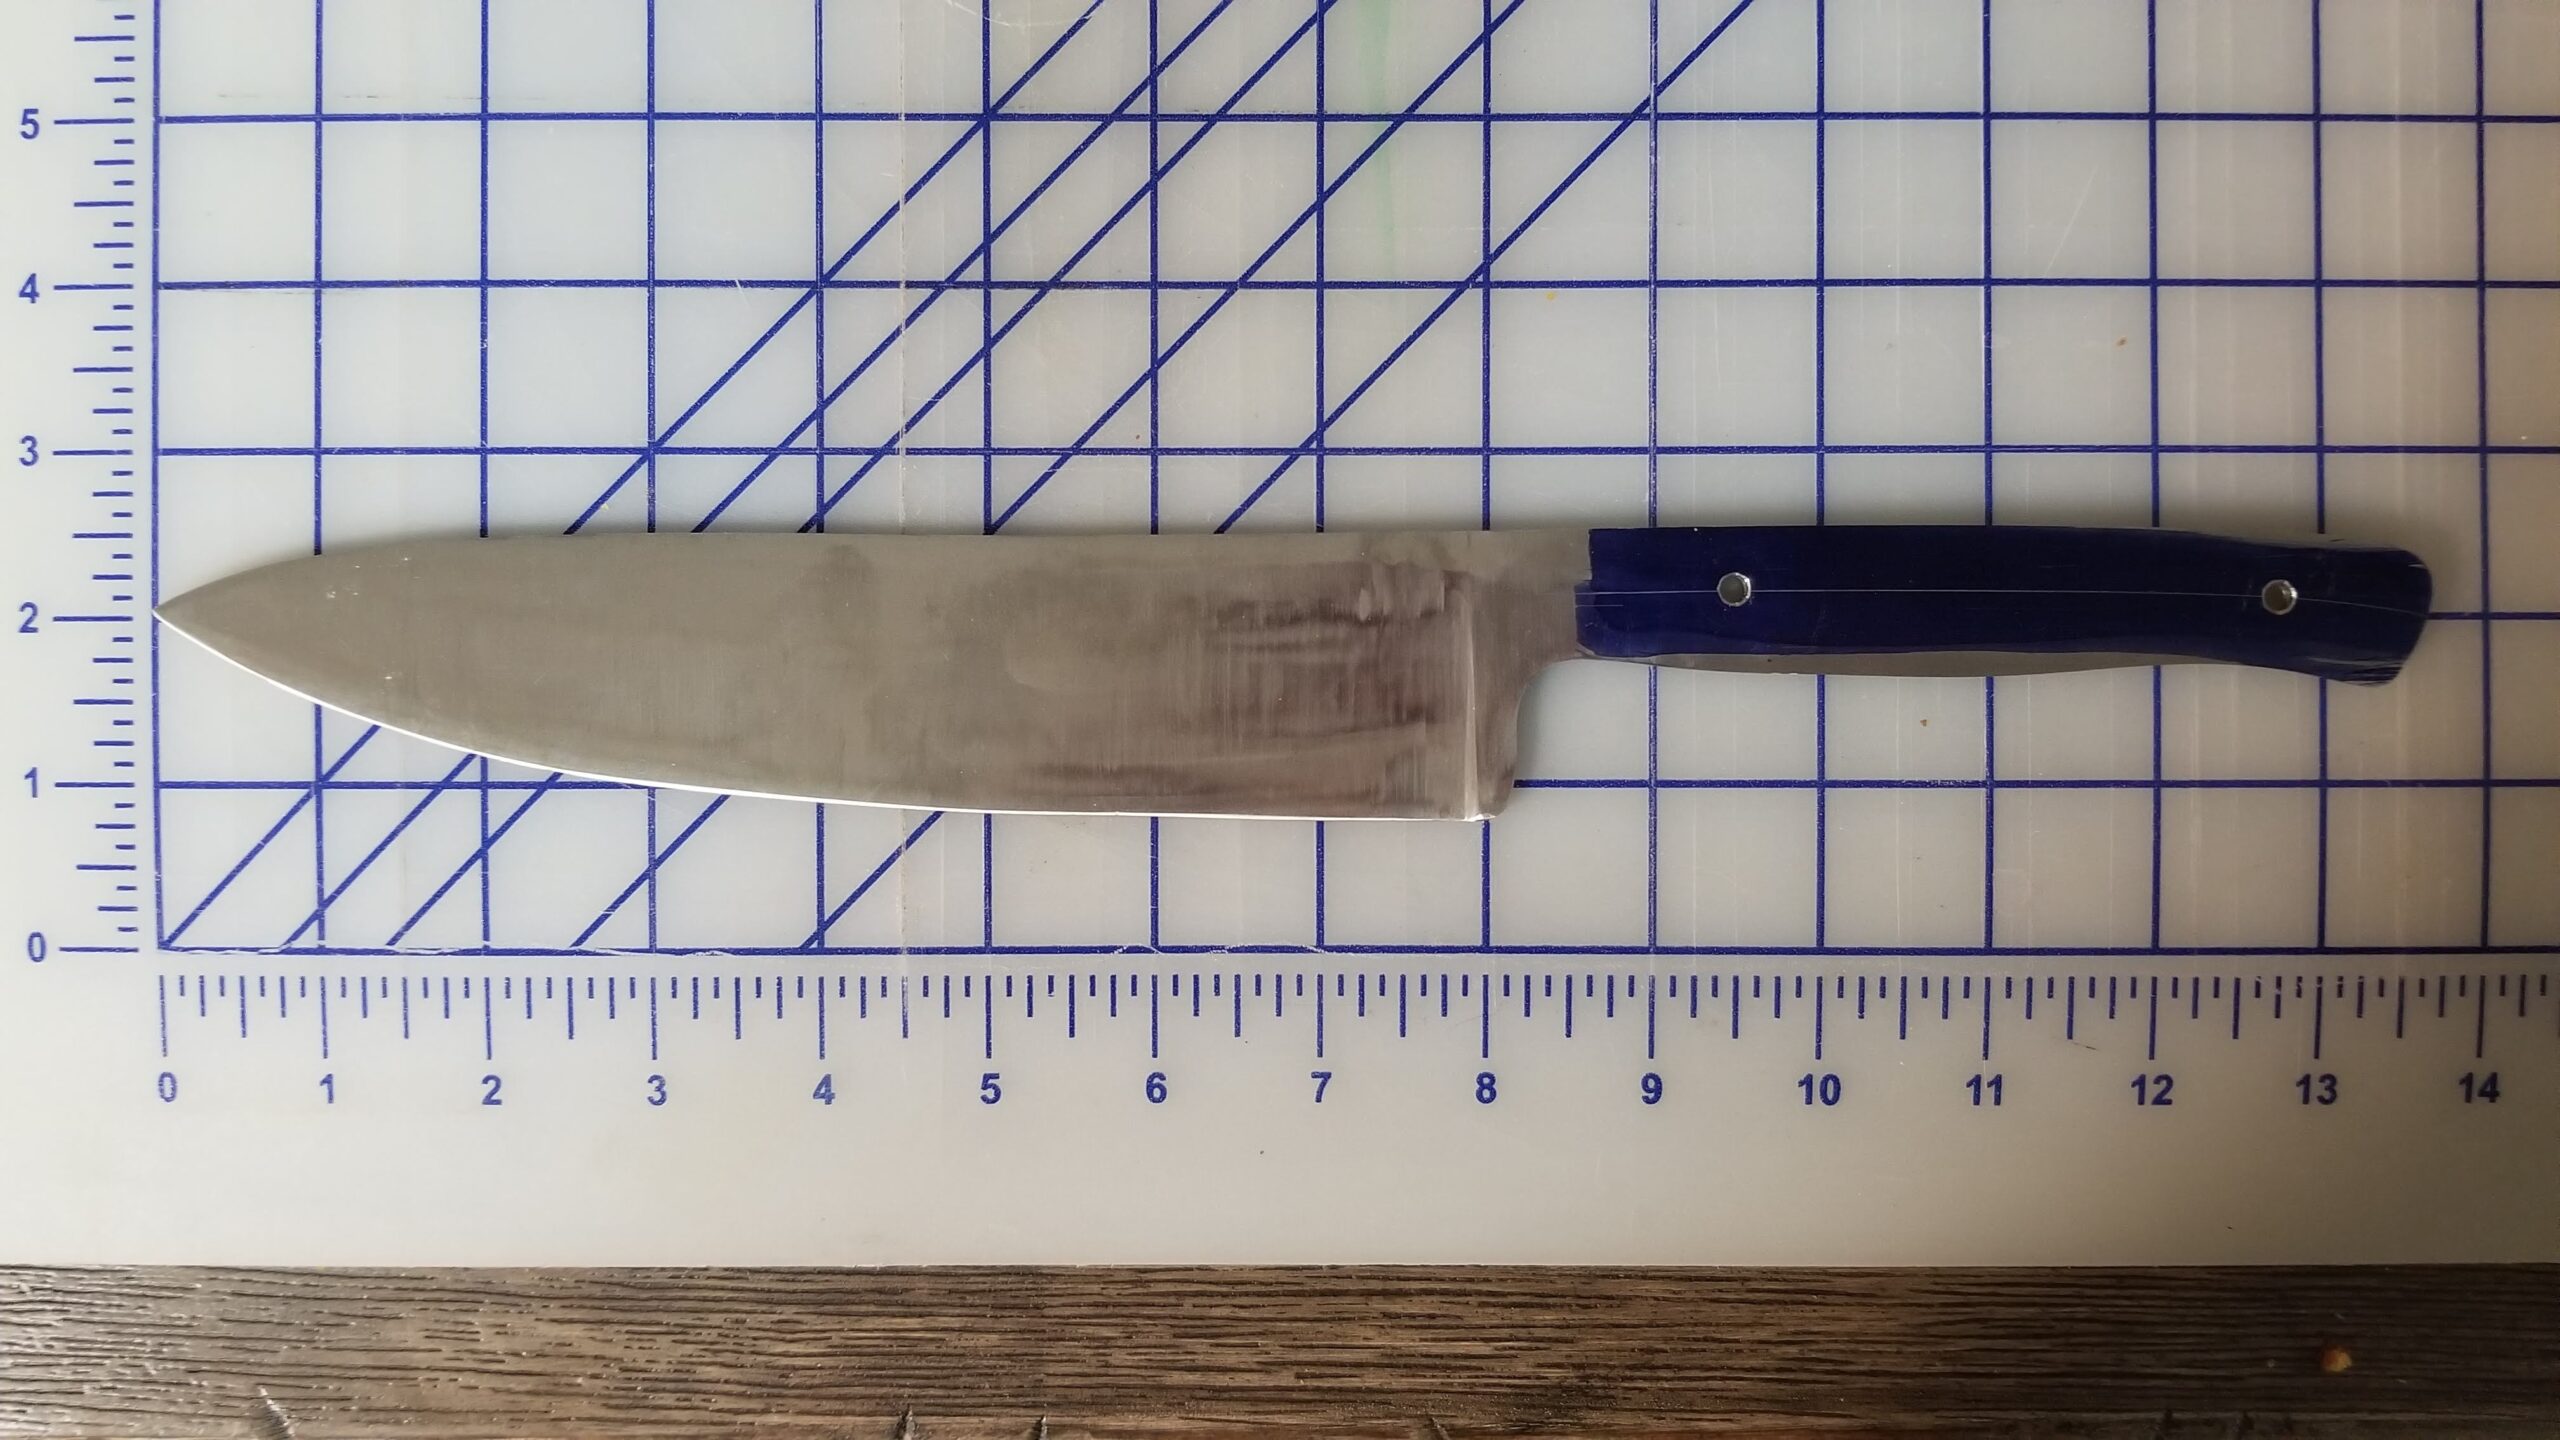
As for the first blade, I just scribed a line describing it as a narrower blade, less a chef’s knife and more a carving knife.
I ground the new profile, reground the bevels and hand sanded it.
I put mesquite scales on it. It is perilously close to finished.
I started this post September 2020…. I’m typing this sentence January 2021. It was February 2019 when I posted last.
It’s been a busy couple years since my last confession post.
Using a method that has worked for me before, I browsed through the pix from my phone for reminders of significant events in since the last update.
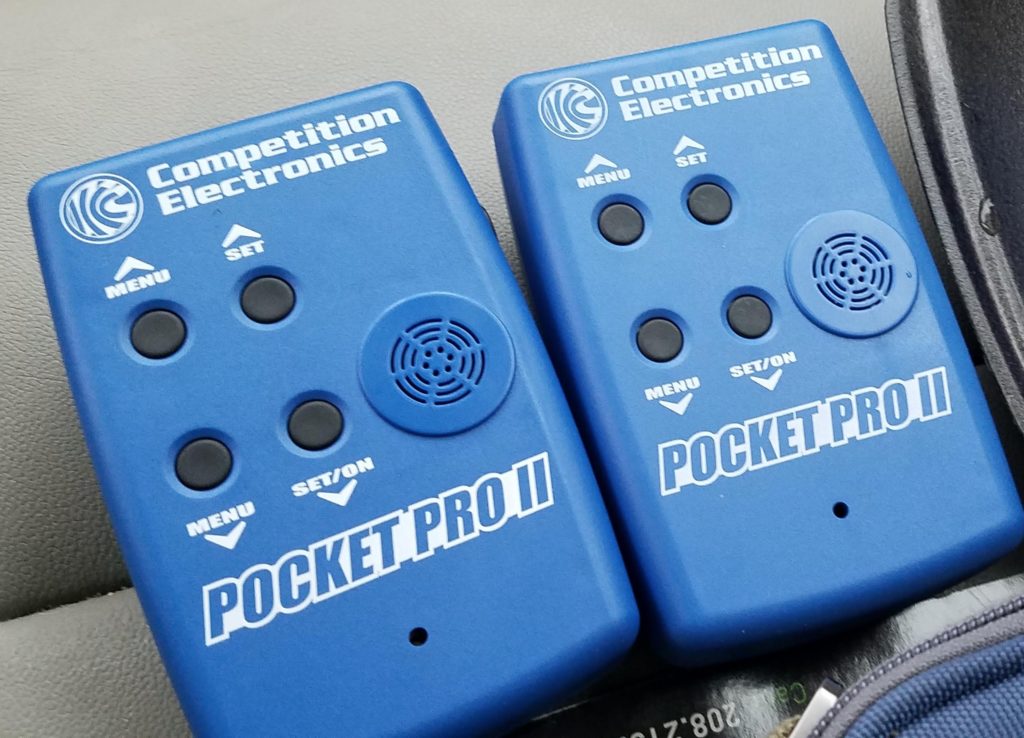
I decided long ago that I don’t particularly like the common and inexpensive CED shot timers. They work well enough and are quite compact, but my old-guy eyes have trouble reading the display. So, I wanted something with a bigger display and decided to get a Competition Electronics Pocket Pro II. I found one on Amazon and I was kind of expecting it to not be super cheap, so I purchased the one with a short shipping time and went about my life.
The next day, I was going to share the link to the factory website with someone and noticed that it was available for about half the price directly from Competition Electronics. I quickly ordered one from there and only then realized that I had bought the Amazon one, not from Amazon, but from a third party seller. I requested cancellation, but the timer arrived before I heard back from the seller, who then said “Sorry, but we only offer the present deal.” I did not trust them to not make it worse in the return process, so I decided to keep it and chalk it up to an expensive lesson learned. Also by then, the order from Competion Electronics had arrived. I decided that having two timers was a good idea and just put it out of my mind that I had way overspent on half of them. Hey, they are nice timers. Can you tell which one has the gold circuitry?
I started carrying my Glock 19 more often, mostly because I like the idea of having more ammo if needed. I know that statistically, I am astronomically unlikely to become involved in a firearm altercation at all, and if I do, it is also unlikely to need more than a couple of rounds to resolve it.
But what if I’m in that situation where I am the only armed person around and it does take more than a couple rounds to protect those around me?
Ammunition is kind of necessarily heavy. It’s how the physics works. You need something heavy or something fast and with handguns, fast (actually fast) is almost never a realistic option. There are a couple of fringe exceptions, but generally, big heavy slow is how pistols go.
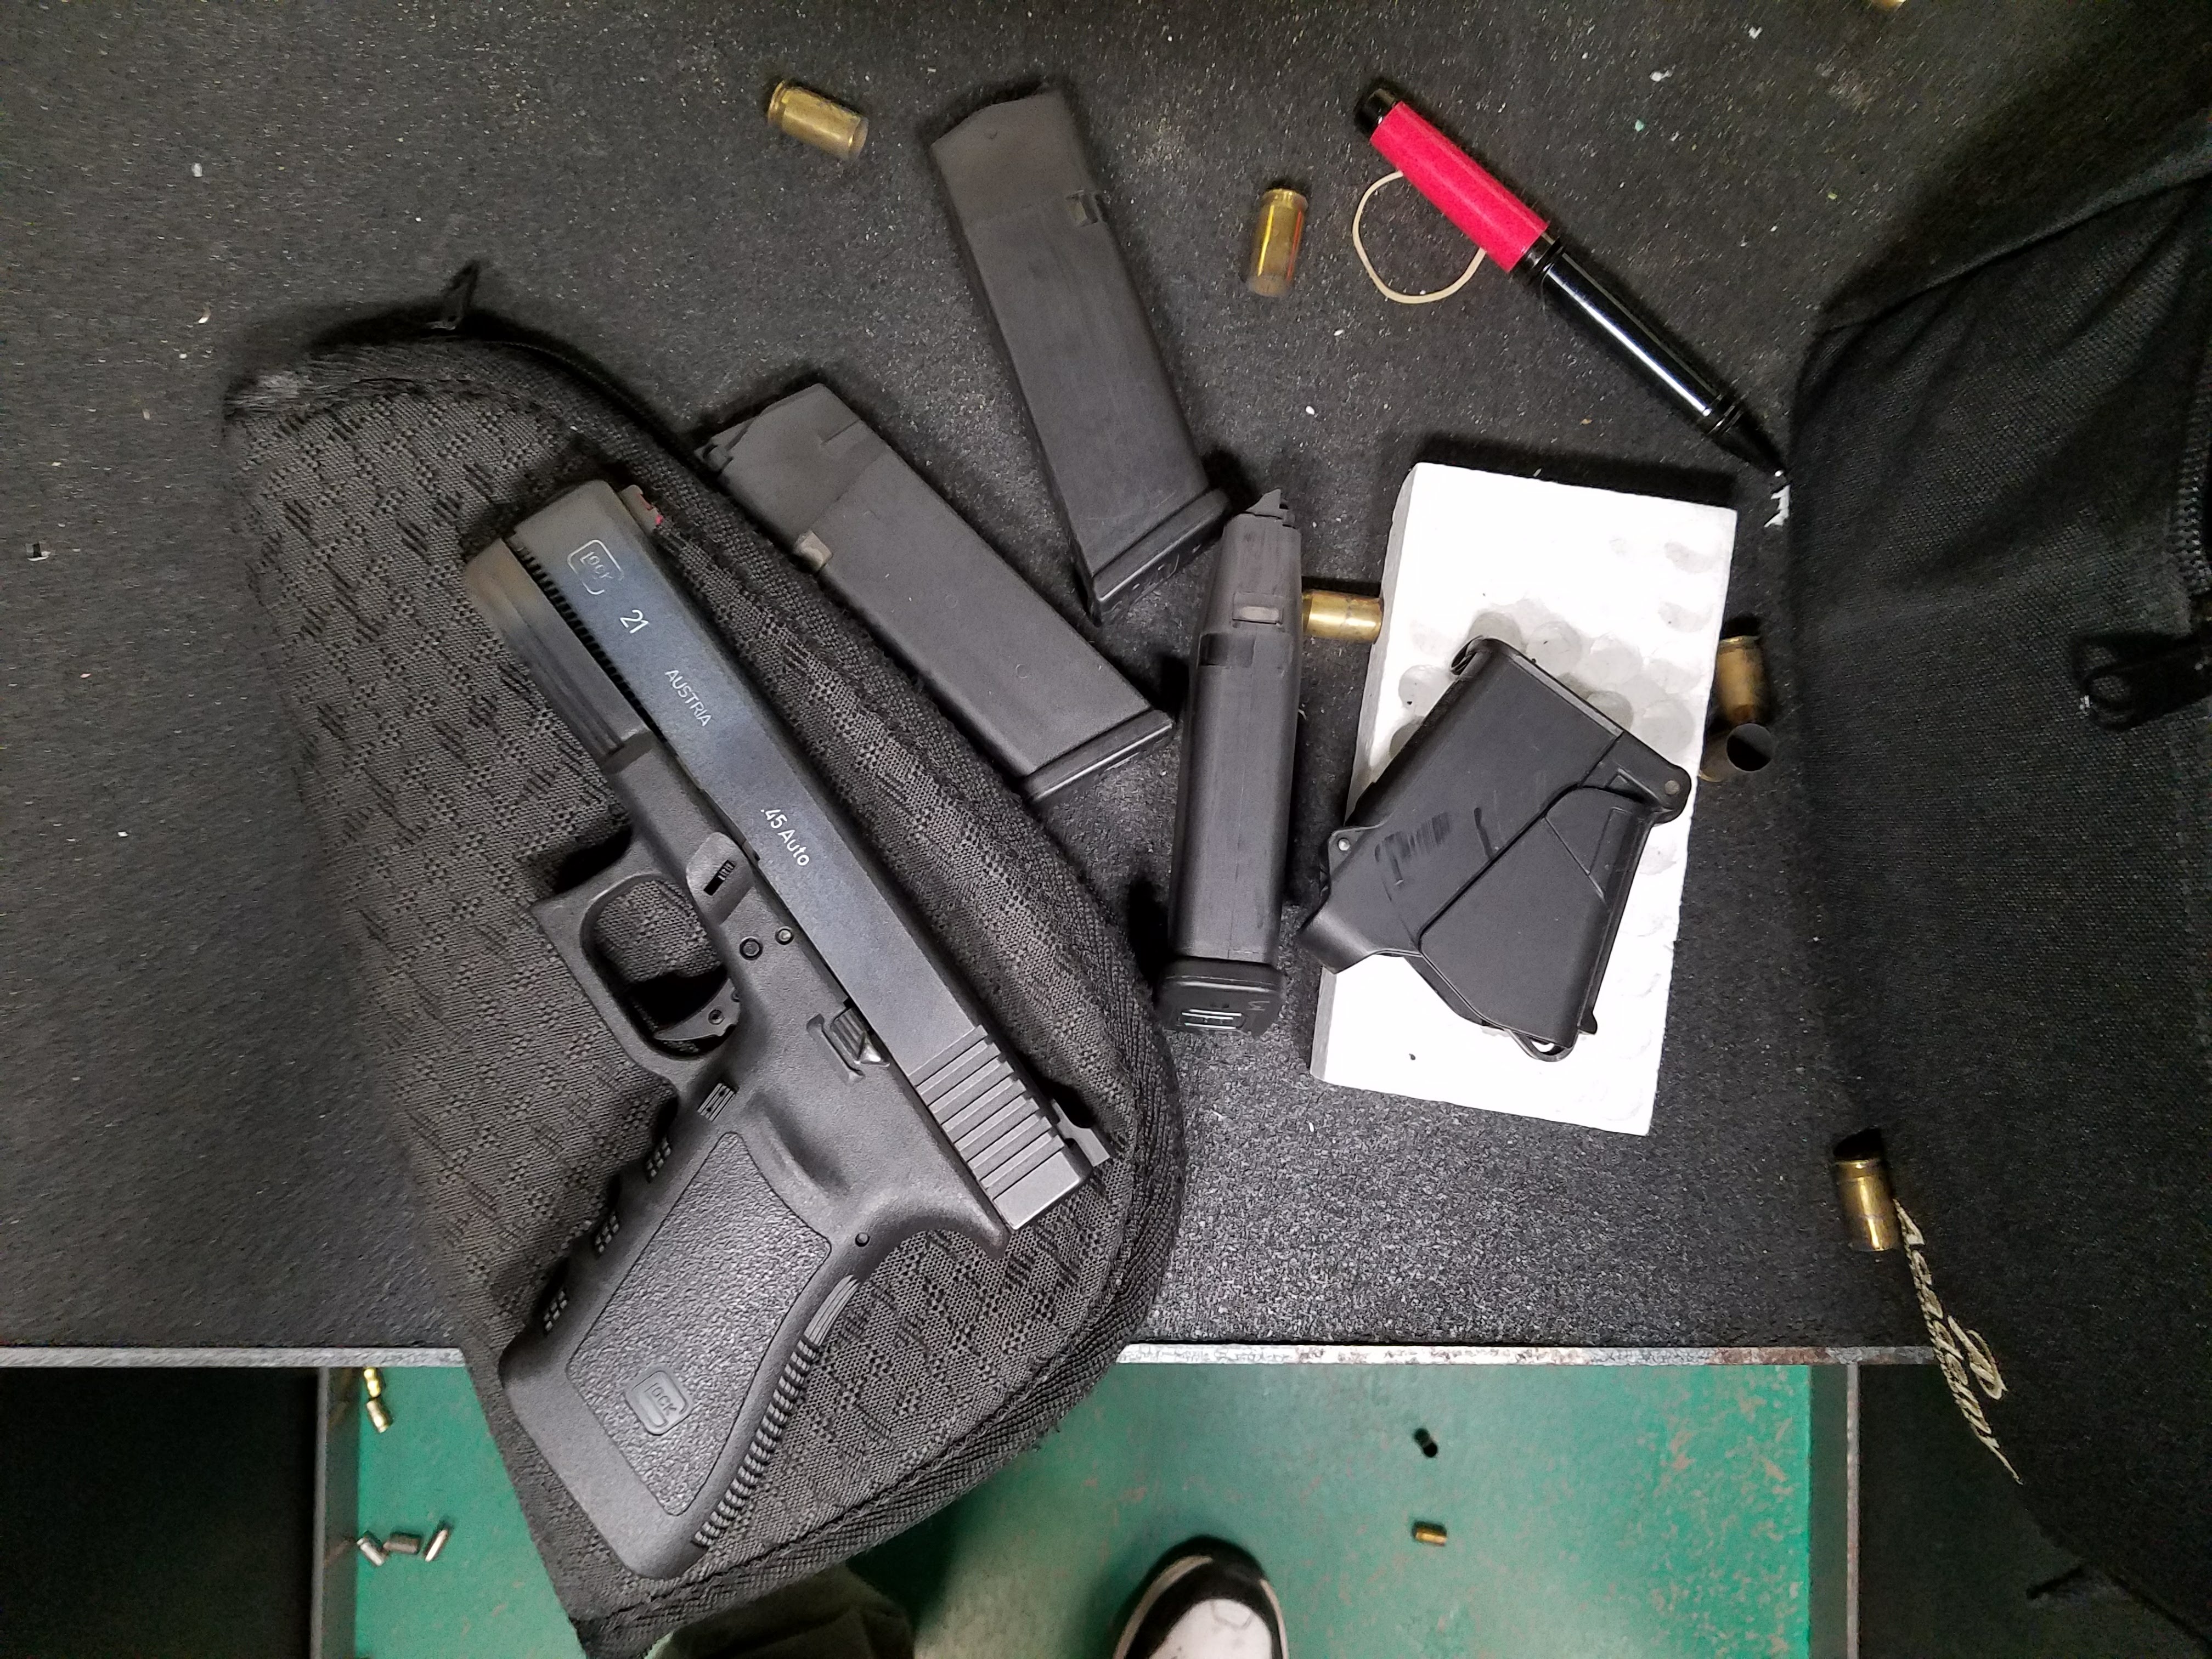
Heavy ammo can add up if you want to carry more of it. One of the arguments for the adoption of 5.56mm back in the late 50’s was that a soldier could carry about 3 times the number of rounds in the equivalent volume for the same weight of 30.06. In my case, a Gen 3 Glock 19 with an empty magazine weighs 23.63 oz. 15 rounds of Hornady Critcal Defense adds 6.8 oz, for a pistol carry of 30.48 oz. A second 15 round magazine is another 9.32 oz to carry.
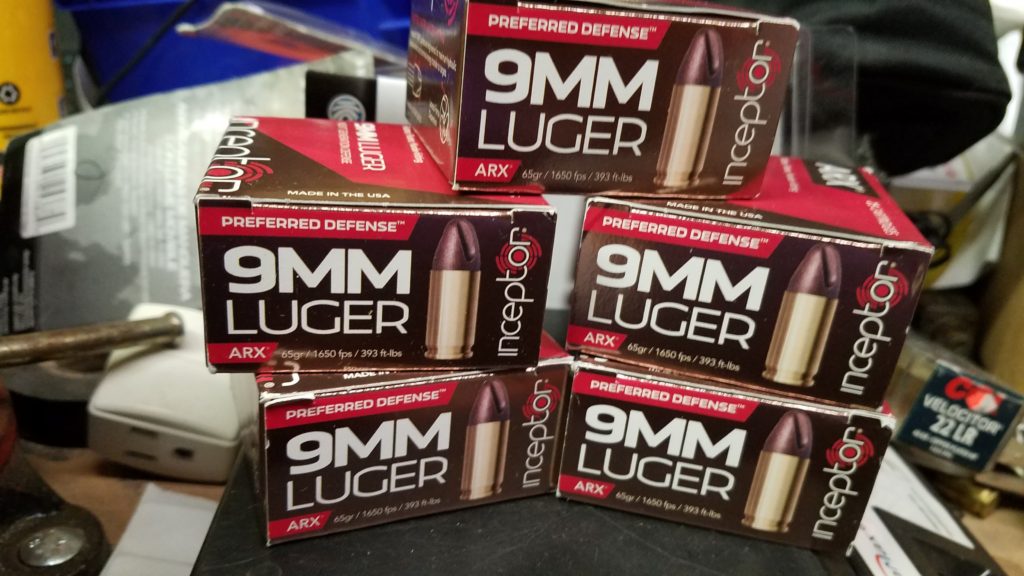
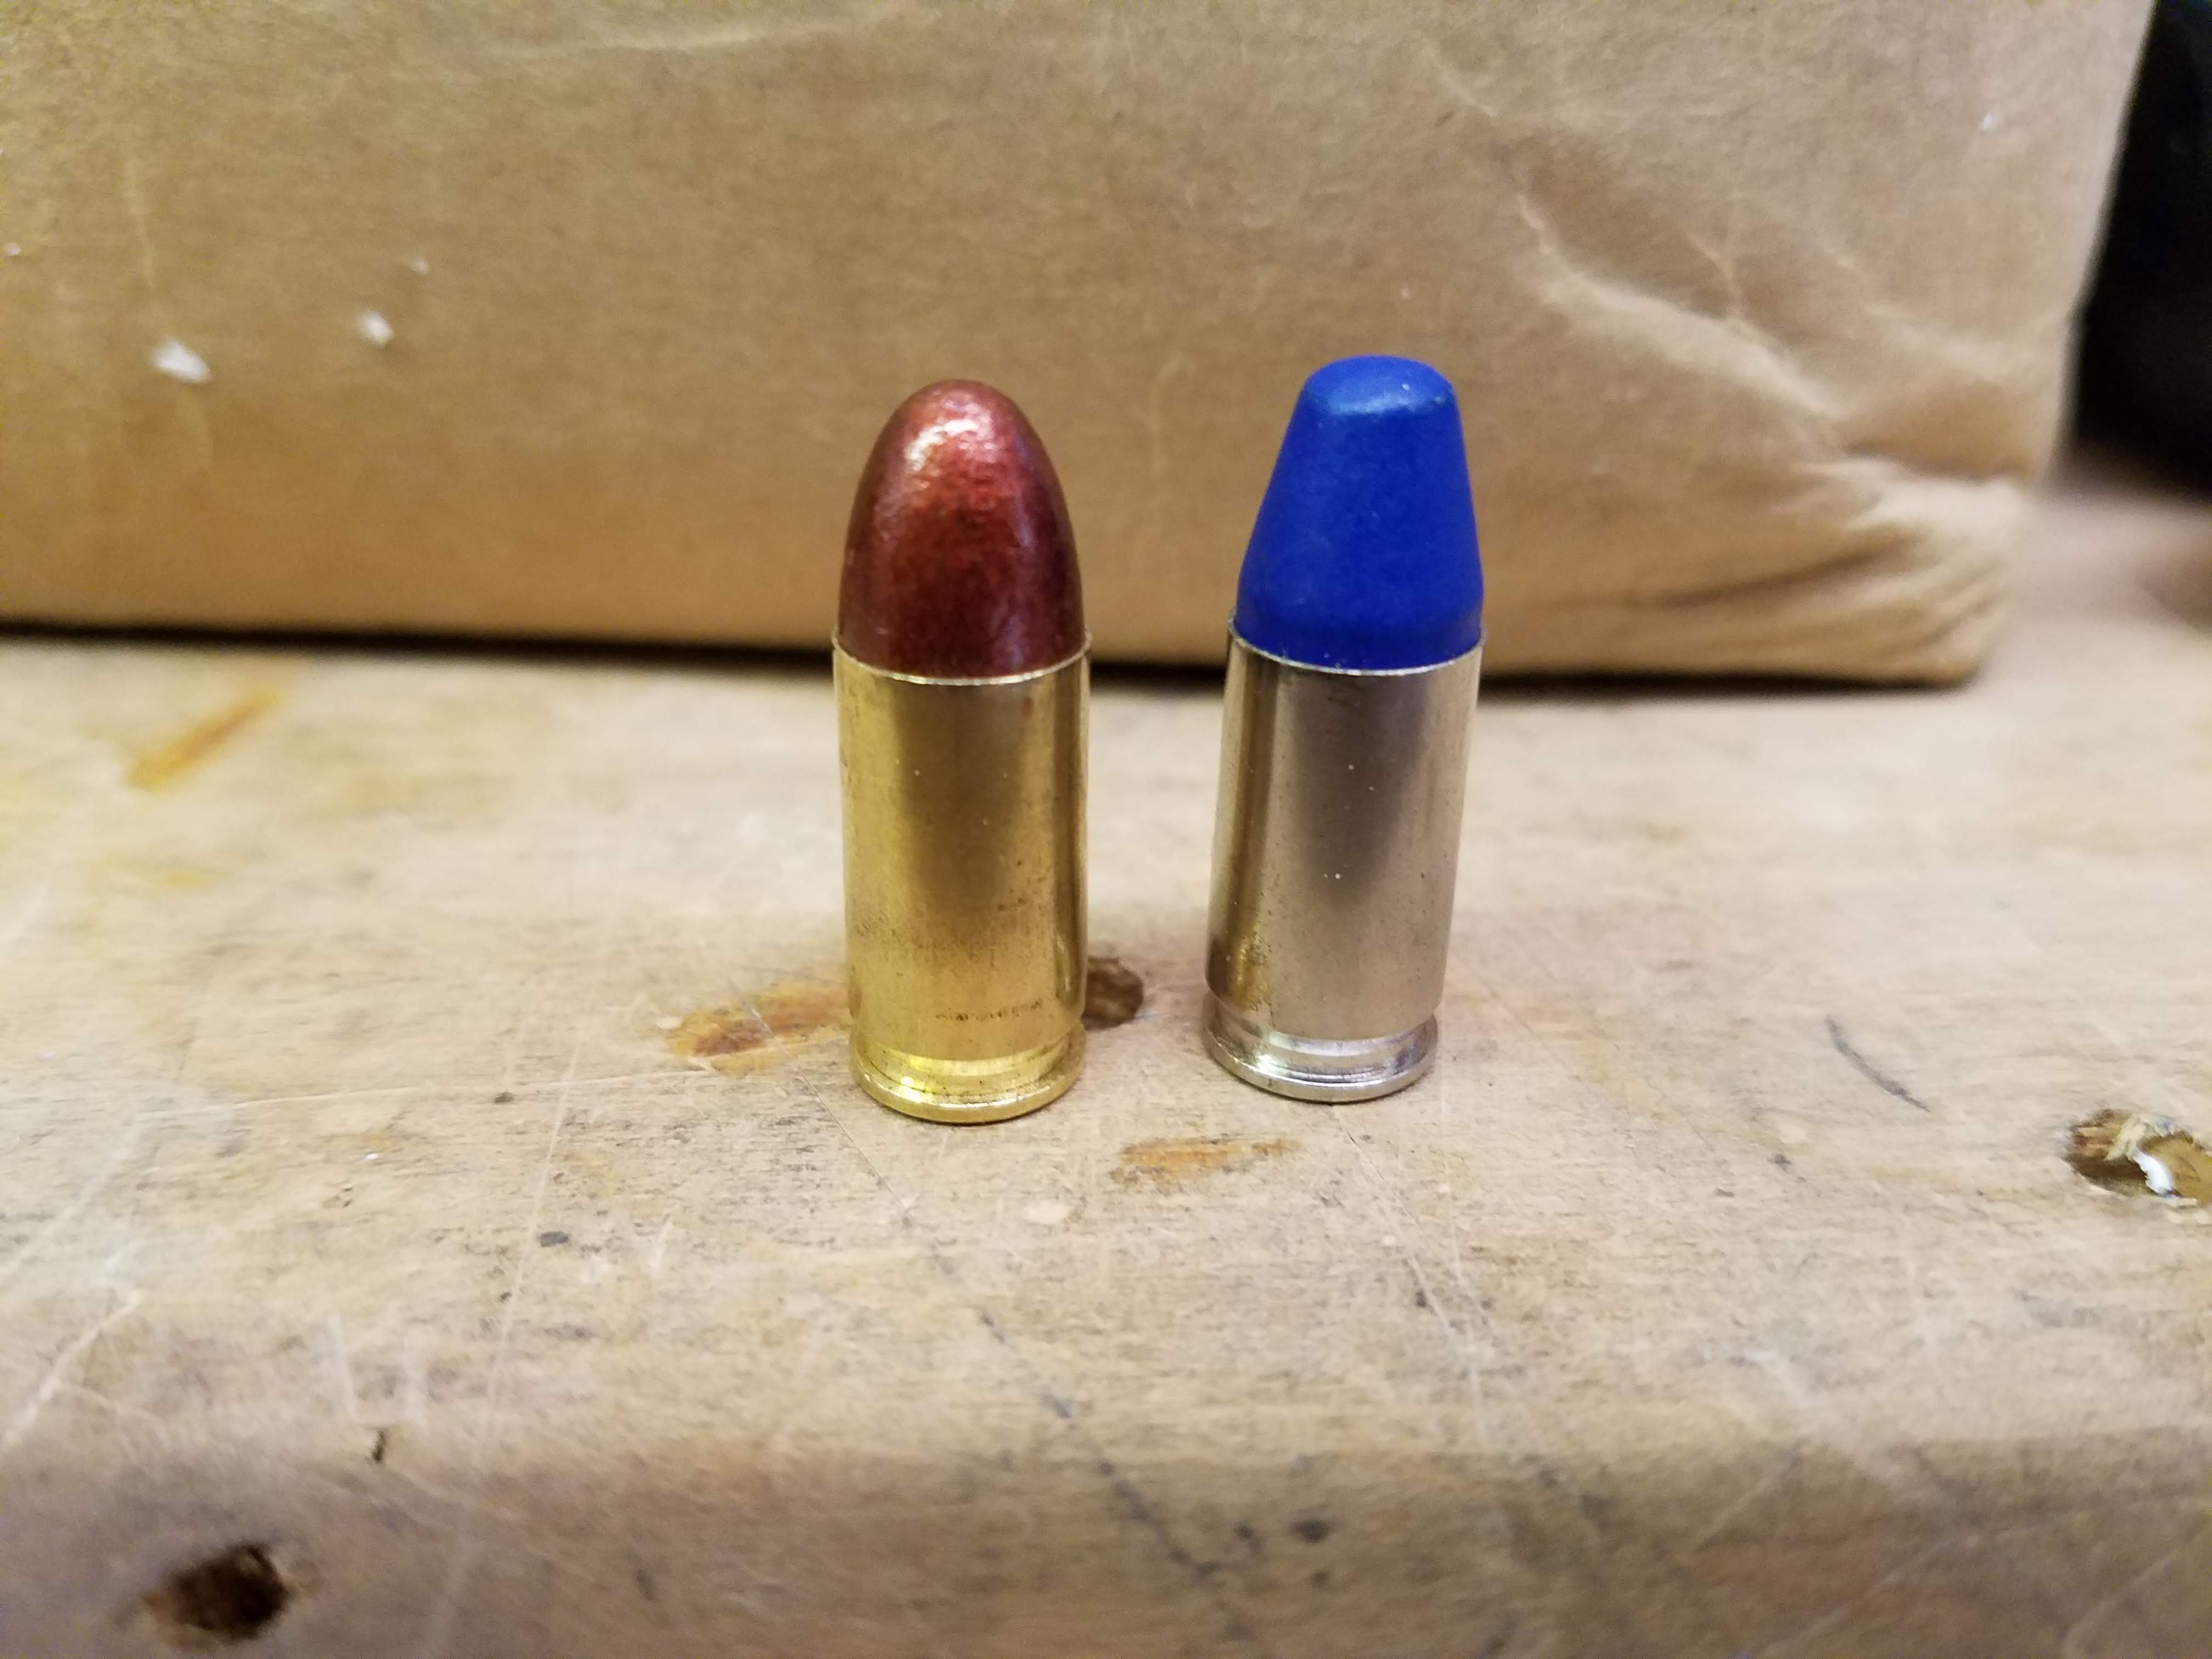
Inceptor is a polymer copper projectile ammunition. I’ve discussed it before, handloaded the projectiles and even won a 5th place trophy shooting it. It is lead free, and is good for all the reasons lead free ammo is good, plus it’s lightweight. The individual 9mm projectiles are 65 grains, compared to 115 for the Hornady. They get the muzzle energy from smokin’em out of the barrel at 1600+ fps. They are frangible, so they don’t overpenetrate and the use a clever shape and that velocity to make terminal performance in soft, wet targets.
From a carry ammo point of view, the 9mm Inceptor ARX ammo is lighter. Still has a brass case, but the bullet is only 55% as heavy. That works out to 4.47 oz less per 15 round magazine or 9 oz less for the whole rig.
The Glock loaded with Inceptor ARX is not necessarily my*every* day rig, but it is definitely the most days rig.
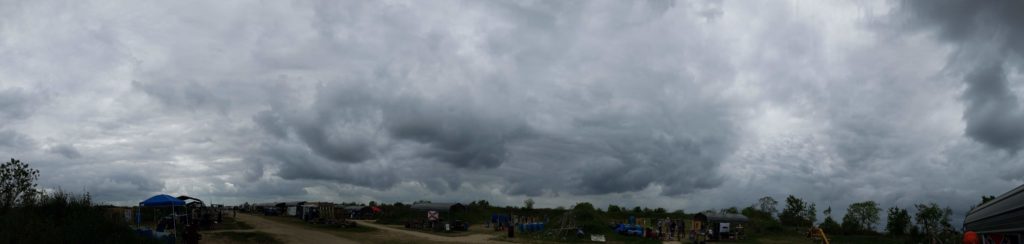
The 2019 Gulf Coast Championship was a fun match. The weather was a little chilly and threatening, but it never really rained on us.
As always, they put together a fun and challenging match. One of the fun stages (that I also happened to have done pretty well on) was also caught on video. I didn’t place, but I won a MantisX in the raffle! I already had one and I was able to sell one of them to a coworker. 🙂
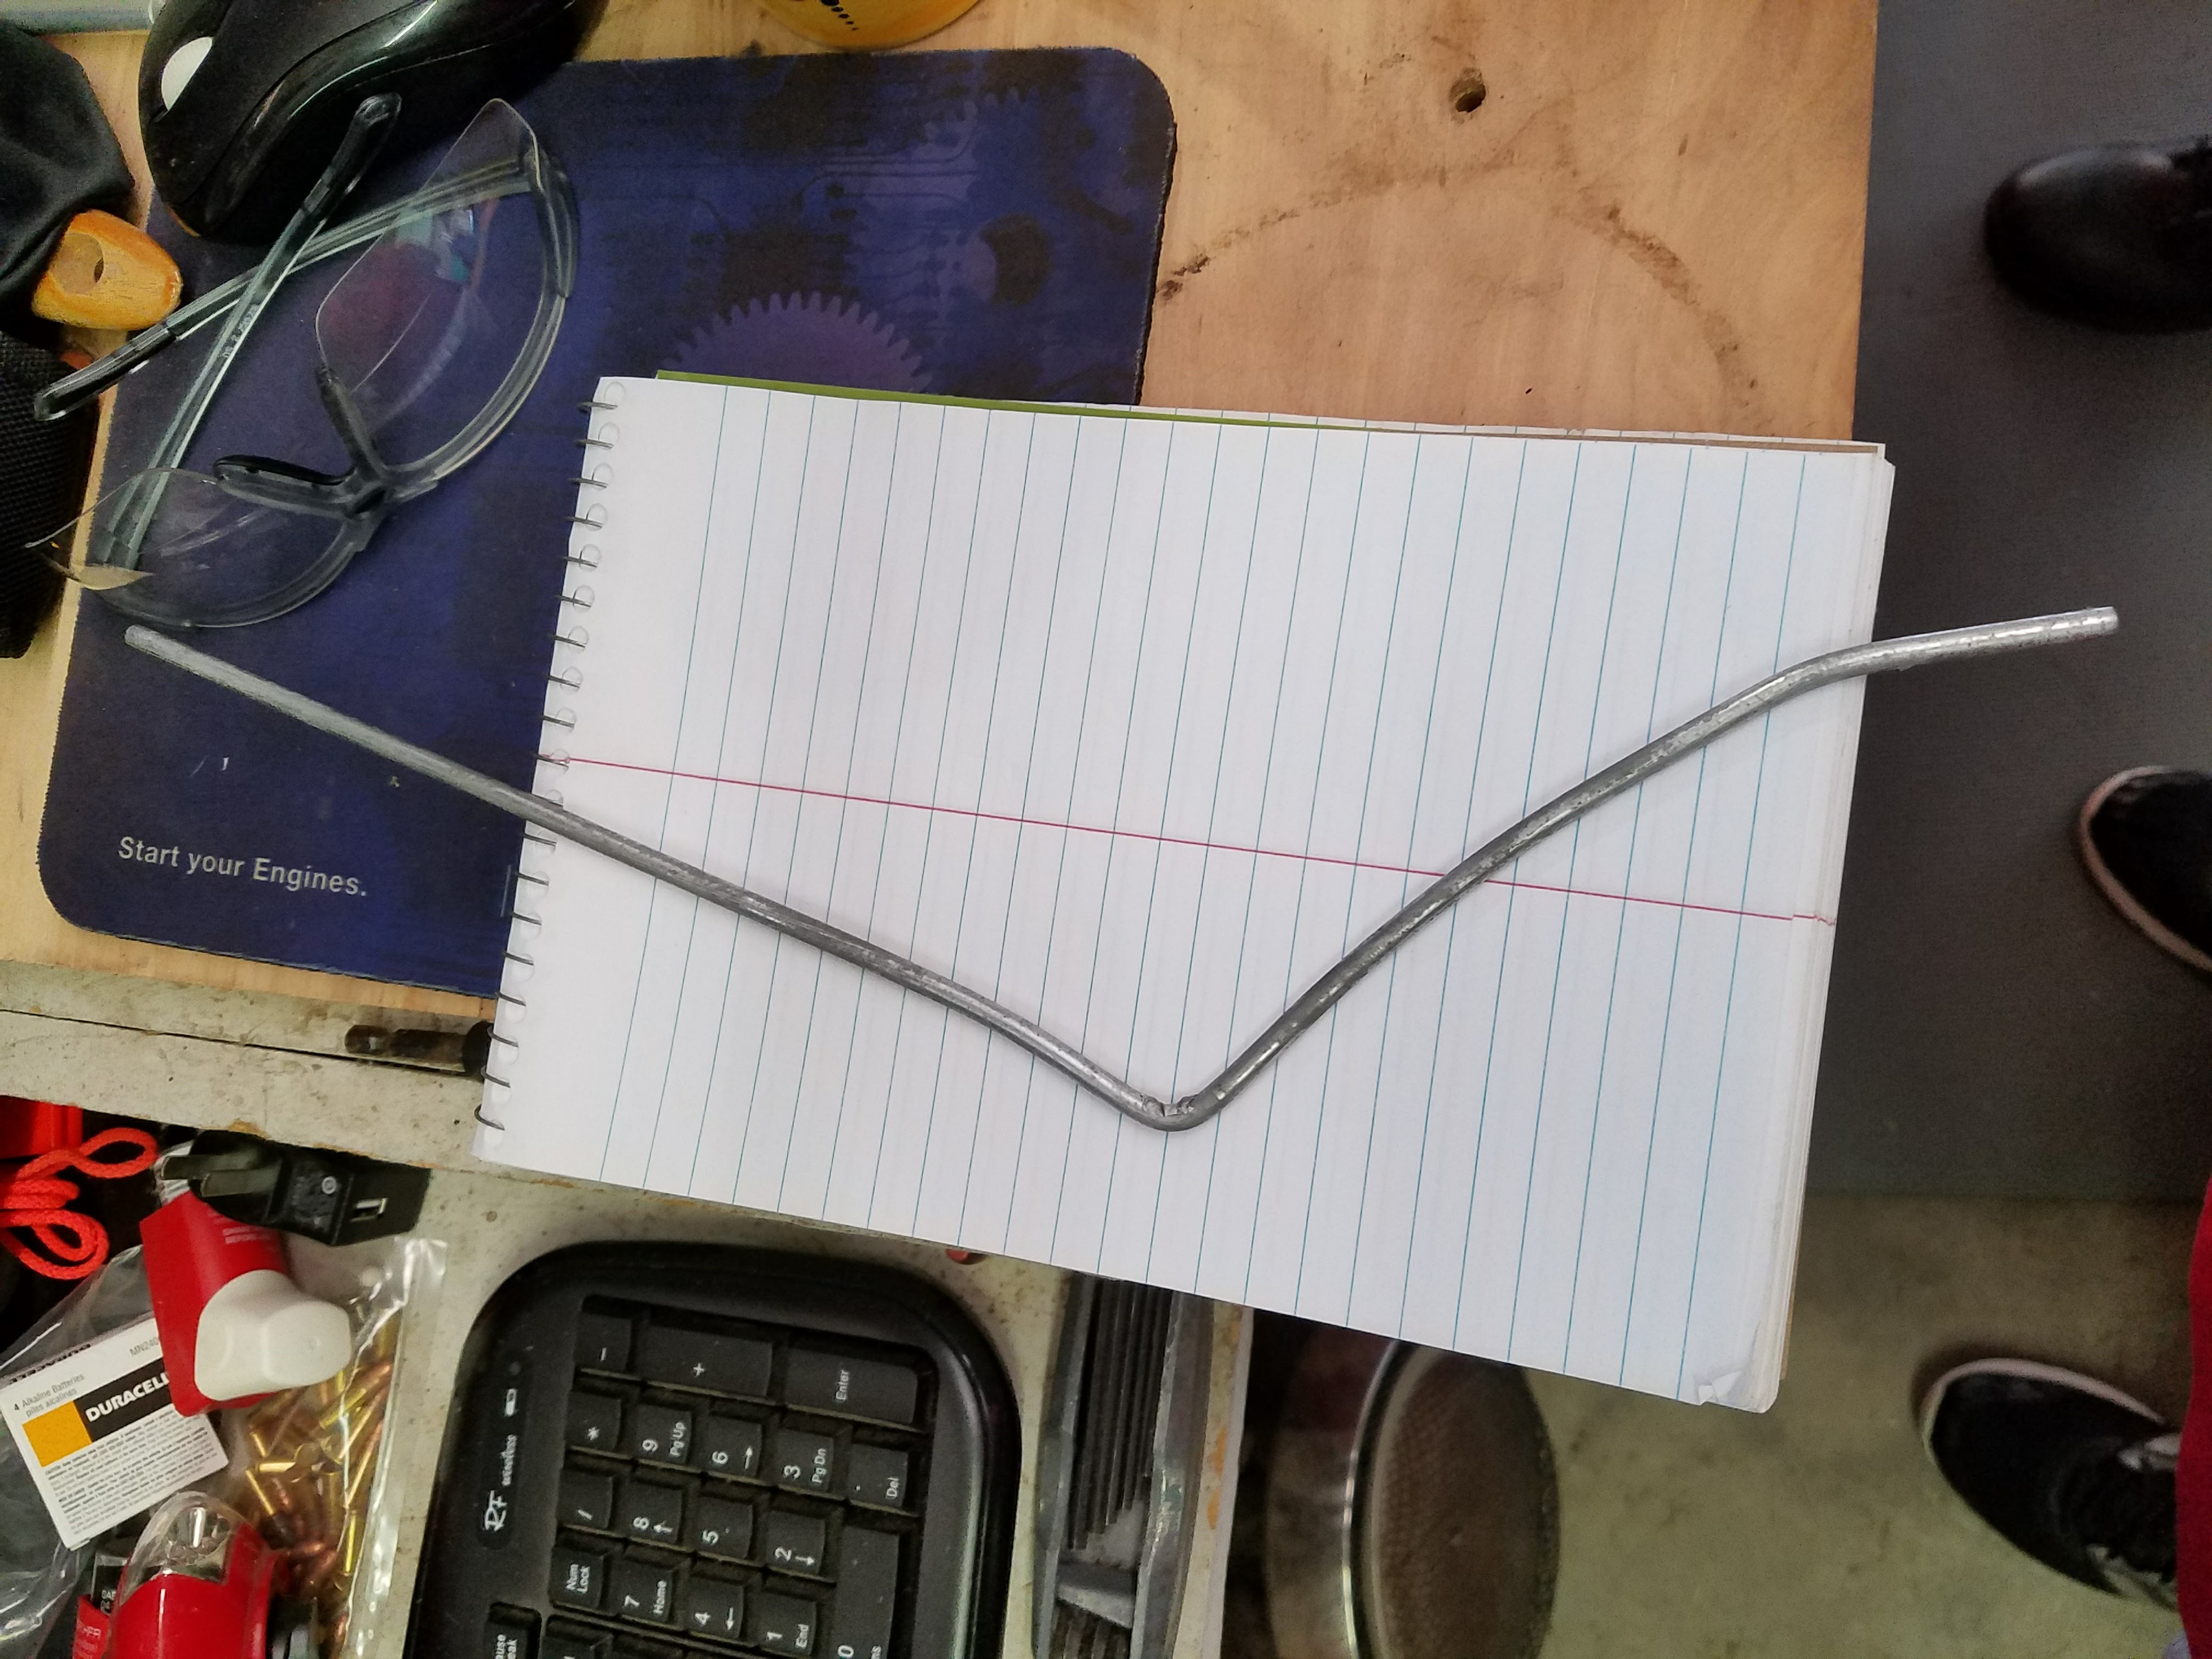
I built a slider target. I completely stole the idea, but my victim advised, so it’s probably ok. I streamlined some of the design elements by having a custom bend done on some metal. I actually made this thing back in October of 2018 and I’ll probably document that separately, but we finally tested it
The CoolFire training system is an awesome way to “dry” fire that’s not really dry firing. You get some recoil, some realistic action and you are using *your* pistol to train with. If I were to make one complaint, it would be that it would cool if there was a way to make it lock the slide back after some arbitrary number of shots for the most realistic simulation possible. All I have to do as actually use it on occasion. Once I had it, I ordered a laser module for it. Being less than careful, I ordered to wrong one. I happened to take the unit to IDPA World Championship (more on that later) and the CoolFire rep there swapped my module fwithout question. I’ve heard a couple of similar stories of high quality customer service from them.
Defender Outdoors added a Glock 18 to their fleet of rental guns. When it first arrived, they gave members an opportunity to reserve an appointment to shoot it before it went into normal rental rotation and I definitely had to do that. It was not uncontrollable by any means, but it was definitely a handful. 5 stars, would do again 🙂
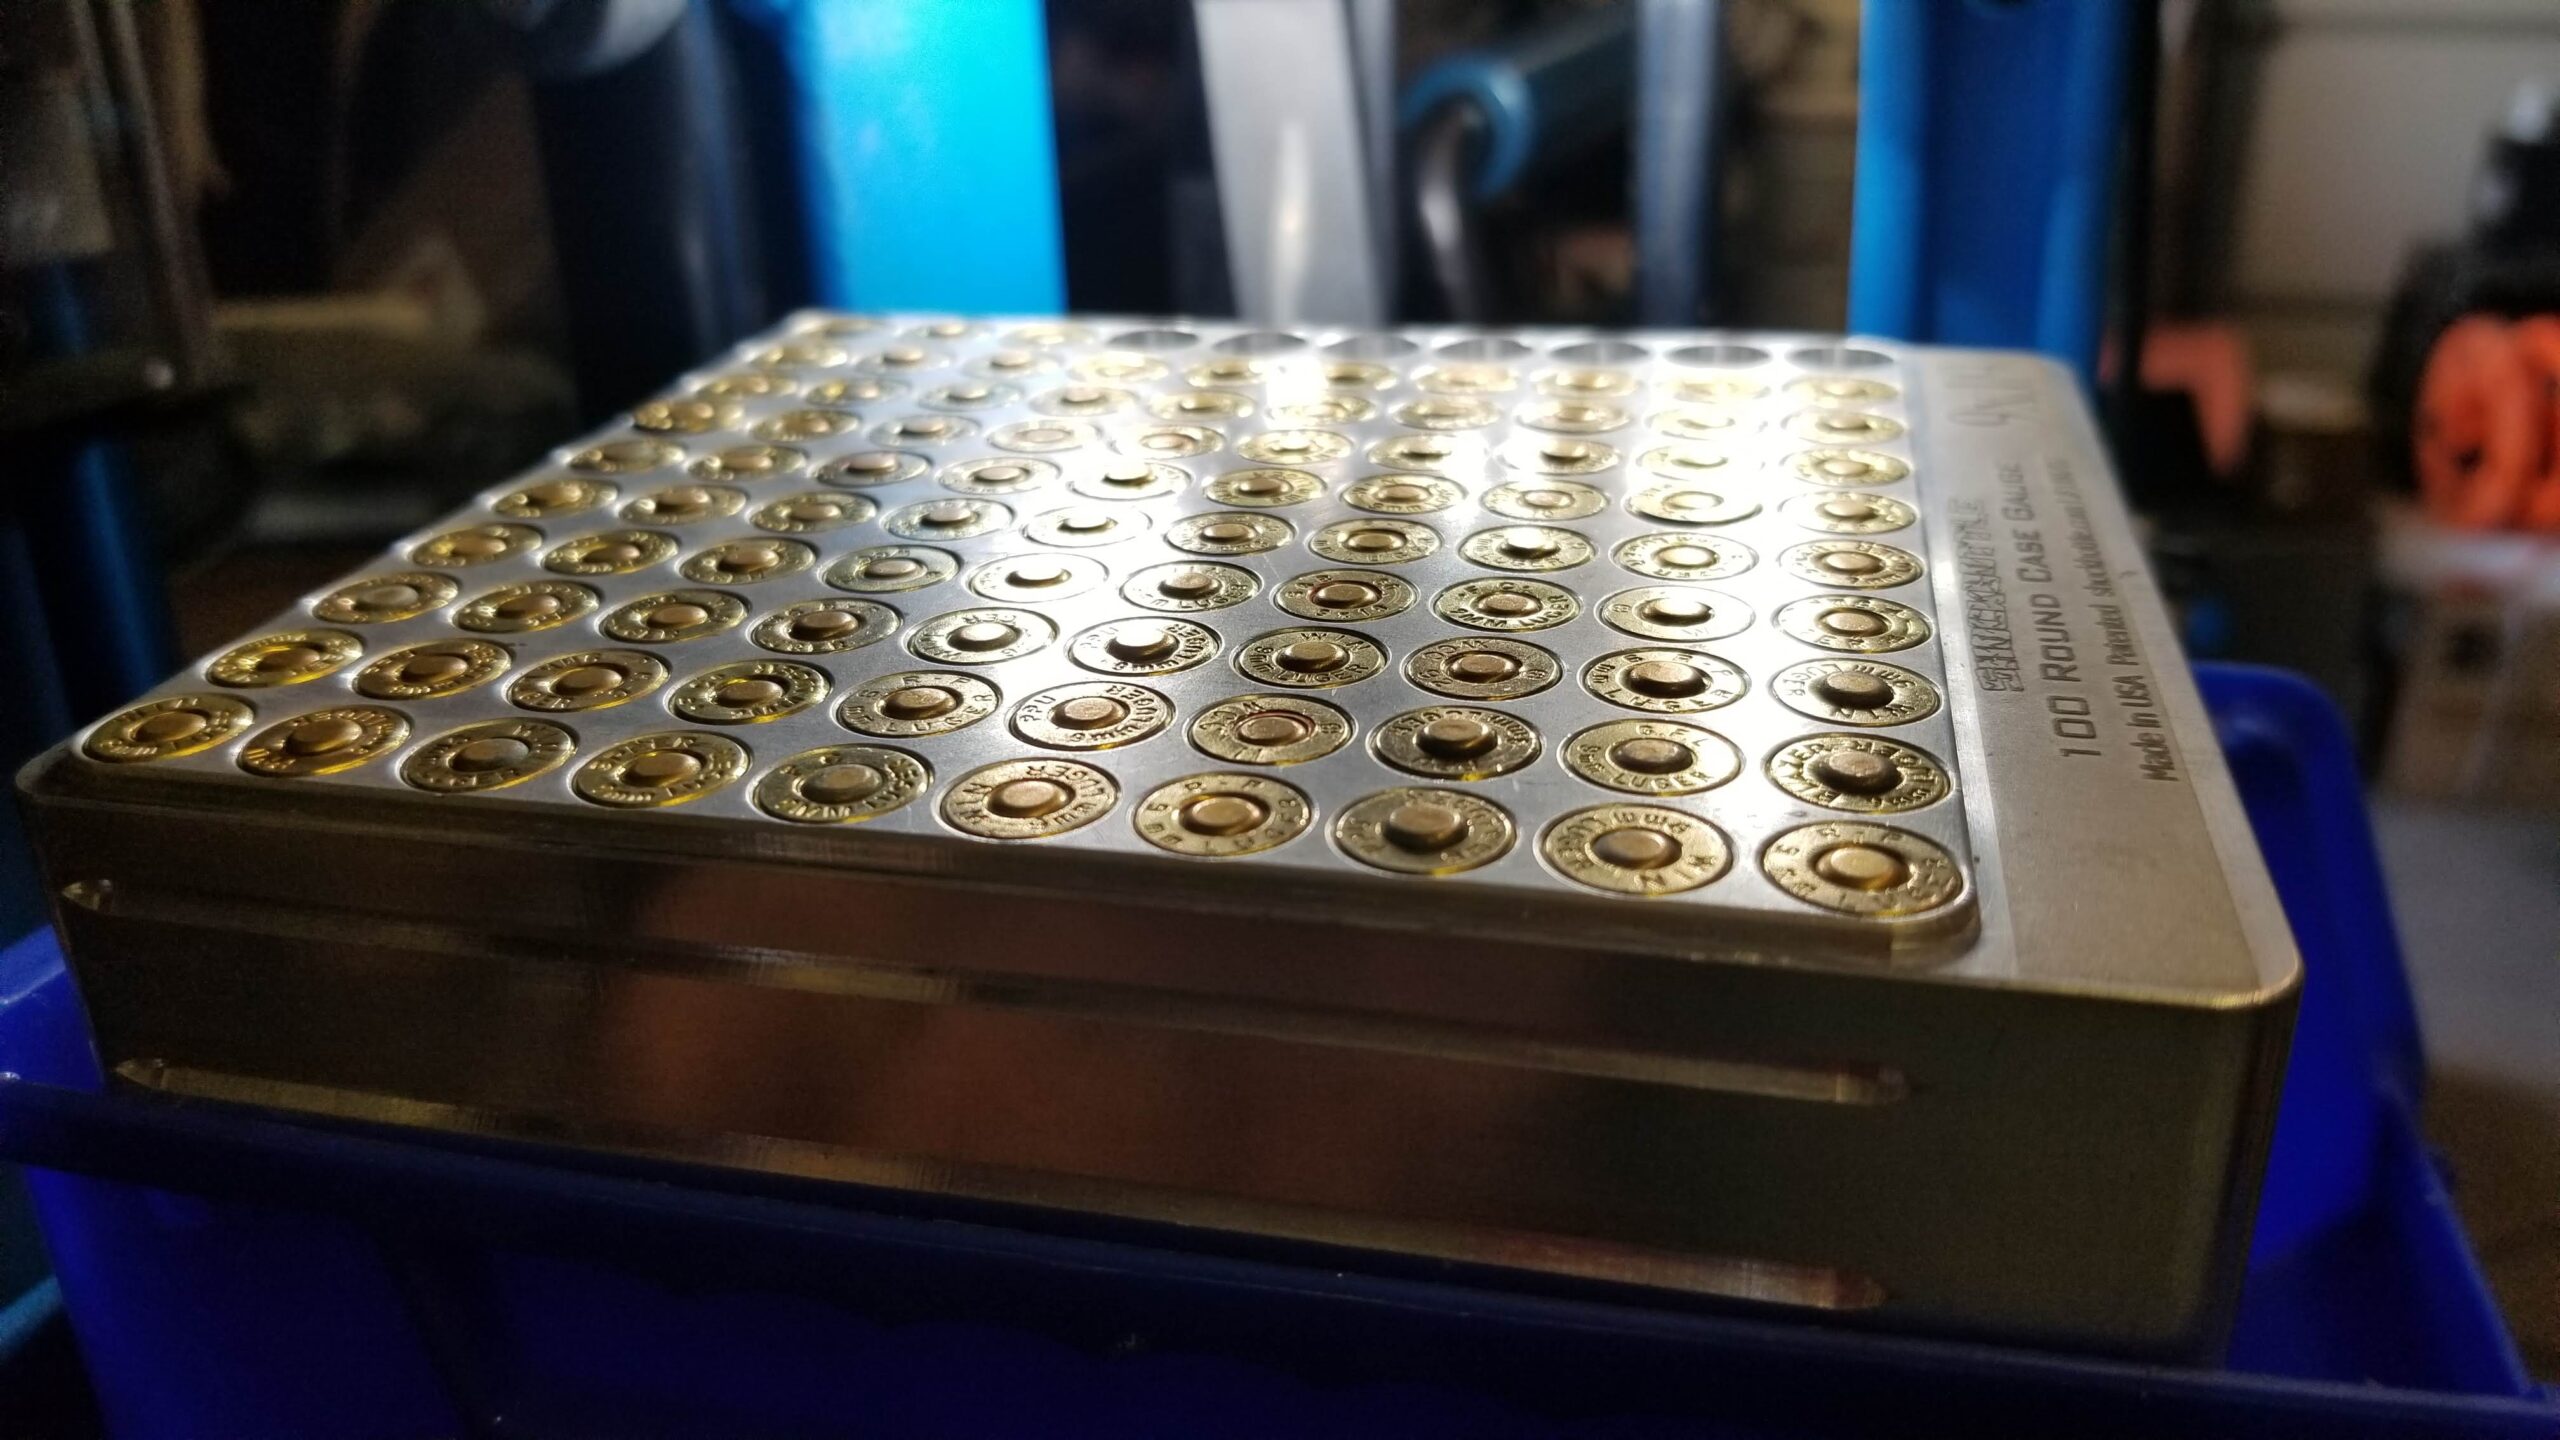
I have been handloading since the 1980’s, though back then, 100 rounds was a major project. Now 100 rounds is what I need for a local match. In all that time, I’d never had a primer detonation. Note the past tense.
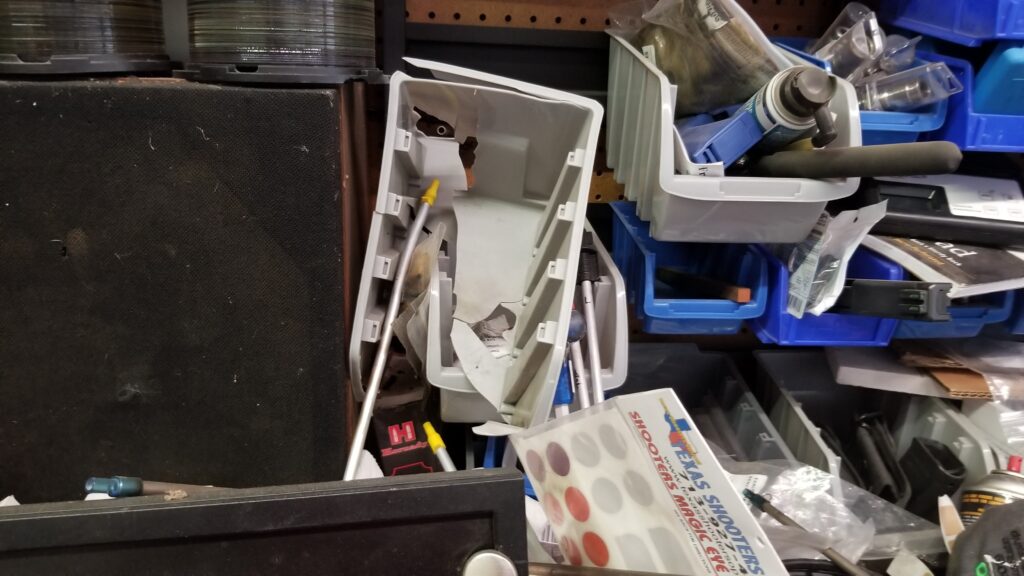
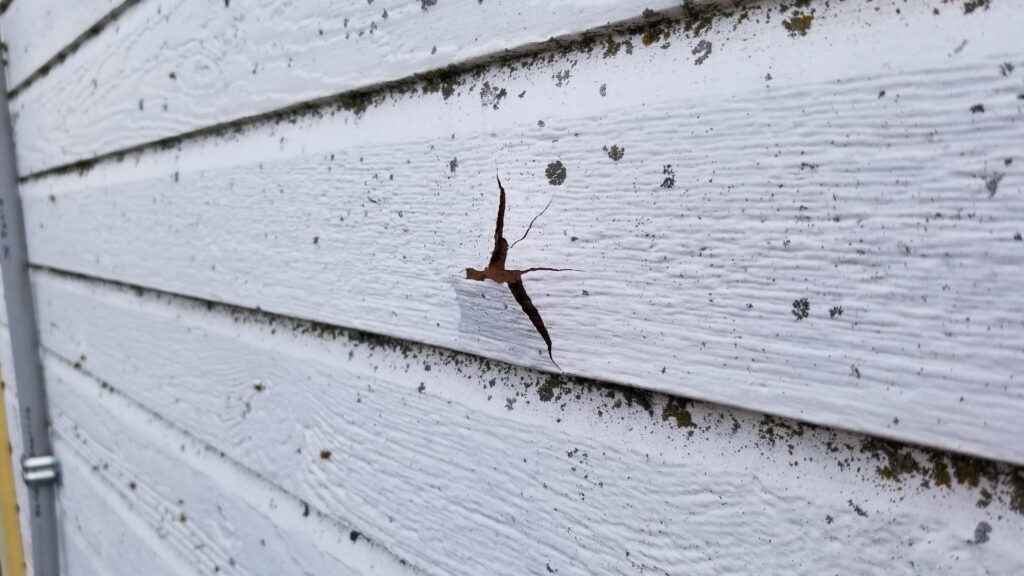
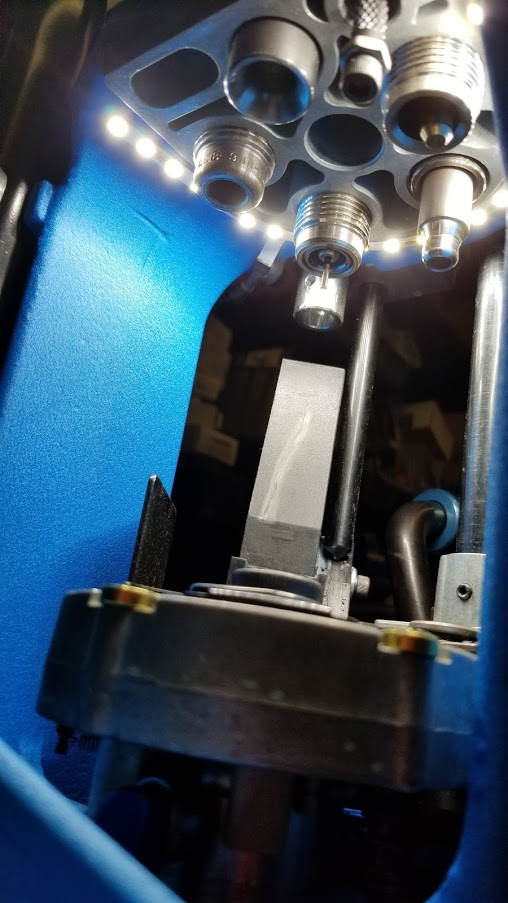
I’ve been using the Dillon RF-100 to fill primer tubes for a while now. Also, I’ve been loading 9mm almost exclusively for a couple of years. Consequently, the trap I set for myself had been dormant for a long time. I was working on some metalworking project that involved using a handheld angle grinder at my bench vise. I had been grinding on and off for an hour or two when something went off, POW! Obviously, I stopped immediately. My first thought was that somehow, sparks from the grinder had set off a cartridge, as unlikely as I considered that to be. As I began looking around and saw where the damage was centered, it dawned on me what had happened.
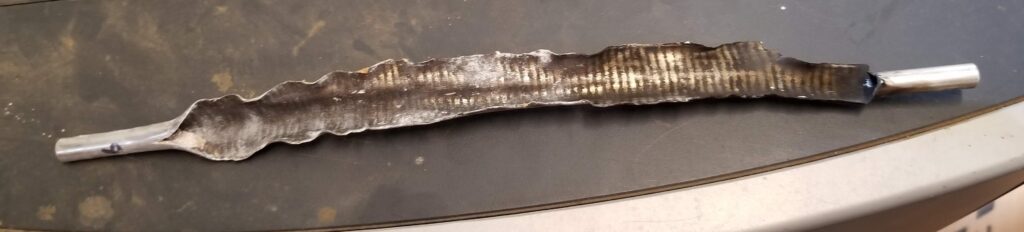
Before I filled them one at a time with the RF-100, I kept a stock of filled primer tubes in a bin above the workbench, coincidentally directly behind the vise. Sparks had apparently gotten into the one and only tube of larger primers that was in that bin, left from the last batch of 45 Auto I had loaded. When the one primer on the end set off, it set off the rest of the tube.
Note the tube still in the bin is bent. All the empty tubes in that bin were bent to some degree and are now aluminum scrap.
Note also the little circle visible in the upper lefthand corner of the bin.
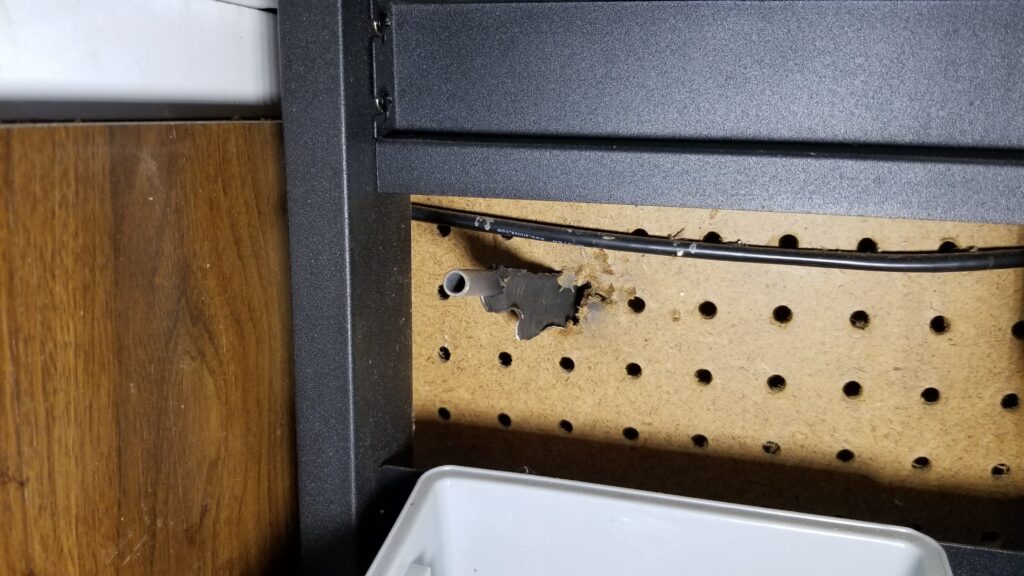
The tube launched through the back of the bin, through the pegboard, the sheetrock, the insulation….
… and tried it’s best to continue outside.
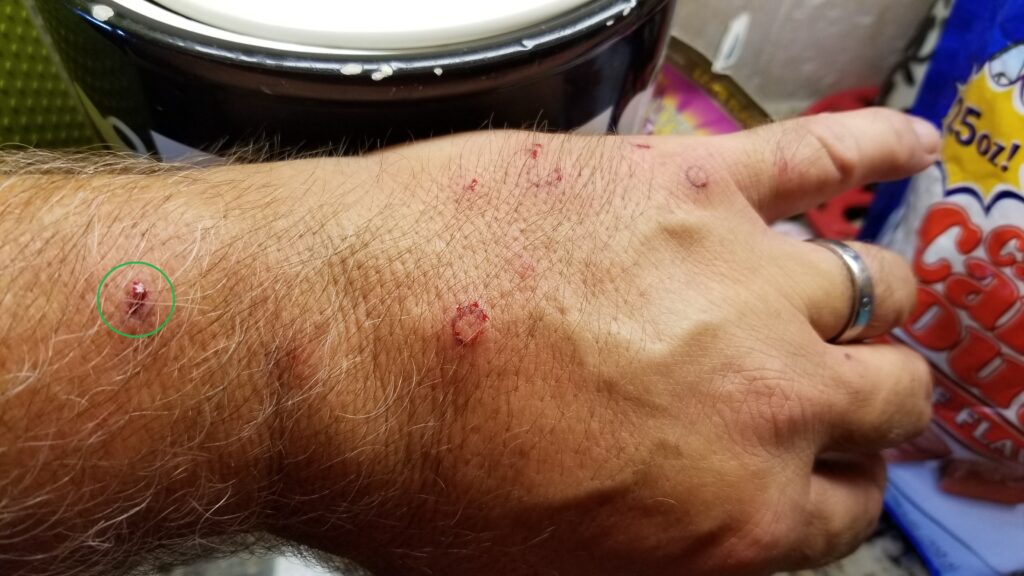
Inside, there were spent primers everywhere, including peppering my arm.
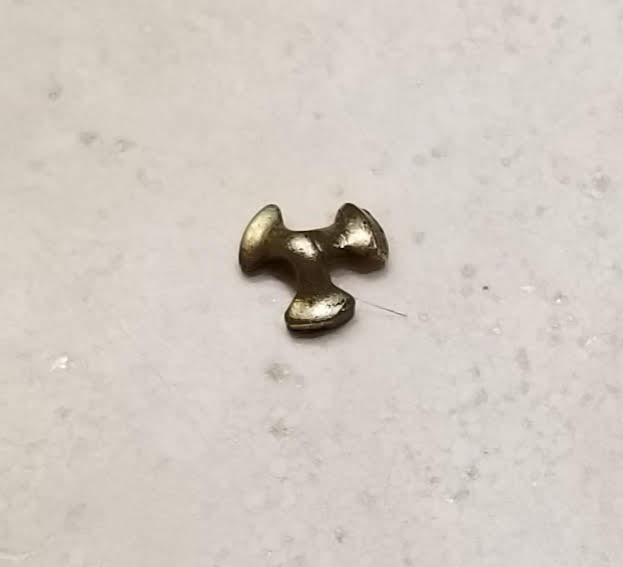
The spot marked in green would turn out to be most interesting a couple days later as the primer anvil that was lodged in there finally revealed itself. It hurt but didn’t really feel like anything was in there at first, but eventually, I saw a glint of brass and worked it out.
Primary lesson reinforced: Turns out primers shouldn’t be stored near sparks or flame. Who’da thunk it?
I got to attend and/or work my first IDPA Nationals and it was a special one, World Championship and Nationals combined *and* innaugural PCC Nationals. So, by submitting and having accepted my application to work that match, it was basically a two week long match at the Civilian Marksmanship Program range near Talldega, AL.
For the pistol match, the first day it seemed I could not hit ANYTHING. The morning of the 2nd day, I noticed that the rear sight on my pistol was WAY off to the right. It was loose. I used some improvised tools (a tent stake as a hammer, for example) and set it straight, but it was far too late to place. Since it was two matches, I got to run over 400 shooters during the entire event. I got pretty good at it.
Being as it was the World Championship, there were several teams from various countries. Our stage was sponsored by IDPA China and we got a great picture with the whole team.
I love my Dillon RL550B. It was my first Dillon press. I bought it from someone, who in turn had bought it used from someone else. Between the (at least) three of us, it has loaded probably several hundred thousand rounds. I had a part break on it and experienced the legendary Dillon customer service for that repair and refurbishment.
I was not *looking* for an upgrade, but a deal on a 650 came to me and I grabbed it.
I don’t care for the primer system. It works flawlessly, but it does not tolerate interruptions in production. It works exceptionally well, but it delivers primers with every stroke of the handle, whether you need a primer just then or not. Same for the case feeder. Sometimes, a case will feed upside down and when it gets to the plate, it jams things up. It generally takes a couple of strokes to clean up the mess. Meanwhile, a couple more unneeded primers have been fed…
All that having been said, I can loaded about 50% faster on the 650 than the 550, basically a couple hundred rounds per hour. A match worth of ammo takes about 30 minutes.
Sometimes, the case jam up can result in a partial or double powder drop. Most of the time, it’s easy to catch, but at least once, I missed it. I had my one and only kaboom.
So, the rule is: If you are going to have a double charge, at least it should be a double light load in an all-steel gun.
Neither me nor the pistol suffered any permanent damage. The event was merely days before Gulf Coast Championship and I was sweating bullets about it until a fellow CZ shooter offered his almost identical pistol for me to use in the match.
Gulf Coast Championship is always a blast and 2020 was no different, although timing-wise, it was kinda the last match most of us got to go to for a long time.
My own experience was unique in a couple of ways. Remember my kaboom and my concerns about my pistol. Turns out, all that worry was misplaced. I should have been worrying about having not practiced PCC, since *that* was what I had signed up to shoot at GCC. It was my 2nd major match shooting PCC (first was Nationals, so there’s that) and my otherwise solid performing PCC had a mechanical failure partway through. It was not my week.
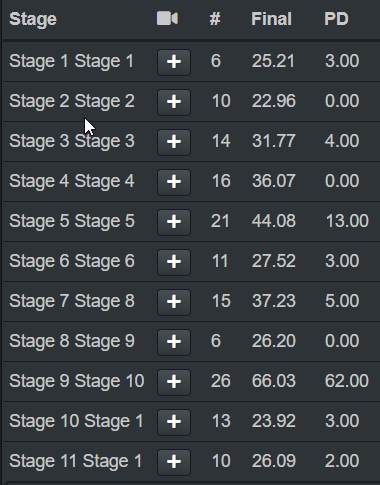
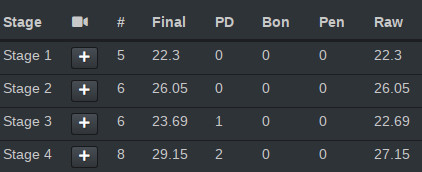
See if you can tell from points down which stage it was…
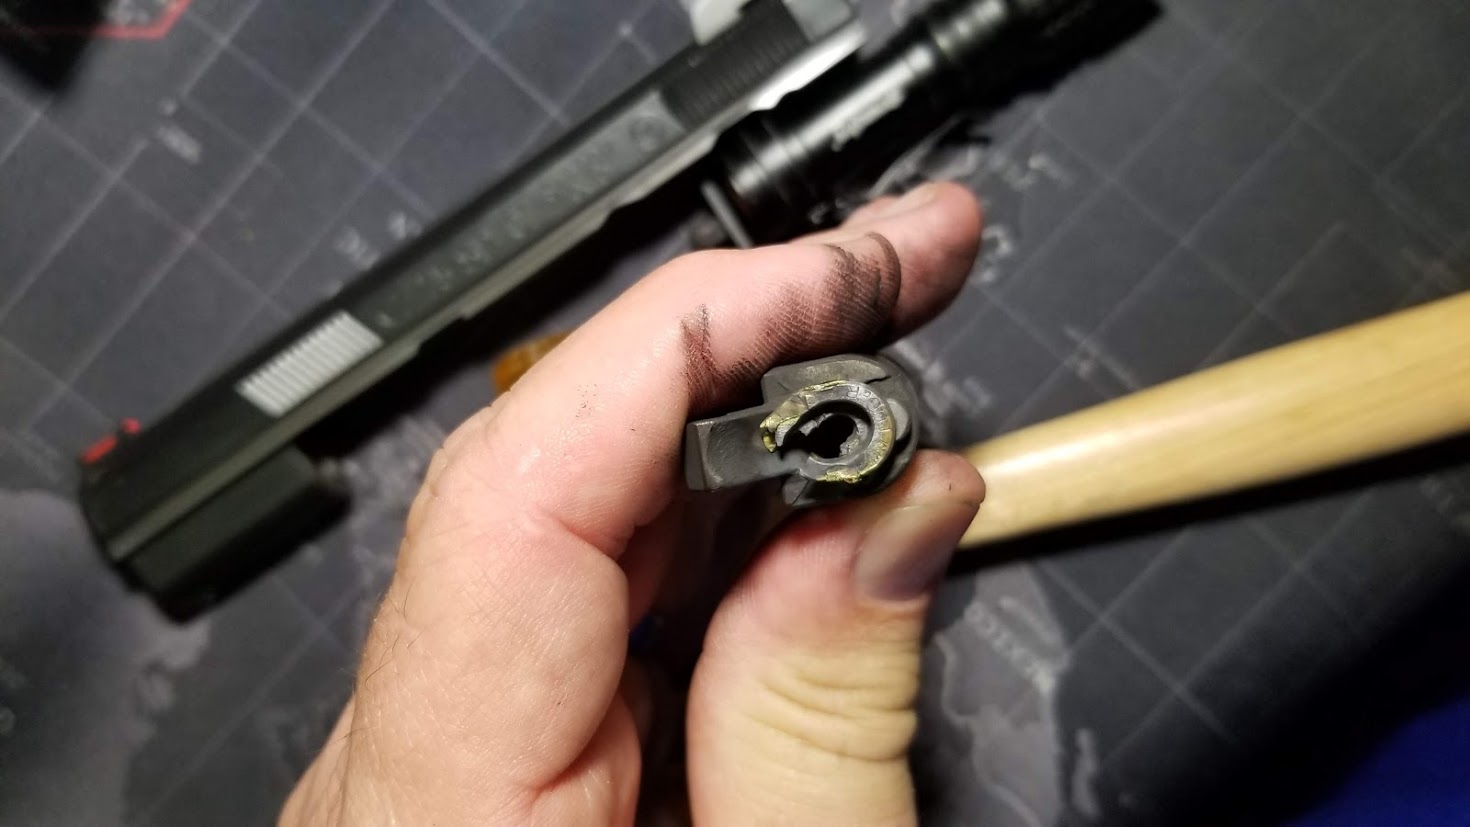
The issue was that the firing pin retaining pin, a known issue on this firearm, had finally failed. Now. Of course. I was able to borrow a PCC from a fellow Rudy Project Team member to complete the match.
Here’s the funny bit. Even with that, I was 4th in my class and division and without that 62 down, I would have come in 2nd.
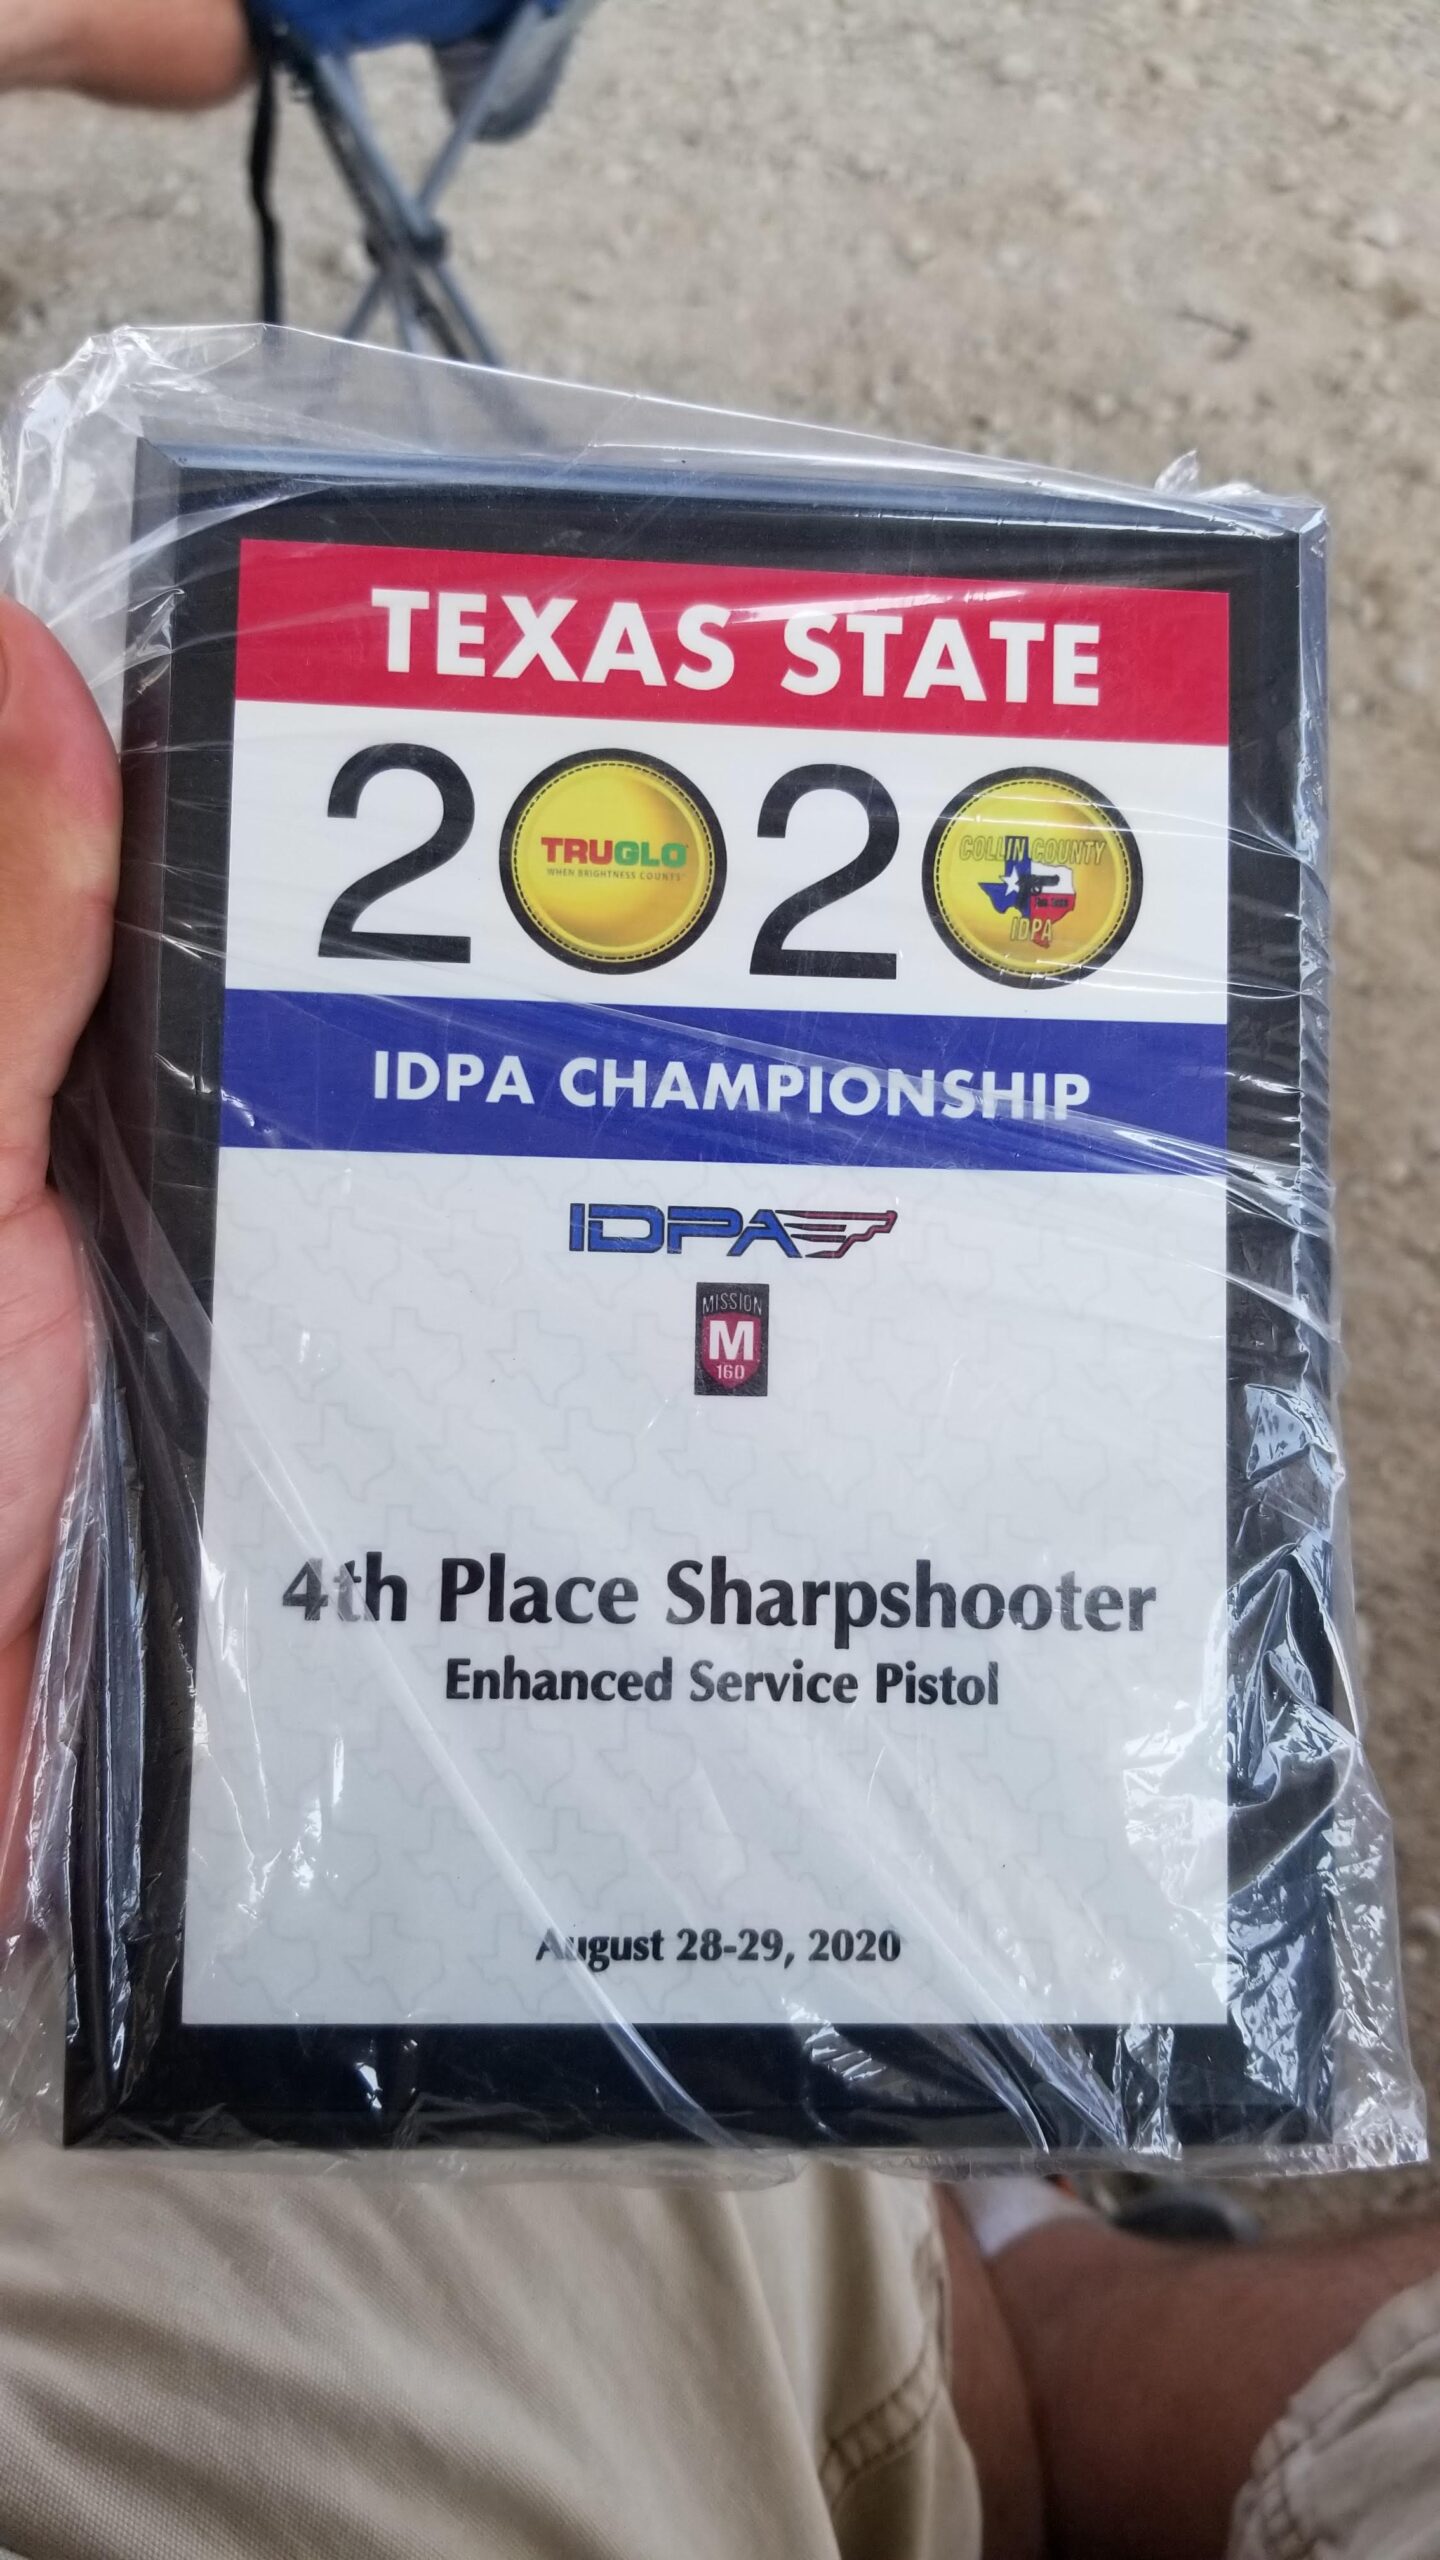
It was about now that COVID-19 really started having a big impact on gatherings, the daily commute, shopping… pretty much everything. From the end of GCC 2020 on March 14, I did an absolute TON of stuff, just almost none of it was shooting related until August 28, where I managed to place 4th ESP Sharpshooter at TRUGLO 2020 Texas State IDPA Championship. Considering the dearth of practice opportunities, I was really pleased with that.
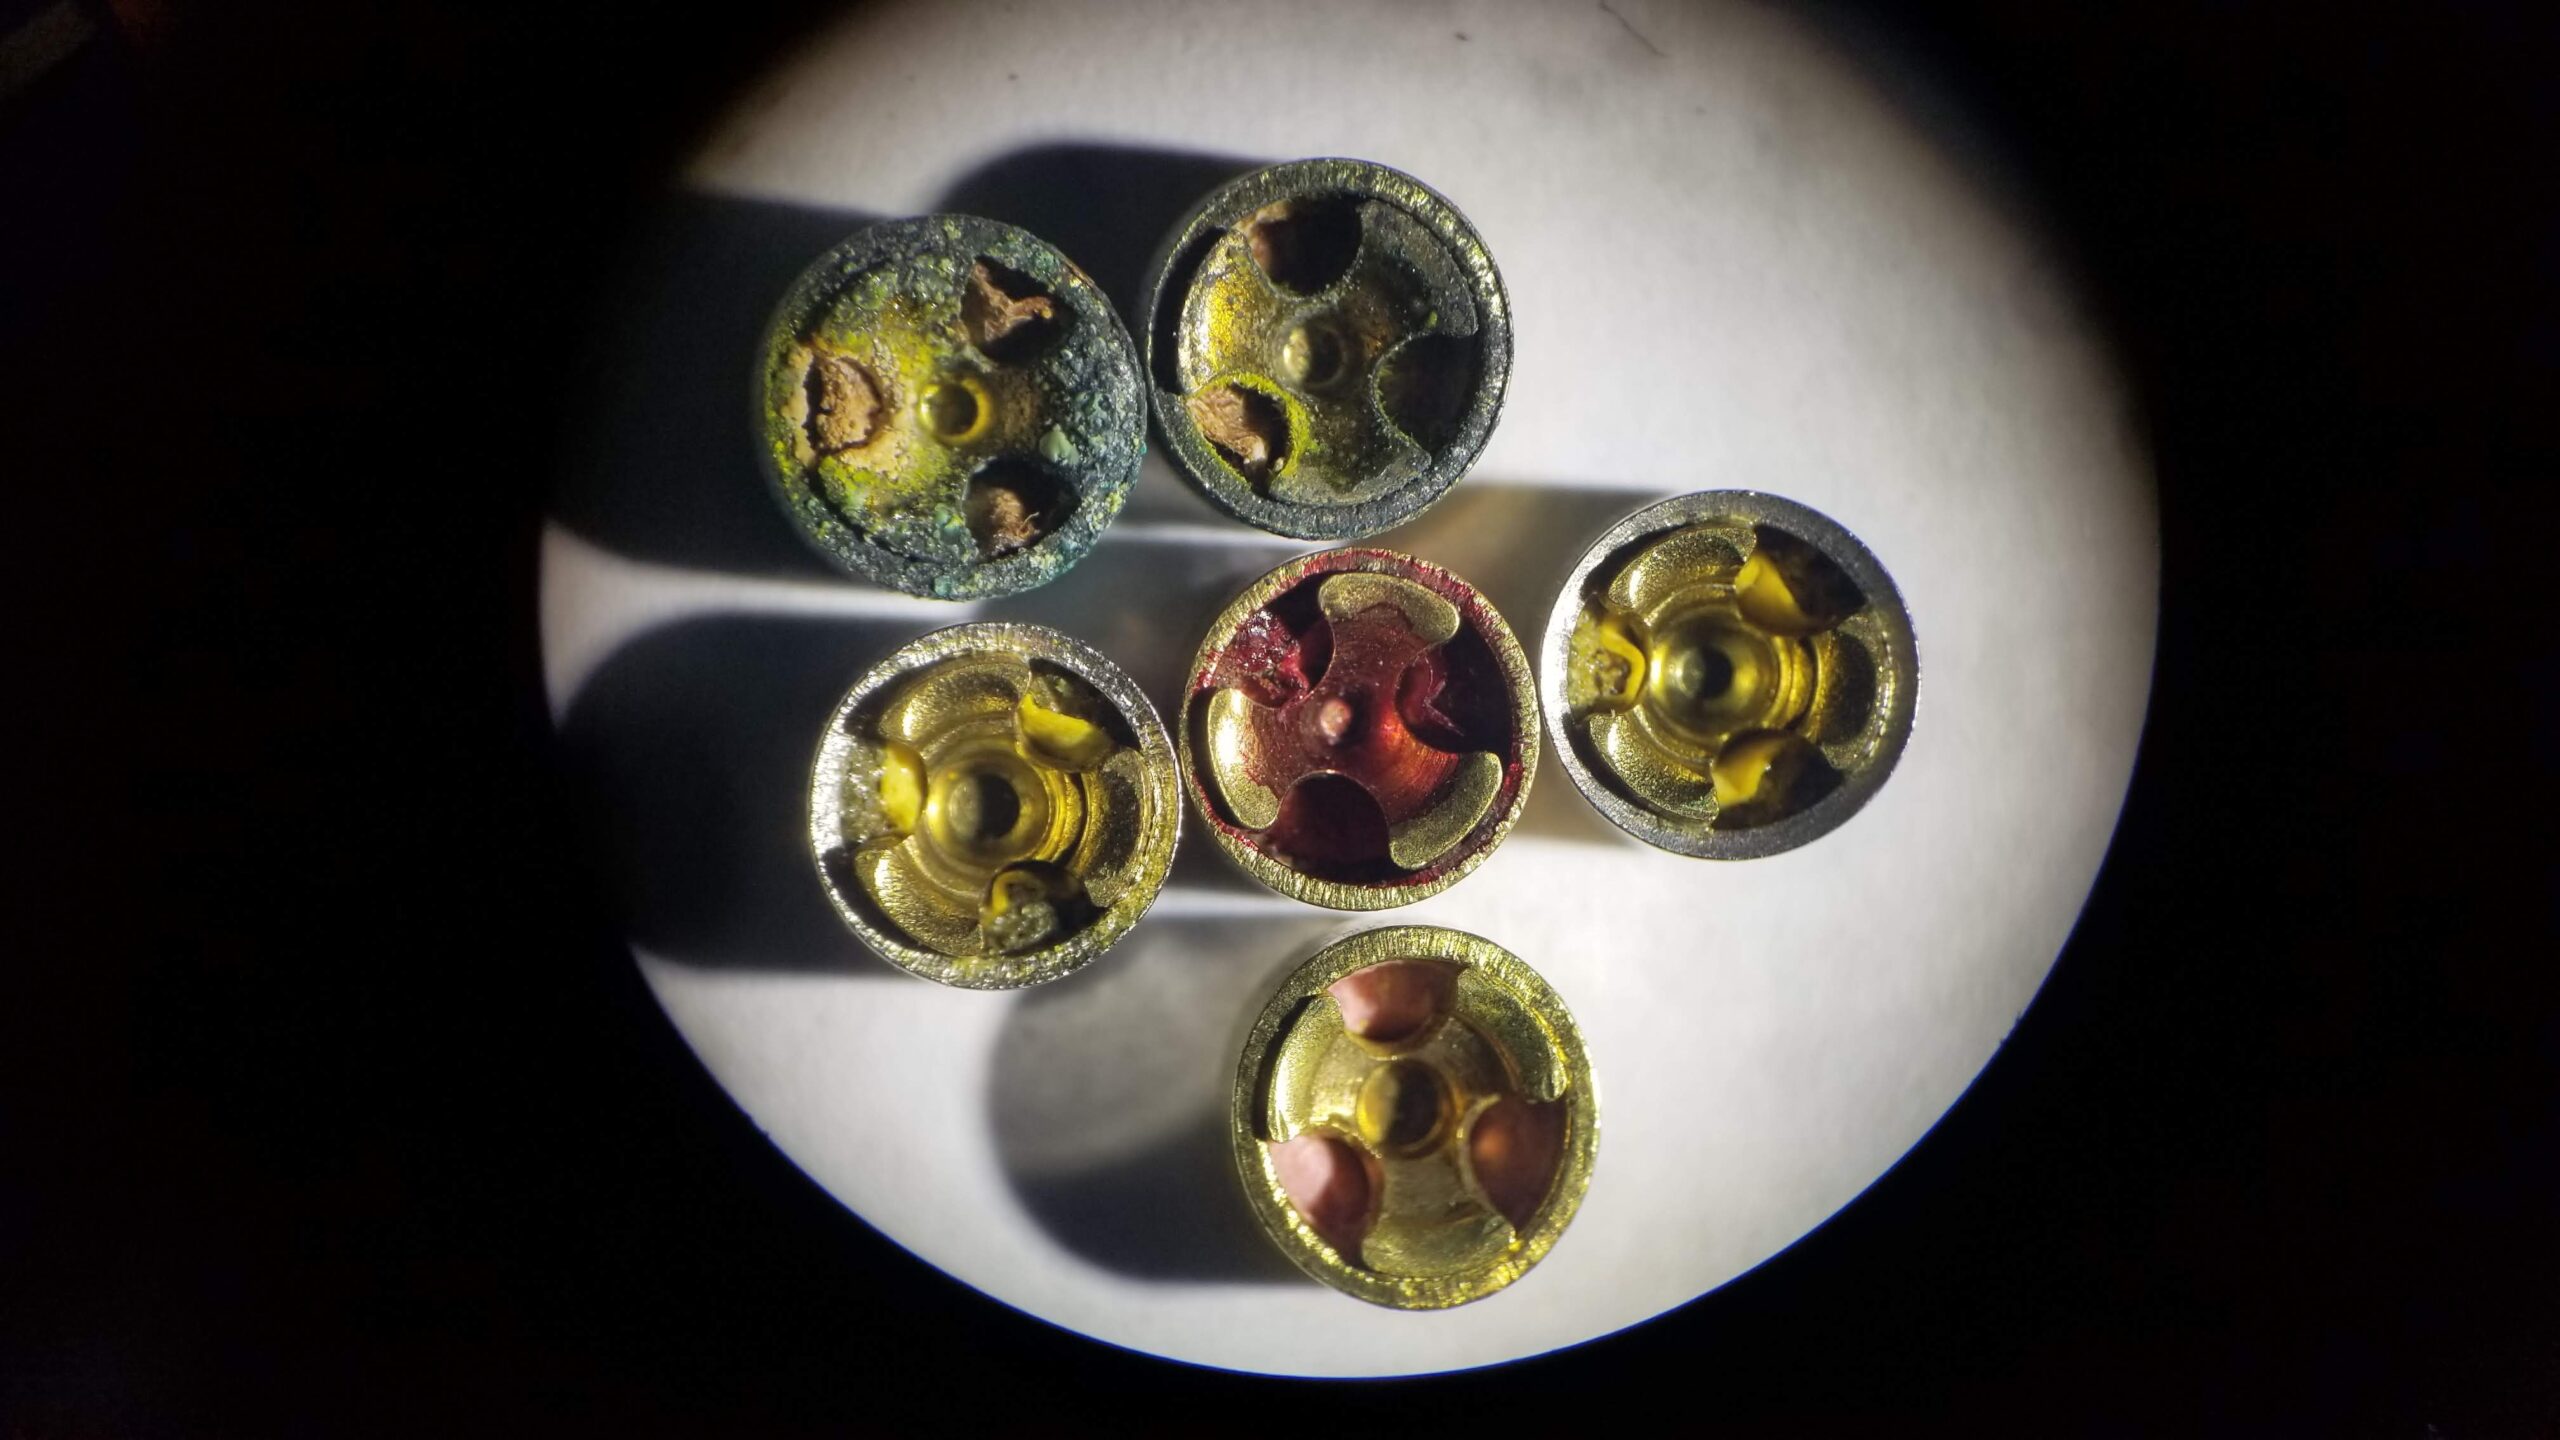
Finding primers is still a challenge for everyone. A friend pointed me to a deal of sorts for some surplus Fiocchi small rifle primers. They were not exactly free, but considering their condition and that it was 12000 to a box, they were reasonable. The seller revealed that they had been stored near a vent or some such and thus had some humidity related damage, but that in their testing, they had not had any failures.
Here is a closeup of these and some other primers.
The top two are the Fiocchi primers. One is an example of a pretty bad one, one pretty clean. The rest of the primers are new primers, a mix of pistol and rifle primers.
My own testing concurs with the seller’s. Regardless of their ugly duckling status, they tend to always fire, so long as they are hit hard enough. They *are* rifle primers, so the thicker cup needs a harder whack. If you have tweaked your trigger, you probably are striking your primers lighter than stock and even stock might be lighter than needed for rifle primers.
There is an issue, though. I sometimes have trouble getting them to seat all the way and *that* can cause them to fire going into battery. No, not good.
Speaking of COVID delays, I was accepted as a member of Dallas Pistol Club in April. I had to cancel my first new member orientation not directly because of COVID, but because I ended up working all that Saturday setting up remote users for my company. A couple more opportunities arose, including one the same Saturday as the TRUGLO match. Finally, October 18, I got to get my gate code and keys!
Also around October or November, we got back to doing limited indoor matches at Texas Gun Experience. In particular, on November 16, I had a match with a DNF. It’s hard to finish with a broken shoulder. I slipped and fell HARD on my left side. Ouch. Ambulance. Xrays. “Comminuted fracture of the humeral head and a fracture of the humeral neck” which basically means that not only was the ball joint broken off, but it was split in half as well. I saw an orthopedic surgeon the following week. The surgeon didn’t even need his own imagery; the ER xrays were good enough for him to say, “we’re replacing that.”
I’m well into the Physical Therapy phase of my recovery. I’m nowhere near 100%, but I think I’ll be able to safely attempt a pistol match in the next 30 days or so.
So, that catches us up, shootin-wise. You’ll have to check out the other blogs, including the new one, to see what *else* I’ve been up to.
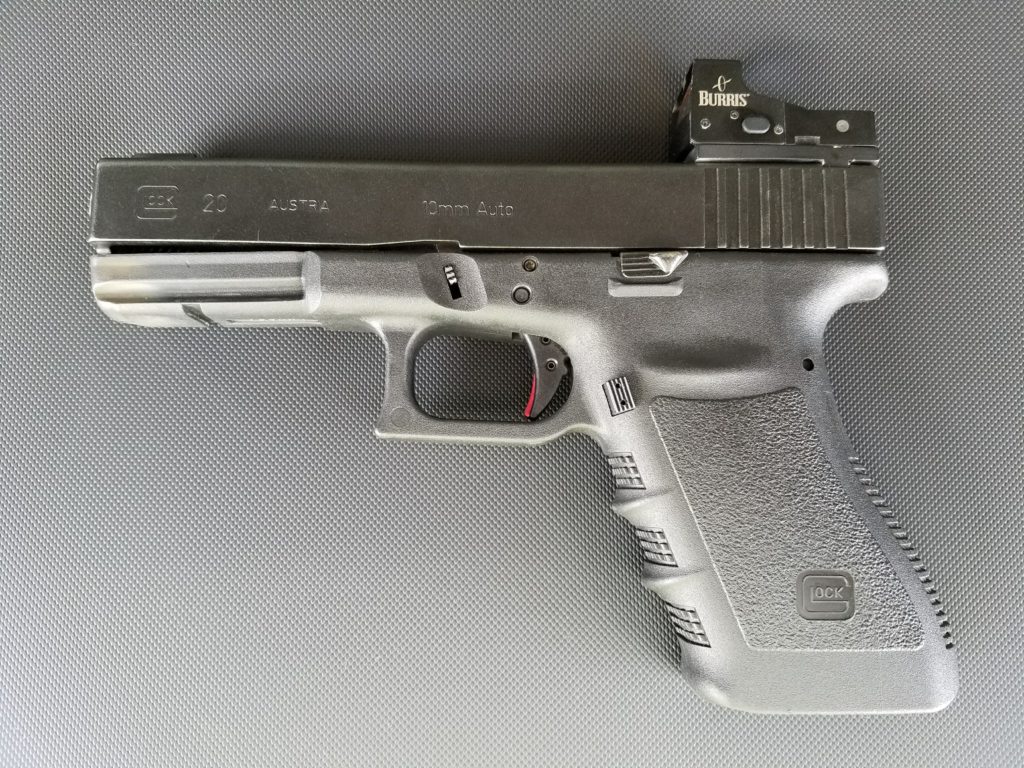
I like my Burris Fast Fire III on my Glock 20. It is a very nice electronic dot sight.
In my opinion, however, there are three specific issues that most, or really all, red dot sights suffer from.
First, they require power, which means a battery. Batteries run down and I have also seen that, fairly often, the battery seems to be prone to part company the sight under recoil. I have recovered the cover and battery from my Burris and just last night, a shooter in a local IDPA match lost his, maybe 5-6 shots into the last stage of the night. I am certain there is some degree of user error involved; there certainly was with mine. Design plays a role, driven by the need for a battery to be there at all as well as needing to be replaceable.
Tied closely to needing a battery is needing a power switch. You have to turn it on to use it and remember to turn it off when you’re done, or it needs to have added complexity to try to do this for you automatically. If the system uses some sort of sensor, then even when “off”, the unit likely draws some miniscule amount of power from the battery.
Finally, they tend to be kinda clunky, even the sleek ones. Even if a pistol is designed for one, function follows form and they necessarily need to sit on the top of the pistol like a frog on a log. Even if you like this look, and I kinda do, the extension of this issue is that the visual axis is farther offset from the bore axis than with plain ol’ open sights on the same pistol and even more so if the pistol was not specifically designed or modified to have such a sight installed.
Since it really isn’t the sight’s fault, the Honorable Mention green ribbon goes to the double edged sword issue of the user’s own eyesight. If, like me, you are fairly profoundly nearsighted, one of the common prescriptions for corrective lenses is to split the corrective powers so that each eye can specialize on near or distant vision. Typically, your dominant eye is elected to see nearby where details are important and the dot, which is optically at infinity, is thus rendered as a blur. In my particular case, it is not only a blur that also appears larger than the entire target, but it’s also not even a nice regular blurry spot but a jagged starburst. It looks as much like fireworks as anything else.
Ironically, this prescription arrangement works well for open sights because the all-critical front sight is in focus and the non-dominant eye can see downrange. This is at least an addressable issue for me and IDPA/USPSA competition because I can just swap contact lenses and thus roles, letting my dominant eye see in the distance where the dot is. I have the same sort of issue with my Vortex rifle sights and really pretty much any optical sight, camera viewfinder, etc, though the illuminated dot is the worst.
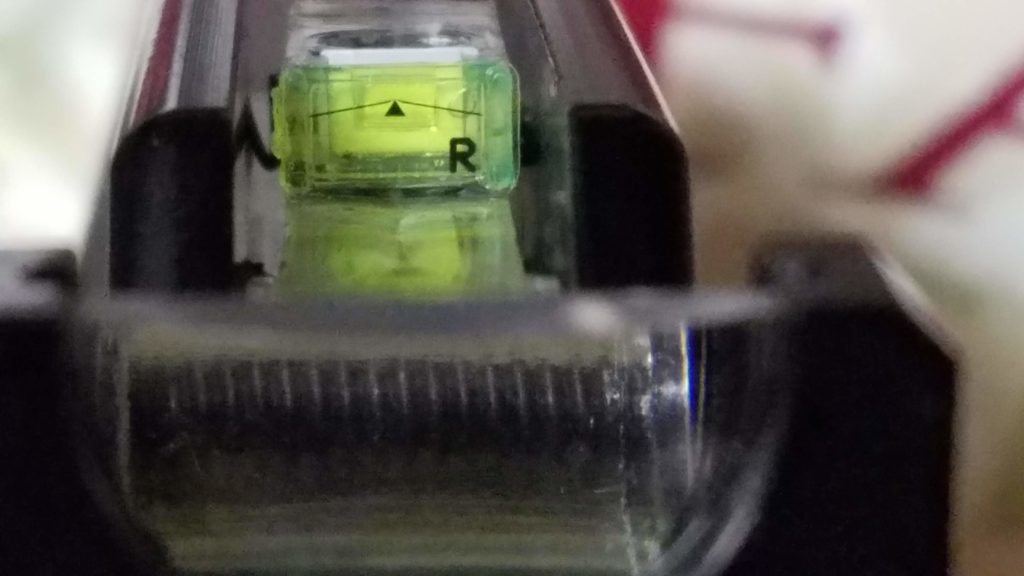
The SeeAll sights eliminate the power and/or switching requirements. The compact design also helps with the offset between the visual and bore axes. It does nothing specifically for my nearsighted visual issues, but the problem arguably less severe since the reticle not a tiny illuminated point.
The sight works very simply, really more of an optical interpretation of open sights. Align the reticle with the target just like putting the front sight and rear notch or the red dot on the target and shoot.
When I decided to get one, it was right after SeeAll started a Facebook advertising blitz. I don’t know if that was the cause, but when I wanted to order, the pistol models were all backordered. The $99 standard version was backordered two months until March 1st and the $199 tritium backlight version was only backordered only one month, until February 1st. Even though I will use this primarily for competition and essentially always in reasonably good lighting, I was kinda forced to buy the the more expensive version in order to have it in hand sooner. I chose the triangle reticle assuming that would be easier for my compromised vision to find. They also make it with a crosshair reticle.
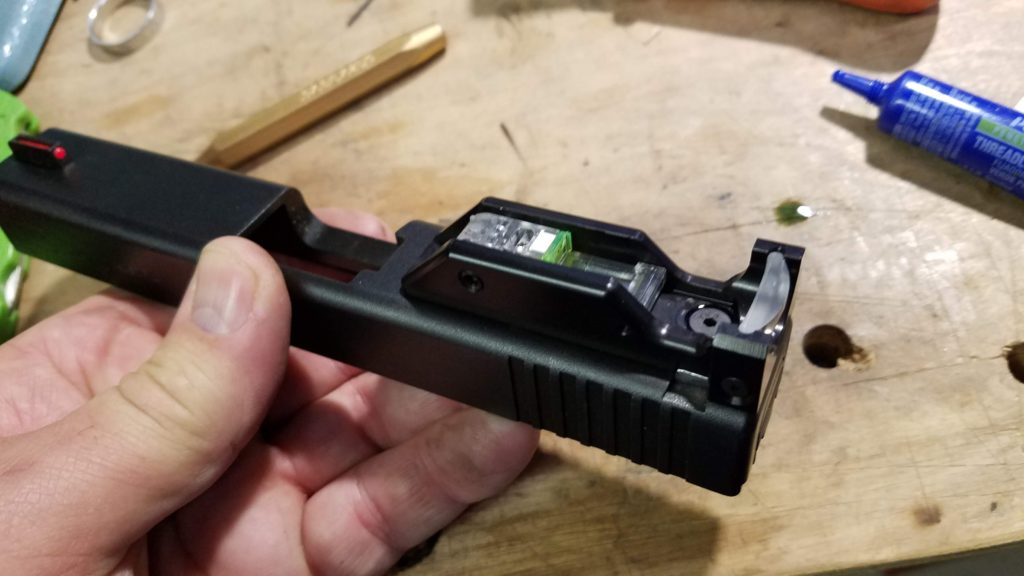
True to their word, is was shipped promptly when expected, actually a couple of days earlier. It arrived in simple but well made packaging and I had it installed in minutes.
It works very simply. There is a tiny printed reticle on the top of the sight and a lens at the back that magnifies the image of the reticle. You can also just see the tritium tube inside the white cutout area behind the triangle.
In my personal opinion, the tritium light is not bright enough to be seen except in conditions that are dark enough that you probably can’t see what you are aiming at. To me, the difference is not worth really the doubled price. Your mileage and use case may vary.
The next day, I took it to the range for for sighting in. For the first time *ever*, I had a new sight that needed no sighting in. It was dead on point of aim as it. I still have not touched it.
I have an installation caveat that might just be something that would happen only to me. The night after the range trip, I was cleaning and oiling the pistol for a match the next day, the SeeAll’s first trip to a match. I noted that around the screw that attaches the sight to the dovetail, there was a film of liquid, presumed to be oil. It’s tight in there, so I elected to just use air to blow it out. After that, I noticed that the oil was all over the lens and thought, “Ah, next time dig out a swab.” and cleaned the lens. Well, attempted to clean the lens. Turns out that the fluid was green Loctite that had not set in OVER 24 HOURS. It set wonderfully once it was all over the lens. It was a mess, like looking through a dirty windshield. After much hand wringing, I found that denatured alcohol cleaned it well enough to return it to functional status.
In use, I find the SeeAll to be at least as fast to acquire as a red dot and easy to shoot. In the first match out with it, I shot reasonably well and where I didn’t, it wasn’t the sight’s fault. As it was an outdoor match, the green and black reticle was brilliantly visible. In the first indoor local IDPA match I used it, I was only 3 down in 4 stages. I was perhaps not as fast as I may have been otherwise, but I’m not really super fast. Not yet anyway.
There were a couple of slightly dimmer areas in the indoor range that made it slightly little more difficult to locate the reticle. Active lighting is not all bad.
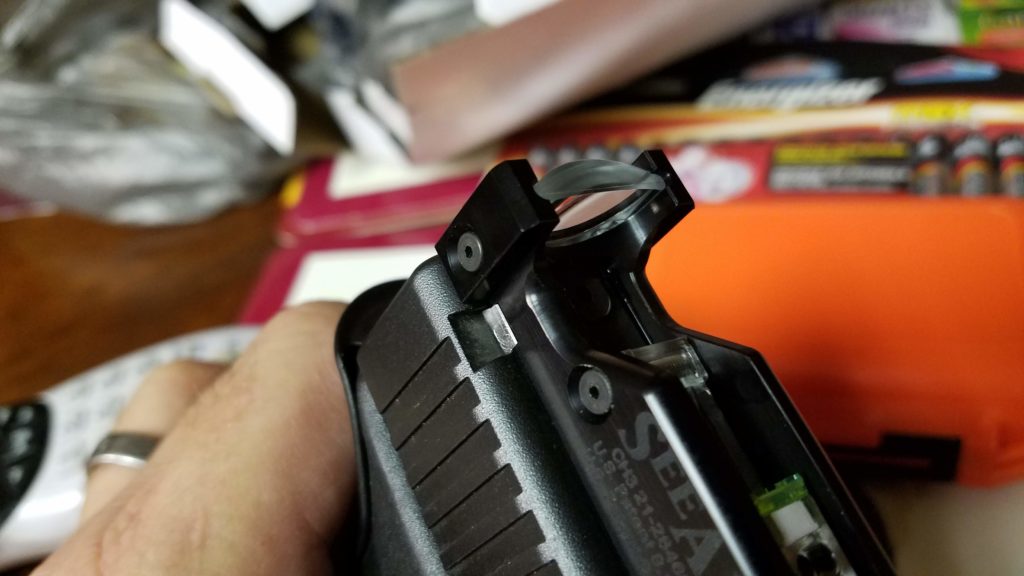
The one major detraction is that it has some sharp edges on it.
This edge, really a corner, is placed so that you are likely to scrape across it while operating the slide, especially in a rapid manner such as clearing a malfunction. It was harsh on the range trip to sight it in and it drew blood the first time out for a (non-IDPA) match. I went directly to the workshop when I got home and filed the most dangerous edges down.
This is somewhat better, though in the aforementioned IDPA match with it, this softer edge caused a blood blister in the same as-yet-not-fully-healed spot where the previous outing had cut my thumb. In a match last night, I kept all my blood and skin. Once the initial injury fully healed and after filing the edges, it may not be a big deal.
I note also that some of the SeeAll sights are not made exactly like this one. They may yet be experimenting with details and for the short term, the edge might be a side effect of another improvement.
So, is it a really cheap optical sight, in the same vein as a Burris or Vortex red dot, or is it just a funky new design for open sights? Should that matter? It was fun to studiously avoid the advice of a helpful SO who reminded me to be sure the optic was switched on for the first stage.
In any case, the proof may lay in how I classify with it at an upcoming classifier match in a couple of weeks and again how I place in a special IDPA Tier 3 CO/PCC match my club is hosting in June 2019.
I will measure the offset between open sights, SeeAll and Burris at some point, probably utilizing another slide I have because I don’t want to remove the SeeAll to do so.
In the post about making a lot of pens, I mentioned that making the custom drawstring bags for those pens deserved its own post.
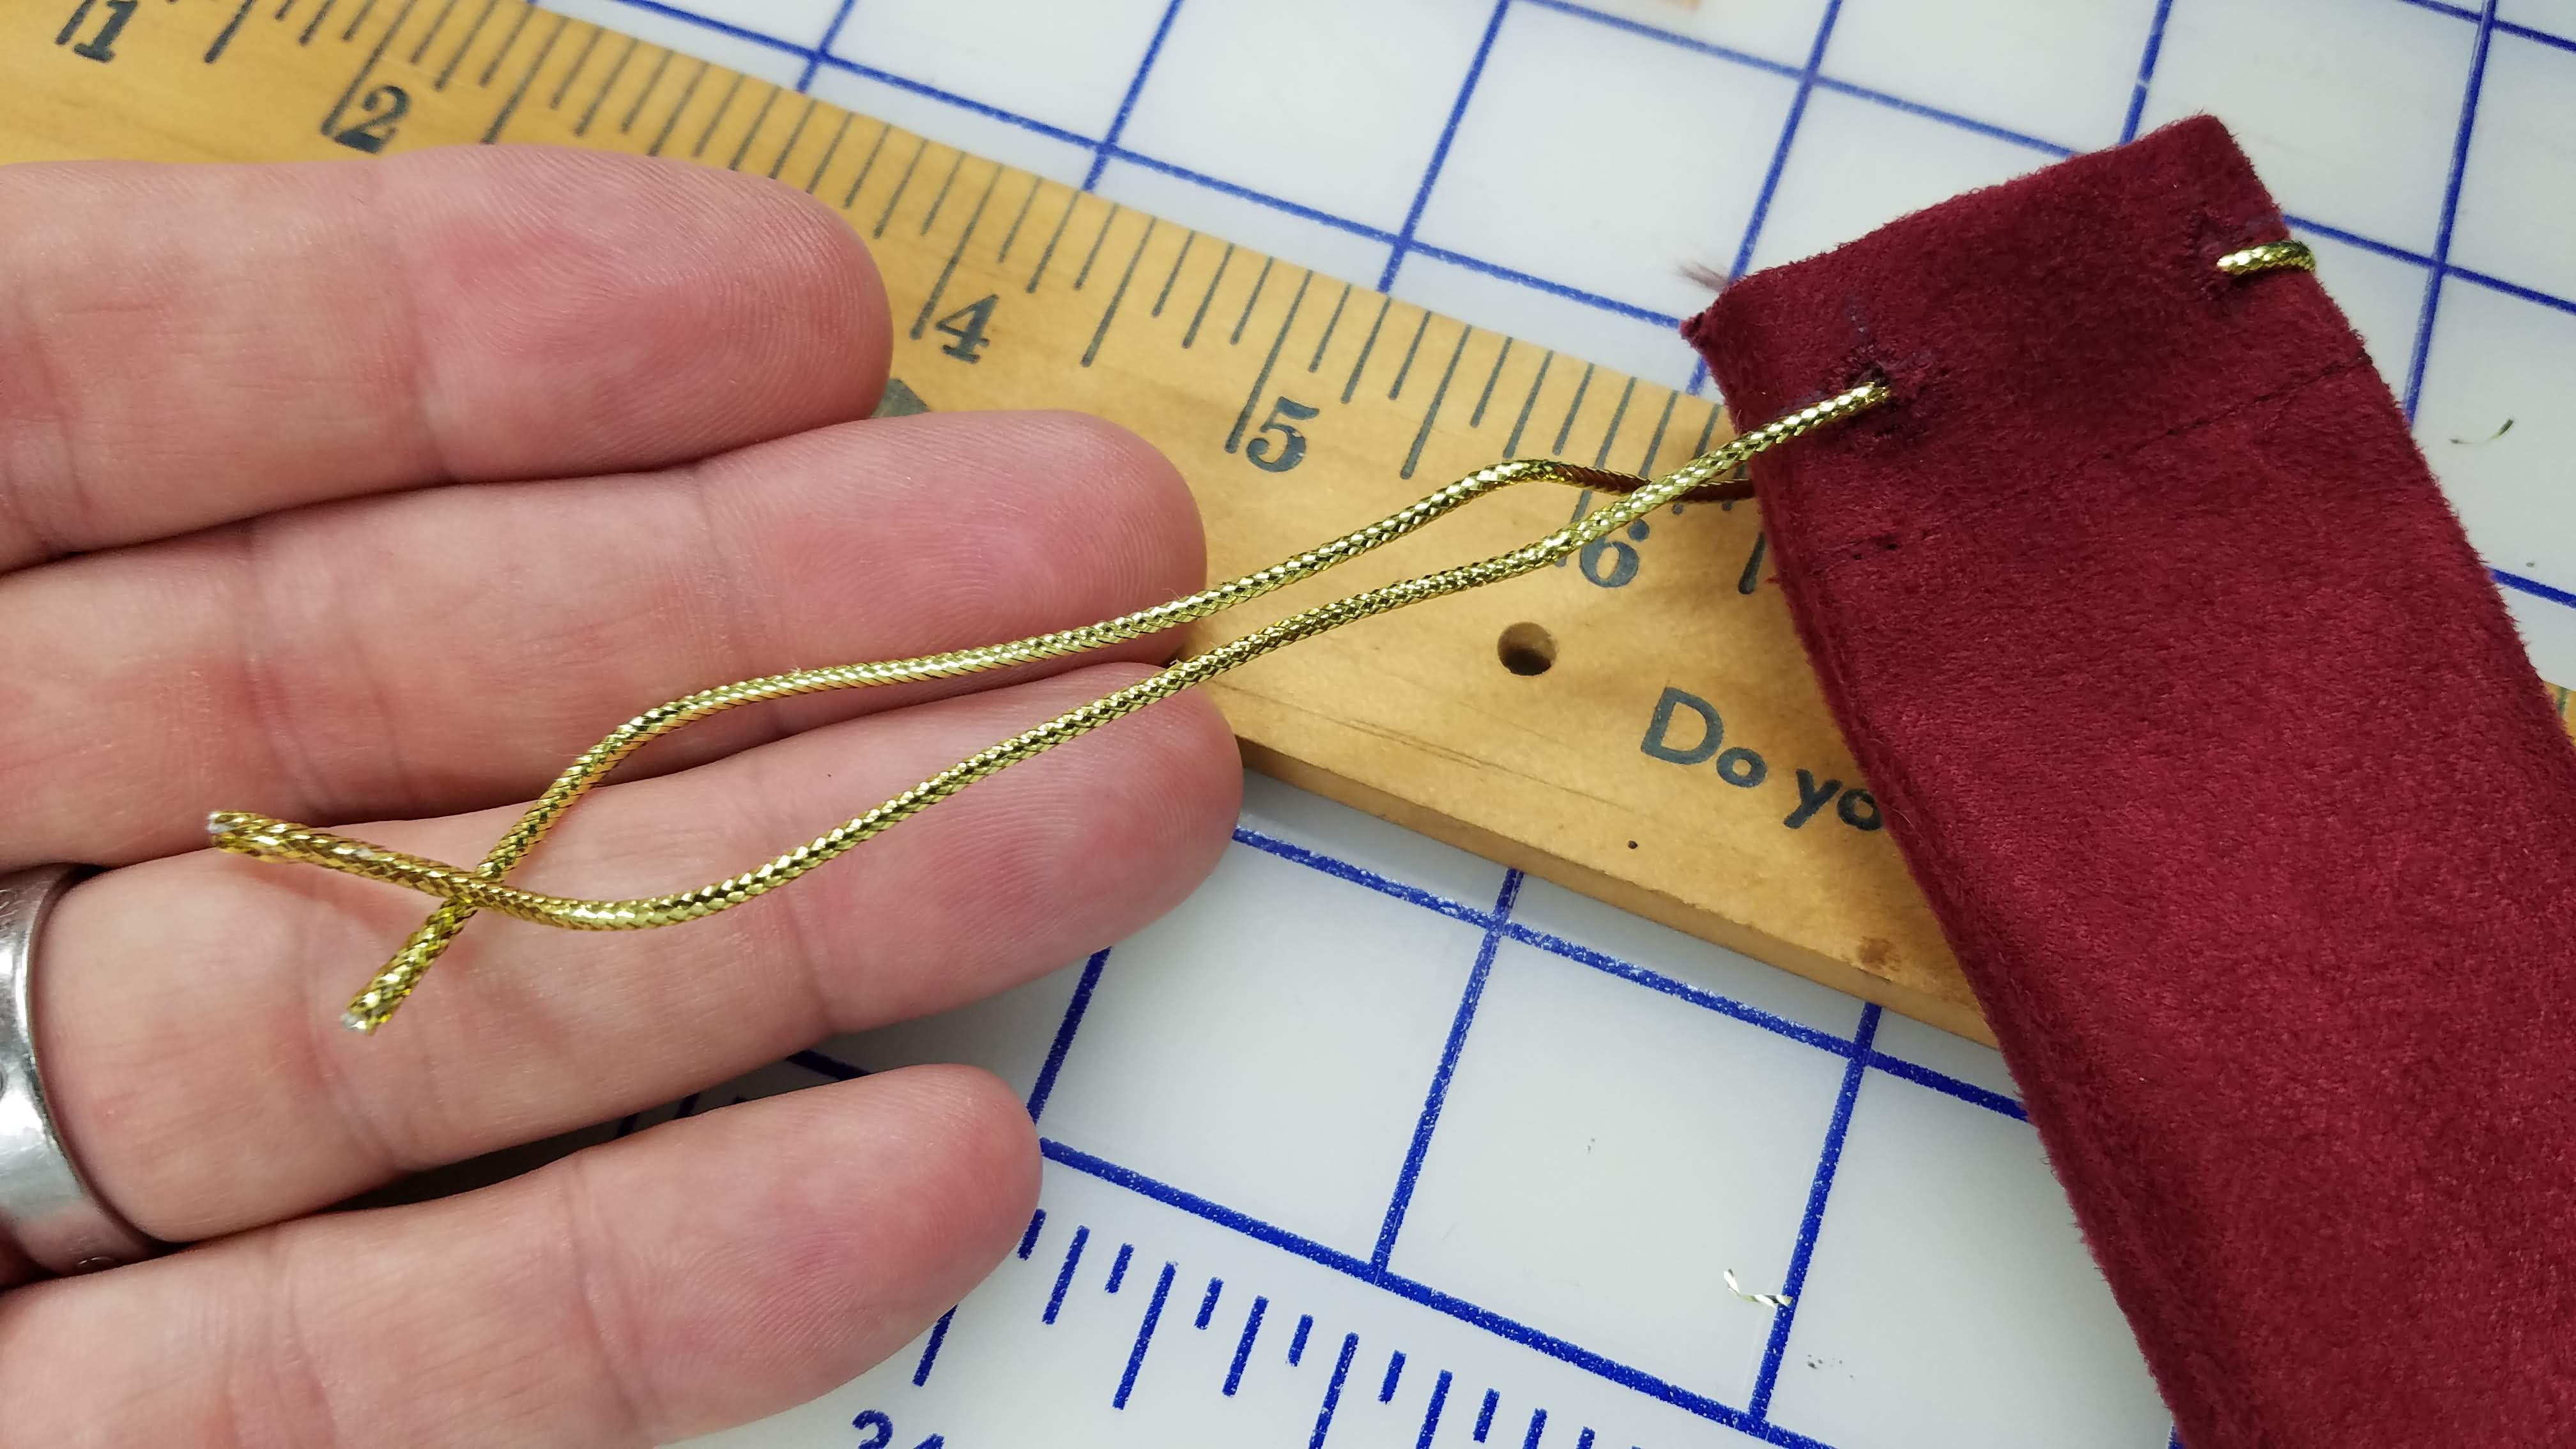
I started by deconstructing a commercially available velvet pen bag to develop a pattern. These are pretty simple bags, made from a single piece of fabric about 3 x 7 inches, with strategically placed slits cut into one edge. The top edge is turned and stitched down, leaving a tube for the drawstrings, and then the fabric is folded right sides together and stitched down one side and across the bottom. The resulting bag is turned right side out, the drawstrings threaded in through the slits and tied, and you have a bag.
We decided on an arguably easier way for us to stitch them, though it did require stitching both sides.
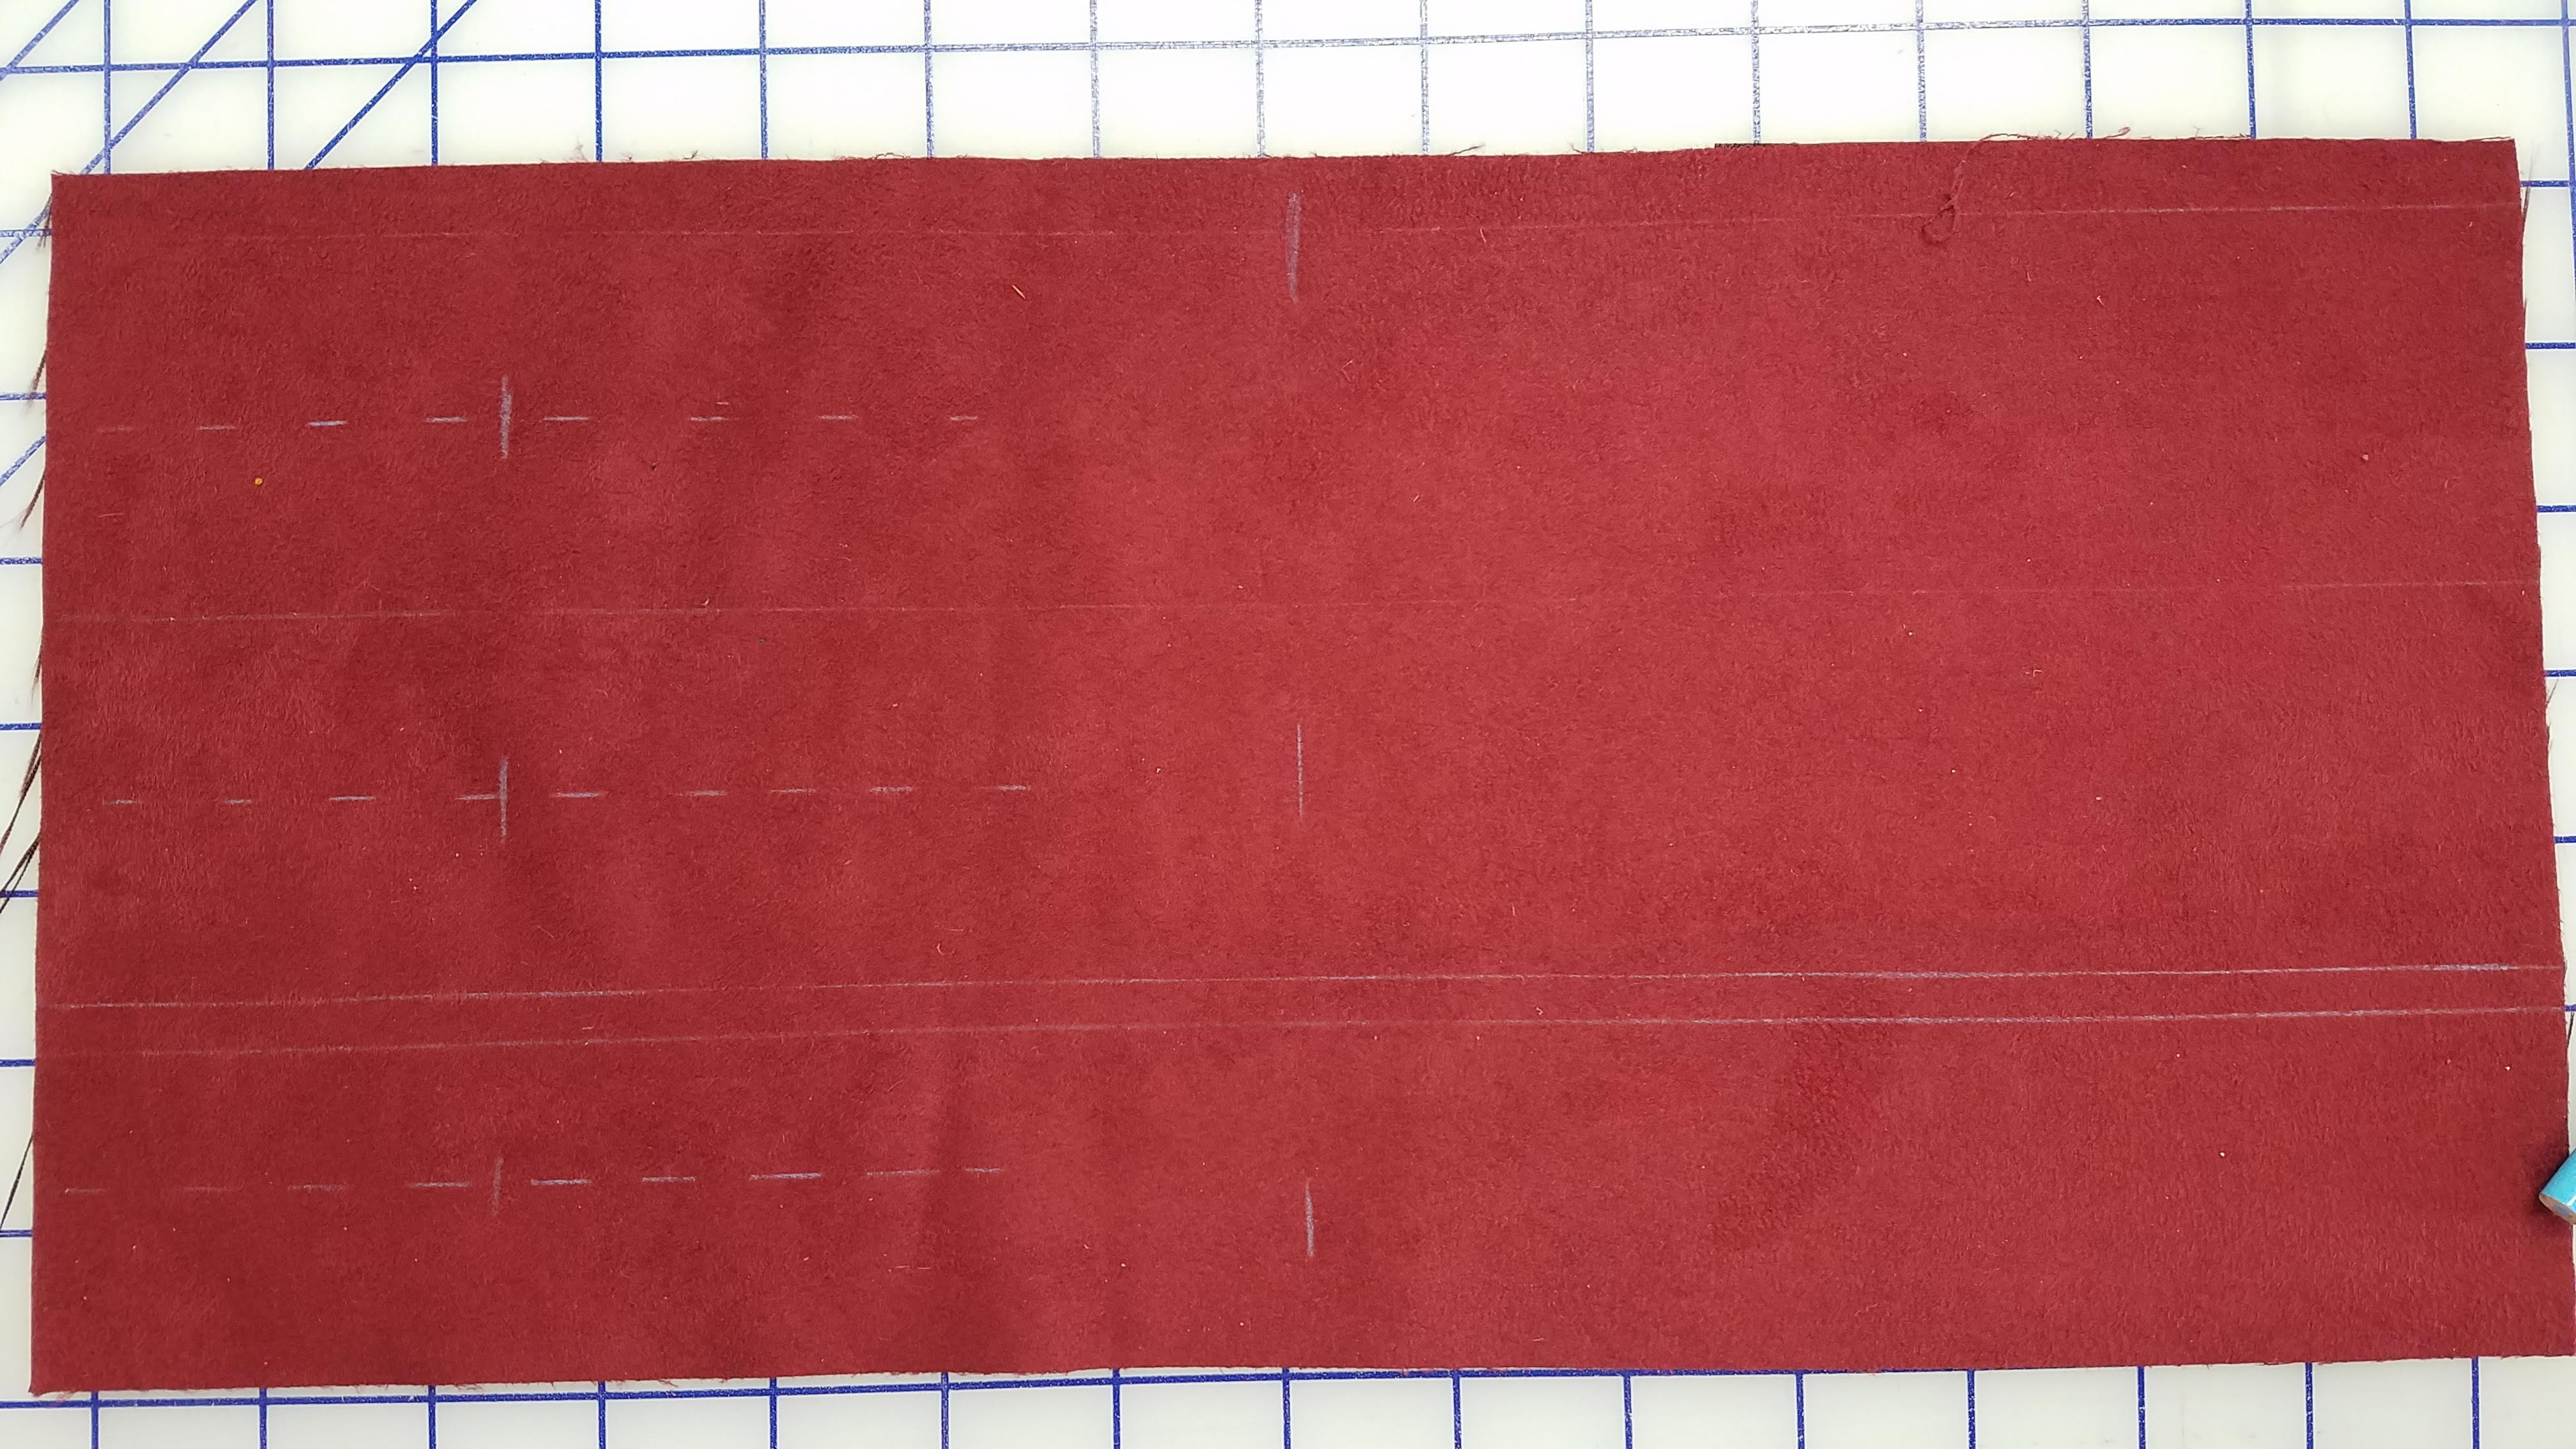
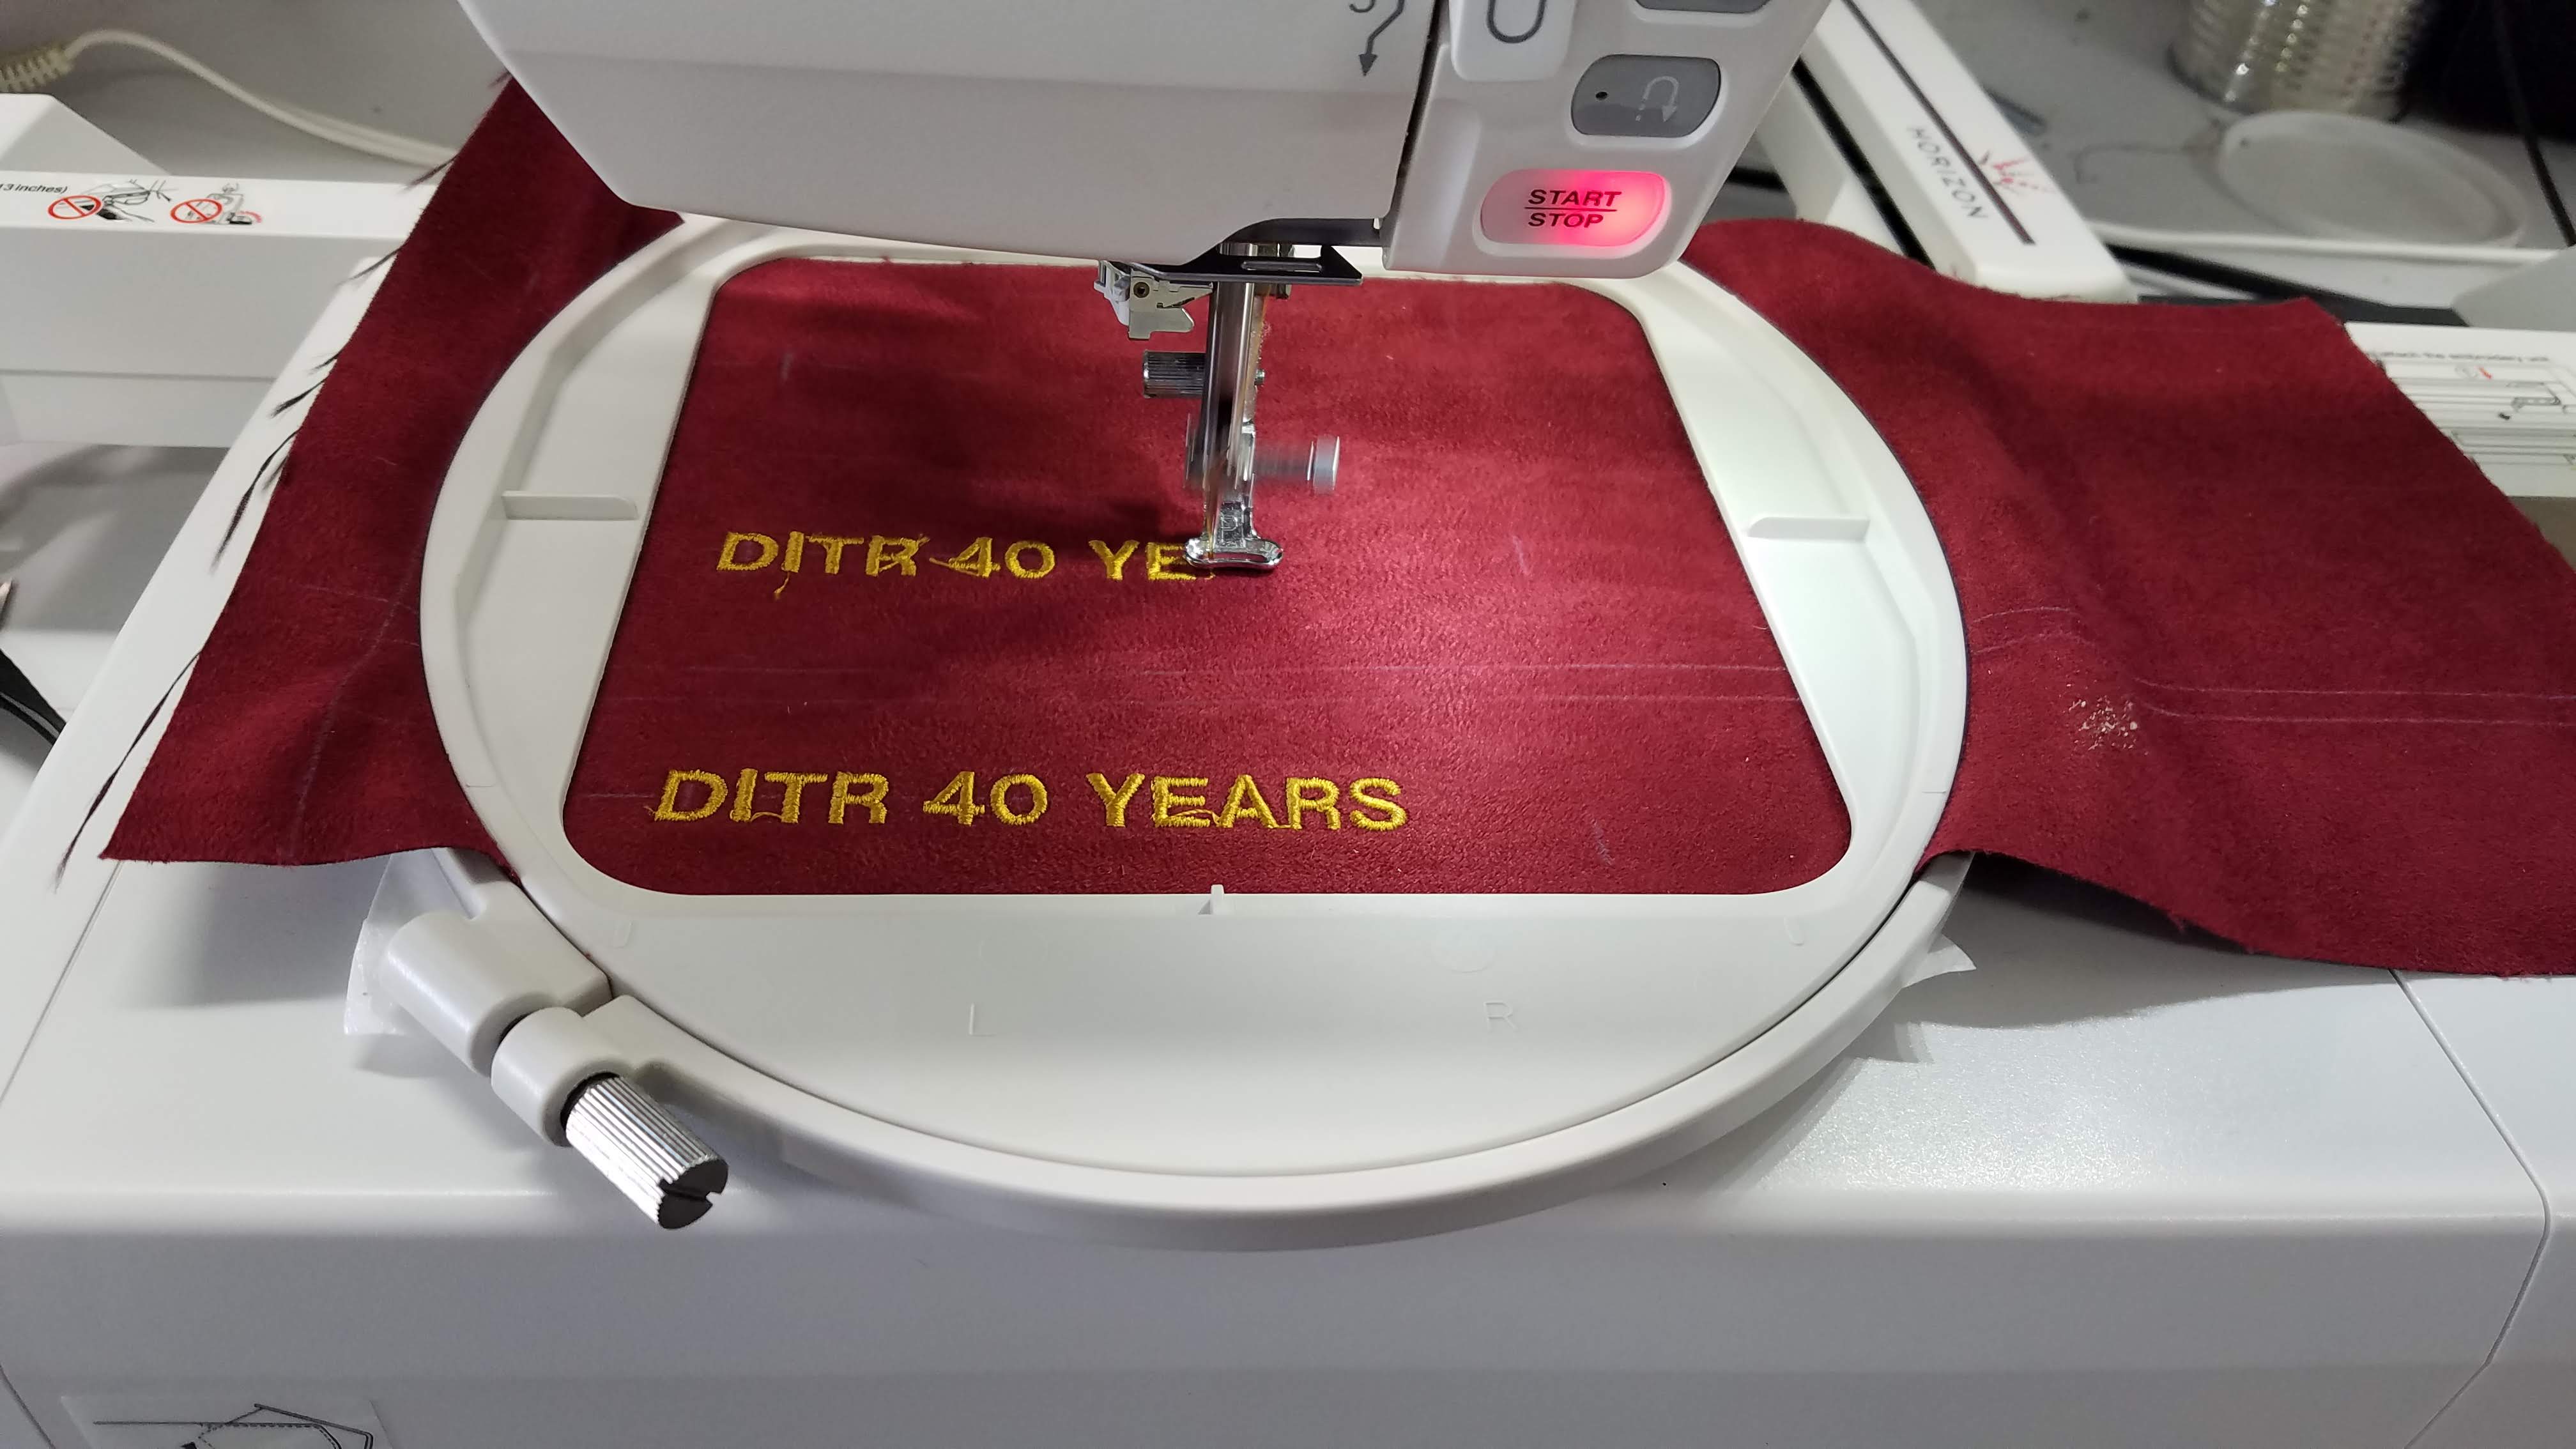
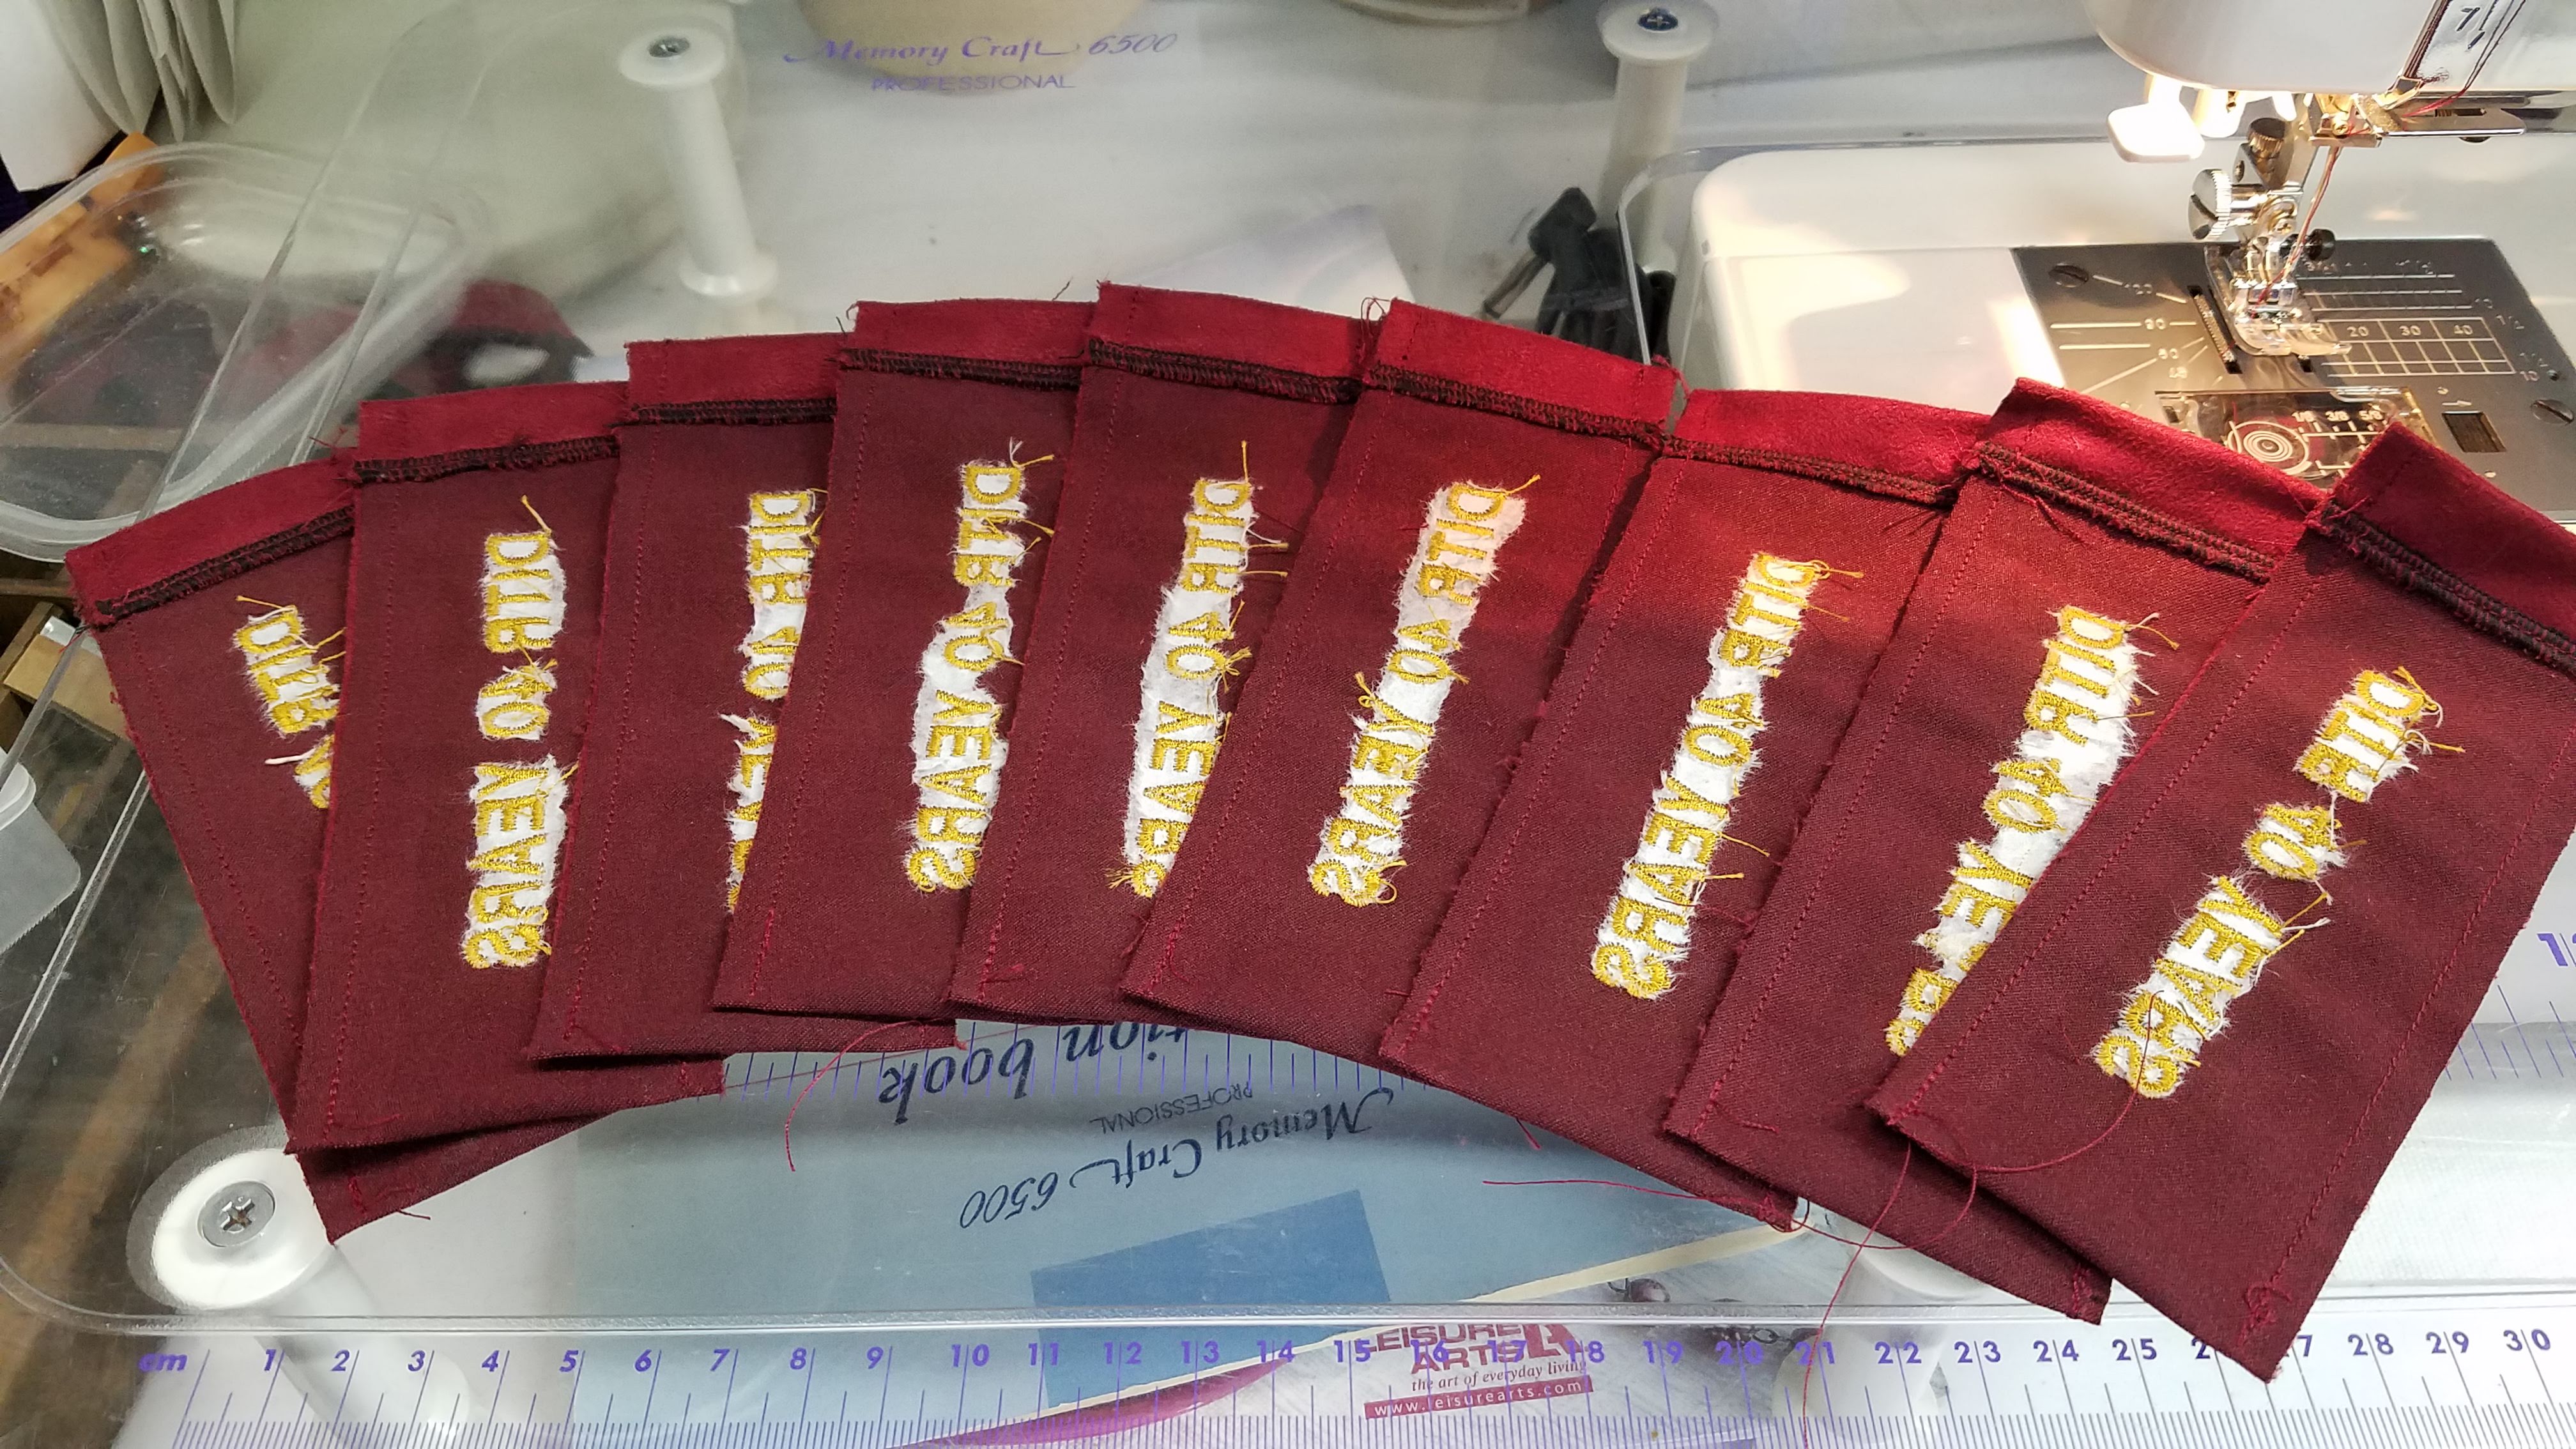
We made a couple of prototypes to nail down the dimensions. The final dimensions to cut for one bag was 2-1/4 x 15 inches. I determined where to mark the fabric to simplify embroidering the logo onto the fabric, it was best to hoop one 6-3/4 x 15 panel, enough fabric for 3 bags.
I f you look closely, you can see my fabric marker lines. The solid lines are the 2-1/4″ marks to line up for later cutting the strips apart. There is a center fold line at 7-1/2″, which I never actually used for folding. The dashed line is the center of the strip and together with a crossing line 5″ from the center, was used to line up the embroidery.
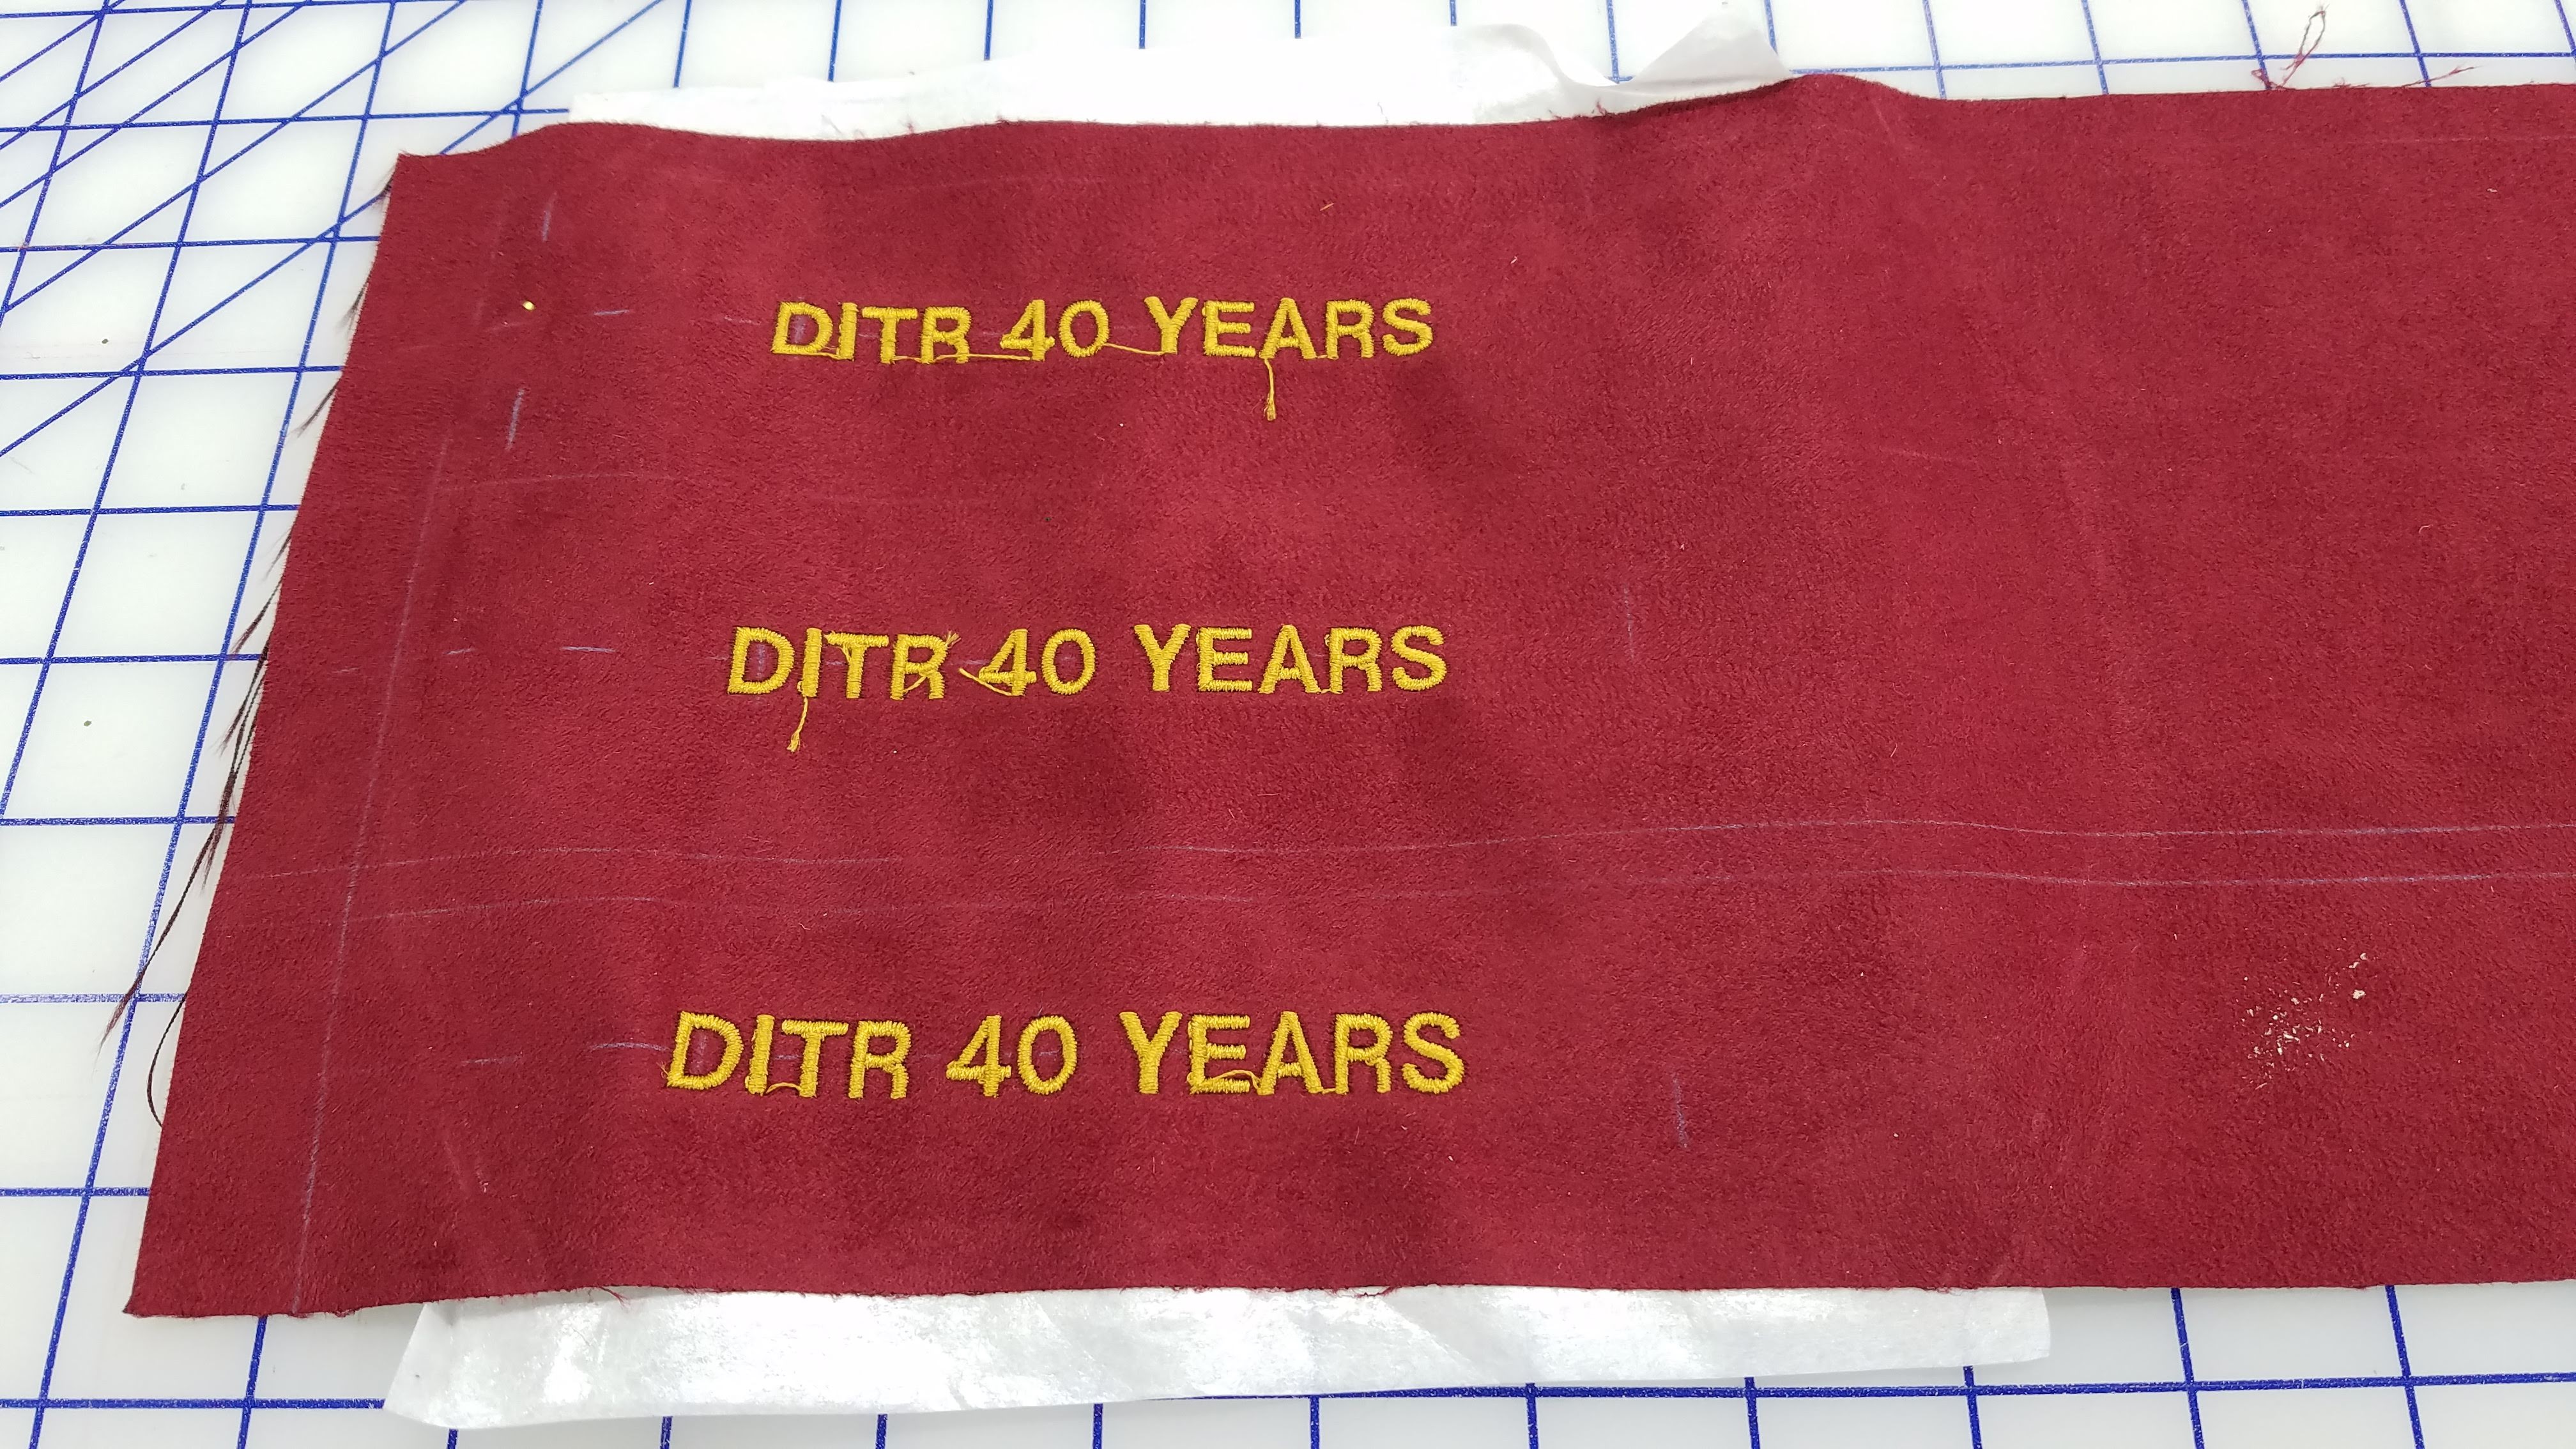
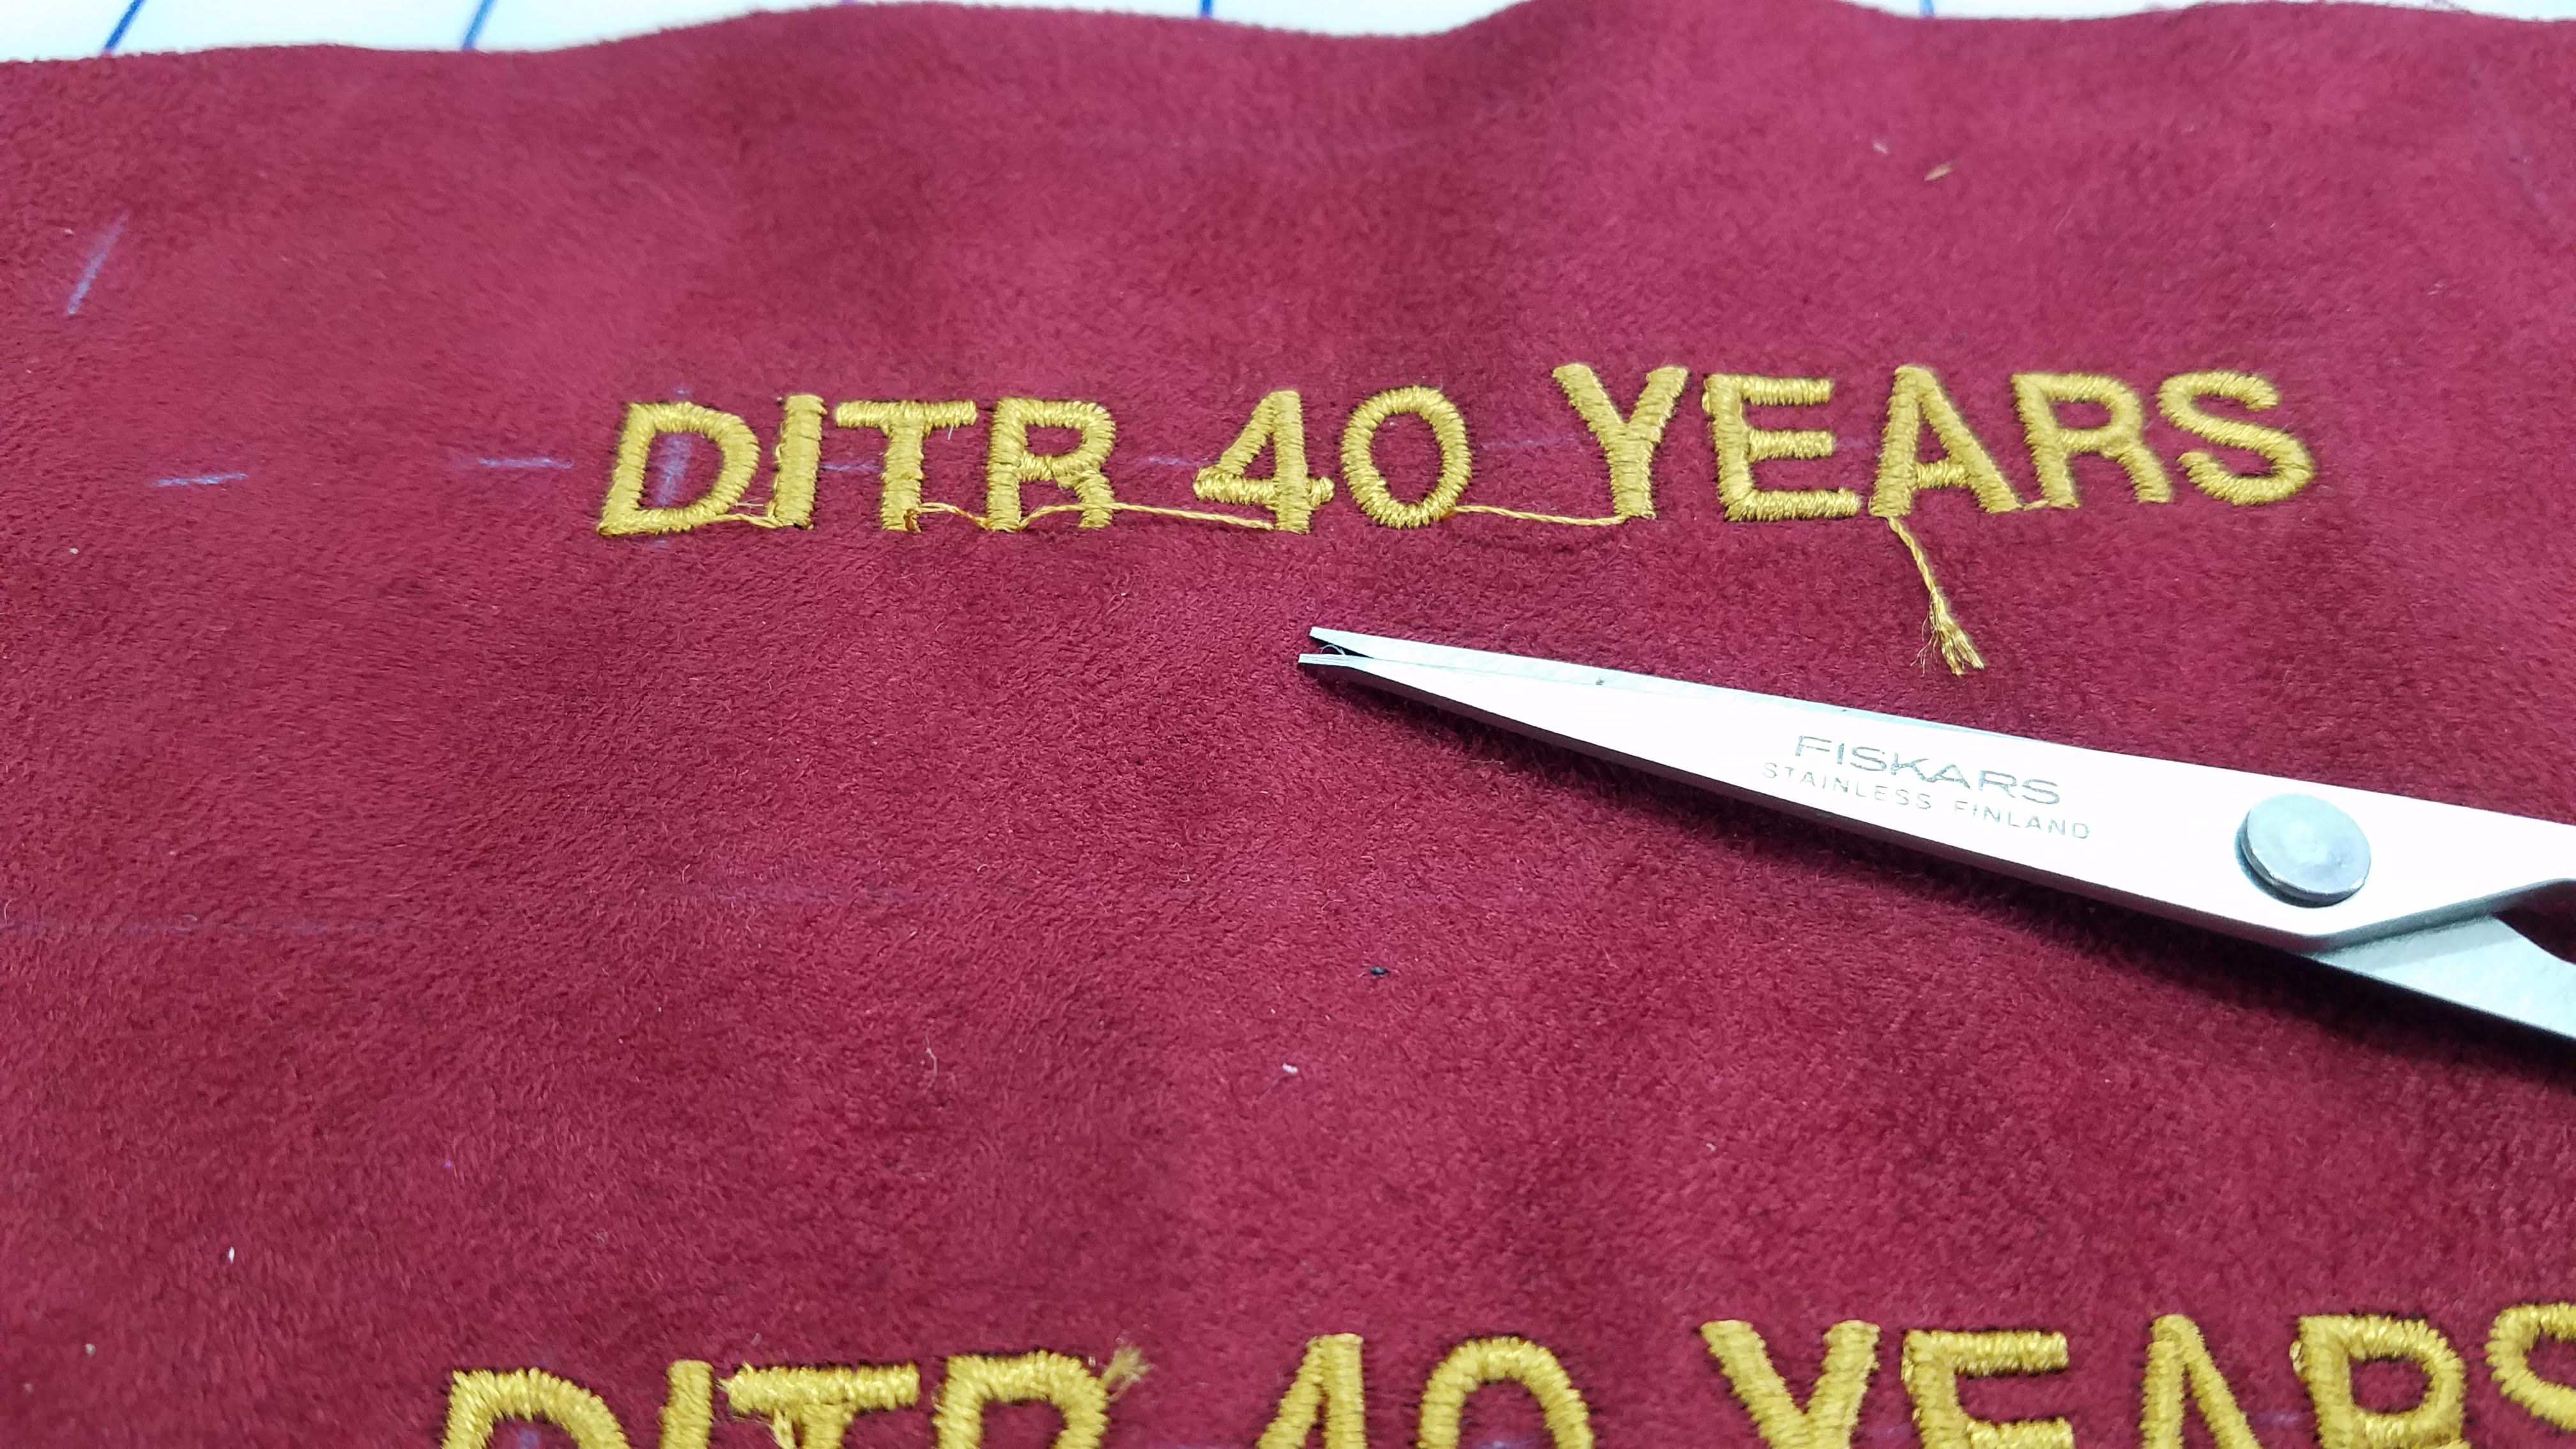
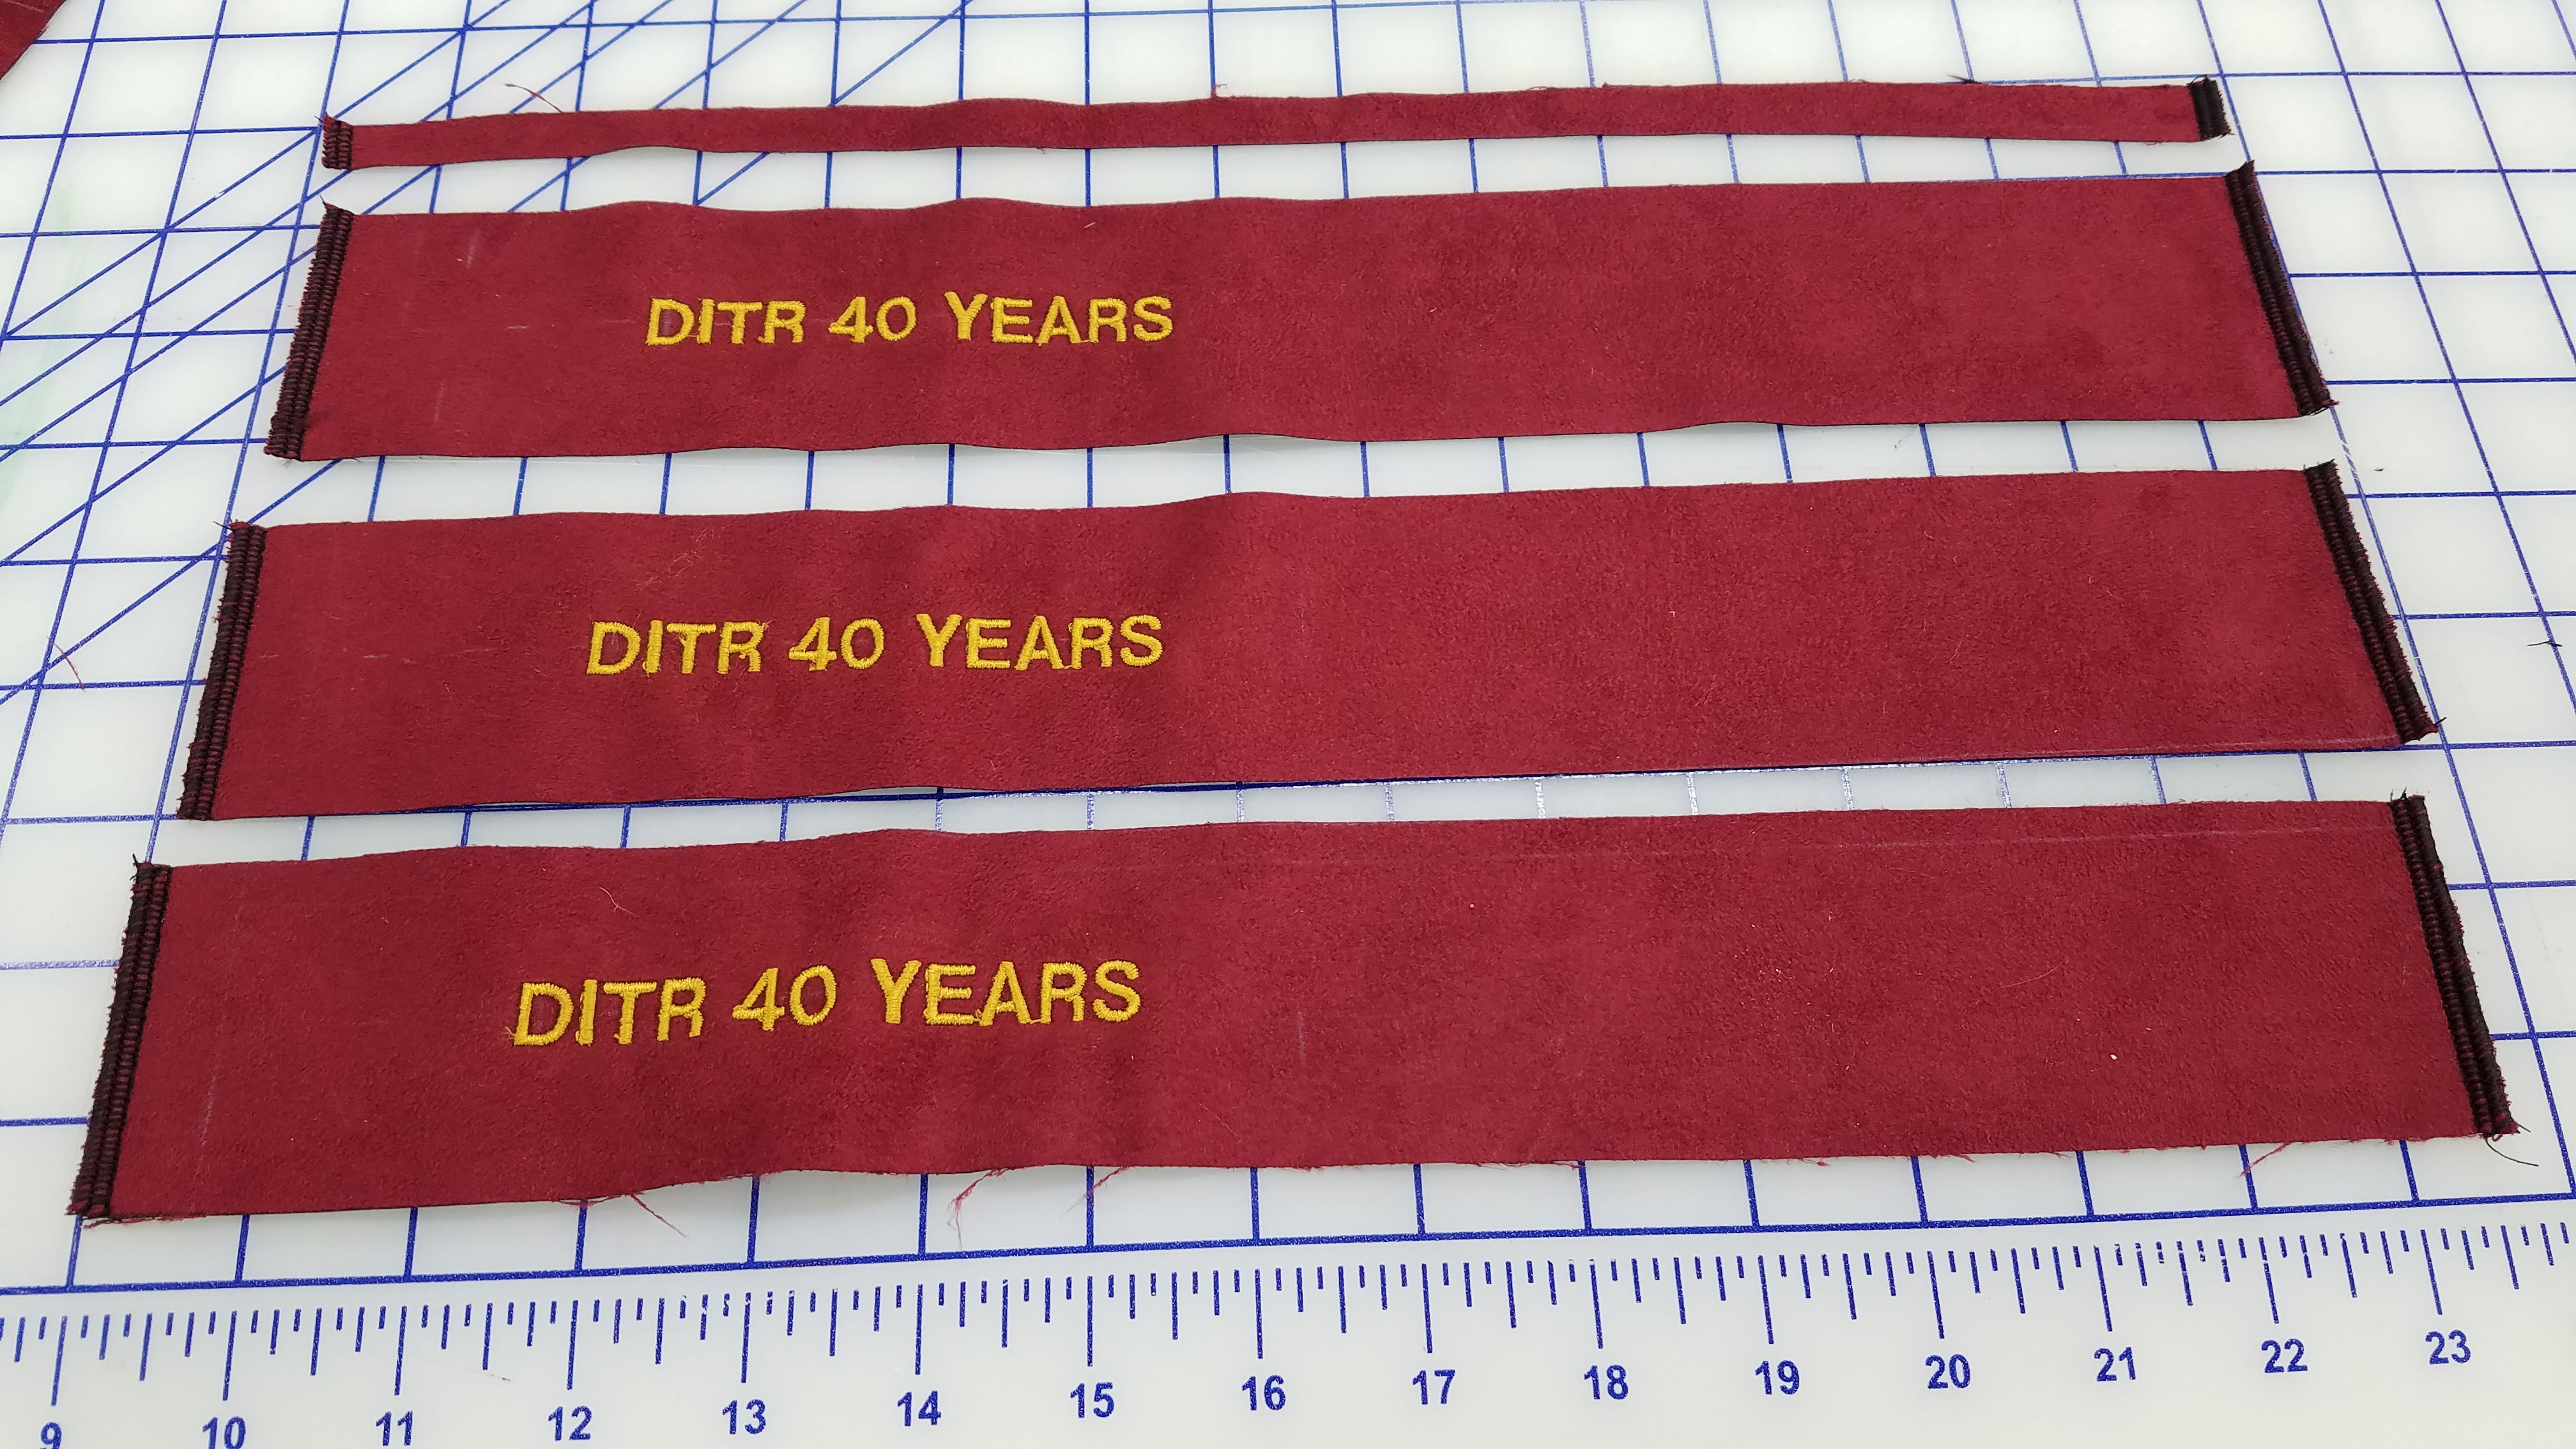
After removing the stabilizer, trimming the threads, and serge stitching the short edges, the panel is ready to cut into strips. I fine tuned the dimensions so that I didn’t have any waste strips like this one had.
Now comes marking the ends. Experimentally, I arrived at dimensions that were just easier to measure off with a metric scale.
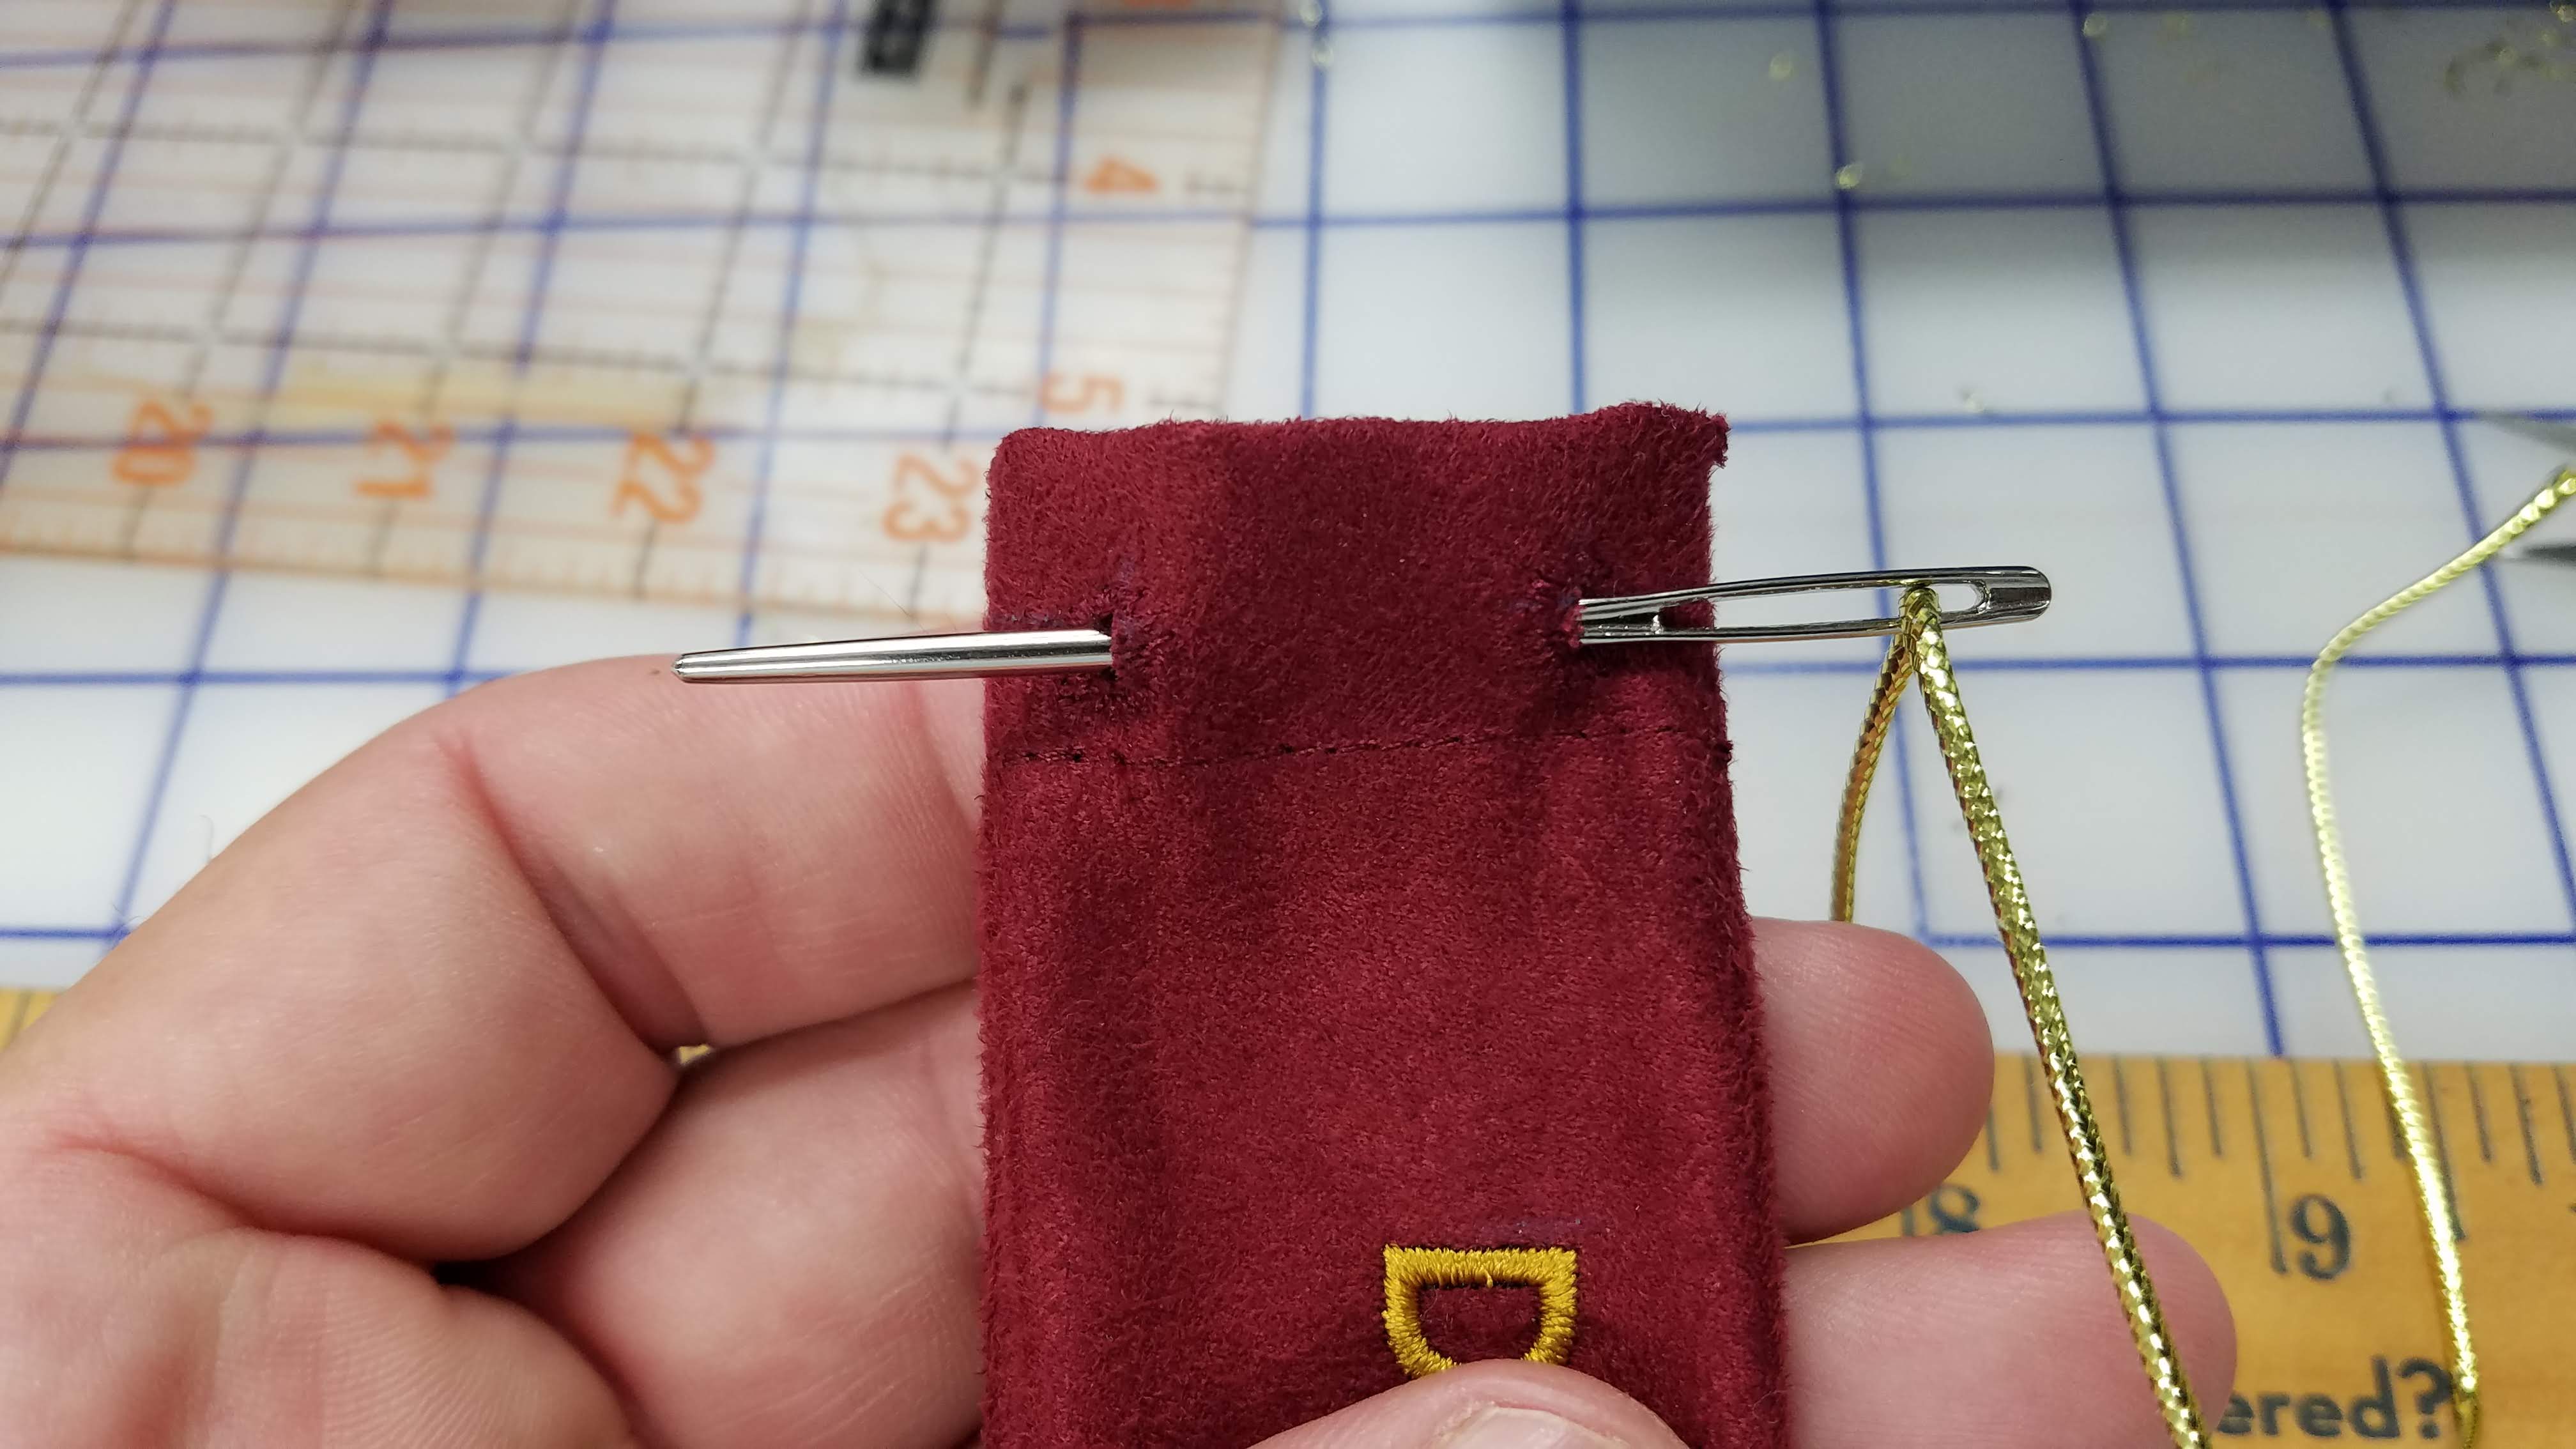
At 20mm from the end is the fold line. 30mm from the end and 15mm from each side are intersecting lines that mark where an eyelet will be sewn and cut.
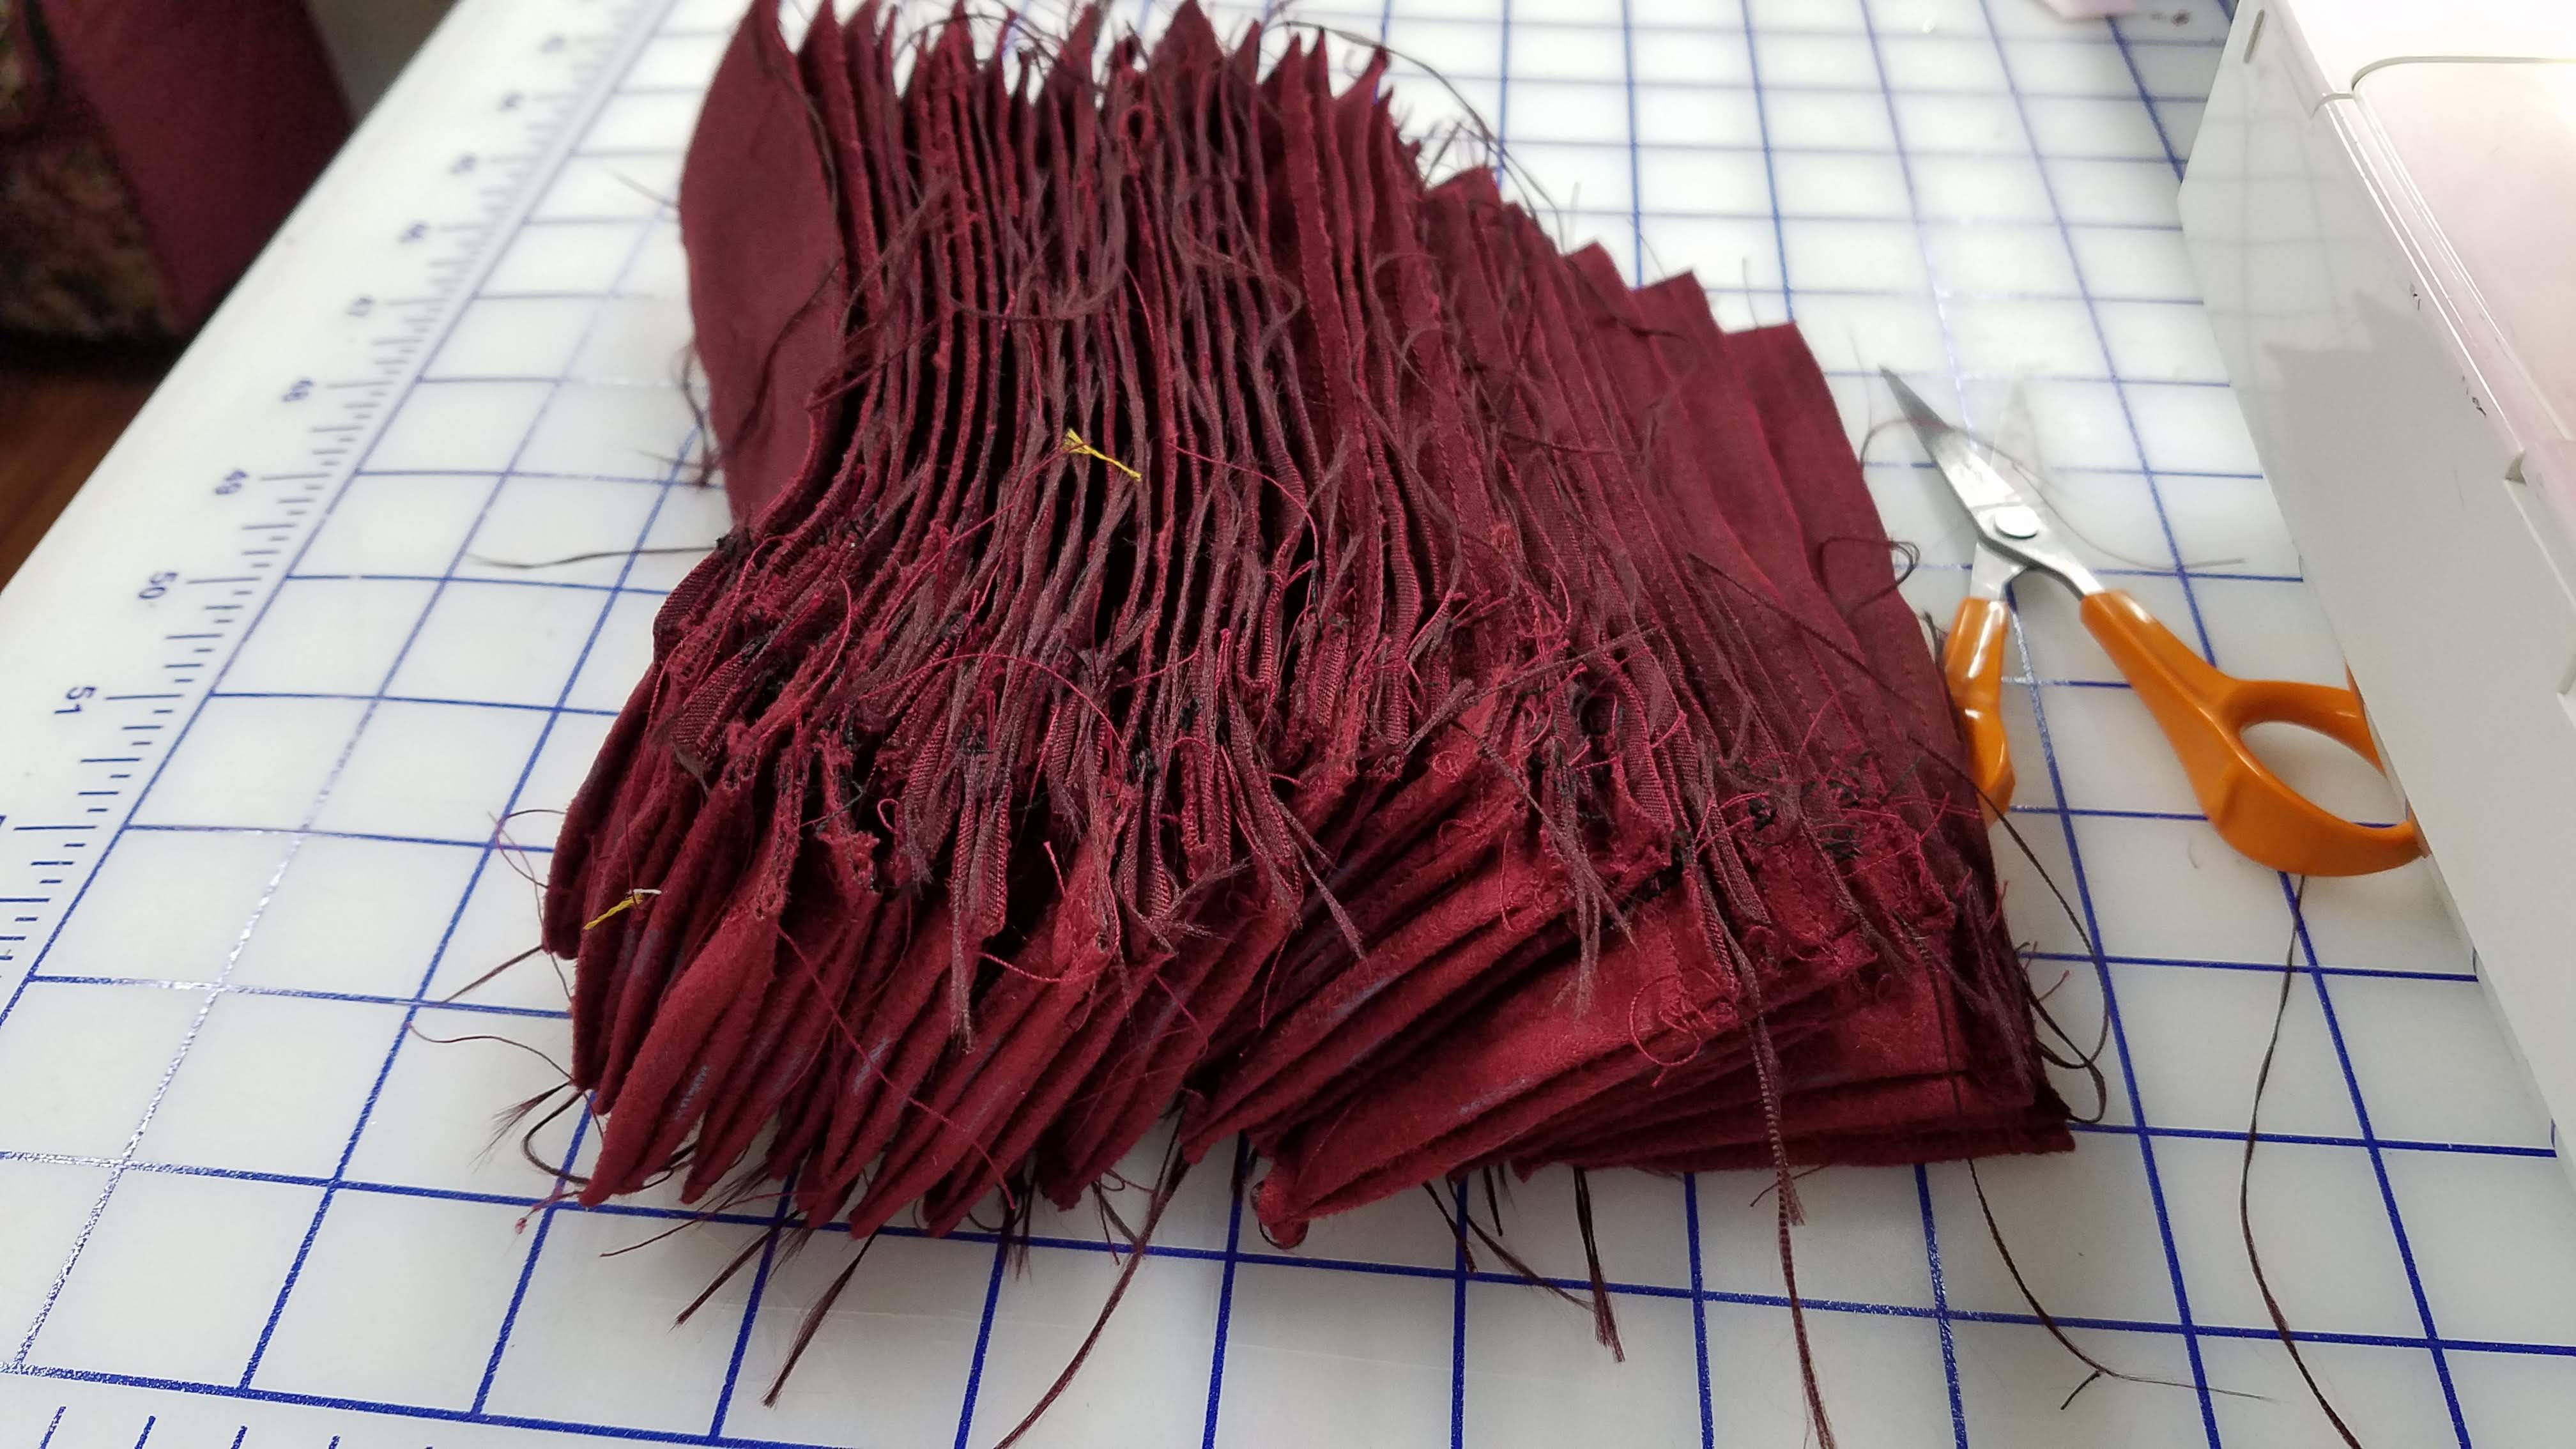
I then folded the two ends wrong sides together using the 20mm fold lines and stitched it along the serging. Finally, I folded the whole thing right sides together and stitched the two long sides.
I trimmed the fray, and any sewing thread ends, and turned the bags right side out.
Lastly, I threaded the drawstrings through the eyelets, one from each side of the bag.
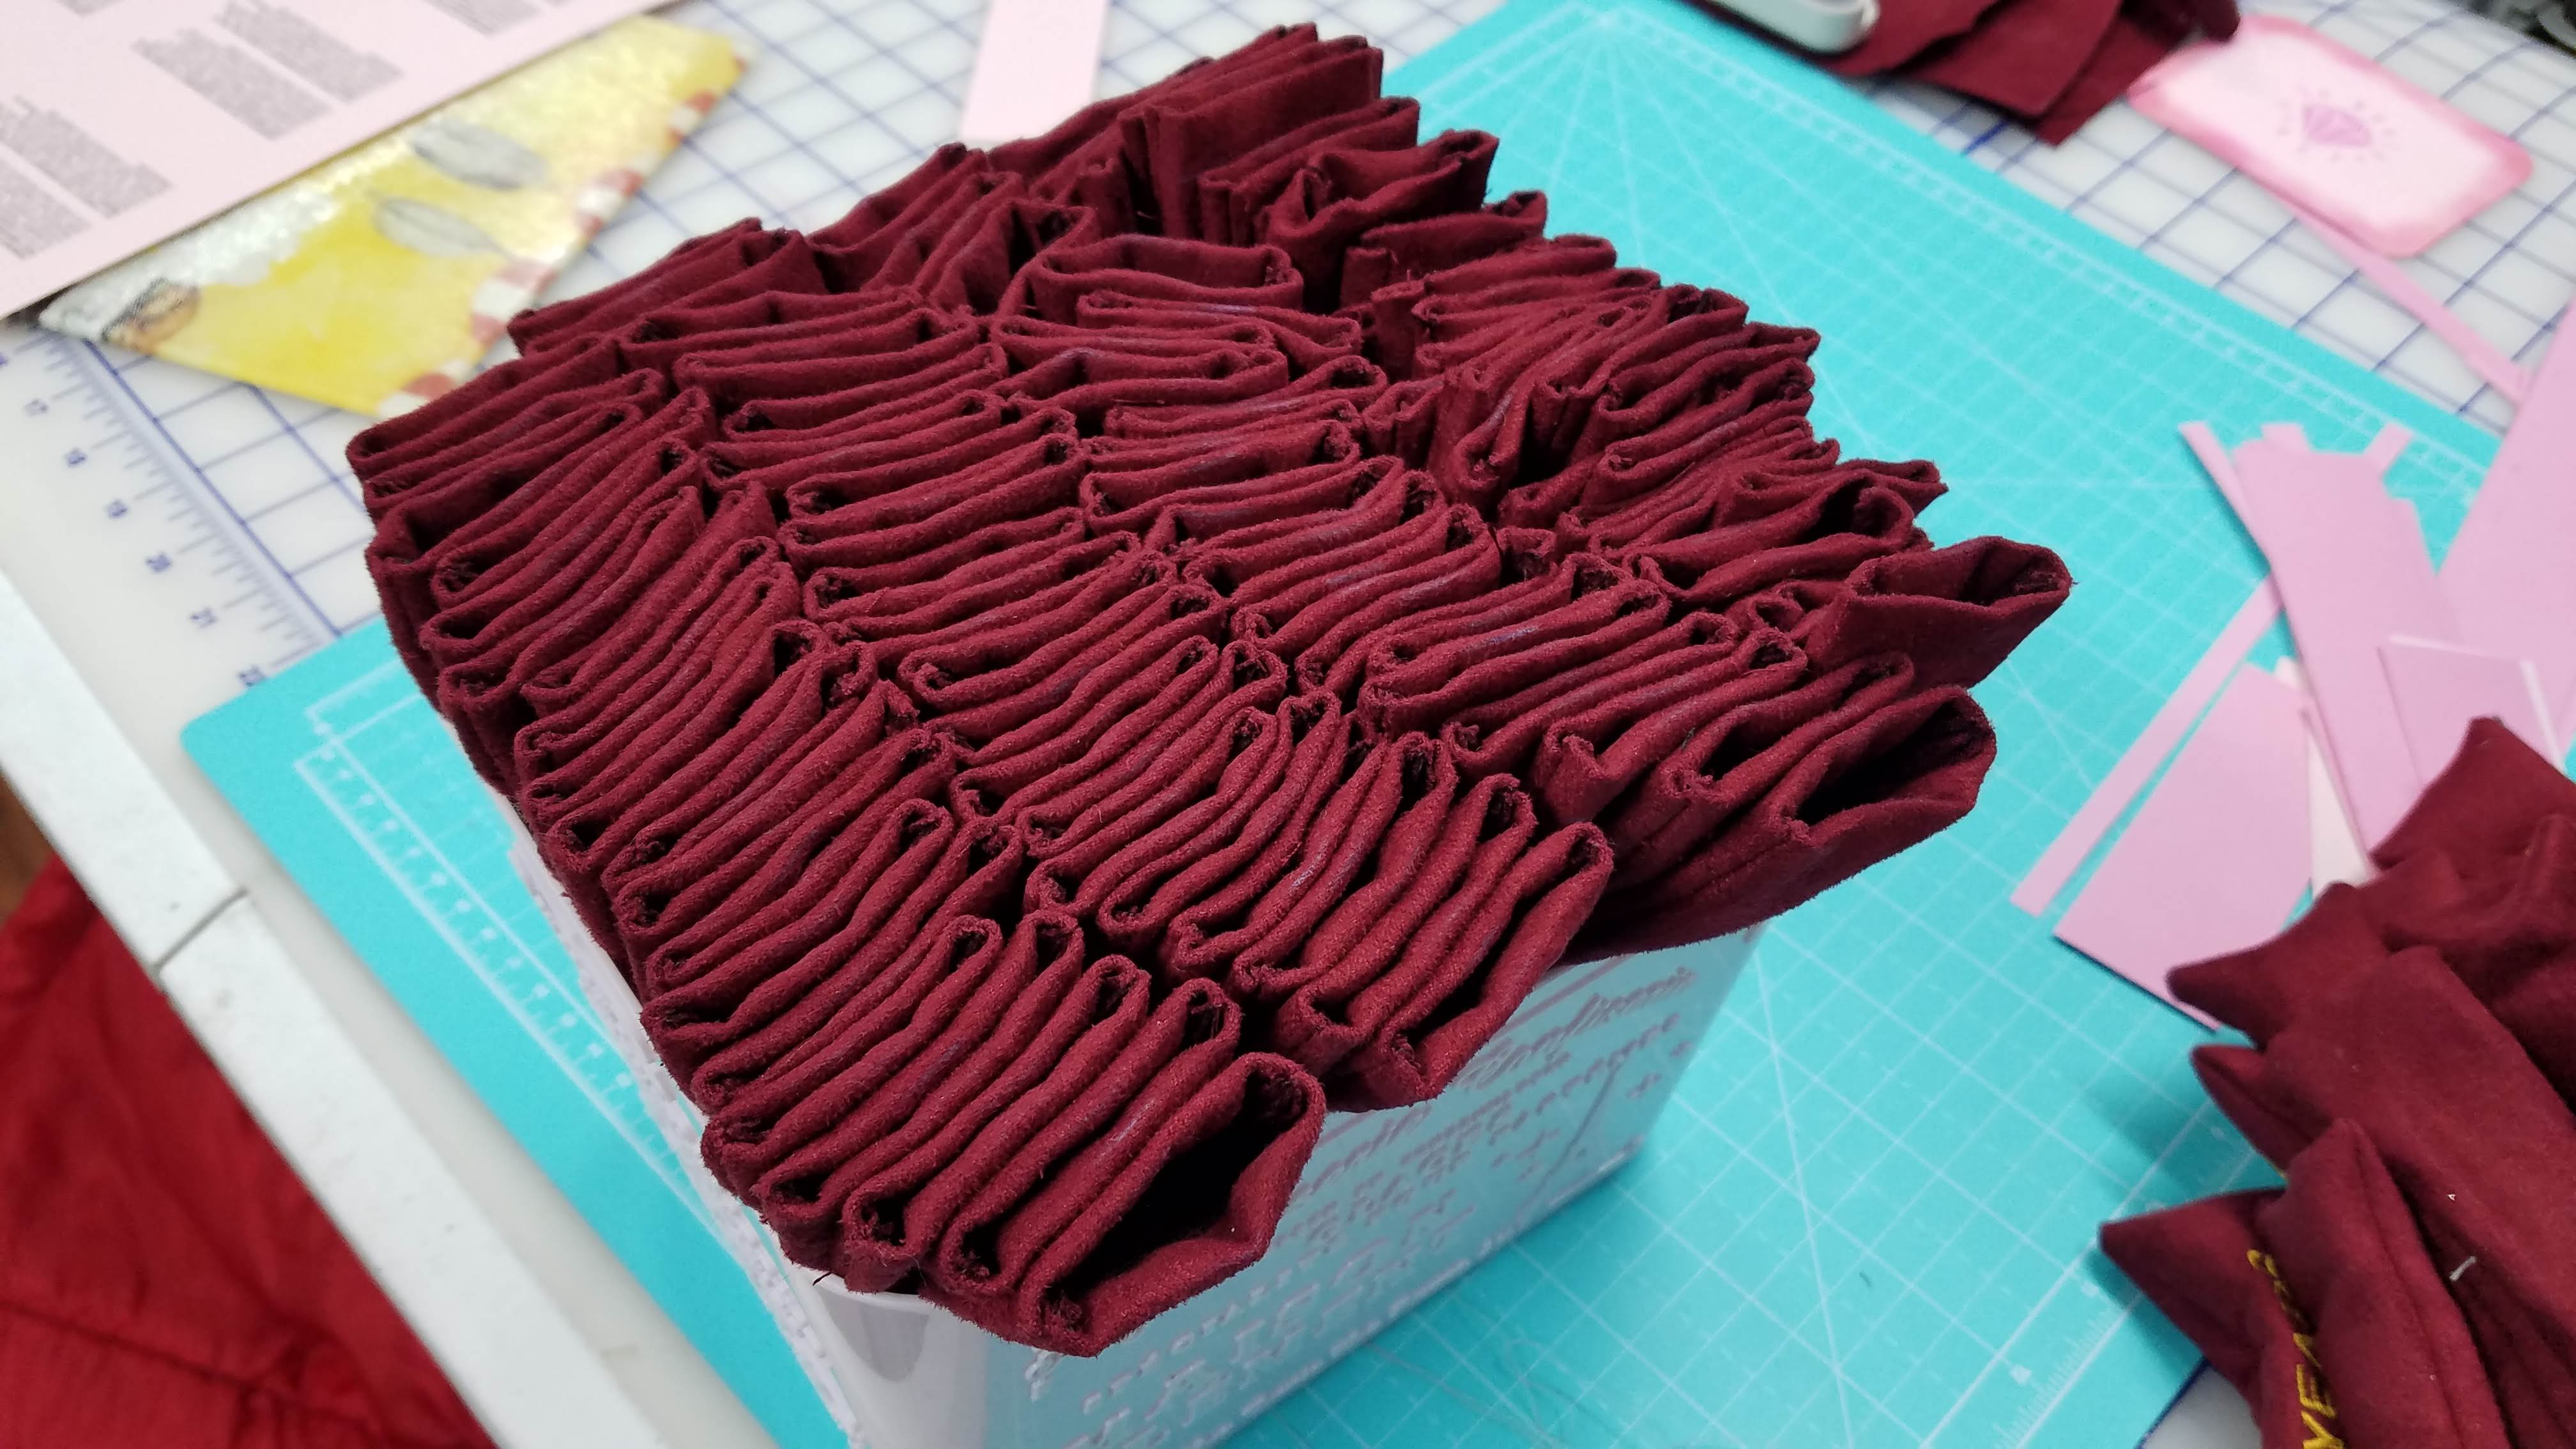
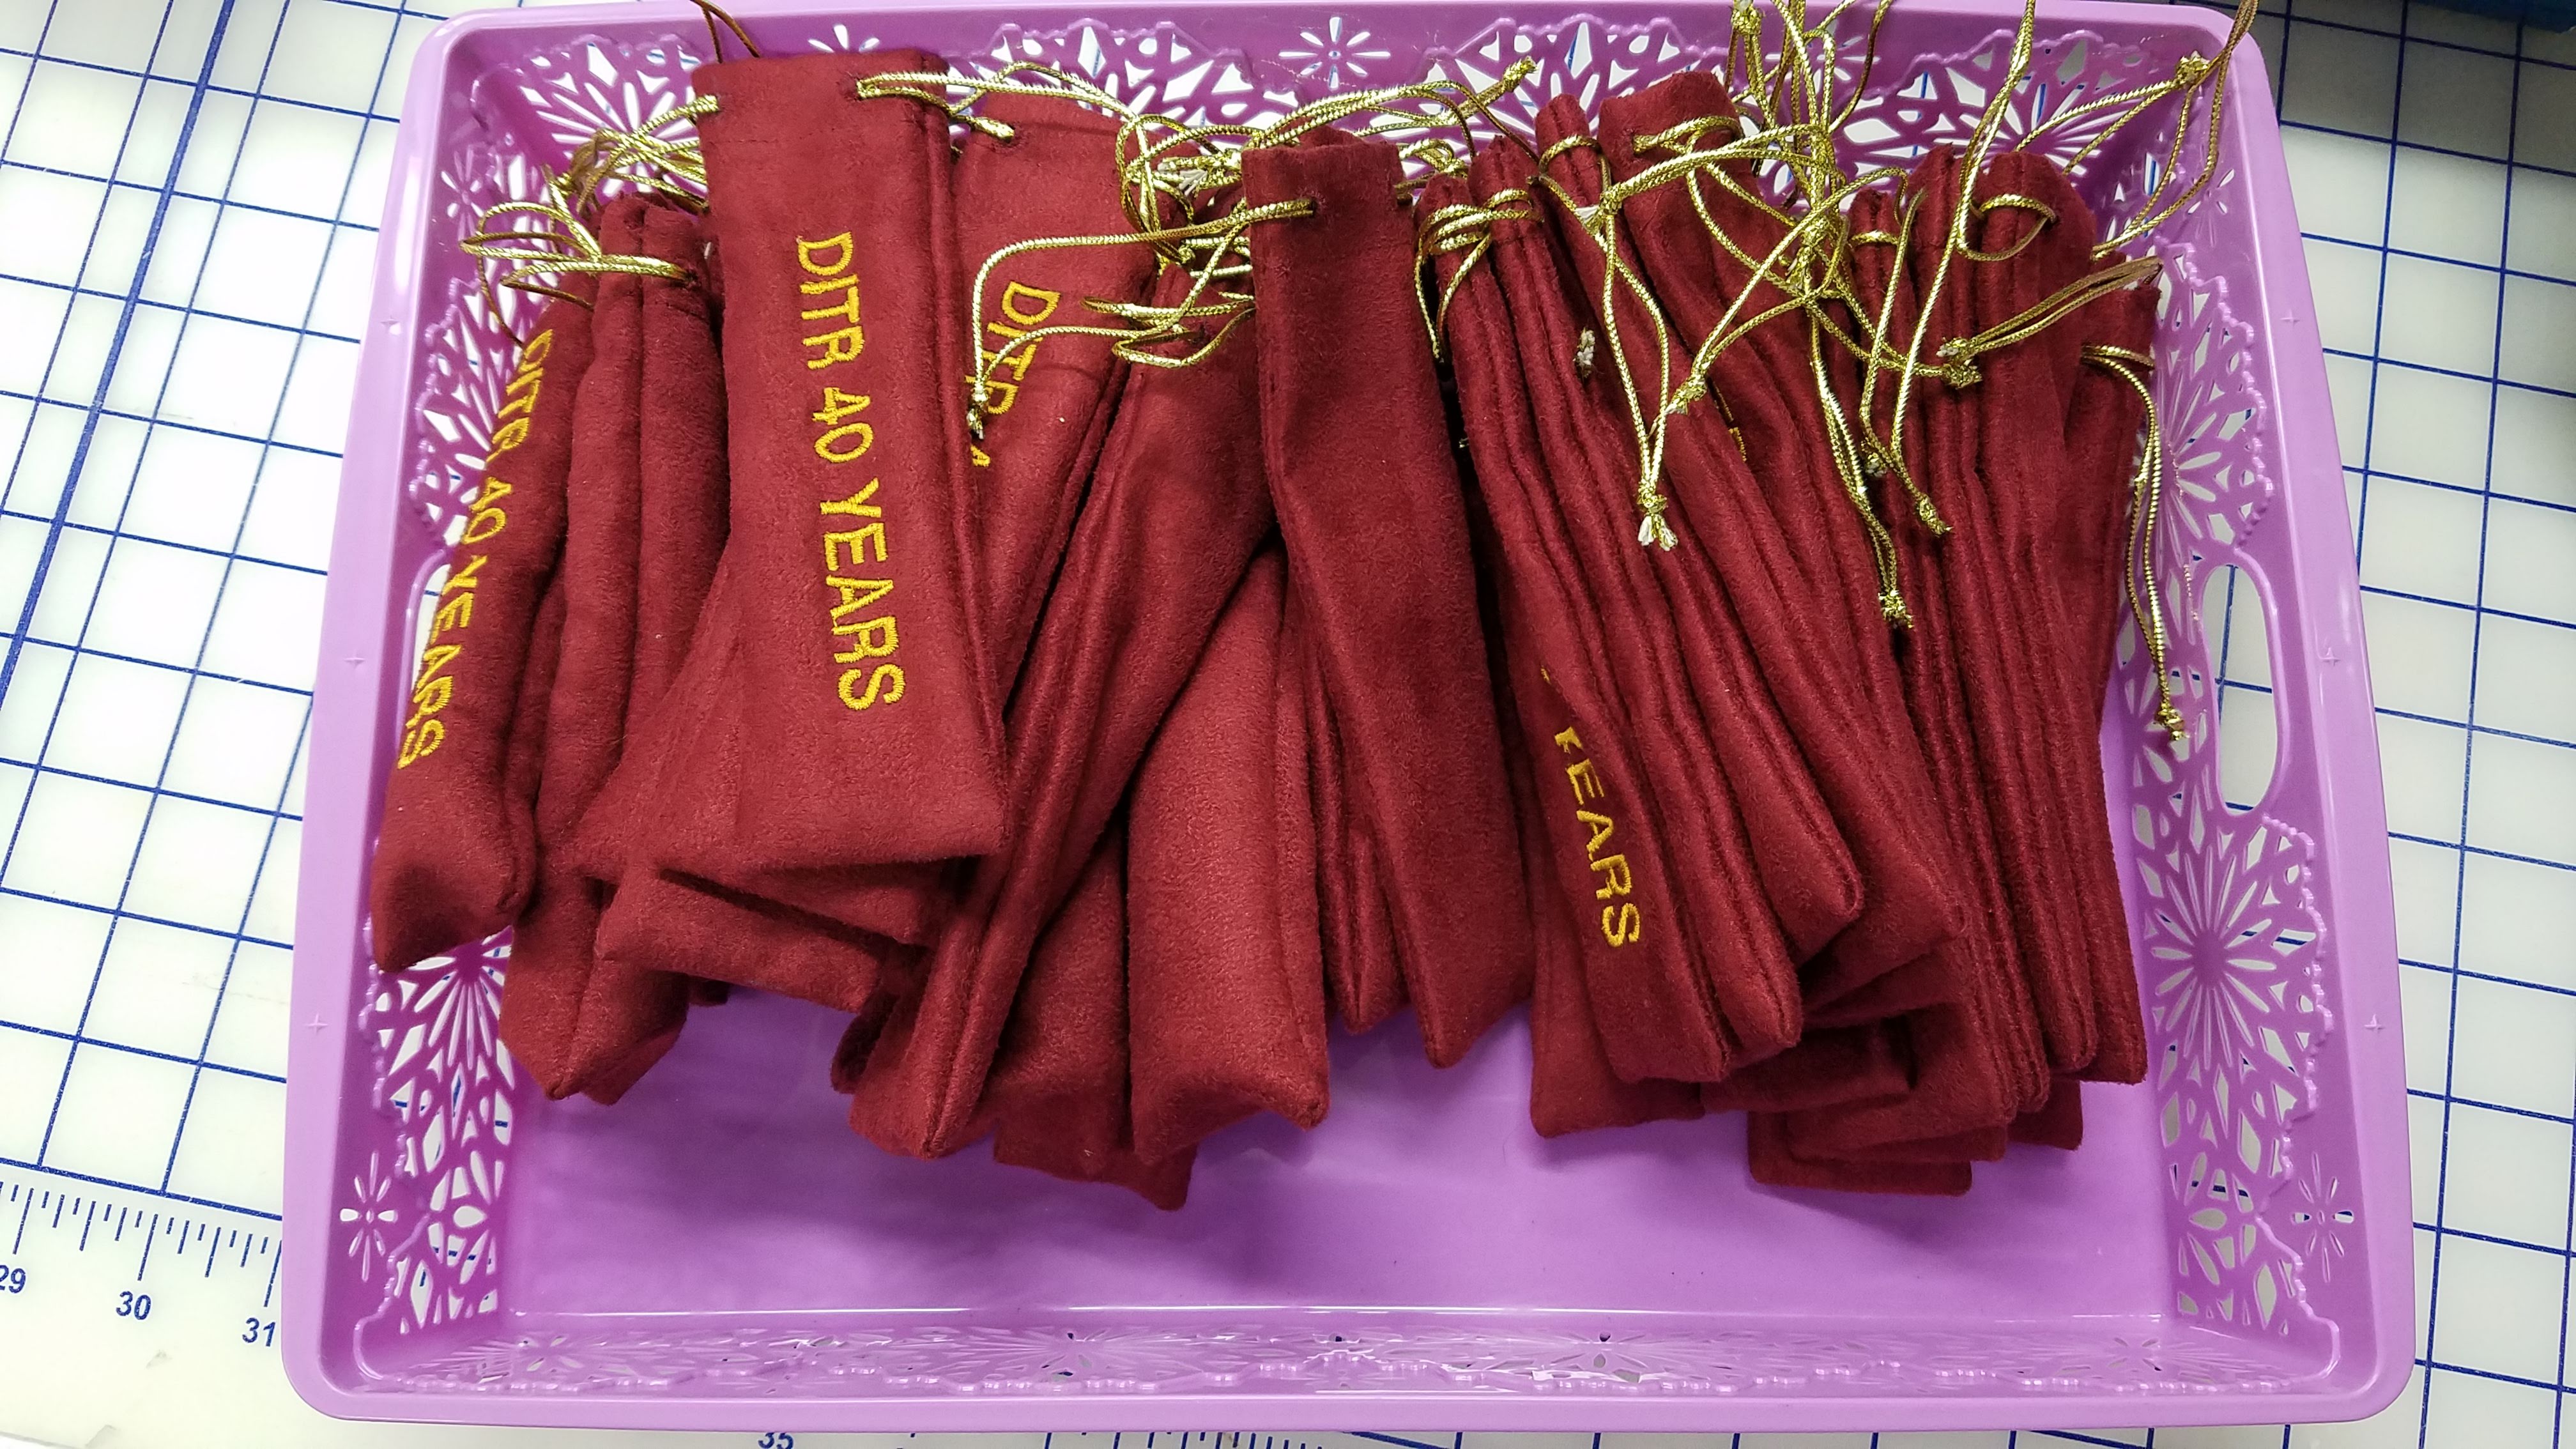
The finished bags look pretty good, if I say so myself.
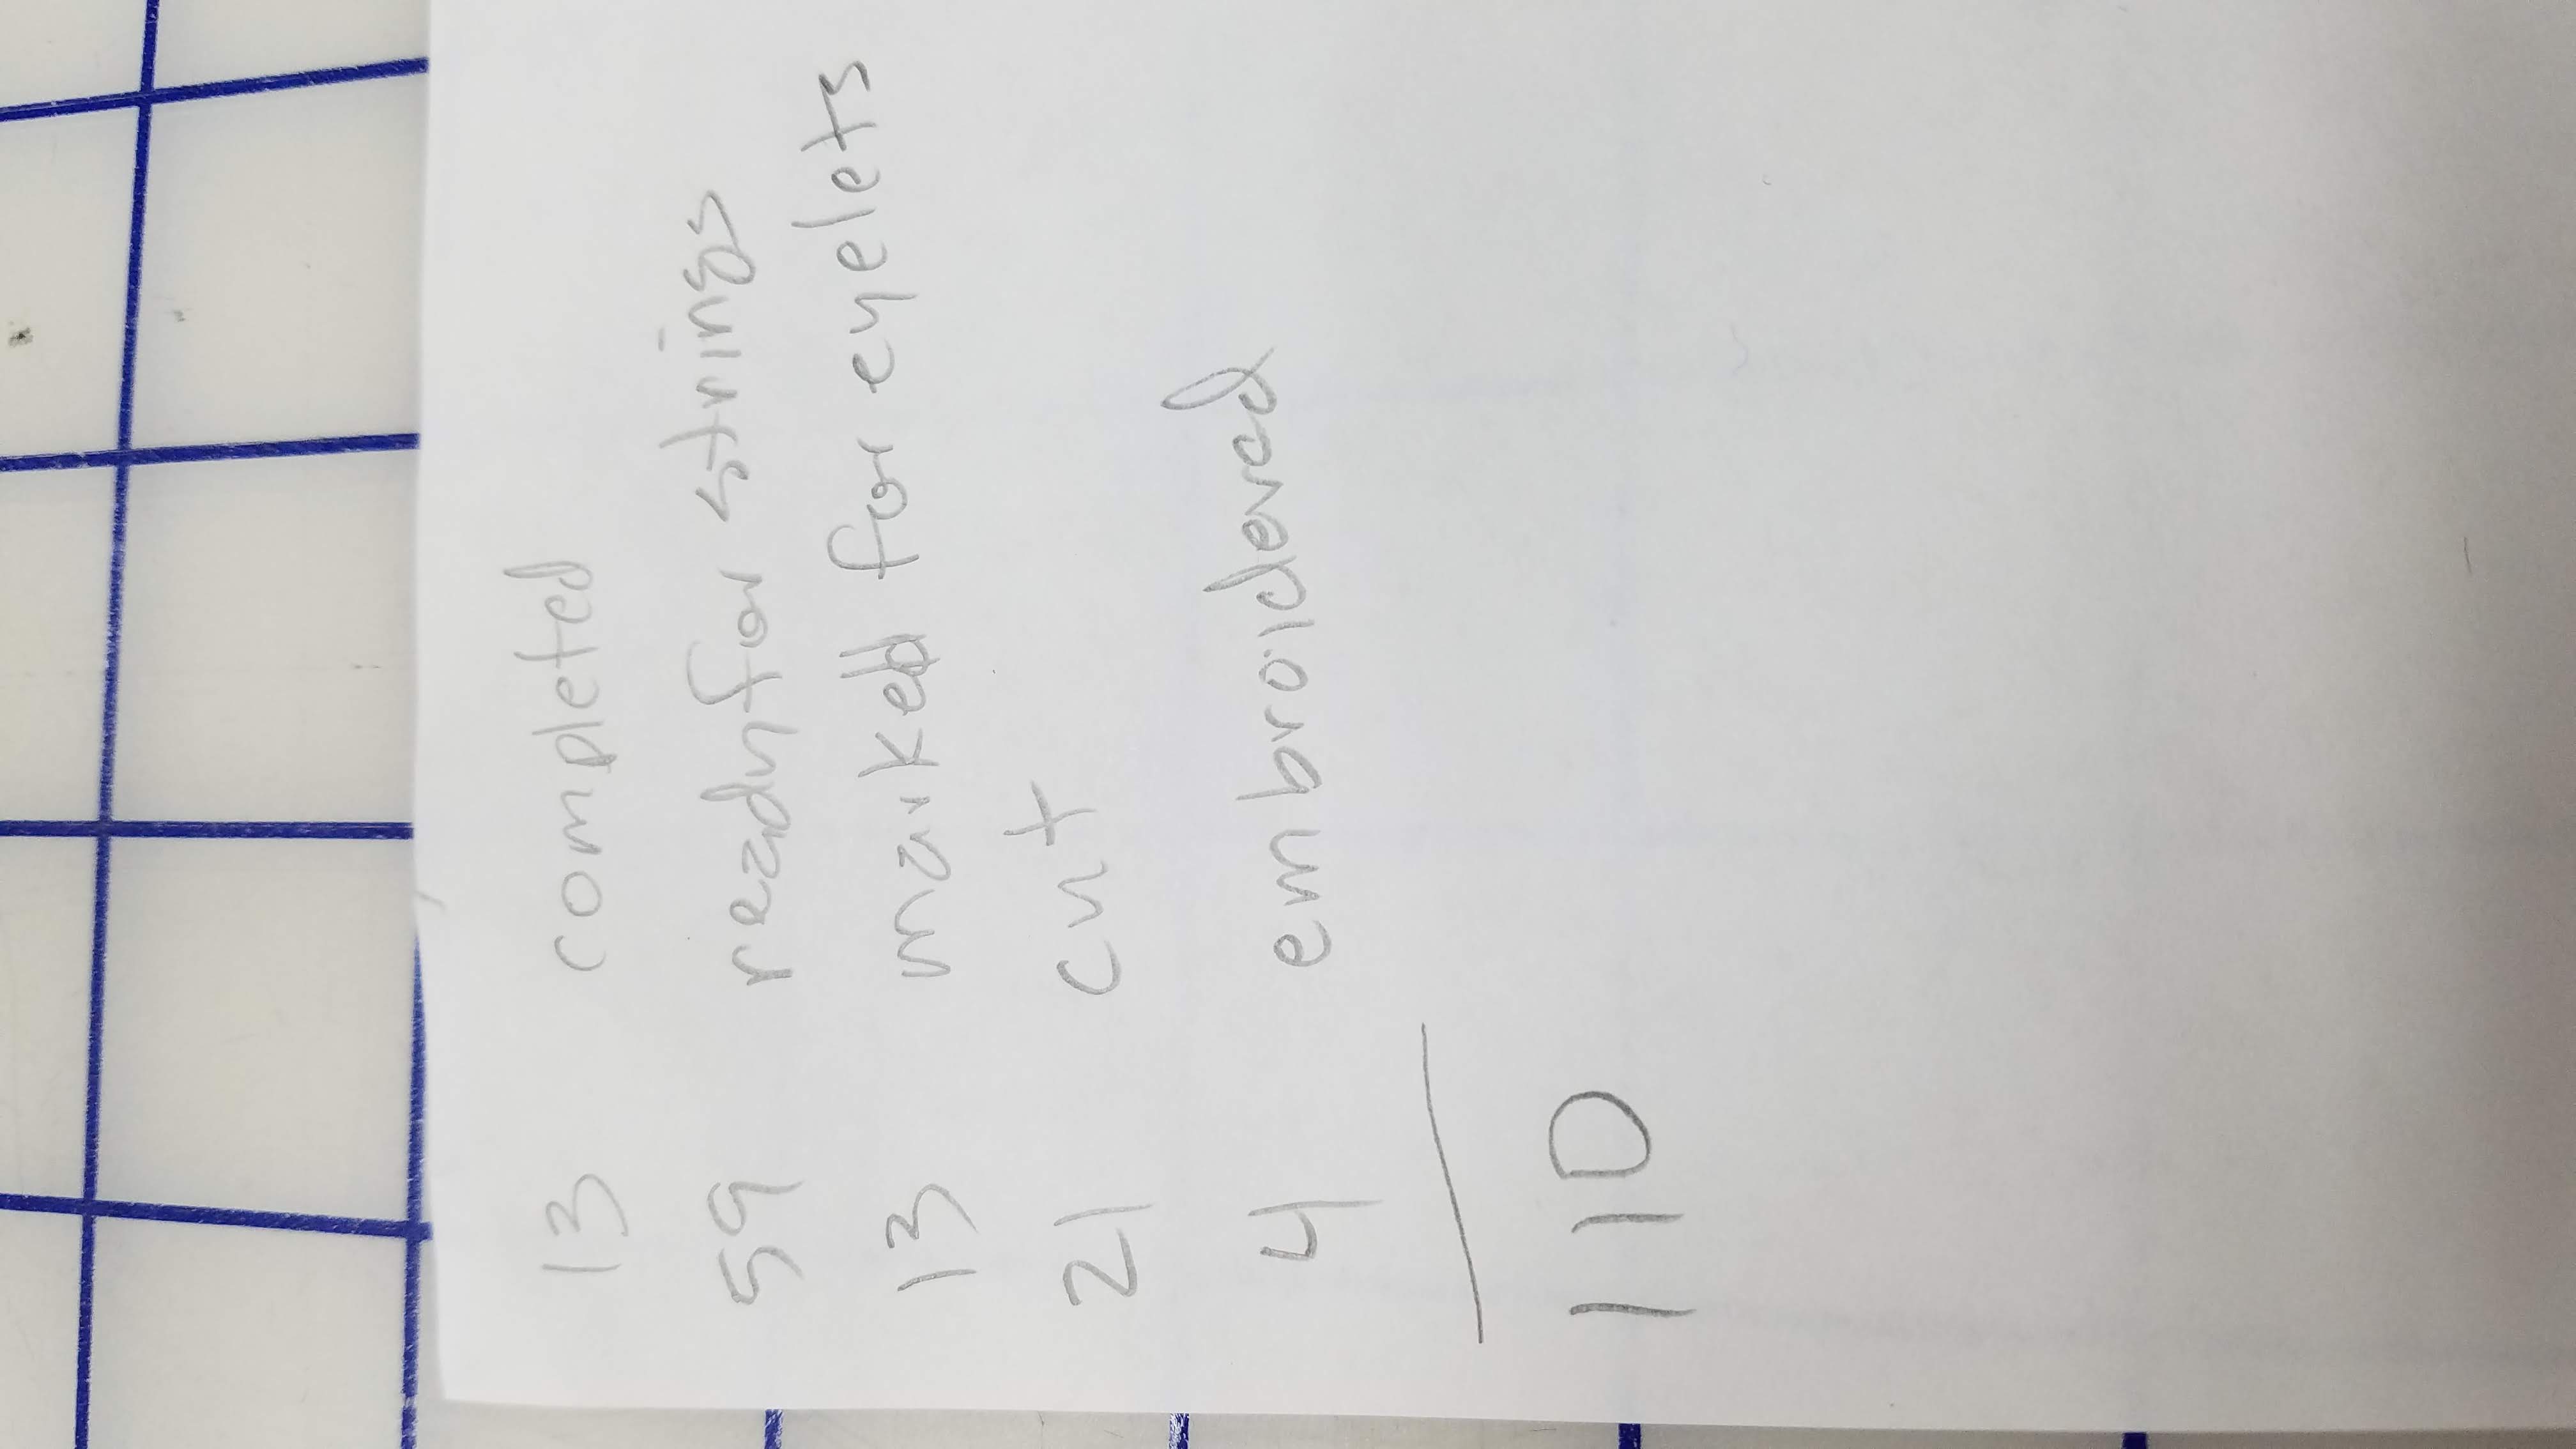
Logistically, I cut all the fabric I had and was a little short for 120 bags. Since it took 6 minutes for the embroidery machine to do each logo, I used that time to do all the other steps as far as I could until time to change the panel out for another in the machine. I thus stayed busy very nearly 100% of the time while I was in the sewing room and I made pretty good time. At first I had a dozen completed bags, then I had various other numbers of pieces in varying stages of completion. I would inventory as I finished each night.
For the last dozen, once I had more fabric in hand, I made them in much the same way. I couldn’t get quite as far ahead of the embroidery machine, though.
On the morning of delivery, I had a few bags left that still needed drawstrings, but Toni and the LGA crew finished those few as they distributed the pens into the swag bags with the rest of the goodies.
Here they are in the car, about to head to the club. I was happy to see them go!
Photo metainfo indicates that we first started turning pens in November of 2012. I can only estimate that in the intervening 6 years, I have made somewhere around 200 pens. Well, until a recent order which adds 50% to that figure.
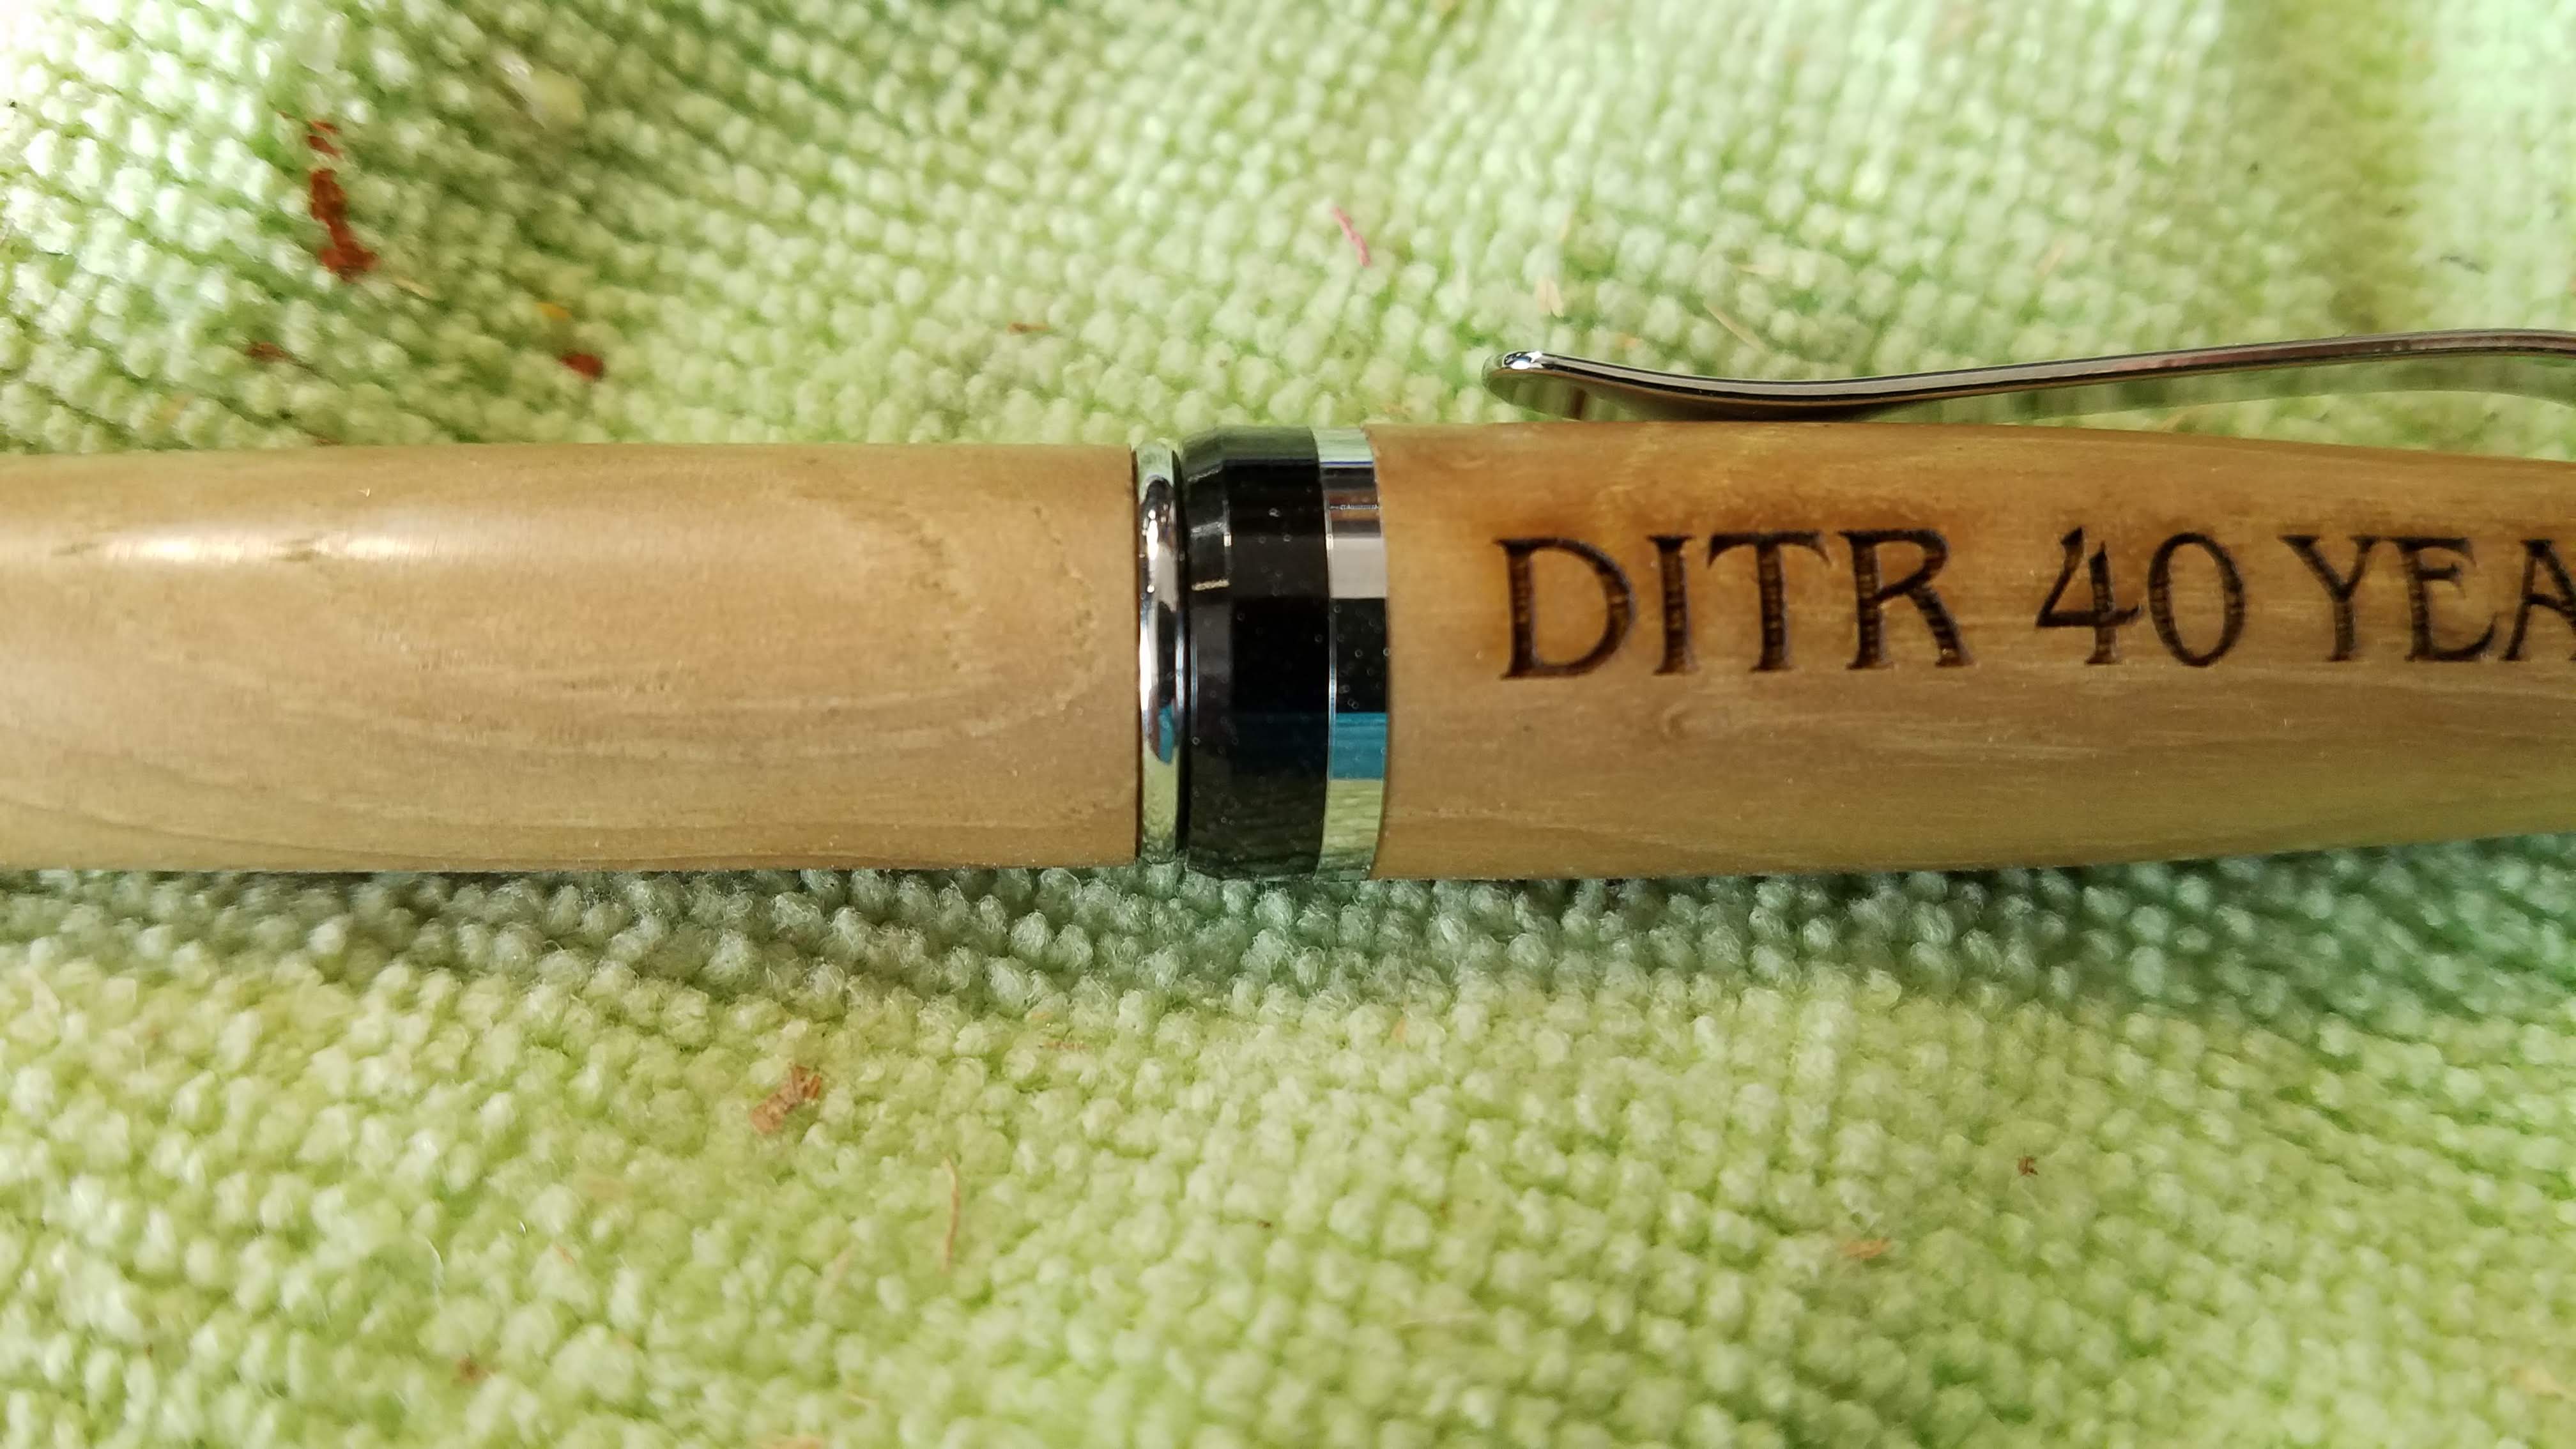
My wife is a golfer and her club has an annual charity golf tournament. This year is the 40th anniversary of said tournament, so they were looking for special items to include in the swag bags for 100 players.
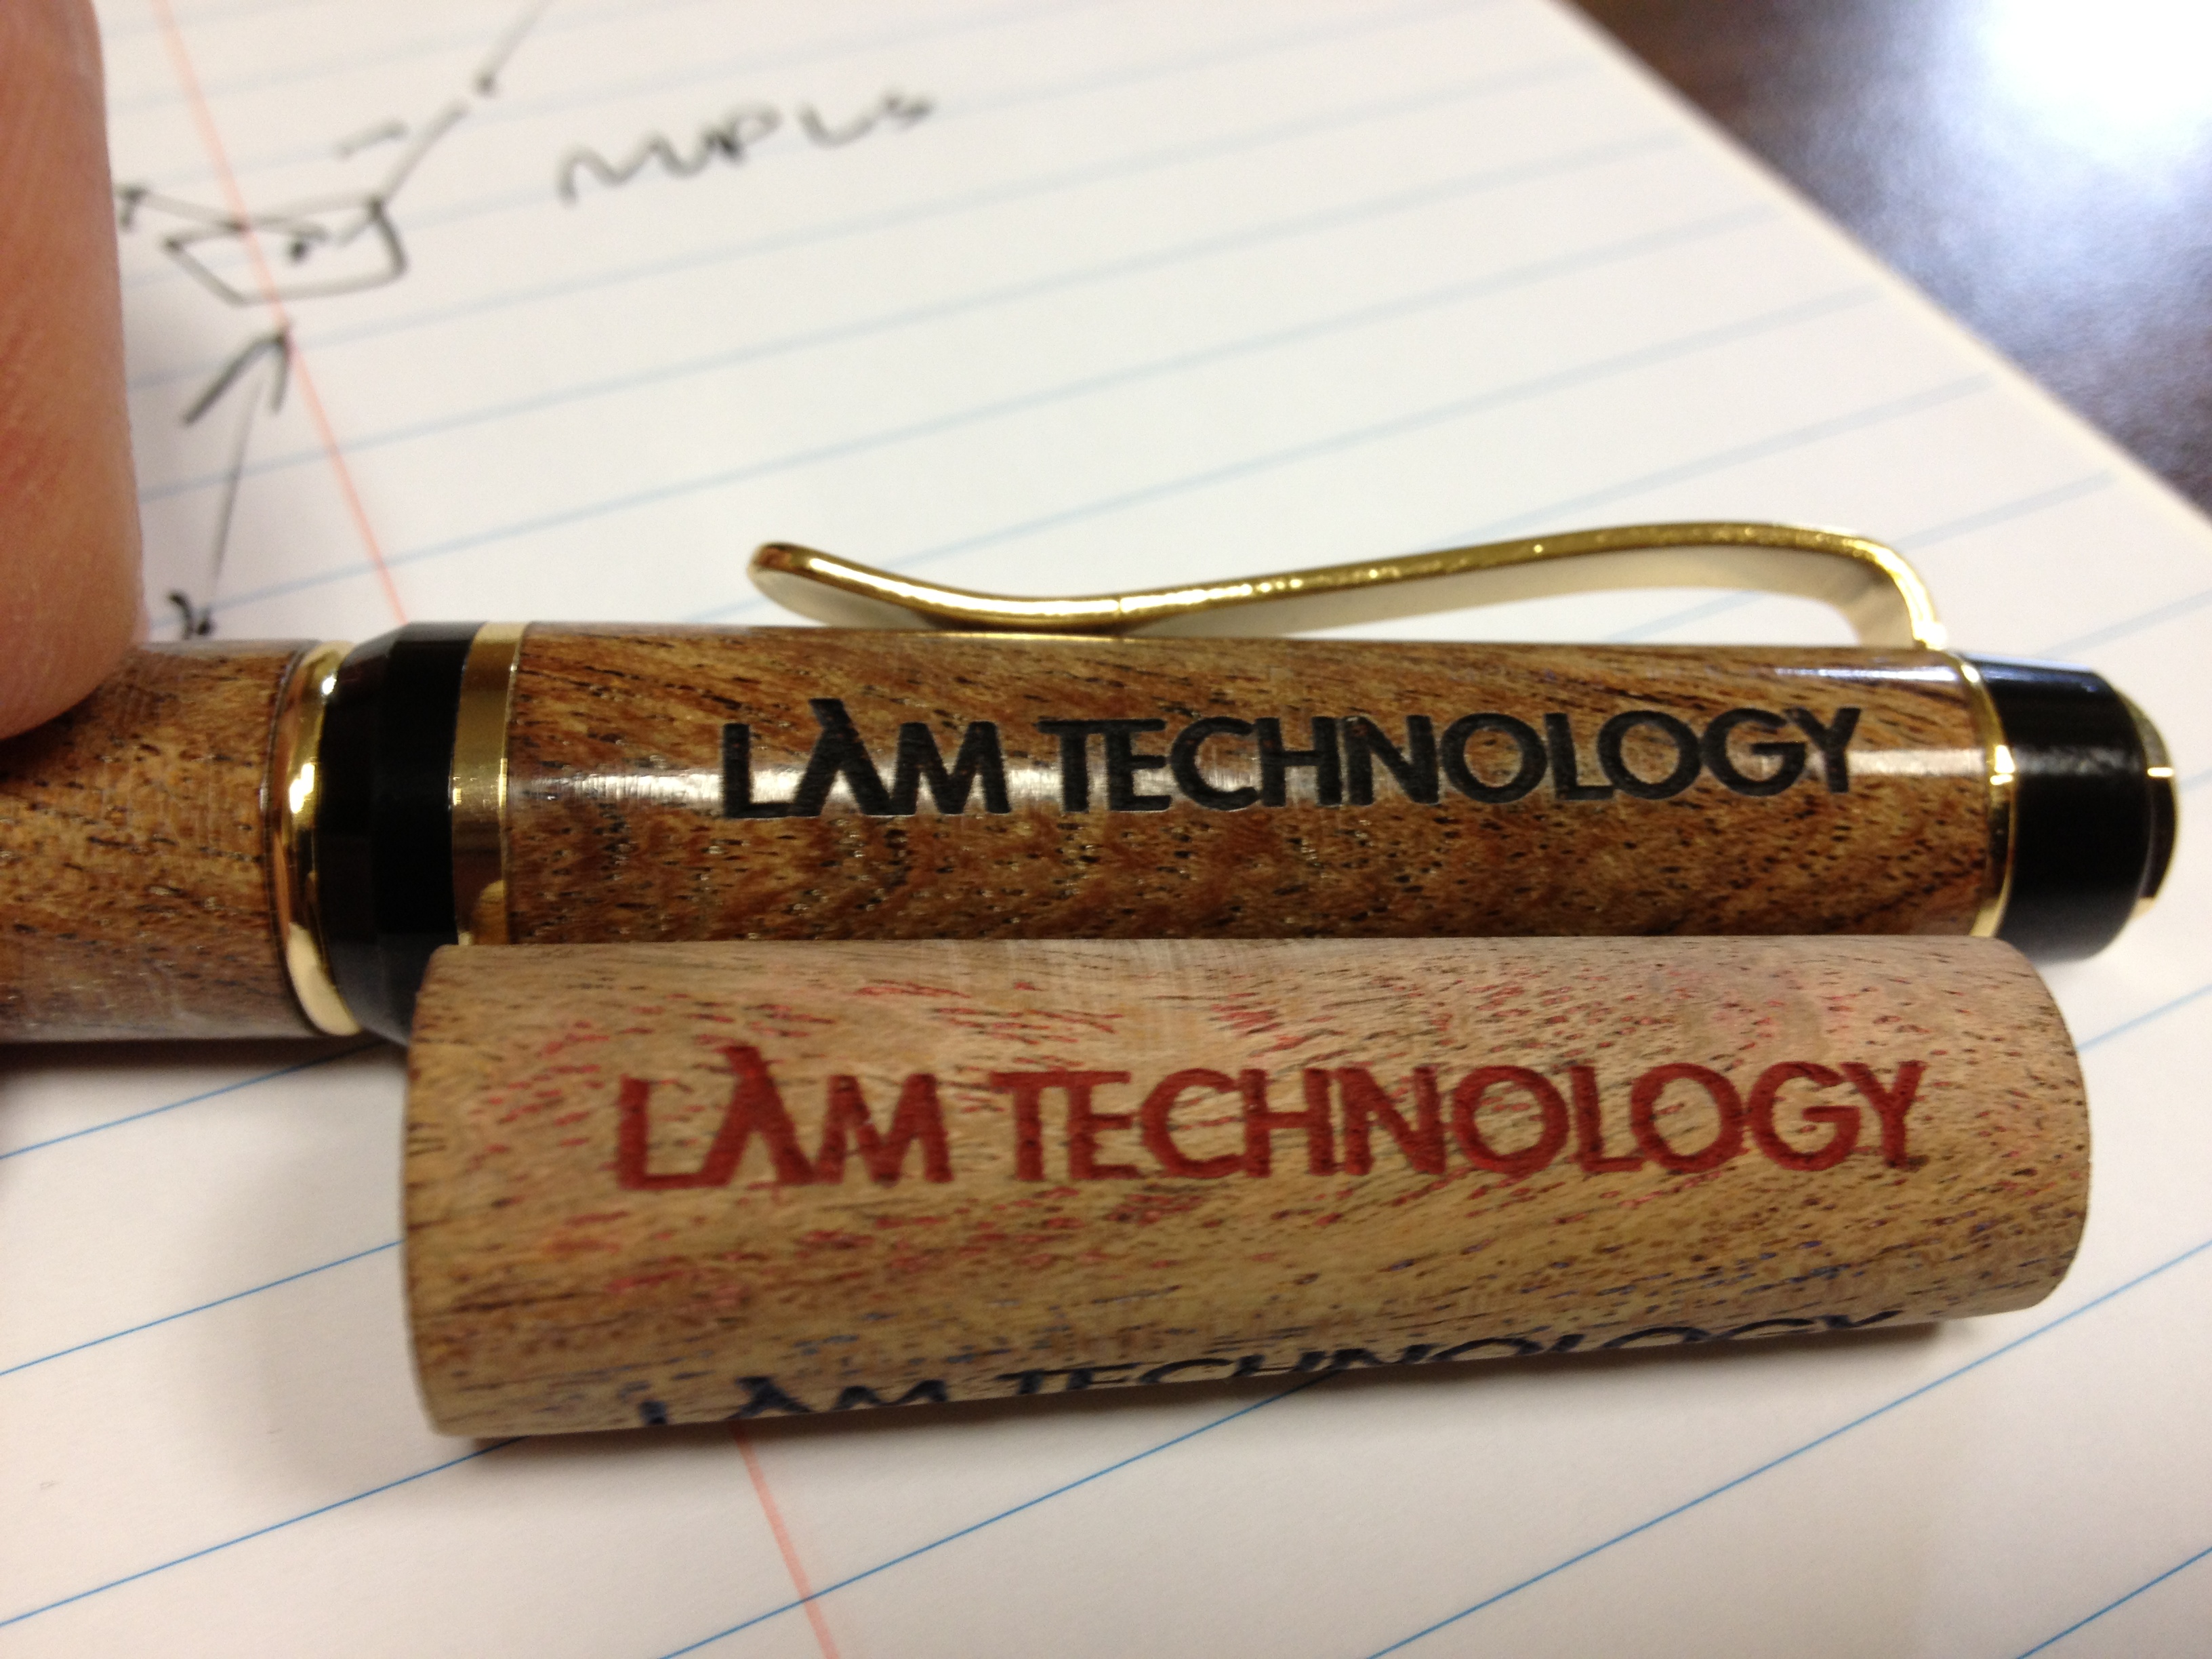
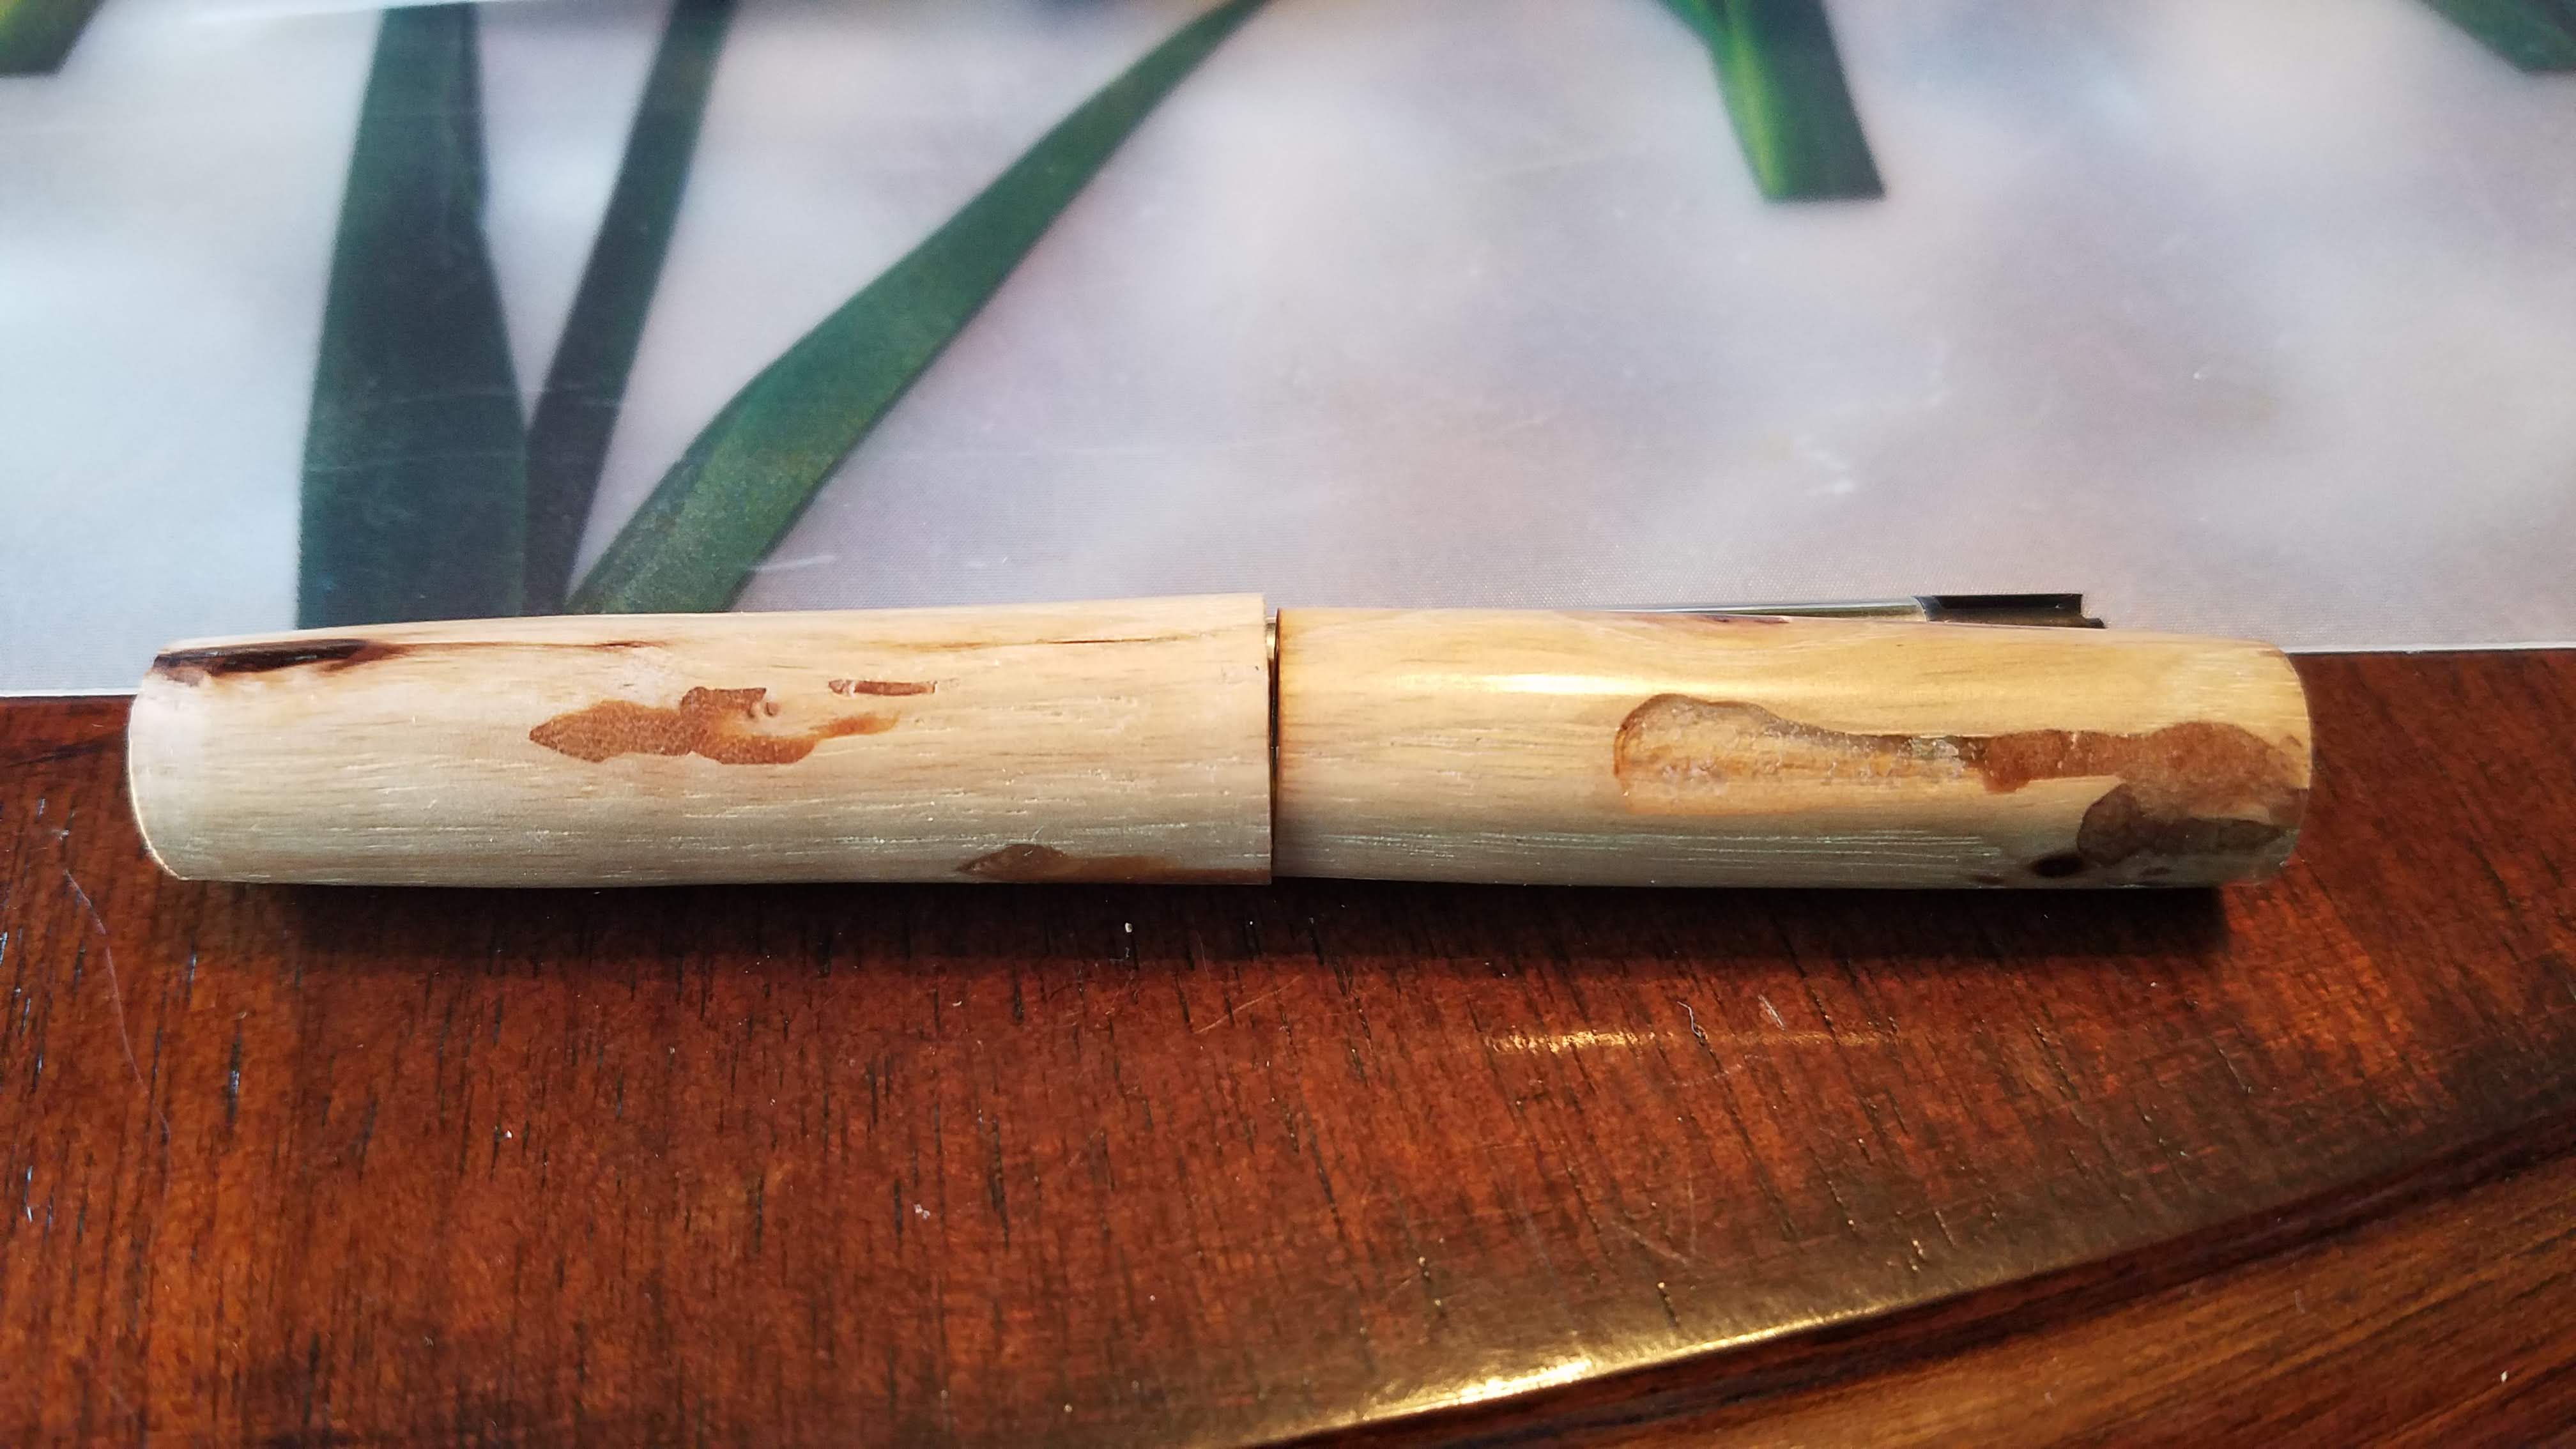
Pens were a natural for us to suggest and to make it more special, we made them from wood from the golf course, mostly fallen branches.
Turns out that, within some limitations, the more diseased and damaged the branch is, the more interesting and beautiful the pen is.
Most of the time, I make pens one at a time or on rare occasions, I may suspend work on a pen for a bit while I make another, usually for rush orders or other such logistical reasons.
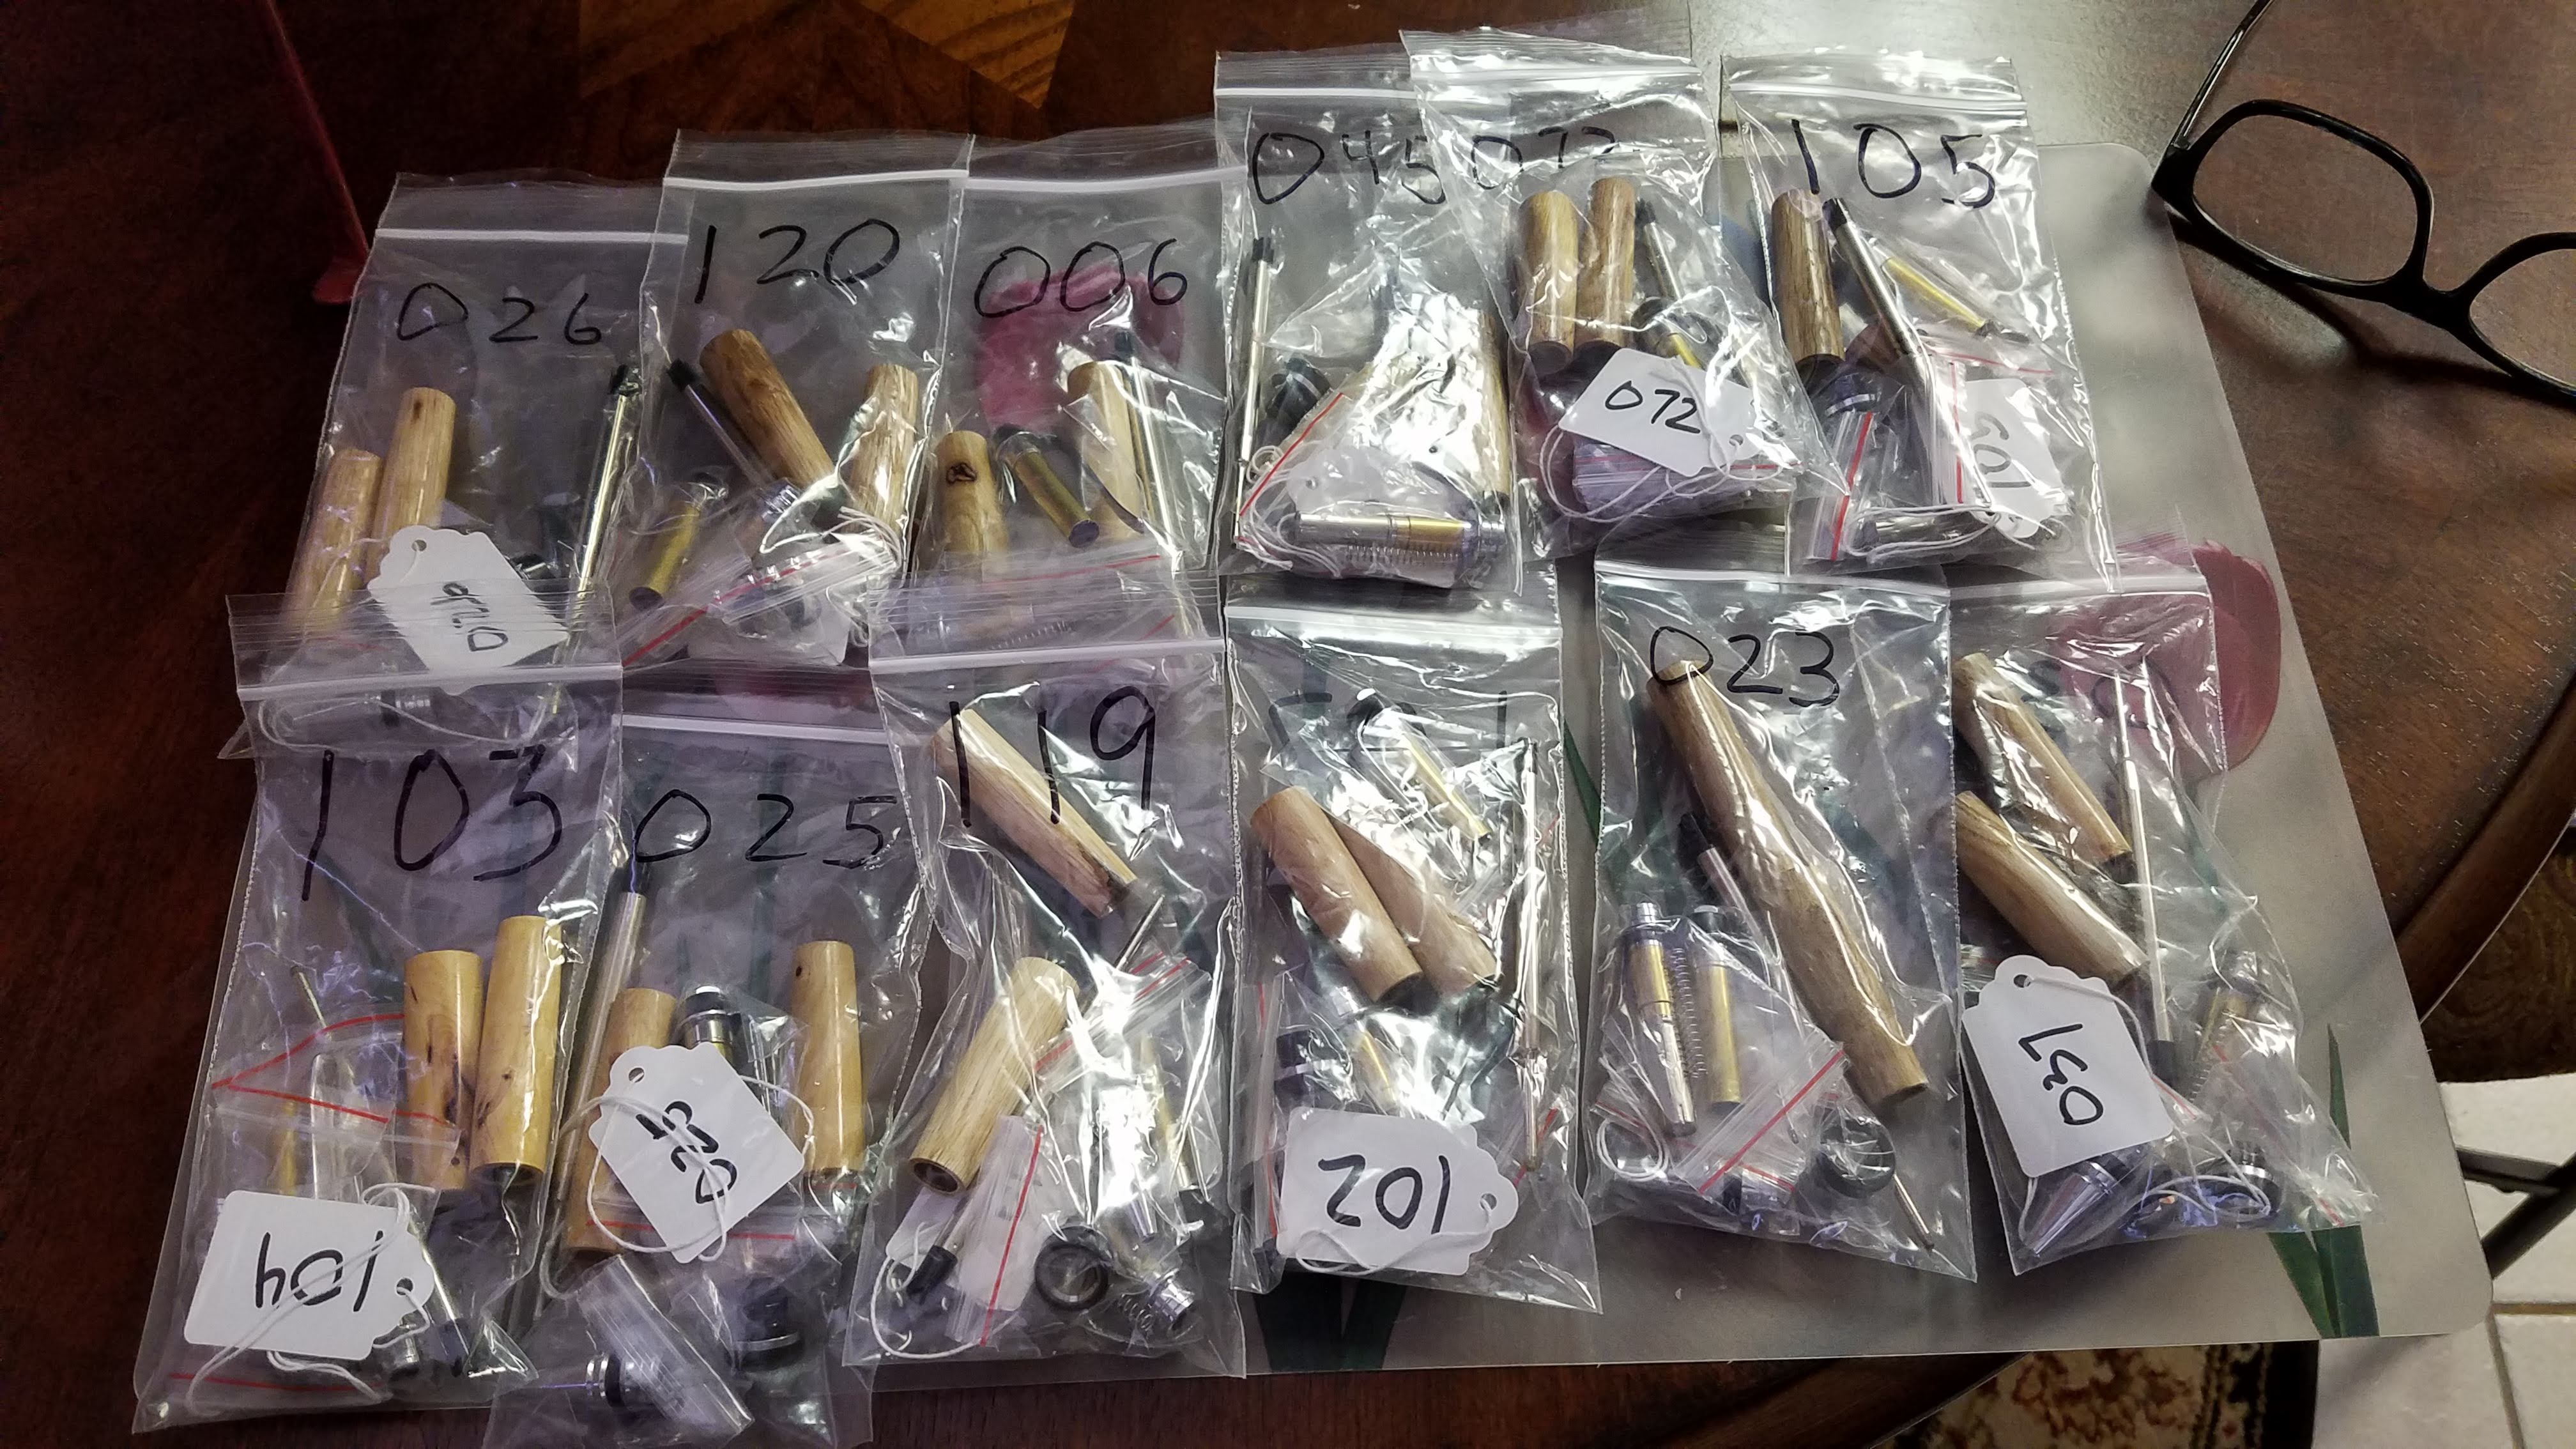
I made an order of 10 pens once. They were all turned from mesquite and they all had a company logo engraved on the cap. They each went back to the engraver later to have individual names engraved. I kept the units separated in a divided container and matched the parts up visually when the caps came back from from the logo engraving.
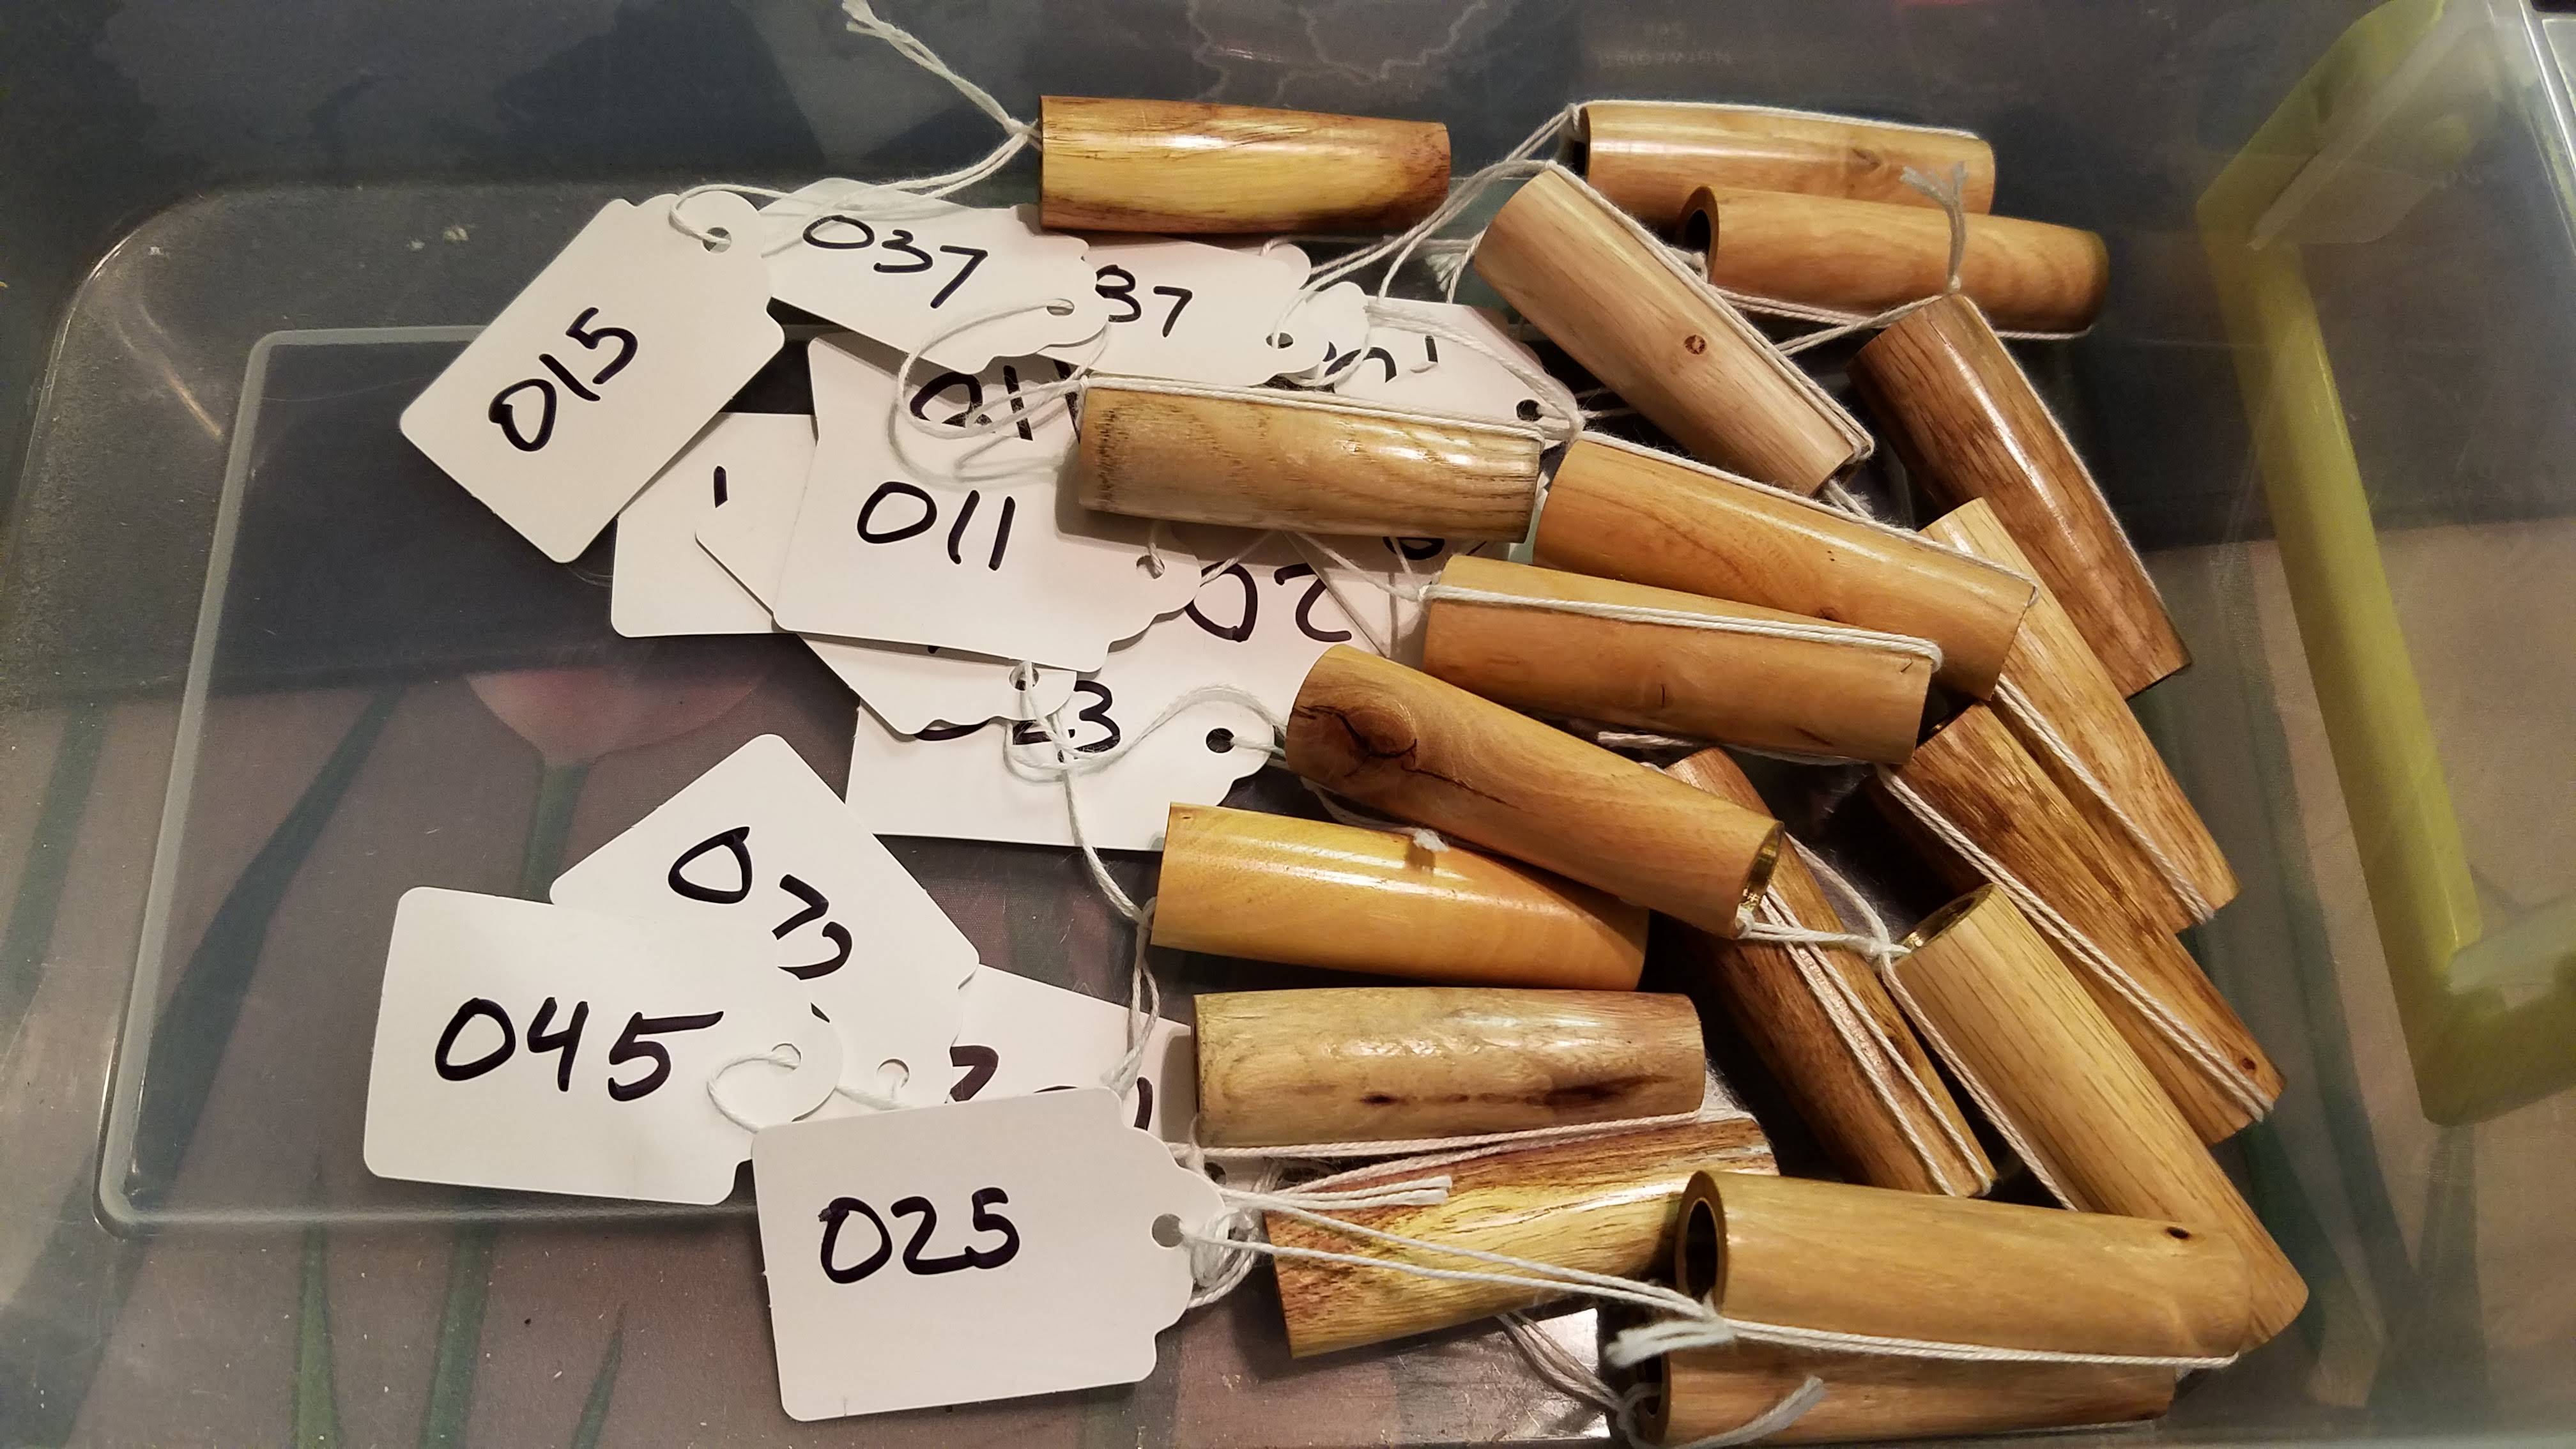
I knew that making 100 pens was going to need better organization. So, before I got started, I ordered tags and bags. 1.75 x 1.093 inch string tags and 3″ x 6″ 2 mil Zipper Reclosable Plastic Bags. I suppose ZipLoc is a brand 🙂
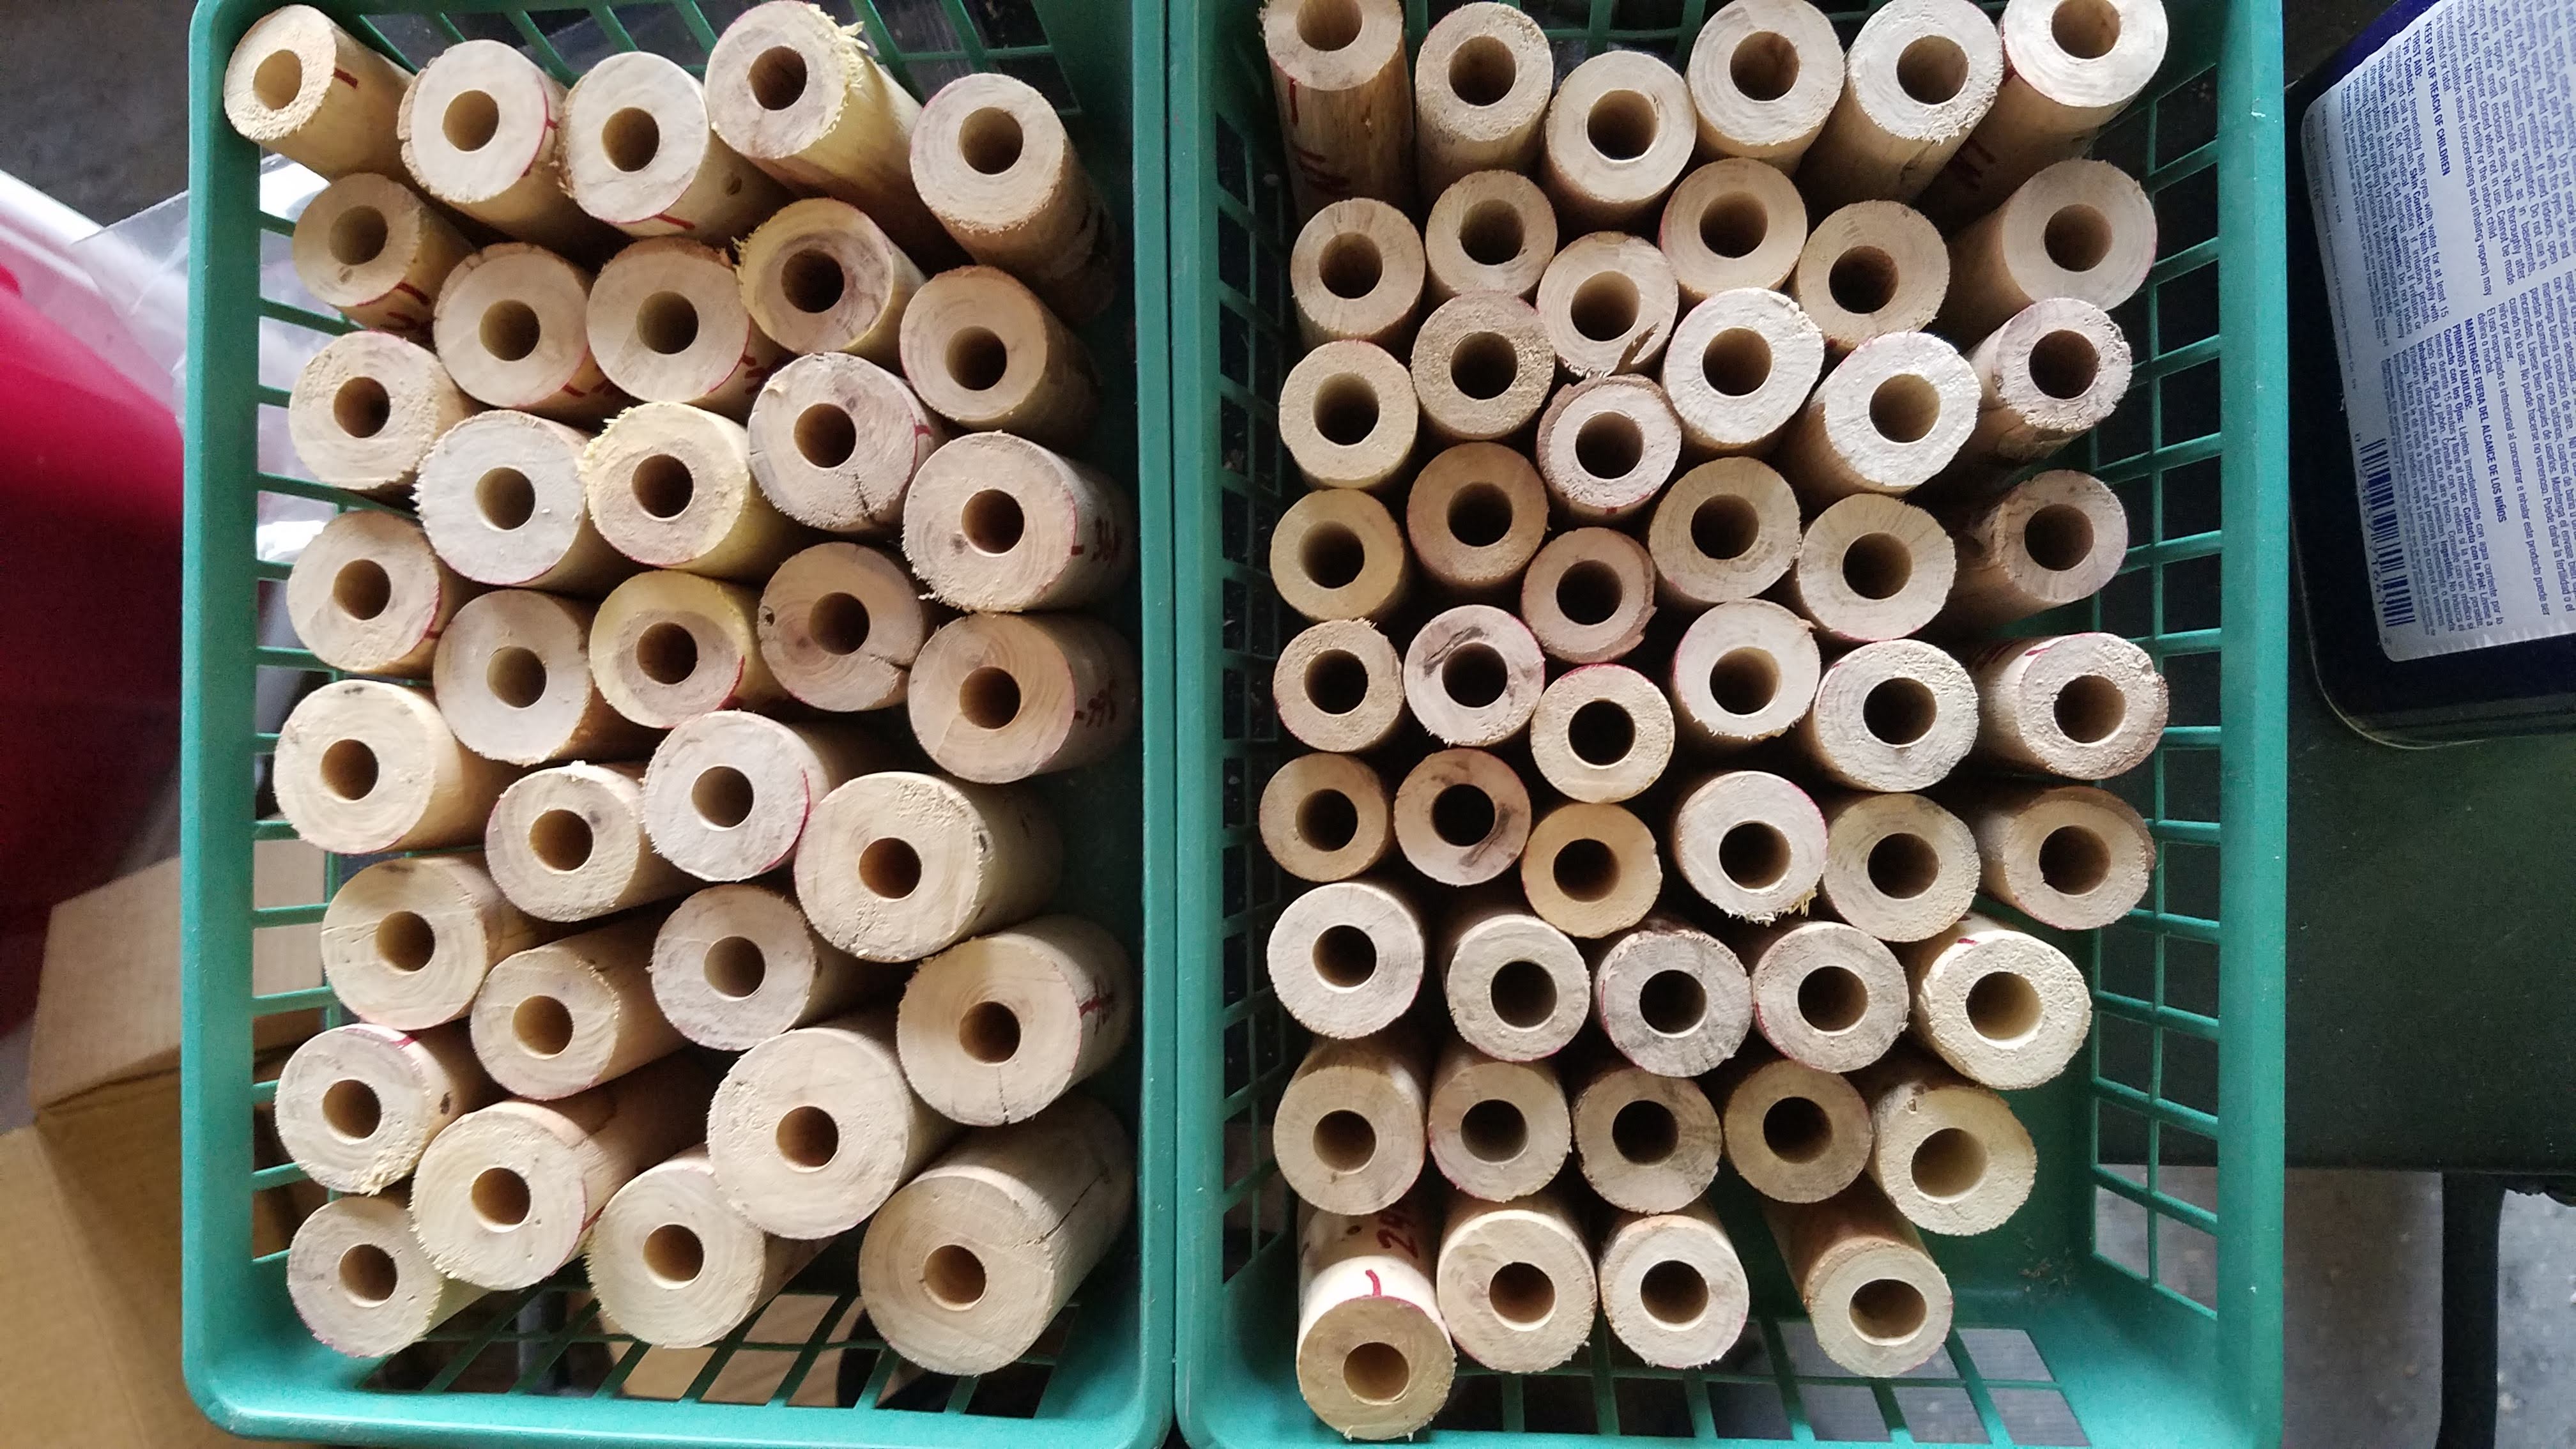
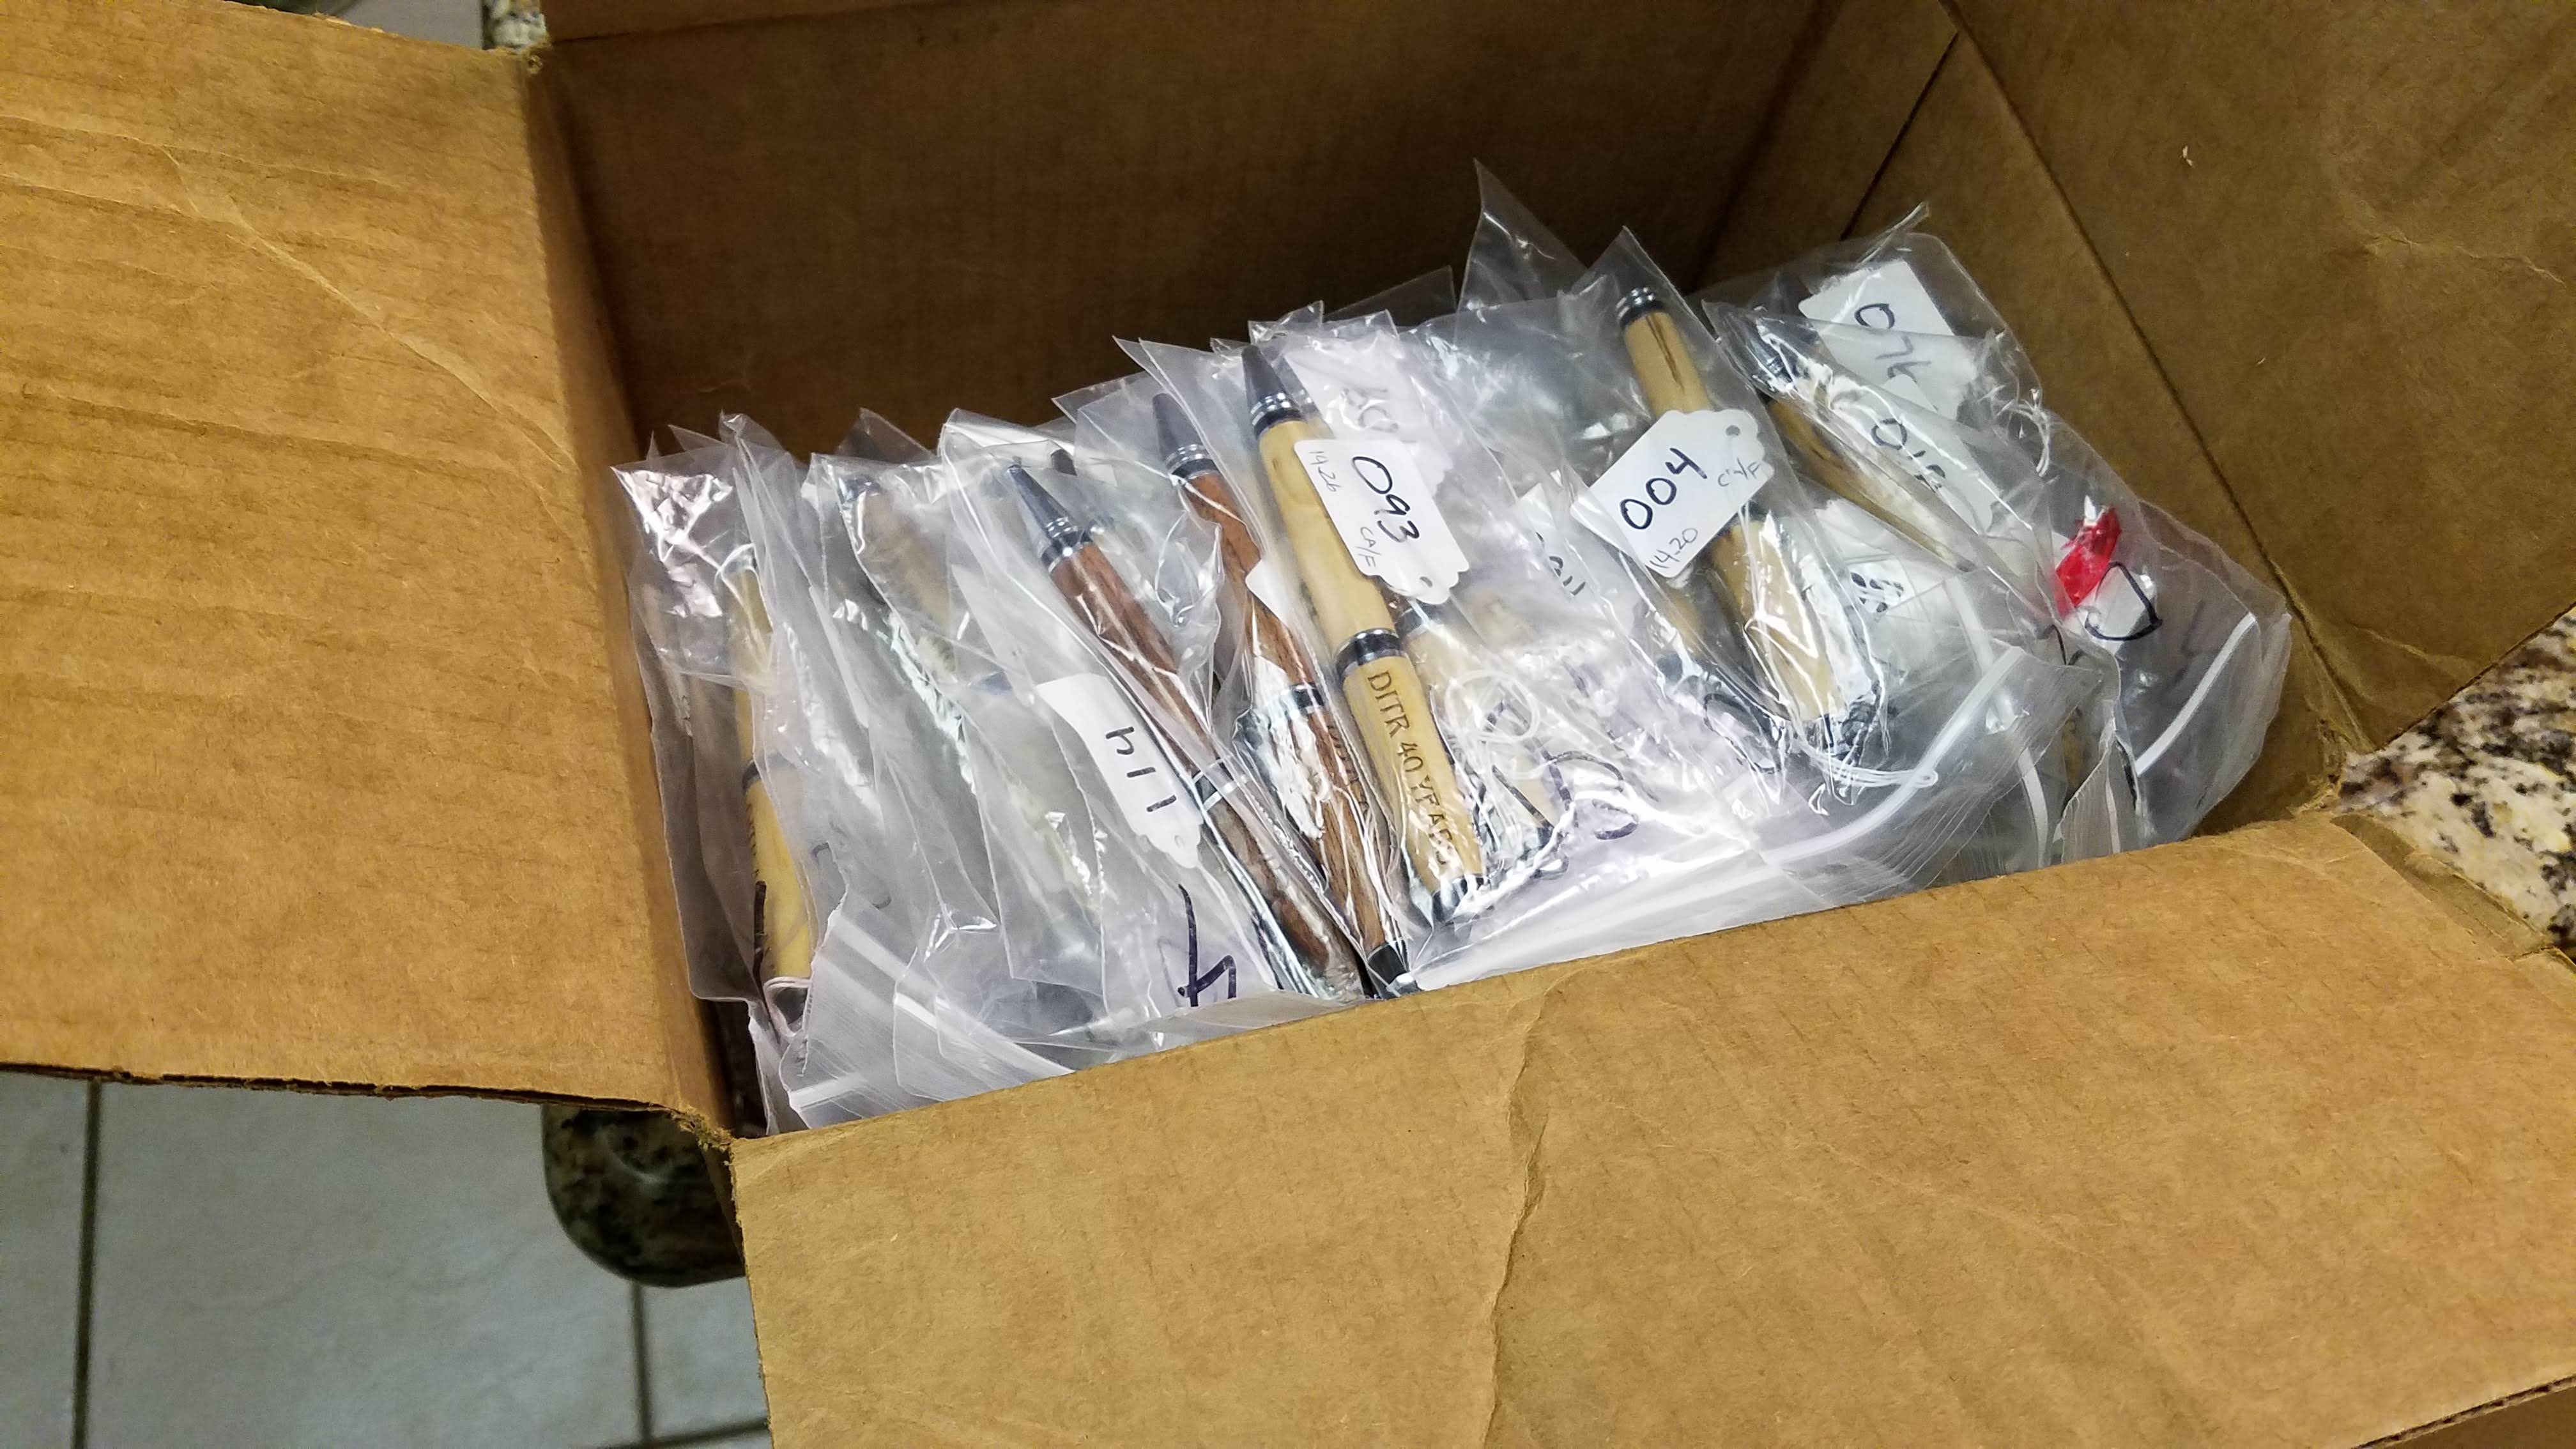
I used a Sharpie brand permanent marker 🙂 to number bags 001 through 100; likewise for string tags. I then ordered 100 Cigar pen kits from Craft Supplies USA. When they came in, I took the kits apart, putting the tubes in separate bags and putting the rest of the kit parts and the string tag in the numbered bags and finally putting the now numbered kits in a box.
The wood selection was complicated. We had been gathering fallen branches at a low rate well before the pen order came to be, but accelerated once it was decided to use wood from the golf course for the pens.
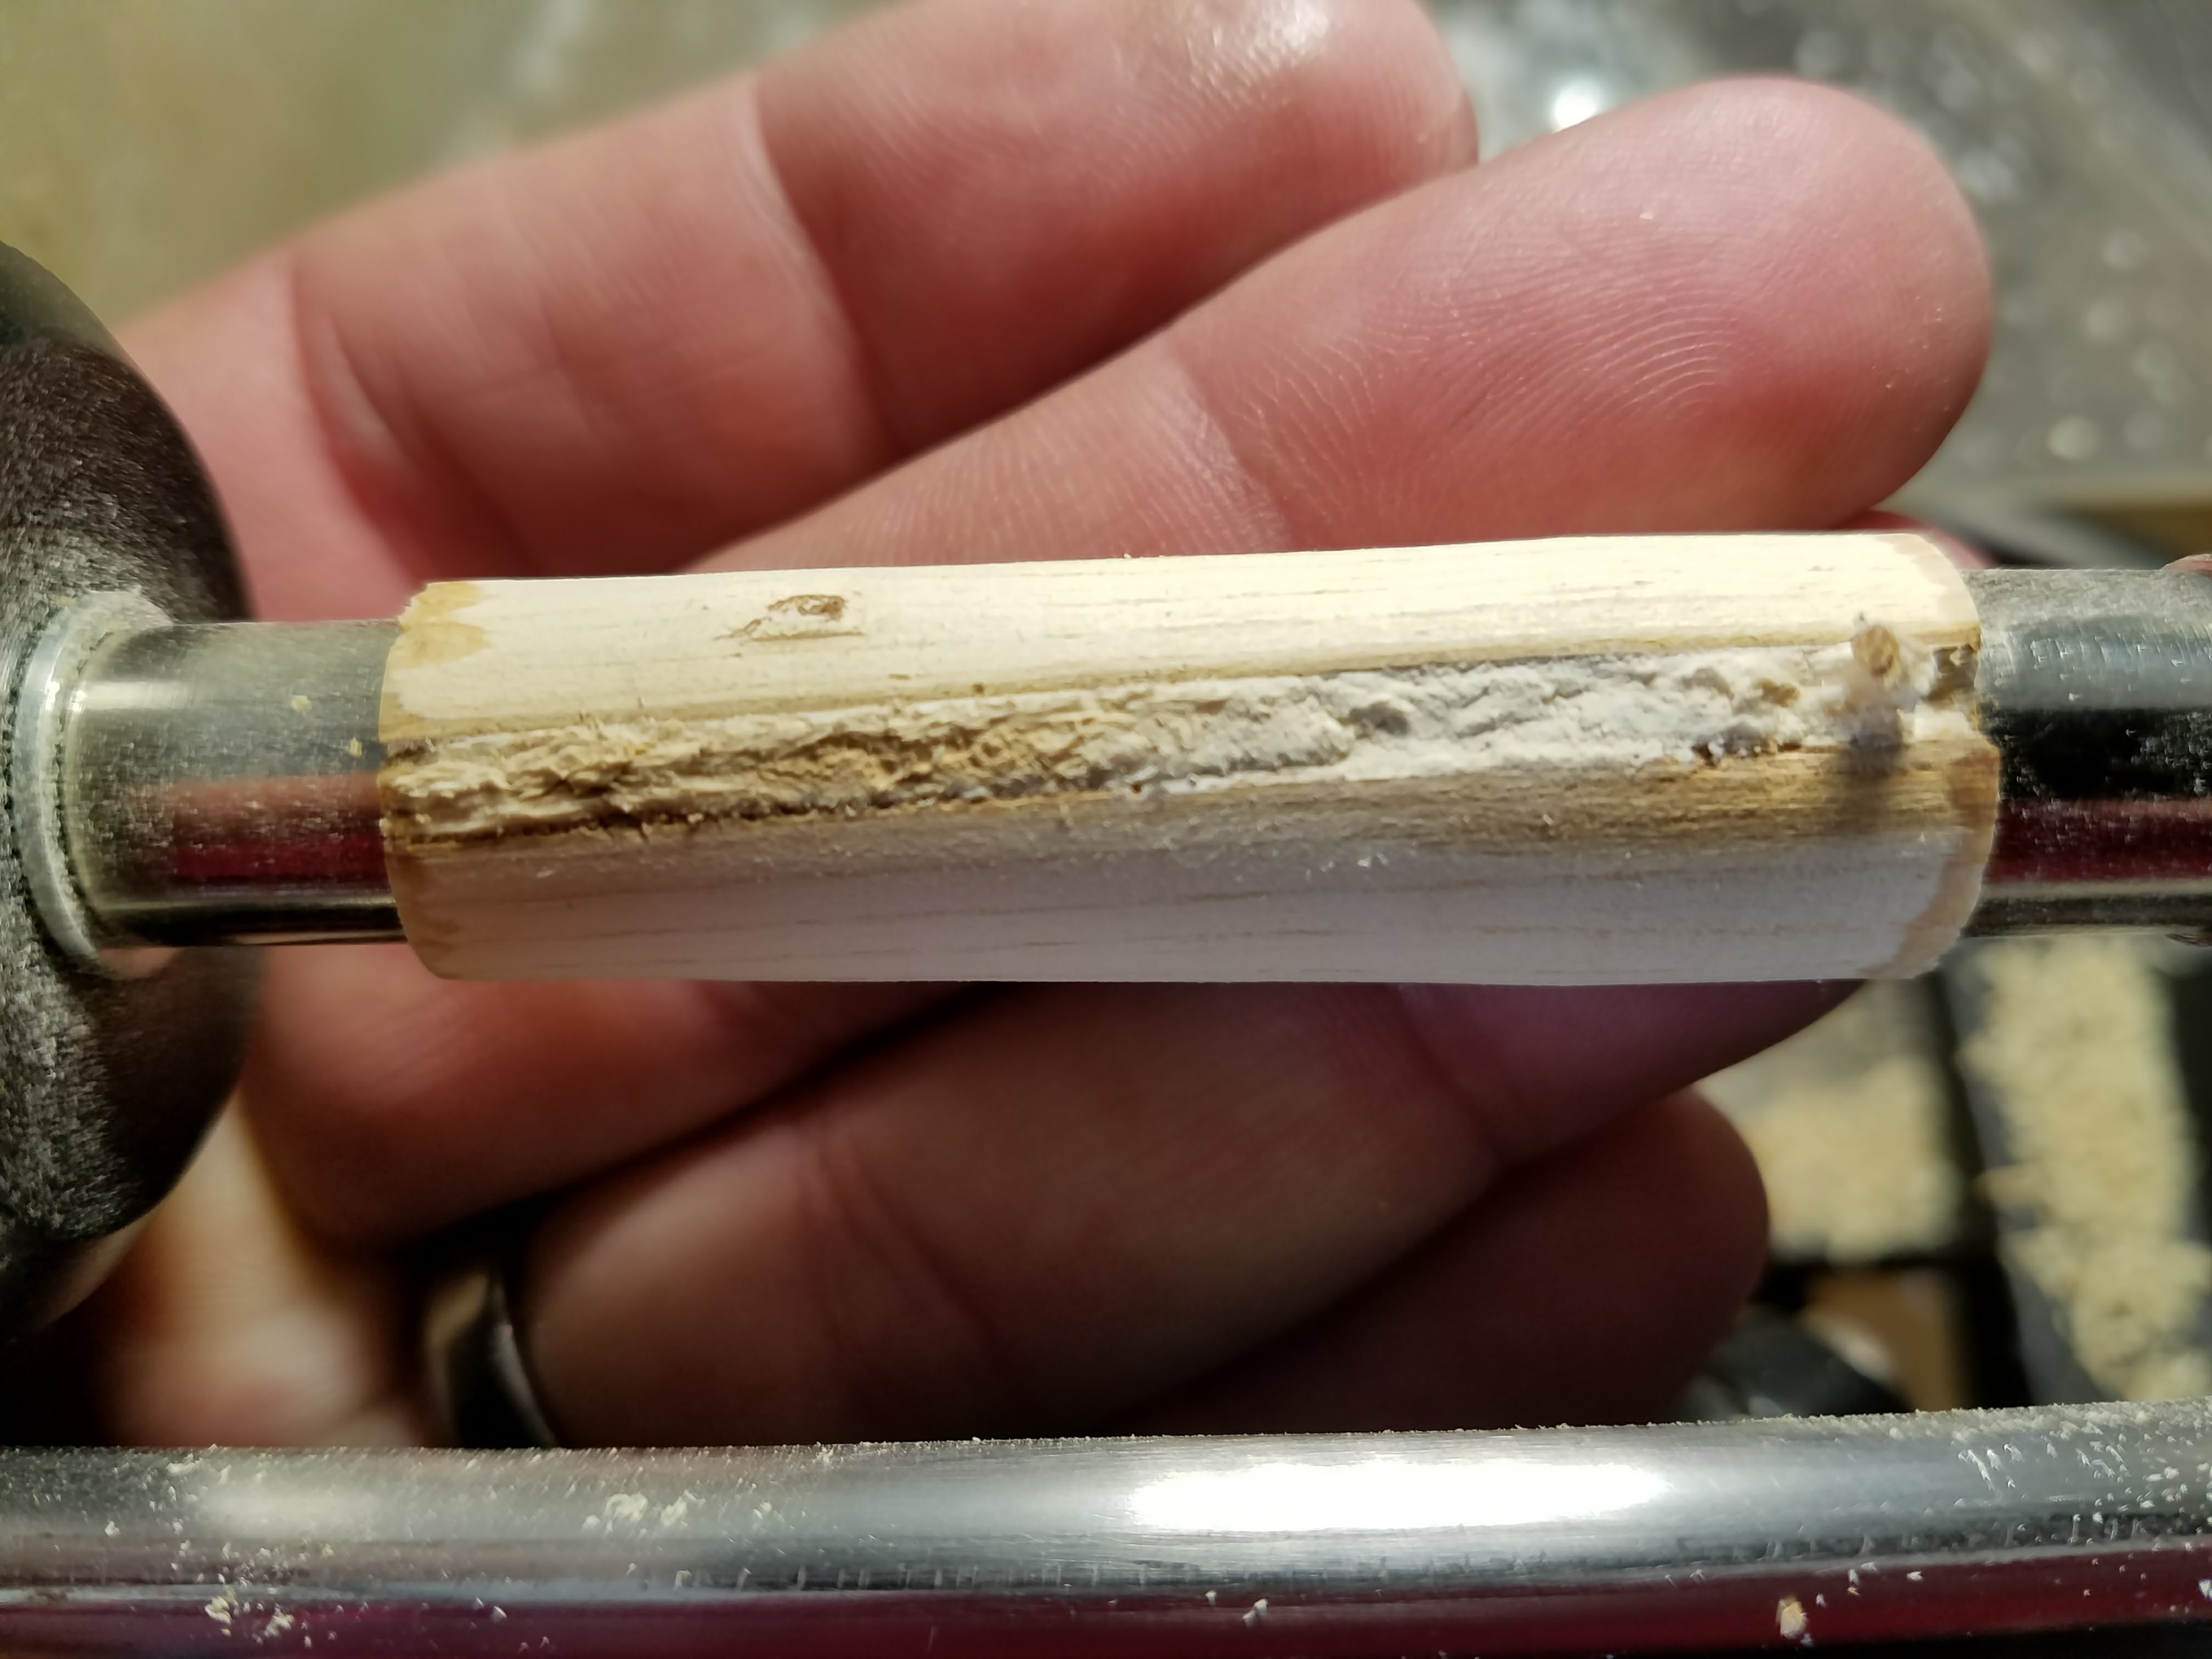
The golf course is populated with oak, sycamore and mesquite trees. For the most part, fallen branches have fallen because they were sick. Once I started cutting the branches into blanks, the rejection rate was pretty high. Some were obviously damaged by fungus. Some had insect damage that was not visible until you look really close. Whatever woodboring insect that enjoyed munching on these branches left a tightly packed fine sawdust behind. It’s so tightly packed and so much the same as the wood around it that it’s easy to miss, at least until it bites you a few times.
Wormholes at in the periphery of the blank are not much trouble and if the bug moved largely across the grain, leaving holes in surface that could be filled easily.
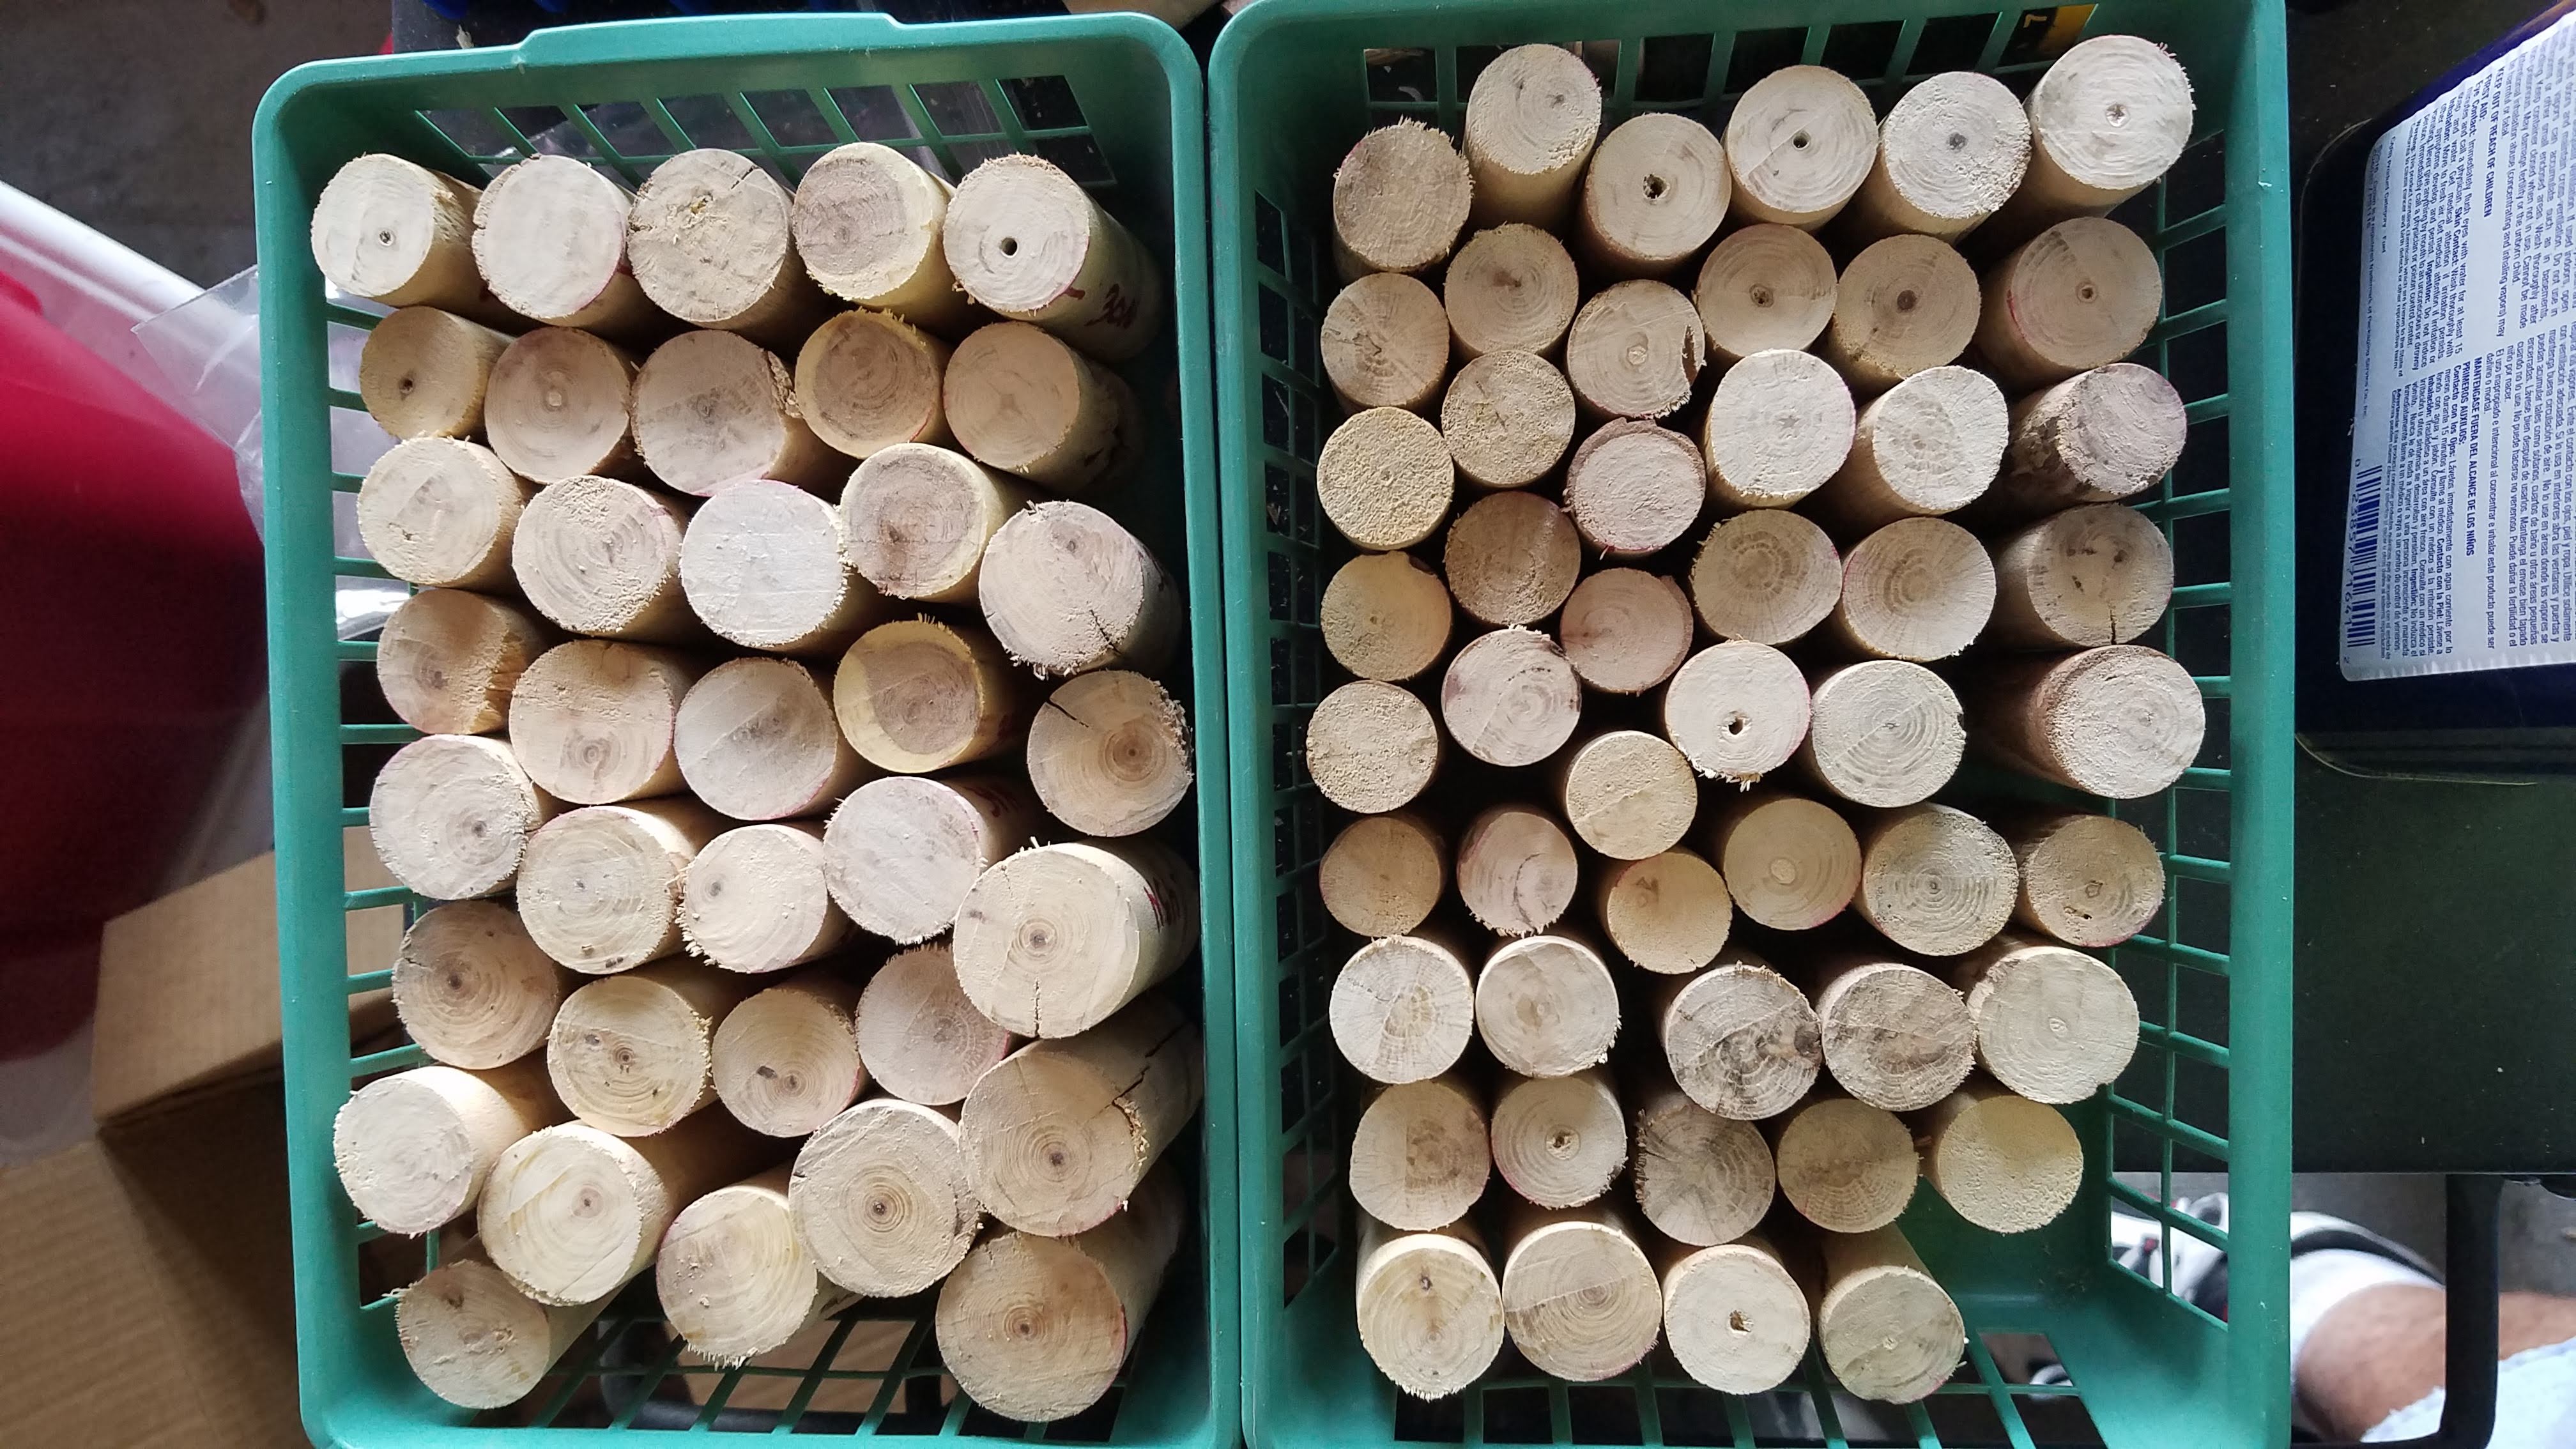
I did blank cutting in batches. I set up my bandsaw outside where sawdust could just be on the ground and cut until I was out of branches. I numbered the pieces as I went, just in numeric sequence. For the first half or so, I cut bark-on rough blanks into cap and nib end halves, marked with a jig tool I made.
That proved to be imprecise enough to cause more problems than it fixed at first.
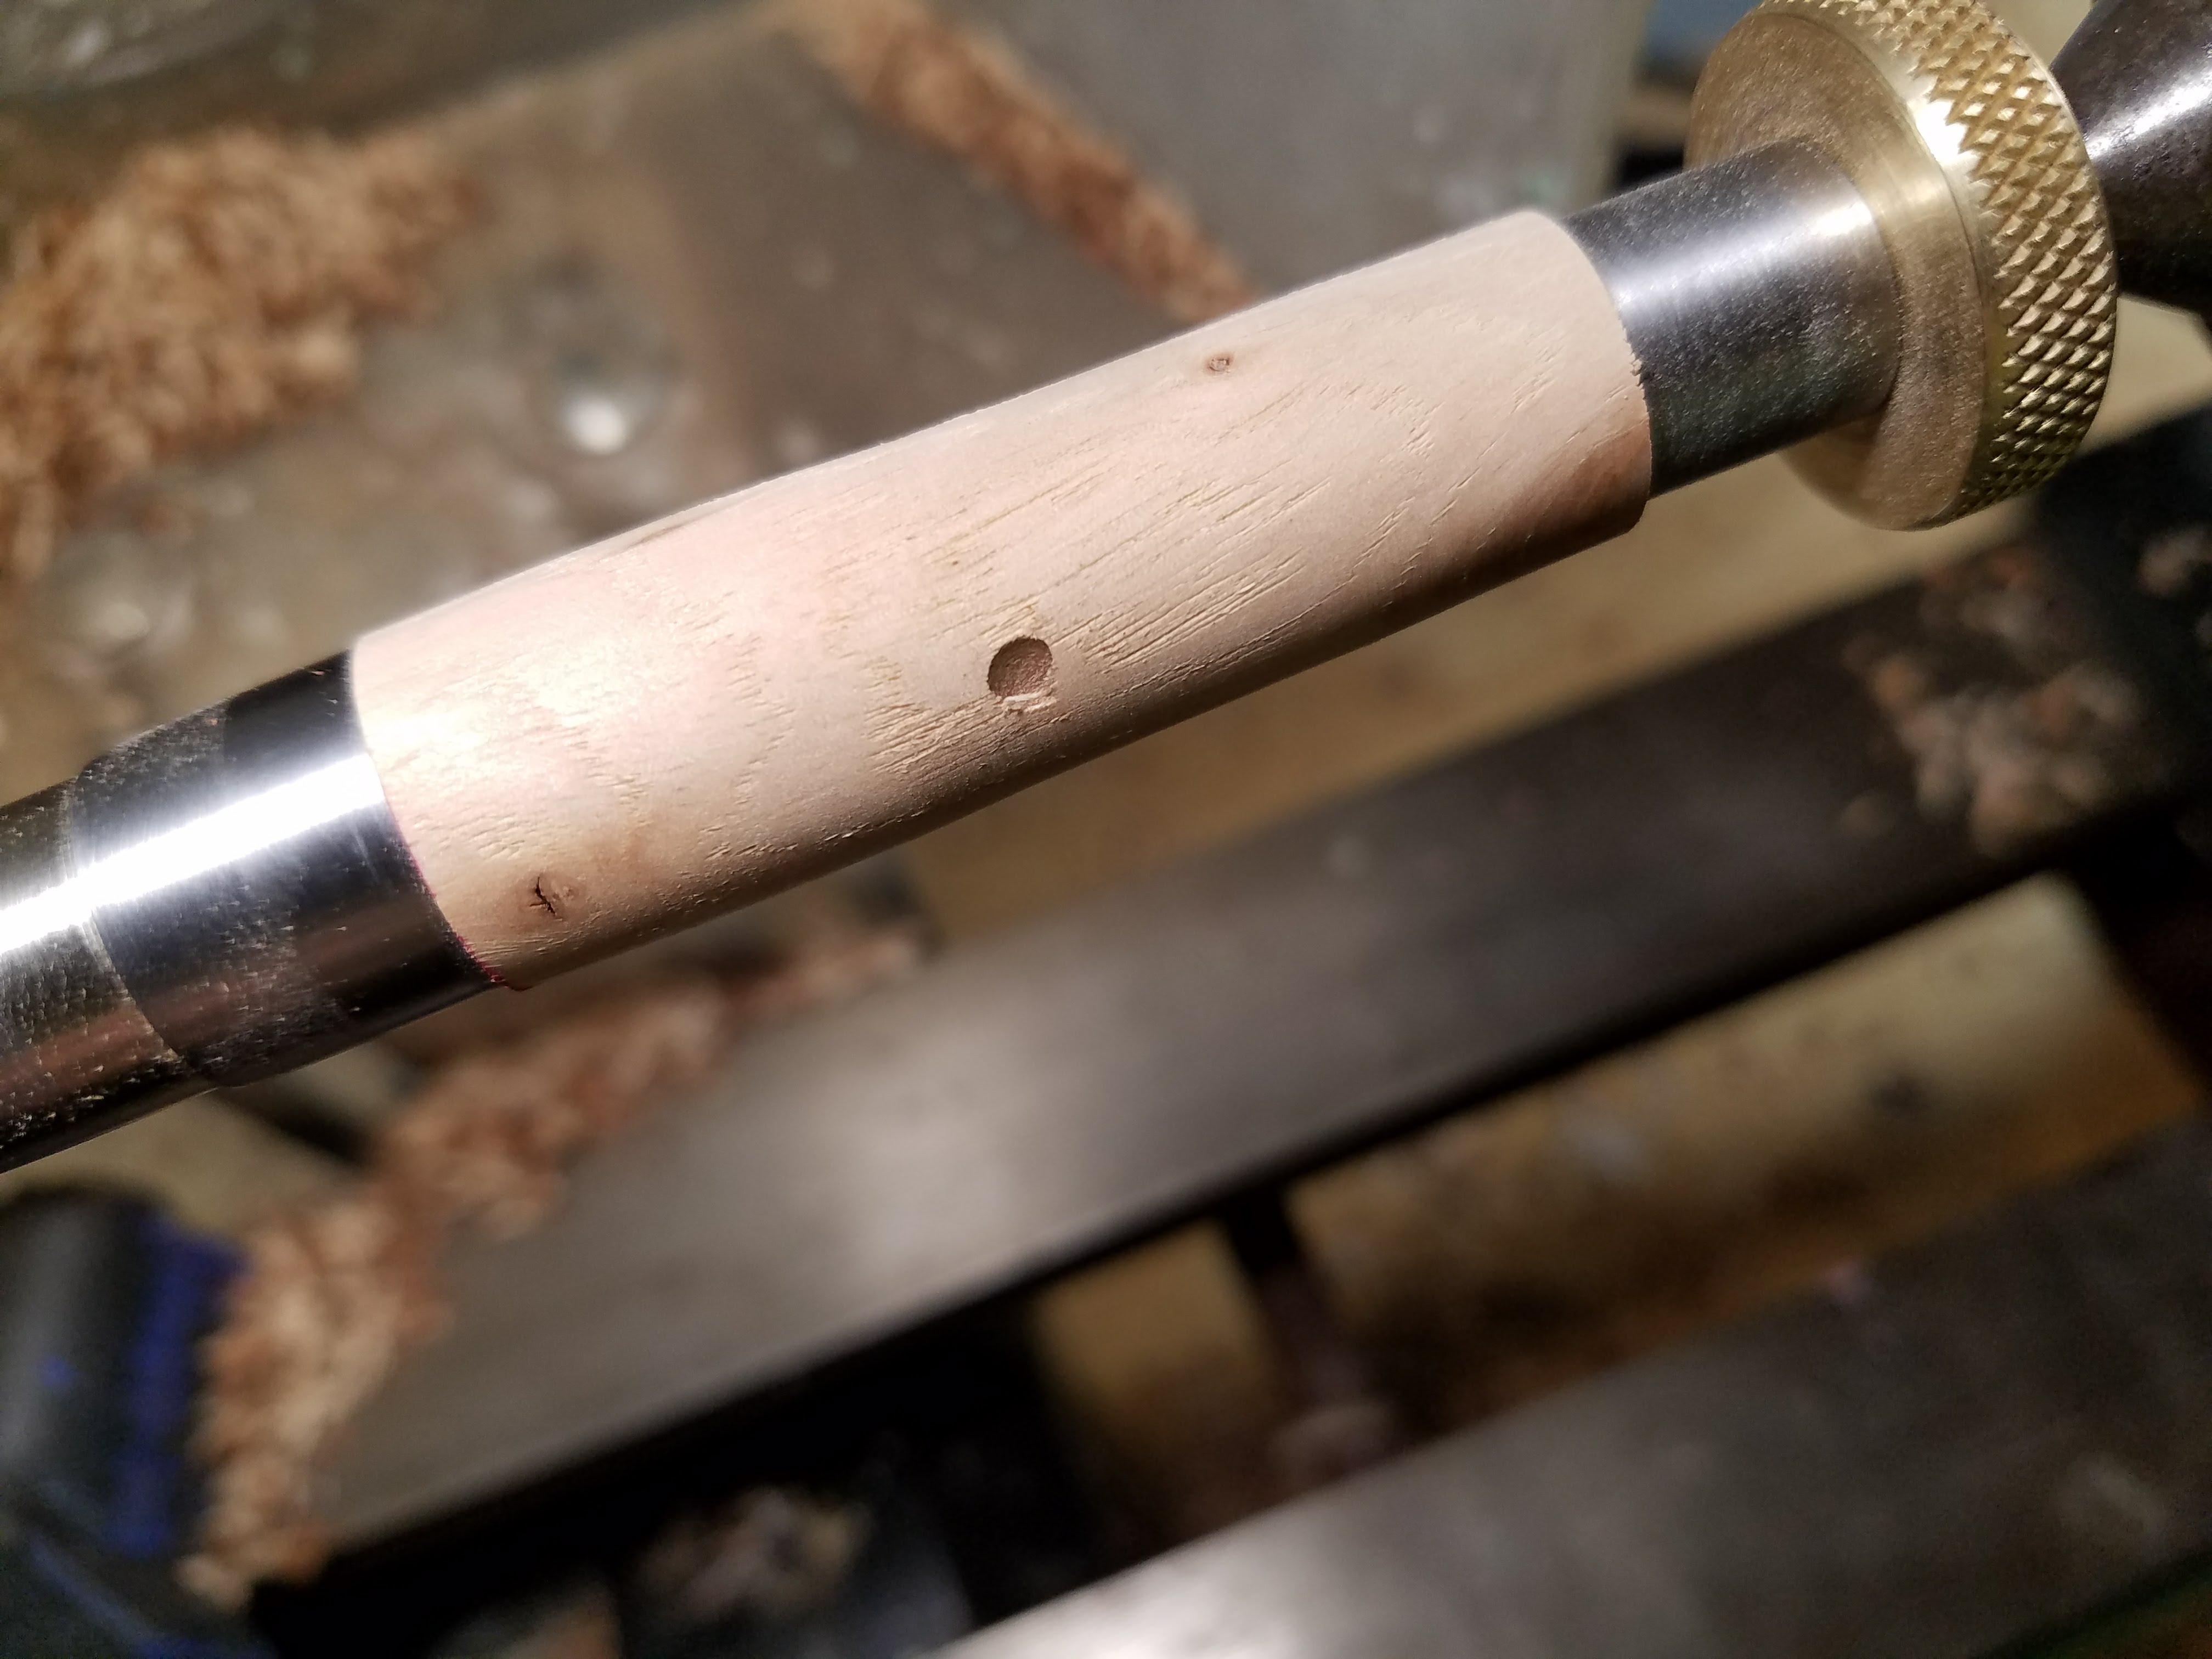
Finally, I learned to cut the branches into lengths similar to commercial blanks, using one as a template. I would inspect the end of the cut to see if the insect damage was likely to be a problem and discard if necessary. If it looked ok, those went in a stack of potential blanks.
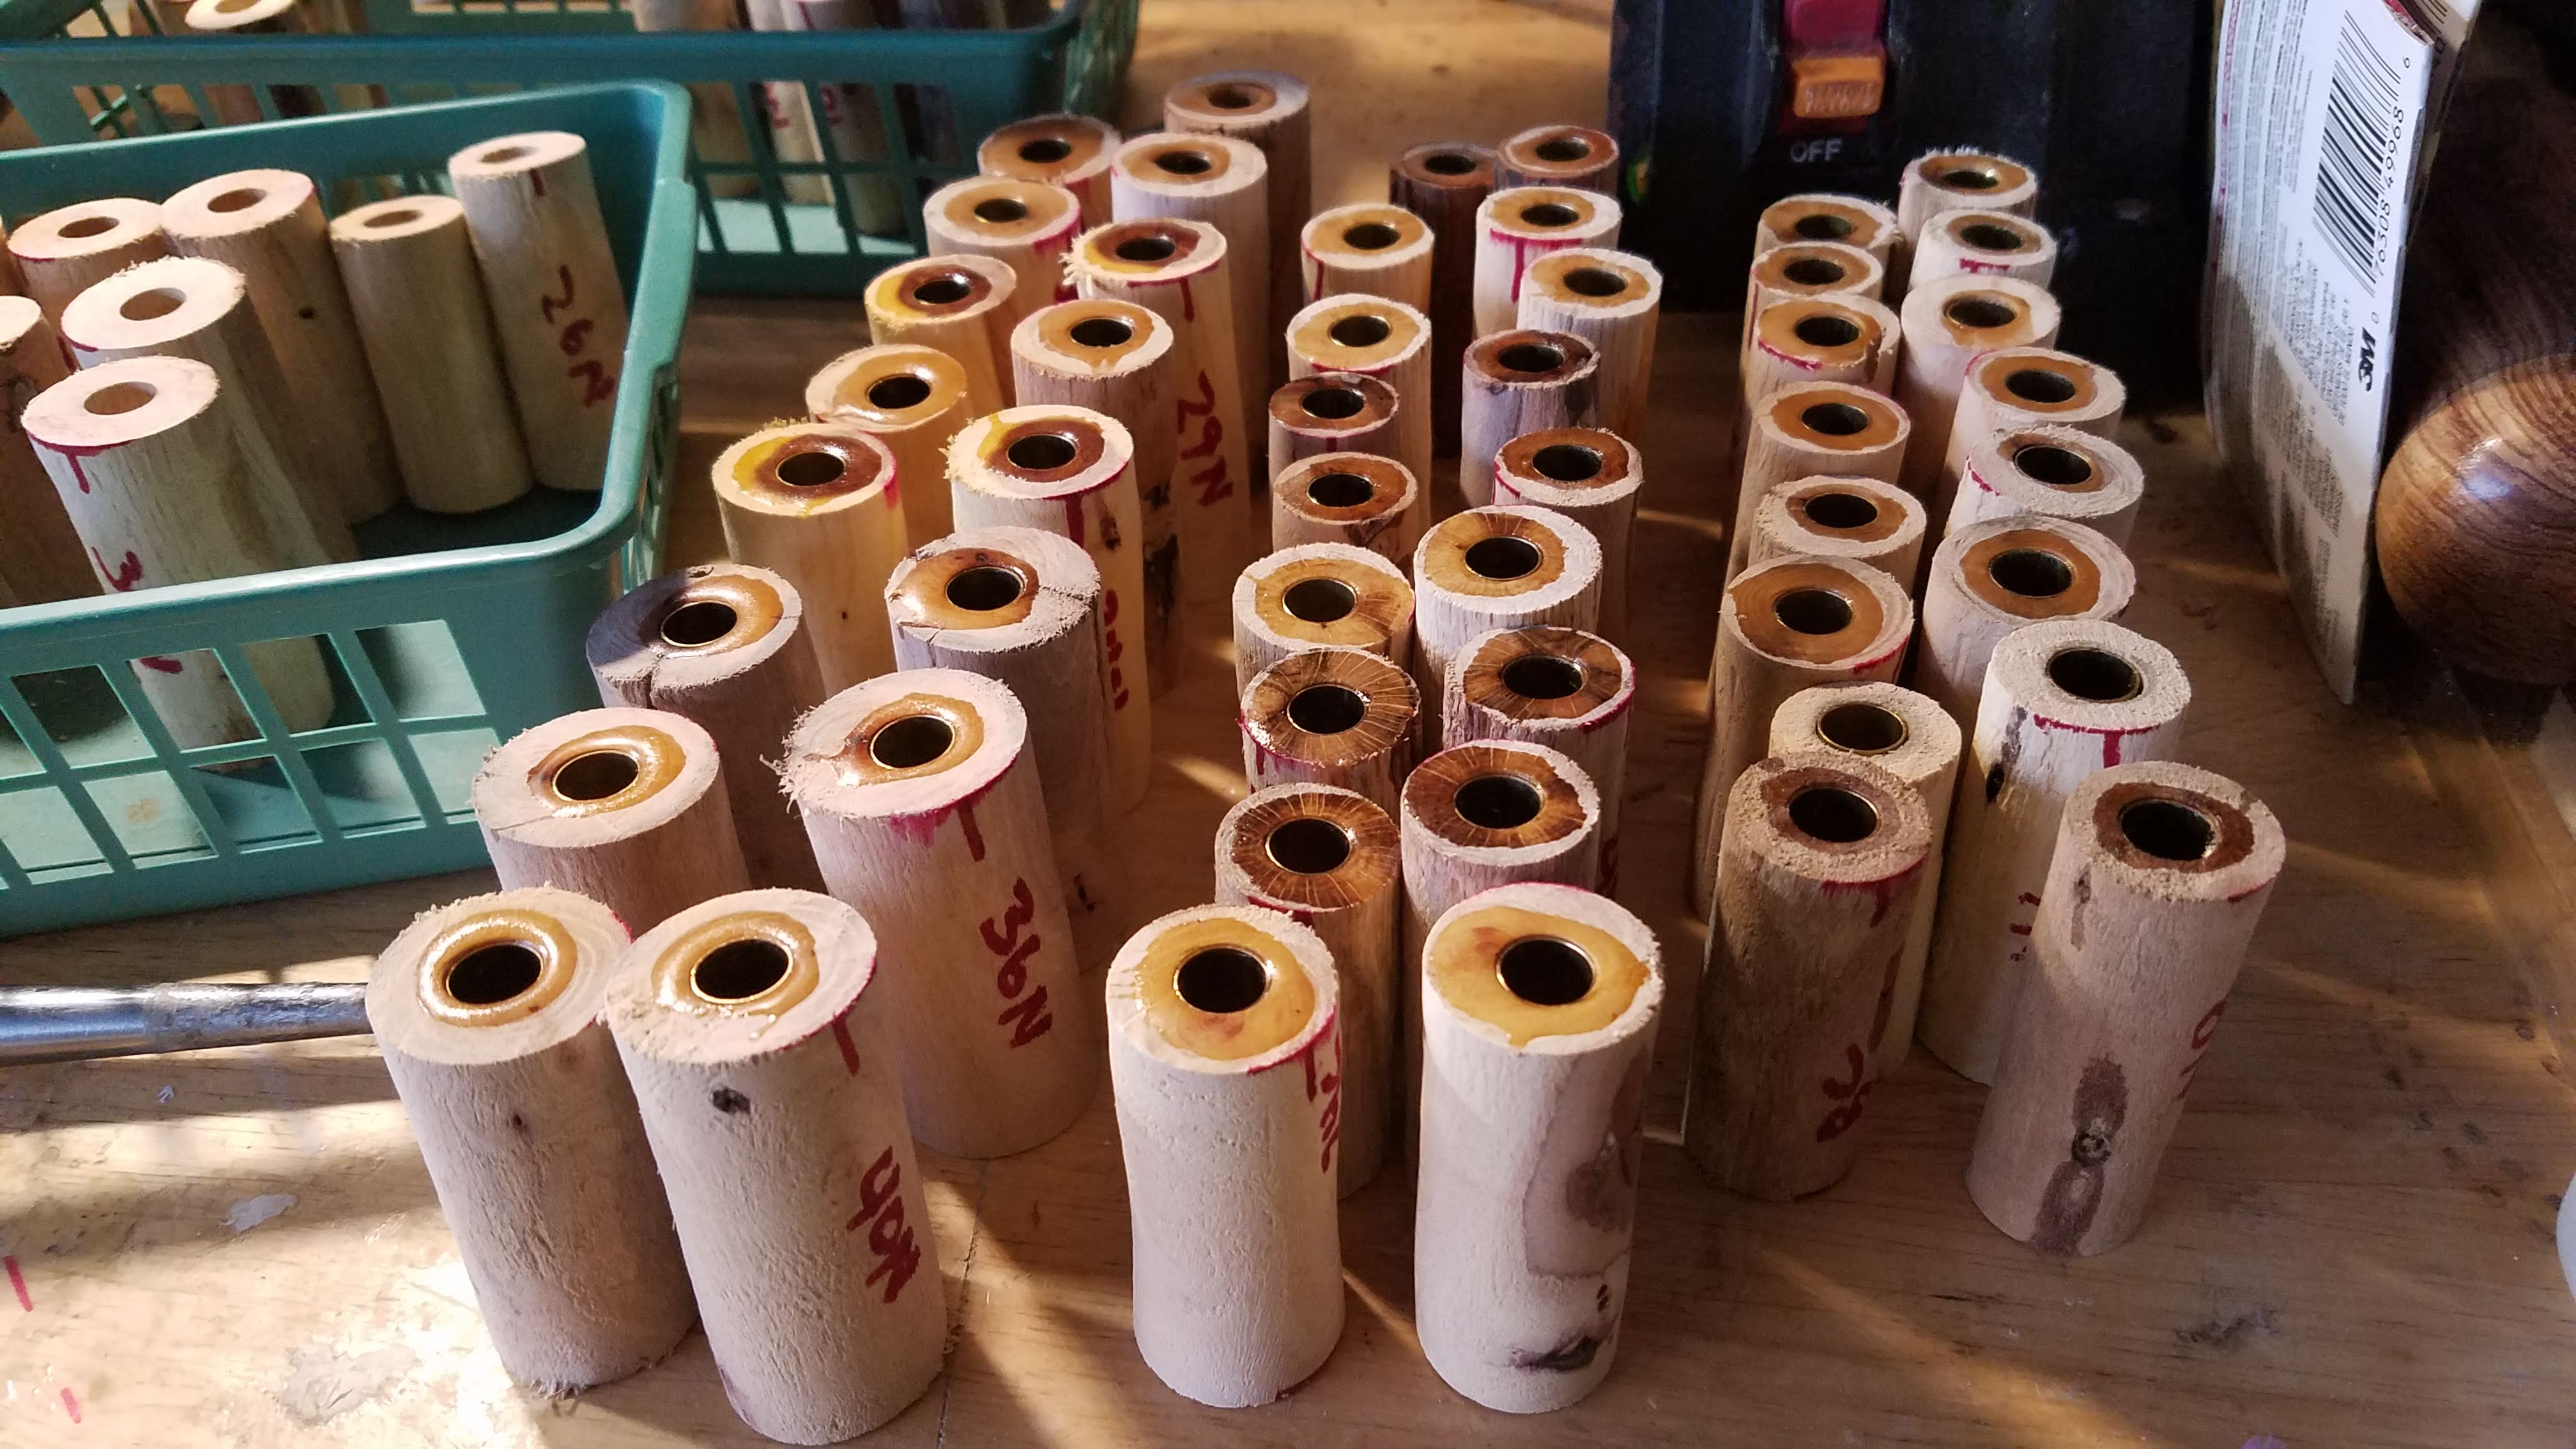
I set up a “spare” lathe outside as well after cleaning up a bushel of chips and dust off the workshop floor. Knocking the rough blanks down to round outside helped the workshop tremendously! Then the jig worked better marking the blanks for cutting to length.
Somewhere in here, the organizers added 20 players to the roster, so I had to order some more pen kits and number some more bags and tags for a total of 120.
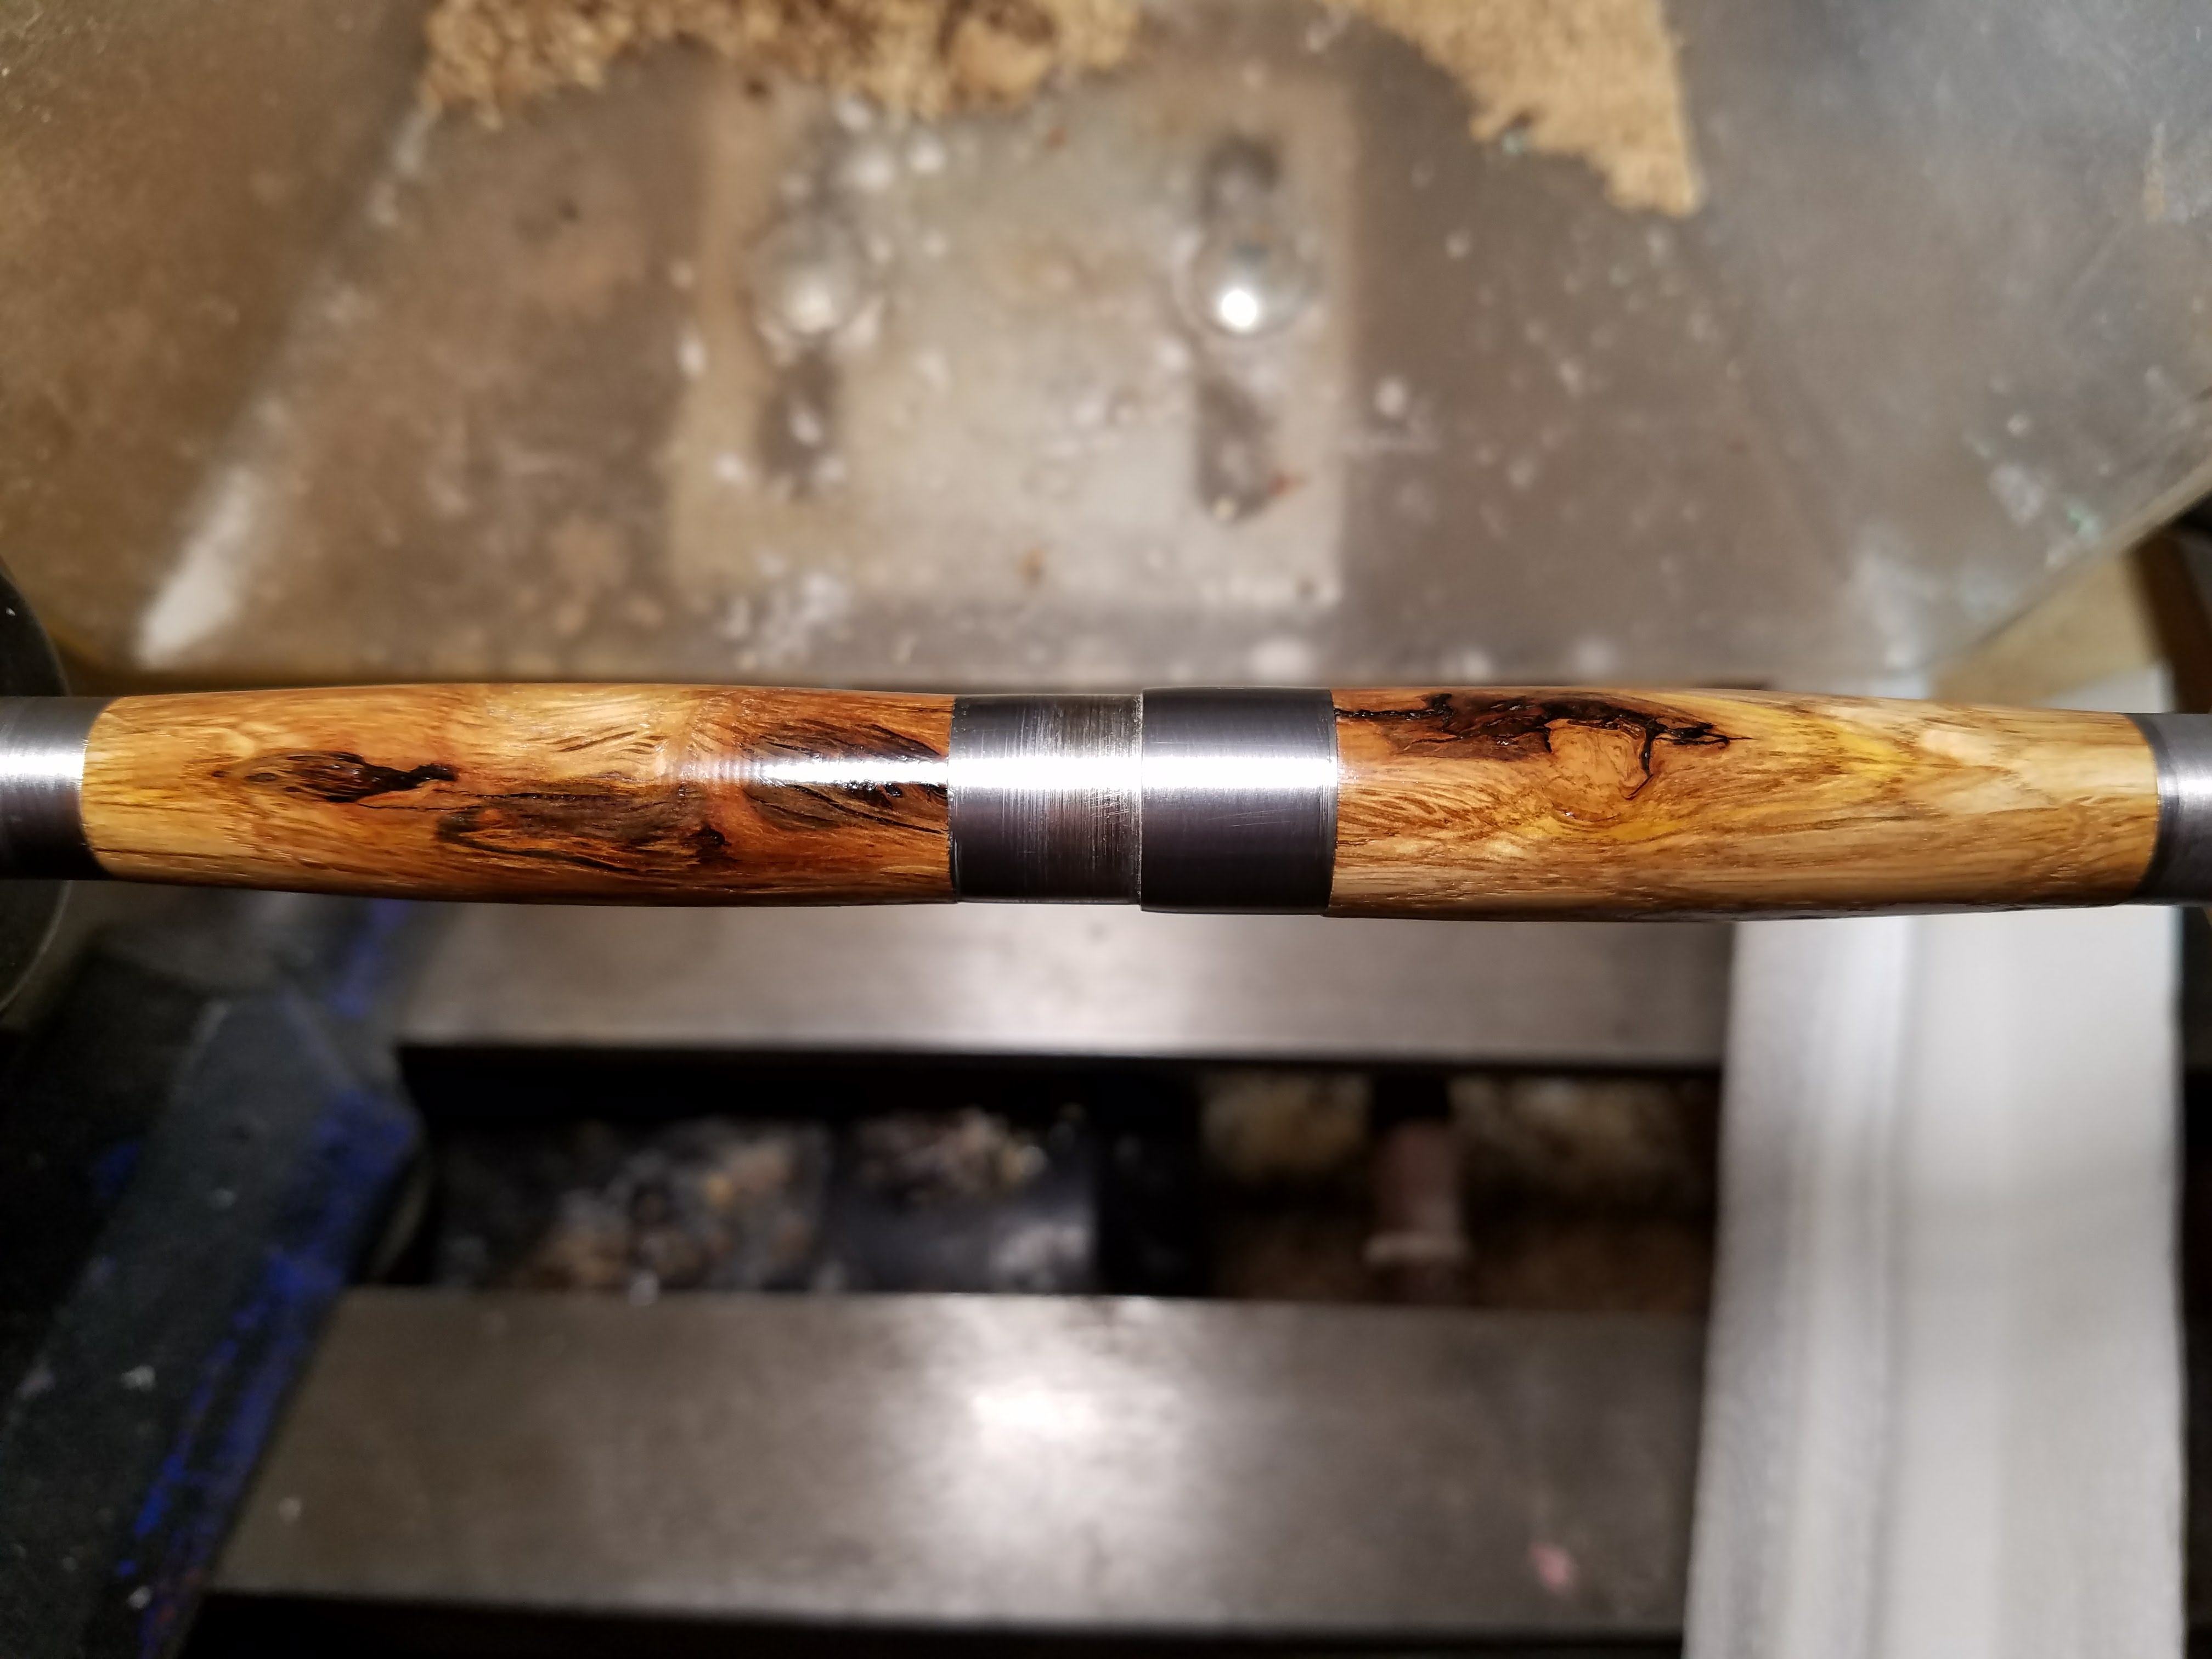
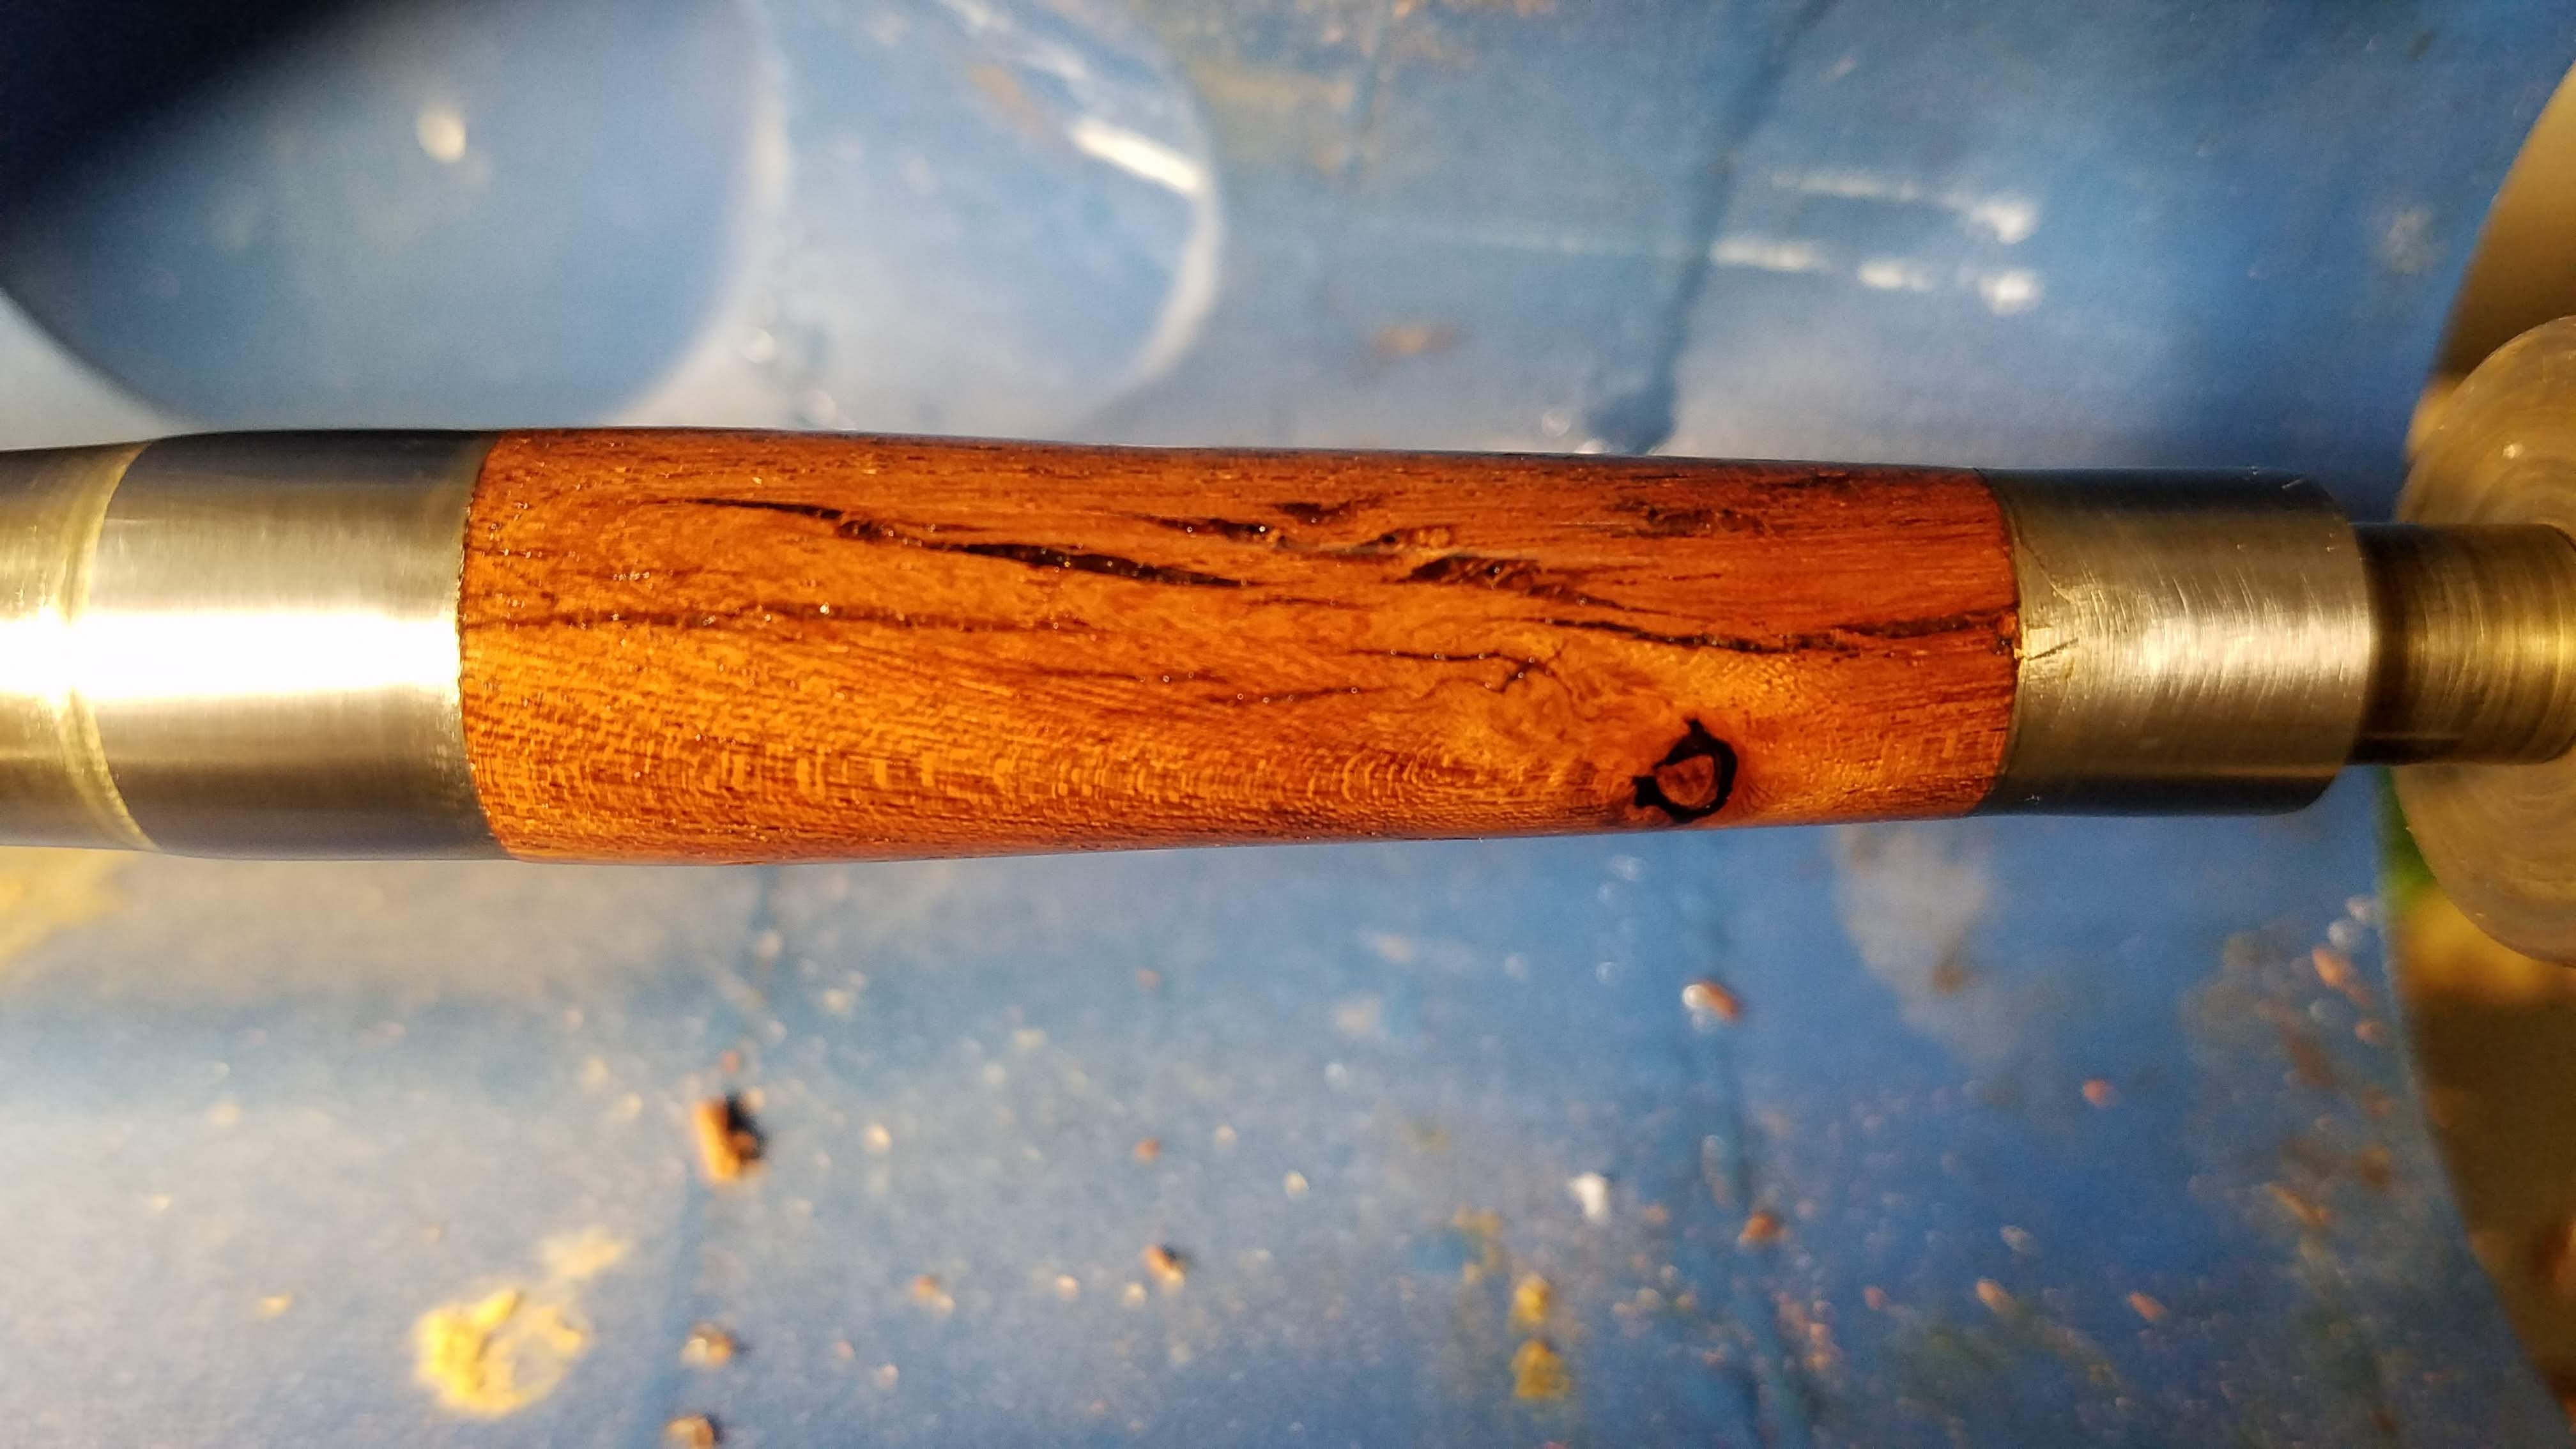
Fairly early in the process, I realized that I was spending about 10 minutes turning a pen and anywhere from 30 minutes to an hour with the filling and finishing process using CA. I prefer a CA finish, but it was killing my production numbers, especially as I had more pens to finish. I picked up some Doctor’s Woodshop Pens Plus finish. This is a walnut oil and shellac based friction finish that is probably 90% as glossy as CA, presuming the surface is nicely prepped before application. Most importantly, it usually takes about 5 minutes to apply and polish. I don’t have any really long term wear info yet, but the test pen I made has held up to use and transport without issue.
Surface prep before applying Pens Plus sometimes was just filling holes and sometimes even sealing / stabilizing spongy wood with thin CA. The Pens Plus finish works over the CA just fine. That does not work the other way round. It takes some time, but CA applied over Pens Plus will crackle and flake. That is not really surprising, but I had to at least try it.
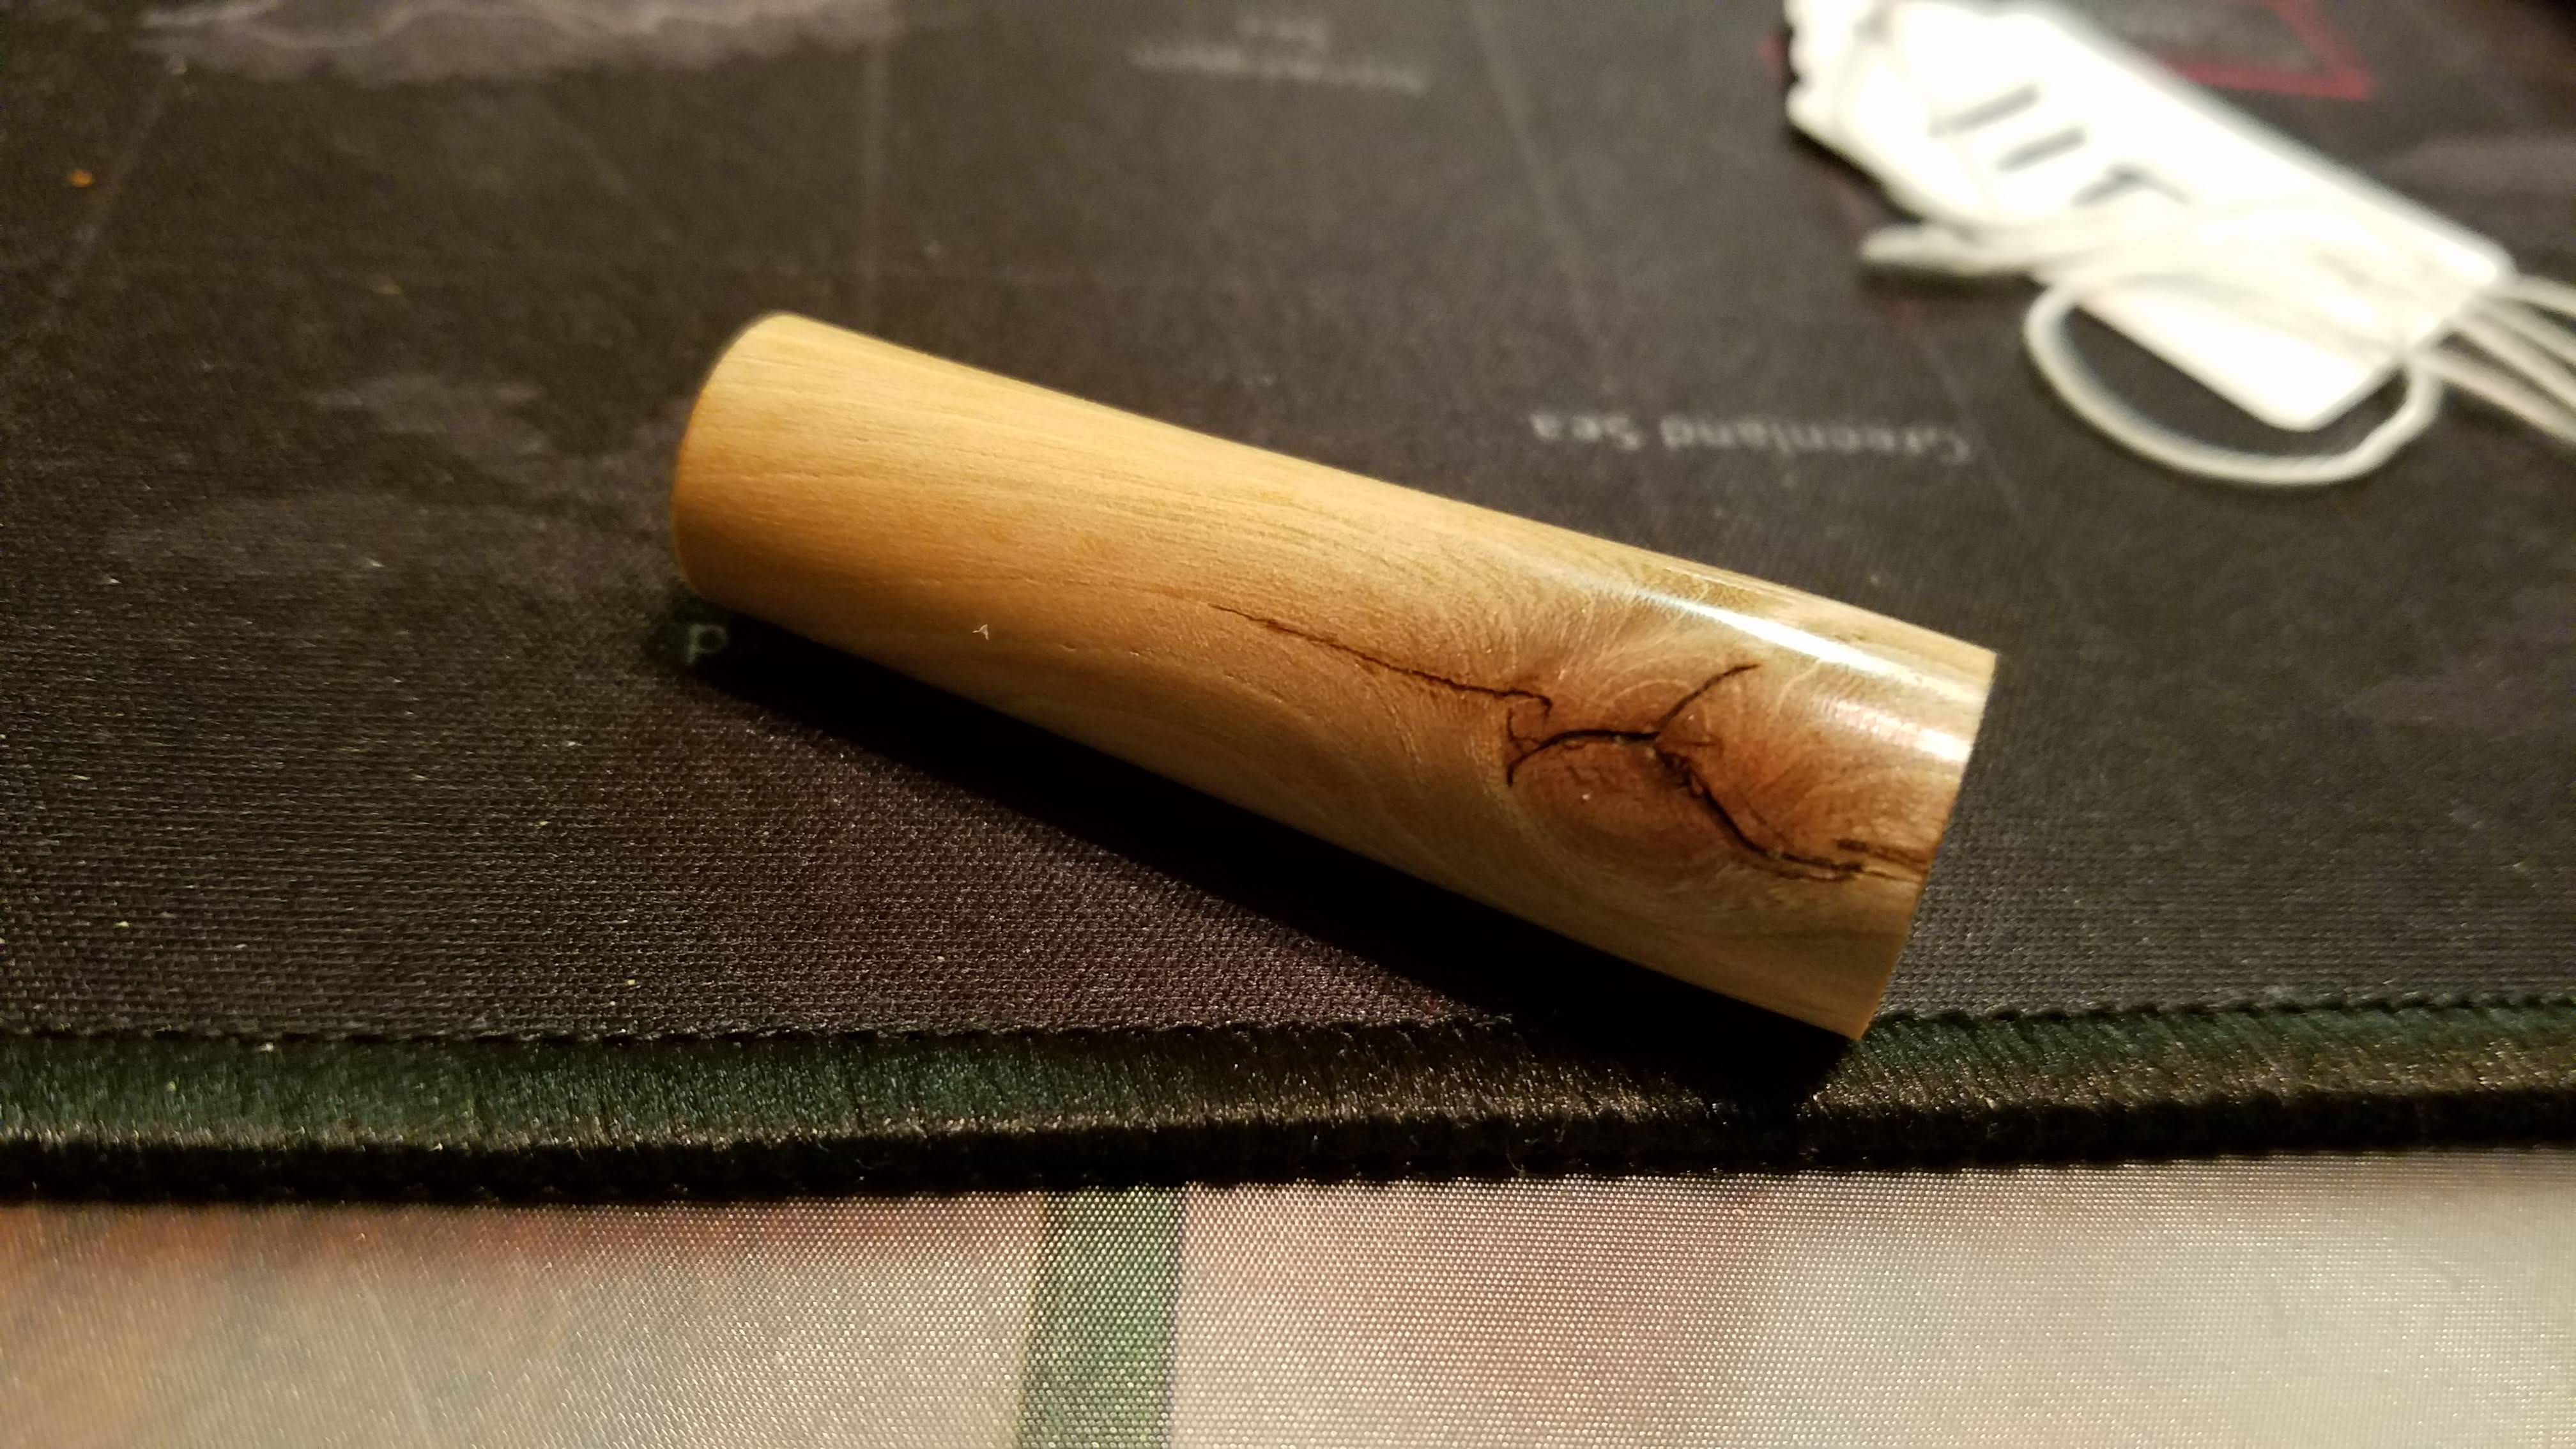
Most of the wood was oak or sycamore. The oak tended to have more simple insect damage and the sycamore tended to have more staining from disease. Most of the pens turned out basically white or light honey colored with little bits of interesting contrast, like knotholes, cracks, or staining. Some pens feature all three.
There was only a few pieces of mesquite. Some of those were very nice pieces but some were run through with cracks. I turned them down to within a few millimeters of the final dimension before filling the cracks with CA. The final pen turned out very interesting.
By the last half or so of the pens, I had a pretty decent process in place for spending a Saturday making blanks and a Sunday turning those, filling in the occasional weekday evening pen here and there.
The numbers in the batches of blanks were mostly just to keep the pairs together and did not correlate to the kit numbers at all. When I ran out of one batch of blanks, the next would restart at 1 and sequence up until I ran out of material.
As I finished turning each set of barrels, they went into the next numbered kit bag that I pulled out of the box. They were just pulled out of the box without regard for the kit number; it didn’t matter at this point.
I delivered three batches of pen caps to the engraver to have the logo lasered on. I pulled the cap and the string tag out of the bag and ran the string through the barrel to secure it. The caps went in a plastic box and the kits with the nib end only went into their own box marked “out to engraver”.
Having had quite a few pens engraved by this guy, he let me basically run it on credit so we could pay for all the engraving at once at the end of the whole job. That way the LGA could write one check. Your mileage may vary.
When they came back from the engraver, I just had to pull out one bagged kit, find it’s mating cap in the box and do the final assembly of the pen. I put the string tag on the pen clip and put the assembled pen back in it’s numbered bag and finally into a box of completed pens.
Things did not go perfectly, so I had to make a few extra pens to replace those that did not pass muster.
I overzealously trimmed some barrels, which I will blame on lighting and not being able to see it was trimmed enough. That resulted in a couple of pens with barrels that were too short, so the filler could not fully retract.
One that was particularly sad was for a pen in which I had found the live insect when I was turning the pen. Well, most of it anyway. I had gone to special effort to fill the very large void so that I could have a pen with a specific story.
Unfortunately, on this one and only pen, I had installed the center bushing reversed, so the finished pen did not fit the hardware 🙁
I should note here that we picked two especially stunning pens to be our own from this project. I spent the time to apply CA finish and I paid cash separate for their engraving.
Finally, it came down to the last weekend to completed all the pens. I had the last batch of caps from the engraver. I assembled them and found that all kits appeared to be accounted for. We had decided to make custom embroidered drawstring bags for these pens, which deserve a blog posting of their own. On a Saturday morning I was taking out each pen, taking a picture of it, removing the number tag and putting the pen in a drawstring bag; final packaging you might say. In the box of completed pens, there was one bag, #95, that had an unassembled and unengraved mesquite pen. I set it aside and continued the work. Due to some time constraints, a few of the bags did not have drawstrings yet and Toni was going to take them with her to finish them and the last few pens to back up. I counted up those plus the bagged ones and came up with exactly 120.
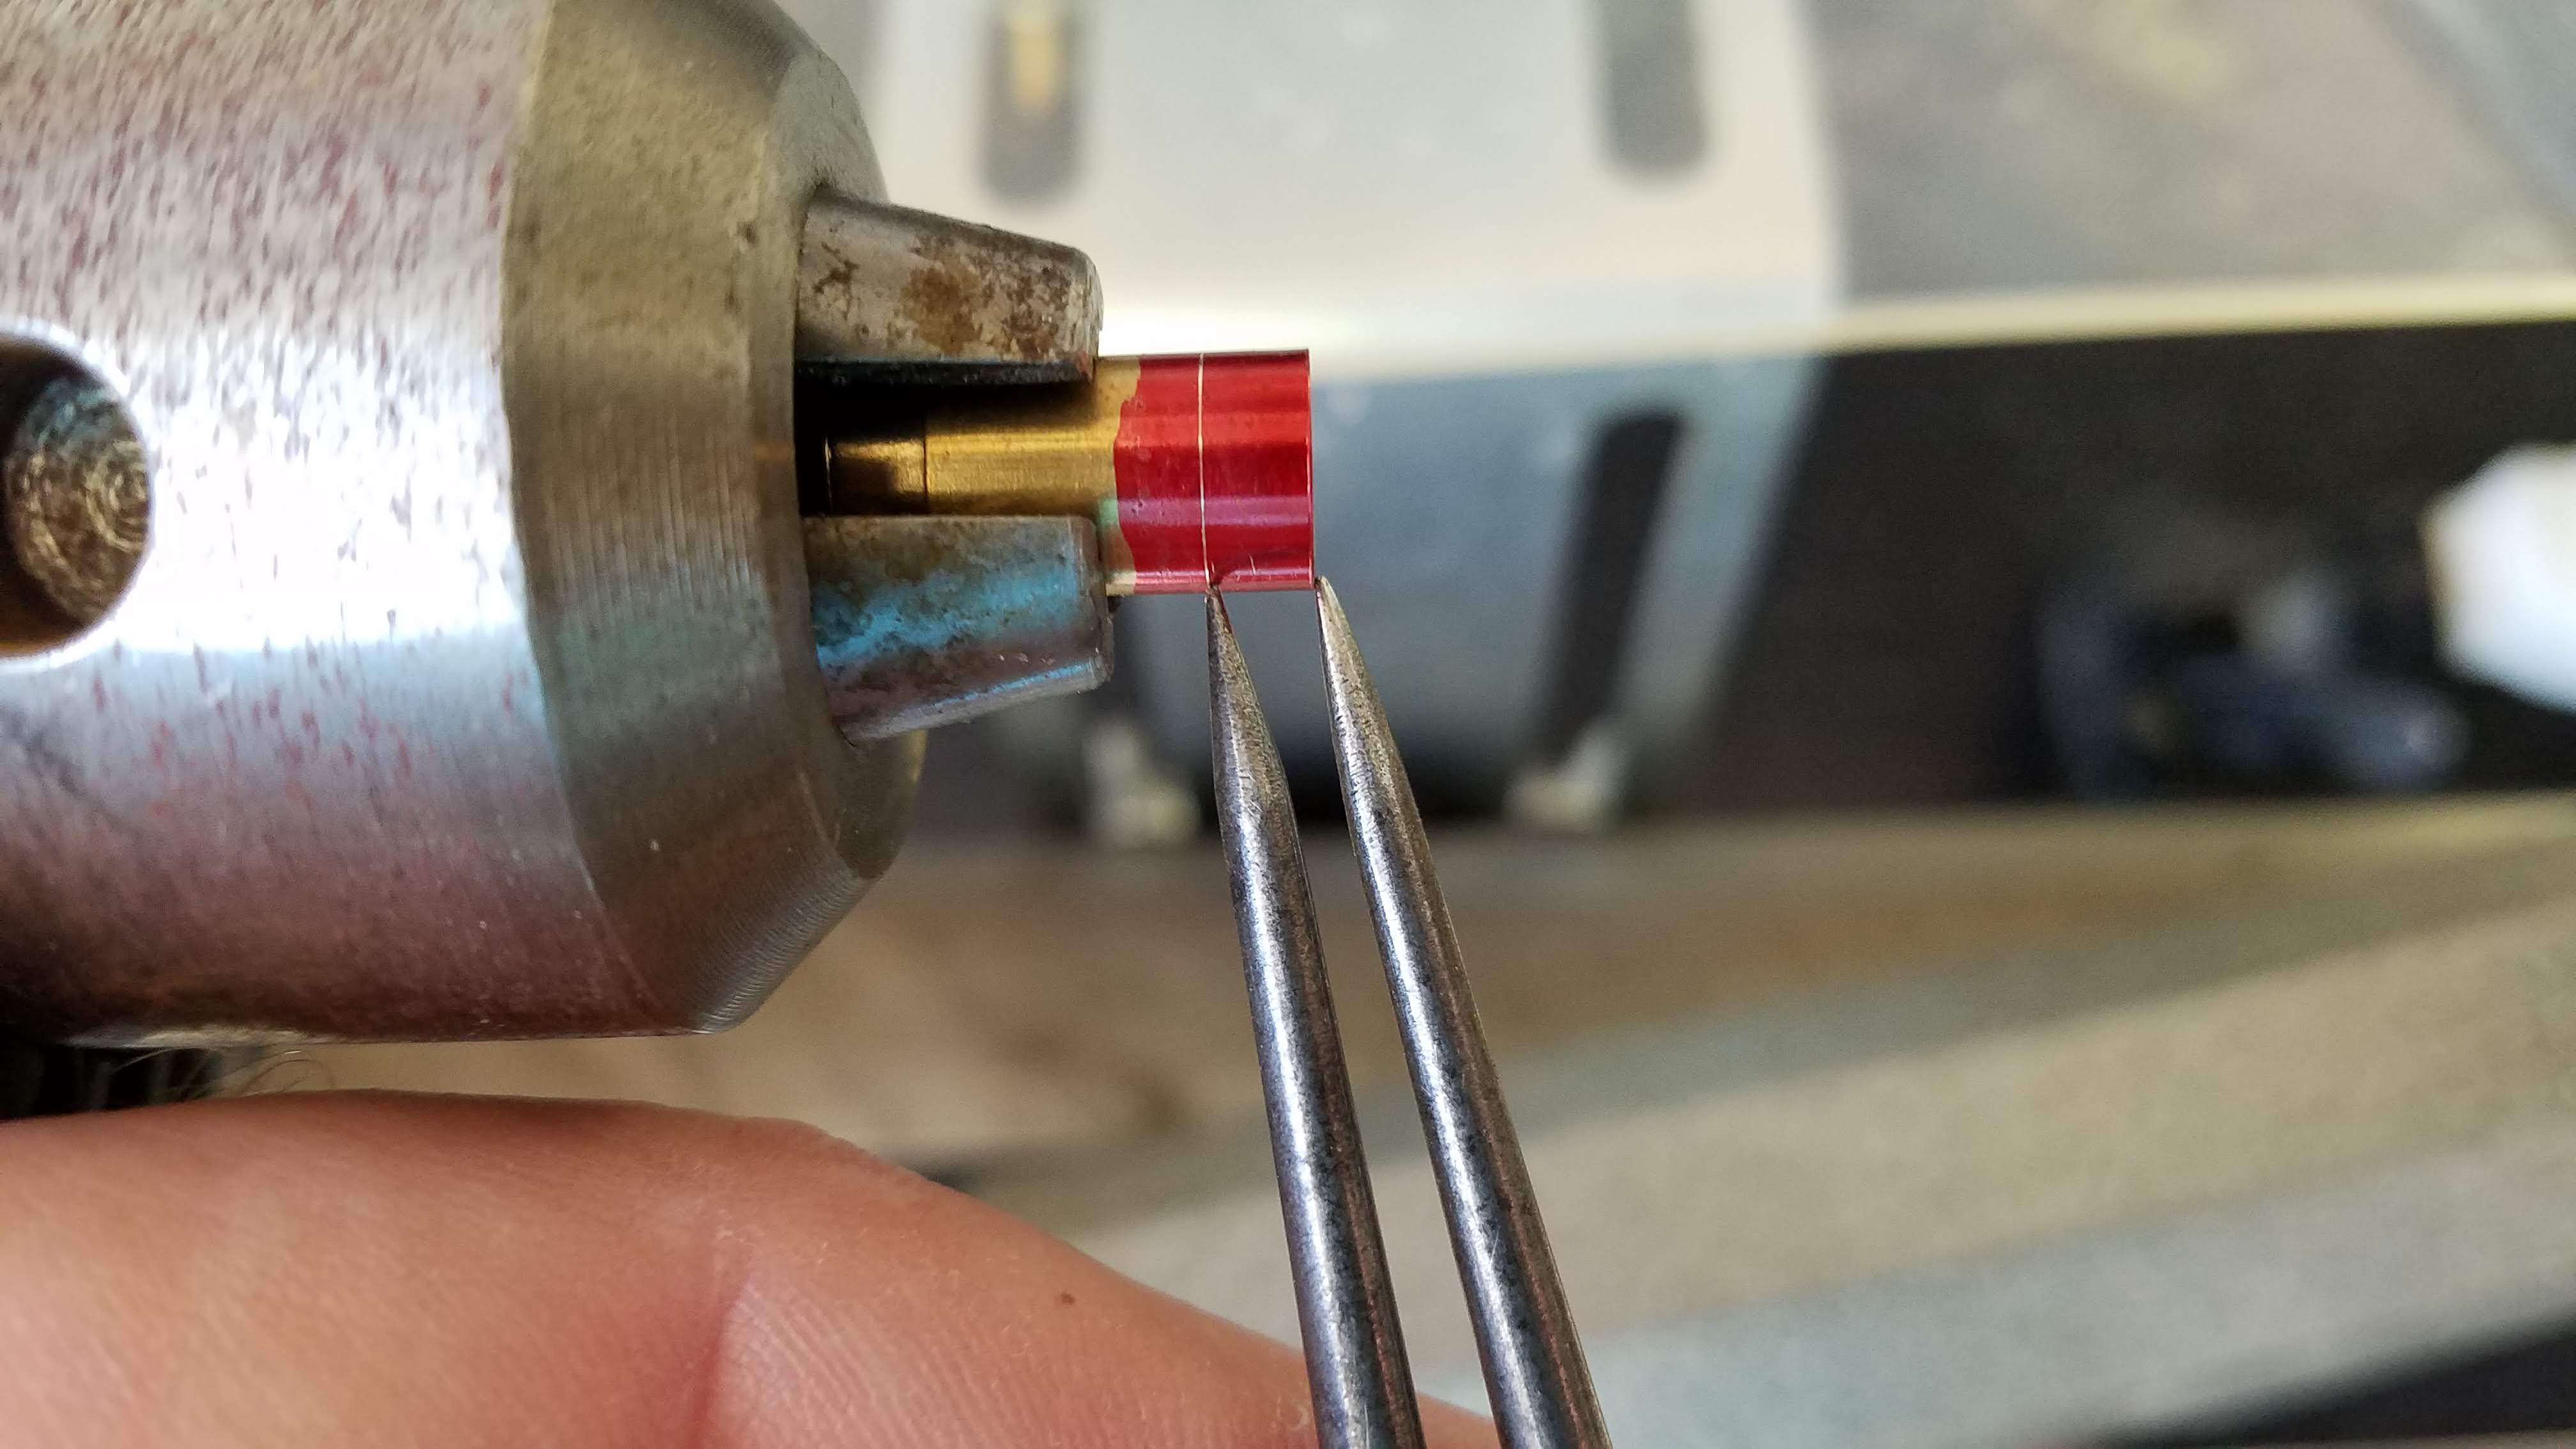
Toni reported later that they were actually short by ONE pen. I presumed that I miscounted or added the counted numbers wrong. In any case, I had three options. Rush the pen #95 to the engraver on Monday, see if I could fix one of the pens with issues or surrender one of our special set-aside pens. I decided try fix the short pen.
My first solution, while extremely elegant, was absolutely *NOT* the correct solution.
Duh! The problem is that the barrel is too short already. Cutting the transmission shorter makes it WORSE.
The much better solution is to trim the transmission plunger, effectively lengthening the space where the filler goes. I just used a drill bit, hand held.
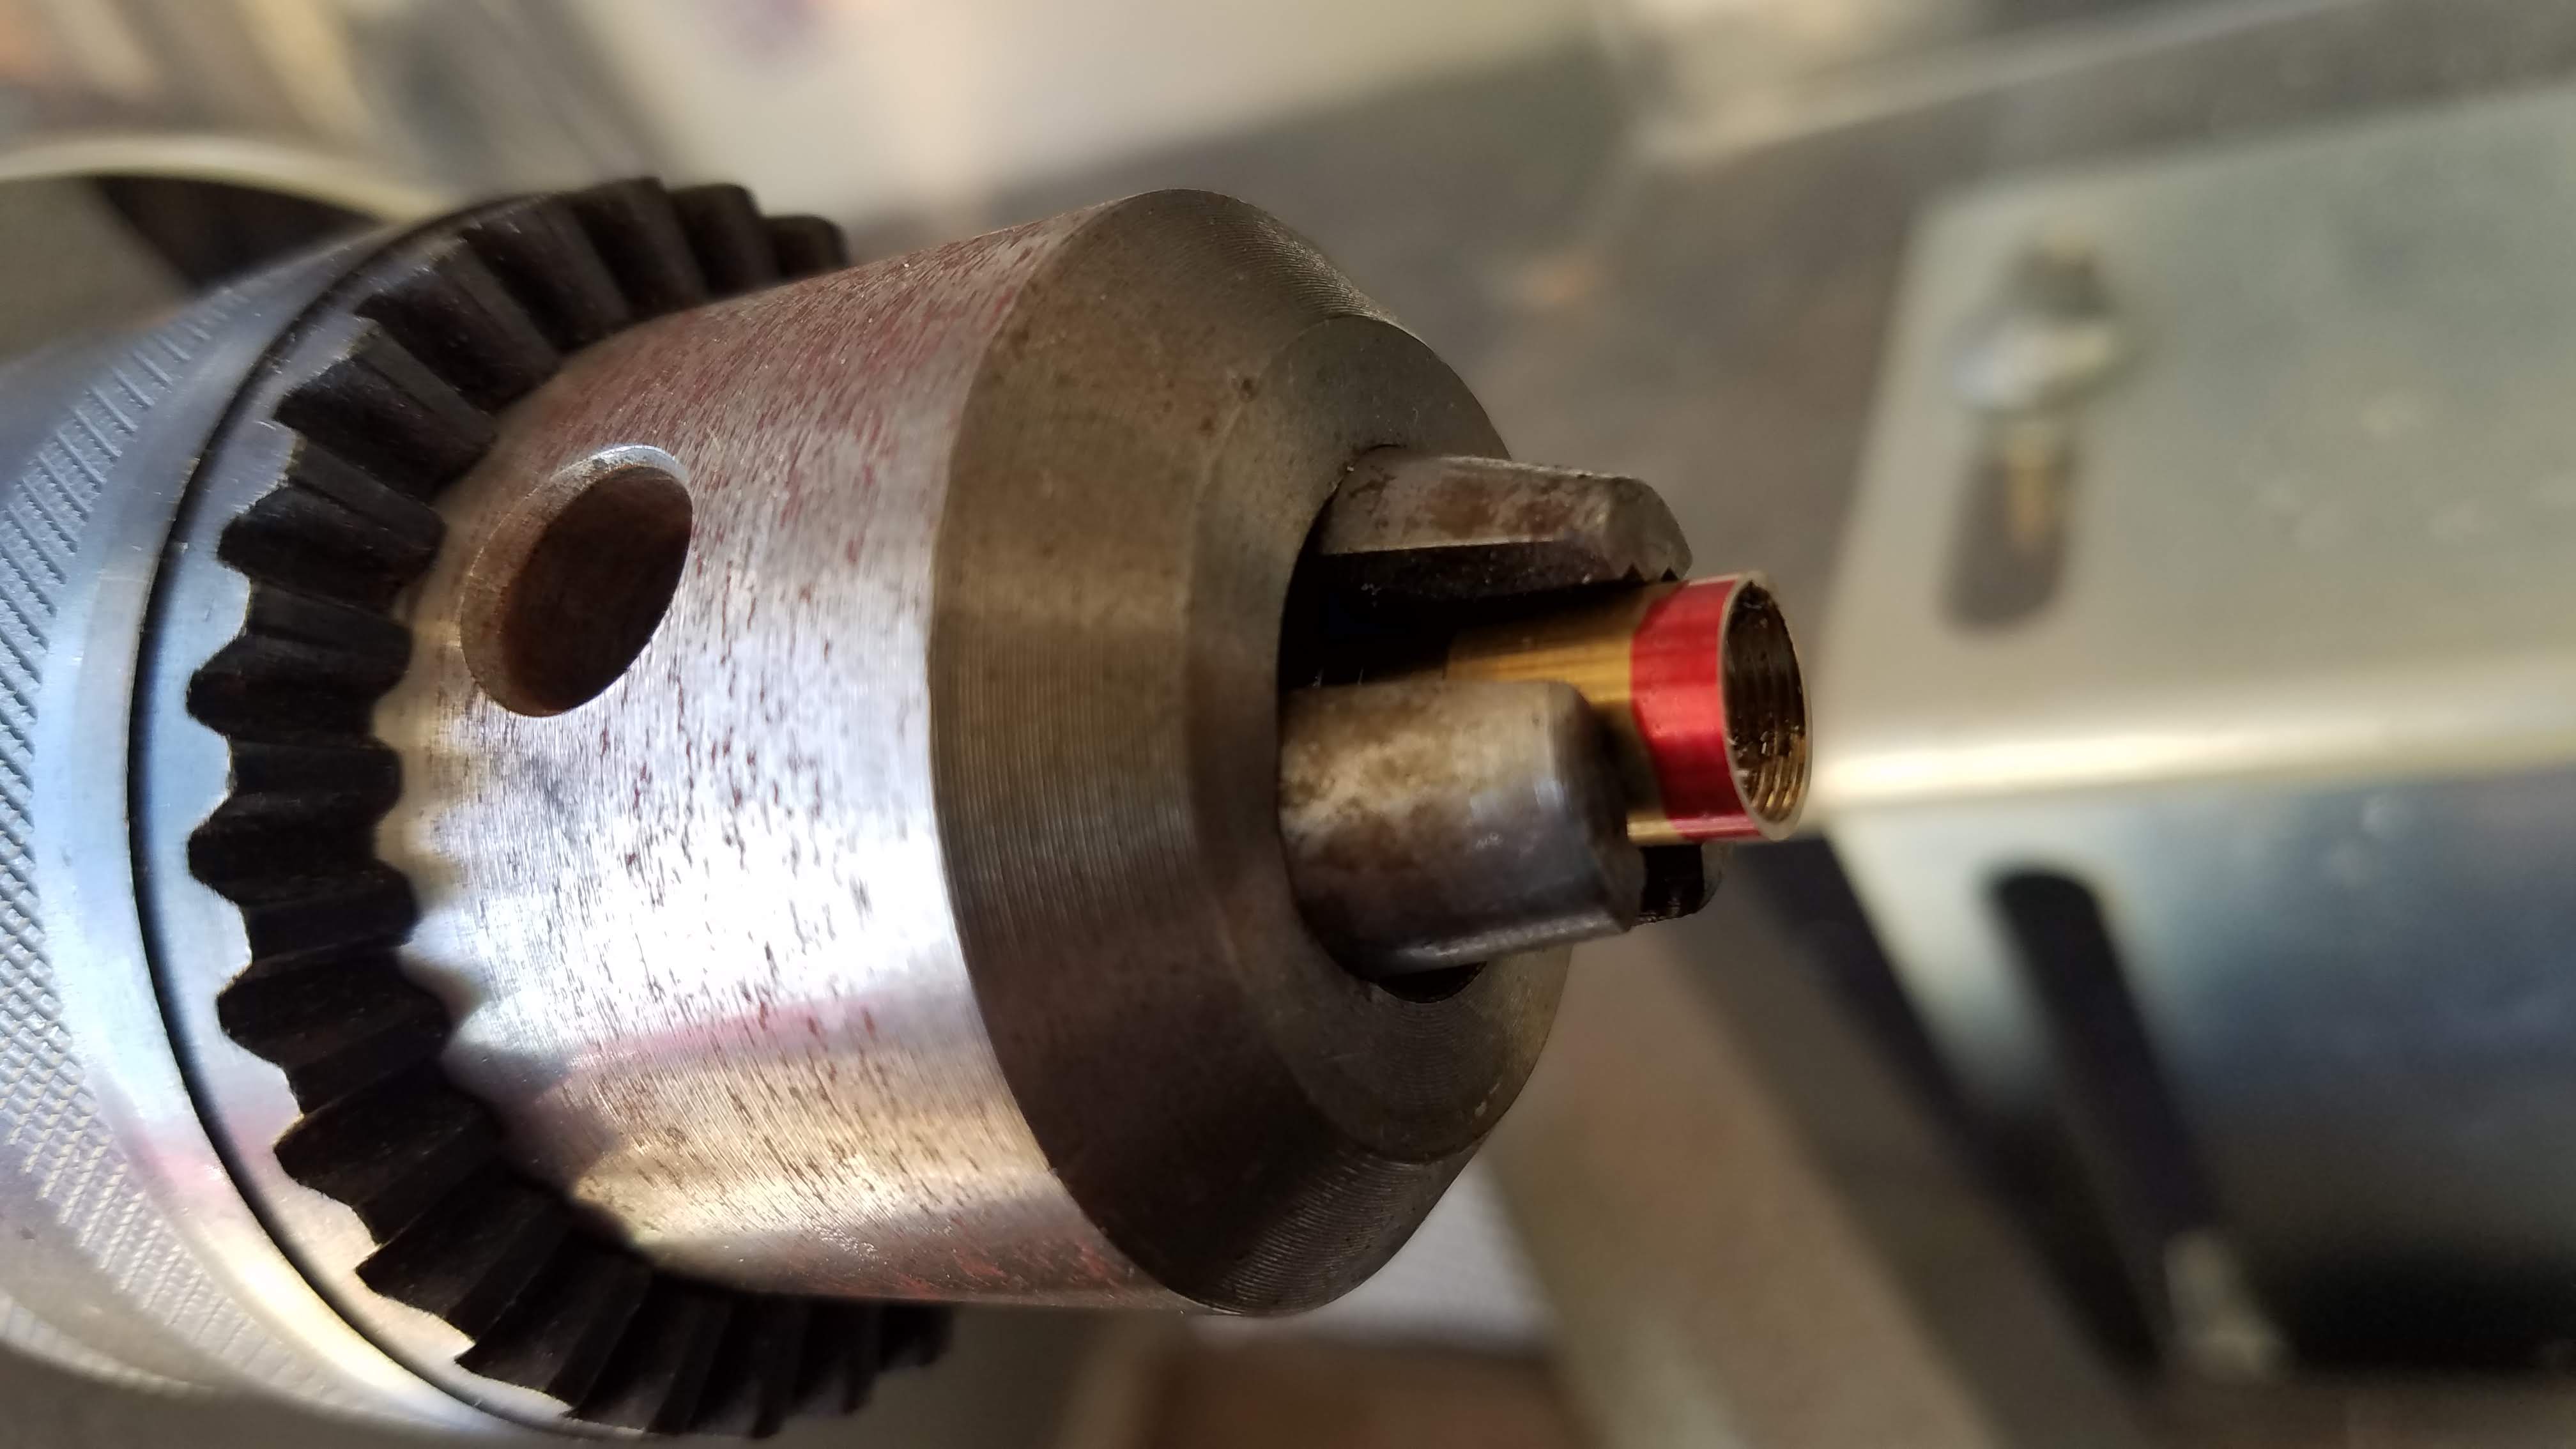
The cap was too short as well, though not by quite as much.
I failed to photograph the solution, but the top of the transmission has a friction fit to an insert in the main tube of the cap. There is also a threaded fitting that the top nut threads onto to retain the pocket clip. The very top of the transmission was bumping the bottom of that fitting. I tried to remove that fitting with a hammer and punch, but I don’t think I had enough retention on the part and the fitting wouldn’t budge.
I made a (fairly poor) cutting tool to remove material from the fitting from inside the part. It took a bit of force to cut (abrade, really) the piece to clear the top of the transmission, but the mission was a success!
Friends who have followed this project (often without necessarily *wanting* to follow this project), after hearing of the various delays and issues with blanks and simply the number of units to make, have asked if I would ever do another large order. The answer is definitely yes. I might try to dissuade the use of salvaged tree branches, but I enjoyed the actual pen making and I am certainly willing to do more of that.
I do not intentionally update this blog quarterly, but that does appear to be how it turns out!
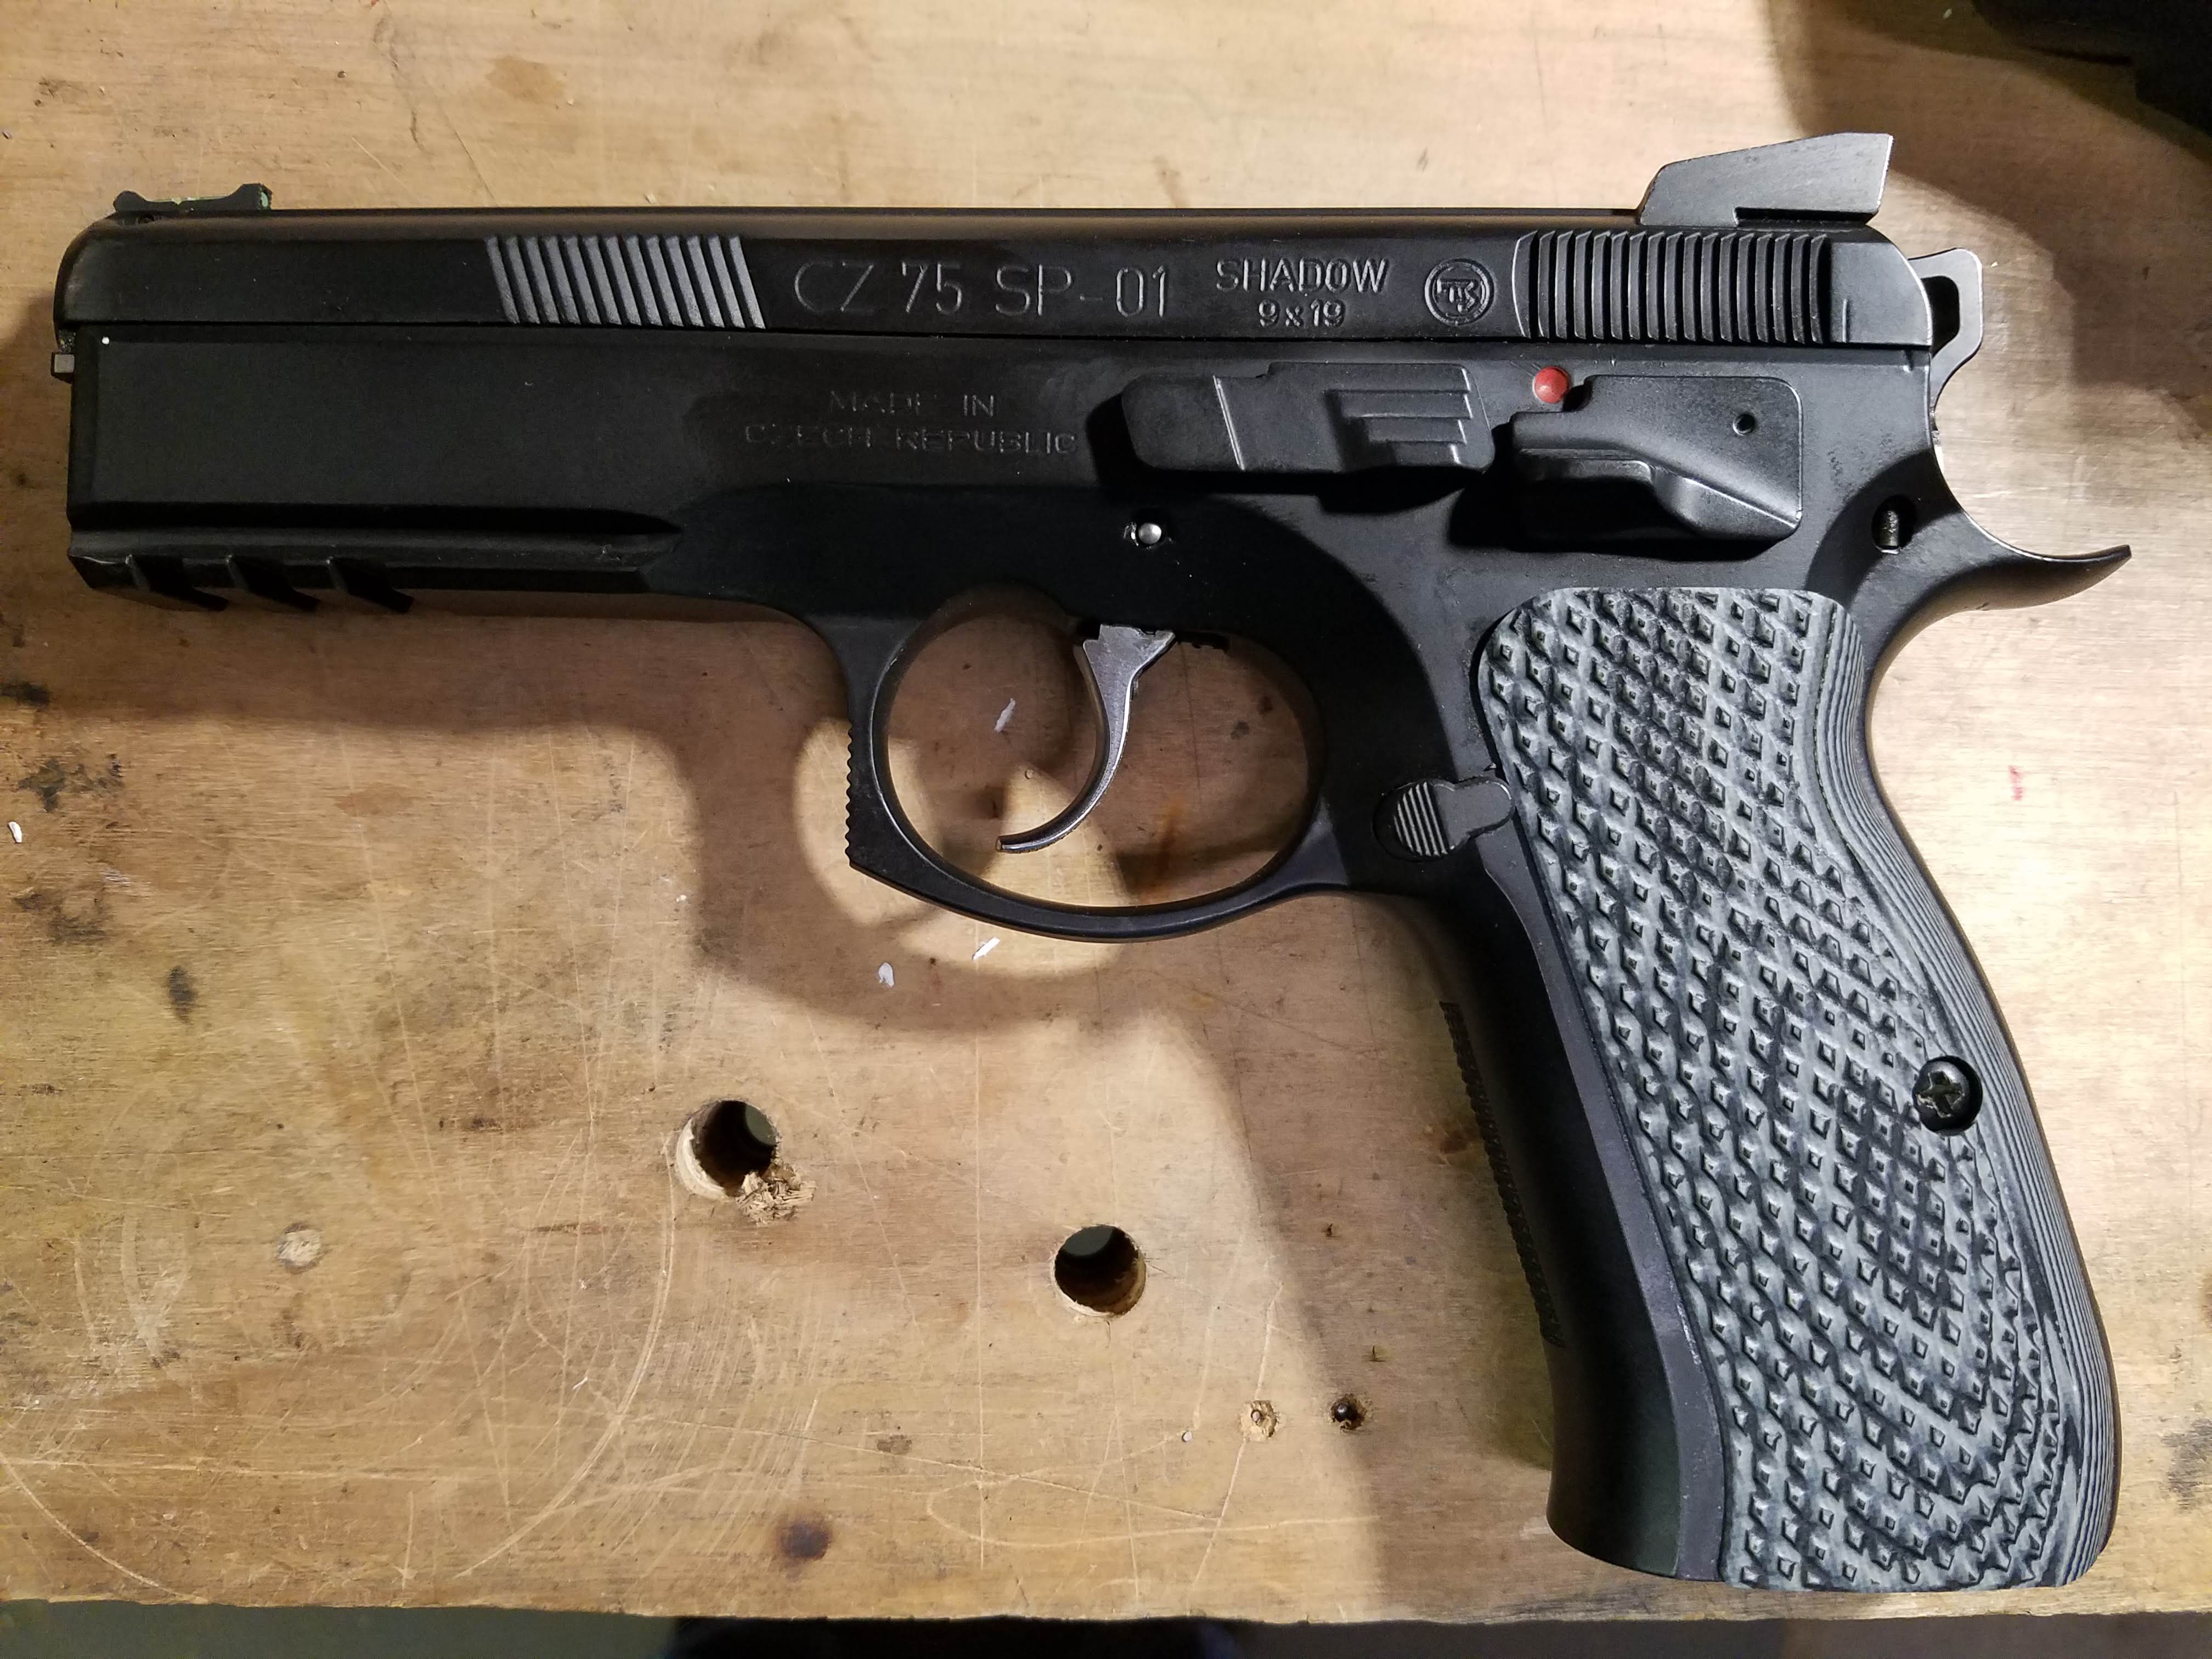
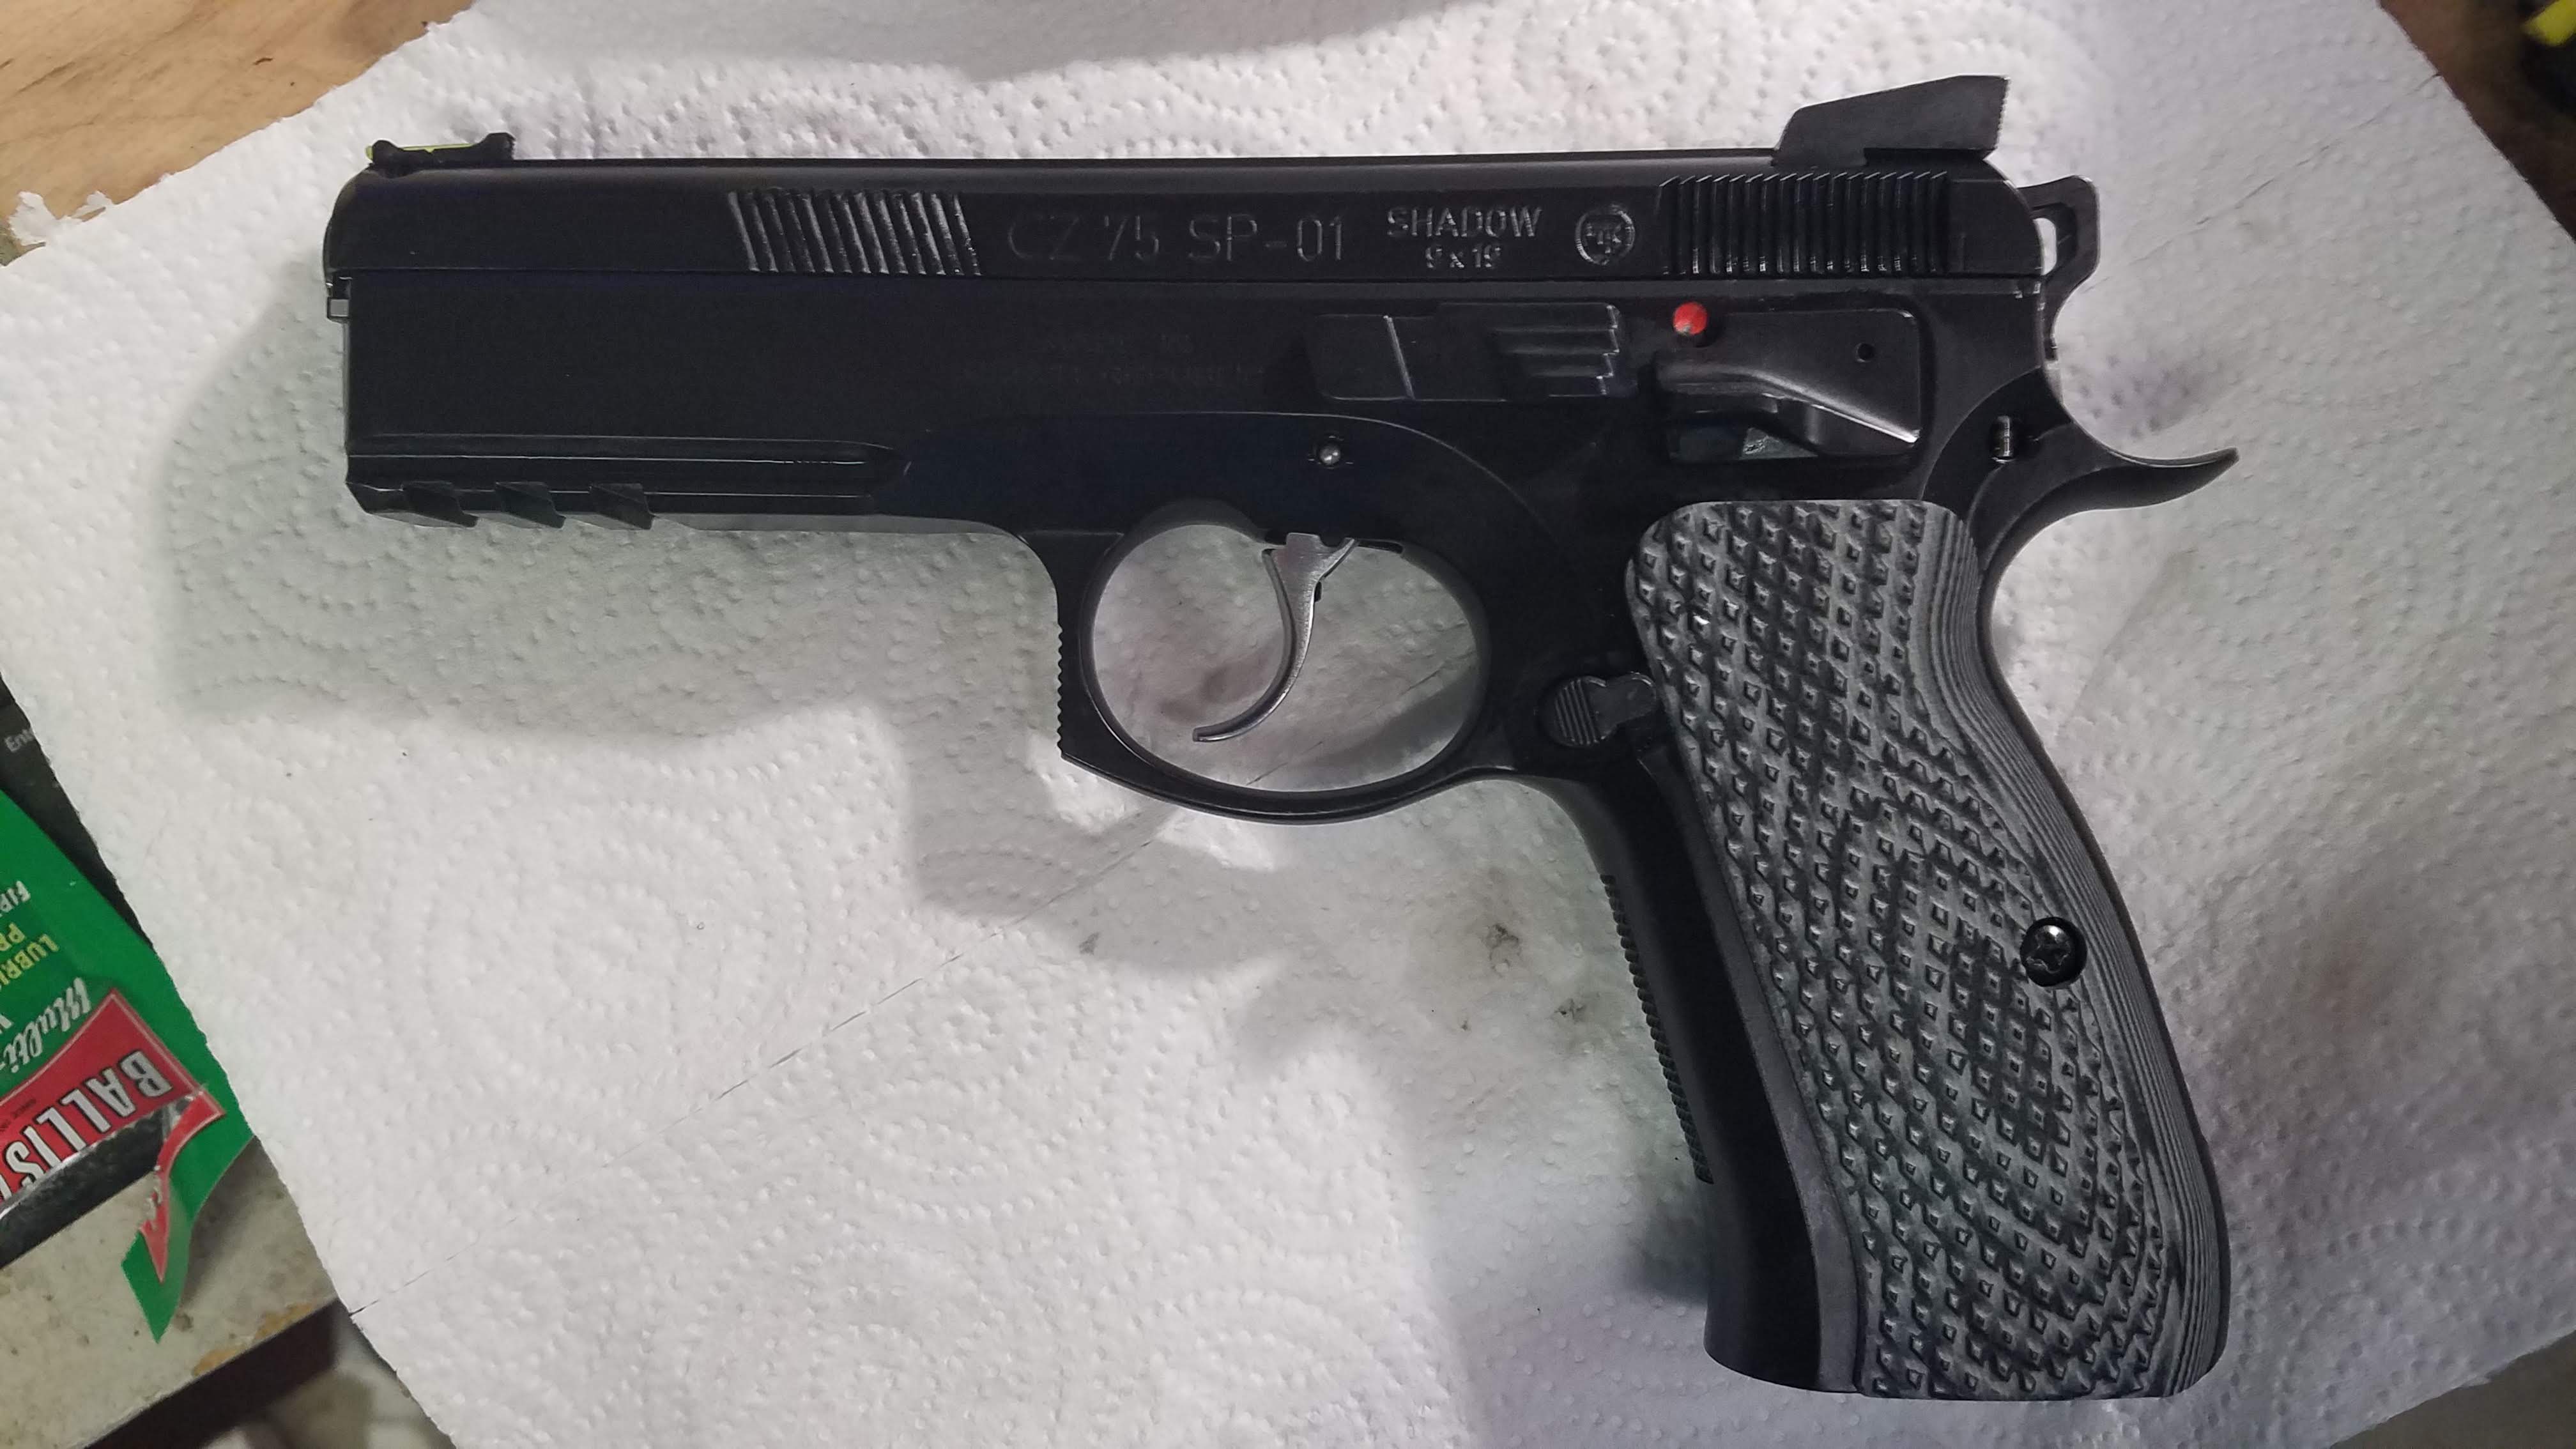
In mid-April, I cut a deal on a CZ Shadow SP-01 from a fellow Cross Timbers guy. He had already installed all the Pro Package parts that Cajun Gunworks offers and included all the original parts, a CompTac holster and mag pouches and a stack of magazines. It was simply too nice to pass up.
It seems to work ok…
Although I had that nice new (to me) CZ with an incredible trigger, I didn’t want to recalibrate my brain thing for another pistol so close to Texas State.
I worked for the TX State Republic of Comp-Tac match. Hey, I like Comp-Tac products and as the sponsor, they can call it what they want. But Republic of Comp-Tac?
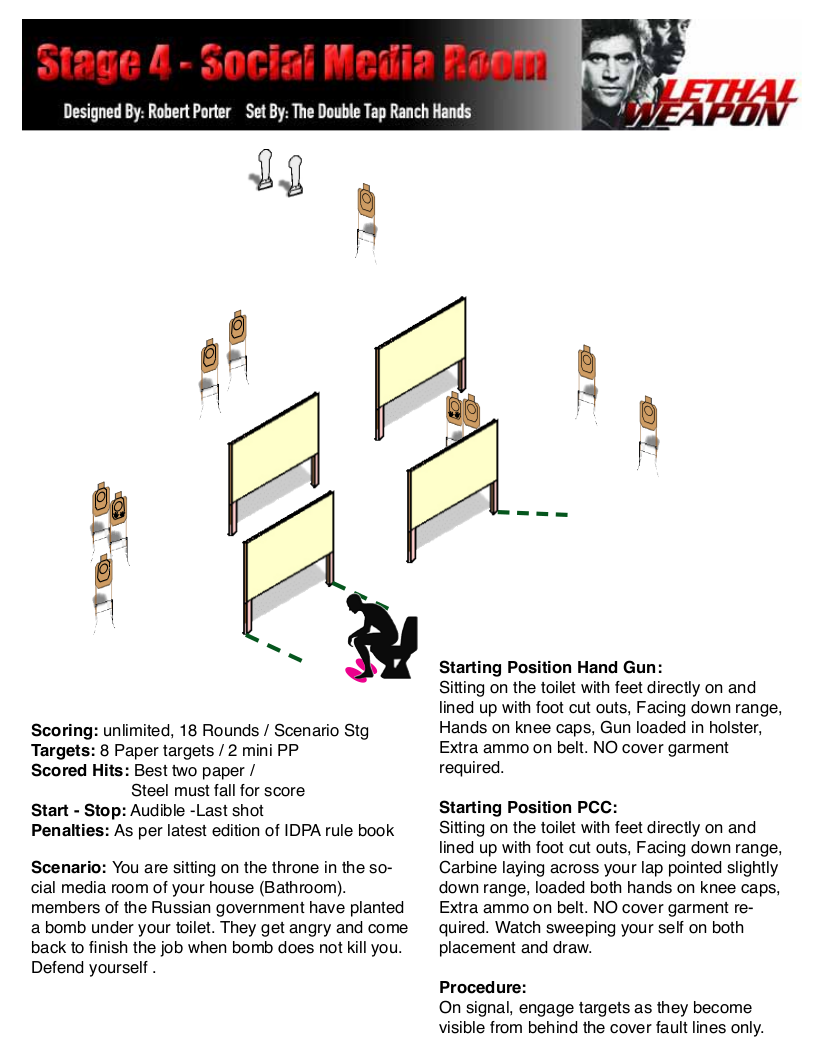
In any case, the theme of the match was scenes from Lethal Weapon. I was CSO for stage 4:
While all the scenarios were taken from the movies, I think this stage with this prop was the one that was instantly recognized without a stage description. It was not particularly tricky to shoot, but the scenario was ripe for lots of restroom humor. Too late in the day, I realized I should have had some little prize to award contestants for the hidden category of best toilet joke. An opportunity missed…
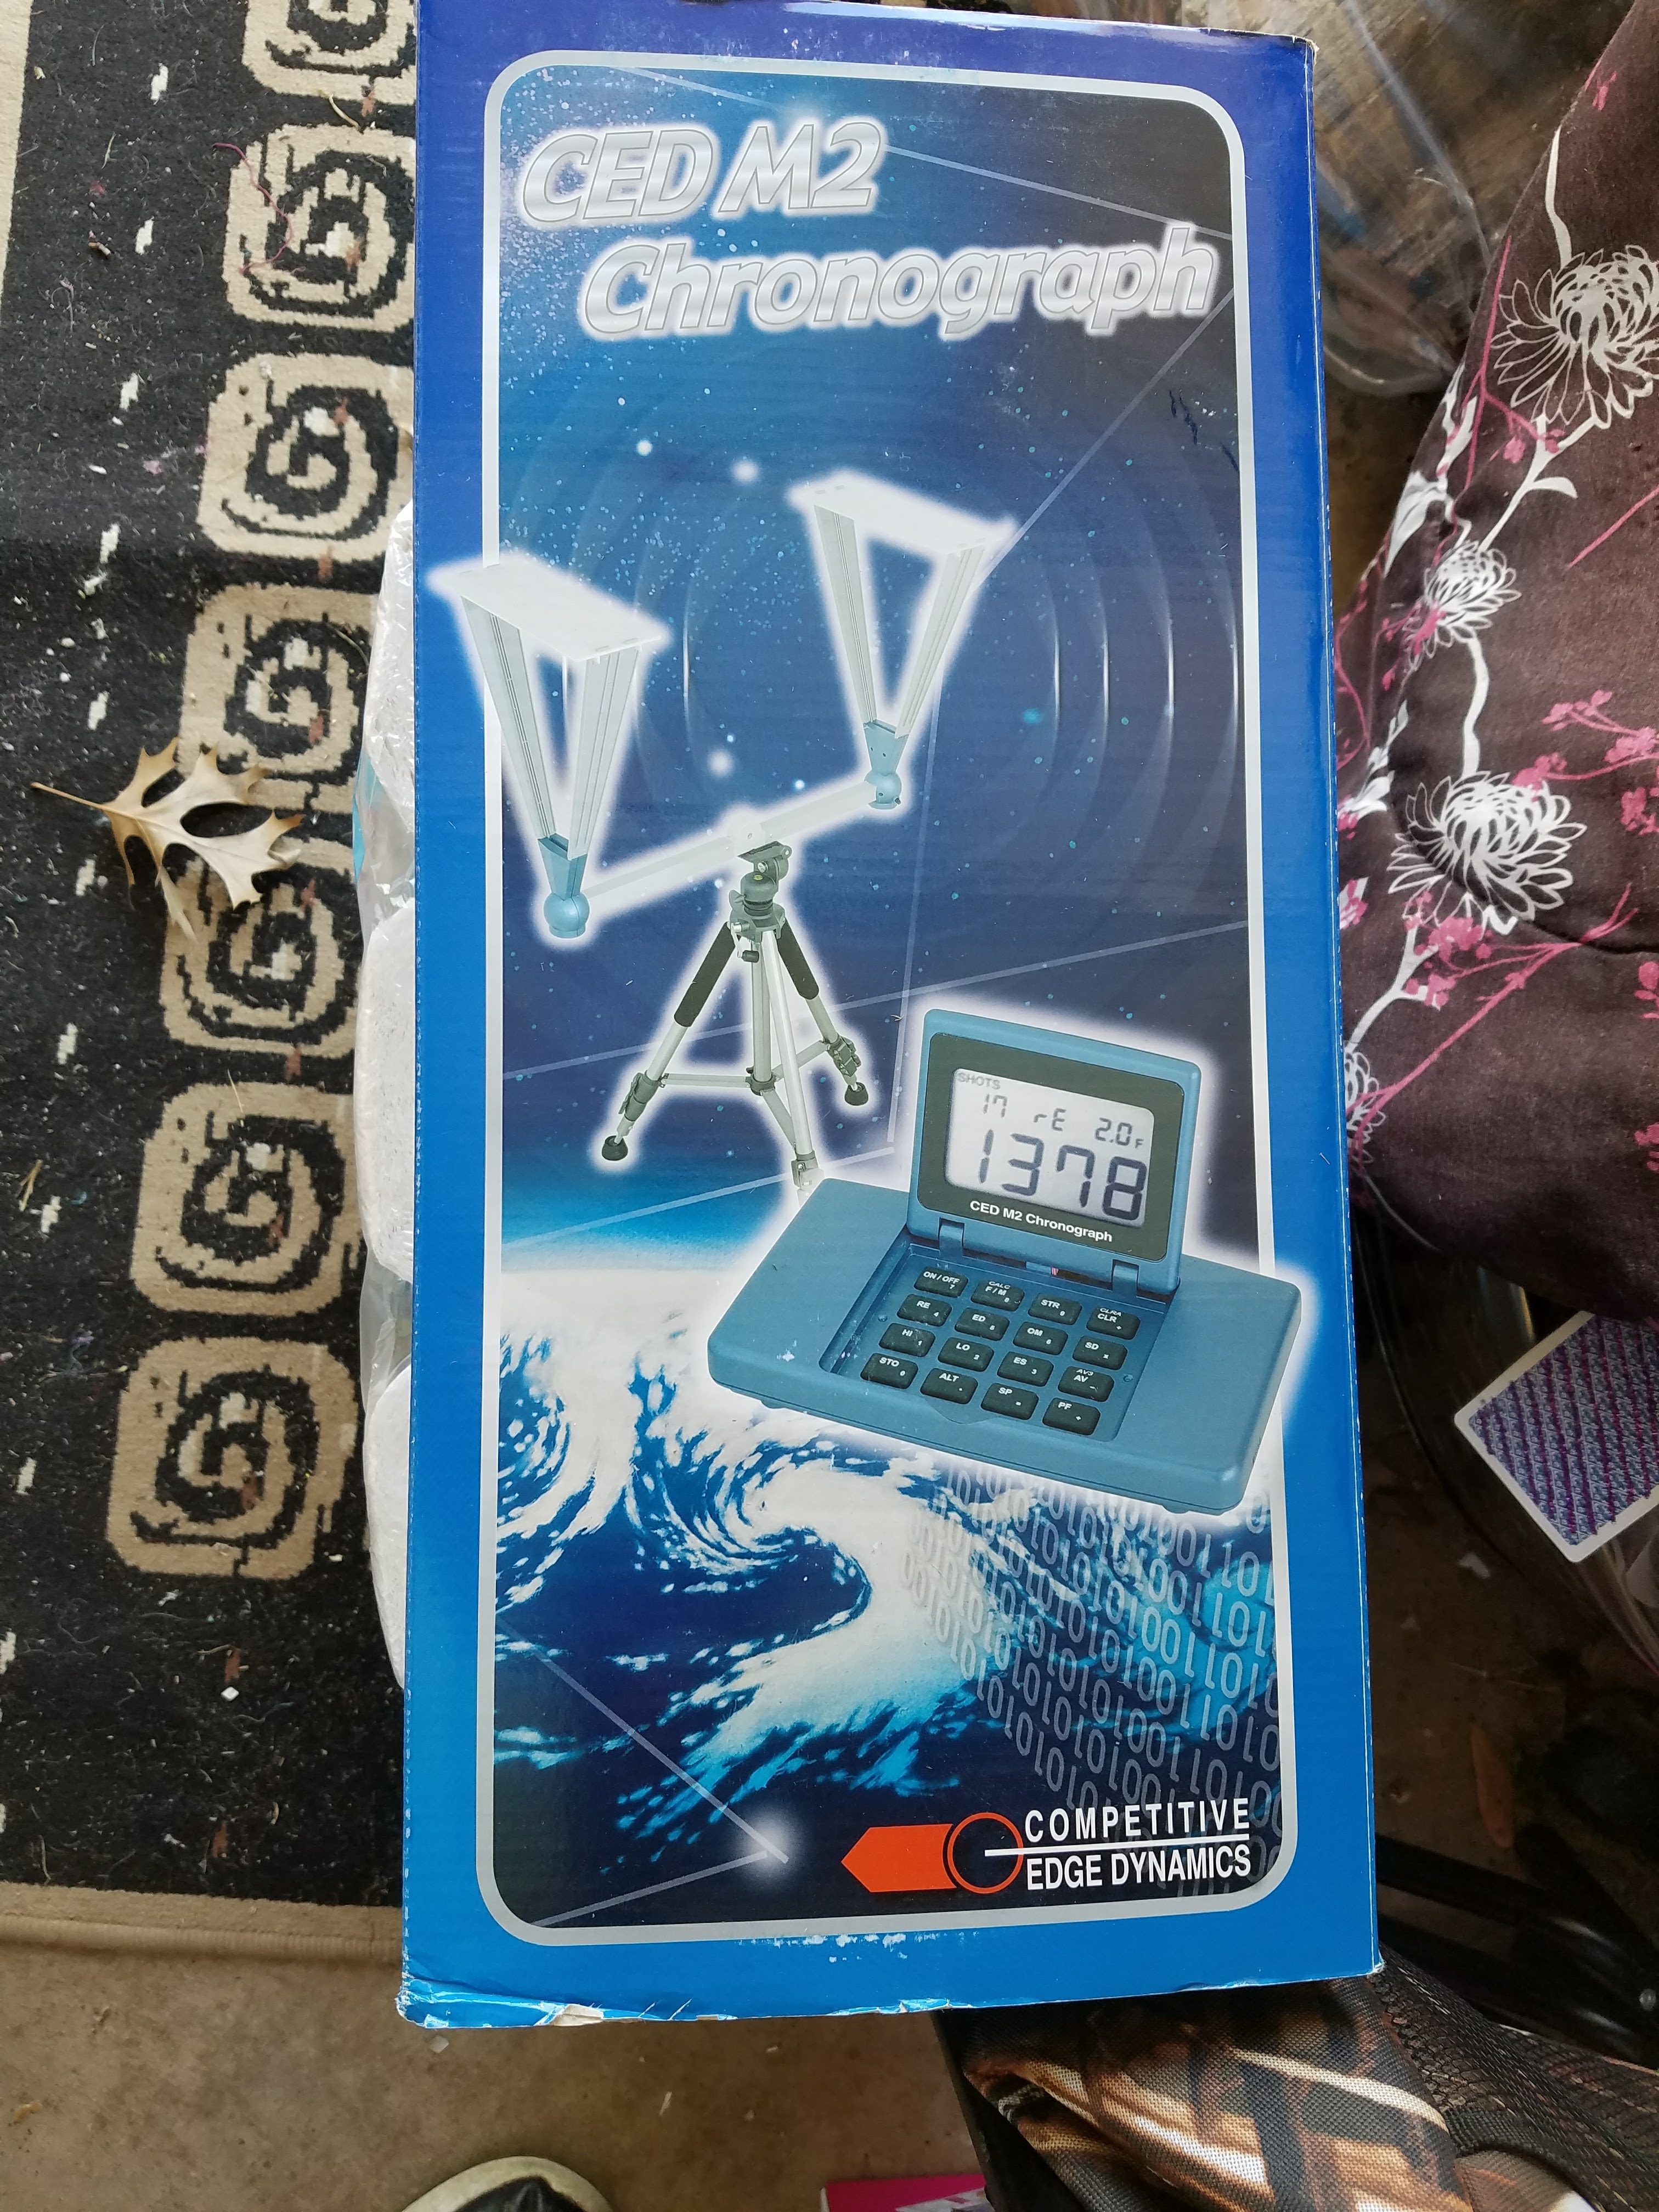
On staff day, I shot reasonably well. I placed (without award) 4th in my division and class. While I did not win any shooting awards, I did win a pretty valuable drawing prize, a CED chronograph.
Now, I have a chrono that I have been plenty happy with. I tried out the new one and found that it has some very nice features in the controller, such as calculating power factor, gobs of string memory, the ability to clock extremely slow projectiles. On the other hand, it is physically larger and substantially more complex to deploy, requiring the sensors to be clamped on to the mounting bracket and wires run to the controller. The unit generally and the screens specifically are much larger and catch more wind. Alternatively, my ProChrono is a one piece affair. Put it on the tripod, turn it on and go. If it is overcast, you don’t even have to use the screens. (actually, that’s true of most chronographs).
The CED would lend itself well to a permanent or semi-permanent installation. I have not connected it to the my laptop with the supplied USB cable, and obviously have not used the PC software. There may be features that would influence my opinion overall, but I would summarize by saying the CED M2 has features I don’t really need in a package that is unhandily large. I’ll probably trade it for something 🙂
The TX State match was the last in which I used my Glock, preferring at this point the CZ. The CZ is treating me fairly well, too. The only thing I have done to it is change the grips. The ones on it looked great and they were large enough for my hands, but a little slick. I put on some VZ G10 grips with some very aggressive texture.
This whole thing is a pretty big swing in standard procedures, not the least of which is that I am now loading mostly 9mm instead of 40 S&W. I have coordinated with fellow CZ shooters to load ballistically similar ammo so that we can serve as backup for one another, floating all boats kinda stuff. I am loading 135g Cimarron bullets running just under 1000 FPS.
I have been working out my hands, particularly the left, to produce a more solid grip. I got a set of simple rubber exercisers, ranging from 30 to 80 pounds. I keep one on my desk at work, one in my car and a couple at home. The one in the car gets the most use, as my drive to and from work is about an hour each way.
I signed up to work my first USPSA major match, the 2018 Cowtown Classic. I also had my first major match DQ. I managed to have an AD during my first mag change on my first stage. Ouch. Pistol was level and pointed downrange. Obviously, my trigger finger was not in the right place, but the much lighter trigger on the CZ may have revealed that more readily than the old Glock might have. At least I got it out of the way early. I had a total match time of about 12 seconds, but the mikes sure added up. 🙂
I spent the rest of staff day taping, occasionally running the scorepad and deflecting apologies when someone would ask me how I had shot any particular stage 🙂 For match day, I was the full time scorekeeper on our stage.
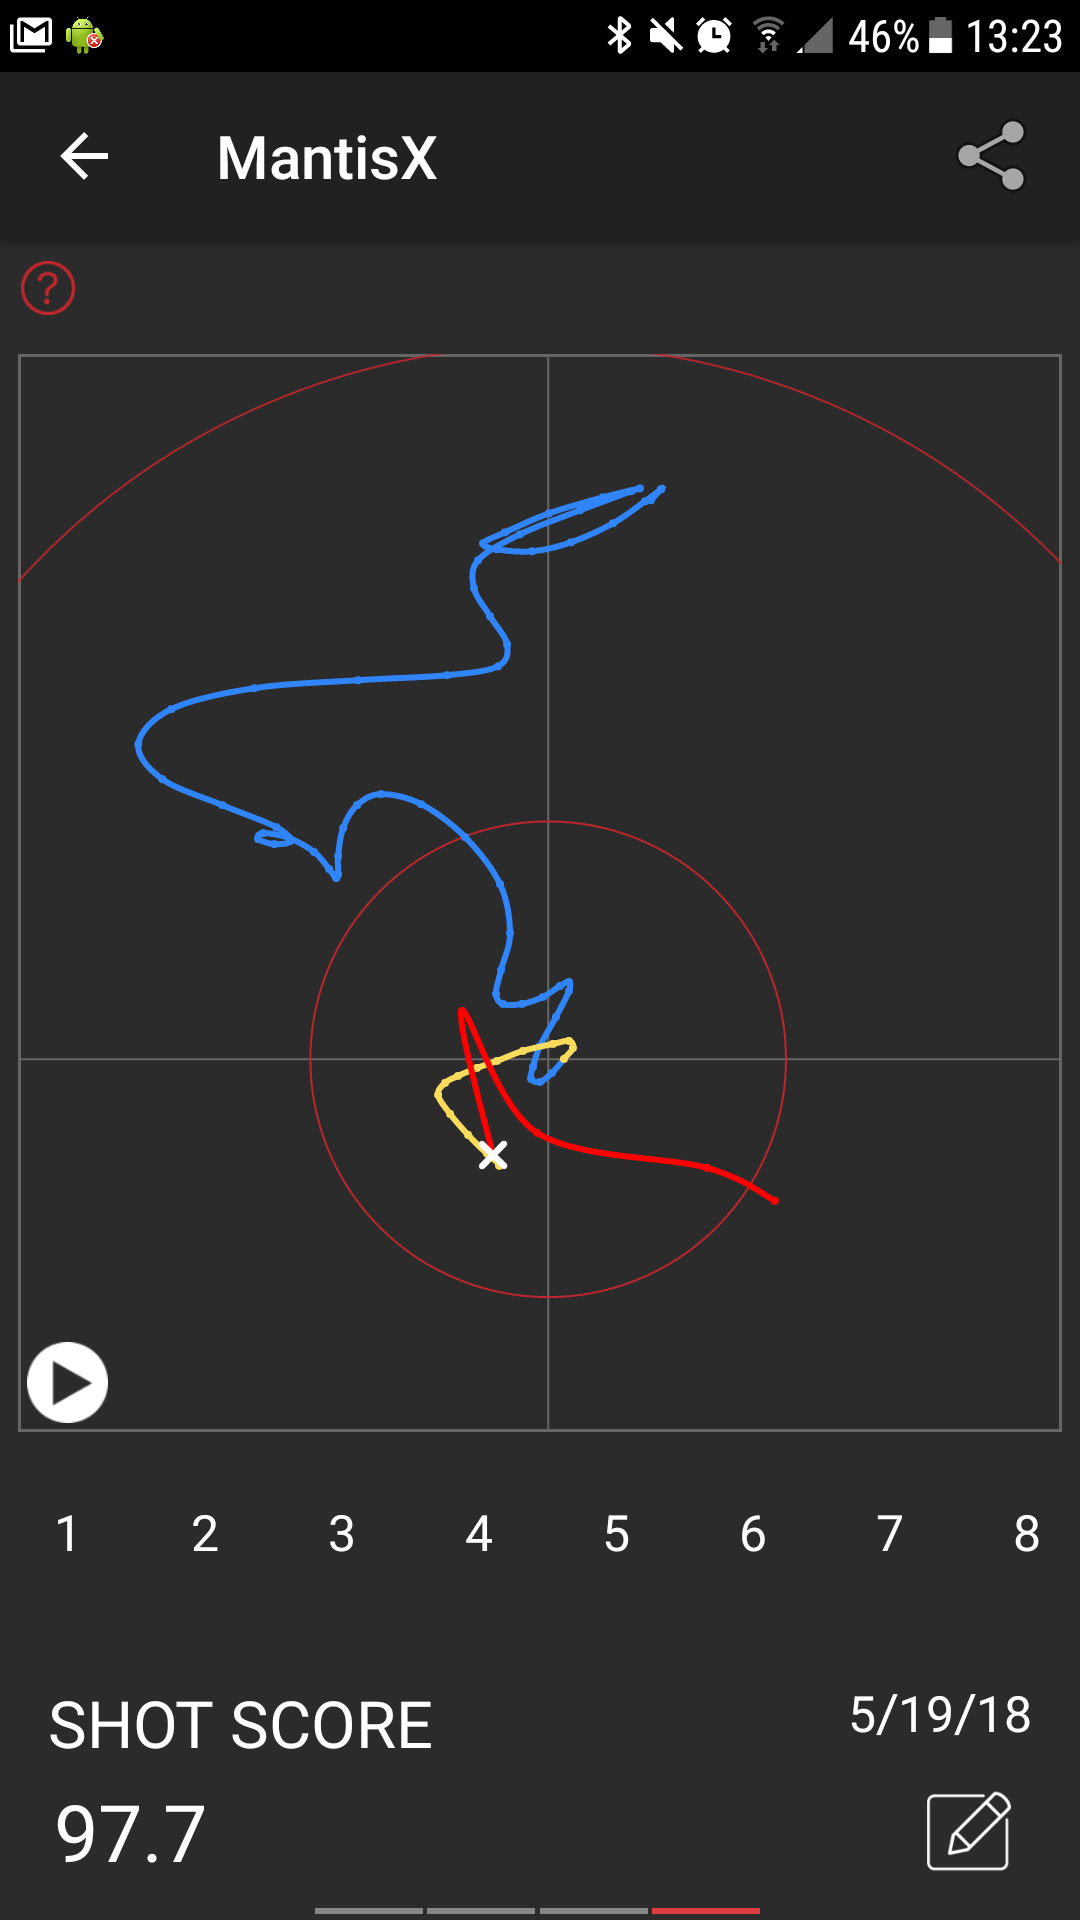
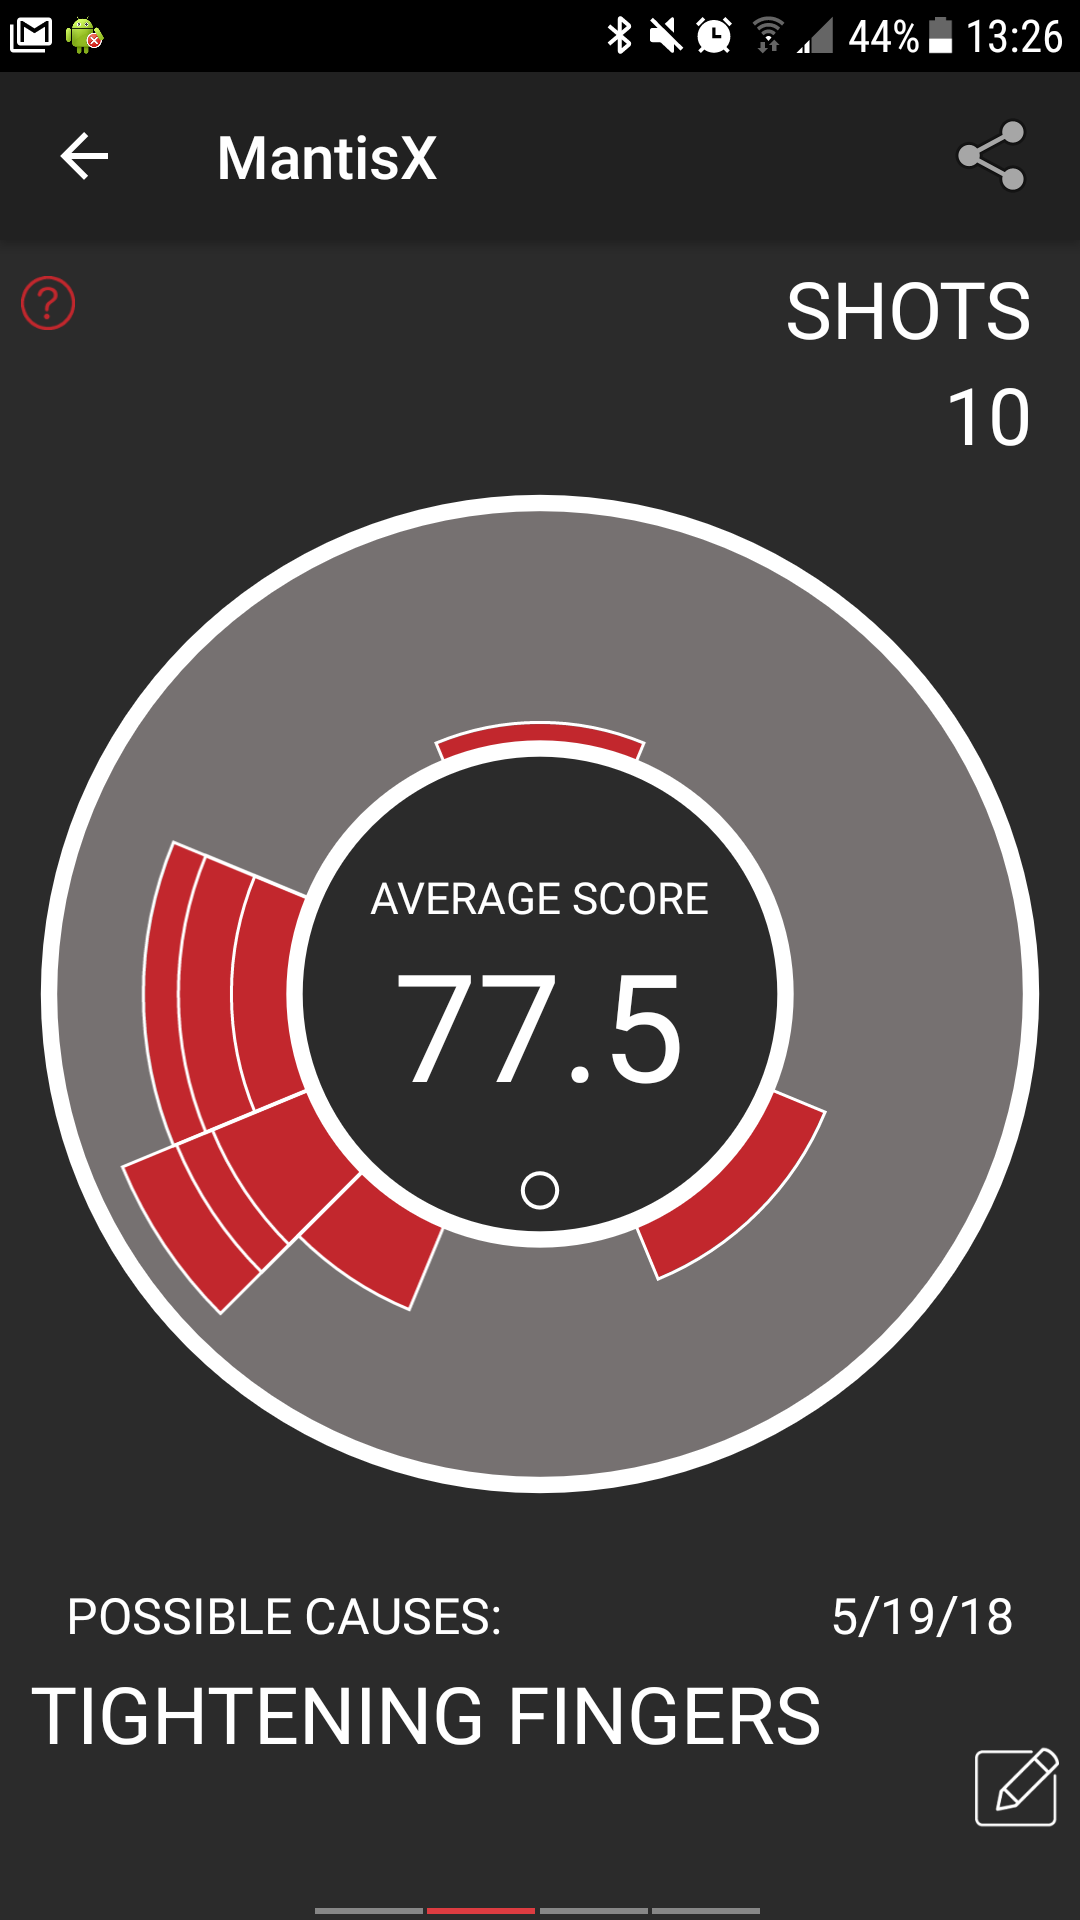
In what was sort of an impulse purchase, I picked up a MantisX training device. Basically, its a Bluetooth equipped accelerometer that mounts on a Picatinny rail. I say impulse purchase because I had been interested for some time and while perusing the match book for the Gulf Coast Championship, I saw that they were a sponsor and I decided to pull the trigger, so to speak.
It is an interesting device. You mount it, start the app on your phone (which requires setting up an account with them) and connect to it via Bluetooth. It “listens” for a hammer fall and reports on how much your point of aim wanders for 200 milliseconds or so either side of the hammer.
The blue trace is aiming time, yellow is during your (estimated) trigger pull time and red is after the hammer falls. As you can see, it is very sensitive to movement. That trace looks like I was waving the pistol around like a madman, but the exercise scored a 97.7 out of 100.
It has several training exercises for you to work through. One of them includes an analysis of possible causes for the biggest issue during that particular exercise.
My biggest complaint is that with the 400 or so millisecond window on either side of the hammer fall, it is not suited to analyzing movement for rapid followup shots or split timing or any of those sorts of competitive data. Even so, I think it has helped me, particularly pulling through a double action trigger.
Speaking of Gulf Coast Championship, it was hot, especially on Friday. A few of us who were squading together went to see the stages Friday afternoon. The actual temperature wasn’t so terrible, numerically, but it was death by drowning to breathe the floating liquid that passes for air down there.
Match day was a little better due to mostly cloudy conditions that kept the sun at bay. They were challenging stages and a lot of fun. I was 9th in my division and class, which perhaps obviously got no award, but 7th, 8th and 9th were within a 4 second window.
Leaving the site at the end of the day, I didn’t notice that the powered gate had begun to close and I managed to get a little scrape from it. It definitely could have been worse! It mostly buffed out.
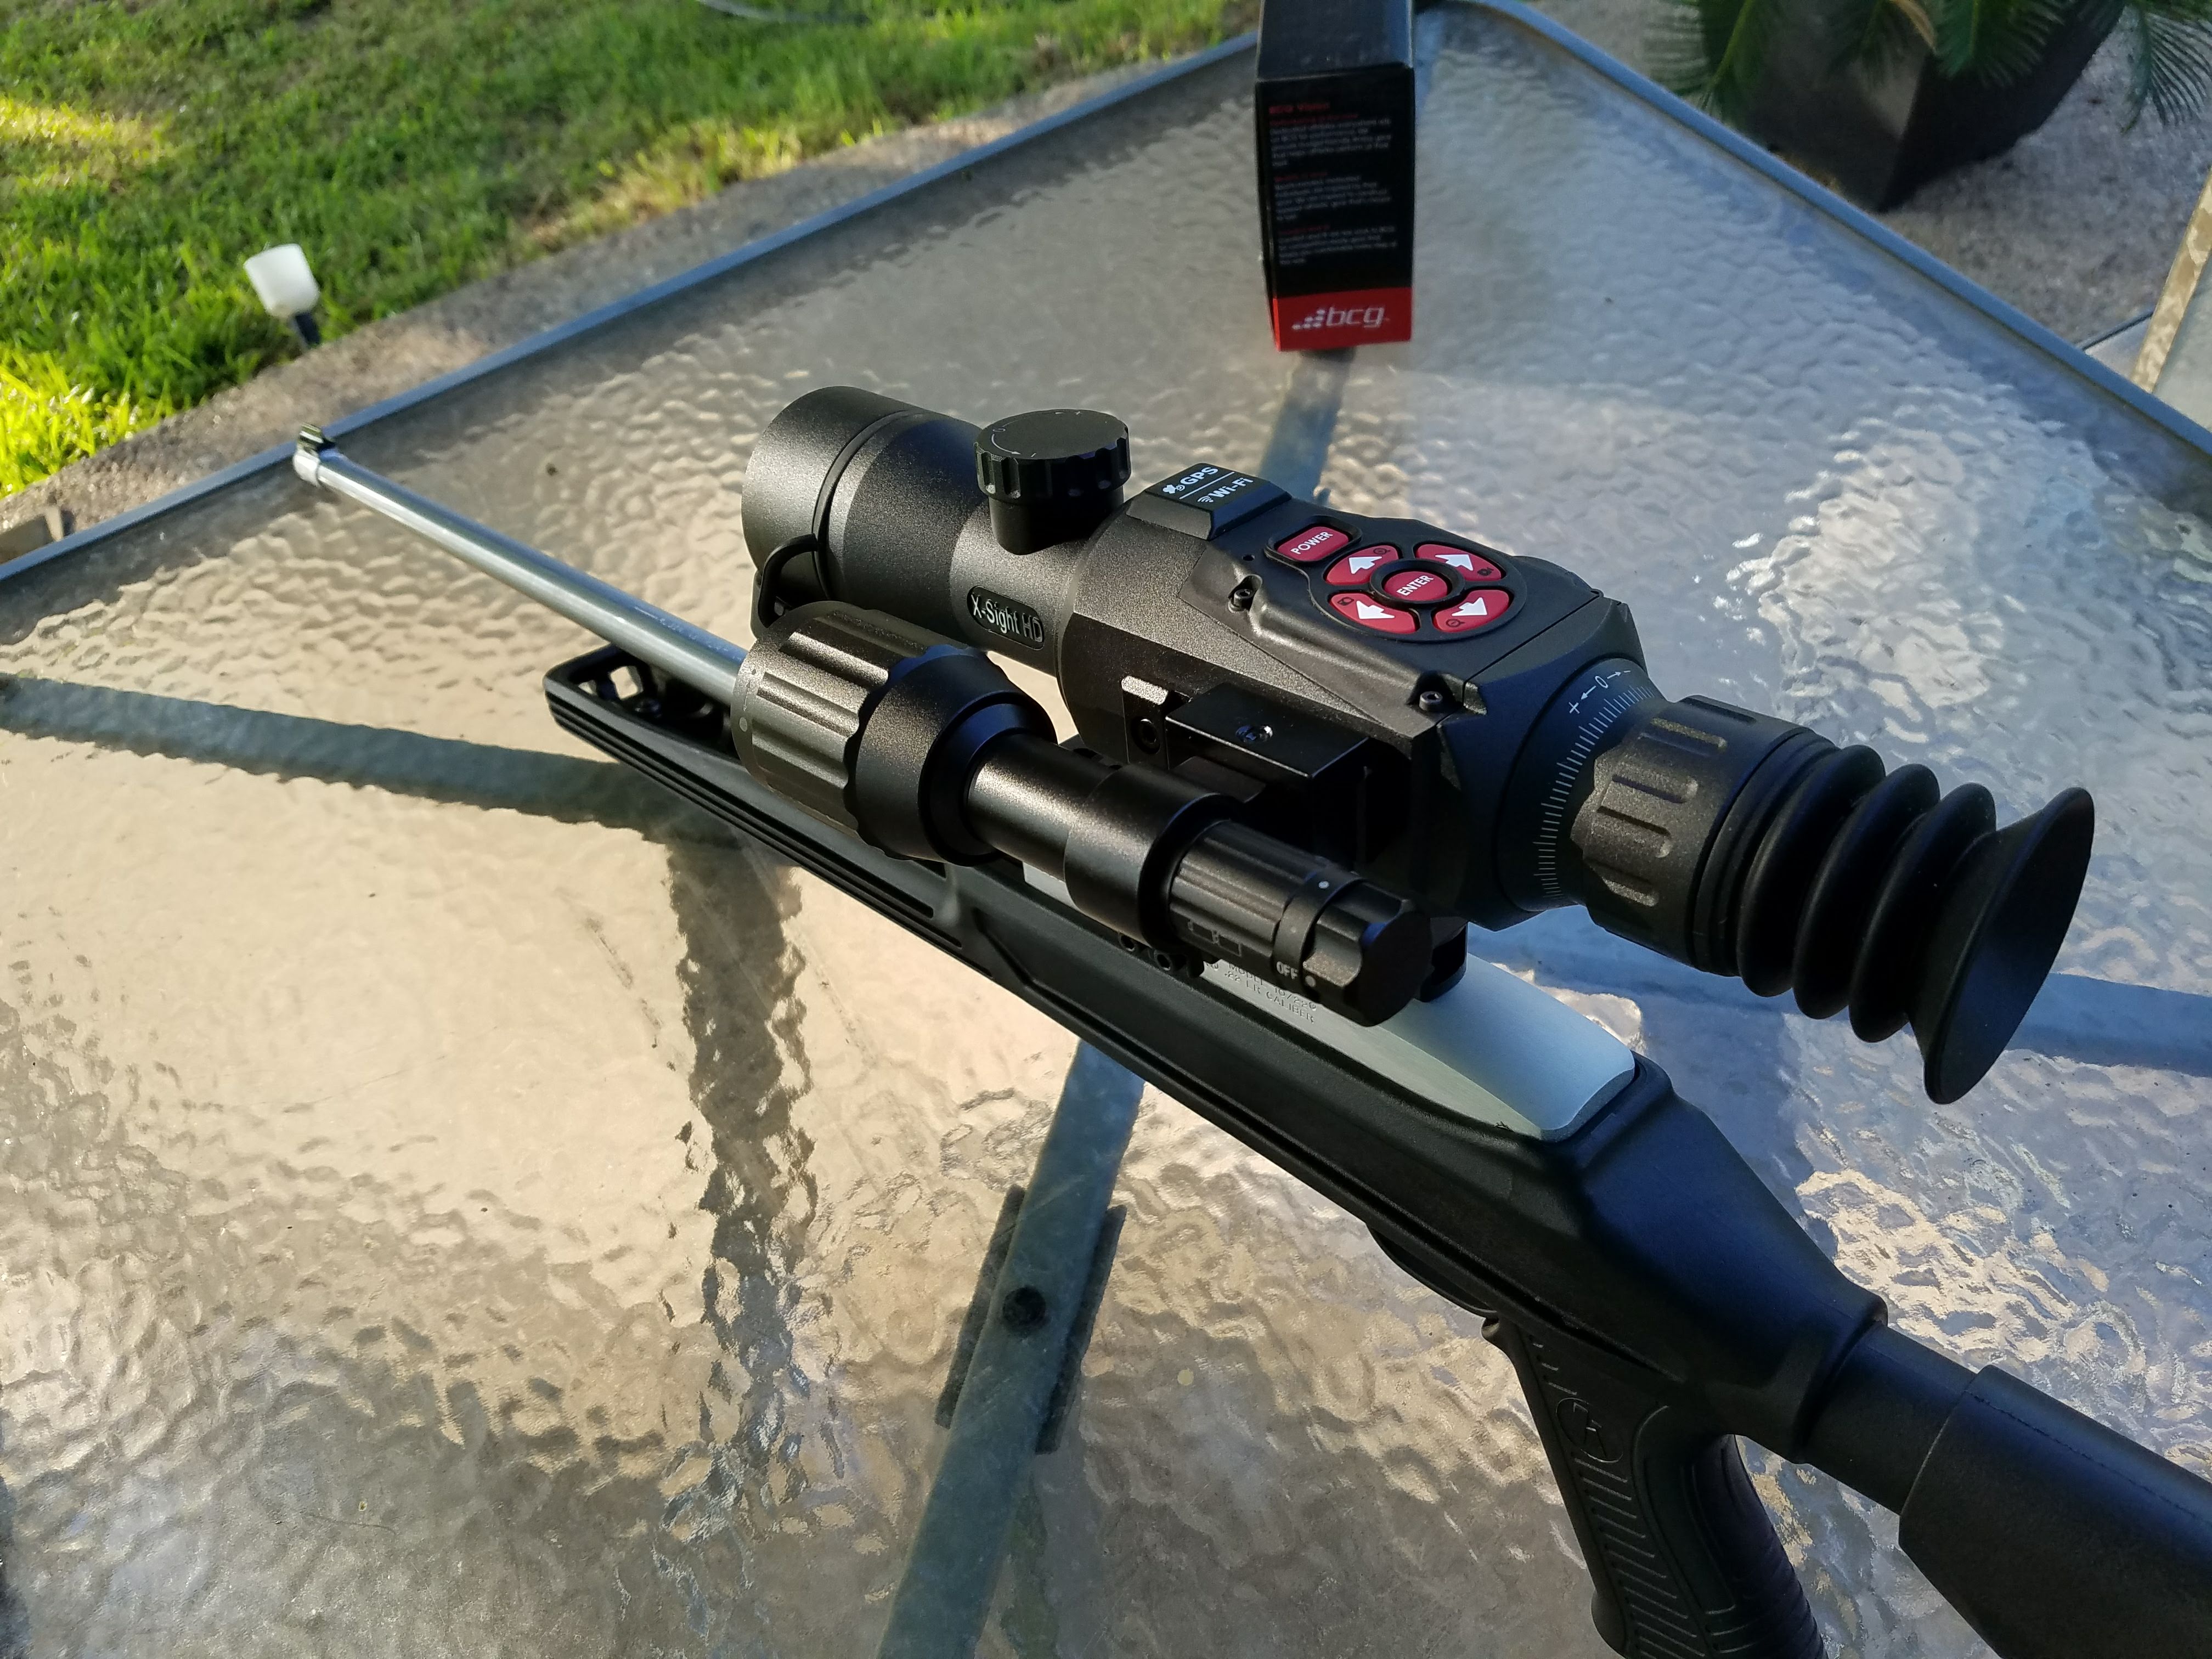
I have wanted a night vision scope of some kind for quite a while. I found an ATN X-Sight II for a decent price. Long term, I think I will put it on my pellet rifle as a tool to address small nocturnal varmints, but for learning about it, I put it on my Ruger 10/22.
I sighted it in in daylight conditions, mostly to learn about the copious menus it has. A couple of the cooler features are that you can store various profiles that make it easier to move it between weapons, but also so you can store multiple profiles for each weapon. You might have a profile for one rifle sighted in at 25 yards and the same rifle sighted in at 100 yards. Just pick the profile from the menu and aim accordingly.
It also has some rangefinding capabilities, based on stored height information about certain targets. For example, it includes a profile for a deer that assumes 5.9 feet from hooves to tips of antlers. In rangefinding mode (which is not a particularly quick process), it tells you to hold a line and the bottom of the target then at the top of the target. It calculates the range based on the tilt difference between the two.
I’m looking forward to trying it out in real conditions sometime.
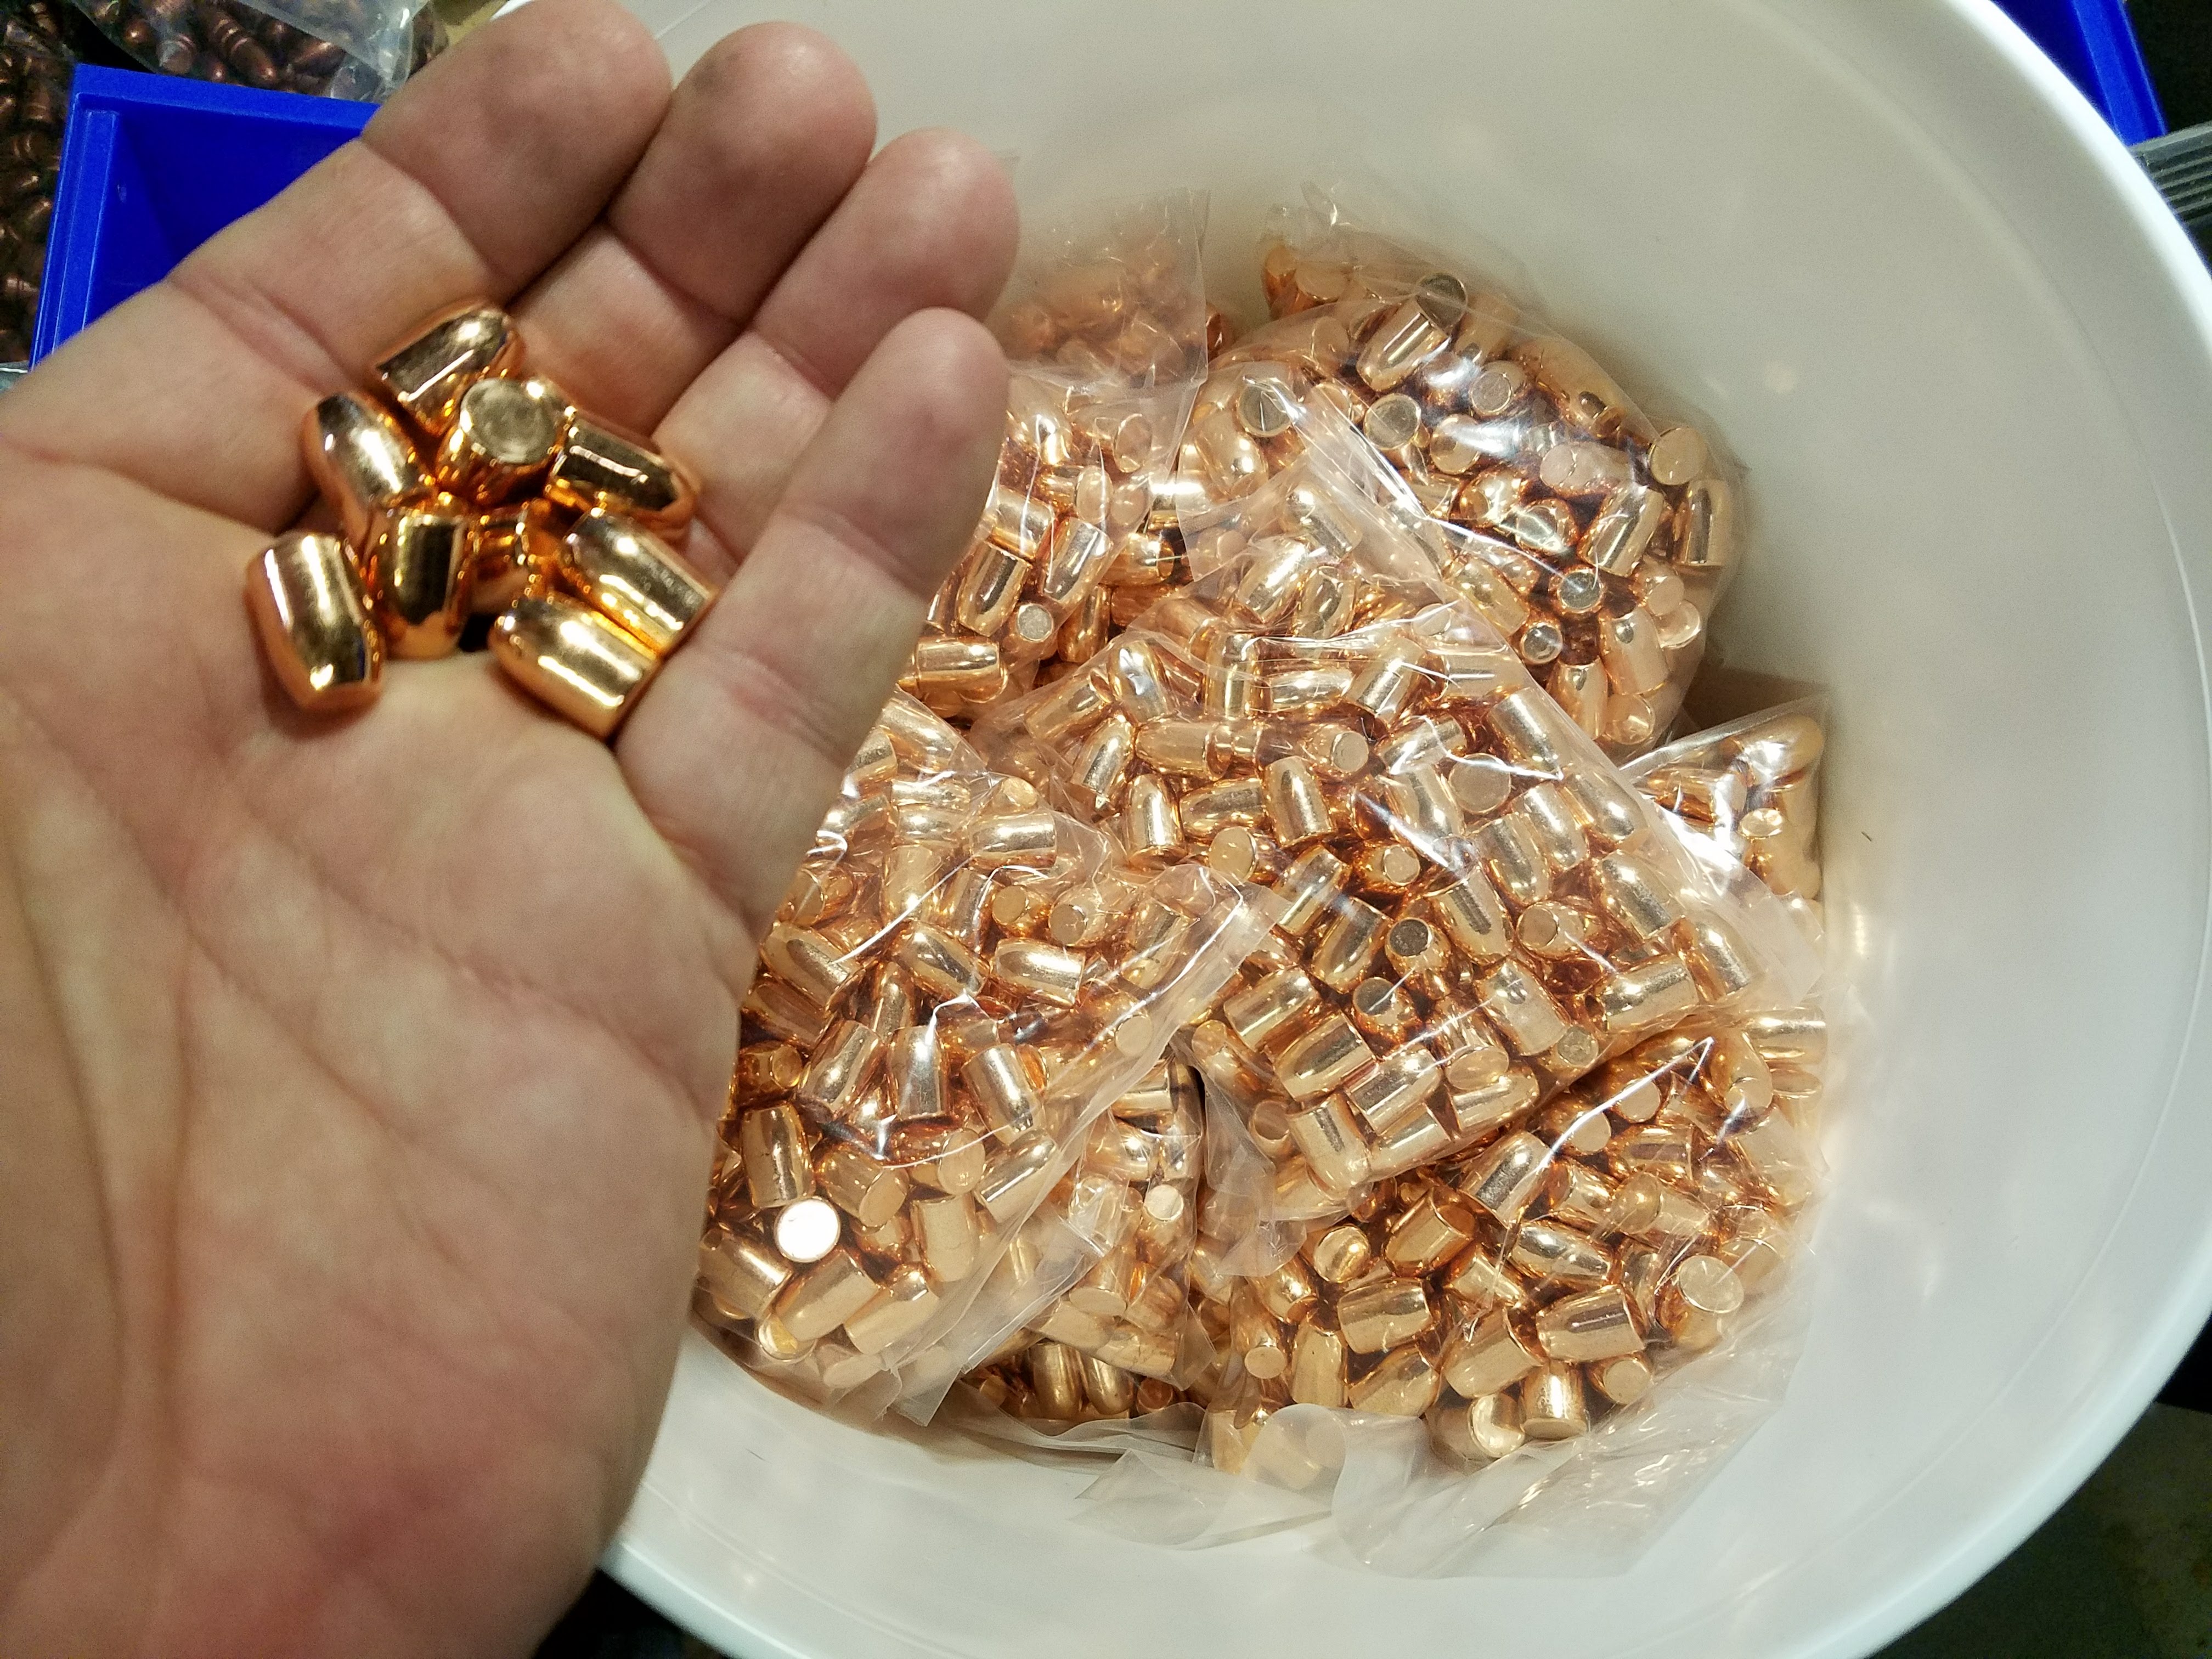
These days, I generally load Cimmaron bullets in 9mm, but I am not exclusive to one brand. Before Cimmaron, I’ve had great results with Xtreme Bullets. One of my friends prefers to load only Xtreme bullets, so when he won a gift certificate for $50 worth of Blue Bullets, we worked a trade and I ordered 1000 135g Blue Bullets in 9mm.
Like most bullets, they look really good in nickel cases.
We had a fun outdoor two gun match at the end of June. I shot the AR and loaned my PCC to friends. We had a great time! One stage had a revolver pick-up gun that had to be loaded on the clock. It also unfortunately spent most of it’s time in the sun, so it was literally hot as a pistol.
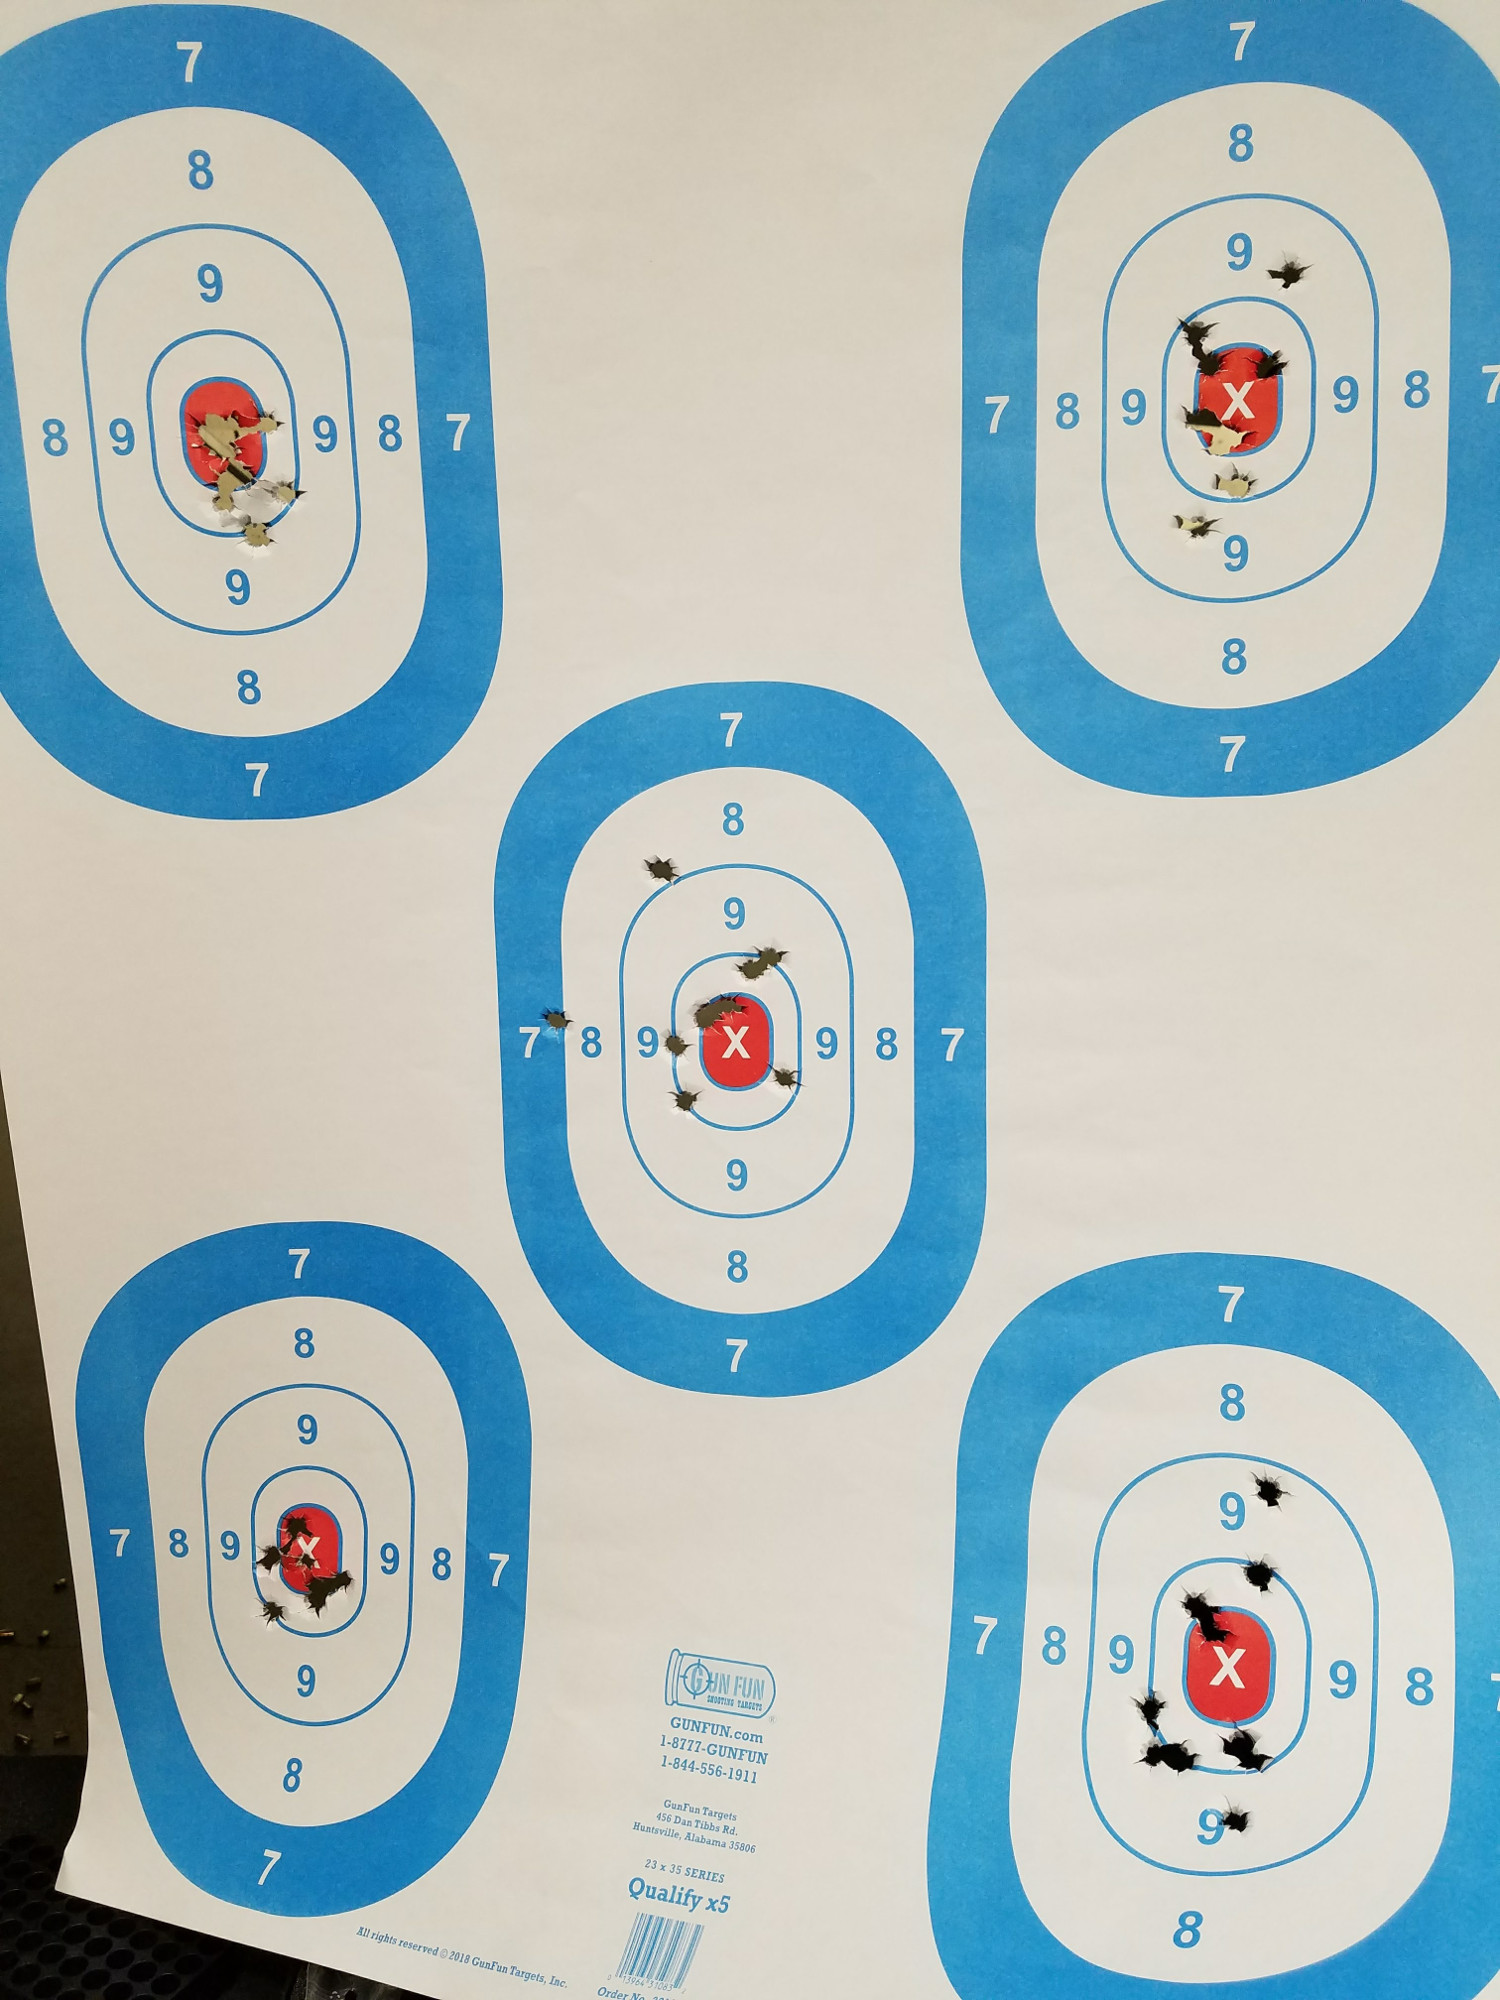
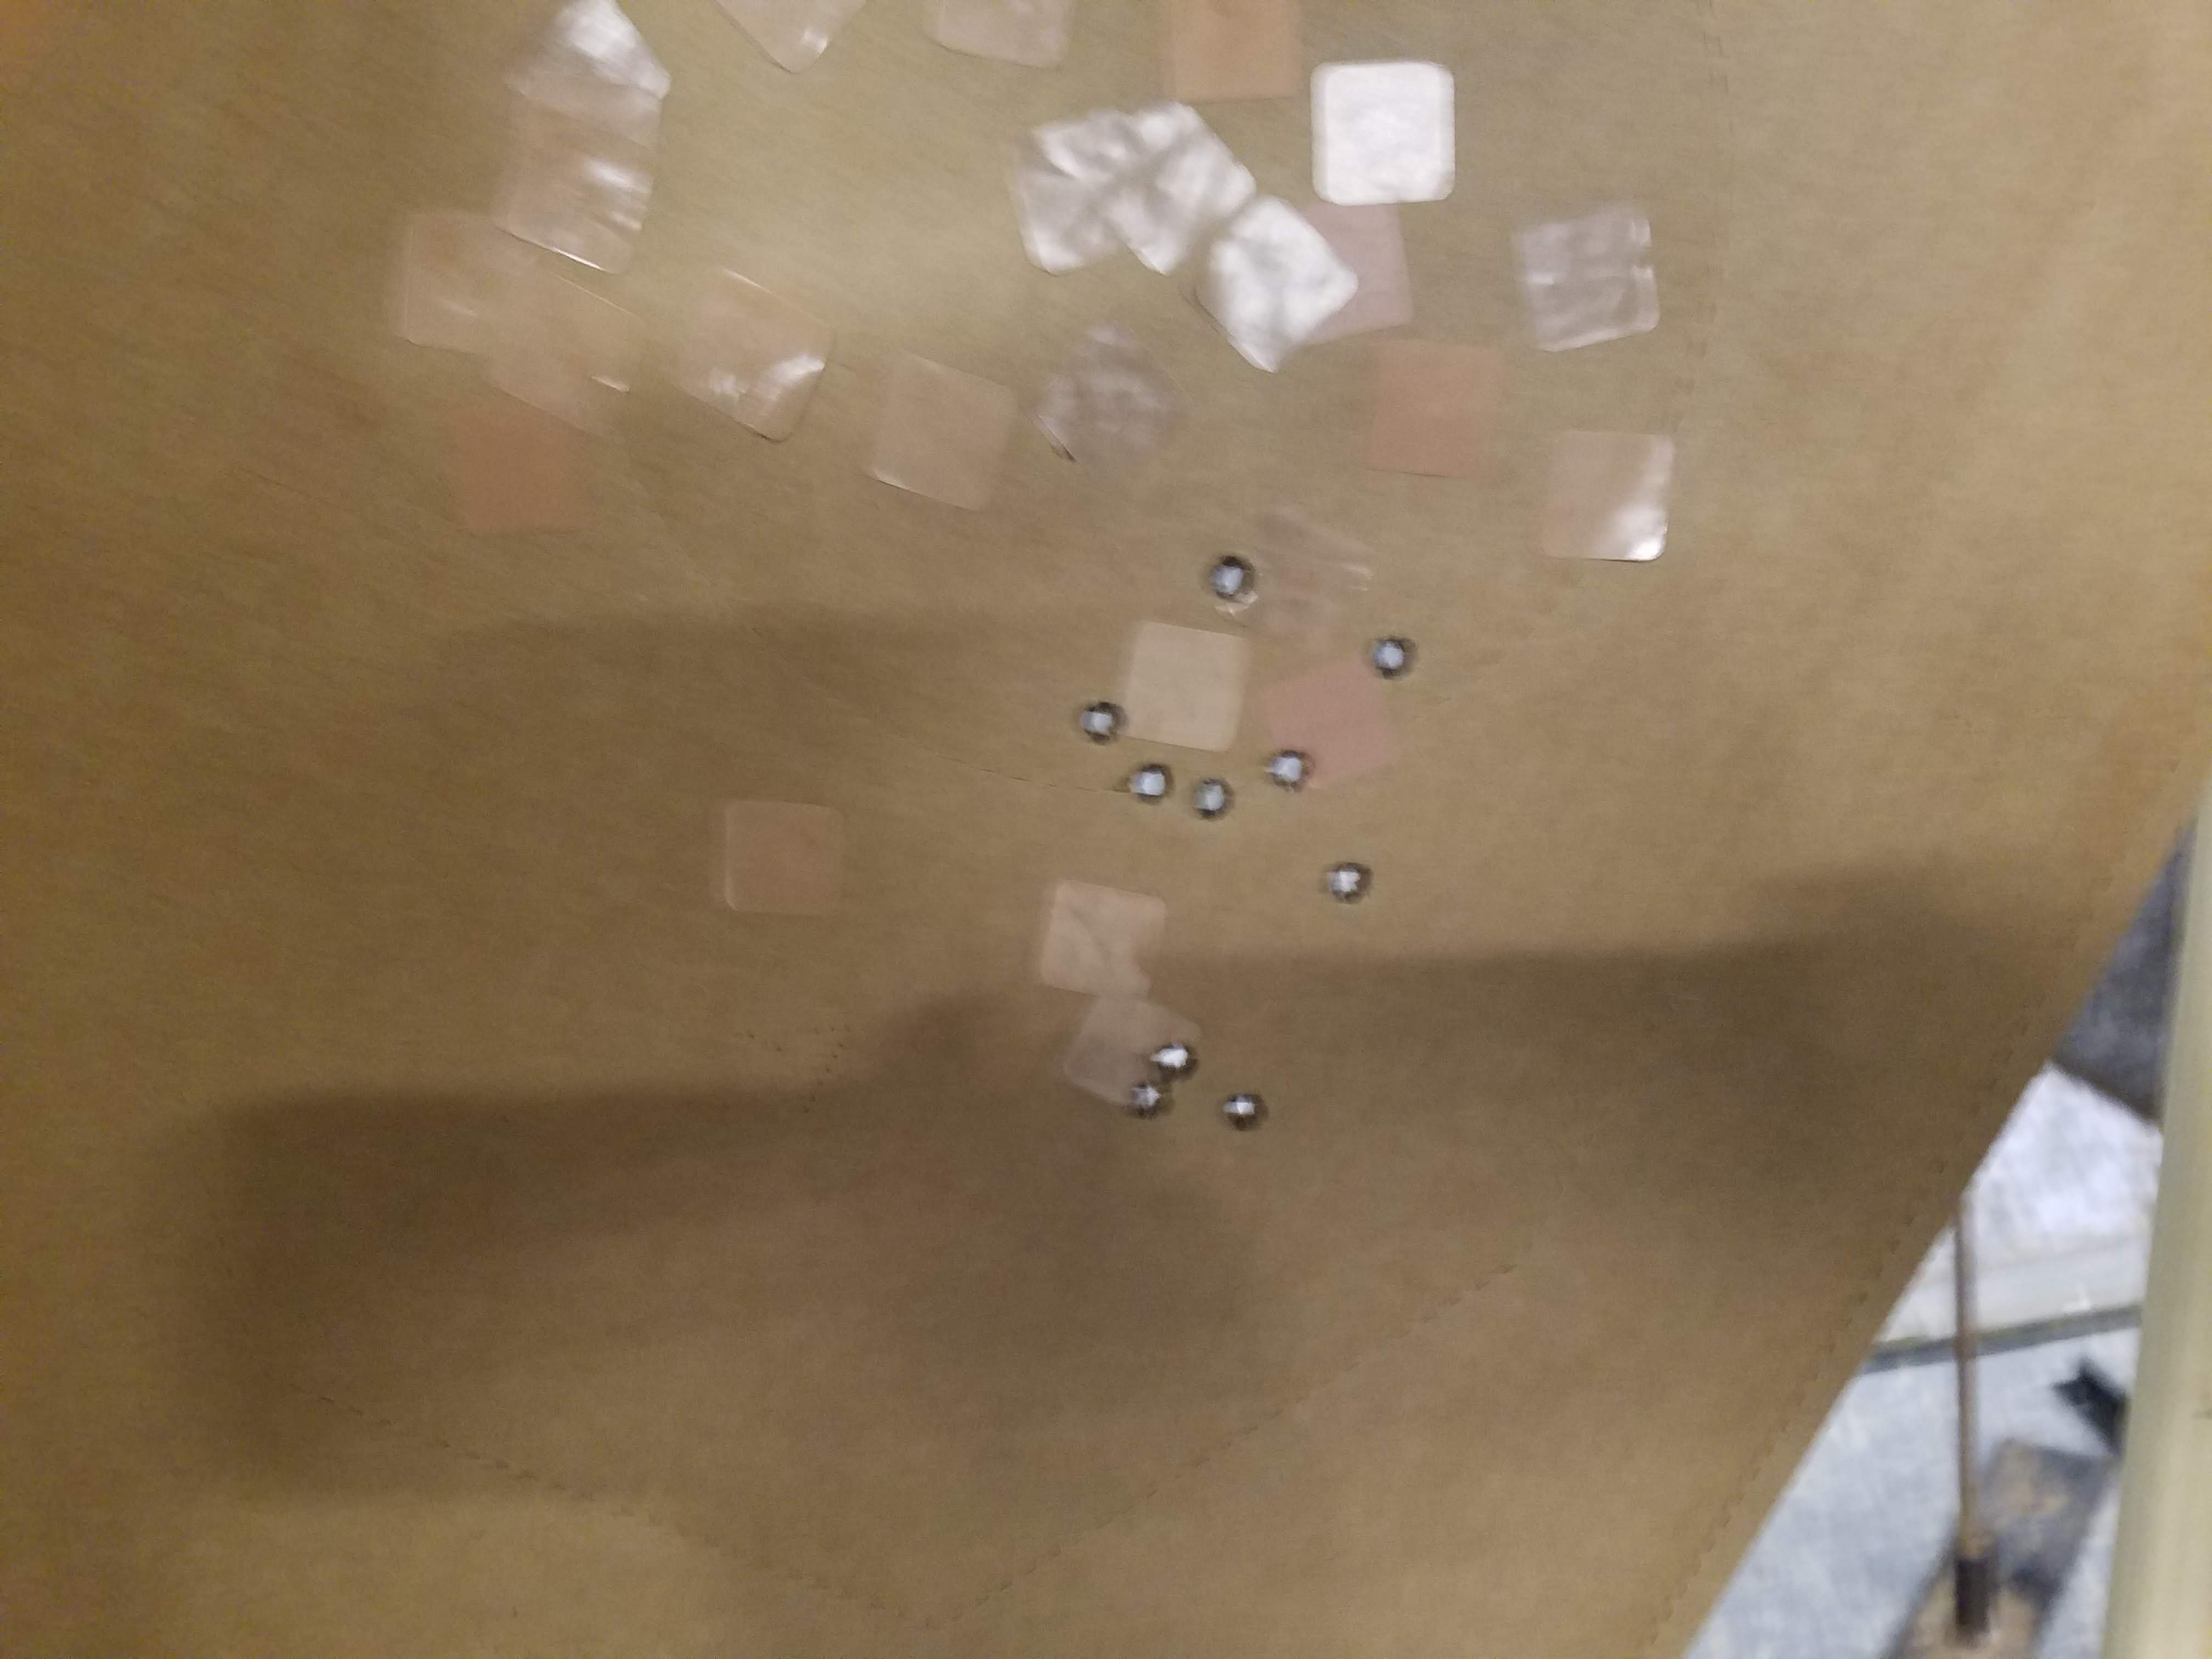
Our July 4th match was not canceled. For two of the stages, we had a full auto MP5 for a pickup gun :). For the first stage, there were three targets in the middle that you were exposed to immediately, one at a shooting position to the left and two at a shooting position to the right. We had a full 25 round magazine and several options for engaging with it. The first three targets required 5 each. The more competitive ones chose to go single action for most of the targets until the mag ran out, then the rest with their pistol. The more adventurous used careful trigger control to fire controlled bursts in basically the same way. Most people did not really blast away with the MP5, which was unfortunate.
I chose a hybrid approach, 15 single shots on the first three targets, switch from single to full, dump the rest of the 10 rounds on the left target, then use my pistol for the rest. I was pleased with my grouping for the 10 rounds, with 6 in the zero zone. It was actually better than the single shots in the middle targets.
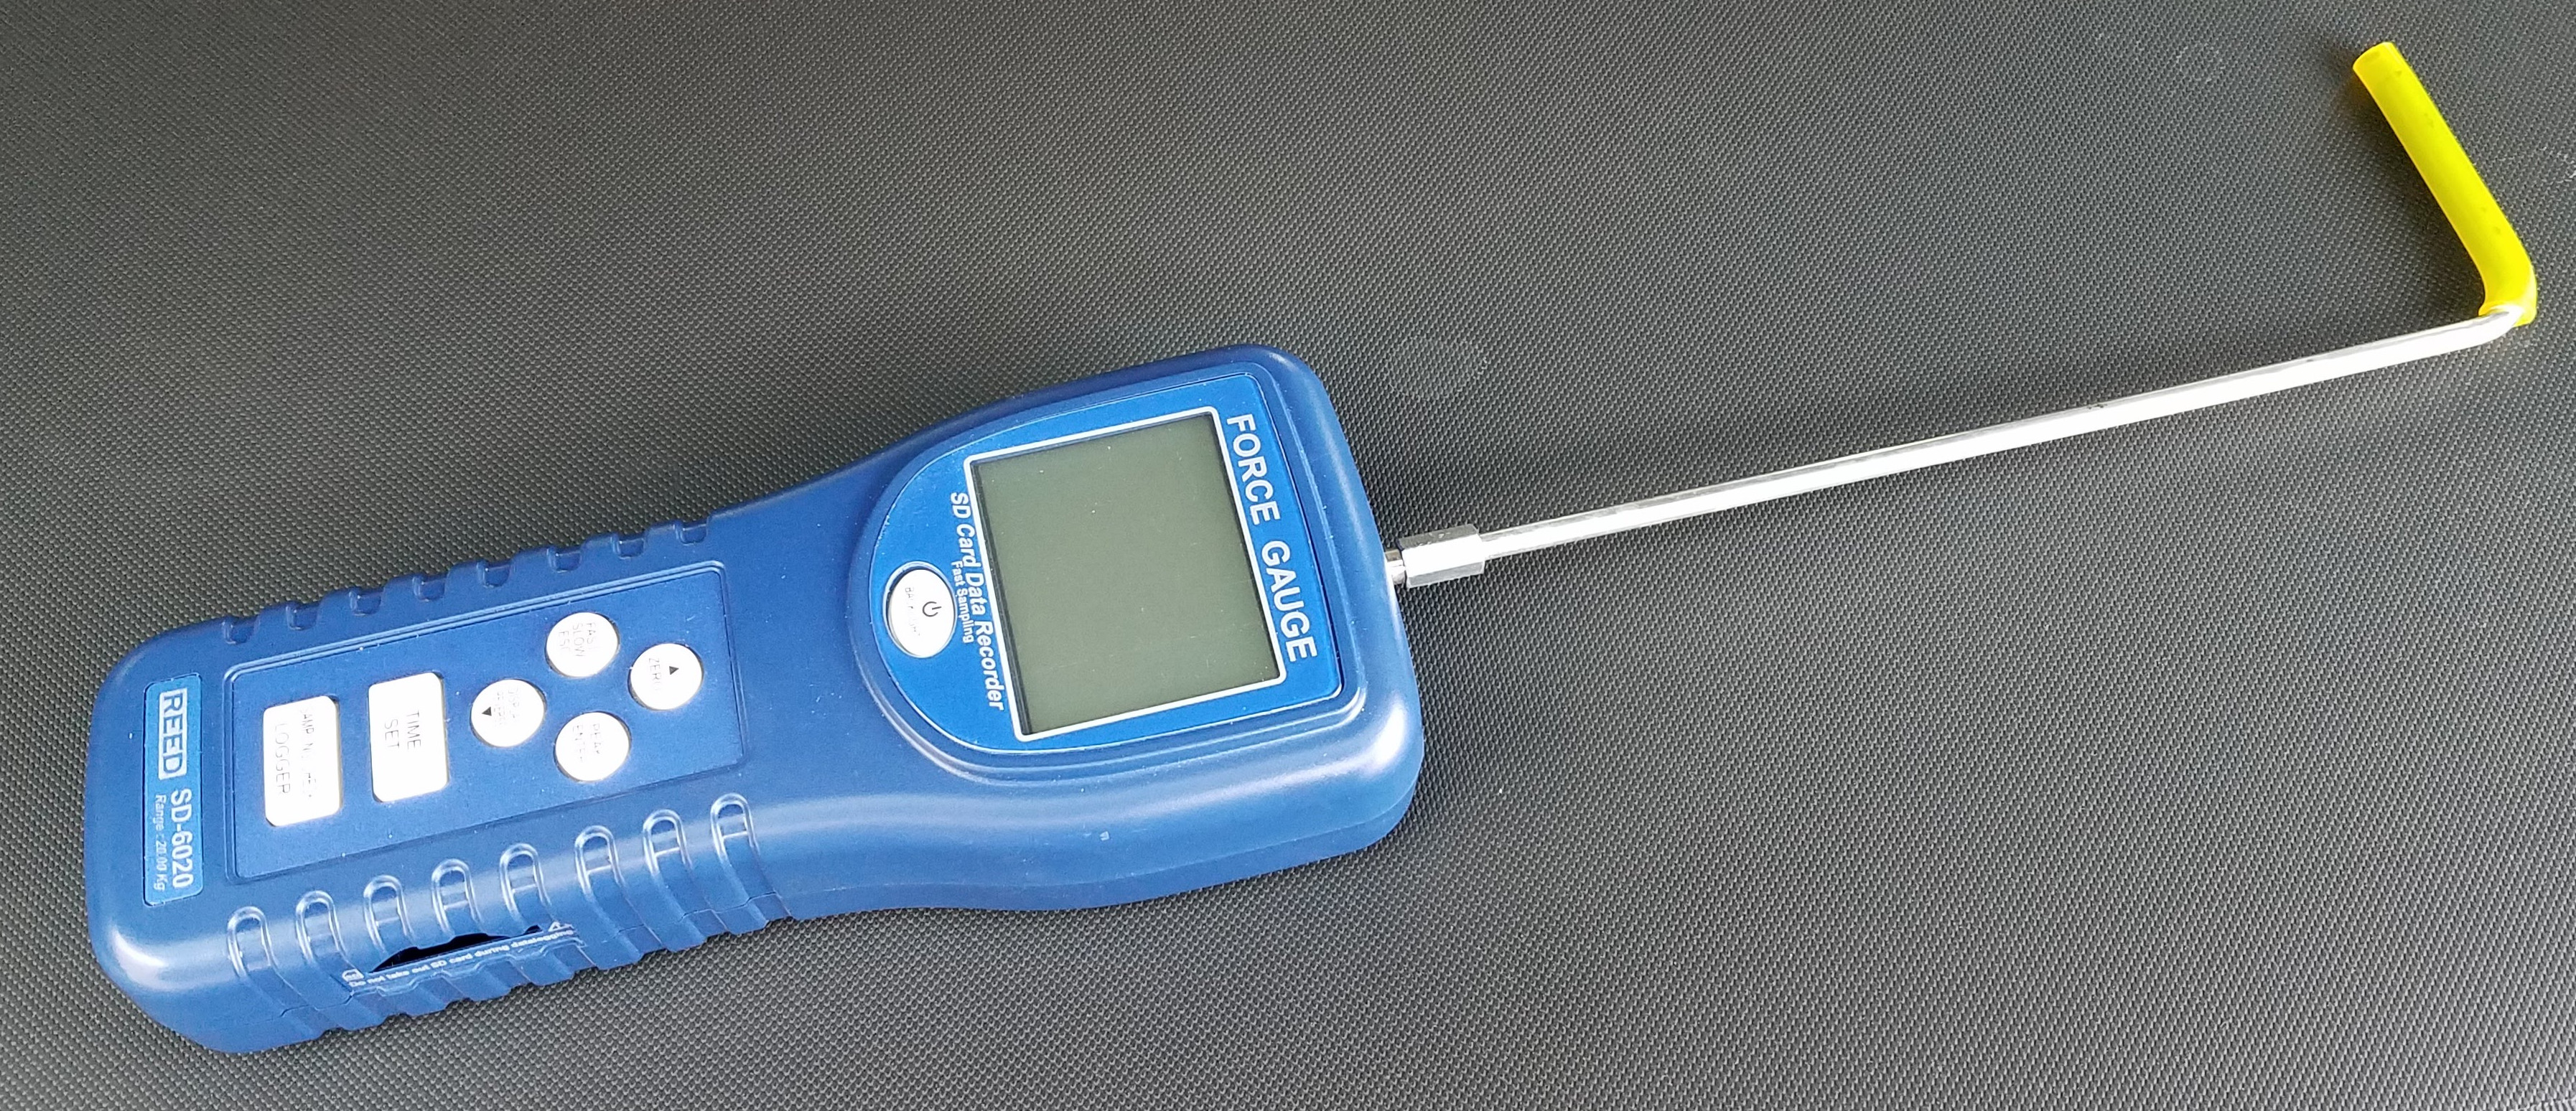
Finally, I have wanted to build an adapter for my force gauge to allow me to measure trigger pull. It turned out to be reasonably easy. I found a heavy wire hook, kind of a pegboard type of thing, but not quite. The part I needed was a nice square 90 degree bend on one end and I cut other end off. I threaded the long end with 5mm x 0.8 pitch and secured a coupling nut with LocTite. The hardest part was fitting it to the force gauge. I wanted the hook pointing level and to the left, making it easier to operate, at least for a right handed operator.
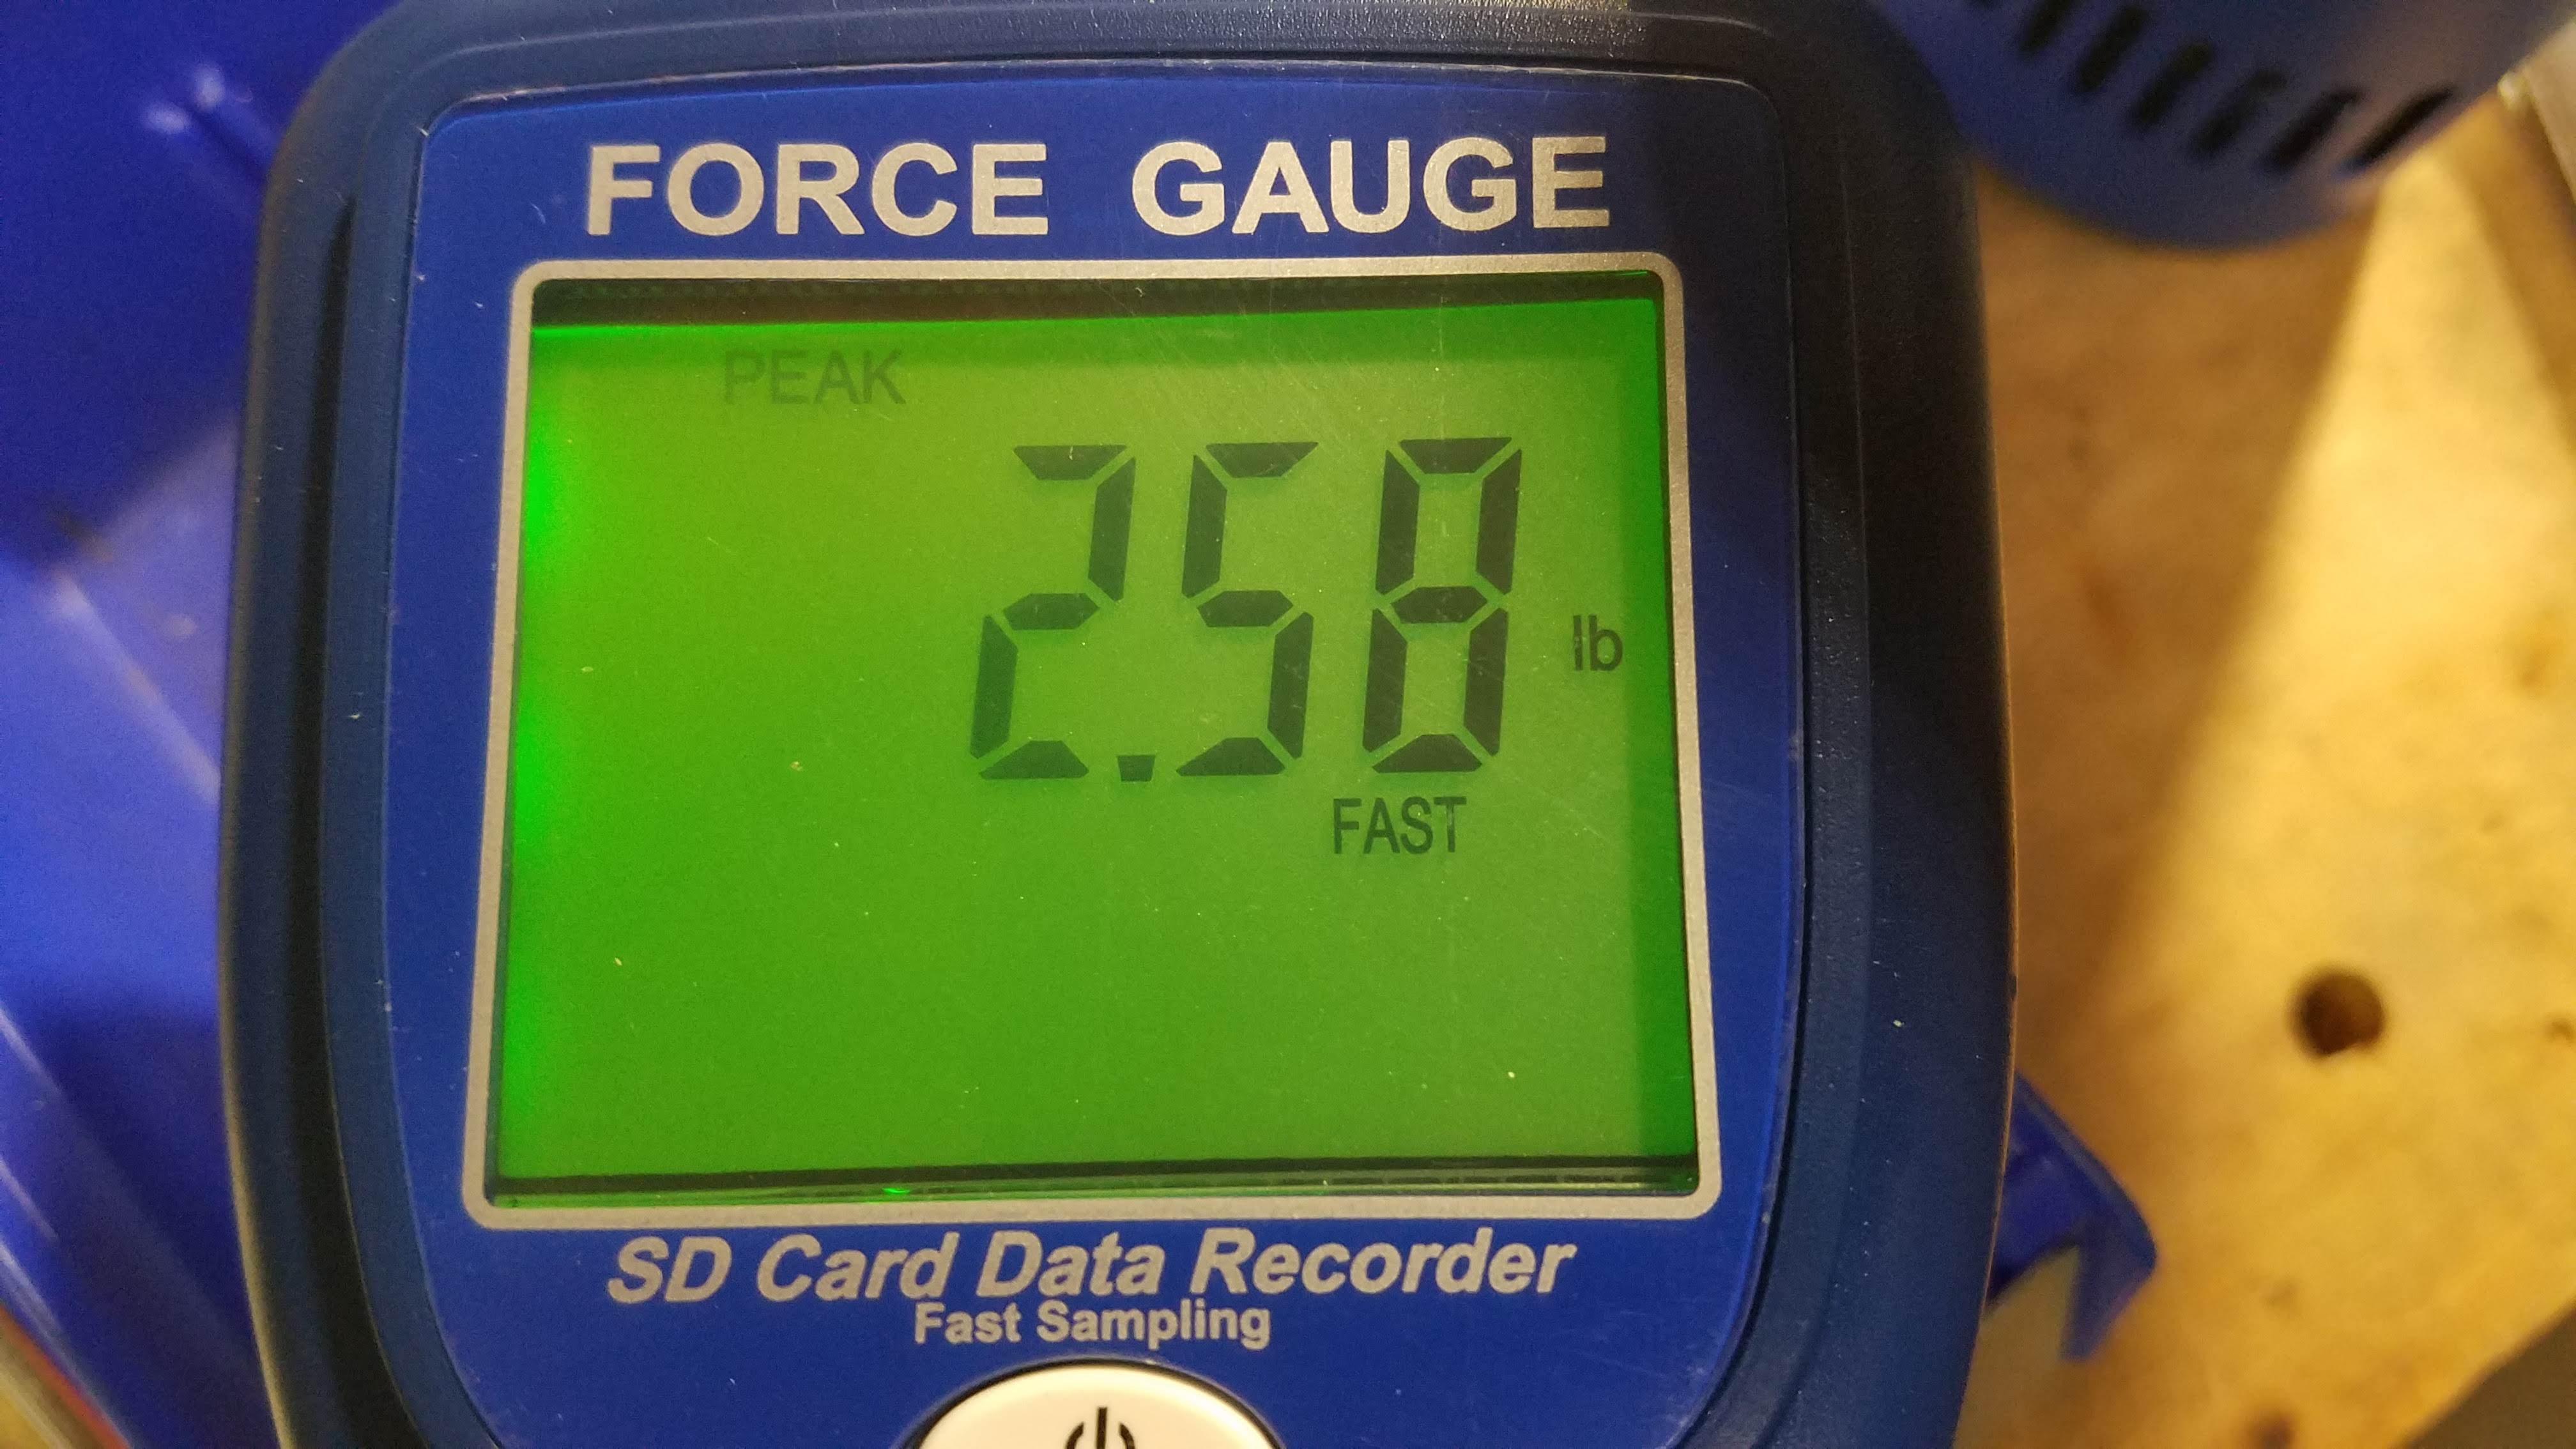
It works really well. To use, hold it level, zero the meter, hook the trigger, then slowly pull. I found putting the meter in peak mode make it much easier to catch the actual reading.
The CZ in double action and single action.
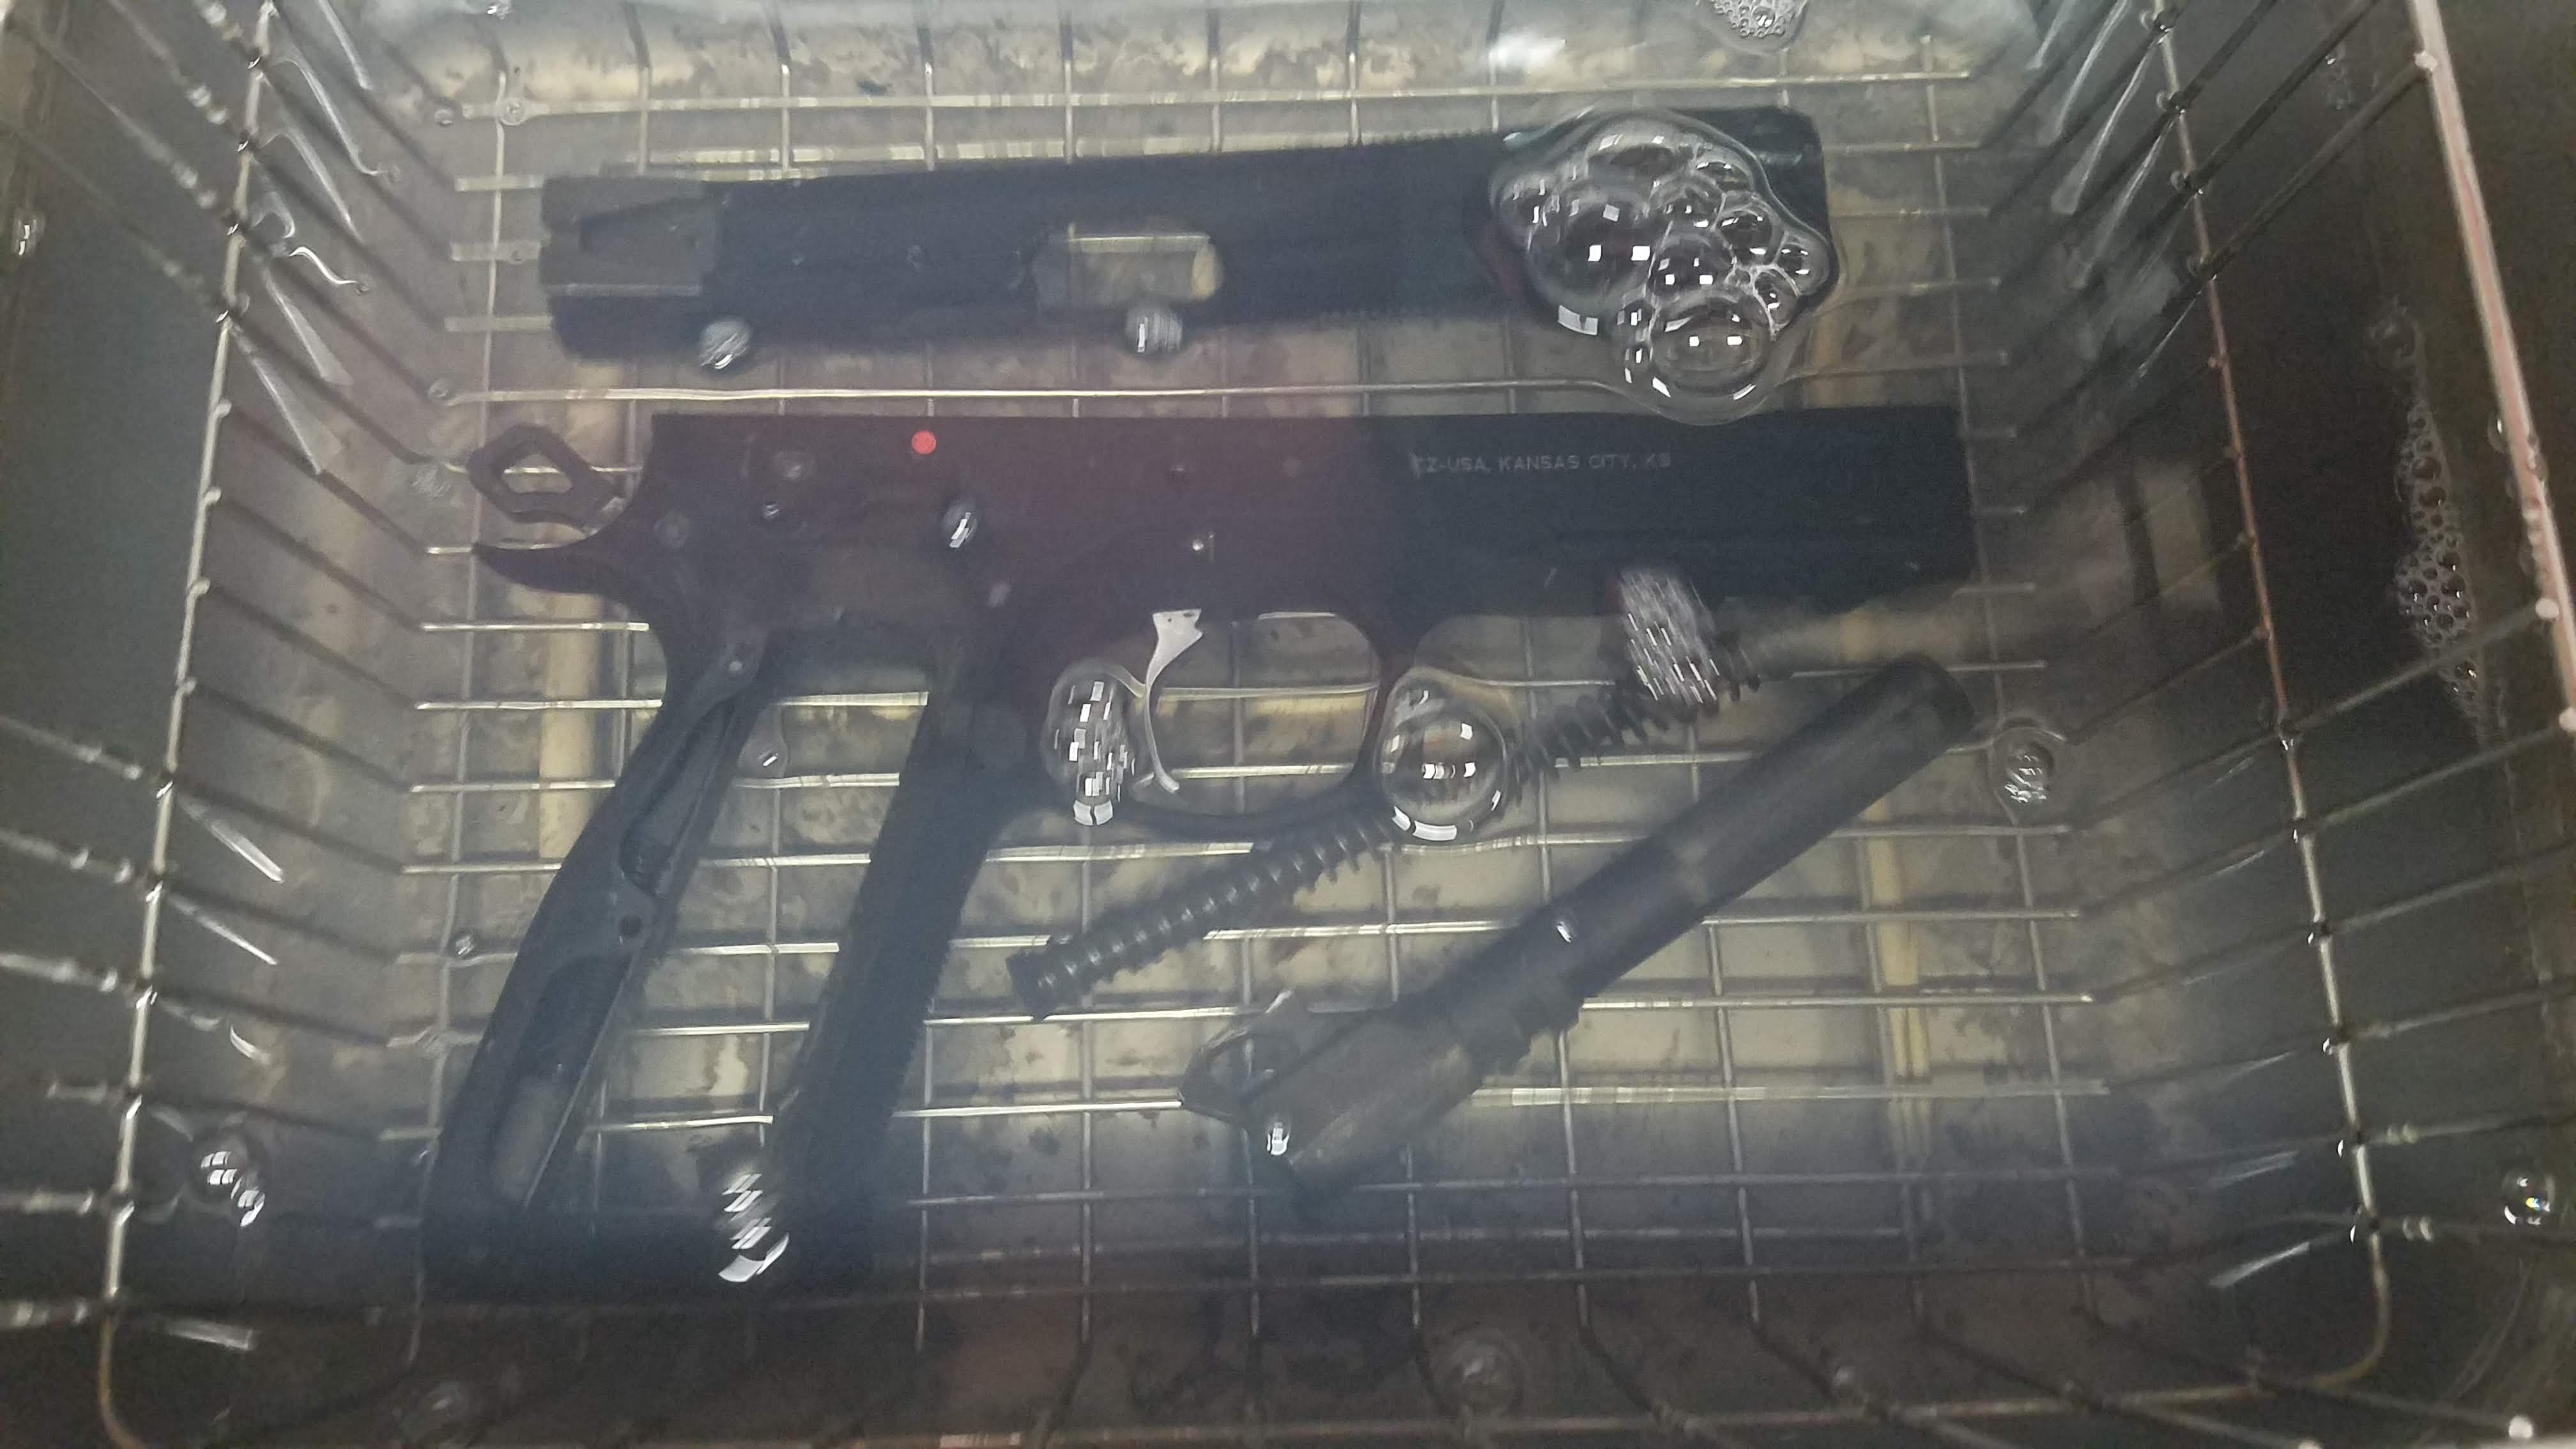
I turned it into a full (ultrasonic) spa day for the CZ…
I mentioned last time that the trigger safety on my primary IDPA pistol had gone on walkabout. This was discovered before a regular Wednesday night match and later research reveals that I had not noticed it was missing for at least a week and probably two. Well, I made little of the missing part, completed the match, split the collected brass with another loader and went on with life, including ordering a replacement trigger, which Zev thankfully covered under warranty exchange.
A couple of days later, I was cleaning that brass and I was kinda vaguely on the lookout for the safety and extremely to my surprise, it was in that brass! That means it was lost there at or before the lunchtime range trip in which I snapped a pic of the pistol, survived who know how many times sweeping the floor, including a couple of IDPA matches, only to end up the the *half* of the brass swept up on *the night* I discovered it was missing. Sadly, the lottery tickets I bought when I realized the pretty low probabilities of all that happening did not pan out as well.
Even before the trigger fiasco, I had decided that I would attempt to shoot CDP division for while, which basically means either 1911 and barney mag or the Glock 21. I went for the Glock angle.
My Glock 21 had Warren Tactical Sevigny sights on it, which are very nice but that I personally don’t care for. I am kinda spoiled to dots on the rear sight and I had some delay in finding a sight picture quickly. I picked up a set of TruGlo TFX Pro sights and swapped them out. Now that they are in place, I kind of wish I’d put the TFX Pro sights on the G20 and put the older TFO sights on the G21. I may still.
In any case, it turns out that between the “wrong” trigger and the increase in power factor for CDP, I was kinda crappy at CDP. After giving it a try for several matches and growing to hate it, I decided the retraining curve was sharper than I wanted to tolerate for the leadup to three major matches in 3 months, so I switched back to the G20 shooting soft 40S&W and started having scores that didn’t piss me off. 🙂
I went to what is officially the most distant IDPA match that I have gone to *for the match*. I did manage to take in a local match in Phoenix last summer while I was there for work and that was farther away, but this was a level 3 IDPA Regional Match to benefit the American Foundation for Suicide Prevention. The event raised $7000 for the AFSP. When the dust first settled, I was 7th in my class and division. While we waited for the scores to be finalized, it turned out that one squad’s scores for Stage 8 had dissolved into digital dust somewhere. At first, they had requested that squad return to that stage for a reshoot, but it turned out that some of those guys had left for the day. They decided to throw that stage out, which did result in a little bit of cheering. Apparently it was not a great stage for many shooters. My own time jumped up quite a bit. It was my worst stage as well, though other people must had done especially poorly on it. When the dust settled for real this time, I had a better score but had gone down to 9th. Obviously, at least a couple of ESP Sharpshooters had shot generally better than I did, but must have really stunk up Stage 8.
For the matches leading up to the Arkansas trip and for that match, I had worked up a nice load running 130PF at home, just to be sure I had a little margin for the chrono in Arkasas. I loaded 300 rounds into boxes that were marked specifically for that match and eight more for the several matches before going to Arkansas. All of this ammo is ideally the same.
For the first match after I got back from Arkansas, I had some intermittent failures to feed. In a couple of those stages, it was just about like I had a bolt action Glock, having to bump the slide or rack out what felt like after every round fired. It was painful!
Between stages, I cleaned the barrel. The pistol had not been cleaned since the MVSA match and while I had never had that much trouble with it being just a little dirty, it seemed to help some. Then I noticed that it might be one particular magazine. It’s just hard to troubleshoot during a match.
It occurs to me that some of these magazines are approaching more than 10 years old and still others came to me from elsewhere, so no telling how old they are. I decided to do a full clean and recondition of all of them, complete with replacement springs. A 10 pack of Wolff +10% magazine springs is less than $50 and less than the individual cost of ordering 7 springs. They should be in soon.
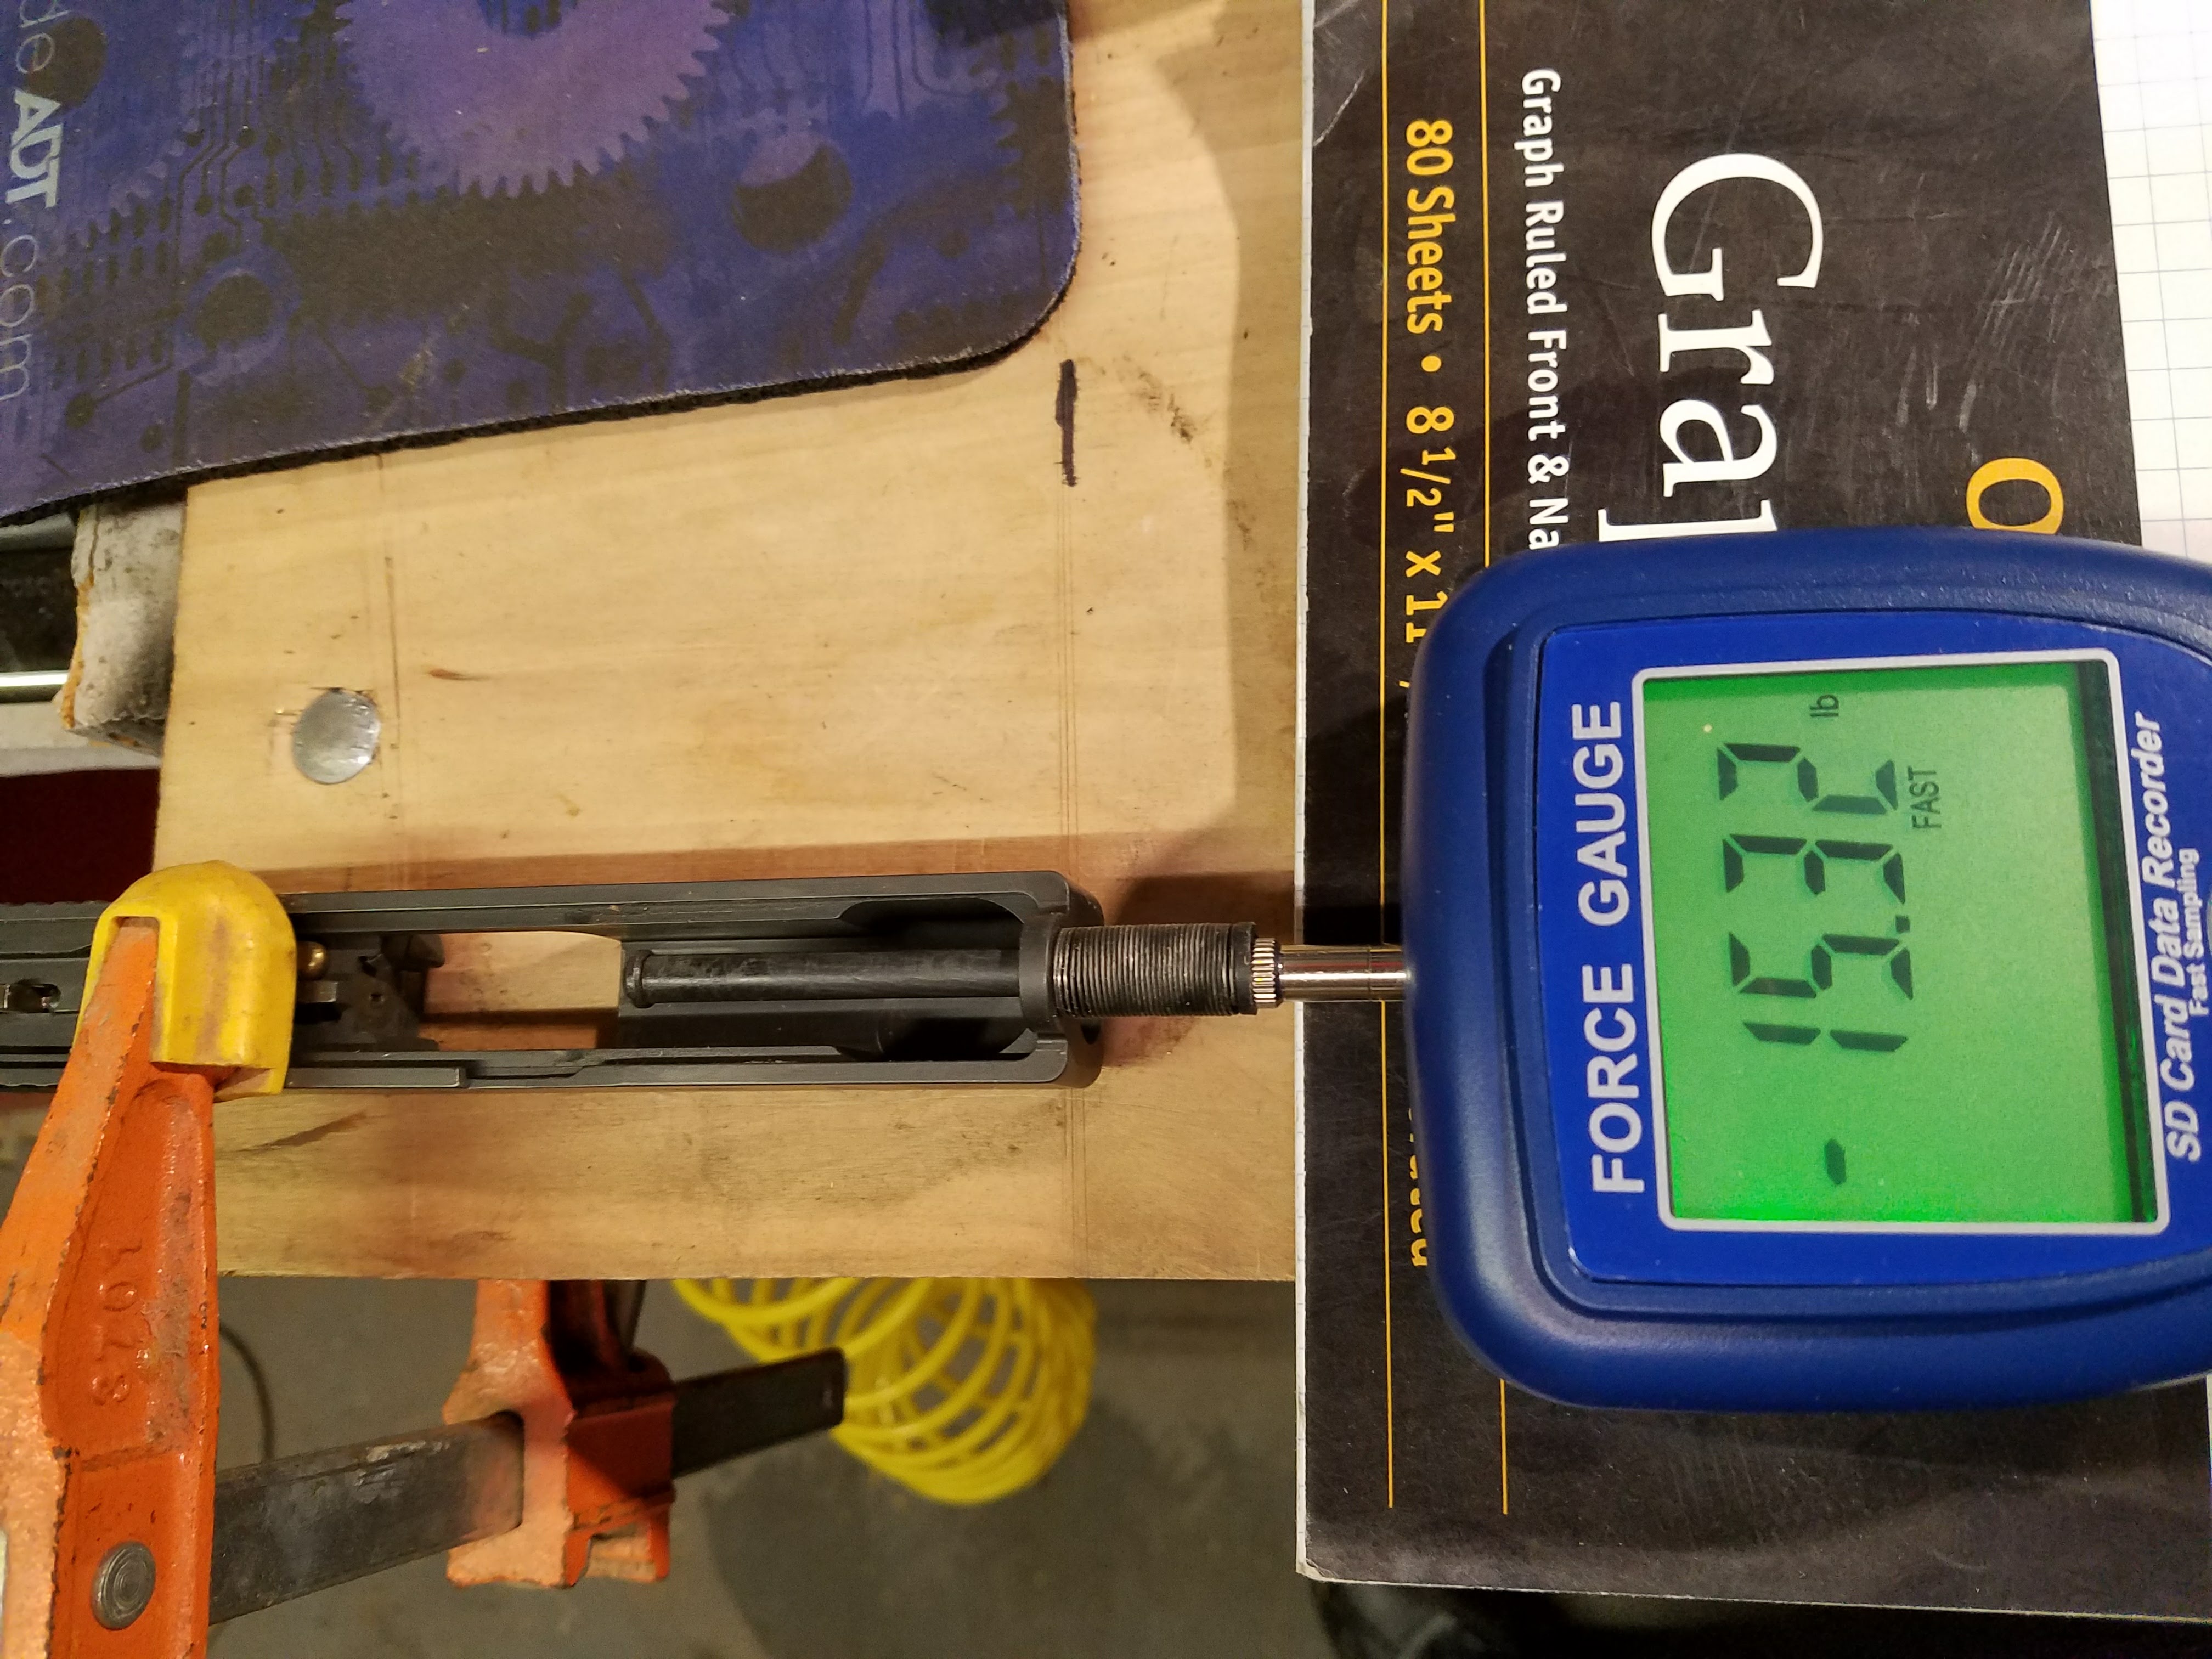
I mentioned in a previous post a while back that I acquired a Reed SD-6020 force gauge. It is a fun and interesting tool. I have used it mostly for measuring springs thus far.
I have a workable technique for measuring captive recoil springs a la Glock. I clamp a Glock slide my workbench then put a spacer under the force gauge such that the sensor is reasonably level with the hole in the slide. In this case, a tablet of graph paper I have is the right size. Then I can slide the gauge back and forth compressing the spring and read the weight.
Here a stock Glock spring, with its plastic guide rod, rings out at 15.32 pounds. To take this measurement, I compress the spring until it locks solid, then back off a hair. Yes, a hair, enough to tell that the spring is no longer compressed completely, a small fraction of a millimeter. This seems to be the valid place to measure because it corresponds with the maximum 2 inches of travel that the slide does when installed on the pistol.
I have several aftermarket springs with stainless steel guide rods. At first, I bought stock weight springs. Then I started handloading specifically to soft recoil and found I needed lighter springs to tune the pistol to run the lighter loads. I remember ordering a 13 pound spring and I thought I had ordered an 11 pound spring. They are marked in paint colors out of the package, but the paint is long gone after using and cleaning the pistol many times. However, I could not find any springs that went below about 13.5 pounds or so.
Soooo… I ordered a new 11 pound spring. Guess what? It measures at over 13 pounds.
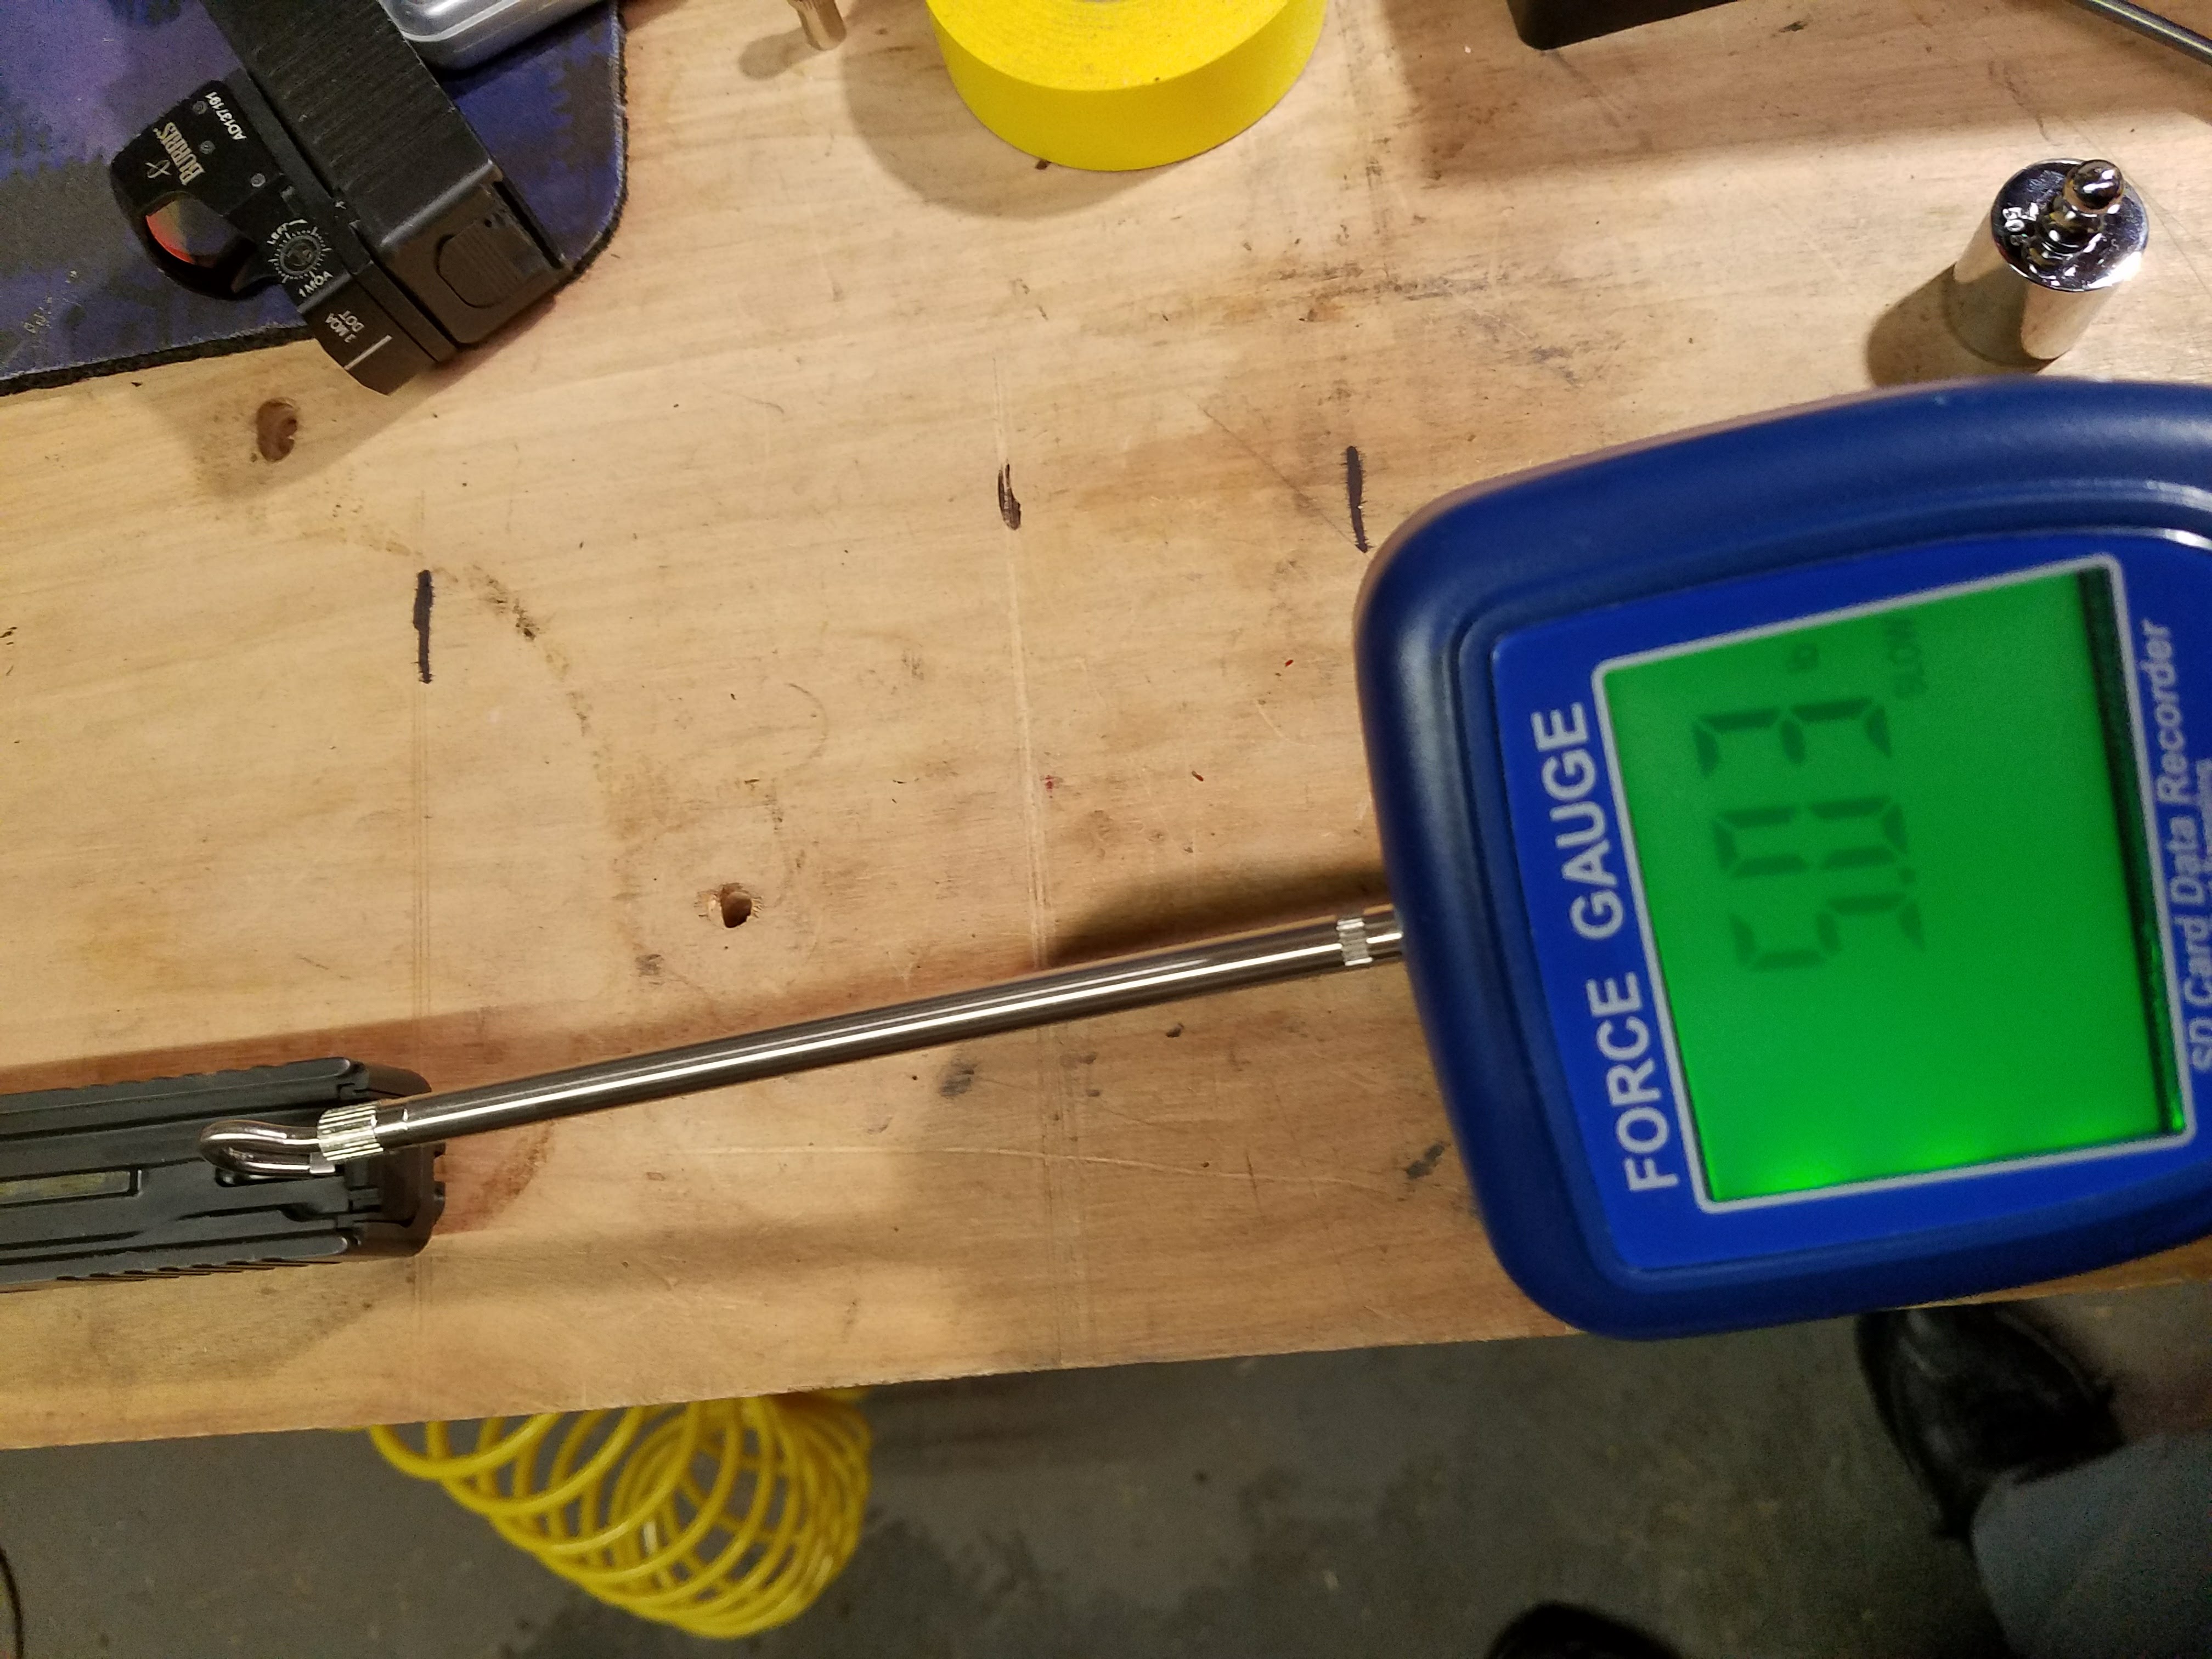
The other measurement the force gauge has been nice for is striker spring weight. I clamp the slide down and use a hook adapter to pull back the striker. My Glock 21 striker comes in at 5 pounds
The Glock 20 slide with the nicest trigger pull is only 3.6 pounds.
After I installed a Zev Fulcrum Ultimate trigger kit (trigger, springs, striker, etc) I knew that I started getting light primer strikes, especially with ammo I had loaded with S&B primers, so not at all surprised to find this. I had a few striker springs, presumed to be stock weight from previous upgrades, and Glockstore competition spring kit, so I swapped some springs around to get a 5 pound striker spring in the Carry Optic slide and 4 pounds in the regular slide, though I should probably swap those. The trigger pull predictably went up. Shrug. It remains to be seen if that solves the light strike issue on my S&B primers. They are sitting in storage at the moment because I never want to knowingly introduce an ammo problem if I can avoid it.
Speaking of the Zev trigger, at a match last night I struck up a conversation about trigger work with a buddy at the safe table. In exchanging pistols in the discussion, I noticed that the trigger safety was missing from the pistol. We decided that it would be fine for the local match, but that it will definitely need to be fixed before any major match and really needs to be fixed regardless.
It is a mystery exactly when and where it was lost. I have a picture of the pistol from a range trip a couple weeks ago and it appears to be missing even then.
The only previous picture I have that shows the trigger was from last August and the safety was present then.
Upon close examination, you can see that it appears to be held in by a set screw, which is missing. I have not adjusted any of the adjustments on the trigger, but I have used the ultrasonic cleaner on it. I wonder if that eroded enough red Locktite away to let the screw come loose? I will check in the cleaner tonight on the off chance that it came loose *in* the cleaner.
I contacted Zev about getting the parts sent to me. For liability reasons, what with it being a safety part, they are unwilling to send me the parts. On the other hand, they will exchange the whole trigger and bar for a new one. They sent me an RMA and mine will be on it’s way to them tomorrow. They promise I’ll have the new one back 1-3 days after they receive mine.
Luckily, I do have two interchangeable frames. Even though the Glock 21 frame has a stock trigger, it is as smoothly polished and lightly sprung as a stock trigger can be, so I will still be able to shoot.
One of the things that happened in January is that I got shot.
Well, kinda.
A bit of a bullet bounced back and dinged me pretty good.
I lived, though it did sting a bit.
I let myself run out of 180g 40/10 Cimarron bullets. I like them overall and they shoot really well, but they are a little fussier to load. While waiting for a big order of Xtreme 180g bullets to arrive, I switched the press over to 9mm and loaded a bunch of 135g 9mm Cimarron bullets. I loaded 600 pretty much in one sitting.
Right about this time, there was an interesting discussion on the Cross Timbers forum about sorting brass before loading and the reasons some people would do such a thing. There are basically two schools, those who want to make the most consistent ammo possible and those for whom the benefits are not commensurate to the required effort. I am in the middle somewhere, though closer to the latter.
The discussion had a significant bent towards weeding out known troublesome brass, such as certain brands that have a stepped interior or crimped primers, before loading them. Since I had 600 rounds of ammo that had been loaded and passed all my QA processes, I counted and sorted them. Of course, it is a slightly skewed statistic for the purposes of the forum discussion because these 600 rounds were all *good*, with no failures. On the other hand, in 600 rounds of loading, I probably didn’t have more than a dozen or so that were culled during loading (mostly crimped primers or obviously damaged cases) and fewer than that made it through the press to fail QA.
About 52% of the ammo was one of 4 headstamps and more than half of that was one or another form of Winchester.
One of the most interesting statistics to me was that there were 26 of a specific WCC headstamp that were all originally crimped primers, but obviously all of them loaded without issue. I’m presuming that some of them may have been previously loaded on a press that swages primer pockets or maybe the crimp happened to be of a suitable symmetry to reload without issue.
Until recently, I have ordered bullets in 500 and 1000 quantities only, mostly just to keep from spending a lot at once. The long term economics are a little better for the larger orders, at least in terms of shipping costs, especially when the seller runs a shipping special.
I noticed that, for X-Treme Bullets at least, the bulk quantities of each bullet weight seems to be driven to keep the package weight right about 65 pounds.
115g  9mm x 4000 = 65.7 pounds
124g  9mm x 3750 = 66.4 pounds
147g  9mm x 3000 = 63.0 pounds
165g 10mm x 2750 = 64.8 pounds
180g 10mm x 2500 = 64.3 pounds
230g  .45 x 2000 = 65.7 pounds
I did some digging on UPS and FedEx websites and I could not find any magic price increase at or around 65 pounds. On the other hand, the price the website quoted for me to ship my 65 pound package was 7 times the flat rate $5 shipping for that order, so it may be part of a contract between X-Treme and UPS. In any case, a 65 pound bucket o’ bullets is pretty heavy.
As is my preference, I spent a little time splitting them into 100 round packages for my personal convenience. There were 2509 in the bucket. 🙂