Category Archives: 1982 Yamaha Maxim XJ550

Buzz Sold

Buzz has been sold.

But, Buzz’s sale helped finance what I’m sure will eventually be another MegaSquirt project, a 1982 Yamaha Seca Turbo.

SAMSUNG

In the mean time, I am still working on my VW Trike. I resolved a mechanical issue with the clutch, so I will have it on the road enough to seriously pursue tuning.

Buzz Robbed

Well, it took about an hour to remove all but three small traces of the EFI project from Buzz. What’s left is the CLT sensor, securely JB Welded to the cylinder head, the FIDLE LED and the O2 sensor bung, plugged with a sparkplug.

The airbox was as much fun to put in as it was to remove. :)

I began cleaning the stock carburetors late this afternoon. By the time I was tired enough to not want to start another, I’d cleaned three of them. The last one has been completely disassembled and the solvent-safe parts are soaking in Berryman’s Chem-Dip.

Between the Chem-Dip and just judicious cleaning, they look pretty close to new.

Buzz will need a plug for where the O2 sensor was removed, the fuel petcock reinstalled in the tank, the carburetors reinstalled and a battery to be ready to start. After that, a thorough and serious cleaning is in order and he’ll be ready to ride or sell.

If I keep Buzz, I will eventually go back to EFI, but I know now that I will need to use a smaller throttle body and will probably need to built a custom intake manifold. It would probably make more sense to procure a bigger bike and ‘squirt that instead.

Robbing Buzz

I have elected to keep Buzz for the time being, but rob the parts I need for the trike.

Thus far, I have only removed the ECU itself, but I’m rapidly approaching a point where I will need the injector harness. The O2 sensor will be soon to follow. I intend to dedicate a work day to removing all the EFI hardware and plumbing from Buzz, even if I don’t yet take the time to reinstall the carburetors. They really should be rebuilt before I do that, anyway.

I still want to get Buzz on the road on EFI and though I want to get the trike on the road first, I know now what I need to do for Buzz. In the mean time, I will also keep my eyes open for appropriate throttle bodies. Really, there are quite a few that would probably work, though all will need some degree of manifold fabrication because there aren’t many 50 horsepower inline fours to rob parts from.

Since I consider this to be a continuing, if delayed, project, I will continue to update this blog as things develop.

Buzz for sale?

I am contemplating selling Buzz.

I am thinking about selling him for two reasons. First, we have a rather full stable of iron critters and could honestly use the garage space. As he’s not on the road, I’ve not had insurance on him since it last expired, but once back on the road, I would need to insure him again. Second, I have a VW trike that I want to run EFI and I need parts. The two most expensive parts that I need are the MegaSquirt controller and the exhaust oxygen sensor and there is one of each on Buzz, who is not really roadworthy.

The battery is dead at the moment from sitting since April. Once I service or replace the battery, the bike should be in at least a minimally running condition, meaning that it *will* start and run and go down the street. It does not, unfortunately, mean that the bike is in any desirable state of tune. It runs quite rich at idle and has a rather unfriendly throttle response. The throttle bodies I installed are far too large for this bike. In short, the injectors cannot deliver a small enough amount of fuel at idle while the throttle body itself cannot deliver a small enough amount of air hardly anywhere above idle. It runs, but not particularly well. It revs like a banshee, though. :)

I have a couple of ideas to address this problem. To my knowledge, there are no salvage four cylinder individual throttle bodies small enough to work with this engine, though there are several for twins and singles. These all would require a manifold to adapt to a four cylinder and I have in fact secured a potential TB and a spare cylinder head that I intended to use in the fabrication of just such a manifold and have discussed this manifold in previous posts. However, I have plenty of other projects, not the least of which is the afore mentioned VW trike, and that throttle body is nearly a bolt-on for the VW.

There are actually several options available to me, in no particular order….

1. Sell Buzz as is, hoping to recover enough for my EFI parts list. Considering he’s only barely a running bike, I would imagine that only someone specifically interested in taking over a MegaSquirt project would be willing to pay anything more than a parts-bike price for him.

2. Part him out. Potentially, this could be the most lucrative, but I really hate to do that to a classic bike with a good title and many miles left to run.

3. Reinstall the stock induction system (all was kept, just in case) and sell him as a working stock bike. This would likely appeal to the largest buying audience, but would also involve the fairly exhaustive list of carburetor tuneup tasks that were actually needed before I took them off, at least if I want any decent money for him.

4. Rob the parts I need off him, put the rest in a corner, put him back together as time permits and maybe sell him then.

I welcome any thoughts, suggestions and comments (or offers)….

Hey, remember me?

Buzz is dusty, having been left essentially untouched since my last update. We have a trike vacation coming up and I’ve been semi-diligently working on the VW trike. Of course, I’m always planning and plotting to squirt the VW, too, but there’s not time before the upcoming trip. I imagine it will be mid-June before I can get back to tuning on Buzz.

After using the borrowed MIG to fix a couple of things and to make a sissybar for my wife’s new Nightster, I had to return the welder, so I shopped around and bought one of my own. Granted, it’s a Chinese cheapy from Harbor Freight, but thus far, it has done everything I’ve needed it to do.

As mentioned back in late January, I purchased a cylinder head from the same engine as Buzz, the intent being to use it as a jig for the manufacture of a new manifold. To that end, I’ve been practicing a bit of tube-on-tube welding. I imagine the manifold for the VW will need a bit of that as well.

I have a pretty good idea in my head how I will make Buzz’s manifold, using EMT conduit sizes. Note to self: remove all zinc galvanzing before you weld on that stuff.

FabMonster in Training


I’ve been away for a work project for a couple of weeks, so no tangible work on Buzz during that time.

As is often the case, however, I’m always working on something, usually at least related.

I have borrowed a decent MIG welder and I am learning to use it. I have not yet done anything practical, but I have been practicing skills I will need to make my next manifold, whatever engine it goes on. It’s pretty easy to weld a nice bead so long as you don’t have to stop and restart. It gets ugly then. Welding a piece of pipe to a piece of flat, for example; I can only keep the wire feeding in at the proper angle for about 75 degrees around the pipe until I have to stop and reposition the piece. Then when I restart the weld, she’s not so pretty. I’m sure its just a matter of practice. I’m running out of practice pipe, though!

Assuming I can muster adequate skill to assemble a thin steel manifold, will I really need to? I have not yet spent the necessary time to see if connecting the vacuum line to the fuel pressure regulator will bring the fuel mixture into line. If so, I will instead need to make an adapter to let me put the twin throttle body on a Weber/Delorto manifold for the VW instead. That will essentially be a plate with adapter rings that will either fit around the outside of the TB and seal with an o-ring, or more likely, connect with a short length of hose and two clamps, kind of like on Buzz. The second also gives better physical support, so that’s probably how I’ll end up doing it.

Yesterday and today have been pretty riding days. At lunch yesterday, I got Buzz started with the intent of taking him to and from work, but he was idling funny. I checked and fuel pressure was a tad over 80 PSI. I’ve not seen that kind of pressure except when I had the regulator return line pinched off accidentally, which you may recall burst the pressure relief valve on the old pump. Hopefully, this one has not suffered the same fate. I verified that the return valve is open, but otherwise didn’t have much time for troubleshooting. Perhaps I can take another look tonight.

A little light reading…


I knew that the purpose of a vacuum line on the fuel pressure regulator was to help vary fuel pressure according to manifold vacuum. I just didn’t realize that it’s actually pretty important to do that.

Quoted directly from the MegaManual:

The vacuum referenced fuel pressure regulator is essential. It provides constant pressure differential between fuel at injector nozzle and manifold air pressure [port EFI] or atmospheric pressure [TBI]. This makes the injected fuel quantity solely a function of the injector open time.

If you were to ‘cap off’ the manifold vacuum port on the fuel pressure regulator, you are reducing the dynamic range of the injectors. This means you will need lower pulse widths at [idle] (giving less control over idle mixtures) and lower flow under boost (restricting the maximum horsepower).

So, in general, for port injectors, have the fuel pressure regulator connected to the manifold vacuum is a good thing. There is very little reason not to do it (though some have argued against it for individual runner port EFI set-ups).

Ok, ok, hint taken, especially paragraph two. It will be very easy to hook up, assuming there is no pressing reason not to allow the vacuum from just one cylinder to operate the regulator. hmmmm Logistically, it would work really well to T off the MAP signal; perhaps the regulator would serve as an accidental vacuum accumulator and smooth out MAP repsonse… In any case, I hope to have some wrench time on Buzz this weekend. I also very much hope to have some *riding* time on Buzz this weekend.

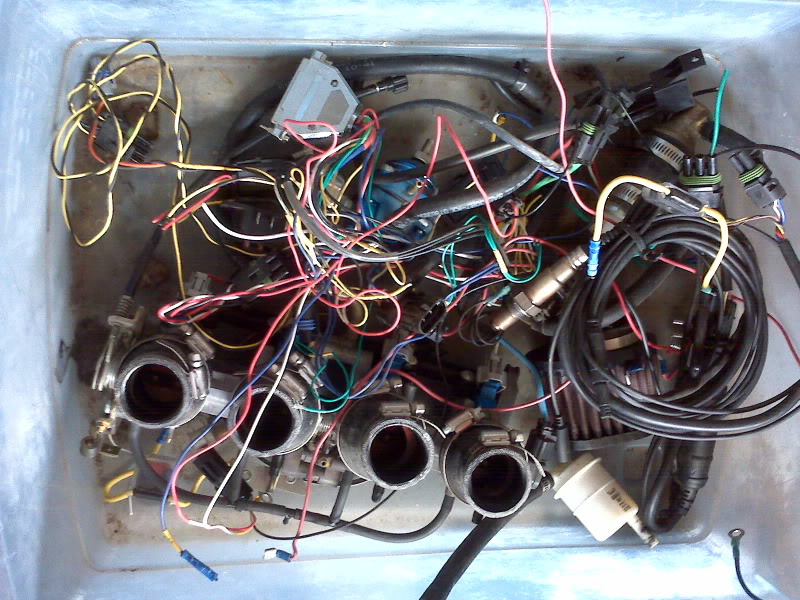
Speaking of fuel, I forgot and left the fuel valves on again. I’ve been out in the driveway at least briefly most nights this week except last night and saw nothing out of place. Low and behold, tonight I go out and find a big puddle of gasoline under Buzz. Of course, it’s dark and I had no time to troubleshoot, so I just turned the valves off. Next time I go out there, there will be no leak and no evidence of a leak, thus nothing to fix.

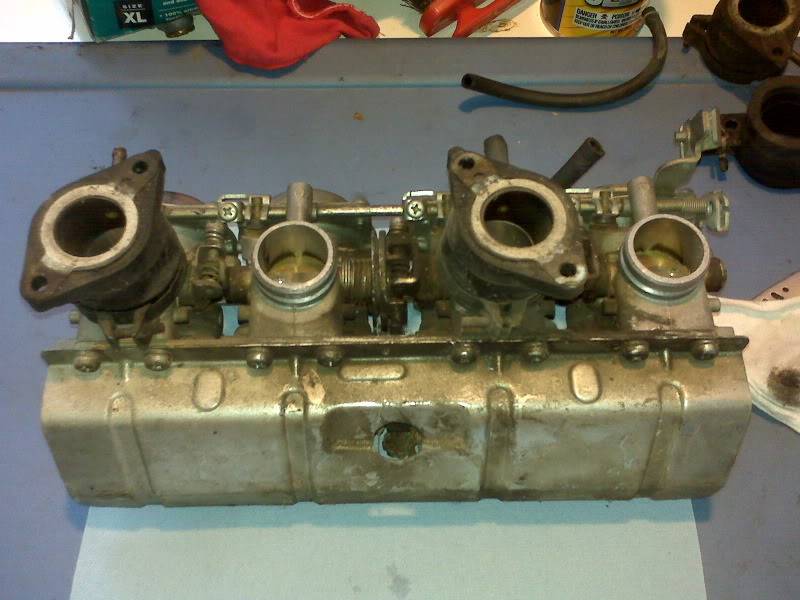
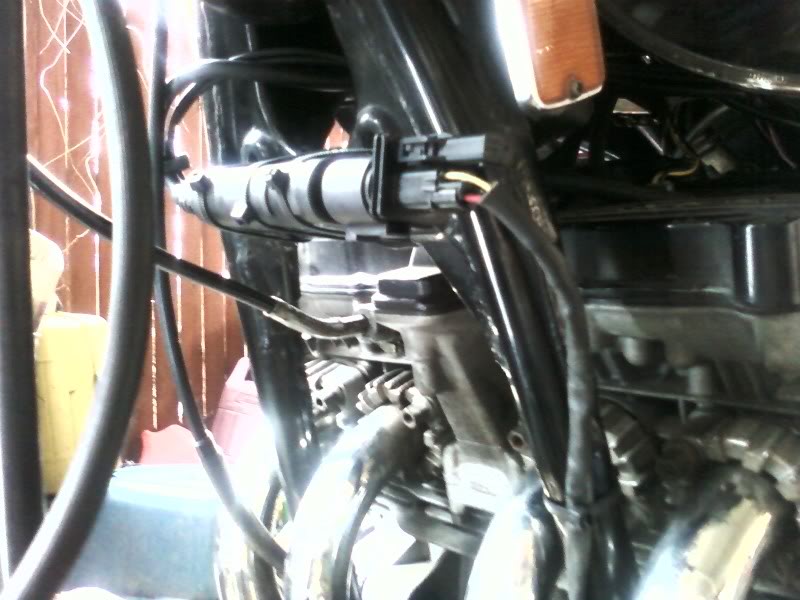
In other light reading, I am trying to find specs on this twin TB. As sold, it was described as being for a Kawasaki KFX450R ATV, but everything I can find on the KFX450 indicates that it is a single. After looking around in the parts diagrams on Kawasaki’s website, I’m pretty sure these are from either a Ninja 650R or a Versys, both powered by a fuel injected 650cc parallel twin. I haven’t been able to match the part number on the box (16163-0078) but the illustration of 16163-0084 is identical. Furthermore, looking up parts for the KFX450R (as the box was marked in Sharpie and as the eBay auction described it) reveals a single throttle body, not a twin.

I suppose whatever the throttle body was intended to fit, it changes my conditions very little. I still need to find out what the injector ratings are. Googling for the part numbers on the injectors (ETA287 on one side, 2870581 on the other) doesn’t find them. I also will still need to build a manifold for it.

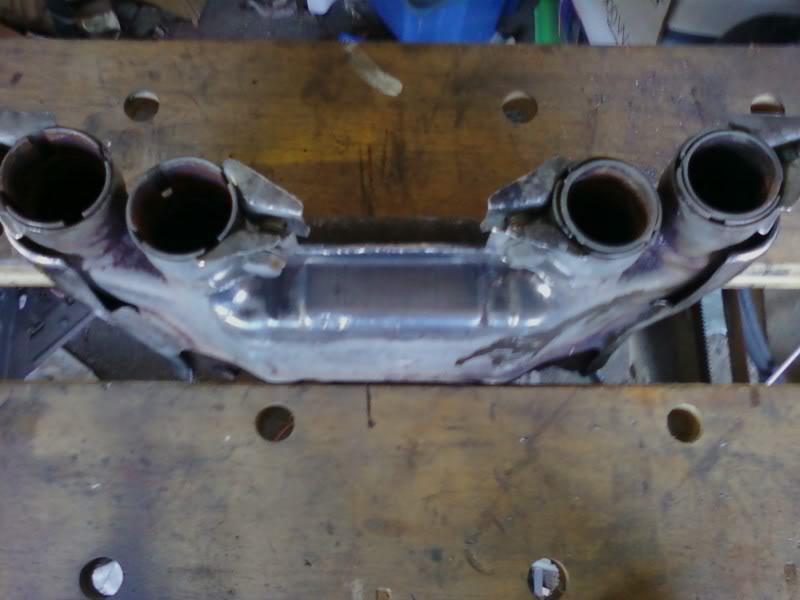
On that subject, the intakes on the heads are so nearly exactly 1″ ID that it will have to do. That end of the TB is 2.2″ and Buzz’s current TB assembly fits in 5.25 inches between the cylinder head and the base of the filters, , not including the filters. Since two TBs will fit between the frame pieces that currently limit the space available to four TBs, I may be able to stretch that distance a bit. Also, these TBs may be a a quarter inch or so shorter than the ones currently installed, but it’s hard to accurately measure with them installed.

But basically, I will be building two kinda short blocky Y (really more like a J with a crossbar; I need to draw it out and scan it), with a 2.2″ pipe on one end and two 1″ pipes on the other. The engine ends will have flanges and the TB ends will hopefully have an O-ring friendly pipe. The two J/Y things will be joined in the center for both rigidity and to facilitate a bracket to attach the TBs to. Because of TB and cylinder spacing, there will be an almost straight shot from the TB into #2 and a short horizontal runner to #1; likewise with #3 and #4. It’s pretty clear in my head, so hopefully my fabrication skills will keep up.

More ideally, there would be two equal length runners from each TB to it’s cylinders. I could probably accomplish this by feeding #1 and #3 from one TB and #2 and #4 from the other. Again, I’ll have to draw it out and see, and accurate drawings will be much easier the the arrival of the spare cylinder head.

Finally, the simplest manifold may be to simply take a 2″ or so pipe about 16 inches long, tap two 2.2″ TB connections on one side and 4 1″ engine intake connections on the other side and see what happens. No bends, a cap in each end of the big pipe, 4 flanges and 6 pretty much standard fishmouth pipe welds.

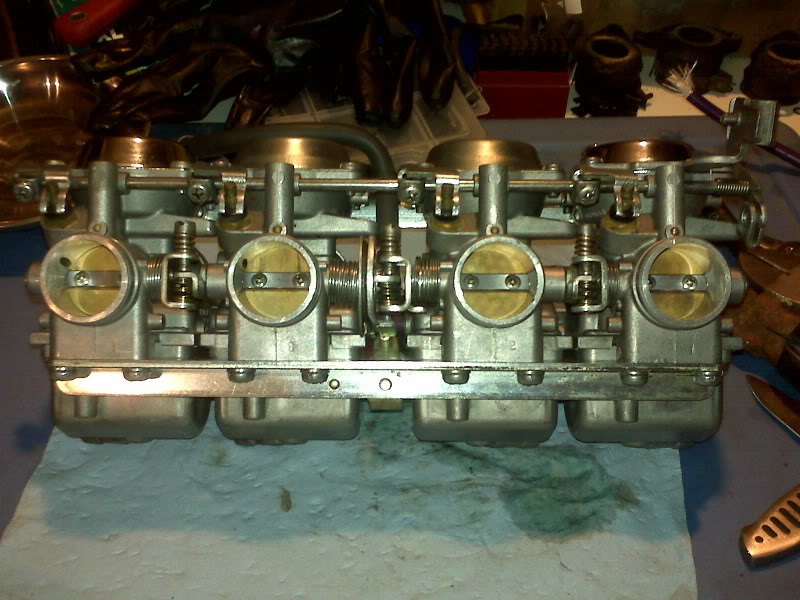
By the way, the sub-throttles can definitely be left in place on this unit. One kinda weird thing is that the fast idle cam arrangement on Buzz’s existing set of TBs is kind of done on these as well, but the cam is connected to the sub-throttles. When the are forced all the way open, the cam engages the main throttle, opening it about 1-2%. It would almost be funny if the IAC stepper function of MegaSquirt could be adapted to run this motor. [note: see this note in the VW Trike blog for the answer to that question – Sluggy] Perhaps someday someone will write some support for them into MegaSquirt. I don’t think I’ll ever had the time!

Intake Manifold Theory


I’ve put some brain cycles into this intake manifold thing I’m considering. I’d still like to experiment with fiberglass fabrication at some some point, but I think I can make an effective steel manifold with less trouble overall. One of the biggest things is that a steel manifold will be relatively heat, vibration and fuel proof without resorting to exotic resins and generally speaking will just be a lot simpler.

I’m watching a couple of eBay auctions for cylinder heads, one of which has a broken exhaust flange bolt. That head would probably require repair for use on a bike, so maybe it will stay cheap. The intake side is just fine and I can thus use that head as a jig for building my intake. If that auction falls through for some reason, I suppose I can still use my own engine.

I see construction from relatively simple steel tubing. I could probably use EMT conduit if I had to, but I’d rather avoid burning zinc. I wouldn’t require a lot of material, anyway, so even hardware store quantities of 1″ or 1-1/4″ tubing would be affordable.

I can braze it together if needed. My torch will get hot enough to weld steel, but I have secured the relatively open-ended use of a decent gasless MIG welder, as opposed to the $120 Harbor Freight model that I might otherwise buy. I think this kind of construction might be easiest with an easy to use wire welder.

I also have a line on the short term use of a fairly decent metal cutting chop saw, which would make pretty short work of the cutting requirements for what I see in my mind.

When I get home tonight, I will do some basic layout and measuring to get started with a parts list.

Celebrating EGO Day


It was a cool, but not unpleasant day today in the carport. I pulled the exhaust system and wirebrushed the area where the O2 sensor would go.

I decided that placing the sensor in the center of the collector was more important than the risk of getting the sensor oily. I marked and drilled the hole. I found, as was somewhat expected, baffles inside the collector. As luck would have it, however, my chosen location was not in the center of a baffle, but rather adjacent to one. I used a die grinder to relieve enough of the baffle to ensure that sensor would have access to exhaust from all four cylinders. The die grinder action went a little wild so the hole turned out a little oblong. At least it’s was smaller than the bung.

I suppose it goes without saying that I ran out of oxygen for the torch halfway through the brazing job, and it being Sunday, I should have just gone directly to Home Depot instead of trying closer places first. Even so, I think it came out very well.

I put the exhaust system back on the bike and mounted the LC-1 just below the steering head. That is probably not the greatest place, but I think it was the best place where the fixed cord length on the sensor could reach. I fished the wiring under the tank without removing it, an easy enough task. Solder on connectors, hooked it up, blew up an LED, another trip to AutoZone to get an almost but not entirely unsuitable replacement LED (I could have found a more suitable LED at Radio Shack, but they were closed by then) and finally fired up the ol’ LC-1.

Following the very simple directions for the LC-1, I calibrated it in open air then reinstalled the sensor permanently (I hope).

I hooked up MegaTune to the ECU and started Buzz up. Immediately, AFR was reading just over 12. I didn’t really need the gauge to tell me that the mixture was rich, but it was cool to see an actual figure attached to it.

I already knew that Buzz’s idle pulsewidth was just about at the minimum and it doesn’t look like I can affect idle AFR that way; the pulsewidth just can’t get much shorter. On the other hand, the pressure regulator seems to have drifted up to about 25 PSI. I need to connect the vacuum line to the regulator. That should let fuel pressure run low at high vacuum and higher at low/atmospheric levels. The lower pressure has also affected starting, so I need to tweak cranking pulsewidth as well.

I tried playing with the autotune feature of MegaTune. As expected, it had not room to adjust anything at idle, but I held the throttle at a few fairly low RPMs and was slightly giddy at seeing it automatically adjust the appropriate cells in the VE table. So, there are a couple of 30-something cells surrounded by 50 and 60-somethings.

That lead me to try again to generate a new VE table. It’s very frustrating that the obvious tool to use seems to think that my realworld parameters are erroneous. It want an idle MAP of <=60, but I’m sorry, it’s 72; that’s as low as it gets at idle. If it’s less that 72, Buzz is spinning down from high RPM with the throttle closed, not idling. Furthermore, I can’t seem to make the table generator happy with the horsepower and torque numbers. I entered the published horsepower spec for the stock bike, 50hp at 9000 RPM, but I tried the actual 9000 RPM (no load) MAP in my log of 79. Nope, sorry, the table generator prefers MAP to be =>90 at peak horsepower. I put in 90 like a good little sheep and it makes a table full of big values. So, I guess the table will be mine to generate manually.

Of course, all this MAP trauma is probably because my throttle bodies are too big, which I have suspected for a long time. I might have to build that intake manifold after all.

It’s still fun, in a kinda masochistic way :)