DStar and VHF/UHF

In 2010 when my interest in the hobby renewed, I knew that I needed some sort of 2m rig to get on local repeaters and see what was going on. Shopping around, I found it hard to ignore the generic Chinese dual band radios like the Baofeng, TYT and Wouxon.

I ordered a TYT TH-UVF1 from Universal Radio. Though the price has come down greatly since then, $130 was a good price then. Configuring the channel memories on these units is generally doable but not much fun from the keypad. Much much better to use software and an interface cable.

Also around that time, I picked up a Kenwood TM-731A, a dual band mobile. To be honest, I keep forgetting I have this thing. I need to put it permanently in my truck. Back then, I used it’s cross-band repeater feature. This allowed me to set the HT up on a 70cm simplex channel and set the TM-731 up to repeat, set to a local 2m repeater. Then I could use low power on the handheld to hit the 50 watt mobile and get the repeater reliably. There is a caveat in this operation wherein the 70cm transmission from the mobile back to the HT is technically not a properly identified transmission. In practical terms, I suppose that with it being simplex and with me being just 100 feet or less away, it might be splitting hairs as to whether it was absolutely unidentified. Handy feature anyway, at least for certain specific circumstances.

Over time, we moved and somewhere in there I misplaced the charger for the TYT, so when I felt the need to get back into 2m and 70cm for spring weather watching, I just ordered a Baofeng UV-5R from Amazon and they had dropped to $40. From home out in the country, it was pretty hard to hit any useful repeaters, but at least I could hear Skywarn activities.

The Baofeng, et al, are all capable radios and nobody can touch the price, but I decided this spring that I wanted an HT with more ham friendly features, so I started shopping. Once a little more feature creep entered into the decision, I ended up ordering an Icom ID-51, a dual band radio with DStar.

In my limited experience, there are basically two interesecting groups of DStar detractors. One group seems to assume (incorrectly) that an internet gateway is required to use the radio, which is not true. Operation is the same as analog repeater or analog simplex. A DStar repeater can, however, use an internet gateway to connect to a distant repeater and allow users on both repeaters to converse.

The other group, and I am somewhat in this camp, dislikes that there is a closed source proprietary codec in use in an otherwise extremely open-source anti-proprietary community.

Then again, I bought an ID-51.

As it turns out, there are a half dozen DStar repeaters within range of home, including blowtorch of a repeater with a 60 mile coverage footprint, but there is not much traffic on them. When there is, it is almost always because a repeater gets linked to a reflector and the traffic is from the reflector, not local.

To get my mobile signal out a little better, I added a Mirage dual band amplifier. Most repeaters I have much interest in hitting, I can hit, DStar or analog.

Another whole pursuit with DStar is the Digital Voice Access Point model. There are some low power DStar capable radios that have no audio circuitry at all, essentially designed to build an internet gateway. A very popular way to connect such a DVAP to the internet is the ubiquitous Raspberry Pi computer. I have mine almost working, but I need to dedicate some time to troubleshooting the finer points of configuration.

I mentioned RemoteRig in a previous post. Since my IC-706mkIIg works 2m and 70cm as well, I thought it wise to set it up with a nice base antenna and complete the last piece of the remote working puzzle. I got a Diamond X-300A, a dual band antenna with 6.5dB and 9dB gain on 2m and 70cm, respectively. The high gain will give the radio an effective radiated power of 136 and 55 watts, respectively. I have mounting brackets and a mast to get the antenna up a few feet above the peak of the roof on the workshop, which should get a signal out there.

The Gateway to the Ether

It’s been a long enough project started long enough ago that I may be a little soft on some fine details, but I’ll try to get it all.

Since I took a fair number of pictures while working on this antenna, the EXIF info helps me nail down some dates.

After much discussion with friends, most notably KD, I decided on a Hustler 6BTV, a 6 band trap vertical. I ordered it from Texas Towers on May 22, 2012. It was $265, including shipping. They offered the best price by a small amount, but I had to wait for the antenna to come in from the manufacturer. I don’t remember when it finally arrived, but on June 4, I sent an email asking about it and it was still not there.

Due to that delay, I ended up ordering the remaining accessories from DX Engineering and upon reflection, I probably should have ordered it all from them for convenience sake. At the very least, they rewrote much of the installation manual, accounting for some real world issues.

I decided that my barn/workshop would make the best permanent hamshack facility, mostly so I would not have to fill a room in the house with equipment and endure the scorn of my beloved. 🙂 So, I decided on a flat spot equidistant from the workshop and a pasture fence.

antenna

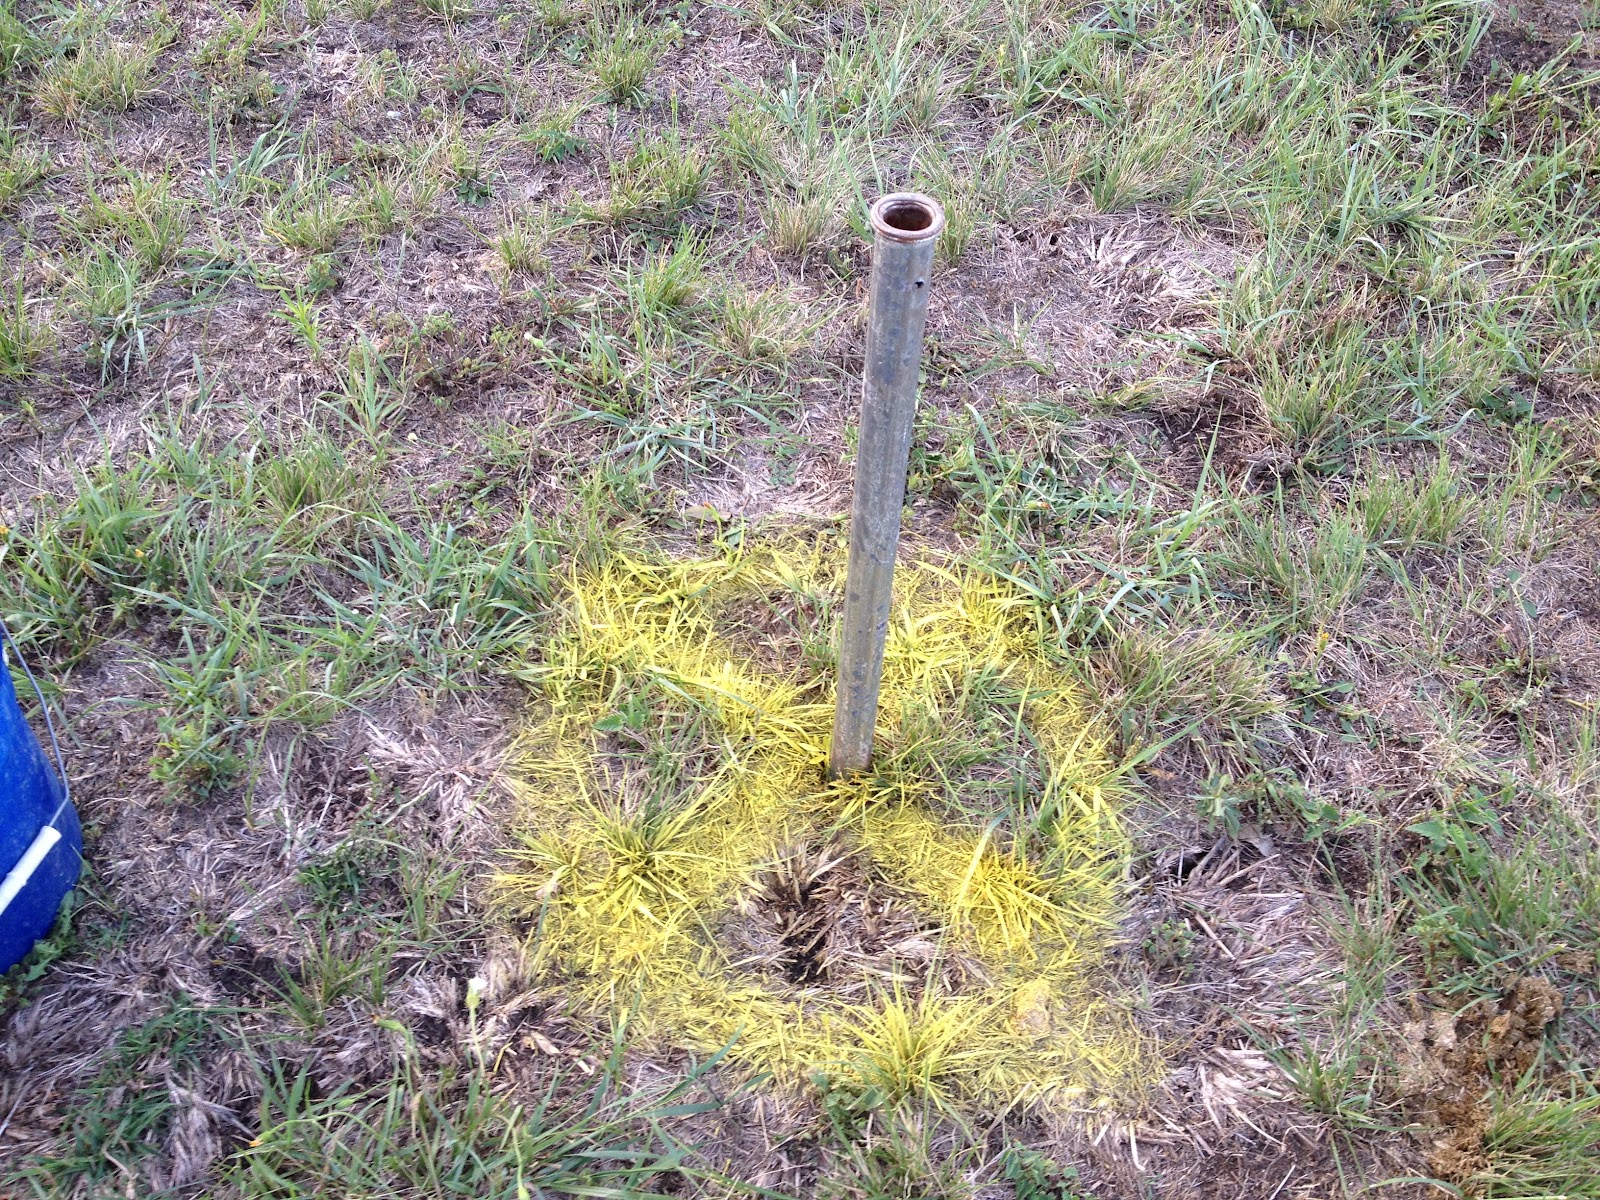
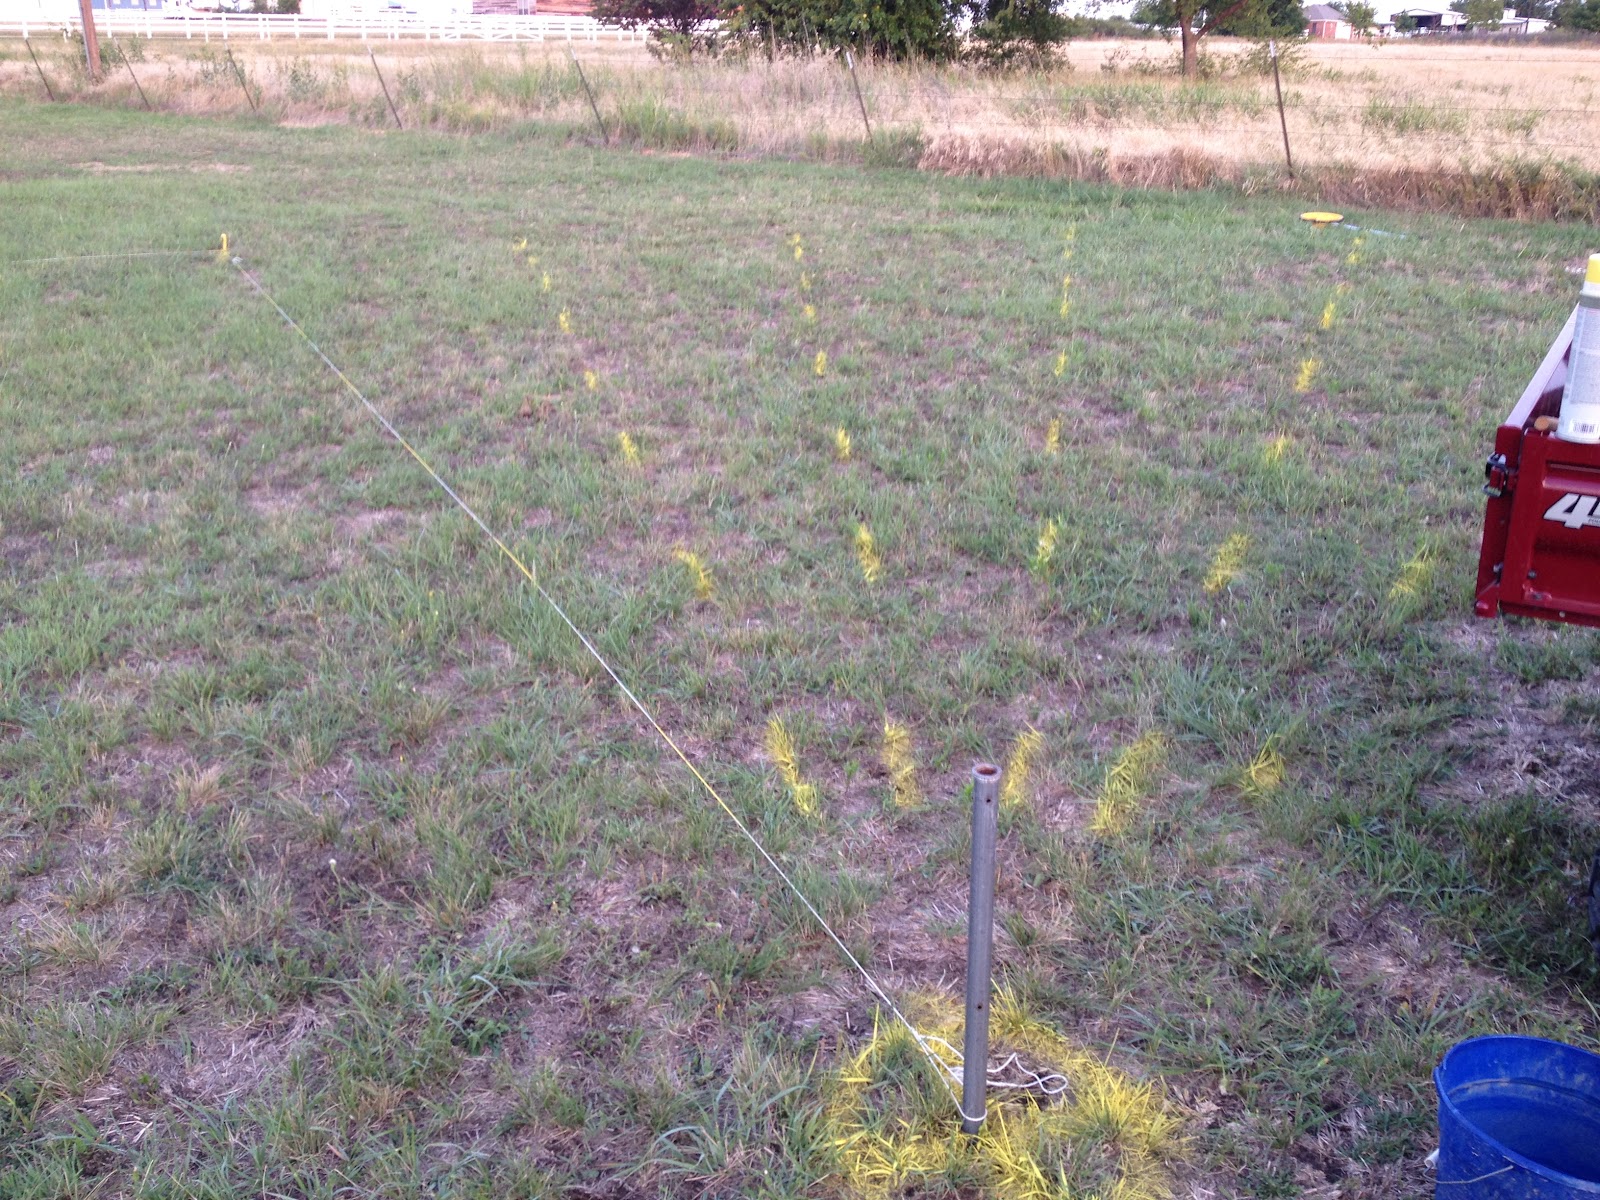
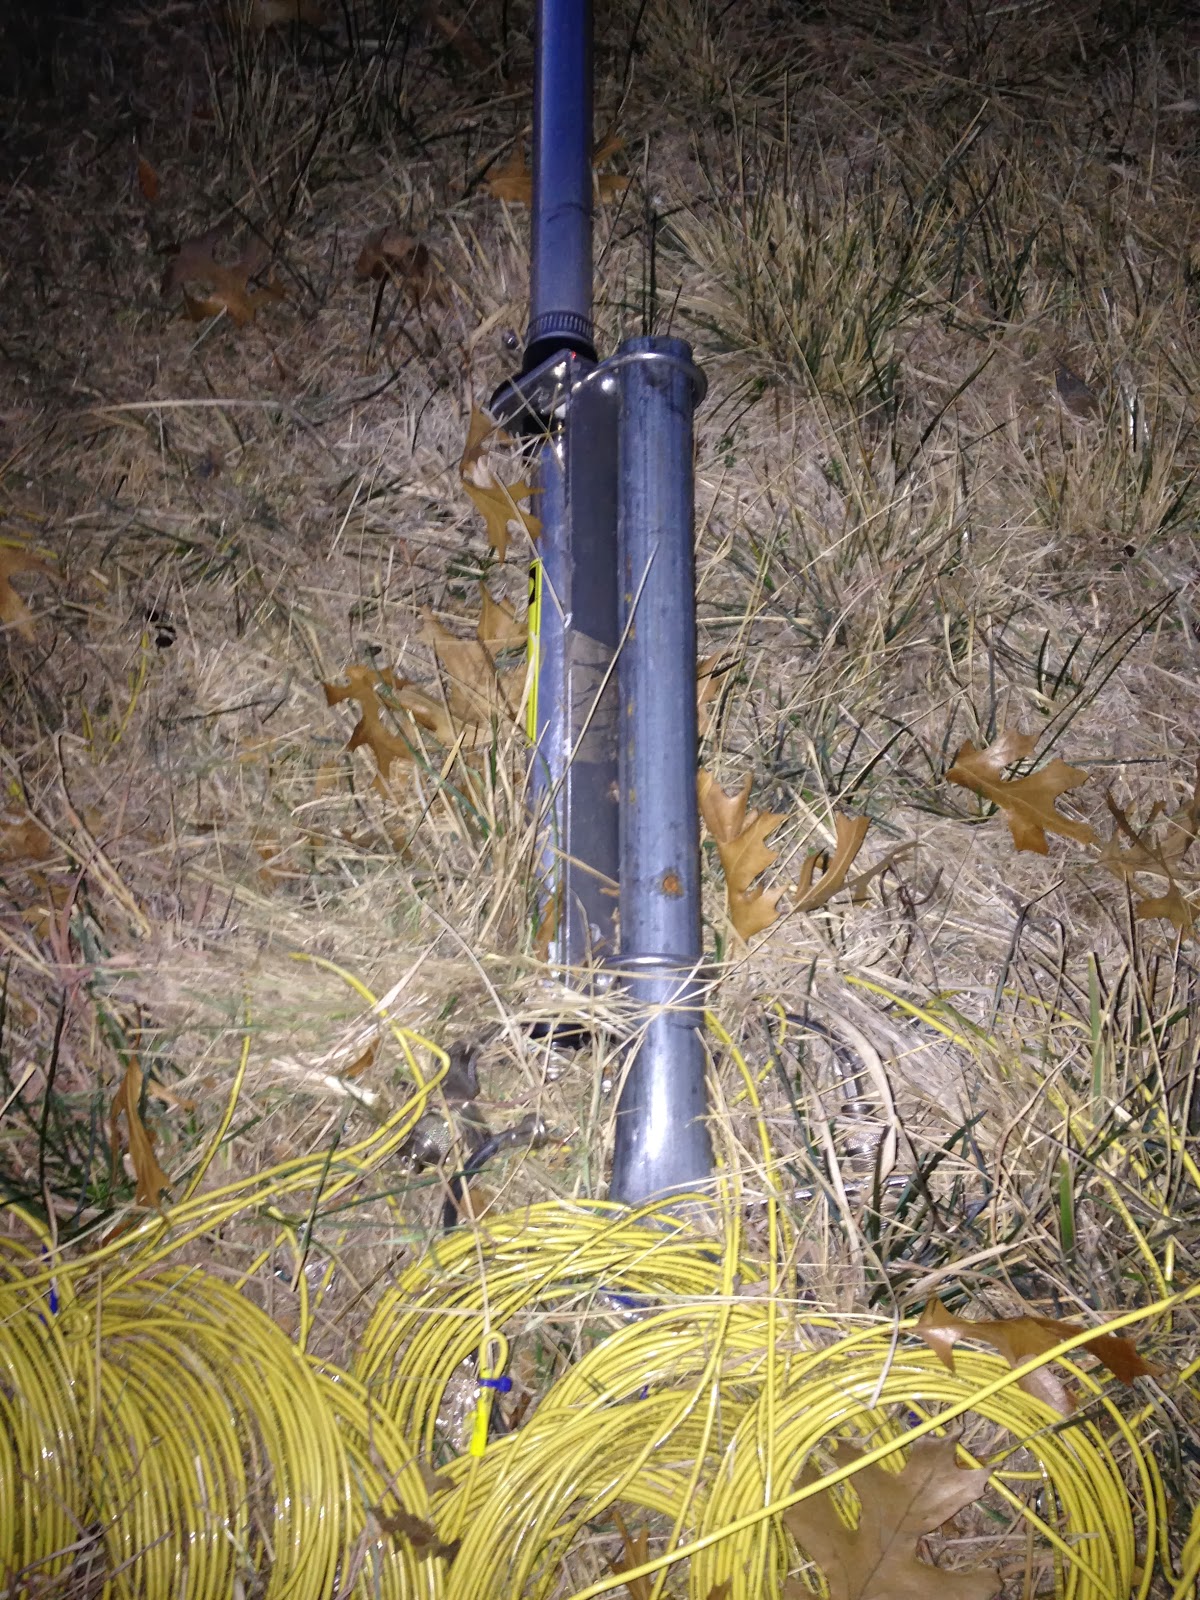
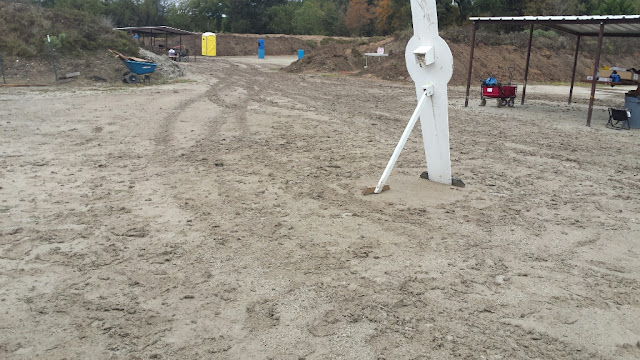
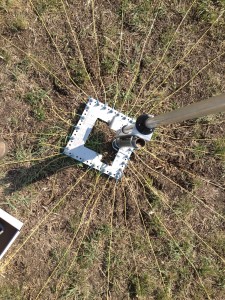
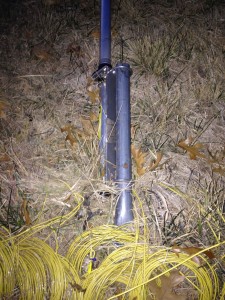
I drove a galvanized pipe, really a chain link fence rail, into the ground to mount the antenna to.

IMG_00185

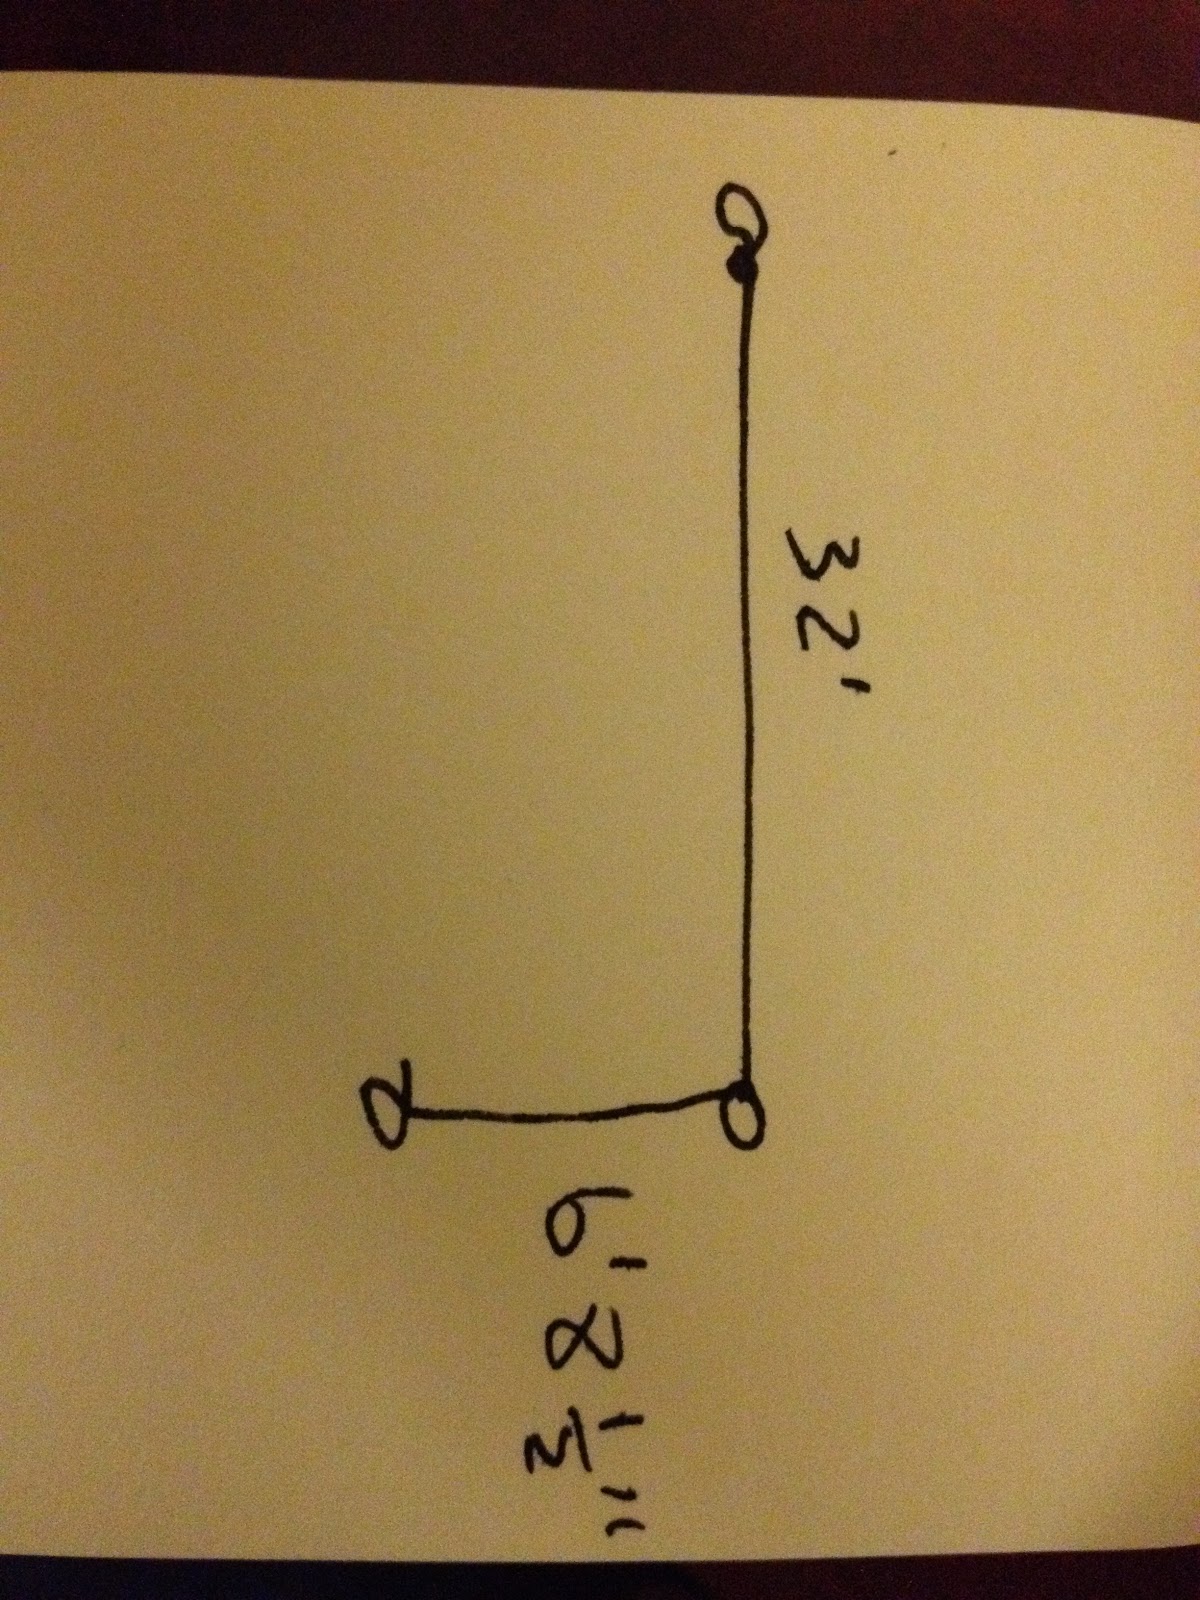
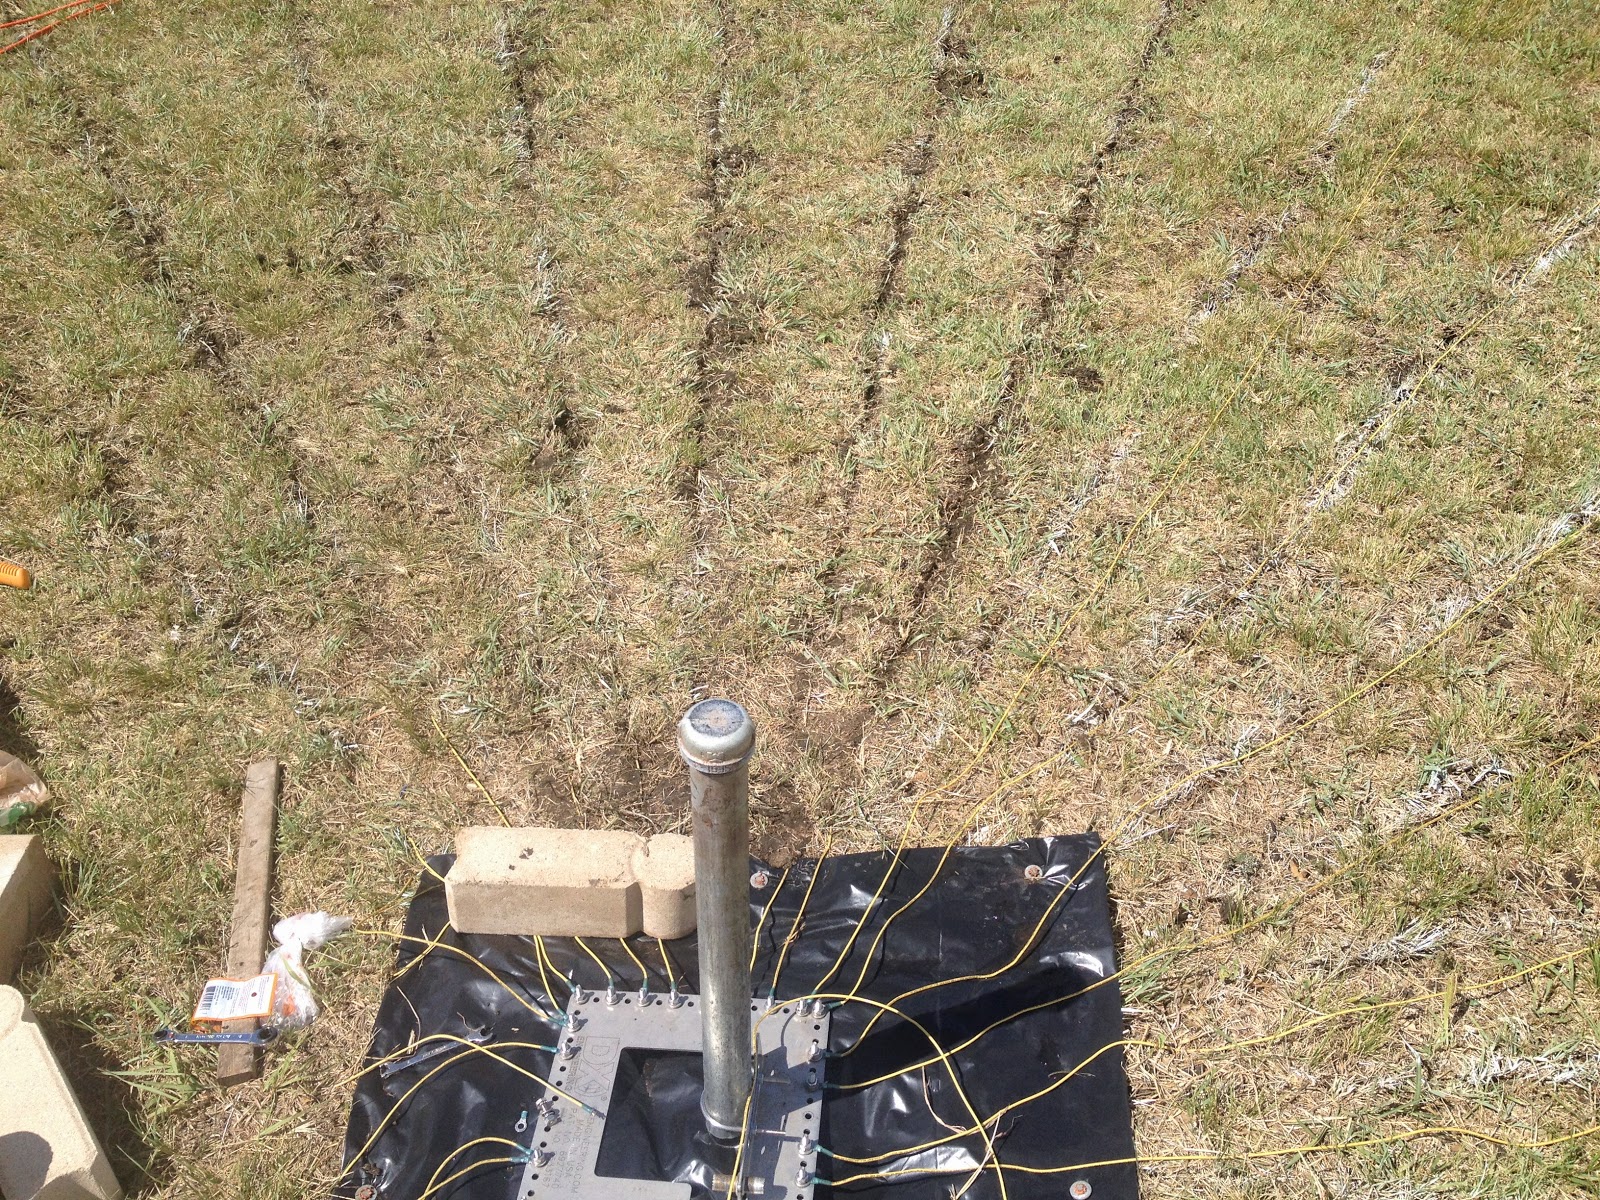
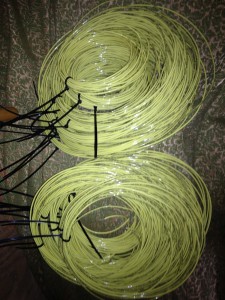
I decided on using 30 radials of 32 feet each. This was a reasonable compromise between the number of radials and keeping the cost down. These dimensions would use almost all of two 500 ft rolls of 12ga THHN wire, about $100. I did a little math and found that the chord of a 12 degree arc of 32 foot radius is close enough to 6′ 8-1/2″ and made a string jig for laying out the radials.

IMG_00178

Using the jig and marking paint, I laid out for all the radials.
IMG_00186

Since the grass in this area is not exactly putting green density, I presumed I could not depend on staples and growing grass to secure the radials, so I elected to use an edger to dig narrow trenches to bury them
IMG_00202

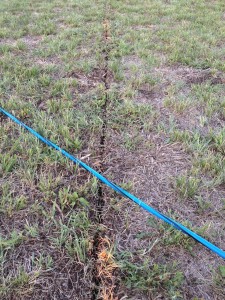
The ground was very dry, it being the middle of June. This made cutting the trenches easy, but burying the radials difficult. The method that end up working best was literally hammering the edges of the trench to collapse it over the wire. My arms are still tired years later. I suggest watering the area the night before next time.

Making the radials was a pretty intense assembly line. It doesn’t seem like 30 would be that much, but it took two solid evenings to roll out 32 foot lengths and put ring connectors on one end of them.

IMG_00201

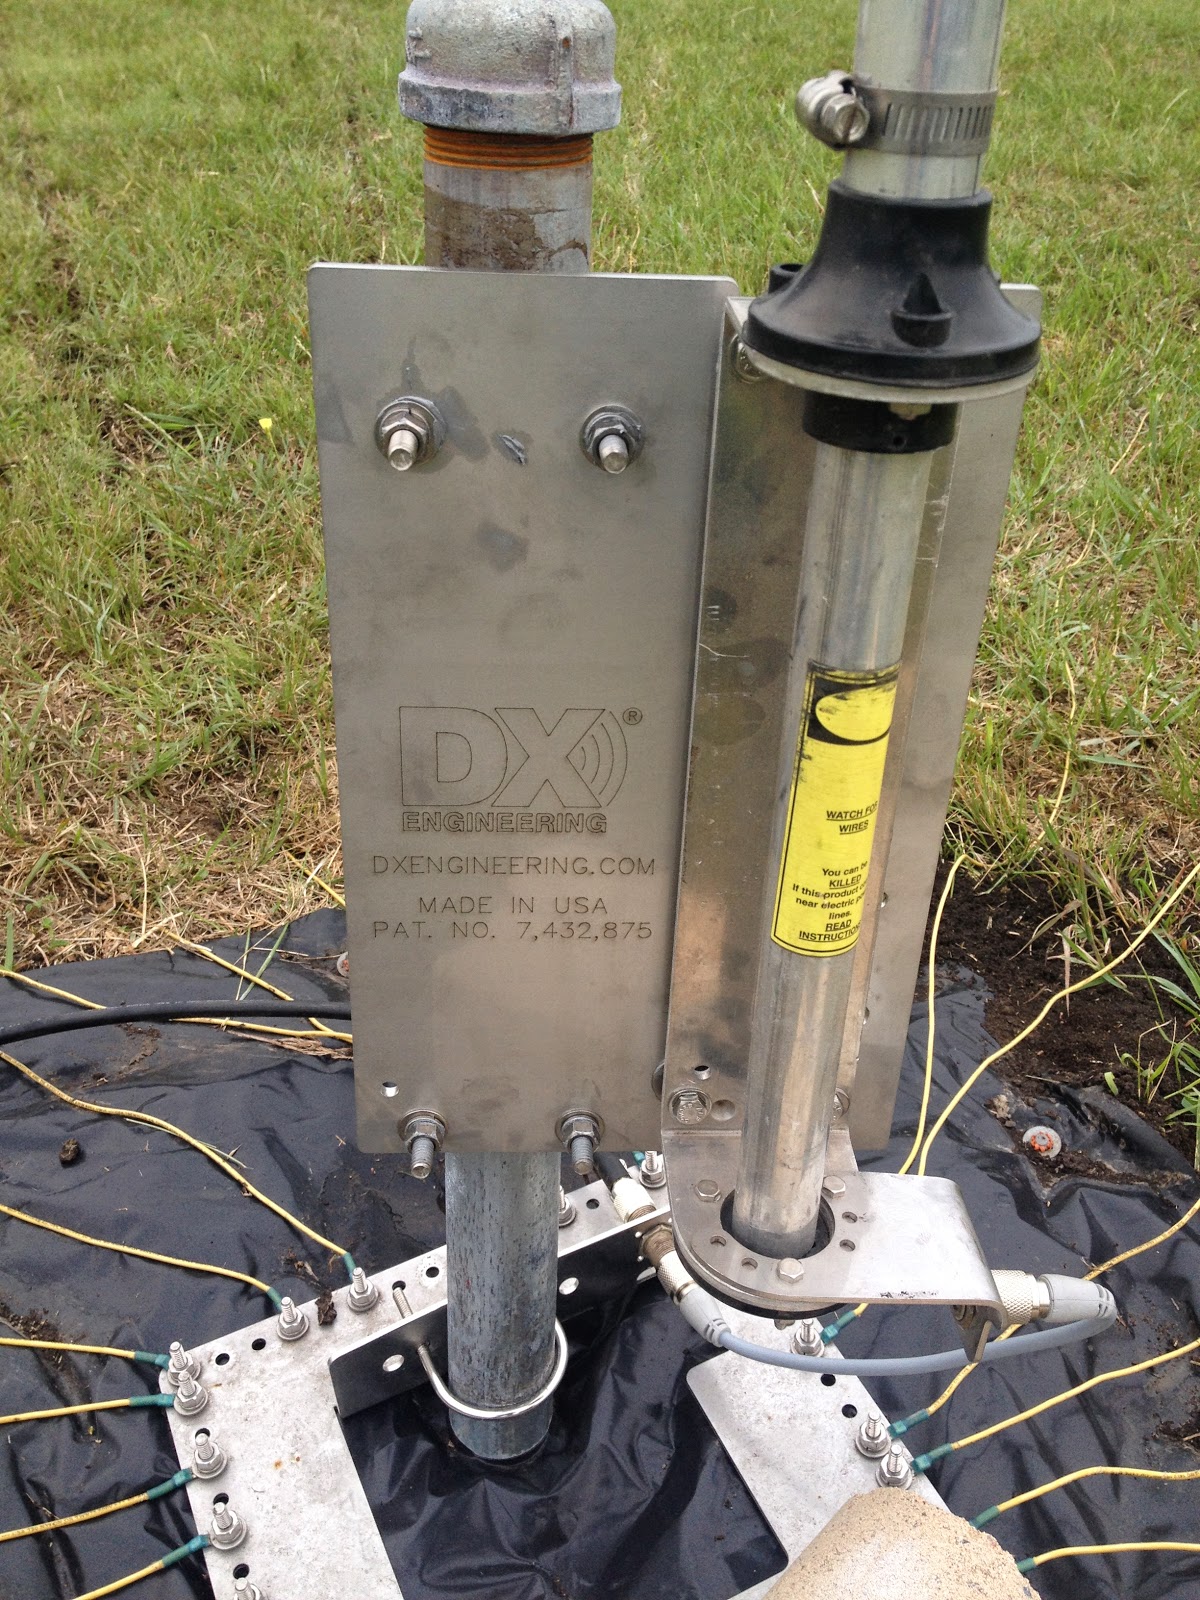
I got the radial plate from DX Engineering and enough stainless steel hardware for 30 radials. *My* plate didn’t come with the hardware like it does now…

With Field Day 2012 now coming up the following weekend and the trench technique limiting me to only getting 6 of them in the ground, I simply laid the rest of the radials out directly on the surface, with nails at the ends to keep them straight.

IMG_00209

On Field Day, we had Amy, Jesse and their daughter out for operations. They brought a TS-140 and a dipole so we could run 2 rigs. We had limited success with the dipole; we didn’t really have a way to get it up in the air and it was too close to the ground to perform well.

IMG_00212

In fact, RFI was pretty horrendous in certain bands. We had a fan to help keep us somewhat comfortable out there. It has a wireless remote control and RFI from the dipole toggled the fan on and off, sometimes per spoken syllable. It was kinda funny, but darned unhandy.

In any case, we had fun and made a few contacts (Cat 2E, 109 QSOs, 488 points) even though the antenna had not been properly tuned. The TS-450SAT’s built in tuner kept SWR at a minimum.

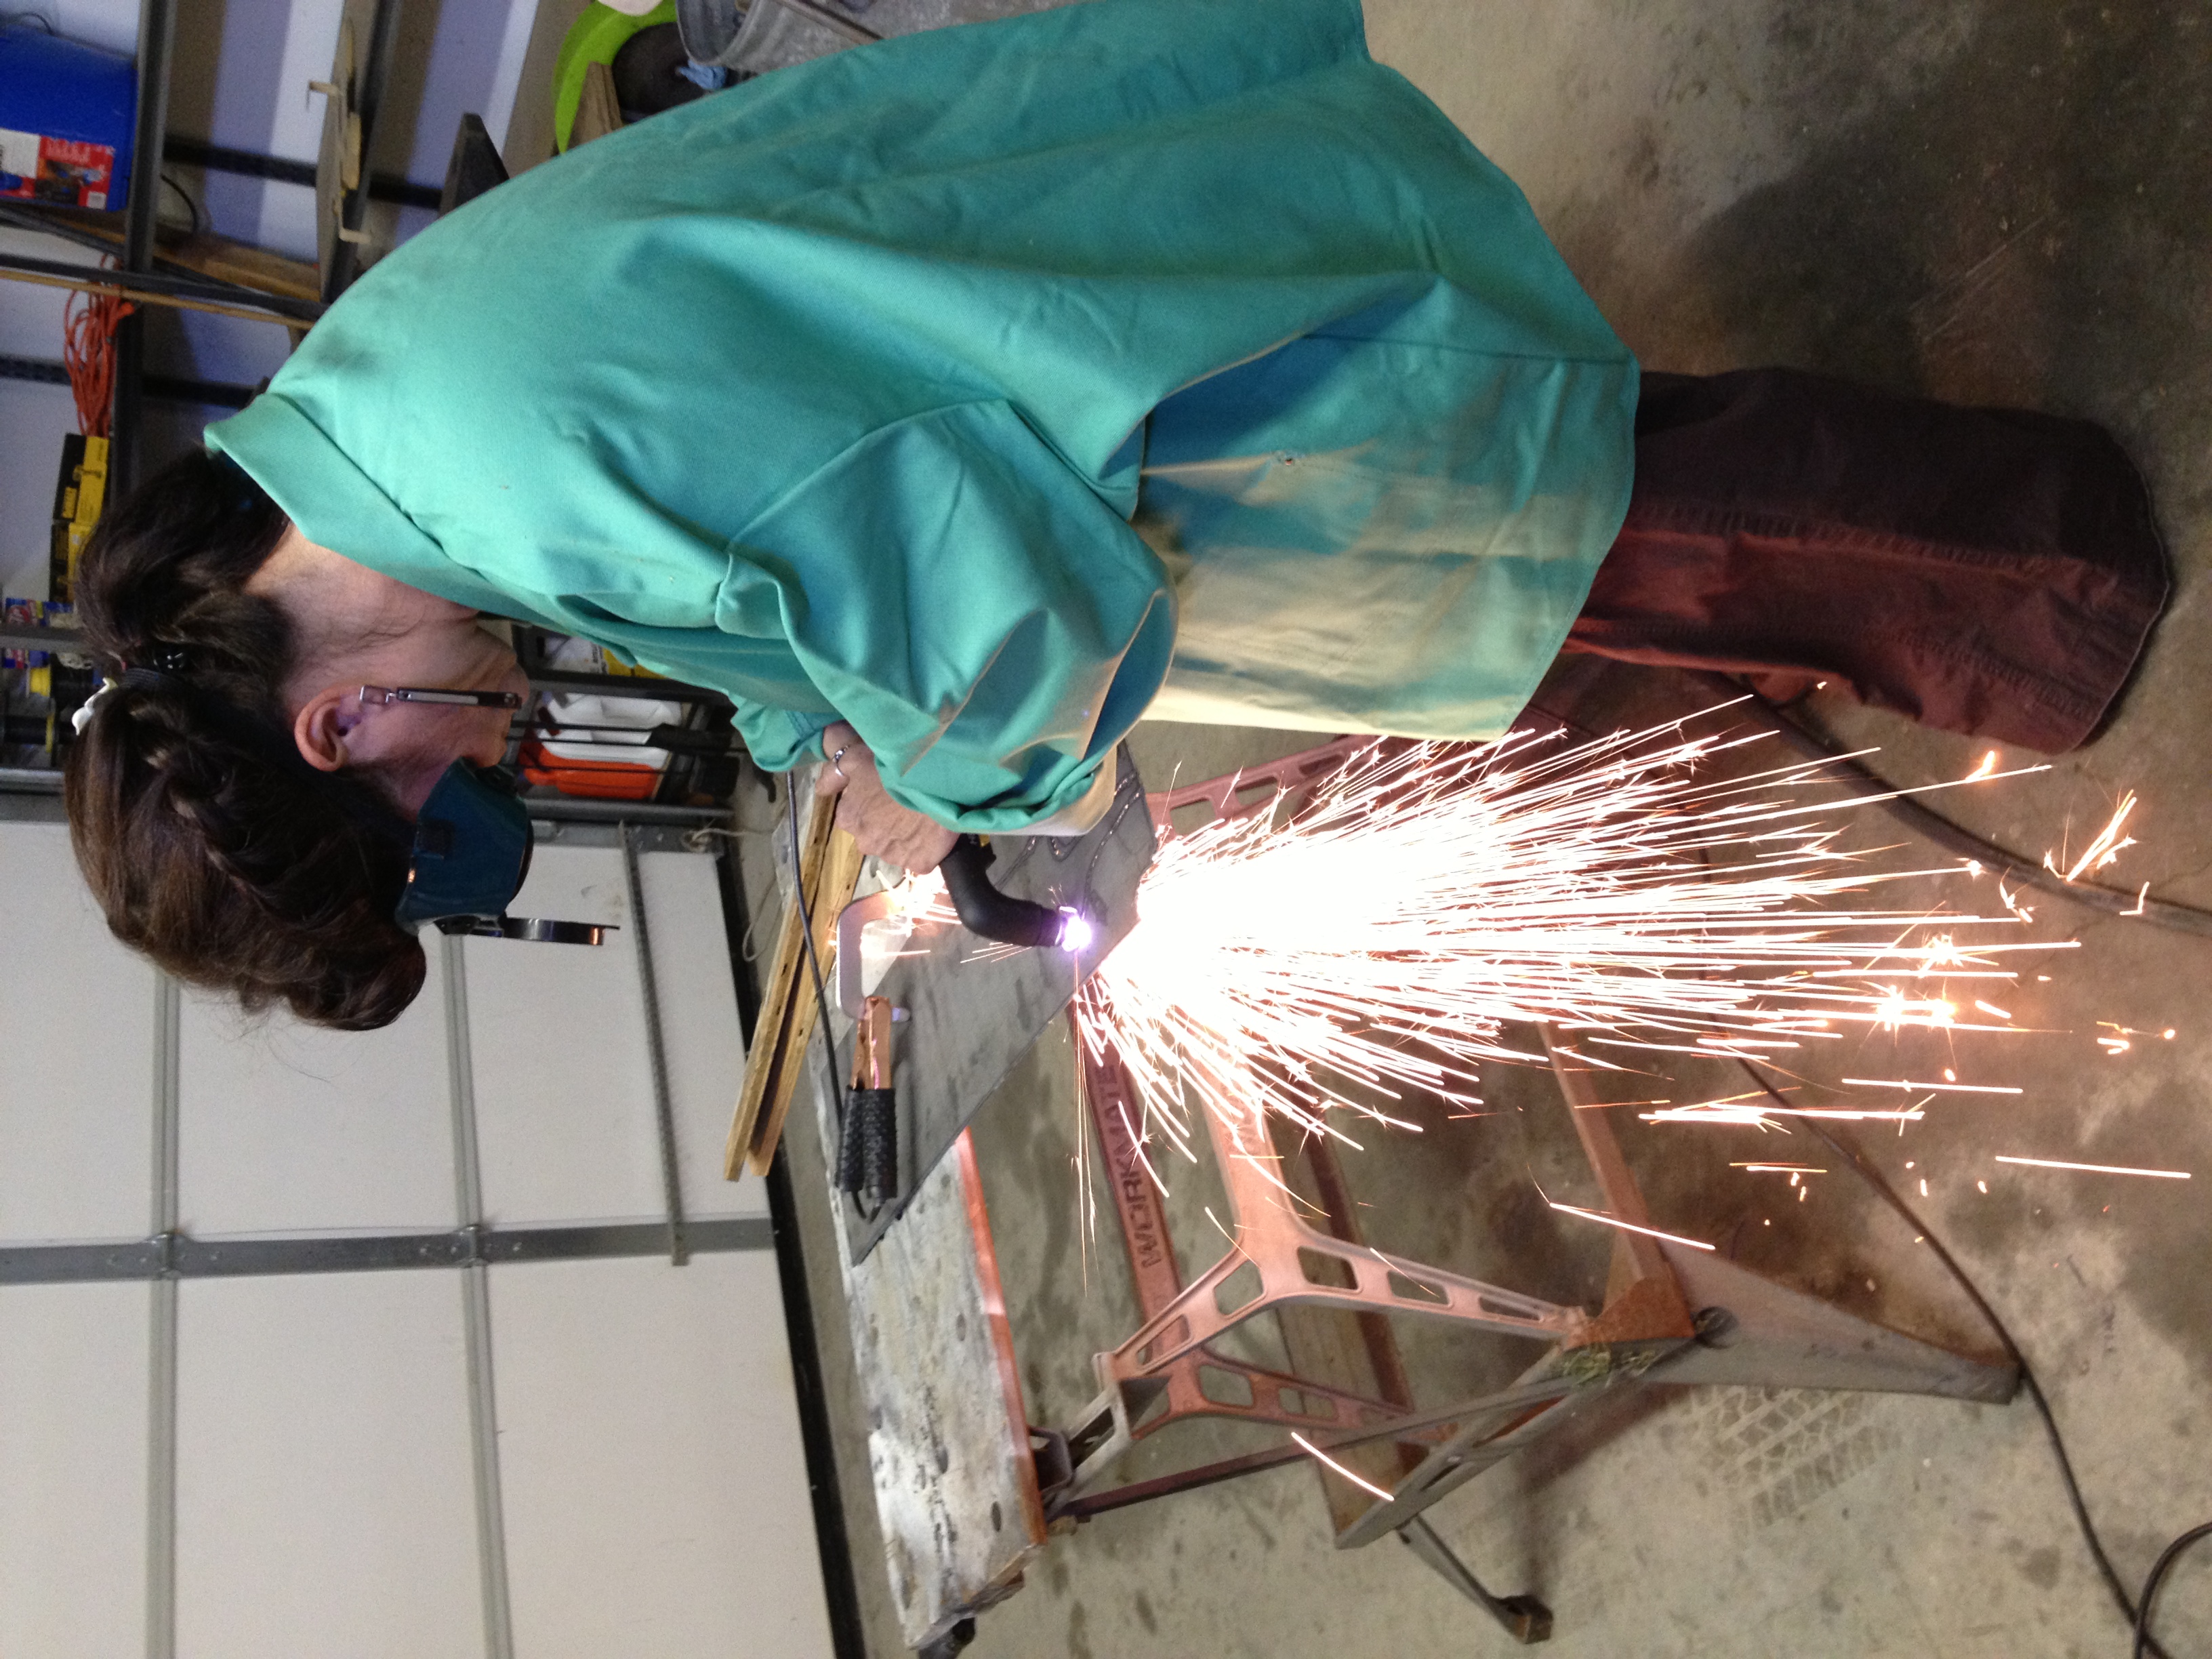
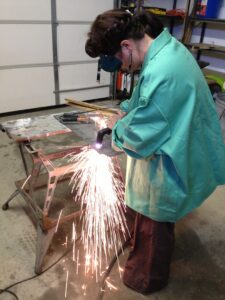
After Field Day, the loose radials were rolled up then later removed, but the antenna was not disturbed for almost a full year. Though I had done some preparation, I was unable to participate in 2013 Field Day due to a schedule conflict. Anytime I can spend the day welding and working metal with my stepdaughter, I’m there.

IMG_01004

In January 2014, I left the house one morning and rounded the corner to find our horses wandering the streets. I knew immediately that I would not be able to corral them without lead ropes, so I rushed back to the barn and grabbed some. I was distracted and in such a rush leaving the barn that I hit the antenna with the truck. I mean, I mowed it down. WHAM!
IMG_01373

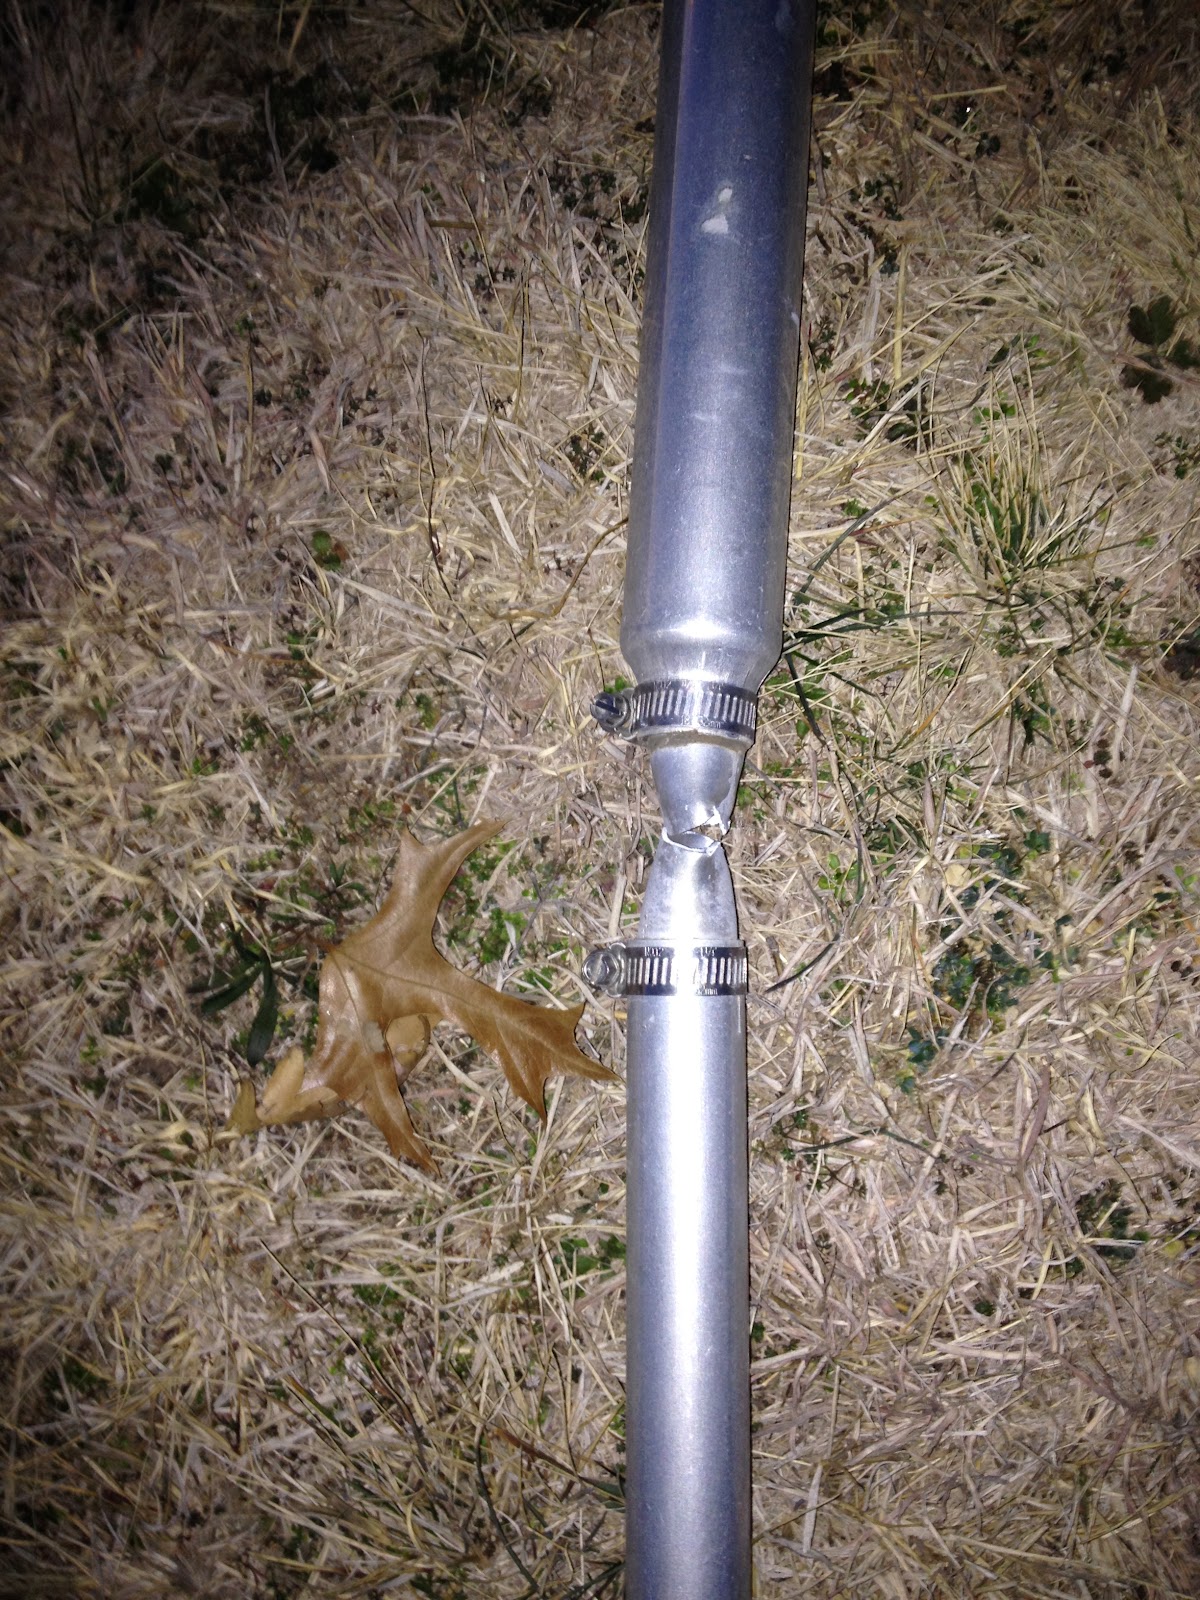
The thin galvanized pole, which had held up more than a year of winds on the plains could not withstand the RAM. That night, I looked over the antenna and found that, while it was damaged, it was not really as bad as it looked.
IMG_01374

I would really only need to replace the bent lower section and the 10m trap.

Somewhere between January and June, I procured replacement parts directly from Hustler, which turns out to be manufactured in nearby Mineral Wells, and rebuilt the antenna. As seems to be the pattern, with Field Day 2014 fast approaching, I resumed antenna work.

I used a new heavy galvanized pipe. If I hit it with the truck again, it will resist more, which, come to think of it, may or may not be a good idea 🙂
IMG_01528

I re-marked the ground for the radials, cut new trenches and got several more buried, assisted by a redneck tool I made to help push the wires into the trenches from a standing position.

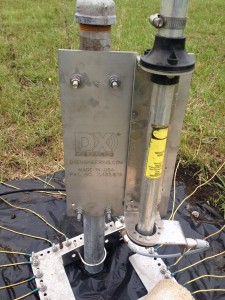
I also had purchased DX Engineering’s tilt mount because taking the antenna down to tune and adjust it was going to be quite an undertaking. Also, the tilt mount provides an opportunity to easily secure the antenna in inclement weather.
IMG_01534

One may note that, at this point, the antenna system as built (and rebuilt) had become pretty much all the same components that DX Engineering offers in a package. The main difference is that this package comes with only enough wire and hardware for 20 radials 25 feet long and it’s arguably less costly at $514, if for no other reason than combined shipping.

Field Day 2014 went wrong early because I strained my back during setup on Saturday morning and spent the day hurting and barely able to walk. Luckily, most of the day was also spent sitting. We were storing a large camper trailer for a friend of ours and we were encouraged to use it if we liked. In order to be in air conditioned comfort for the day, I set up the station in the camper. It made for as pleasant of an operation as would have been possible.

2014 Field Day results: Cat 1E, 111 QSOs, 472 points

Again after Field Day, the remaining above ground radials were rolled up and essentially no antenna construction action was taken until Field Day preparations began in 2015. There were related developments, though.

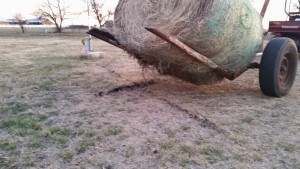
The radials are not impervious to accidents. I snagged a buried radial with one of the forks of the hay buggy.
20141206_172803

Although the workshop is a neat place to hang out, there are advantages to being able to operate from elsewhere, so I got interested in RemoteRig.

Many rigs these days have removable and remotable control heads. RemoteRig is basically a hardware device that extends that remote cable over a LAN or WAN. Particularly well suited to this method is the Icom IC-706 and variants. Even if your rig doesn’t have a removable head, but can be operated remotely via CI-V or other such data formats, RemoteRig helps remote that data and, perhaps more importantly, the audio, over a network. For the curious, it basically uses SIP protocols and is thus pretty much just a slightly specialized VoIP phone. Sadly, it is not an inexpensive solution and it took me a long while to pull the trigger on the $530 purchase, but I have been very pleased with it.

The extension cable for the IC-706 is now out of production, but you can find them on occasion. I actually got mine from an eBay seller before I considered RemoteRig simply because I might one day put the rig in a vehicle. It is quite an emotional undertaking to cut a rare cord that people are asking $150 or more for these days. When I got mine, they were still in stock at Universal Radio for $60.

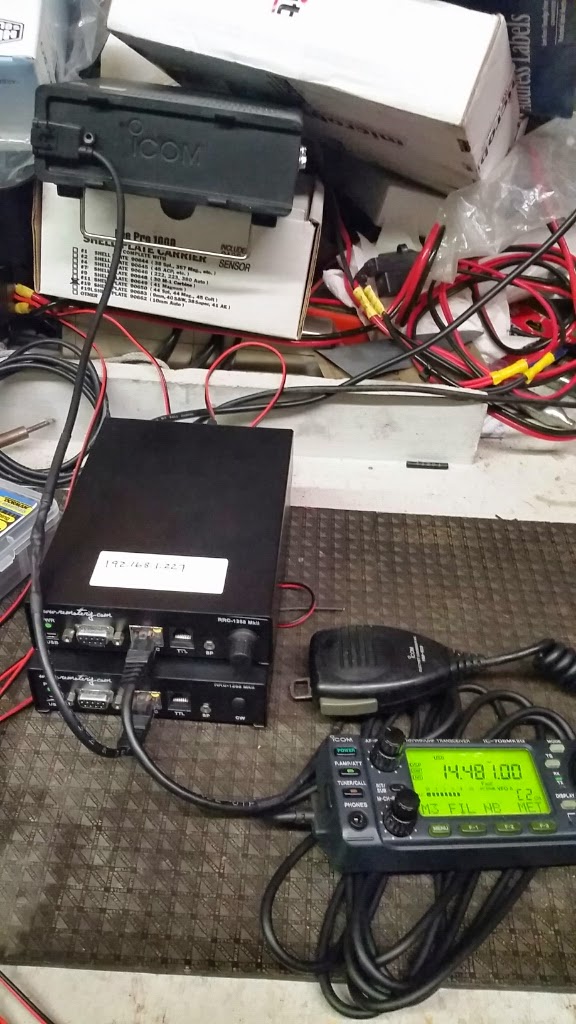
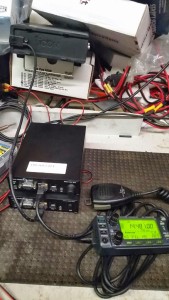
The workbench is somewhat in disarray, but here is my Icom with RemoteRig extending the control head over the LAN switch in the workshop.
upload_-1.39

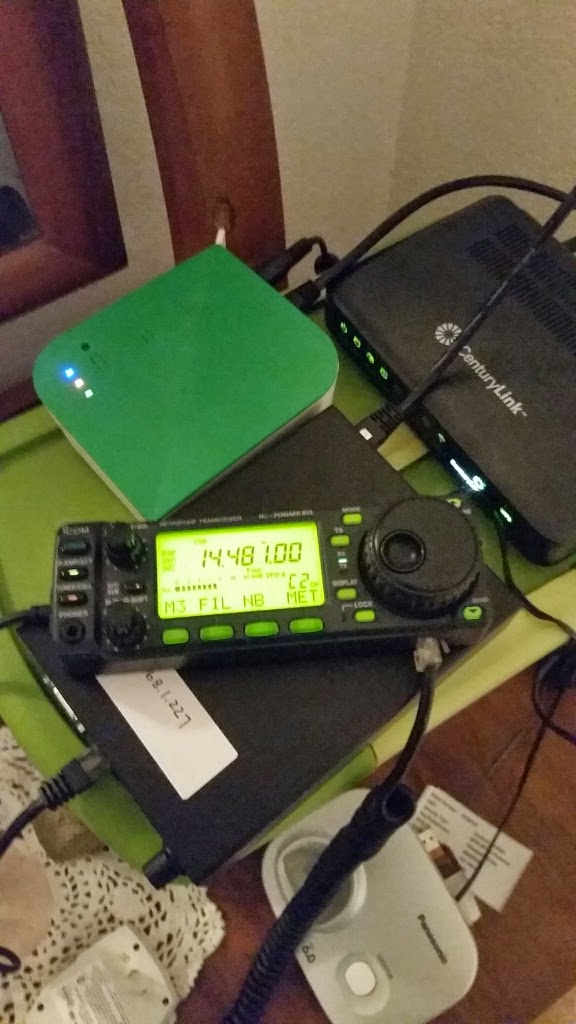
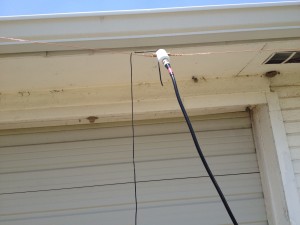
Once that was working, it was trivial to move the control head into the house to test it from there.
upload_-1.16

It takes a little firewall holepunching to set up the system to work over a WAN, but here it is sitting on my desk at work

upload_-1.8
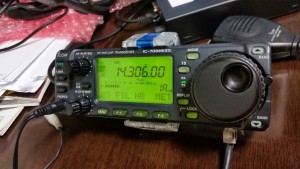
So, in the above pic, pressing the band button on the control head sends a serial command over the cable to the RemoteRig unit, which encapsulates it in a SIP message that it sends out the ethernet port over the LAN at the office to the router, through our provider to their firewall, onto the wild internet to my provider, down the DSL wire to the house, through the DSL modem and it’s built in switch, over the long range wireless link from the house to the workshop, to the switch in the workshop, to the RemoteRig device where it is turned back into a serial command that is passed over the cable to the radio. The radio responds and replies over the same chain. There is a generally imperceptible delay to the user pressing the band button.

Almost as an aside, I decided that to support remote operation, I need to add an automatic antenna tuner. The LDG IT-100 is operationally very similar to the Icom AH4 tuner, connecting directly to the radio and triggered by the front panel button on the radio. It can tune as for as 10:1 SWR on HF, but most importantly, it can work for those small mismatches on either side of my antenna’s resonances.

Though operating remotely over WAN is neat, at this point I really intend for it to be used most often so that I can operate from in the house on occasion. I ended up using it for Field Day 2015.

I started working on the antenna a little earlier this year, late March instead of mid June. I got a few more radials in the ground.

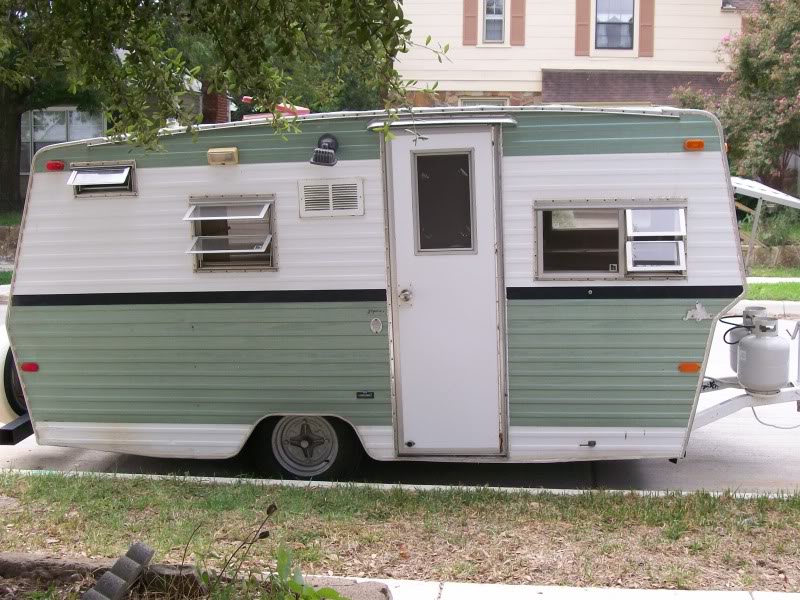
Pleased with the success of operating in the camper for 2014, I decided to do about the same for 2015. The friend’s camper was long gone, but we have our own vintage camper, a 1972 Jayco Jay Wren. It’s a cute little thing.
101_0246

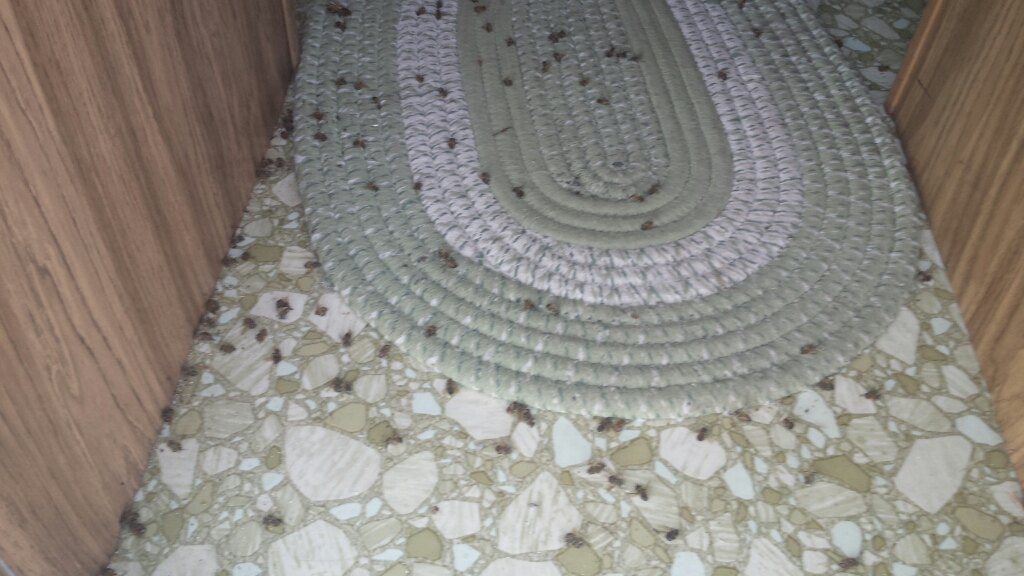
As part of the preparation for  the upcoming event, a week or so before FD 2105, I moved the camper from it’s usually parking place to just outside the workshop. I opened the door and was immediately concerned because there were hundred of dead bees inside.
camper-floor-bees

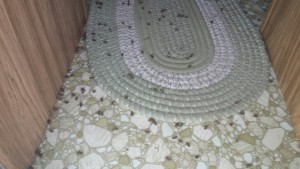
A little more digging revealed that there was a fairly well established hive in one of the storage benches.

I (inadvisedly) sprayed a number of them, but there were too many and really I don’t like doing that, particularly to such a beneficial creature. I was able to locate a beekeeper who came out and was able to capture and relocate the hive. It was quite an involved process and, long story short, the camper was not going to be usable for Field Day.

So, I probably could have set up in the kitchen using RemoteRig, but instead I used my wife’s craftroom. This would keep me out of the way and free of most of the distractions in the house.
upload_-1.9

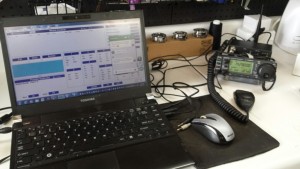
The laptop was used primarily for logging, though I did try to make a few digital contacts. Note the RigBlaster interface behind the control head. The network latency does not appear to be an issue for digital modes, either. Note also the rubber ducky antenna on the back of the RemoteRig device. Using WiFi makes it all that much easier to use at home. The RemoteRig with the wifi adapter needs only 12V power to be ready to use anywhere in the house.

Due to extreme knuckleheadedness, I did not submit the logs for this Field Day. Unofficially, I had 57 QSOs, operating as a 1D station.

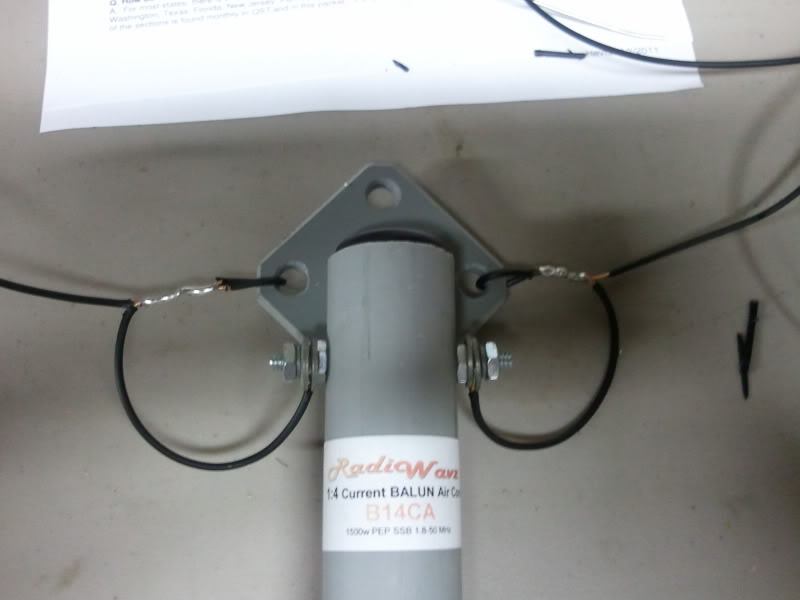
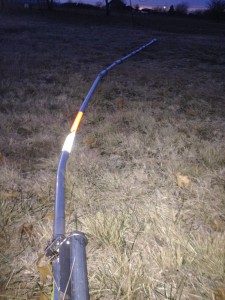
Believe it or not, there are STILL a few remaining radial wires that have not been buried. My neighbor and fellow ham had rented a trencher for a project at their house, so I borrowed it and cut three trenches I needed as well, one for power to an outbuilding, one for water to the barn and a shallow one for the coax to the antenna. My LM400 coax is rated for direct burial and buried coax can help choke stray RF currents, even though I do have a set of 1:1 baluns for that.

As it stands today, there are just a few radials, maybe 5 or 6, left to bury plus one to repair from the coax trench digging. Once those radials are in the ground, the only task left is to finally tune it as built.

The Tale of The Ancients

I haven’t been able to nail down the exact date, but it was sometime in the early 1980’s that I got my first ticket. It was just barely before the Volunteer Examination systems was created, but at that time, a General or higher could administer the Novice test. The club in San Angelo, TX held a class. I recall three of us, Mark, lifelong friend KD and me. We got KA5RZZ, KA5SAC and KA5RZY, respectively.

Mark has kept his callsign though all the years, currently Advanced class.

KD kept his through Advanced, then got NN5KS as a vanity call once he got to Amateur Extra.

Once VE testing was in full swing, I was living in Abilene, TX, and in 1989, I took a club-offered Technician class and subsequent VE testing. I passed and got callsign N5HRK.

I was fairly active for a few years, notably with then new-and-exciting packet radio on 2 meters, and a little HF. There was no Novice/Technician phone on HF at the time, so it was all CW, all the time. As I never was particularly good at Morse code, it was not something I really excelled at and so I found it to be somewhat frustrating. That, and antennas on an extreme budget in rented housing can be a significant challenge.

So, I chilled somewhat on the hobby, doing other things over the years. I moved to Fort Worth, working primarily in voice communications, primarily telephone systems. Hobbywise, I did a lot of robotics. I never completely forgot about radio, though it was not front of mind. Expiration of my license in 1999 came and went and then some.

I got interested again in 2010, due largely to KD. My license was long expired and even the 2 year renewal grace period had expired some 10 years earlier. In the good news column, however, the requirement to show proficiency in Morse code had been eliminated. This meant that studying would be all technology, rules and operating. I had originally planned to study for General class, but along the way decided that I would push for Extra

I used a lot of online study tools and eventually I started using online practice tests that presented questions from the pool of questions for all three classes. Once I was studying the Extra class questions, I had refined a process wherein I would get the question and if I did not know the answer immediately, I would research the question to understand the subject rather than simply look up the answer to that question. I think that gave me a much better understanding of the actual material, which I think is the actual intent of testing licensees.

So, I found a testing session and in March of 2011, took all three tests in one sitting. I aced Technician, did well on General and squeaked by on Extra, but I passed! I got callsign AE5XB.

So, with my fresh license, I decided that I was going to run a 1E station for ARRL Field Day. I had a Kenwood TS-450SAT, but I needed an antenna. I knew that a monoband dipole would be too limiting and that with a small property, a standard 50 x 100 foot lot in an older part of town, I needed something compact. I elected to make an off center fed multiband dipole using a commercial balun.

SAMSUNG

My experience with it was not totally positive, but I am reasonably sure that the design, construction and height above the ground would all have been issues.

Still, I got a handful of contacts, 29 QSOs and enough multipliers for a whopping 158 points, 2428th place out of 2632 🙂

I found that I could hear a lot of stations that could apparently never hear me. When someone did hear me, they had trouble copying my callsign. Cool as it looked, I decided I would get a vanity callsign.

I looked at a couple of other possibilities, like my initials, etc, but what looked best was my still-available former call, N5HRK.

By Field Day 2012, I had the new call and we had moved to our house in the country on almost 12 acres. Even with the available space, I still wanted to have a compact antenna, largely for aesthetic reasons. I decided to put up a strong multiband vertical. With the vertical in place, FD2012 was good for 109 QSOs and 488 points and we didn’t even work the whole 24 hours.

The antenna installation deserves it’s own story and I’ll put that in the next posting.

BUG/CCP Match and Ammo Talk

Well, the BladeTech Southern Regional BUG / CCP Match held last Saturday was great fun! It had rained Friday and overnight Friday night. The rain was pretty much gone by match time Saturday morning, but it was still vera muddy.

I was my own worst enemy when it came to arriving on time. I left the house plenty early, but 20 minutes down the road, noticed I had left my wallet at home. So, 40 minutes added to trip. Caught at the railroad crossing on the way out the second time, so 5 more minutes there, though it always feels longer. Then as I neared the range, I lefted when I should have righted and didn’t realize *that* for 15 minutes, so 15 extra minutes added. I arrived at the gate shortly after the shooter’s meeting, and the range is still 15 minutes from the gate. Still, I got there, parked, registered and caught up with my squad and got inspection and stage description before the first shot, so not bad…

Two stages kind ate me up. The first was simply a matter of shooting faster than I can go. It looks good on the video but the score was pretty poor, 25 down on that one stage. One other stage had a poor score. Those two account for 2/3 of my total penalties. In contrast, the other 10 stages averaged 3 down.

Still, it was fun and I had almost no ammo issues. All rounds that saw the firing pin fired. I did have two rounds that failed to go into battery. I have gotten into what could arguably be a bad habit of racking out such failures. I think I need to develop instead the habit of bumping the back of the slide to attempt to force them into battery. With a BUG pistol at a BUG match, the stages were understandably BUG friendly, designed largely to be shot in groups of 6. Two targets get 3 each or 3 targets to two each, then move. Well, when you rack out a fail to battery, you now have only 5 rounds. You will run out before you address all 6 rounds. So, advance to cover, reload, take the last shot. *Now*, you’re probably going be short for the next 6 rounds and have to stop and reload for that. Both rounds that were racked out were lost in the copious mud, so I could not check those to see if there was a dimensional issue with them.

All in all, however, it was a fun match with ammo I feel I can trust, at least for competition. This Thursday, I may get to test that load in the Glock, though Thursday is also the last day of work for my retiring spouse. I might be busy. 🙂

It’s Not Really Science If You Change All The Conditions

I loaded up 100 rounds of low recoil 40S&W, using new Starline brass, Remington 1-1/2 primers and a slightly hotter 4.6g charge of Power Pistol and shot it from my Kahr CW40. So, other than keeping the Xtreme 180g RNFP projectile, I changed all the parameters of the test.
First, the Kahr is running it’s stock spring, which is pretty stiff to judge by just a finger pull. I’m sure the smaller size of everything magnifies the apparent effort needed to cycle the slide, but the ammo never failed to extract or in any other way, fail to operate the pistol.
So long as it actually fired.
I had a few click-no-fire failures. Several, in fact. I recovered at least three manually ejected cartridges with seemingly light strikes. Upon closer examination, it appears that the primers are set deeper in the pockets than expected.
On the left is one of my previously loaded 180g rounds, with used brass and CCI primer. In the center is a light strike failure and on the right is an unfired “new” round. The really sharp observer will notice that the light strike is also a smidgen off center, but that is not generally a problem unless it’s WAY off.
It may be tough to see in that picture, but the primers in both of the new rounds are noticeably set back.
Not sure if this is a better or worse illustration.
Since the previous load is in different brass and using a different primer, it’s hard to compare them fairly, but the degree to which the new rounds are wrong is very clear.
Since I need to load about 200 rounds of ammo for a major match *tomorrow*, I need to resolve this tonight.
Most obviously, I will see what CCI or even Tula primers look like in the Starline brass. Before I load any, however, I will see if the Remington primers are smaller than the others and/or if the primer pockets in the Starline brass are different from the fired brass I have. The Remington primers gave me some fits anyway. They didnt want to feed reliably in the press. It seems to like CCI better. Actually, it seems to like Tula primers as well or maybe better. My hopes are very high that this will resolve the problem and I can use this load tomorrow without issue.
Using new brass was an unaccustomed joy. None of the usual QA gyrations that fired brass needs seemed to even apply. Never fired means never GlockBulged; loaded rounds dropped straight through the bulge buster without interference, so that fairly time consuming step could be eliminated. Thanks to a minor adjustment of the crimping die, they dropped into and out of the gauge block as well. I did not put a caliper on every round, but the 20 or so random rounds that I checked were all dead on 0.419″ at the case mouth and OAL 1.115″, +/- 0.001. That is a little short, so I will move that out to 1.120″ or so. I have had some feeding problems in the Lone Wolf conversion barrel of the Glock and that will likely help.
In looking up some figures about primer pocket depth, I came across an article about the dangers of loading 40S&W with 180g bullets. The gist of the article was that since the 180g bullet is physically longer than any other weight bullet, but that we maintain the same OAL, the combination results in significantly reduce loaded case volume. This volume does indeed affect the burn rate and peak pressure of any powder in any round and the article included a scary chart showing that a variation of 0.140″ in cartridge OAL and thus case volume, resulted in pressures soaring as high as 4 times the maximum SAAMI pressure for the cartridge.
The same sort of problem comes from too light of a crimp on an autoloading pistol cartridge and even more often, chambering the same cartridge over and over (like you might do if you unload and reload your carry ammo into a pistol you also compete with) can set the bullet back from being rammed into the feed ramp. At the very least, it can affect accuracy because the pressures vary from shot to shot and in the worst case, your pistol comes apart in your hand due to extremely high pressures, possibly taking your hand with it.
In my case, I think my handloading goal avoids this issue. I am not loading anywhere near full power, let alone max power. Just the opposite, in fact. I am developing the lowest power load that will meet minimum power factor for my competition and reliably operate the pistol.

Punching Holes Gently, Continued…

The 13 pound spring did seem to help operation of the pistol in general. With the stock spring, I had several issues where extraction and ejection seemed to not complete in pretty much every stage I shot. The lighter spring as reduced that greatly, but it has not completely eliminated it. Last Thursday, I still had a couple of them.

Also, the lighter spring seems to have made the pistol a little less forgiving about about case mouth tolerances and thus I had a few failures to go into battery.

In my defense, though perhaps it’s not a truly warranted defense, I have found that I can have rounds that drop freely into the gauge block but close observation reveals a tiny bit of the flared mouth remains. This might not be an issue on a Glock 22, with it’s native 40S&W magazines, but using the 10mm mags and a 40S&W conversion barrel might introduce enough geometric change to take up all the usual tolerances and result in a failure to go into battery.

Message received, Cody. I need to mic those case mouths. Adjusting the crimp die will be very simple and will probably take care of it.

So, with the BUG match coming up this weekend, I have two critical ammo related problems to address.

Even the lighter spring on the Glock isn’t quite light enough for the current load, so I need to bump up the powder charge just a little. As I am using the Lee Pro Auto Disk powder measure, I will just go up one cavity size on the disk. I think I’m using the 0.40 cc cavity and the next larger 0.43 cc cavity should raise the powder charge to about 4.8g. This should add about 50 fps to the velocity, but more importantly, about 31 foot pounds of energy to the slide.

Of course, that whole paragraph applies to shooting the Glock. For the BUG match, I’ll be shooting the Kahr, and I haven’t tried that ammo at all in that pistol. The current load might work, or I might need to bump that even higher for the Kahr. I may be able to test that this evening.