When last we left our heroes, Home Assistant was running via SD card on a Raspberry Pi 4 B with 4GB RAM. Why was that not OK?
Well, the biggest thing is that SD cards have a finite life and as the primary hard drive for a continuously running system, it is subject to significant writing action over time. The operating system does stuff, Home Assistant does stuff, both of them log activities, etc. Some SD cards are optimized for longer write time, but in short, SD cards can actually wear out.
The SD card I used to install Home Assistant on the Raspberry Pi was not new, but probably has plenty of life left. Still, I’d rather use a drive intended to be a hard drive.
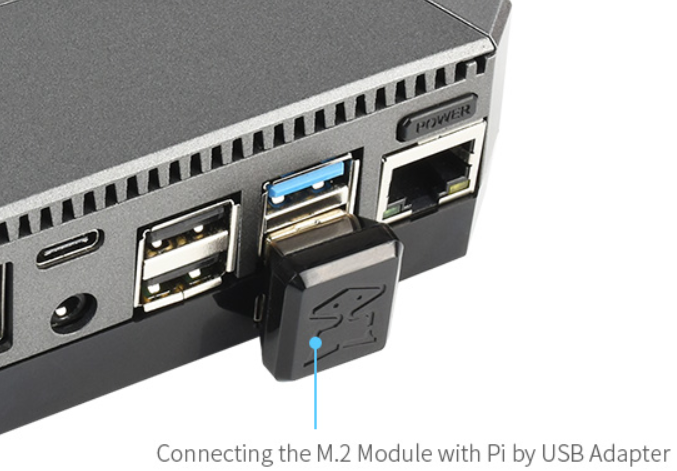
Running a Raspberry Pi on an SSD drive is pretty simple, though with the Pi 4, we are limited to USB adapters. I didn’t want to have such a critical component hanging on the end of a plug in cord, so I was happy to see a recommendation for the Argon One case for the Pi4. Specifically, I ordered the case equipped with an M.2 SATA adapter, along with a relatively unknown brand 64GB M.2 SSD.
The Argon One case is pretty nice in several ways, but the cool part here is that the basic case holds the Pi 4 in the top of the case and bottom cover is interchangable for a plain bottom or a bottom equipped with an M.2 SATA adapter. It uses a clever U shaped plug to connect the adapter to the bottom USB 3.0 jack on the board.
The Argon One case adapts the micro HDMI on the Pi4 to standard HDMI, if that matters to ya. In my application, I don’t need it, but if I use a Pi for something else, that will no doubt be handy. It also adds an actual power switch and still gives access to all the I/O pins.
Since I was upgrading anyway, I checked stock at Adafruit and found that they had 8GB Raspberry Pi 4 boards in stock, so I got one of those on the way as well. May as well do all the upgrading at once and be done with it for a while.
The process for setting up a Pi4 to boot on SSD is pretty straight forward. First, I used my USB to M2 adapter to put a Home Assistant image on the 64GB SSD, the image provided by Raspberry Pi Imager. Then in the utilities section, there is an image to put onto an SD card that sets the boot order in the Pi to try SSD first, which I burned to a handy SD card I had laying around. I booted on that SD according to the directions, then booted on the SSD in my USB adapter and it came up. I did not do all the setup as I wanted to wrap everything up in “permanent” fashion in the new case first.
It was at that point that I discovered that my 64GB SSD would not quit fit the socket in the case adapter. Much trial and error and even a little forcing revealed that, although it was not mentioned as so on the ordering description, the 64GB SSD was apparently an NVMe SSD and the case adapter specifically is not NVMe compatible. Not only was the non-NVMe drive a little cheaper, all indications were that NVMe speeds were wasted on Raspberry Pi hardware. None of that would help me right then.
I also found that M.2 SSDs that are verifiably not NVMe are really hard to find. Apparently nobody is looking for slower stuff anymore. If I found one at all, shipping times were long. I decided that the best bet was to look back to Argon One and get their upgraded NMVe base.
It took a couple of days to arrive and a few more to reach a point when I could dedicate some time to work on it. Everything looked ready to go, but the 64GB SSD would not boot up. As part of verifying it, I put it back in the USB adapter and put it on my PC. The PC would show the adapter plugged in, but as a drive with 0 bytes. Long story short, after several attempts at recovery, I concluded that somewhere in the previous attempts to use it, perhaps in the steps involving force, I must have damaged it. I gave up, drove to WalMart and got a Western Digital 500GB NVMe for less than $50. I think it may have been $34, but I don’t remember for sure.
Back in the late 1990’s, I was in the San Francisco area for work. We went to the local Fry’s electronics and found they had a fantastic deal on 1GB SCSI hard drives for about $300. It was still a lot of money, but imagine what I could do with a GIGABYTE of hard disk space?!?!? Try to find something that small now. Not even at WalMart.
Anyway, skip back to the part where I put the images on the SSD and from there forward, everything worked perfectly, including backing up the “old” 4G system and restoring it on to the new system. My Home Assistant is now running on a Raspberry Pi 4 with 8GB RAM and a 500GB SSD with 458GB free space.
The new case provided two big improvements. First, while i liked the heat sink wrap ‘case’ I had it in before, the Argon One case does look better, especially to my primary customer. Second, the fans on the heatsink case were iffy on day one and one of them had already just quit, so it ran hotter than it needed to. The system is inside a closed cabinet with a 16 port PoE switch and two NAS units, so it’s a little warm in there already.
The big improvement, however, is speed. Particularly if a process involves reloading or rebooting, the SSD is significantly faster than the SD card. Updates take far less time than they used to, which is important since there are so many of them, especially at the beginning of every month 🙂
If I were to pick one disadvantage to this new setup versus running Home Assistant as a virtual machine on the NAS, it’s that the VM method gave me the snapshot tool. With it, I could completely hose the system and have a snapshot to restore from, either the automatic weekly snapshot or if I thought I was going to break something, a specific ‘before’ snapshot. There isn’t really a substitute for that particular freedom with the current setup.