Weight Reduction Plan

I had a little time on Sunday some more serious measuring of the RIA 45. In short, this pistol weighs 47.3 ounces and I need it to be under 43 ounces to be IDPA legal.

One bit of good news right off. The included full length stainless steel guide rod weighs 1.6 ounces. The standard guide rod from my Colt 1991A1 weighs 0.4 ounces. There’s 1.2 ounces essentially for free. The RIA with the standard guide rod and otherwise in IDPA equipment check condition came in at 46.1 ounces. 47.3 – 1.2 = 46.1! I love it when math works.

Not all the news is rosy. I thought the mainspring housing on the RIA pistol was steel and I had hoped to save a fairly significant bit of weight with a plastic part I had removed from the Colt. Unfortunately, it already has a plastic mainspring housing, so I will have to look elsewhere for 3.1+ ounces to trim.

The next big place to lose some material is under the grip panels. The frame is cast chromoly steel, 4140 to be exact, with 100 percent coverage under the grip panels.

20161030_152456

This is a strong steel and I believe I can safely skeletonize this area of the frame without compromising the strength of the pistol.

20161030_161923

This is very preliminary scribbling. The cross bar is an optional piece that I may elect to leave. I won’t know exactly how much weight this will remove until it is cut, but back of a napkin calculations look promising.

4140 weighs 0.284 lbs per cubic inch. The slabs to cut out are about 1 x 3 inches and the material is (from memory) about 1/10 inch thick. So…

2 cuts x 1 x 3 x 0.1 cubic inches x 0.284 lbs per cubic inch) x 16 oz / lb

2 x 0.3 x 0.284 x 16 = 2.7 oz

Because of it’s complex shape, calculating the weight of the cut off end of the dust cover is not quite as easy, but if it is 1 oz or more, I’m done.

If my math is questionable and if after all of the above the pistol is still overweight, I can carve on the magazine well funnel. This part is 2.7 ounces by itself, though discarding it would not look right and might draw undesired attention at the equipment check stage of a major match. However, the funnel is far beefier than it needs to be and I think I could carve enough out of it to help and it would probably look better. It has some rough and bulky edges. Some blending would look better.

When all this is done, I should refinish the pistol or at least the frame and magwell funnel.


Blade-Tech Lone Star IDPA Championship

On October 22nd, I attended the Lone Star IDPA Championship in Cresson, TX. I was #11 out of 25 ESP Marksman shooters. Not enough for any award, but still a personal best. I was #135 out of 182 shooters overall.

I didn’t have any meltdowns, though I did have one stage that could almost count as a meltdown. Stage 8 started with dropping a steel pepper popper that triggered a swinger with two targets. I was just not getting the rounds onto the swinger targets and once I felt I had, I should have either dumped a few more rounds and reloaded or done a tactical reload before leaving cover. There were four targets in the open on the way to the next cover position and I ran out after the second. I had no ammo to engage the third target and it was specifically not allowed a makeup because it would not have been safe to do so. So, 10 down, FTN, FTE. At the end, I had a single 1 on one swinger and about five 1’s and 3’s on the other and all other targets on the stage were 0’s.

My long game was in pretty good form. The Tuesday before, I spent 250 rounds at the range, almost all of it at 12 yards. It appears to have helped quite a bit.

Scoring-wise, half the stages were 7 down or better and the worst (not even Stage 8 described above) was 21 down. I had three procedural errors, three FTNs and that one FTE for the entire match.

Generally, I don’t like being the first shooter on a stage because I don’t yet have the full confidence of experience and I like seeing how a couple of other people, particularly the Expert and Master class shooters, approach a given stage. Well, with 12 stages and 12 shooters on a squad, everyone will be first shooter once. My turn came up on Stage 4.

Stage 4 was modeled after a skate park, with all targets only visible from on the  ramps. The plan came together pretty well, and I was happy to see more experienced shooters adopt essentially the same plan. From the left ramp, two low targets and two distant targets get two rounds each. Move to the center ramp, one low target gets two rounds plus one round dumped, reload, distant targets visible to the right get two rounds each, move to right ramp, one low target gets two rounds. Of course, Josh from the video above ran it in 13.11 seconds and it took me 20.46 🙂

Stage 1 was thrown out; I think someone charged that not all squads were given the same instructions. When the preliminary scores were posted, Stage 1 was still included and I placed at #11 in my class and division. When the final scores were posted, with Stage 1 removed, I still placed at #11, just with a lower score.

Even if there are no awards coming, one should always hang around for the prize drawings. IDPA cannot award prizes for match position beyond trophies, but match organizers can give away door prizes and run raffles. There are usually at least a couple or three pistols on the prize table and often match sponsors will donate heavily. At this event, there was a long table covered with Blade-Tech products and gift certificates. I got none of it. There was a raffle for a very nice Springfield Armory stainless 1911. Winning ticket drawn: 2630. Tickets I held 2632-2634.

It was still a fun match and I was on a really good squad of mostly Cross Timbers members.


A Diet and A Nose Job

What do you do when you have a pistol that would be awesome to shoot in IDPA but it’s not IDPA legal? Most people would trade it off for one that is legal. You probably know where this is going, then.

The Rock Island Armory TAC Ultra Full Size High Cap 45 does not meet IDPA requirements on two points. All divisions specify a maximum weight of 43 ounces and the RIA is a smidgen heavy, exactly 10% over, at 47.3 oz.

20161025_191803

Also, it has a full length dust cover but the rules limit the dust cover to 3-1/4 inches, as measured from the back of the slide lock release lever pin.

20161025_191616

The first objection I would address is rules 8.2.2.1.7 and 8.2.3.1.7, which both say that a pistol that violates certain rules in ESP or CDP (and the specific example given is of a dust cover that exceeds 3-1/4 inches) will be allowed if they are otherwise SSP legal. Unfortunately, handguns permitted for use in SSP must:

8.2.1.1.3 Be double action, double action only, or striker fired.

The RIA is single action. Single action is allowed in ESP and CDP, but the dustcover exception only applies if the pistol is otherwise SSP legal.

The first obvious place to address both problems would be to lop off an inch or so of the dust cover and that is in my skill set. However, that piece of metal is not likely to weigh enough by itself.

The pistol has a heavy duty full length stainless steel guide rod that weighs 1.6 ounces. I can’t eliminate it, but a 1911 that *requires* a full length guide rod to work is actually broken, so I imagine I can replace it with a standard GI guide rod, which itself can be lightened somewhat. The actual weight savings would have to be determined later.

The mainspring housing is steel. I have the stock mainspring housing from my Colt 1991-A1, which happens to be made of plastic. I only changed it because I wanted a metal one. As of this writing, I don’t know the actual weight of either unit, but the plastic is significantly lighter than the steel.

After that comes modifying existing parts. The low hanging fruit there would be to drill or cut away some of the frame under the grips.

The factory magwell funnel weighs 2.6 ounces by itself. However, the frame is cut specifically for it, so just removing it might function just fine, but it will definitely look like something is missing. At this point, I don’t know how much fitting an aluminum magwell funnel for another pistol might take. Also, though I have not measured the width of the magwell funnel, it occurs to me that it might be too wide anyway and may require thinning to meet the physical dimension limitations, particularly the 1-5/8 inch maximum width.

Note that I am trying to stay completely away from the moving parts of the pistol. Lightening the slide means a change in the spring weight and a corresponding adjustment in ammo. Most any other part replaced will pretty much have to be quite dollary titanium replacement parts. Very quickly, one could spent the balance required to upgrade to an IDPA legal pistol.

If after these steps, the pistol fits in the IDPA box and weighs in at about 42.5 ounces to allow for possibly sloppy scales at the equipment check, I should be able to use this pistol in either the ESP or CDP divisions.


Blistering Handloads

Literally…

image-20161017_074603

Coming up this weekend is the Bladetech Lone Star IDPA Championship. As is usually the case, I have not been able to get in as many matches lately as I wish. I missed matches Wednesday, Thursday and Saturday last week. With the match coming up, I needed to be sure I had an adequate supply of suitable ammo loaded.

The last time I did much loading was in June. We had the wreck, which pretty much killed off July and much of August for recovery, but when I did get to shoot, I had ammo loaded already.

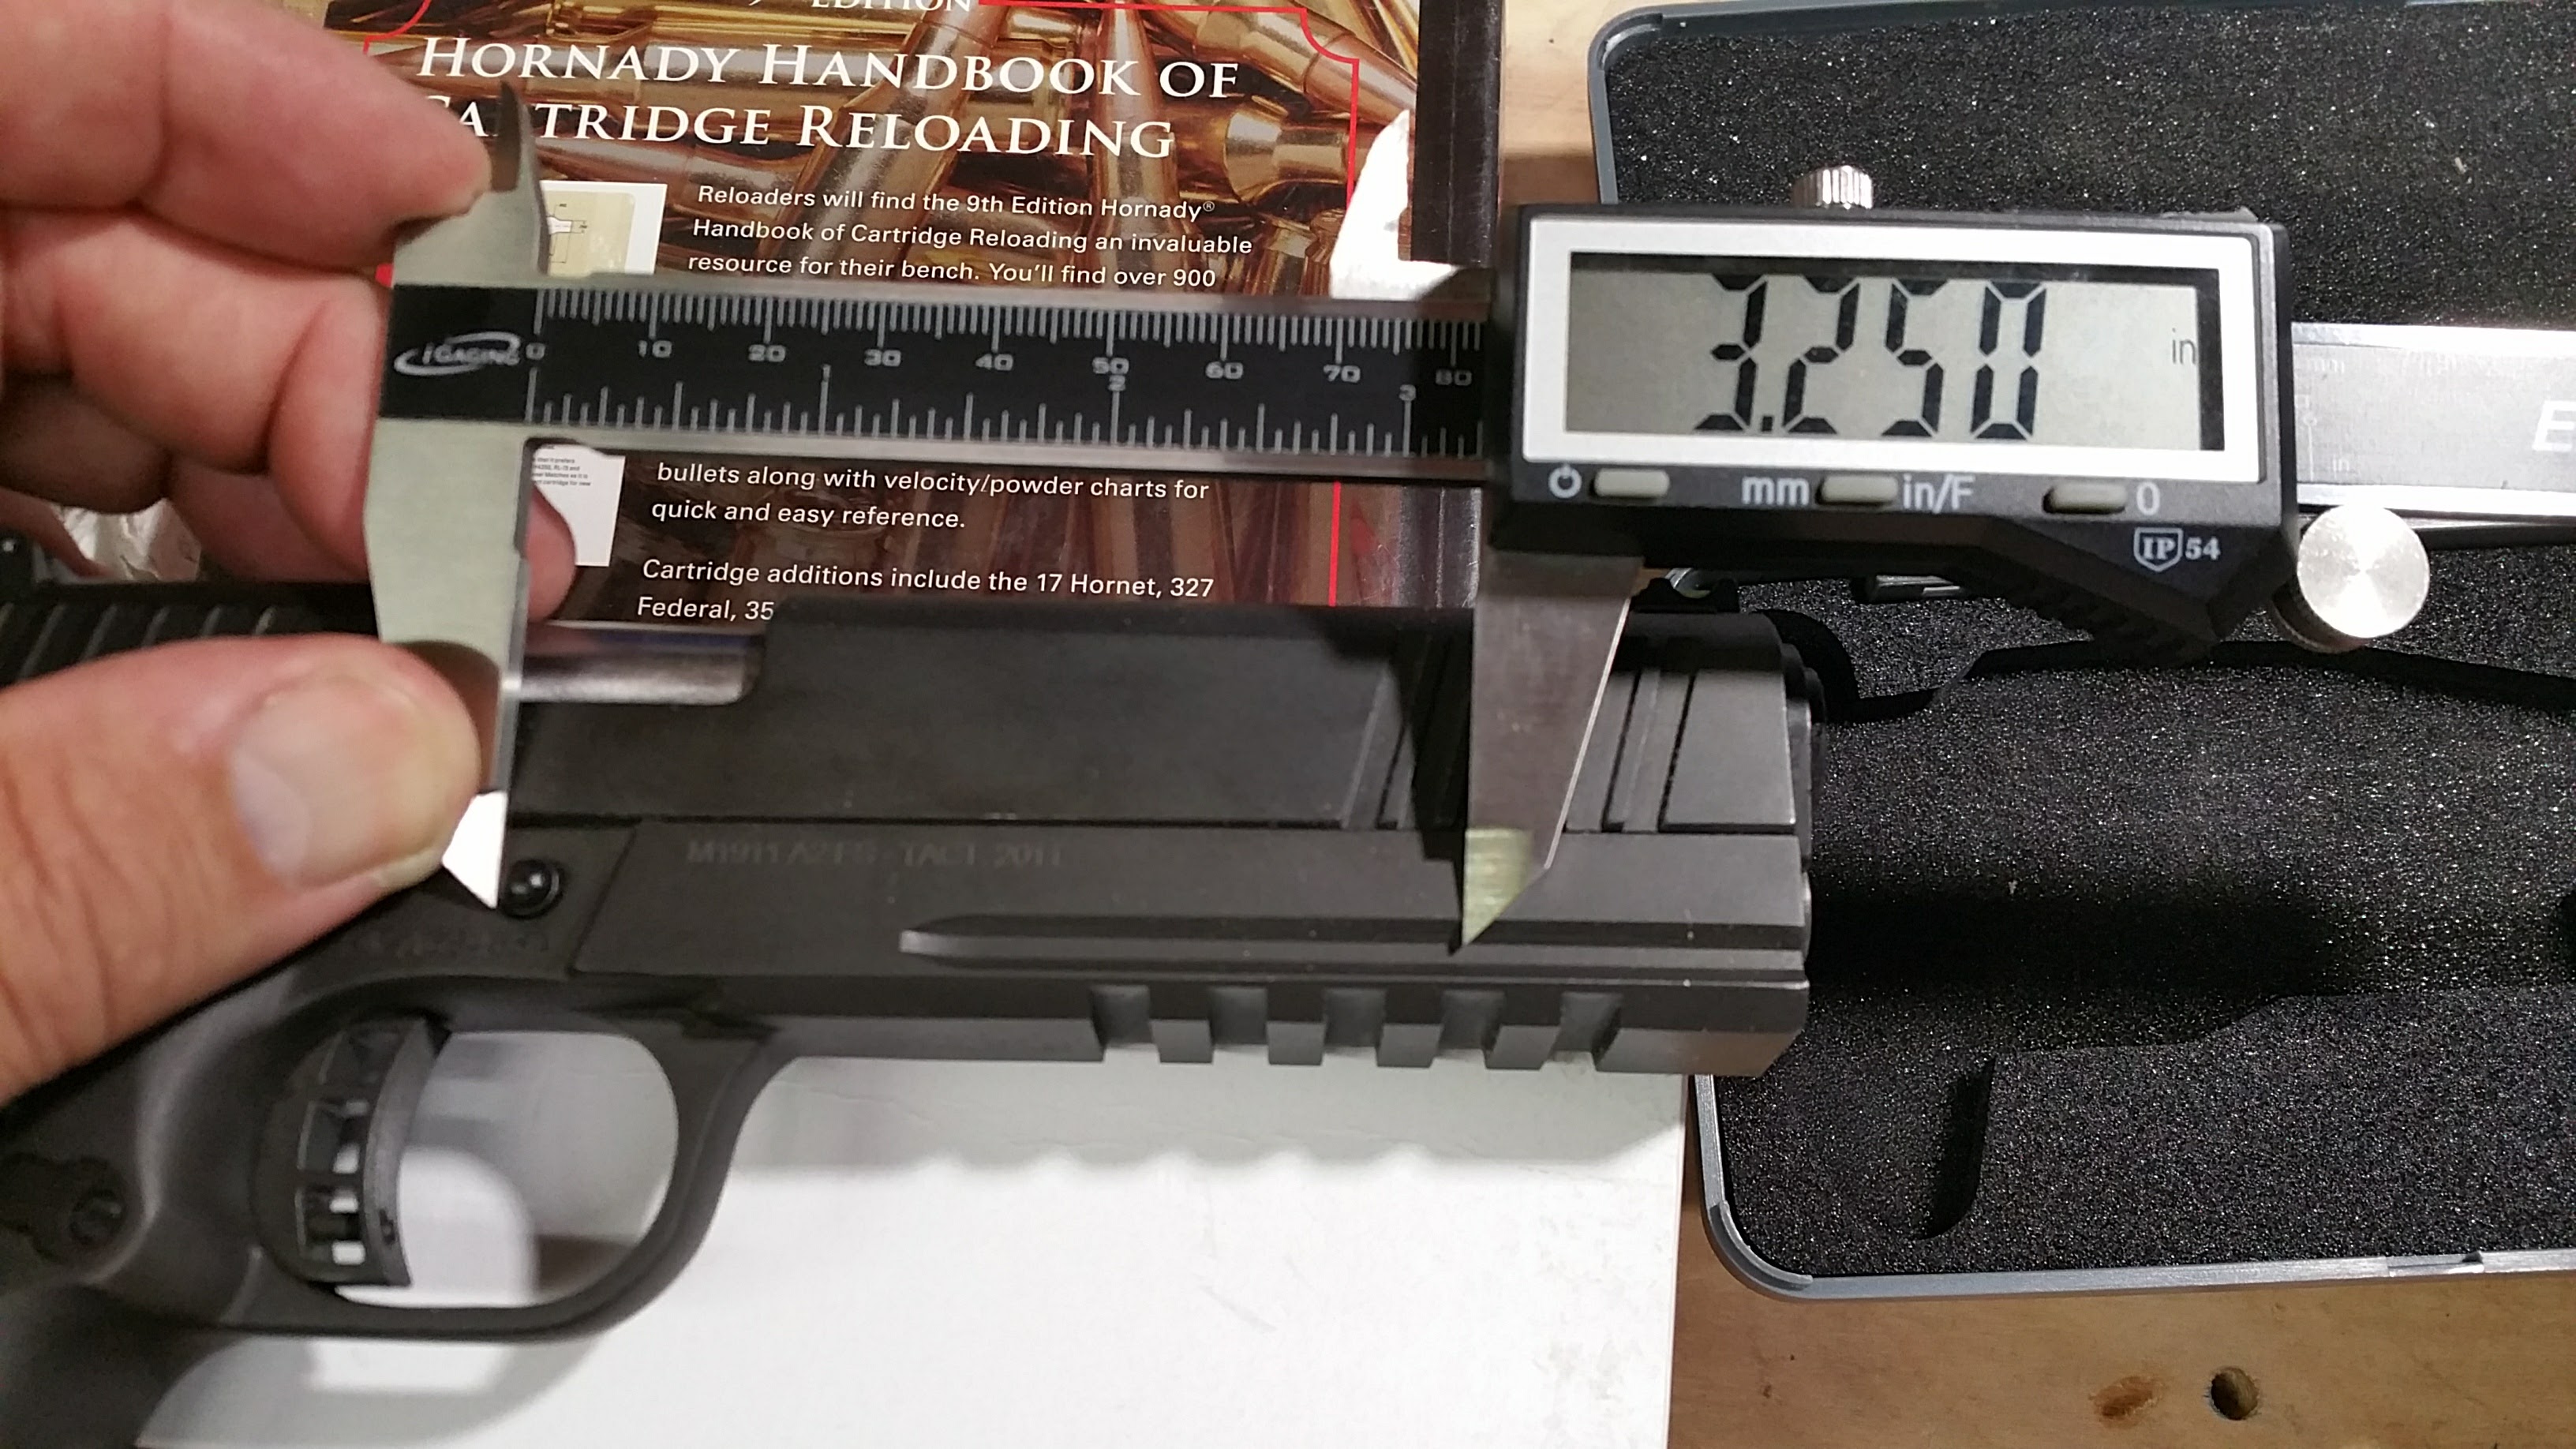
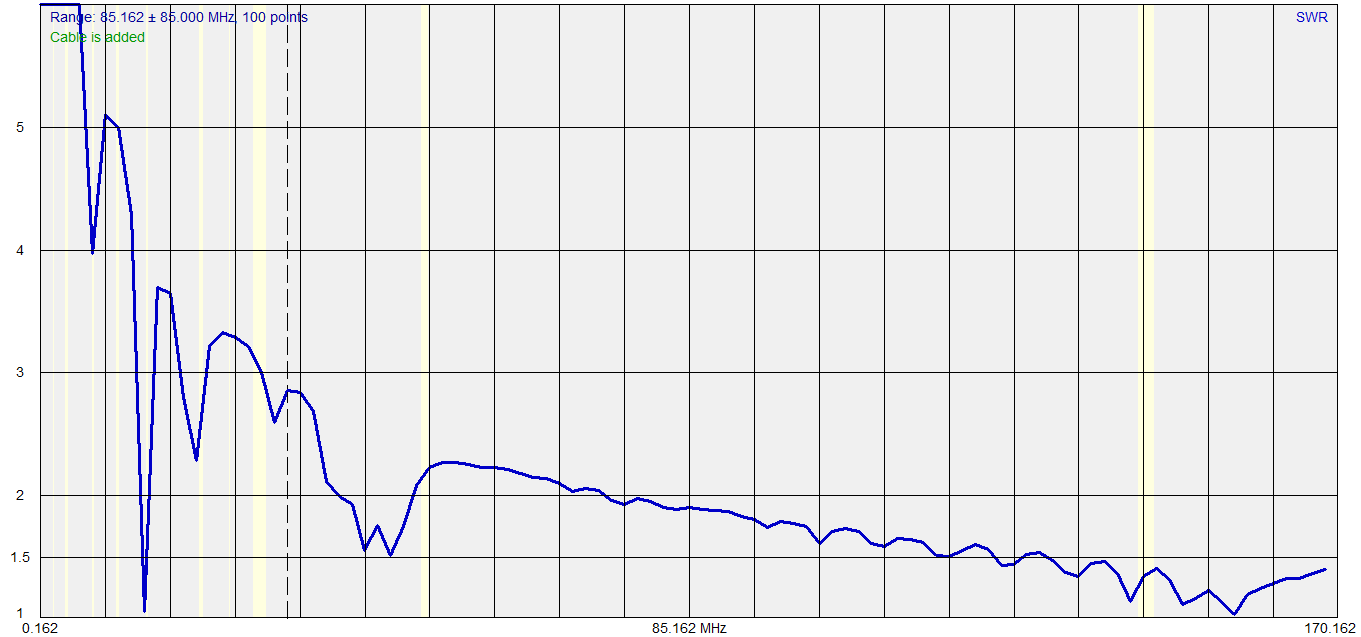
My favorite 40S&W load for IPDA is 180g plated lead bullets from Xtreme Bullets propelled by 3.9g of Winchester 231. It’s a nice soft recoil, very controllable. I was, however, concerned that it might not make required power factor.

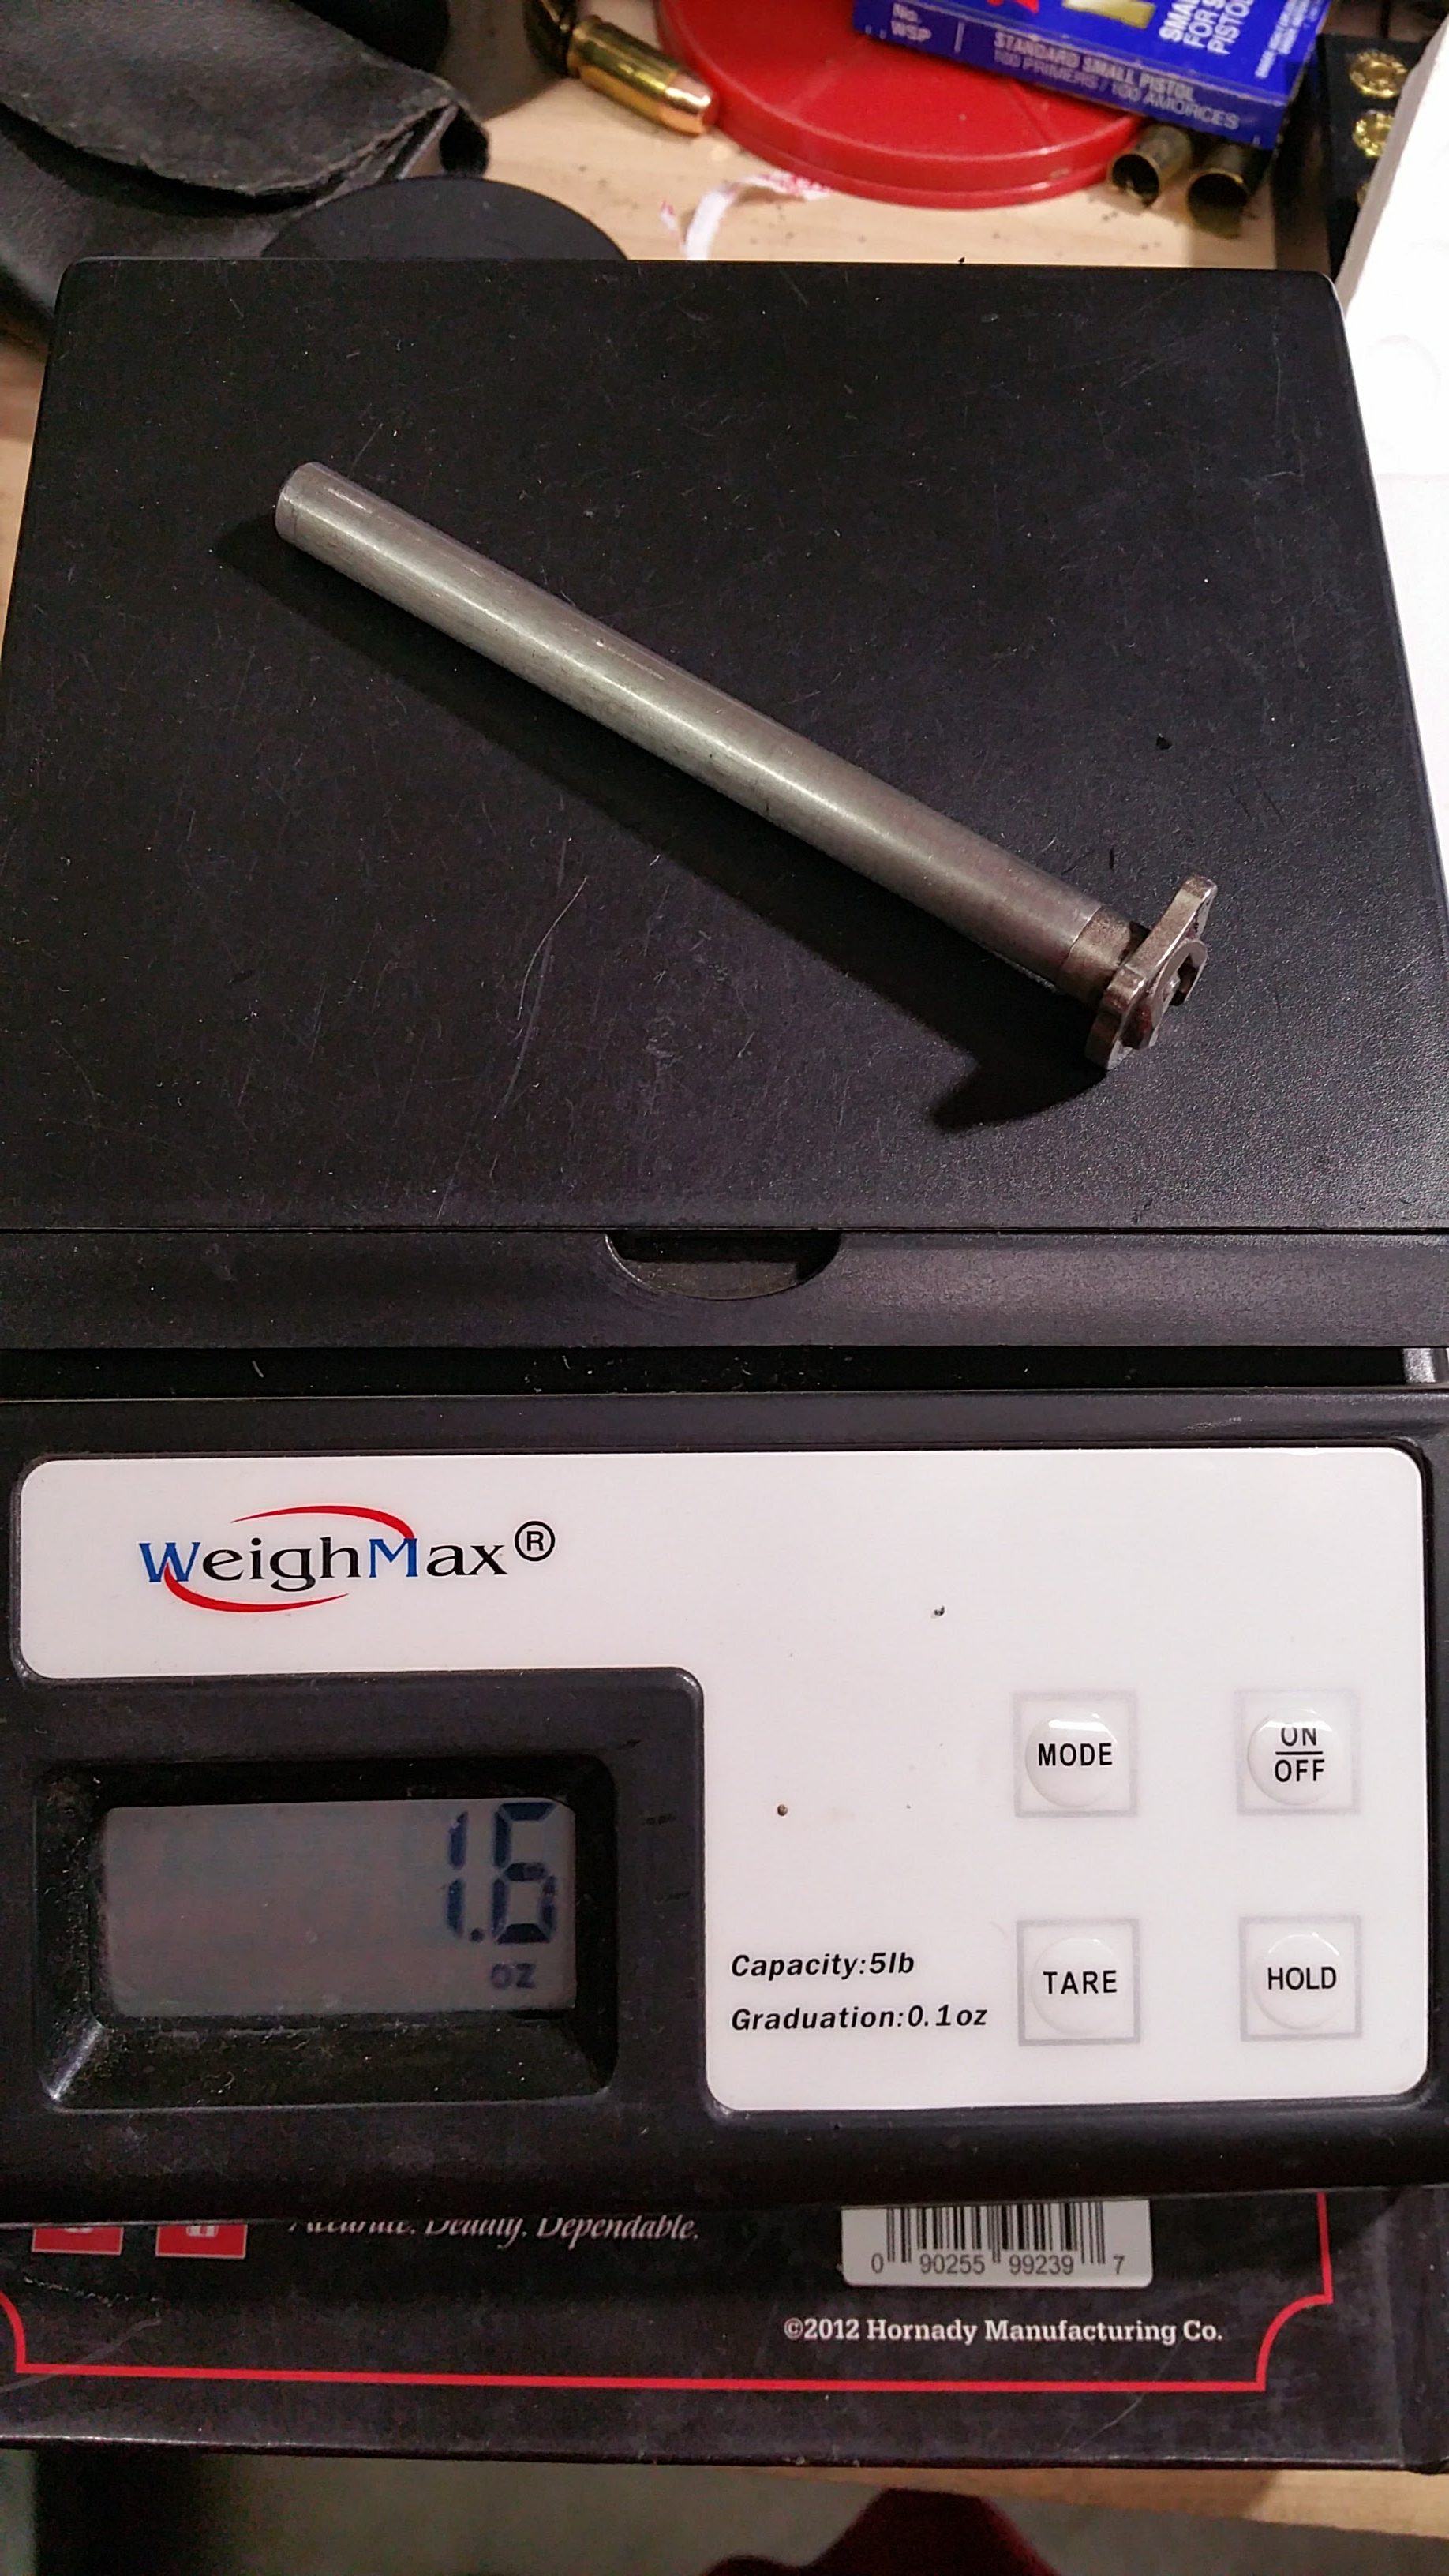
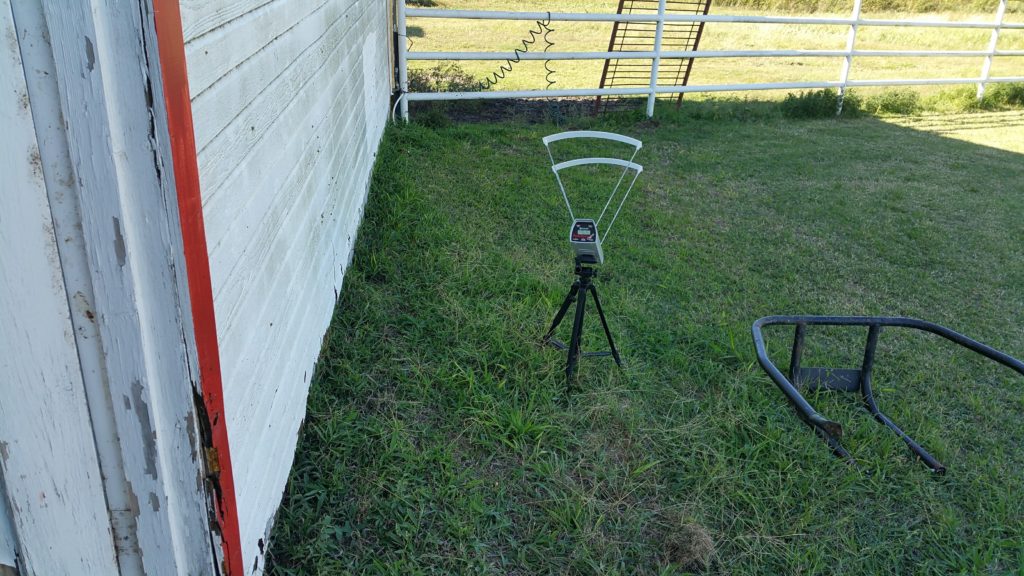
I set up my chronograph right outside the workshop door and fired 5 round test groups.

20161016_160631

The 3.9g load was pretty much exactly at 125 PF with average velocity of 697 fps. It takes 694 to make minimum, so that margin is just a little too close for comfort, unless I could guarantee identical performance on the chrono stage at Lone Star 🙂

So, I turned the powder measure up a little. 4.2g was a reasonable step up, raising the average velocity about 100 fps to 792. This makes 142 PF, which is noticeably hotter than the 3.9g load, but still very comfortable and controllable and plenty of margin for chrono slop.

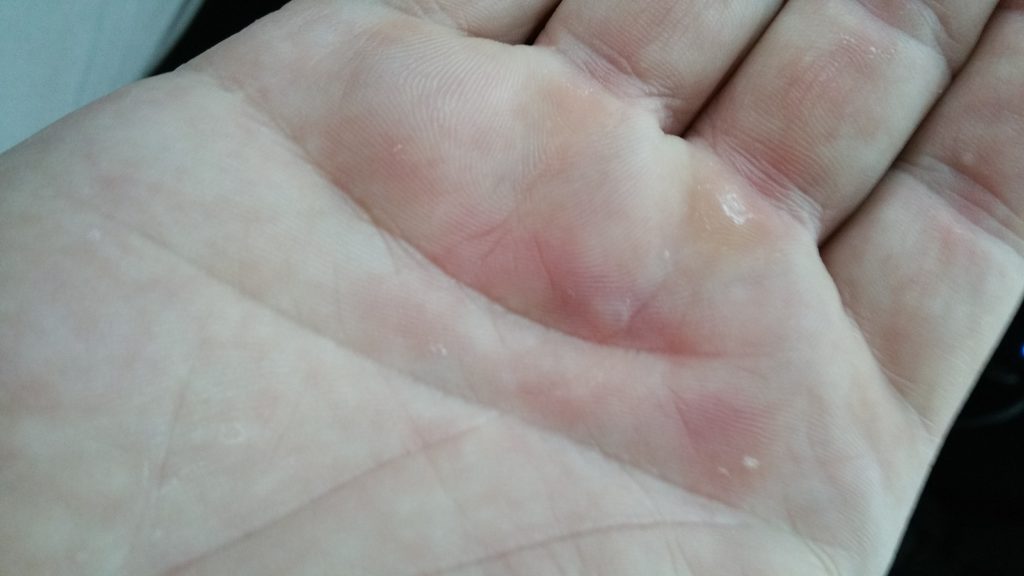
Having ooched the load up by a comfortable margin, I started loading in earnest. Four and a half hours later, enough later for it to be dark outside, I reached a stopping point at 800 rounds total. My hands were tired, but I didn’t expect a blister. It developed overnight. Imagine if I didn’t have a roller handle.

This gives me enough ammo to have 300 for the match and 100 rounds per day for practice, assuming I can shoot somewhere each day. Of course, that first practice day will be with the 3.9g load, just to use it up.

Speaking of practice…

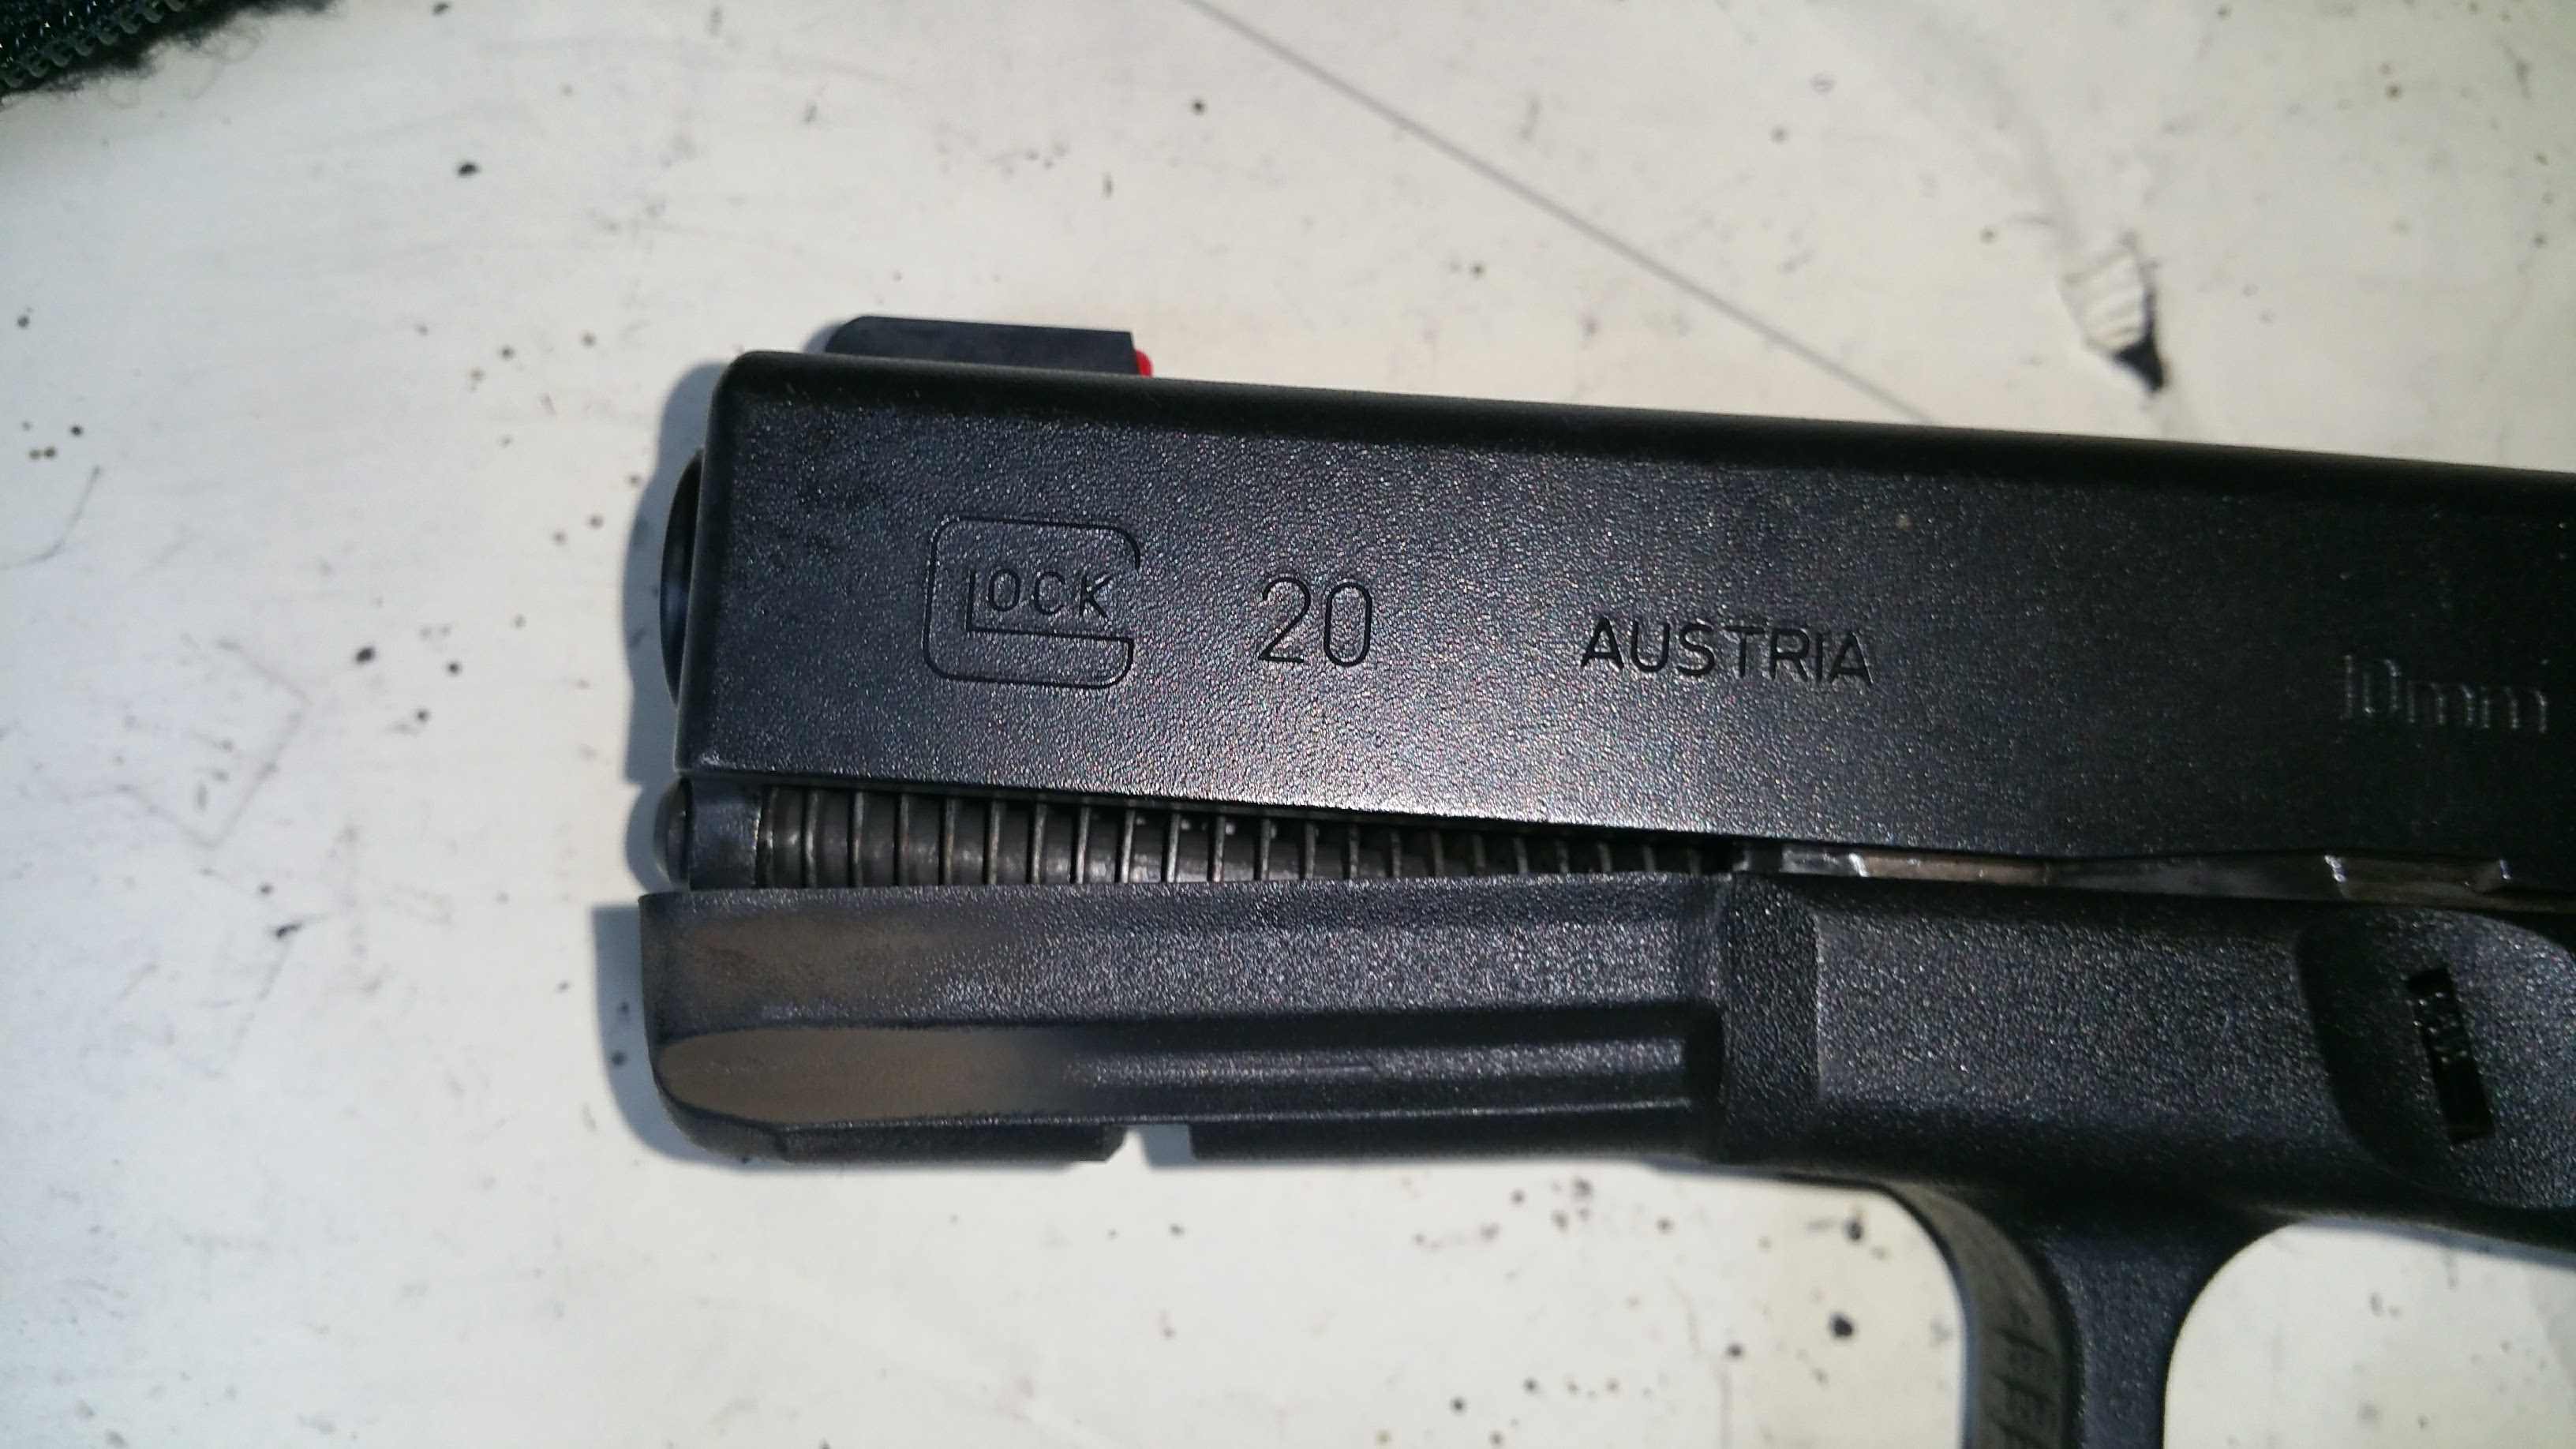
Last week, on one of the days I missed a match, I went to Shoot Smart and shot about 250 rounds. I used up all the 40S&W I had with me first, then just to play around some, I changed the slide and barrel out to 10mm. I wanted to shoot a magazine of normal semi-hot loads then a box of a much lighter 5.0g PowerPistol loads to compare the contrast. I shot a full magazine with 165 grain bullets propelled by (I think) 10g of BlueDot. That isn’t the hottest BlueDot load, but it’s no slouch, good for about 1100fps. I had changed magazines to the lighter load then before I shot again, I noticed something didn’t look right about the pistol.

20161007_204021

xenomorph-007tyran

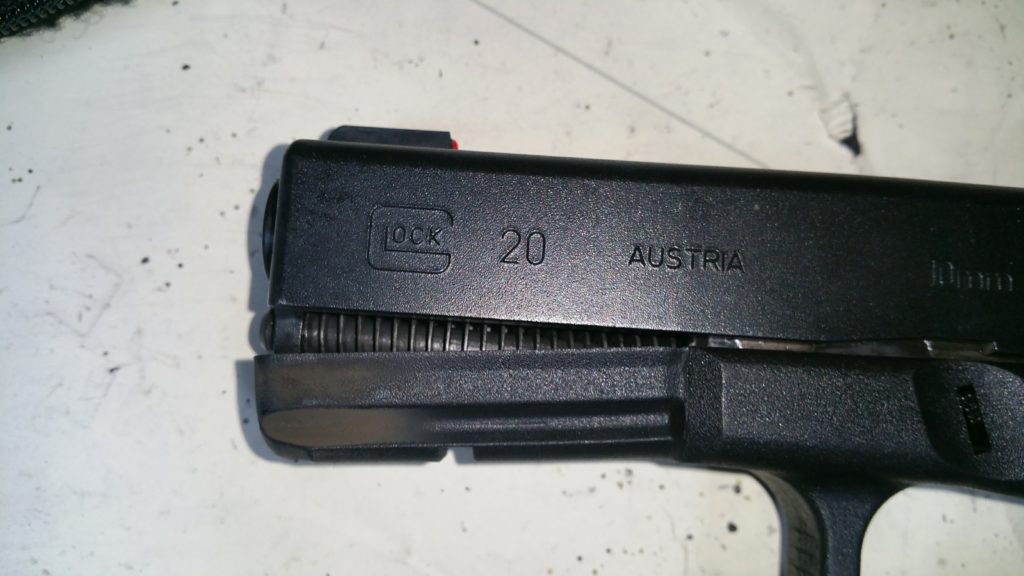
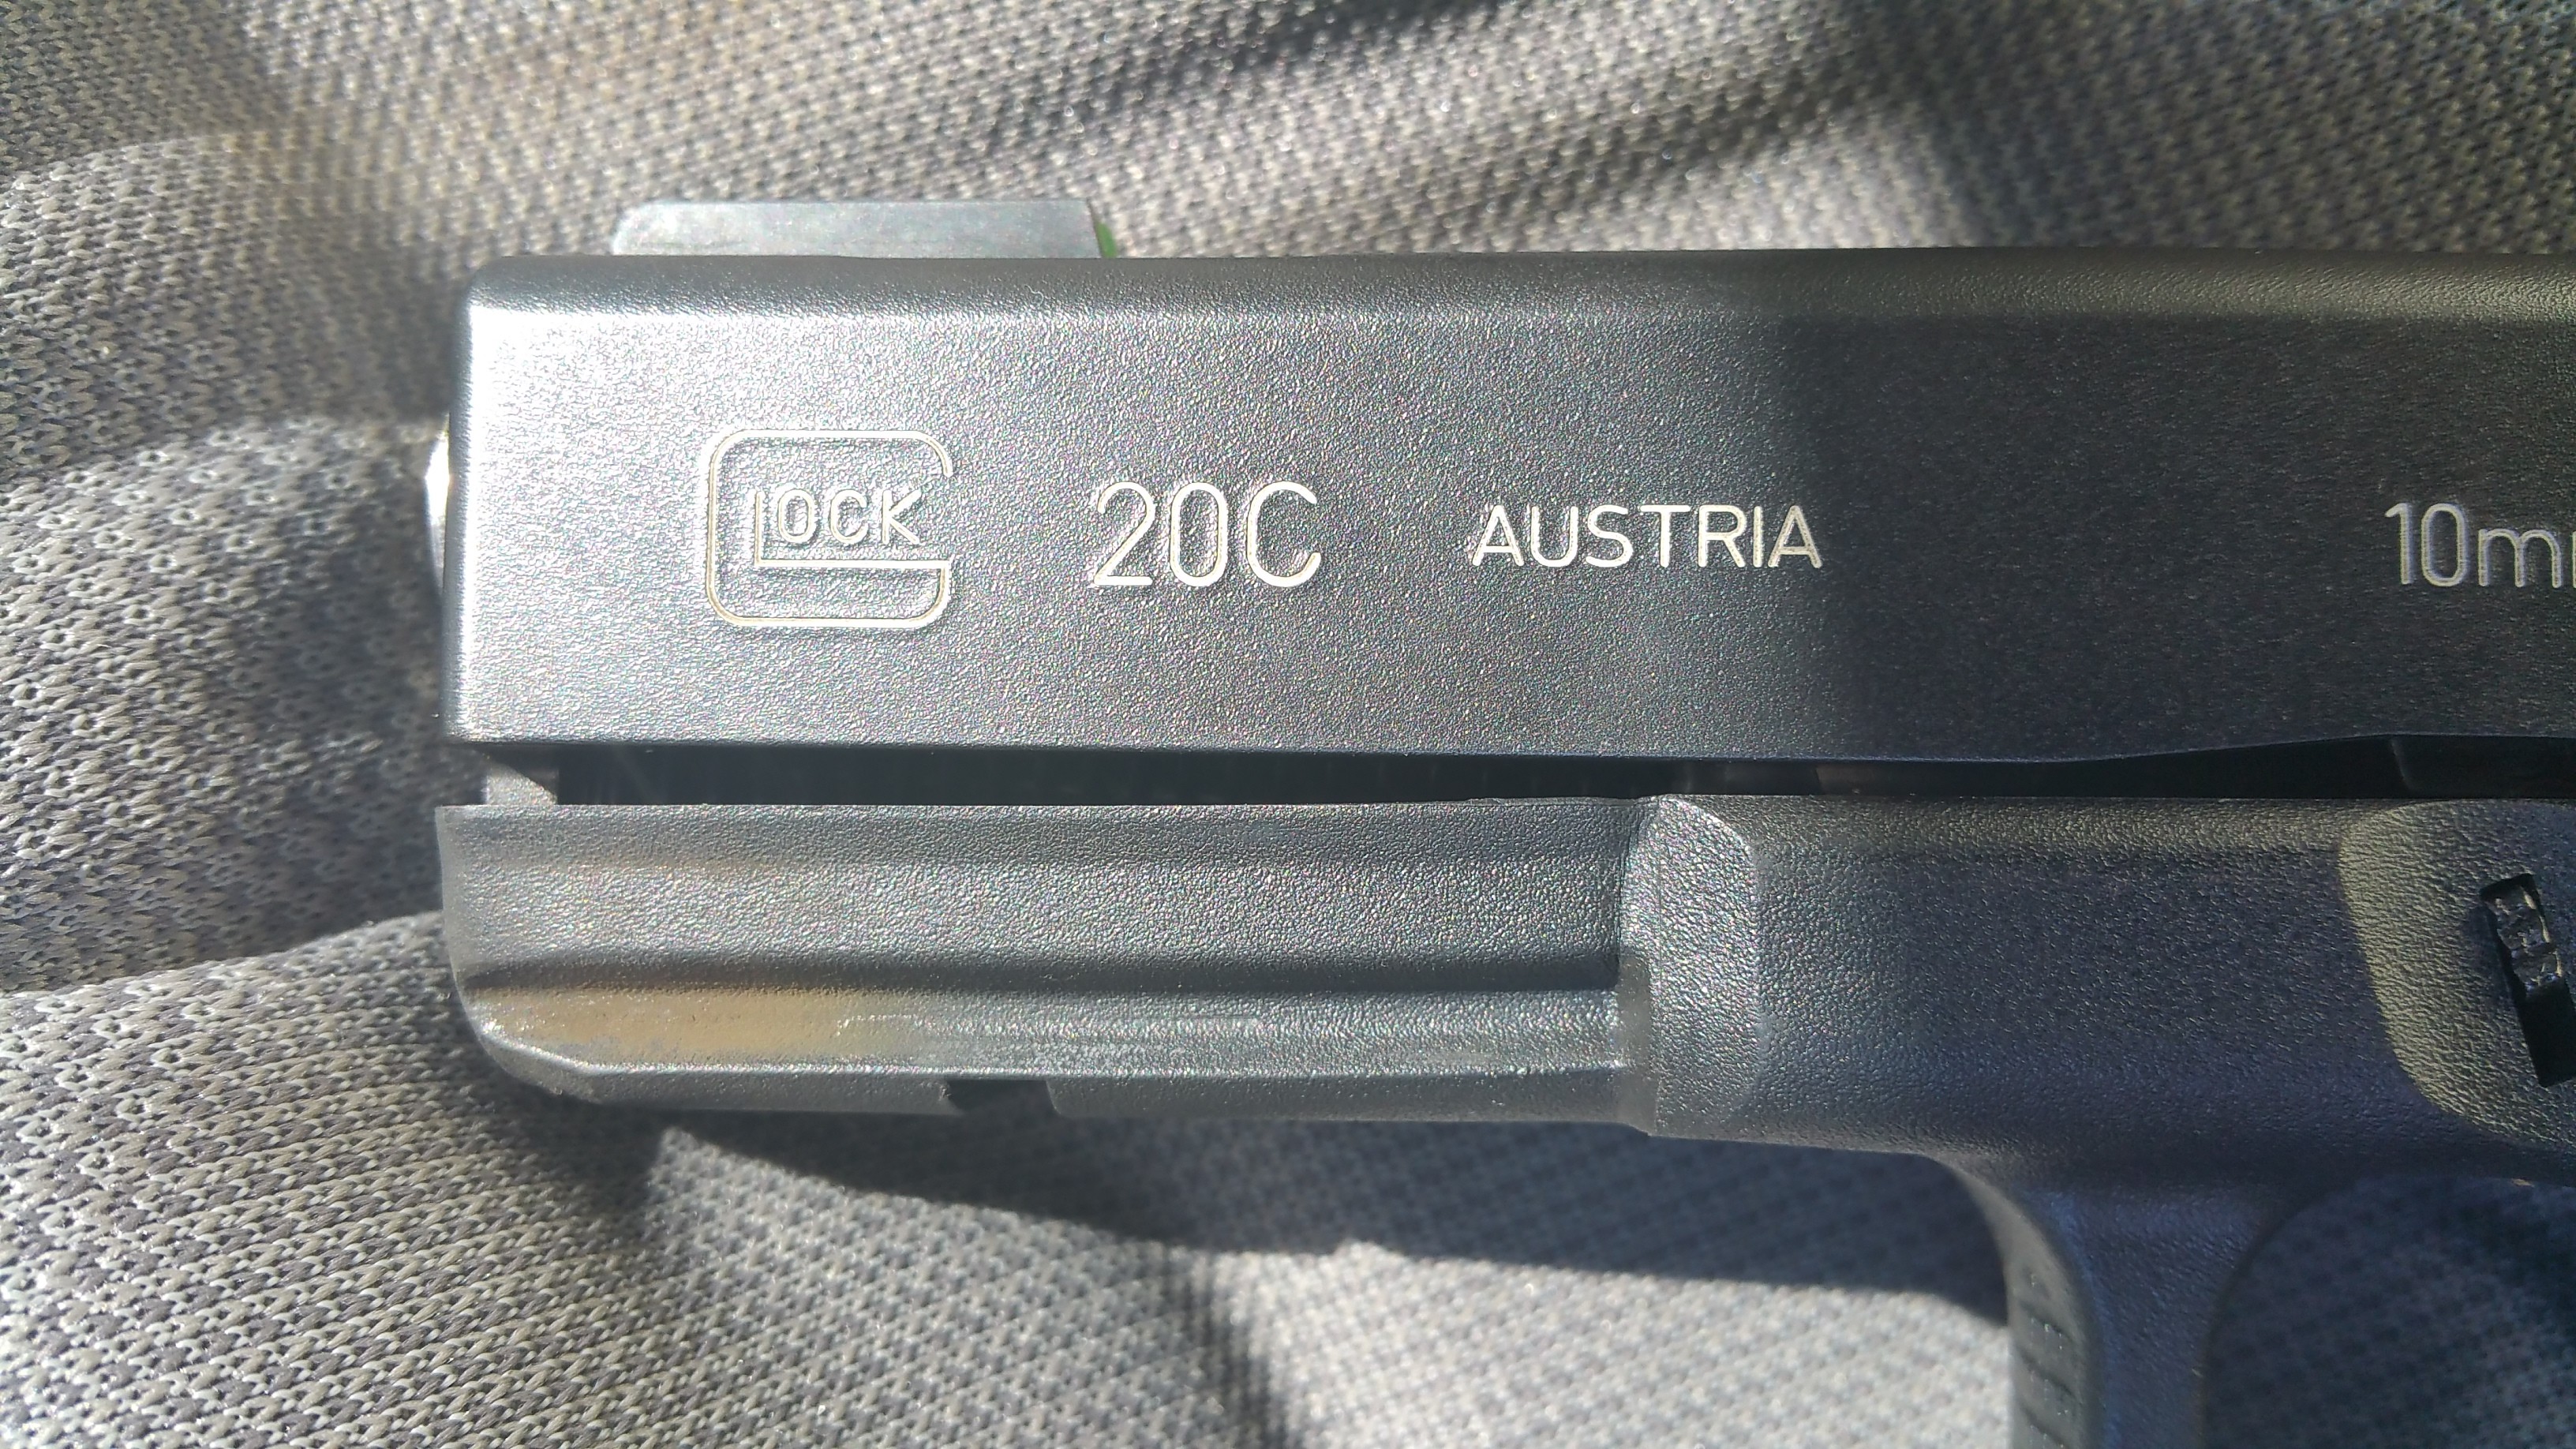
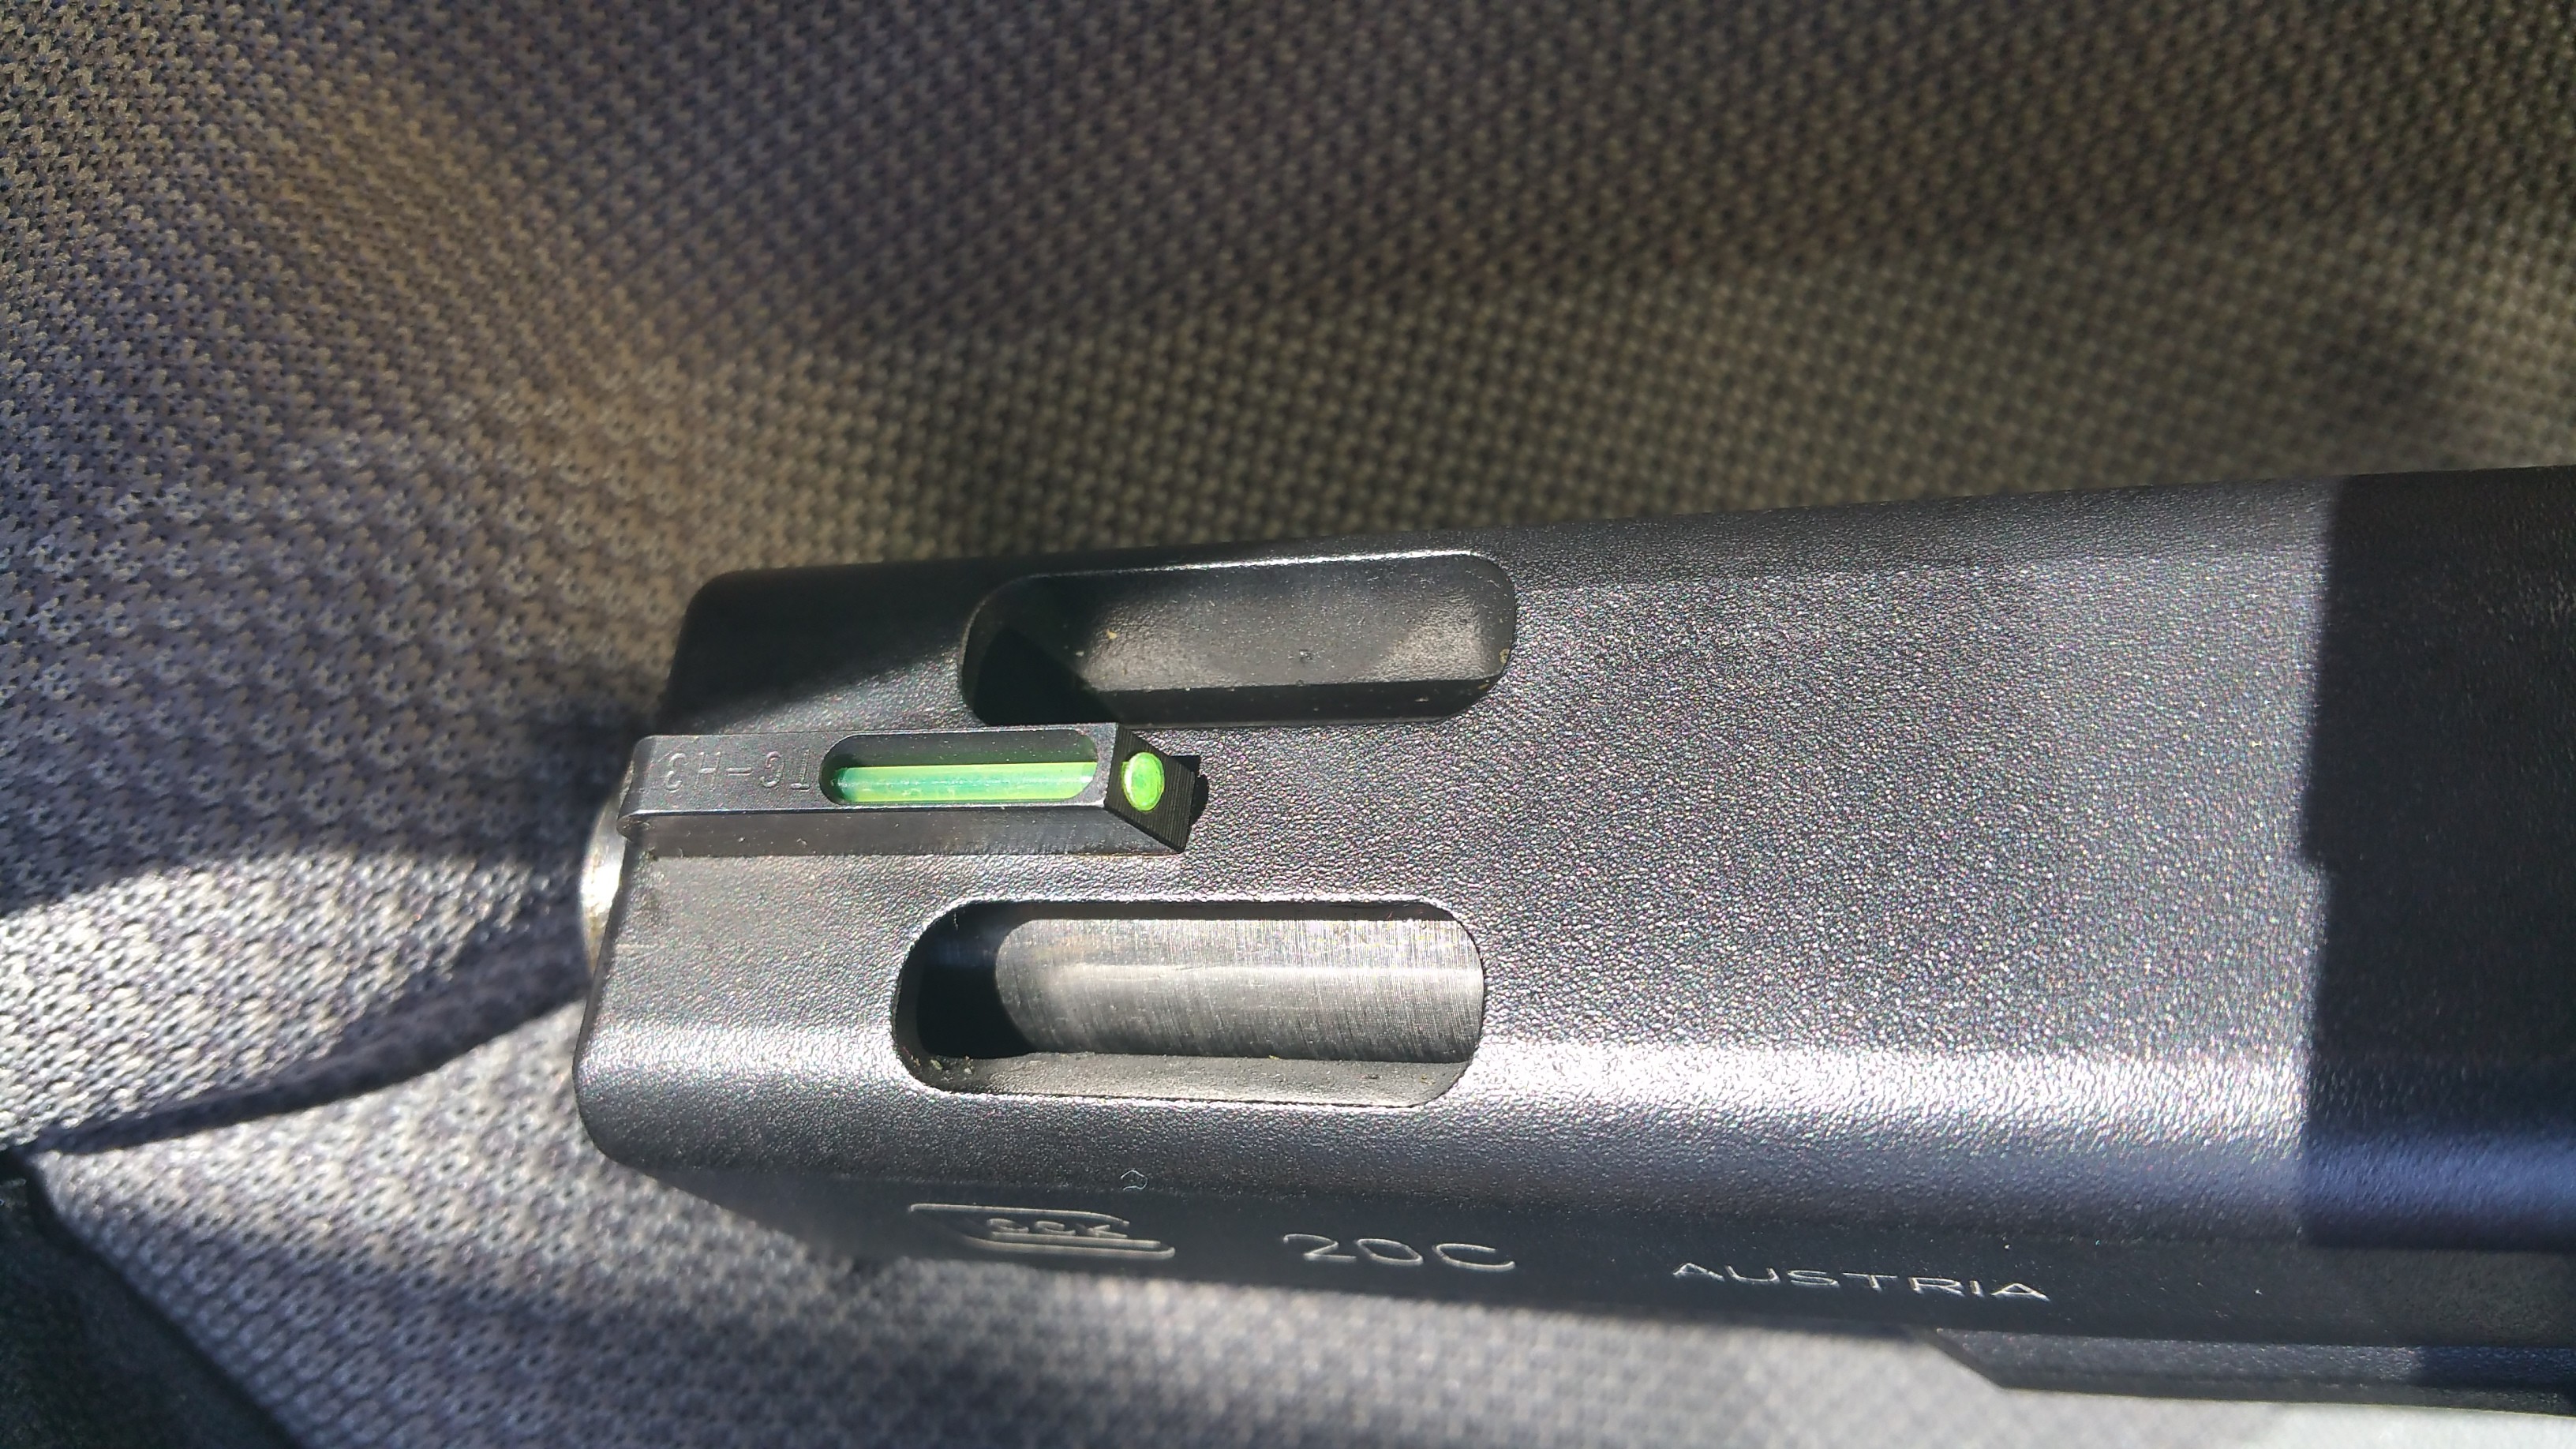
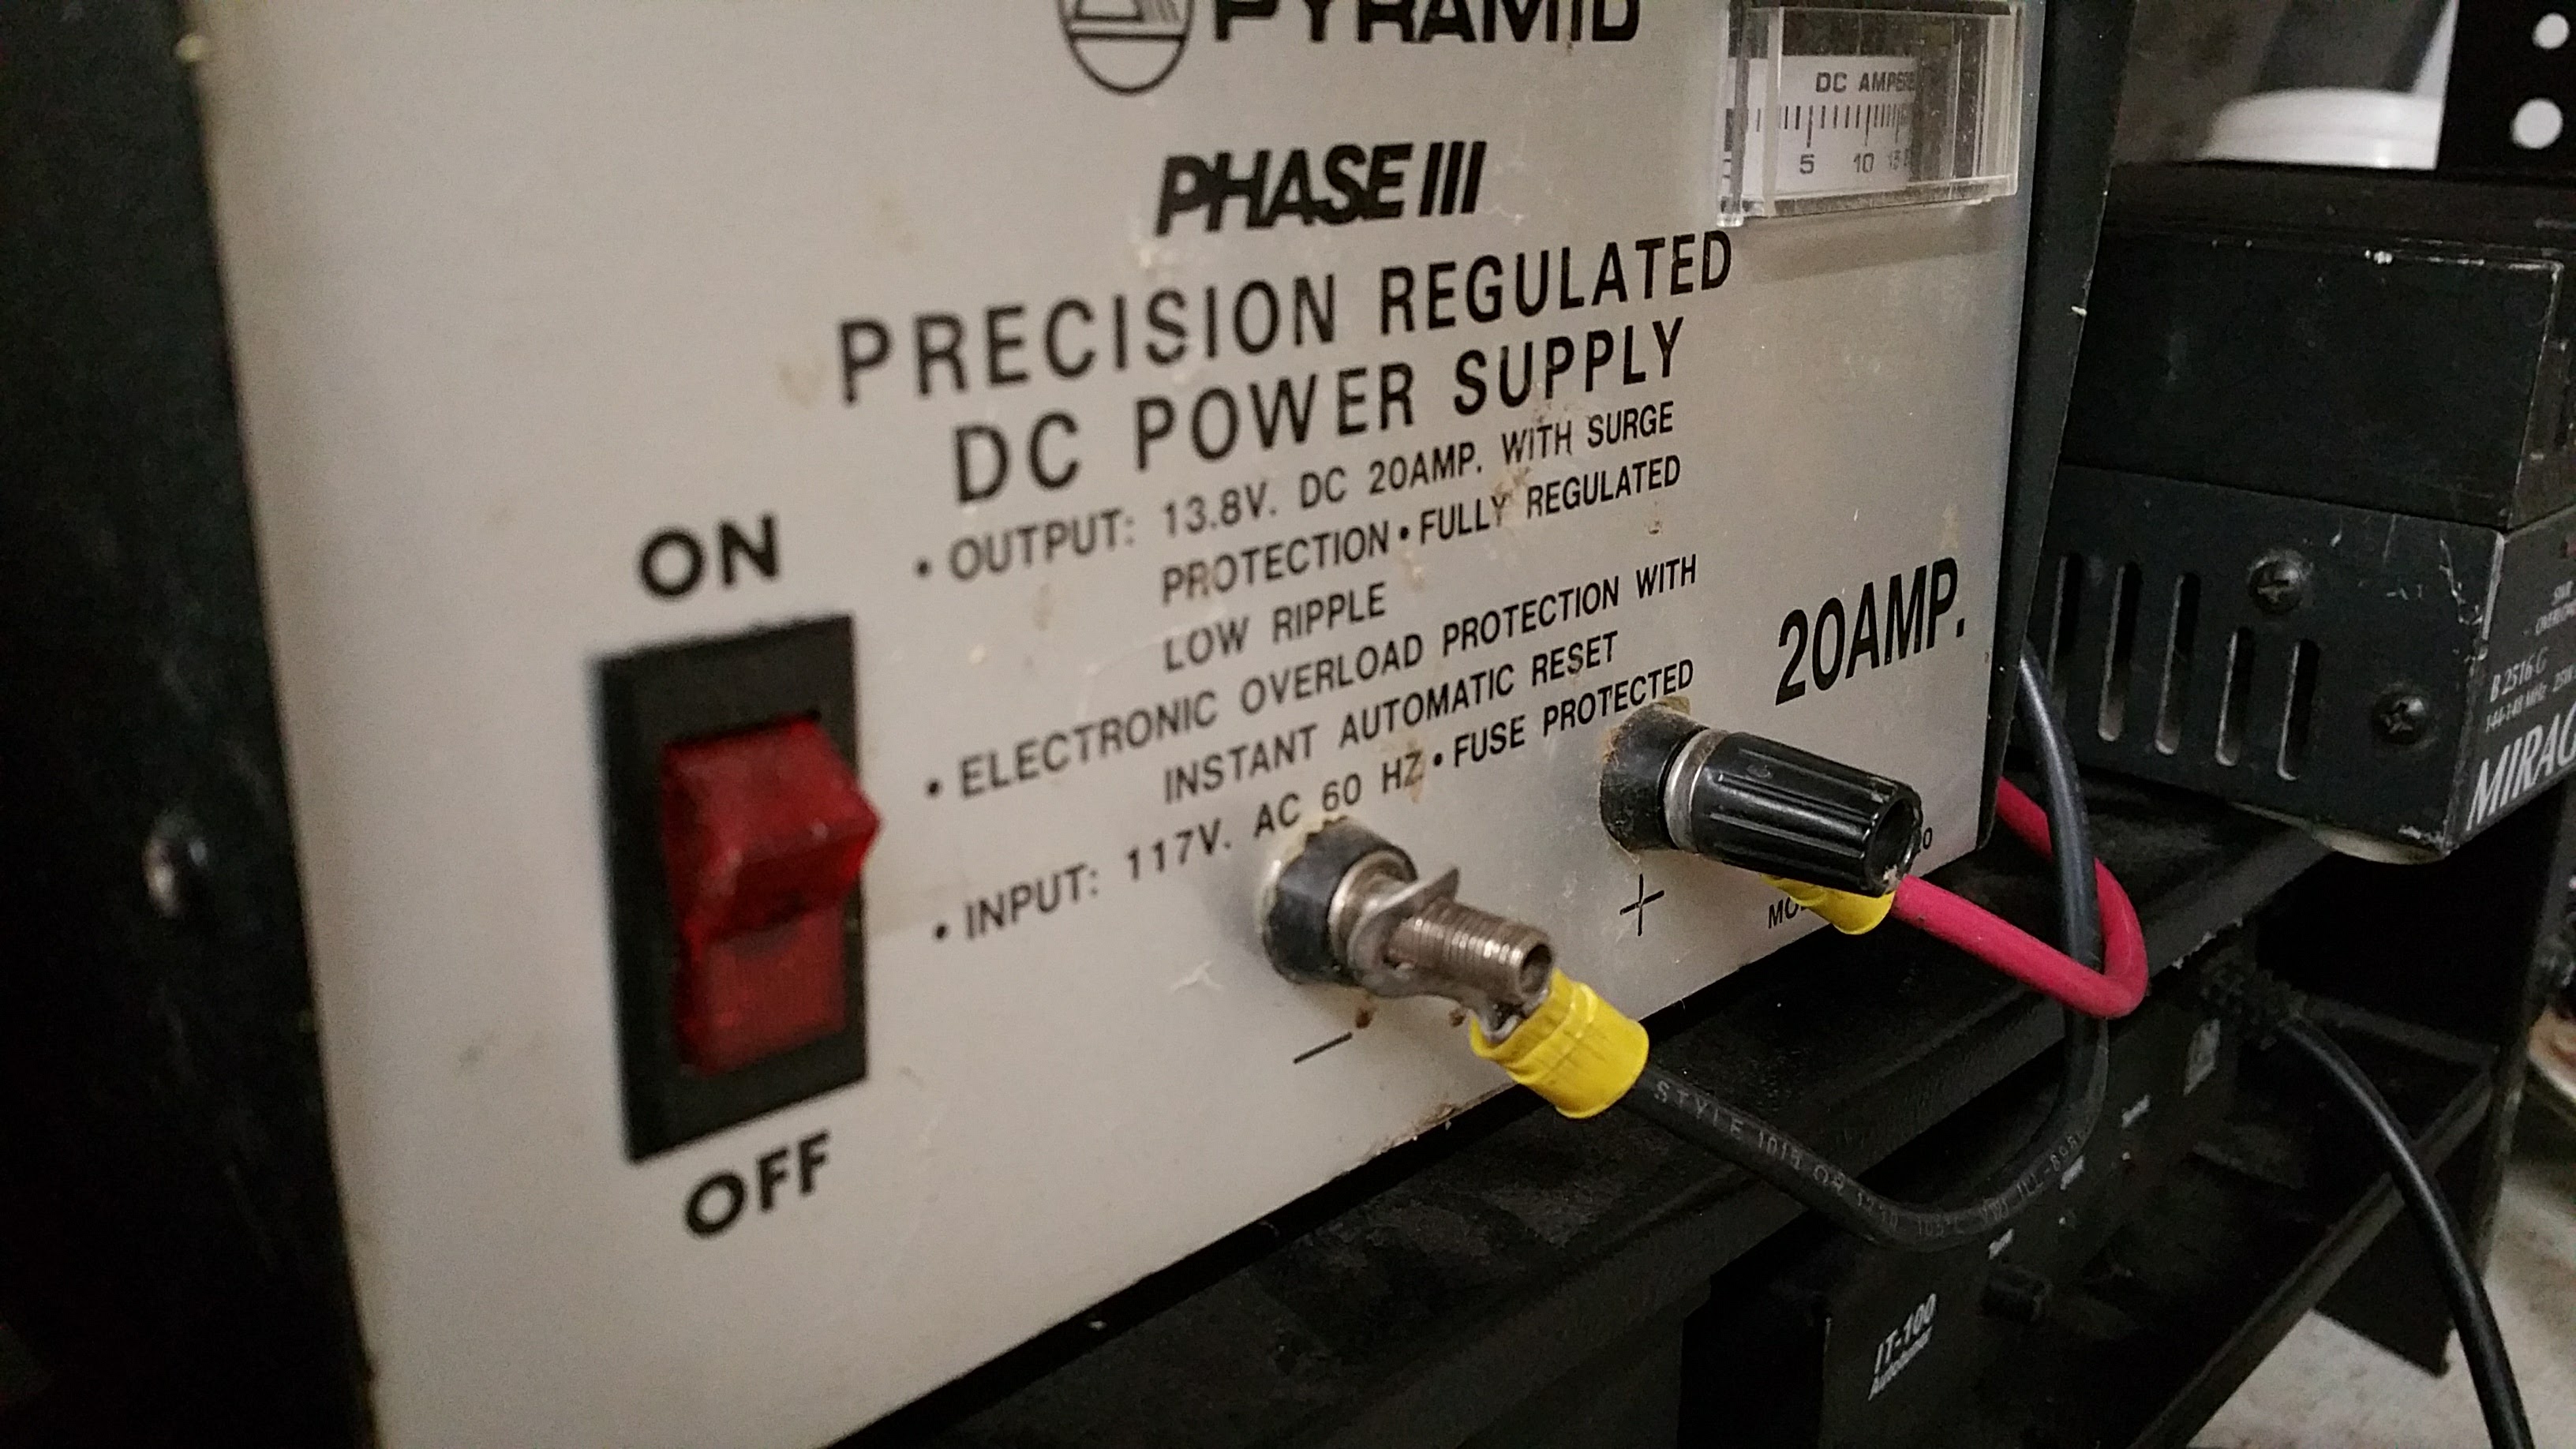
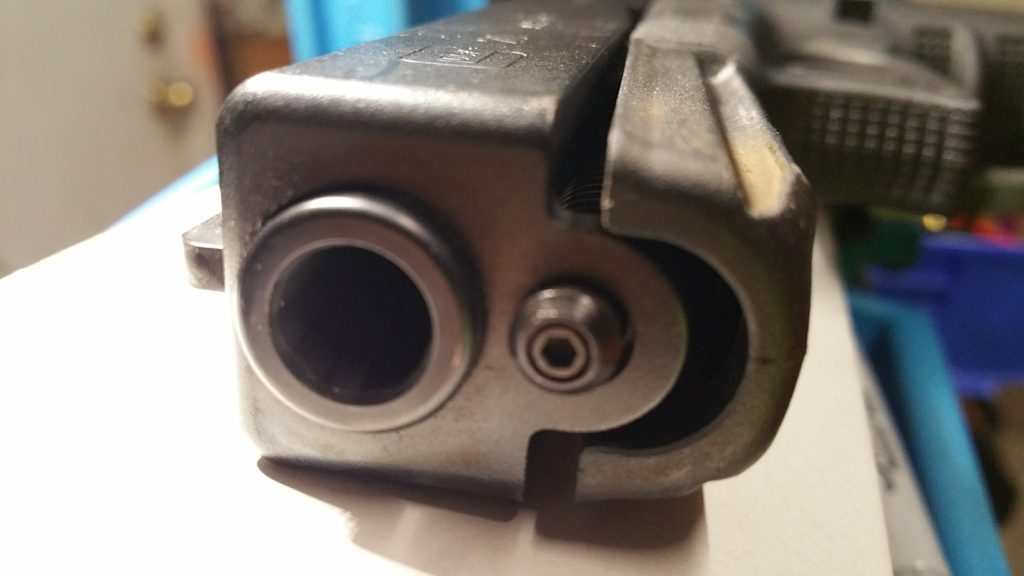
Some months ago, I was swapping slides and barrels around. The combination that ended up in my gear bag was my spare Glock 20 slide, with the stock Glock 20C barrel.


The Glock C models have ported barrels in order to use some of the gas produced by the cartridge to help compensate for recoil. Thanks to Oil The Gun for this awesome still from their video of a Glock 23C shot in the dark.

g23c-dark

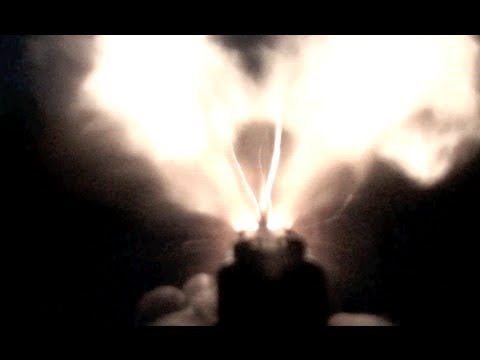
All that gas vents upward in a V above the pistol, through matching ports in the slide.

Oops.

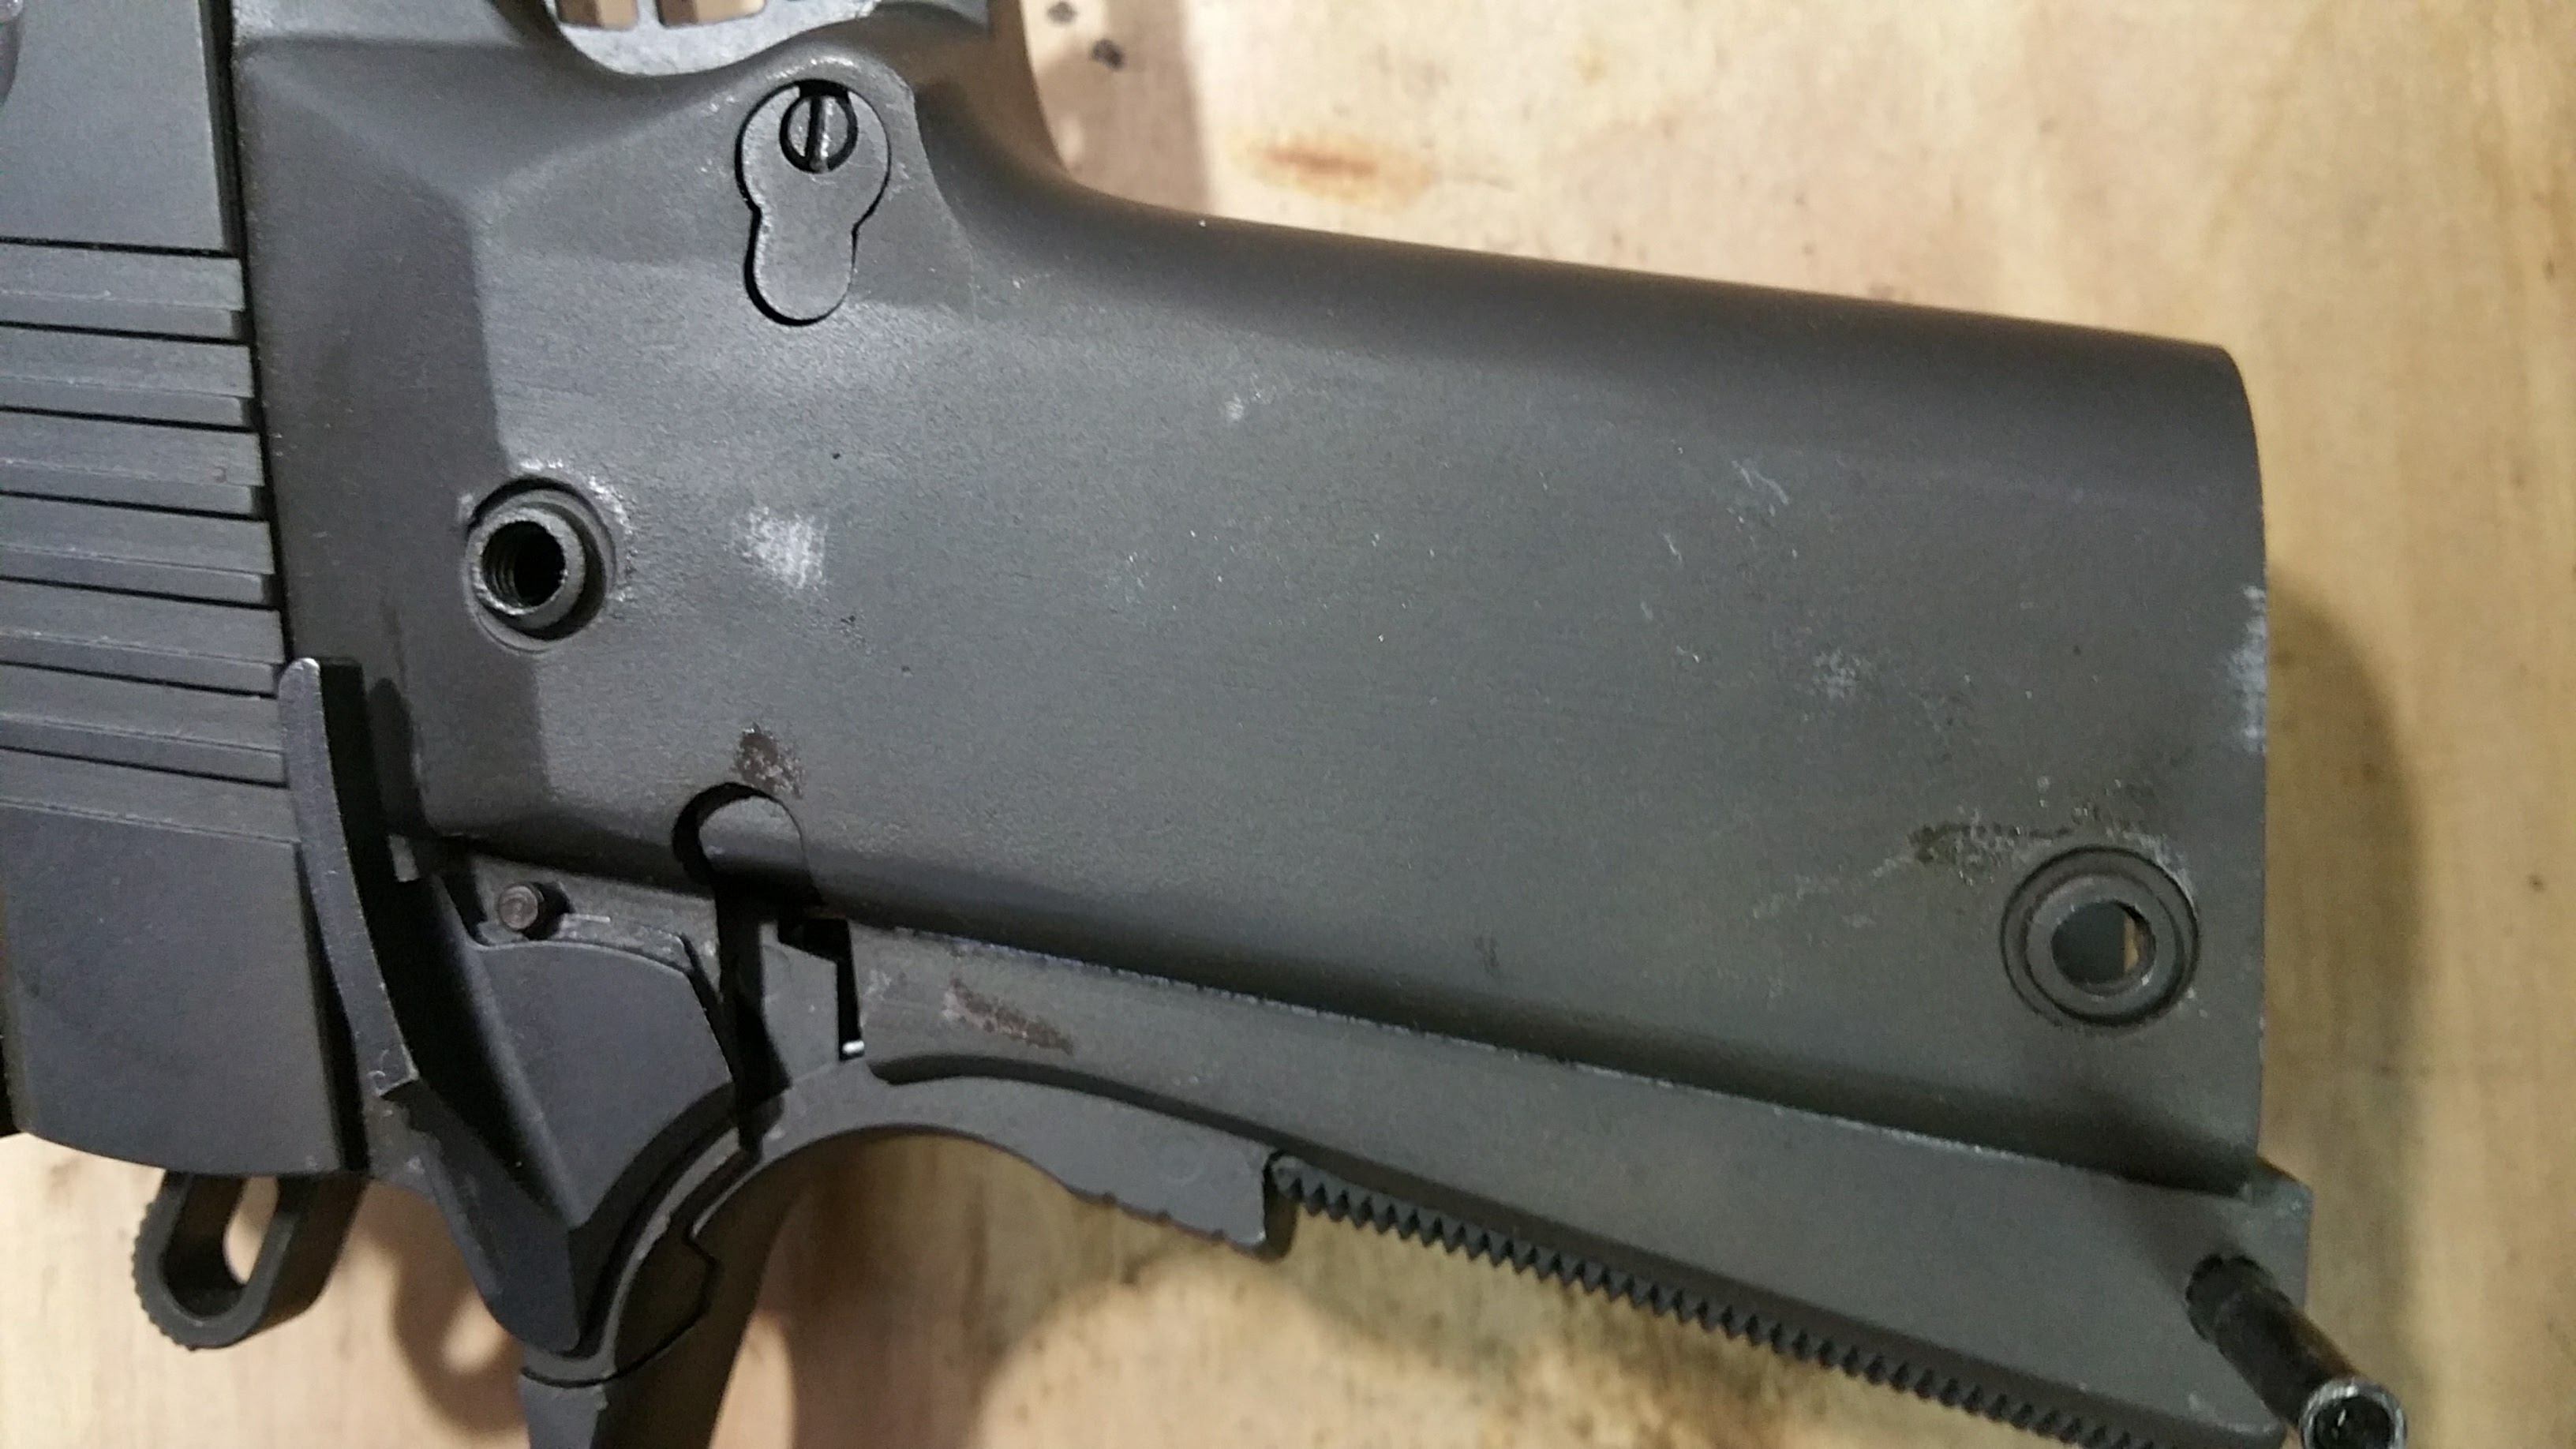
Note that I have the unported Glock 20 slide installed. That gas coming out of the ports on the barrel had to go somewhere and the dustcover offered the least resistance.

20161013_213230

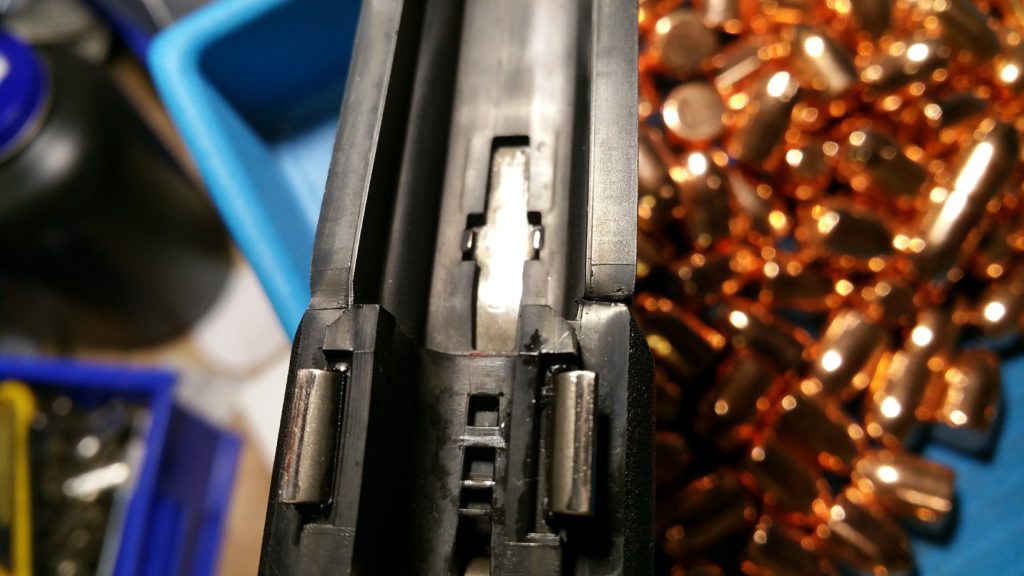
The worst of the damage is most visible above. On the left side, the plastic is seen having stretched enough to distort the area and on the right, enough to crack the plastic. Perhaps on a steel pistol, the damage would not have occurred at all, but at least the damage appears to be only cosmetic.

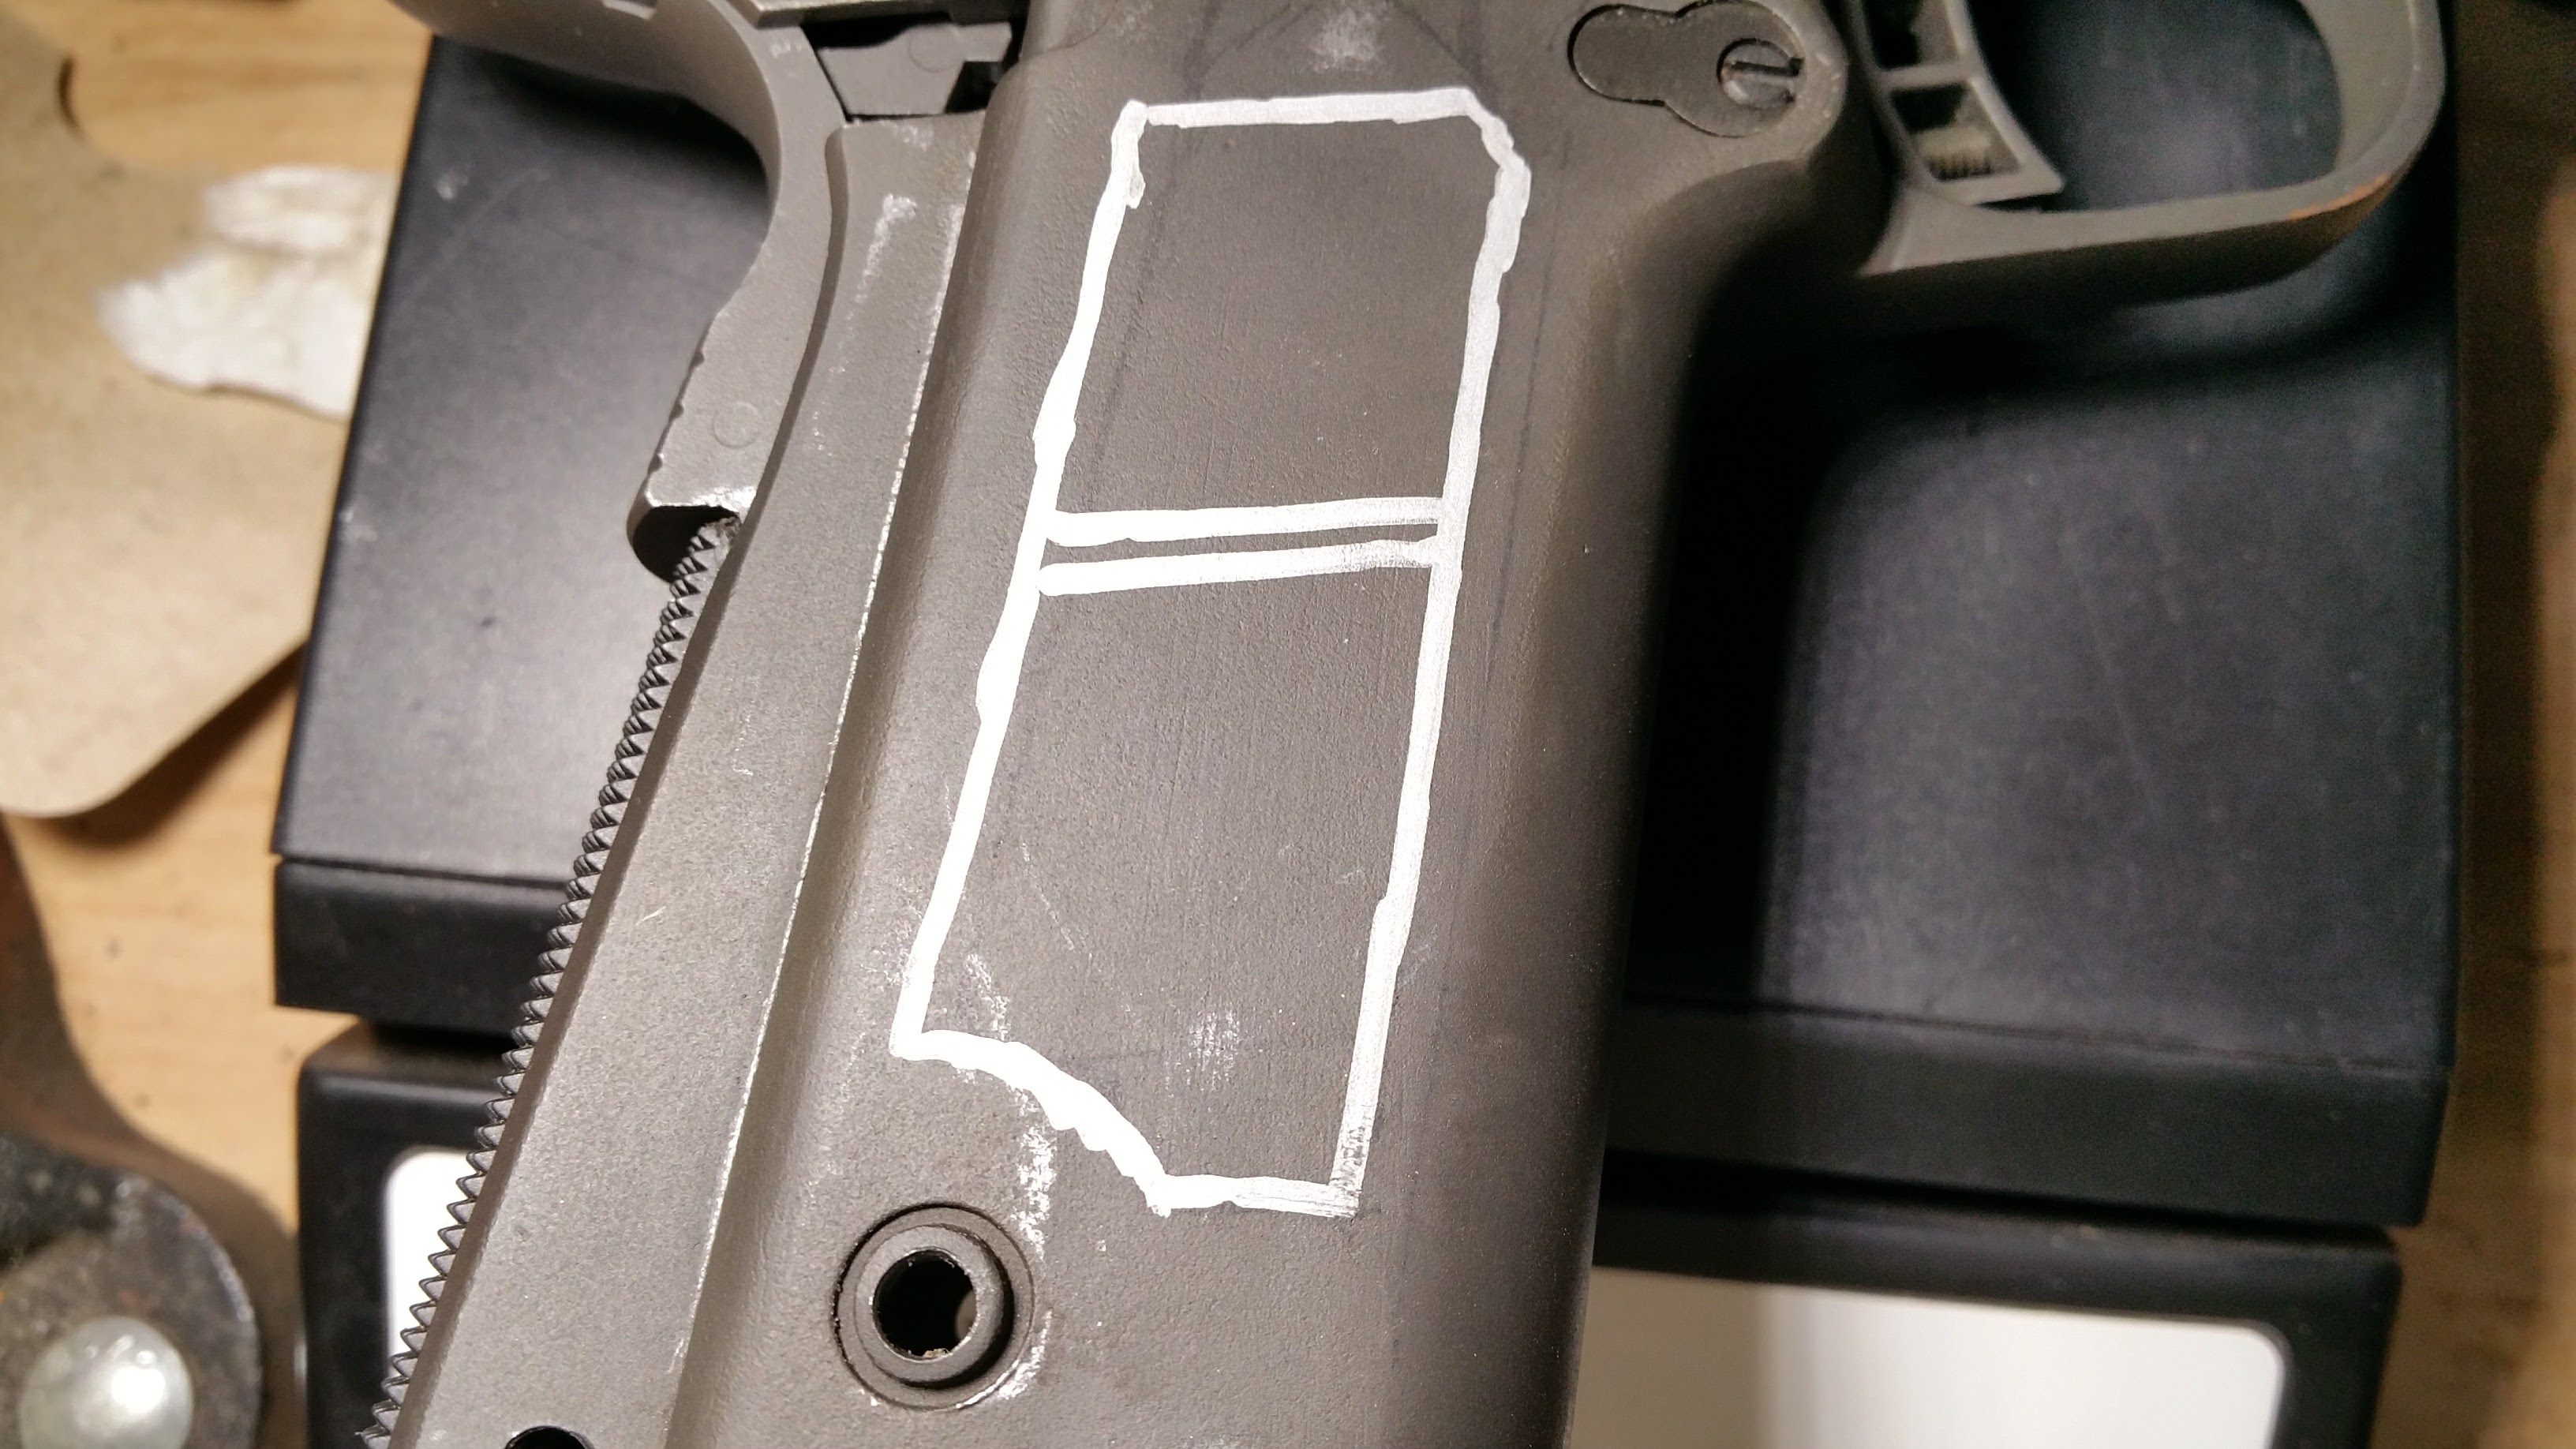
I put the pistol in a sort of cold traction, clamped in a soft jaw vice with a cord pulling the rest of the frame over. Left overnight, this corrected the bend about 50%.

20161014_201059

I have verified with the match director for Lone Star that this should not be a problem with him or the safety officers. He recommended using a heat gun to do more correction, though.

My wife has an embossing heat tool, which is basically a heat gun with a pretty small nozzle, less than an inch. It makes a tightly controlled torrent of heat, which lends itself well to this task. Luckily, I am secure in my manhood because her’s is pink.

The frame is now even better, with the dust cover almost back in a line with the rails. It contracted a little more as it cooled and I was being very conservative with my adjustments. I also used the flat end of a drift punch to flatten the serial number plate from the inside, which will hopefully take away a little more of the tendency to spring back into the bent position. I will apply a little more heat for the final tweak.

20161017_142331

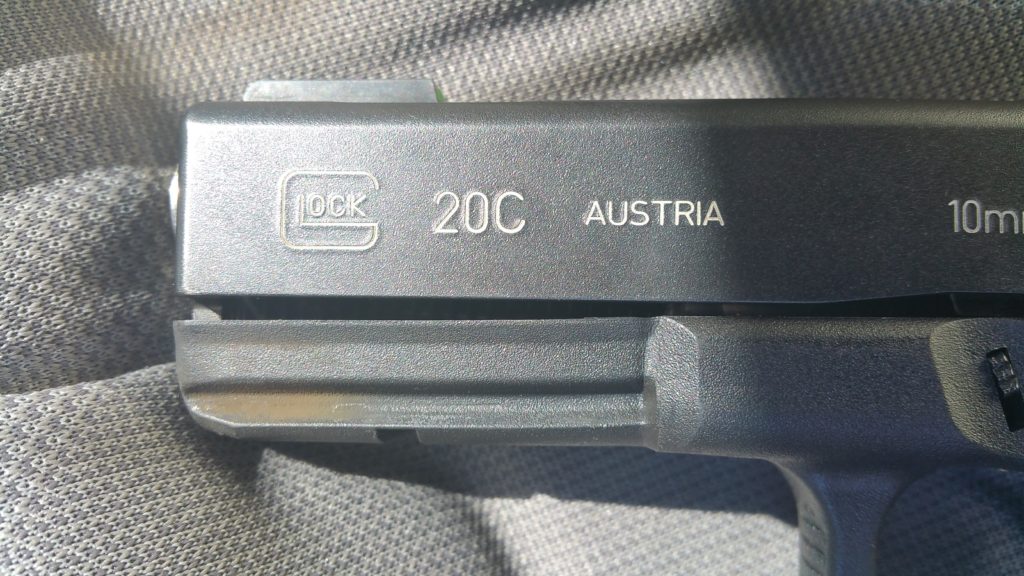
Normally, I use the 20C slide, mostly because the stainless 40S&W conversion barrel looks pretty cool through the ports, even when the pistol is dirty.

20161017_142342

That reminds me, must add Gun Scrubber to my shopping list…

The Off Kilter Dipole

I couldn’t help it. A few days ago, I was looking for something else (a common pass time for me) and in the cabinet I opened, I saw the off center fed dipole that I built when I first got back into the hobby. I had it up at the old house. It was an attempt to have a physically smallish antenna that could operate on several bands. I used it for at least on ARRL Field Day. There were problems, most of which are not expected to have been with the design of the antenna 🙂

While I have not found a specific online source of the original instructions, I have found several essentially identical sources, so I will refer the reader to Google on the matter.

Basically, cut a wire to the full length of a half wave dipole for the lowest frequency desired, in my case 40 meters so a bit short of 66 feet, plus a foot or so working and tuning room. Instead of cutting it in the center, the design I chose had me cut it 14% off center, 42′ 2-1/4″ and 23′ 8-3/4″. You connect the legs to a 4:1 balun and voilà, OCF dipole. Note the wording “14% from the center”.

20161001_102212

Here’s where the online information and what I was holding in my hand depart. As I write this, I have not carefully measured the legs of the antenna, but I strongly suspect that I may have cut the short leg not 14% from the center but 14% from the end. That leg of the antenna is significantly shorter than 23 feet and I really think it’s more likely about 9 feet, which would indeed be 14% from the end. Definitely a newbie sort of error. Turns out that 14% from the center is the same as 36% from one end, which most directions specify, rather than 14% from the center. Had I originally found instructions written that way, I may not have made that particular mistake. 🙂

Now it gets maybe kinda weirder.

I strung that antenna up Saturday morning. Well, very temporarily “up”, with one end anchored to the workshop door frame and the other to the Mule. The short end is nearest the camera.

20161001_102126

I connected the RigExpert to it with an 18″ jumper and did several SWR scans using it as a standalone unit.

Turns out, the antenna appears to be tuned a little low, but it’s not so far off that it would be unusable, particularly with a tuner. On the low end of 20 meters, might not even need a tuner.

ofc-hf

Those low SWR dips are just below 40, 20 and 15 meters.

I think it’s funny that, at the time I was testing it on Saturday, I did not yet know about the 14%-from-the-wrong-point error I apparently made when I built the thing, so this didn’t seem to be off base at all.

Scanning the whole range that the RigExpert can do reveals an even more surprising bit. From a vector analysis point of view, the antenna appears to work at 2:1 or better from about 70MHz up. I suspect real world results might not bear that out.

ocf-all

This scan is a little rough because there are only 100 points on a plot covering a full 170MHz. Armed with the information I now have about this antenna, I think I want to set it up and scan it at higher resolution and see if I can learn enough to understand why it works at all. My intuition suggests that the high frequency response might be due to the one really short leg. I want to see exactly where that lowest SWR dip around 150MHz is and what relationship that has to the actual length of the short leg. I think the still reasonable response at lower frequencies may be related the antenna’s overall length and maybe harmonics of 7, 14 and 21 MHz.

I do not yet fully understand the Smith chart, but this doesn’t look like one to learn on, at least not at 170MHz bandwidth.

ocf-smith

Unrelated to that, I also rearranged the equipment rack to accommodate a Mirage 160W VHF amplifier. The power supply I have for it is only 20 amperes, so it may not be up to the task. It is also missing the binding post nut.

20161003_070448

At first glance, I thought this was a 1/4″ x 28 tpi stud, but it turns out to be 6mm x 0.75 pitch. Once I have the power supply connected, I will try out the amp.

Interestingly enough, the thing pulls about 8 amps just sitting there. I am mildly suspicious.