Category Archives: Home Automation

Home Automation in general

All The Water Things

Early in my Home Assistant journey, I had planned to connect something to and/or control our self-cleaning whole house water filter.

I had discovered the ESP8266 and it’s pulse_meter sensor and then planned to have a board to connect the sensors for the water meter and later the unfiltered water meter and a separate board for the water heater meter since it is a short distance away, but it is really is a very short distance.

After working with the ESP8266 for a bit, I have decided that there is no reason these functions cannot all be on the same board, thus the Home Assistant device “watermeter” has been repurposed and one of it’s identical syblings “watersystem” has be configured.

It may not win any prizes for awesome miniaturization, but it is packed in pretty tight. On the left is 5VDC power.

On the right, the pair of three terminal connectors are for the unfiltered and hot water flow meters. The voltage divider resistor networks to adapt the meters’ 5 volt output to 3.3 volts are on the bottom of the board. I have not yet connected them, but my confidence that they will operate is reasonably high.

Immediately below those is a Dallas TO92 DS18B20 temperature sensor. There is a 1/4″ hole drilled in the lid of the case to allow it to stick out a bit and measure the ambient temperature. Since all these water system components are installed in an unheated garage and it has gotten below freezing in there before, I need to monitor the ambient temperature and control a heat lamp during winter months.

Next is the pulse input for the main water meter, shown connected in this picture.

Finally, there is a connector intended to connect to the water filter to monitor when it’s cycle runs.

I have covered the details of the configuration elsewhere except for the binary_sensor.

binary_sensor:
  - platform: gpio
    pin:
      number: 15
      # D8 Filter Cycle Sense Switch
      mode:
        input: true
        pullup: true
    name: "Filter Cycle"
    filters:
      - delayed_on: 100ms
      - delayed_off: 100ms

This is the input to monitor the water filter cycle. Since the original water meter, I have learned that the ESP8266 has built in pullup resistors that can be activated, eliminating the need to add a physical resistor. In this application, I may not end up needing it at all. The filter settings are currently there assuming I would be debouncing a switch input.

The water filter has a motor that runs a multiposition valve with a cam and a single sense switch. Investigations indicate that the switch is normally open, with 5V from it’s own controller across it’s terminals when it is at rest. When the filter cycle begins, the switch closes as the valve cam moves. The filter cycle puts the valve into three positions, a flush and a rinse position during the cycle and a normal position when done. I think I can monitor the 5V signal across this switch then either simply time when it has returned to 5V for long enough for the filter cycle to have ended or possibly even count the two stops in the process. I will need to play around with that.

The one thing that might be added is to connect one more GPIO pin to a relay output in order to trigger a filter cycle remotely. There is plenty of room for a couple of wires to run to an external relay. The area in front of of the USB jack needs to remain open in case it is needed to reprogram the board if it becomes unreachable on WiFi.

Funny story there. In arranging the ESP8266 D1 Mini board on the 40×60 perf board, I dithered on whether to mount the USB jack up or down. I decided to mount the board with the jack down, mostly because all the pinout illustrations of the D1 Mini board are shown that way. However, I did not account for how thick the connector is!

I was able to slightly mutilate the connector on a cable enough to fit, though. For future boards, I will need to put a little space under the board.

Let’s Get Board

The ESP8266 boards have eight GPIO pins, though some of them are kinda hijacked early on, they should be available for more general use after the board boots up.

Leaving the bare board hanging by wires is just begging for trouble, so I want to put them in some kind of enclosure. The first ones I ordered turned out to be just a tiny bit too narrow.

Chalk that up to poor tracking of dimensions while shopping. I will keep the little boxes because they may be usable for something else at some point. That and at roughly $0.87 each, even a dozen of them are too cheap to be worth the trouble of return shipping. I think it’s planned that way.

I was more careful with the next case. I first found a small prototype circuit board of 40 x 60 mm, big enough to put the ESP32 board on with some margin around it, then found a case with internal dimensions to fit that board. If I also provide 5V power in some other form besides microUSB, I can mount the ESP8266 in the most space efficient manner on the board and inside the case. This will leave the maxium room for additional components or connections.

I think I will first rebuild the water meter device, adding an on-board temperature sensor and the sensor input and relay output that I had originally intended to put on the big water filter to let us manually trigger a filter cleaning cycle remotely. What would really be cool is if I can find 5V or even 3.3V available inside the filter and eliminate one more wall wart power supply.

While I was ordering stuff, I got too many Dallas DS18B20 in the raw TO92 package suitable for putting directly on a PC board and too many additional ESP8266 boards to connect them to. I also got a variety of little terminal blocks to make it easier to build boards for external connections and make those connections later.

Finally, I got some breakout board things which should help with prototyping all kinds of things with the ESP8266 boards. They breakout all the pins on easily accessible terminal blocks.

Hopefully, all these tools and supplies will soon lead to a bunch more ESP based peripherals to my Home Assistant instance.

Everyone Loves A Little Probing…

One of the many tasks the ESP boards can easily do is read the Dallas Semiconductor (now owned by Maxim) 1-wire devices, particularly the temperature sensors. A popular choice is a unit embedded in a stainless steel probe at the end of a waterproof cable a meter or so long.

The Dallas 1-wire protocol is fascinating and clever, but most importantly (if someone else takes care of the fussy bits) it is really easy to use. In the case of ESPHome and the temperature probe above, it is dead simple to connect and read a temperture, but even cooler, several such devices can share a single pin on the device.

For experimental purposes, I used my ESP32 dev board, which has solderless breadboard friendly pins installed, making it even easier to throw together a test system.

Not shown in the picture is the data bus pullup resistor. Because of the distance it needed to reach, from the 6th pin from the left on the top row to the far right pin on the bottom row, I could better fit the resistor under the MCU board with no jumpers.

After a couple of false starts because the IDE for ESPHome is really sensitive to indentation, I was able to identify the unique ID for this temperature sensor then start bringing in data from it.

dallas:
  pin: 21
  update_interval: 10s

sensor:
  - platform: dallas
    address: 0x693ca0e381b17528
    name: "Testboard Temperature"
    accuracy_decimals: 2
    filters:
      lambda: return x * (9.0/5.0) + 32.0;
    unit_of_measurement: "°F"

At the time I am writing this, I don’t know if pin 21 is special, but it was the pin used in the example I followed, so I kept it.

The first thing you do is install the block with only the ‘dallas’ directive and the pin number. The logs will show the address of any devices it identifies. Then you can add the rest of the configuration, complete with the actual addresses of any and all individual devices. Apparently, one can do a ‘default’ device read, but it will understandably fail if there is more than one device.

I played with the update_interval. For my testing purposes, the shorter to better. One thing I will use this board for is testing communication limits, specifically whether I can expect reliable WiFi connectivity in certain outdoor locations from these boards. Rapid updates of the data will help determine that.

The most interesting new skill learned was the lambda directive. This is a special calculation ‘filter’ of sorts. The hardware device reports in degrees C and lambda is used in this case to convert degrees Celsius to degrees Fahrenheit.

One of the practical uses I see for this type of sensor would be to use these probes for each of our non-kitchen refrigerators, one for the freezer, one for the refrigerator and maybe one for the ambient, if some other sensor doesn’t already provide an ambient temperature. I have found the door switches I like also provide a temperature.

Another could be to put various temperature probes into the HVAC system in the attic, return air temp, duct temp, attic ambient, evaporator coil, etc.

I may add one to the hot water meter to monitor the water tank temperature.

The Little Board That Could (and that one time I was an idiot)

I haven’t been excited about a hardware project in a while, mostly because I haven’t really had a practical application that needed doing.

We have a 400-something foot deep well that produces really nice water. It does have a bit of sand that we need to filter out and all that is pretty well addressed by now. According to metainfo on the pictures I took, I installed a water meter in our water system in May of 2012. I chose a unit that included a pulse output so that I could connect it to something to electronically track our water usage. The pulse output is really just a magnetic reed switch operated by a tiny magnet on the 0.1 gallon dial. It closes the reed switch once per revolution, thus ten closures per gallon. The pulse unit is removable and not pictured here, though you can see the magnet on the x0.1 dial.

Incidentally, between May 2012 and the time I am writing this, we have used almost 247,000 gallons of filtered water.

Unfortunately, nothing available to me did a good job at counting and accumulating those pulses, not anything I could buy for a decent price. I had an electronic counter connected to it for a while; it was just an accumulator with no connectivity to anything. It’s battery has LONG since died, but I disconnected it to connect the board described below. I need to put a new battery in it and see how far it got. 🙂 There are professional data acquisition modules that do the task, but not for a price I was willing to pay. When I was shopping for stuff at CloudFree and saw these little ESP8266 boards, especially for $3.50 each, I looked into them. Wow.

The ESPHome project is an entire ecosystem built around a family of boards using the Espressif family of microcontrollers, ready to deploy in Home Assistant. In short, people way more brilliant than I am have done all the hard work and have modularized home automation functions so that with a few lines of configuration, one can set up these boards to do a wide variety of complex functions, interfacing with hundreds of off the shelf input and output devices. You can combine whatever you need in essentially limitless ways.

What mattered to me immediately was the Pulse Meter Sensor. It was original intended to attach to electric meters which provide a pulsing indicator for consumption, but by tweaking that default configuration just a little, it tailors it nicely for water.

After a bit of experimentation, the configuration to read my meter is as follows:

sensor:
  - platform: pulse_meter
    pin: 13 
    unit_of_measurement: 'gal/min'
    name: 'Water Usage'
    internal_filter: 100ms
    accuracy_decimals: 2
    filters:
      - multiply: 1
    total:
      name: "Water Total"
      unit_of_measurement: "gal"
      accuracy_decimals: 0
      filters:
        - multiply: 1

The decoder ring: Pin 13 is descibed in better detail below.

The ‘unit_of_measurement’ is just the text describing the units reported. It doesn’t actually change what the units are. You could call it ‘cubits of sanskrit’ and it would still give you the same numbers you configure it to deliver.

“internal_filter” is essentially a debounce timer in this application. It tells the counter to ignore any pulse shorter than 100ms.

The accuracy_decimals directive is the number is digits right of the decimal to deliver. The meter rate is calculated as a rate per minute, so it basically measures the time between pulses and calculates the rate based on that. So long as water is flowing, it’s reasonably accurate. Kinda weird that once you turn the water off and its not getting any more pulses, it still reports the same flow rate because it’s not changing. There may be a setting to address that. If you wait long enough, the rate drops to 0, so there probably is a timeout value.

Since my meter outputs one pulse per gallon, the ‘multiply: 1’ lines are redundant, but I left them in from earlier failed experiments and for clarity.

For ‘total:’ this is a running total of gallons consumed. Since it is always in whole gallons, there is no need for accuracy_decimals and again, muliply by 1 is just there for clarity.

My board looks almost exactly like this one:

There is a little confusion (for me, anyway) as to what one should call the various pins and which ones are ok to use under what conditions. Some of these pins are asserted internally at boot time; some will cause boot to fail if they are asserted externally. Some are used when communicating with the chip. Long story short, the four pins highlighted in green are generally safe to use under all conditions. I am not sure why I chose 13 instead of 15. Shrug. I am equally unsure why the board designers put D0,D5,D6,D7 & D8 for GPIO 16, 14,12,13 & 15. I’m sure there is an engineering reason. Whatevs.

I put a 10k ohm resistor between D7 and 3V3 to pull the GPIO13 pin up, then connected the pulse output between D7 and GND. It works perfectly.

Flushed with this initial success, I decided to add a second pulse meter sensor to this same card. The water meter above is after all the water filtering, right before the treated water goes into the house. I have also tapped off before the filtering to feed water hoses outside with significantly higher pressure and flow. This water is, of course, not metered. I have another meter very similar to the one feeding the house, but this is not such a critical feature and I don’t really need the ‘odometer plus pulse’ meter. I can really get buy with just the pulse counting. Besides, that other meter was really intended to be a spare for the ‘main’ meter.

I found a cheap water flow sensor on Amazon and as I write this, it (two of them, actually) are due to arrive tomorrow. Plumbing it in should be pretty simple. The ESP8266 board has 5V available to power the flow sensor. Wiring the input will be a little more complex as the flow sensor is a Hall effect device with a 5V output and the ESP8266 board has a 3.3V input. They are reputed to be fairly 5V tolerant, but even a $3.50 board doesn’t deserve to be smoked just because it’s cheap. The easiest way to accomplish this level shifting, especially with the fairly low bandwidth needed for these frequencies, is a simple resistive voltage divider network.

Whatever value chosen, R2 will be (so close as it doesn’t count to) twice the value of R1. I will probably start with the venerable 10K for R1 and likely two 10K in series for R2, because I have a cubic buttload of 10K resistors laying around. If the output of the 5V system is indeed 5V, then the junction between R1 and R2 will be 3.3V. The only factor that might affect that is if the 5V output can’t provide enough current or if the input for some reason sinks a lot more current than anticipated. In all, it’s expected to be fine.

If I understand the specs correctly, this flow meter gives a frequency output of 5.5 x the flow rate in liters per minute. Those multiply lines in the sensor config will mean something now. I have done some scratchpad math and arrived at the following pulse meter configuration:

  - platform: pulse_meter
    pin: 12
    unit_of_measurement: 'gal/min'
    name: 'Unfiltered Water Usage'
    internal_filter: 100ms
    accuracy_decimals: 2
    filters:
      - multiply: .048
    total:
      name: "Unfiltered Water Total"
      unit_of_measurement: "gal"
      accuracy_decimals: 0
      filters:
        - multiply: 20.82

As I write this, I cannot recall exactly how I came to these two multipliers, but I know that 3.78 liters per gallon and 5.5 x the flow rate were both involved. I strongly suspect that some empirical testing will be in order as well.

Also, a chart I saw indicated that at some higher flow rates, the output can be 60Hz or so. This will be getting pretty close to the 100ms internal filter pulse width. On the other hand, hopefully the Hall effect output is already debounced, so that filter may be redundant. We will see.

Furthermore, I will also be adding a flow sensor to the inlet of the water heater to monitor hot water usage, with it’s own board. Perhaps I can be clever enough to subtract that amount from the total usage somewhere.

The time has come for my confession.

I have described the ESPHome experience as it should have been, almost plug and play. It did not go that way and it was NOT because of ESPHome.

I was very excited to get that first board plugged in and make it go. The process sounded very straight forward.

Install the ESPHome Dashboard on Home Assistant. Trivial, done.

Open the ESPHome Web UI, click on Add Device…

Ooops. Well, no BIG deal. Adding an SSL certificate is something I need to do someday, but I can just do this from the PC I’m using instead, so I click on the ESPHOME WEB link.

I get this page, I plug in my cable with the board, click on the CONNECT link and this is the last time anything good happens for a looong time.

It pops up a dialog wanting to choose a device to connect to, but none of them look like anything new or appropriate. I open Control Panel and nothing in Device Manager looks like a new thing, except for that one thing that says it’s not functioning because Windows can’t find a driver for it. I unplug the board, it goes away; plug it in, it comes back. Sigh.

I Google, find the [hardly sketchy looking at all Chinese] driver download page, run the self-installing driver, hoping that all my anti-virus software is up to date. It appears to install.

No change.

I try it on what eventually turns out to be three other computers. Nothing different. And apparently no viruses. Win?

Finally, something I *swear* I saw somewhere suggested plugging it into the Home Assistant hardware to try it from there. Maybe I dreamt that. I had more ports in the USB hub, so I plug it in. I consult the VM to see if it is there and ready to be allowed over. No, just the Zigbee and the Z-Wave.

I wonder if somehow I am limited to two devices by the virtual machine manager, so I unplug the Z-Wave dongle and plug the ESP8266 back in. It still doesn’t show up anywhere.

To be completely honest, the ESP8266 and the Z-Wave dongle were alternatively plugged in and unplugged multiple times during this process, sometimes both plugged in, sometimes to the hub, sometimes to the front panel USB. I probably put one of them in my ear and the other in my anus at some point, just to see if that would help.

By this time, I have spent a few minutes here and there during three hours of the workday and four solid hours that evening trying to get this awesome little board talking and I’ve reached a point where I am both too tired and too frustrated to go on, so I put it away and do something else for a while, probably involving alcohol.

The next evening, I start in on it again, but my fresher eyes realize that I did all this testing with the same presumed good USB cable. Afterall, it definitely shows up when plugged in and goes away when unplugged, it just couldn’t find the driver for the device. So, I walk 8 feet across the room, grab a different USB cable and plug it in.

Comes right up, CH340C on COM3. ESPHome sees it, connects, uploads adoption code. Everything I do with it from this point forward works like it’s supposed to. I try the ESP32 board, works perfectly, but it’s drivers (CP210X, like the dongles, ironically) are already installed in Windows.

All because the F&*%ING USB cable was not 100% bad.

[insert all the ESP8266 success story related above here > ]

NOOOOOOWWWWW…….

A couple days go by and I notice that the driveway light switch, the lone working Z-Wave device currently on Home Assistant, is not working. I have a Zooz multirelay configured, though not deployed, but it is also not working. When I dig deeper, I find that the controller is down. As I’m sure you can predict now, I spend several days trying various things to get the stupid dongle to come back up. I even reach a point where I am contemplating abandoning all Z-Wave and going all WiFi and Zigbee. It’s not a trivial decision; I have a box full of unopened Z-Wave stuff, including a spiffy new scene controller I have just purchased that I have specific plans for.

I was able to verify that the dongle itself was working. The Silicon Labs tools included some network stat tools where you could view a count of packets send and received. I had it installed in my laptop, took a snapshot, waited, took another, waited, etc, just to verify there was no regular traffic. Then I plugged in a multirelay device and there was a burst of traffic between it and the dongle. Reasonable expectation of functionality.

Among the things I tried was viewing lsusb and dmesg from the terminal of the VM. Trouble is, because this is Alpine Linux, this isn’t really lsusb and dmesg binaries but their lobotomized BusyBox equivalents, so most of the usual switches that could add more details to help figure stuff are not really there. Not that I am any kind of ace at troubleshooting Linux issues anyway. I have had the perhaps unenviable position of being more of a Linux power user rather than a sysadmin. My (mostly Fedora) systems have for the most part always just worked and I have rarely had to fix anything on them, so I don’t have just tons of breakfix experience with it. If it doesn’t break, you never need to fix it.

In any case, it turns out that the “solution” appears to have been to let something time out. The last thing I did was a reboot of the VM with the dongle removed. I added the dongle to the USB hub, but for whatever reason, I didn’t immediately allow it through to the VM. Some undetermined time later, a day or so, I sat down to prove that I am indeed insane only to discover that it needed to be allowed through to the VM. I did it and suddenly, lsusb listed another CP210 device and dmesg showed a new USB device found and Z-Wave JS UI showed /dev/ttyUSB1 available.

Now it works again.

Home Assistant: The End of Vera?

Since about 2012 or so, I have been working on some home automation, mostly using Vera (which has changed names again, kinda) and a handful of Z-Wave enabled switches. It has never really taken off like it could have at our house, but I do have a few bits in place that we have grown to appreciate, especially once I deployed a few Amazon Echo devices and we could ask Alexa to turn some stuff on and off for us.

The three things that see use multiple times every day are plug modules that run lights and a ceiling fan in our back yard, a smart bulb in a bedroom lamp and the thermostat on the house HVAC system. Less often, but still seeing occasional use are two wall switches running a driveway light and front porch light.

I do have a smart plug strip that sometimes sees seasonal use for Christmas decorations and a generic plug module that right now is running the pump for an above ground pool, but I’ve used it for other short term uses as well.

As explained in a very old post, the DSL internet we had when we moved out here was not reliable enough for a service that was 100% dependent on cloud connectivity. MiCasaVerde’s “VeraLite” product had cloud connectivity to allow one to control it from elsewhere, but the actual control is local – not dependent on internet connectivity to work at all – so it seemed a good choice.

During the decade since then, I would occasionally add a device, but what was usually the biggest limitation was a less than perfectly reliable Zwave network that needed occasional rebuilding until I installed the version of Vera controller I have in place currently.

Zwave also had some difficulties with the size of our house. Ironically, if I had replaced every switch in the house with Zwave switches, the mesh networking protocol probably would have been much more robust, but with two wall switches side by side and one thermostat 30 feet from them, there probably just aren’t enough nodes for the redundancy.

Once we had linked Alexa and had grown to “depend” on controlling the thermostat verbally, having to reconnect it to the network every month or two became tedious. The then-new replacement Vera controller had Zwave and Zigbee and more memory, so I upgraded it and got a new thermostat that connected via Zigbee. It looked nicer and was much more reliable, needing to be reconnected to the network only two or three times a year. Afterall, the thermostat was the only Zigbee device in the house, so it there was a mesh network consisting of exactly two devices.

One time when I had great difficulty getting the thermostat to reconnect, I reached the conclusion that either the radio in it or in Vera had gone bad and as the only two Zigbee devices in the house, I elected to change the thermostat again, this time going to a WiFi device. Unfortunately, and as is almost inescapable anymore, it is a cloud dependent device, at least as far as remote control of it goes. Sigh…

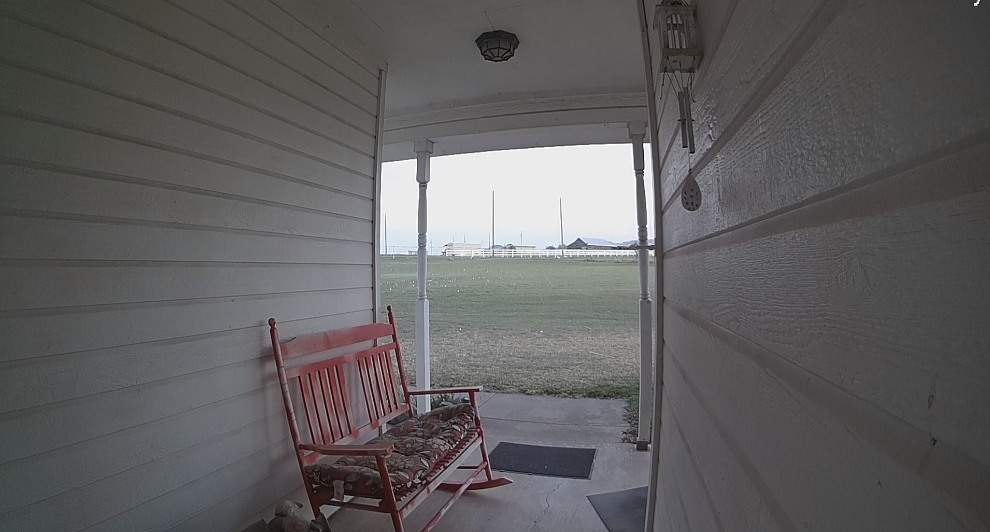
Now that the thermostat is WiFi , the only Zwave devices left are the two wall switches that run the porch light and driveway light. Those are thus also the only remaining need for Vera. Everything else can be, and largely is, controlled by some other means.

Not locally, I might add.

I was at a crossroads.

Do I keep adding piecemeal to the mixed tech automation I have now? Alexa *kinda* ties it together, but only because Alexa has various skills that talk to Smart Things (my WiFi switches) and Geeni (smart bulbs) and Honeywell Home (thermostat) and Vera (Z-Wave switches). They all work slightly differently and none have any real automation other than basically on or off or maybe some simple scheduling.

Do I drop Vera and replace those only two switches it still directly controls and go with all WiFi/cloud automation or do I really do the hard think and get completely away from the cloud, which would probably mean changing my thermostat *again* and implementing a local controller?

Sometimes, it takes a while for me to write a blog post; day job an’ all. When I wrote those last two paragraphs a couple of weeks ago, I must admit that I was already elbows deep in replacing Vera with Home Assistant. Vera is already unplugged. However, at that time, I was still planning to move Z-Wave over and even expand Z-Wave devices in the house. For one thing, I still have a box full of undeployed Z-Wave devices that I purchased over the years. Also, Z-Wave power switching devices seem to be more likely to include power monitoring features. Not exclusively, but Zigbee devices just seem to include power monitoring way less often.

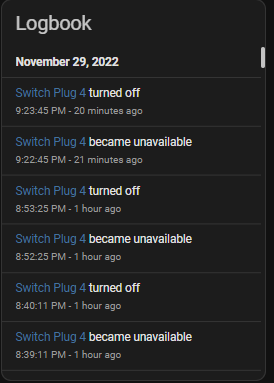
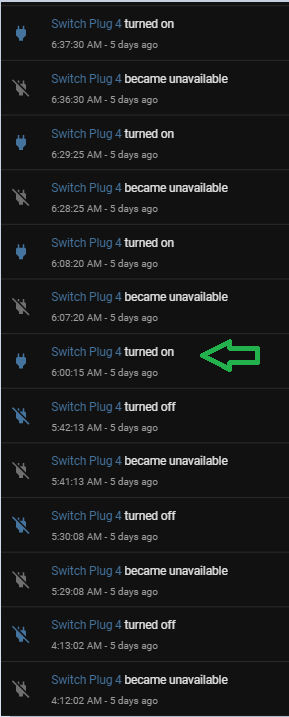
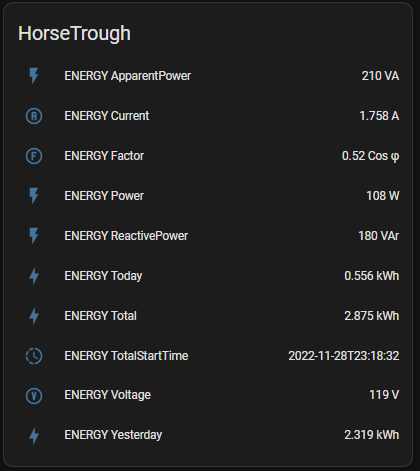
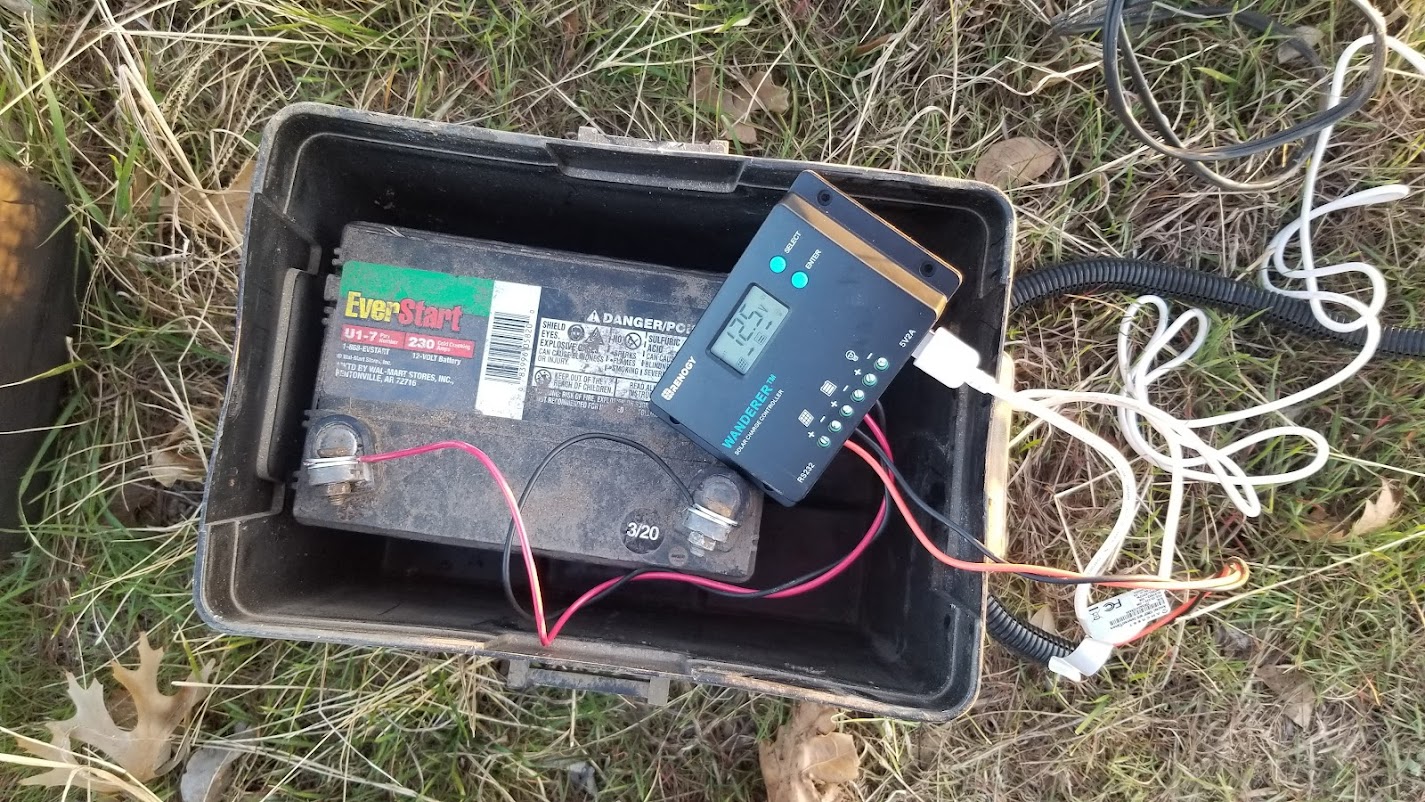
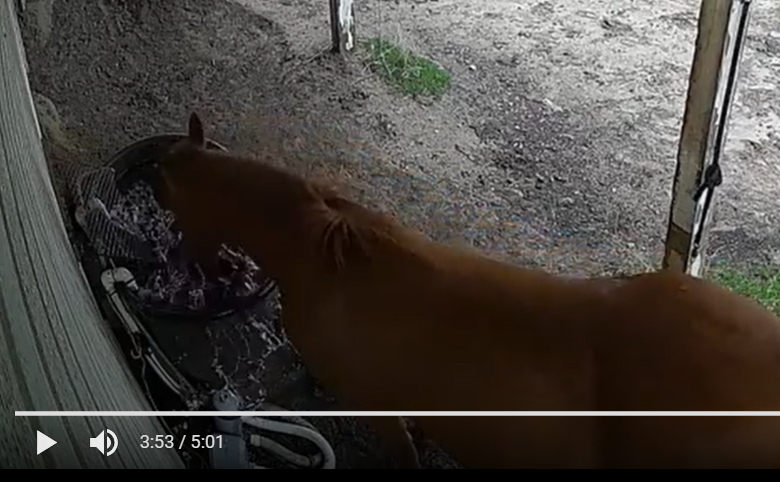
Power monitoring for the sake of power monitoring is not my goal for most of these devices, but for two or three of my applications, I use power monitoring to verify that the device is indeed operating. I use two heatlamps to mitigate freezing of some water system components and a tank heater and recirculating pump for the horses’ water trough. If they are switched on, but *not* drawing power, they need some kind of attention. The Z-Wave smart plug devices I have used in the past have power monitoring, but Vera didn’t really give me any way to leverage that into some kind of action item if it were to suddenly go away.

I’ll stop here to describe my Home Assitant path thus far. I was made aware of it by a friend while we shared a ride to and from Colorado for a firearm competition event. The advent of regaining local control is what really sold me on it, but between the demise of MiCasaVerde (the original company controlling the Vera line of controllers) and the new Ezlo company that has largely taken over that space with what may be limited support of the older hardware and software, I prefer to go in the open source direction. Yeah, I won’t have a customer service rep to yell at, but with most big well supported open source projects, you don’t need to. Somebody somewhere has probably already had your problem and fixed it. You just need to be good at Google to find it.

Home Assistant is usually deployed on a Raspberry Pi, but it is certainly not limited to that particular hardware. At the time I have gotten interested, Raspberry Pi 4 boards are in high demand and rarely in stock anywhere for more than a few hours at most. The only Pi boards I have on hand are probably Pi 2 at best, which is not enough Pi for Home Assistant. While other hardware options might work as well or maybe even better, I chose first to try using a Docker container hosted on my Synology DS220+ NAS since it is not really worked very hard and has plenty of leftover CPU power.

It came up quickly. Almost immediately, I wanted to add HACS, the Home Assistant Community Store, for an add-on to interface with my Emporia Vue account (yet another cloud based service… sigh). Installing HACS in the container required being able to run wget from the console, which was not installed in that image, which itself took a bit to get to, so I picked up a couple of (soon to be forgotten again, I’m sure) skills there.

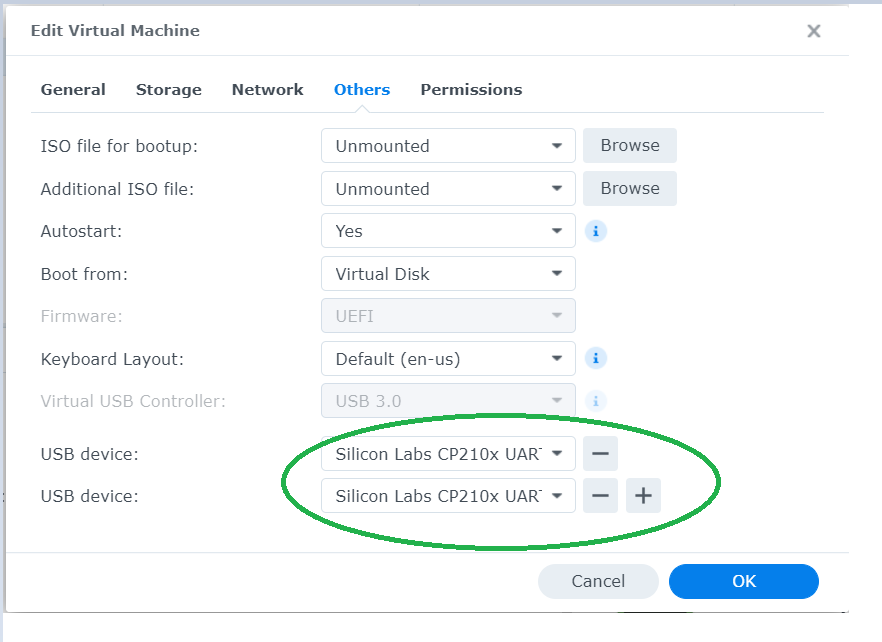
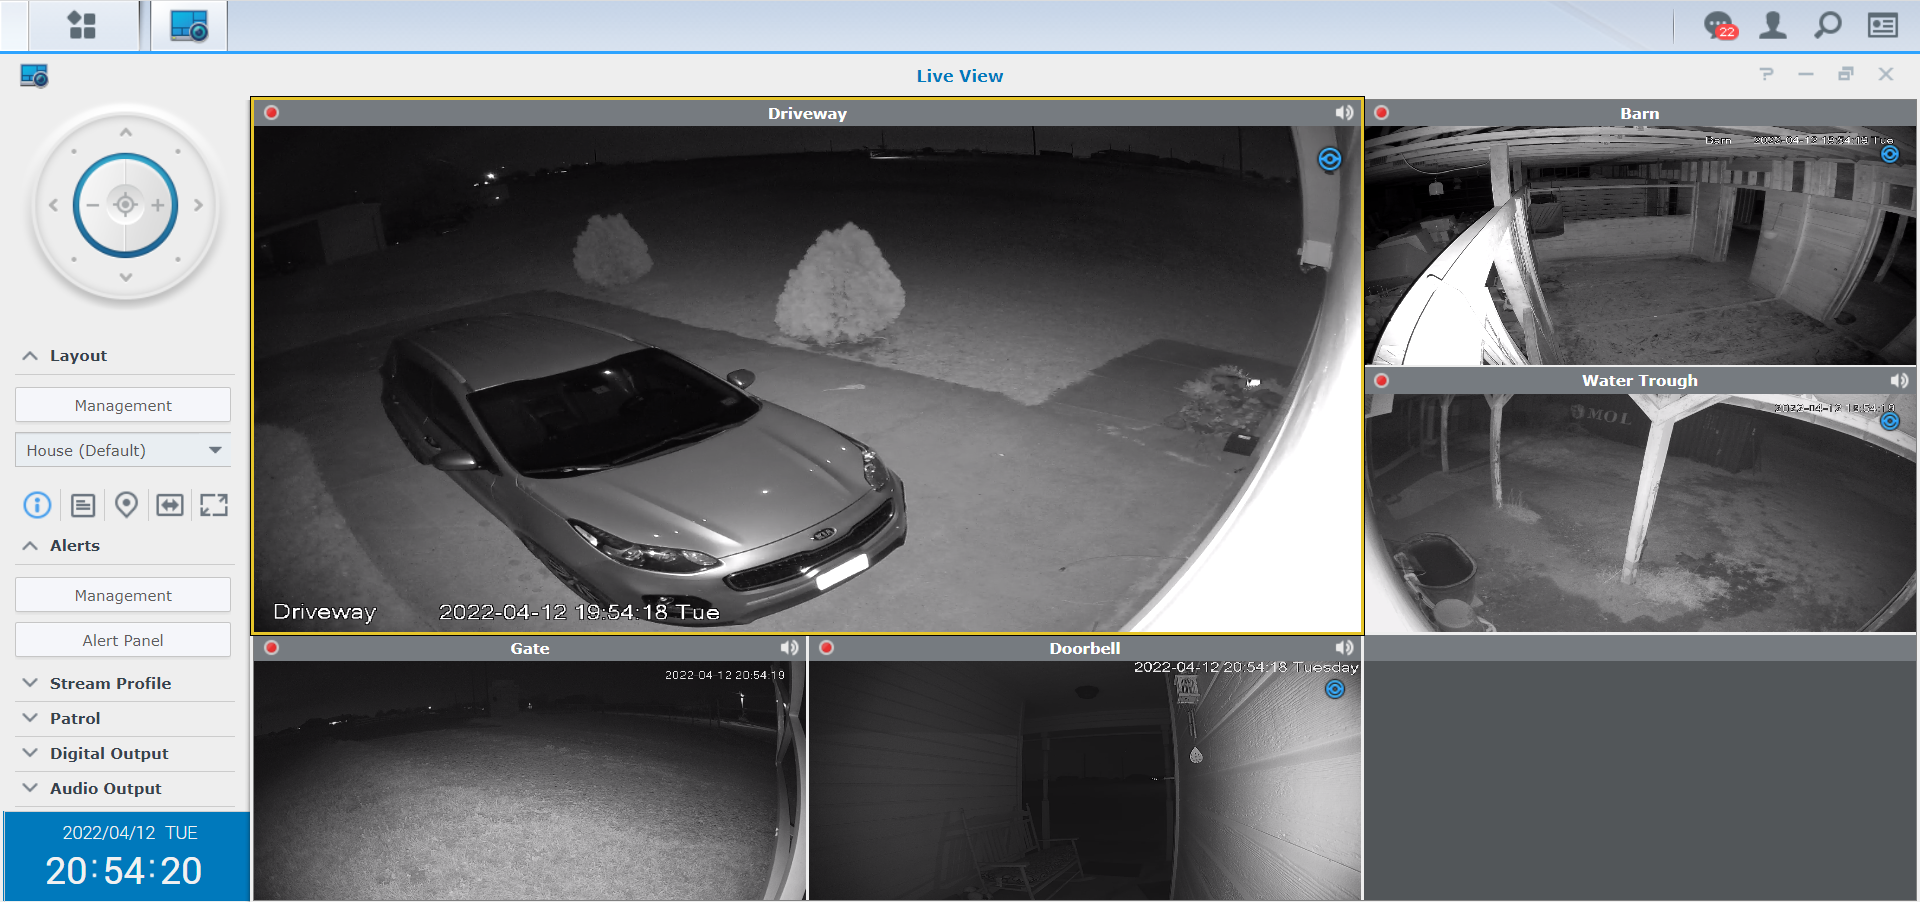
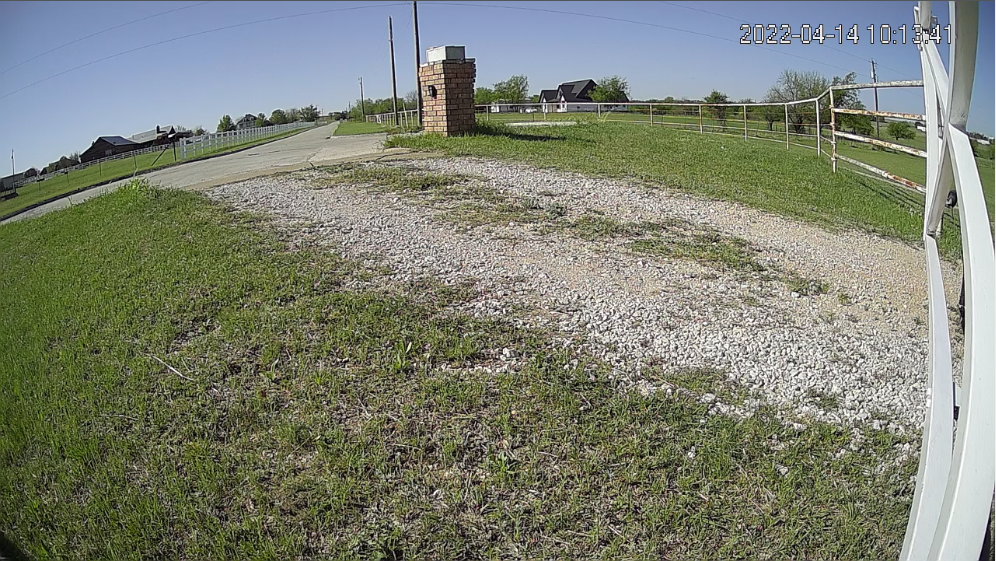
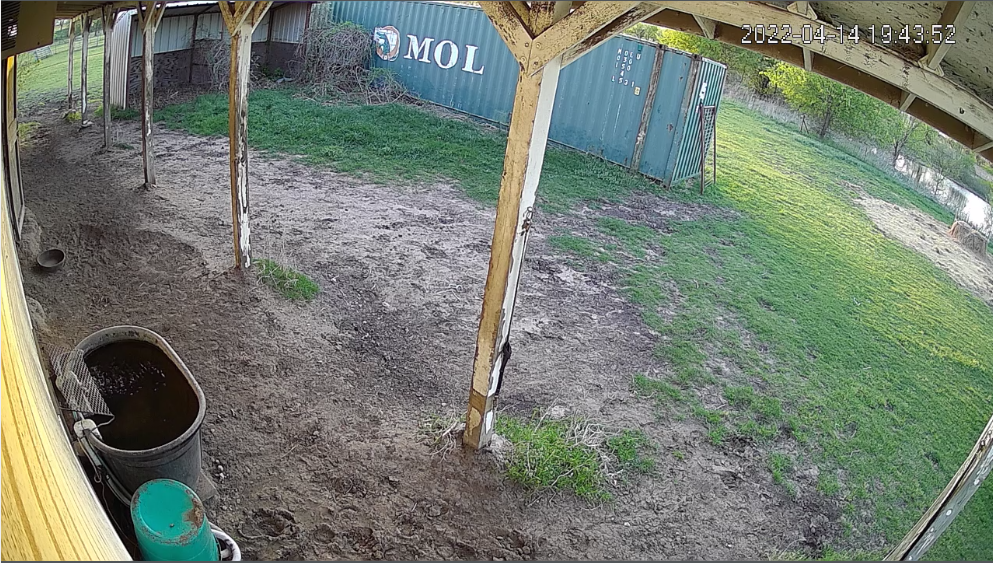
I ran up against other container version limitations pretty quickly, particularly when it came to adding drivers for anything I might need to plug in, like Z-Wave or Zigbee bridges, so after about 2 days, I elected to upgrade to a VM version, still hosted on the NAS. This is with it recording five cameras and running the VM:

This has worked out much better. It’s running Alpine Linux, a lightweight distro. You would almost never need to even know that unless you royally screw something up. Don’t ask me how I know.

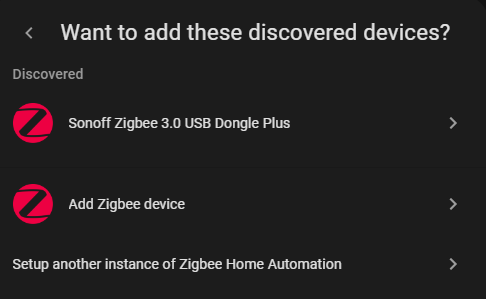
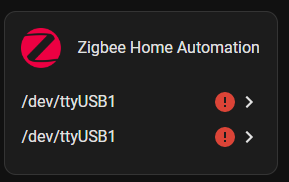
I acquired a Sonoff Zigbee controller and an Aeotec Z-Stick 7, both from general recommendations gathered from various Home Assistant YouTube videos and generall Googlage. These are connected to the Synology NAS via a USB 3.0 hub and they are powered by the NAS.

There was one concern with the Aeotech dongle regarding a required firmware update. The process for that is convoluted, but not particularly difficult. Just a lot of steps. Basically, you download a set of tools and a firmware image file from the chipset manufacturer, Silicon Labs. This requires, of course, a free developer account with Silicon Labs. Once the pieces are in place, it’s a 3 minute job. Curiously, once done, if you try to do it again, it gives you a scary error and aborts, but apparently this just means it has already been done. It is, afterall, a tool for developers, not end users. There are tools there that would also help me later verify that I did not indeed fry my Z-Stick. I’ll get to it…. 🙂

Hardware-wise, the VM passes USB devices through to the guest OS when configured to do so.

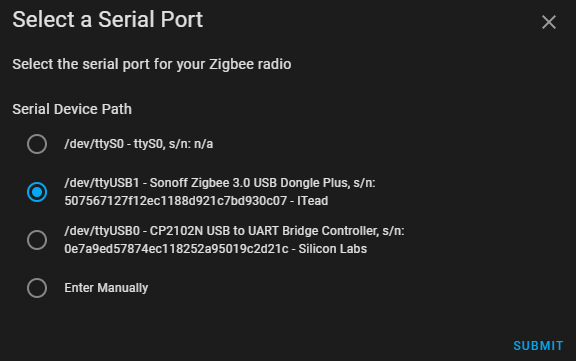
As luck would have it, both Sonoff and Aeotec use the same family of Silicon Labs USB UART chips, which would eventually cause some confusion, but lets avoid that story as long as possible. We will continue to pretend that I was never an idiot and that Zigbee came up on ttyUSB0 and Z-Wave on ttyUSB1 and that all the stuff worked fine!

Actually, Zigbee never gave me an ounce of trouble. Well, maybe an ounce because of the geography of our place and where I want devices.

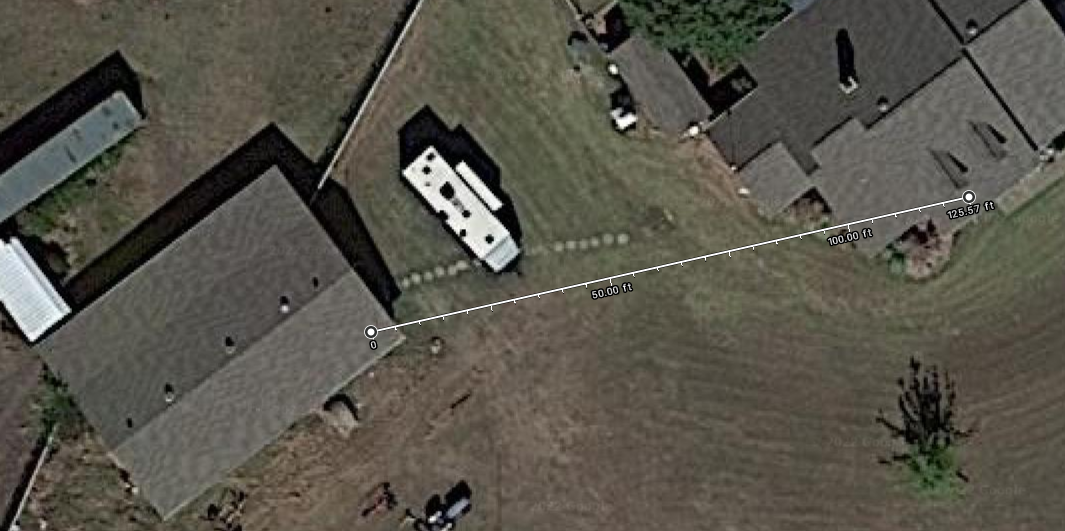
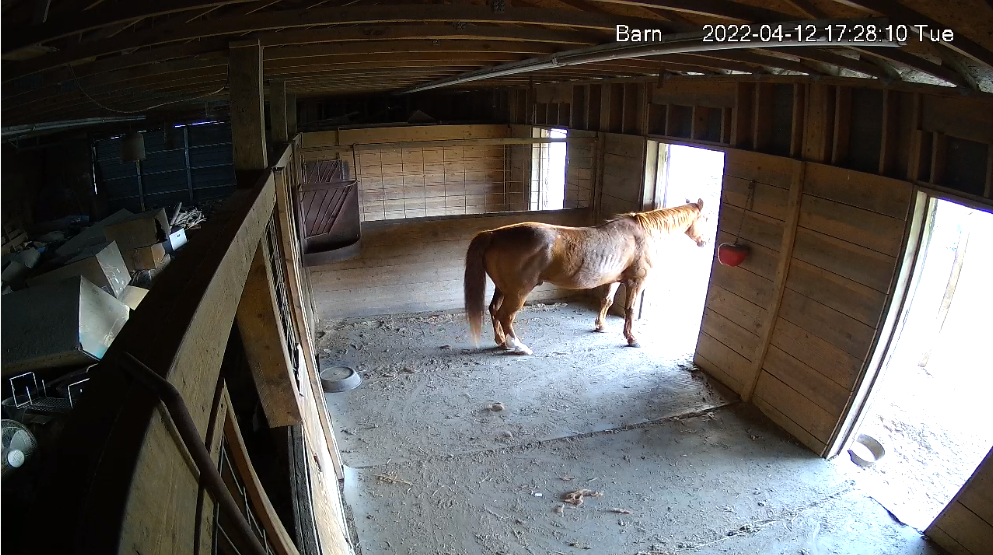
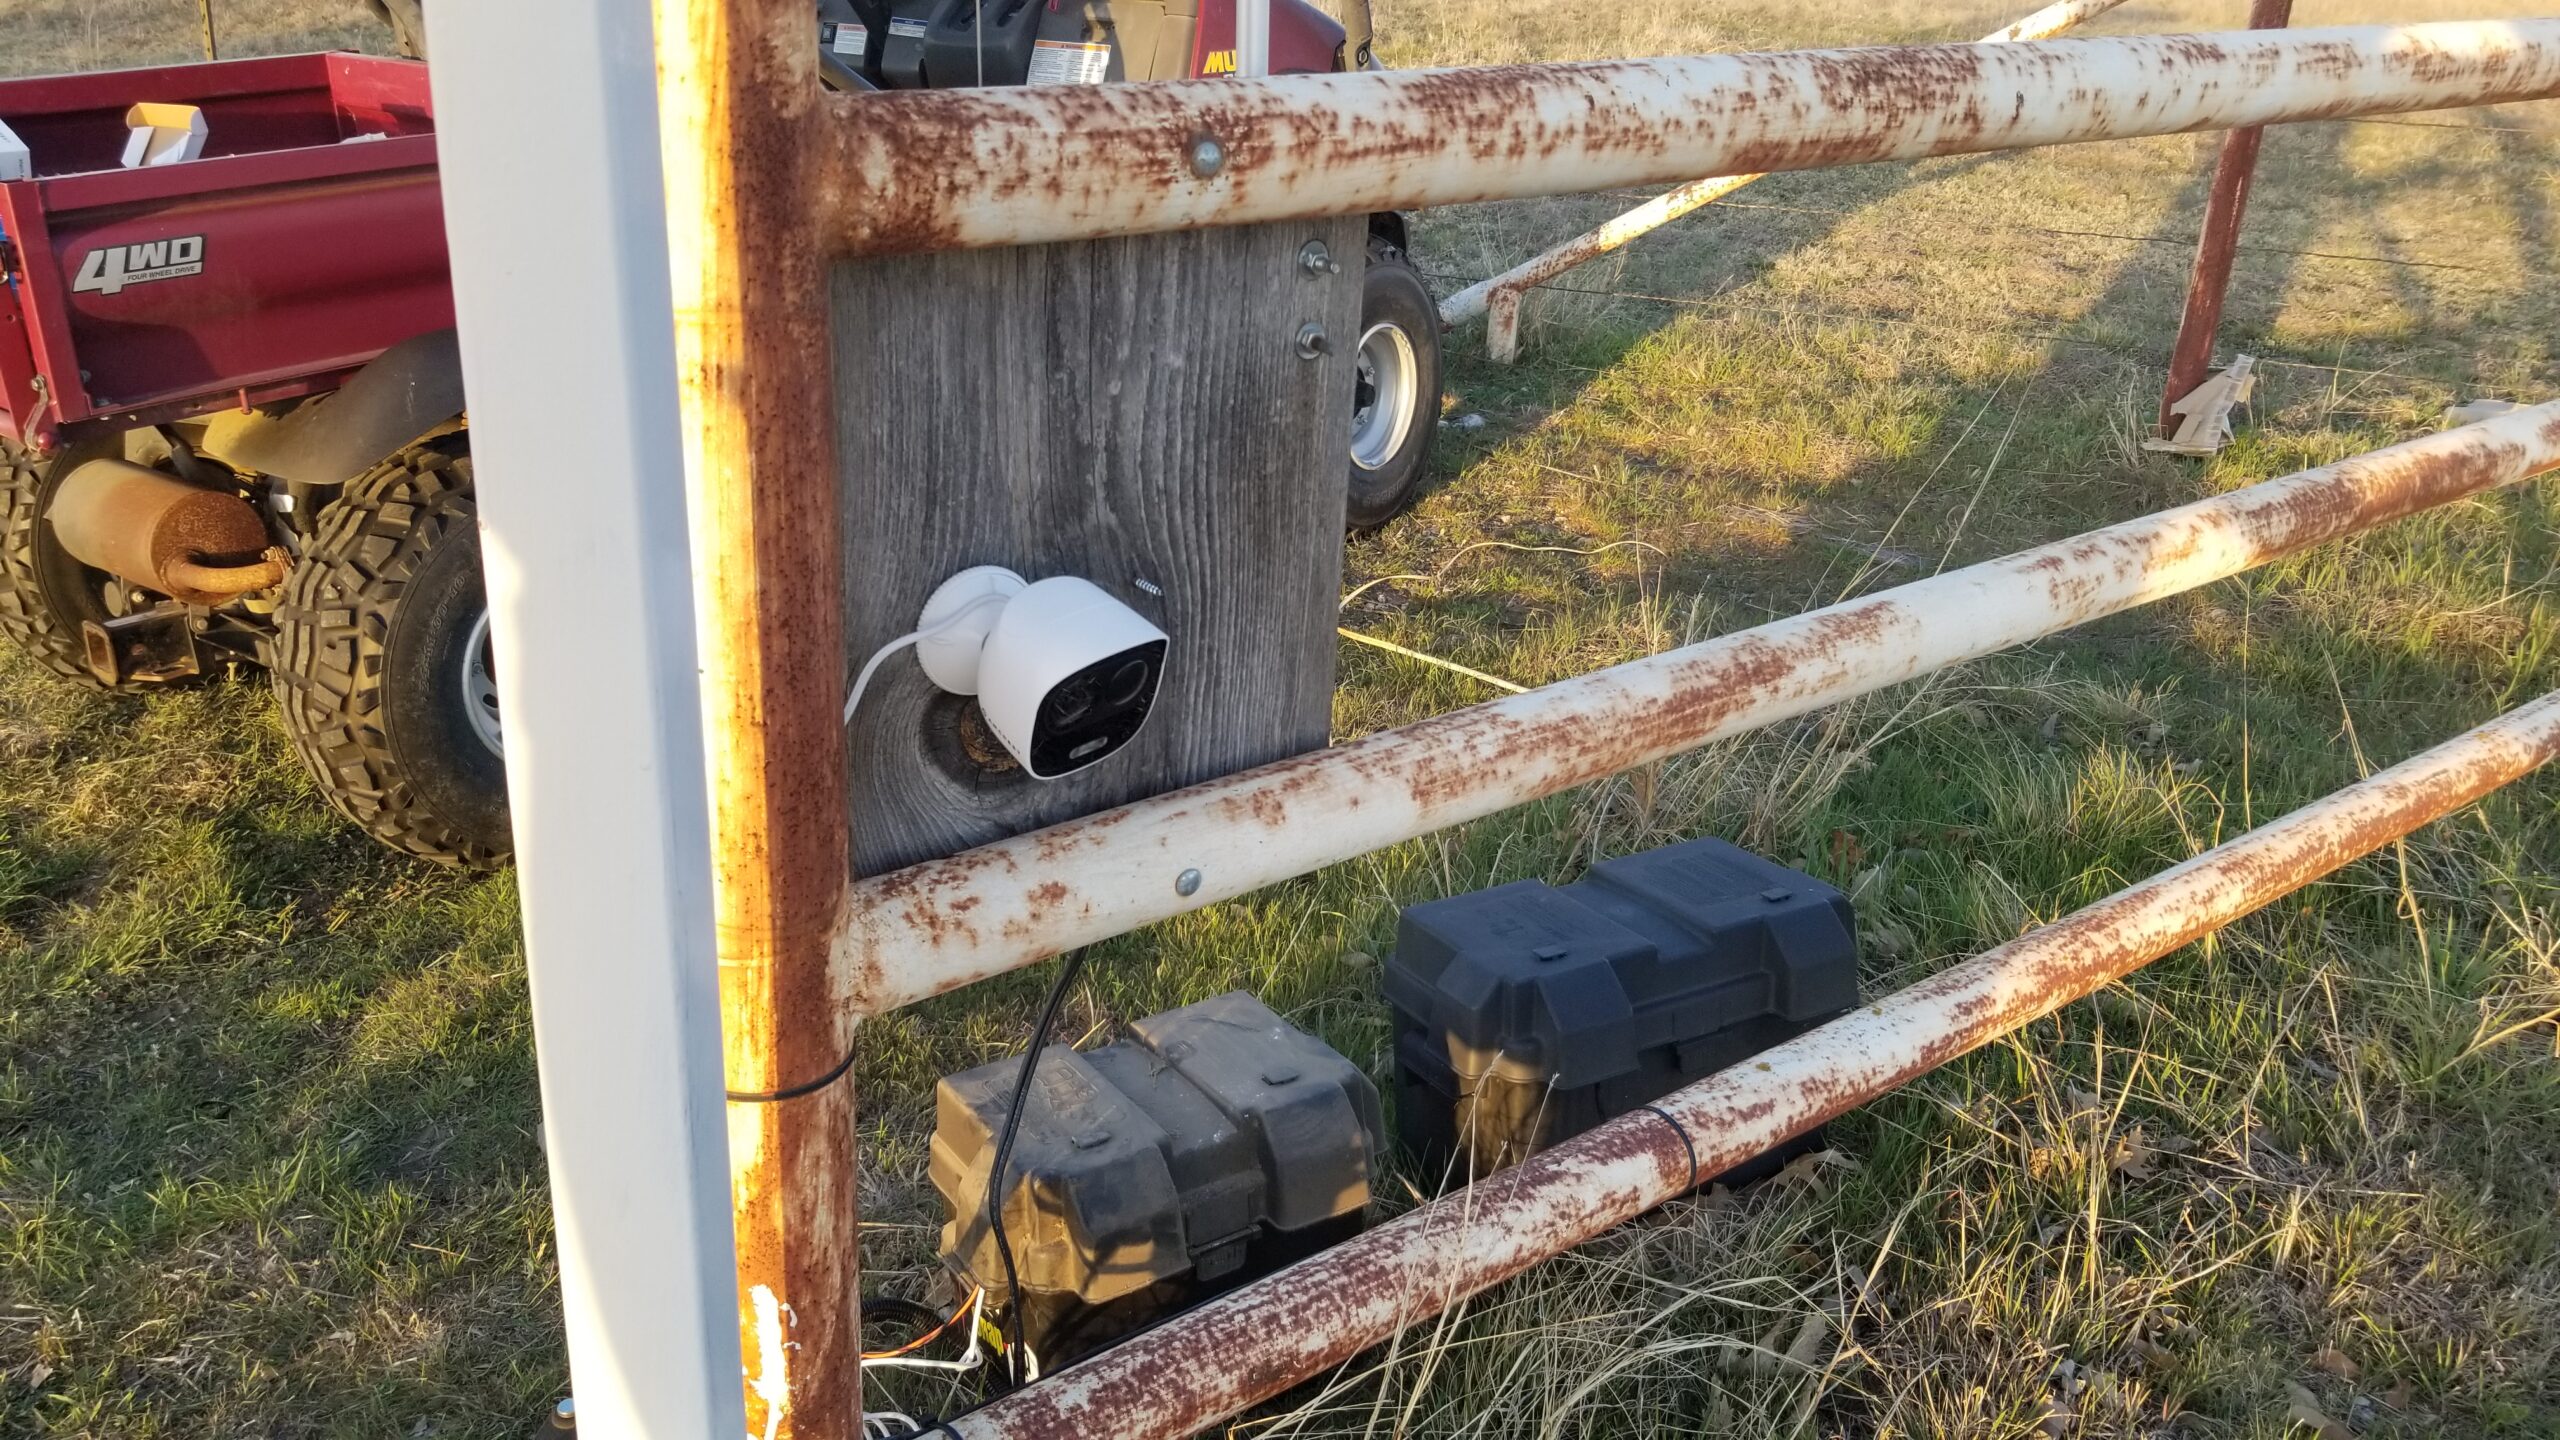
Some of the things I want to control and automate are in our barn/workshop, which is, at minimum, about 80 feet from the house. Realistically, the path from the Zigbee controller to the light switch in the workshop is more like 125 feet.

Zigbee allows exactly one controller in the network. Everything else is an endpoint or a router/endpoint. This means that to reach to my workshop, which incidentally has awesome ethernet connectivity, I must find a way to add Zigbee devices to bridge an RF route out there, completely ignoring that existing robust and reliable communication path. Remember how I mentioned that with open source, someone has usually already solved your problem? Apparently not this problem.

On the other hand, Zigbee, being a mesh network protocol, does work pretty well if you throw enough devices at it and place them cleverly.

I took two strategies to extend a reliable Zigbee network to the workshop. First, I equiped the controller with a directional antenna, pointed towards the workshop. This puts as much RF energy as is practical in that direction. So far as I can tell, the existing Zigbee devices in the house suffered no change in signal strength. Apparently the side lobes on this antenna are good enough to cover the rest of the house. This antenna alone was enough to let one test device connect out in the workshop, at the full 125 foot distance, although the signal was down in the double digits, on the scale of 0-255.

The second leg of the strategy was to pile on the Zigbee router devices and try to saturate as much of the area between the house and workshop as possible with active routing devices.

So far, every AC powered Zigbee device I have seen is also a router. Two of the WiFi cloud controlled plugs I replaced are in the back yard. Actually, it was a single WiFi device with two individually controlled plugs that I replaced with two Zigbee devices, but who’s counting? While not directly between the controller and the workshop, they are outside the brick walls and at least slightly closer to the workshop, so they added to the mesh and signal path available to a device in the workshop.

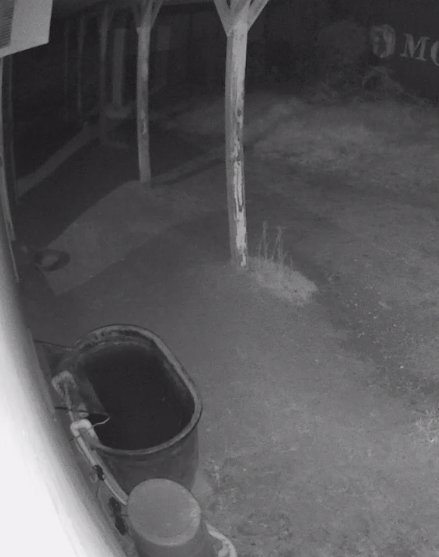
Another item for control and automation is the wintertime heat lamp deployed in our wellhouse, which is between the house and workshop. When we built out the craft shack, I included an outdoor outlet specifically to help accomplish this task. I added another outside Zigbee plug here, which further stretched the mesh towards the workshop.

As of this writing, I have four Seedan smart plugs (which identify in Home Assistant as eWeLink smart plugs, neither of which can I find much authoritative info about online) which connect and operate flawlessly and are about $8 apiece as of this writing. Most of them don’t even have anything plugged into them; I am using them primarily as Zigbee range extenders and routers.

I added one inside the RV, which is parked between the house and workshop. This means that, physically, between the controller in the house and any one device in the workshop there are as few as zero and as many as four available devices to route that entire distance.

I added one in the living room, behind where our DirecTV receiver is. That is physically between the controller and the two backyard units and hopefully helps fill in any gaps there.

The other two are in the workshop, one by the door (it was the first test device deployed out there) and other on one of the workbench plugs, more as a second router for the the workshop as anything else. The long term plan will be to deploy some Zigbee light switches out there. There is a decent need for two sets of 2 way switches. I may also plug my little air compressor into one of the plug switches and use some kind of motion detector for presence to limit the compressor to running only when someone is actually out there.

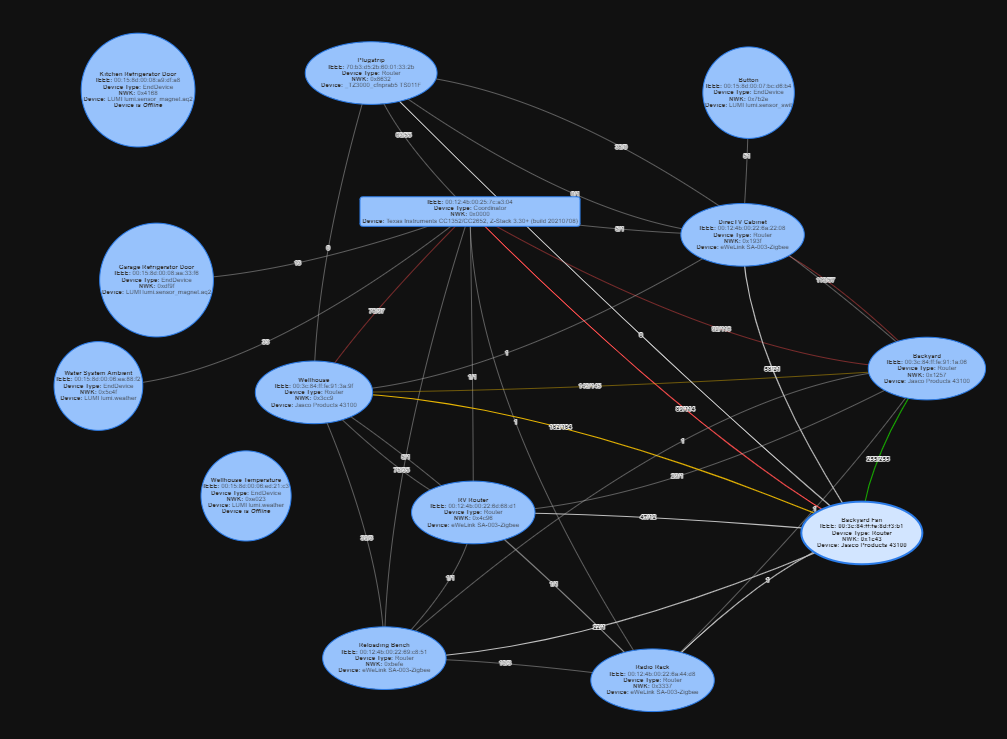
I digress somewhat. The Zigbee network as it stands today looks like this:

The mapping is automatically generated, though I did drag a few things around to make them fit the image a little better and to associate things somewhat physically.

There is, to me, an irritating feature of the map called Physics, which makes things move around on their own. It seems to seek to make the space between objects equal and consistent. It also seems to take off and do that just when I was reading something in the fine print on an object 🙂 Happily, there is a checkbox to turn it off.

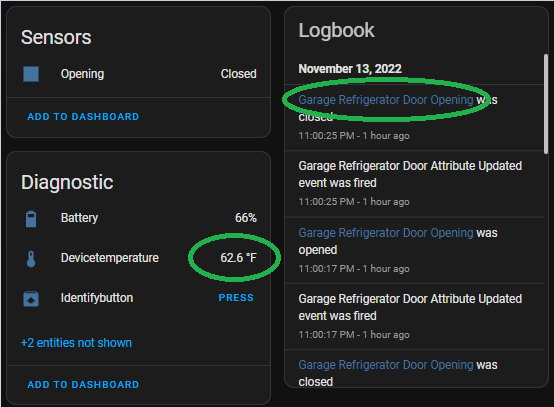
The rectangle is the controller. Ovals are router devices, circles are battery devices. At the upper left is the Kitchen Refrigerator door, which for some reason shows offline in this map just now, but it is definitely working. Maybe an auto mapping anomaly. Shrug. More importantly, you can see the aforementioned complexity of the meshing that Zigbee builds between routers.

The color coding seems to be related to signal strength, red low, yellow lowish, & green great. Most links, however, show gray and numbers lower than red, which is mildly confusing, but generally those devices are working.

I was hoping that the battery units would form more than one path to the controller, but maybe I don’t understand the way they work just yet.

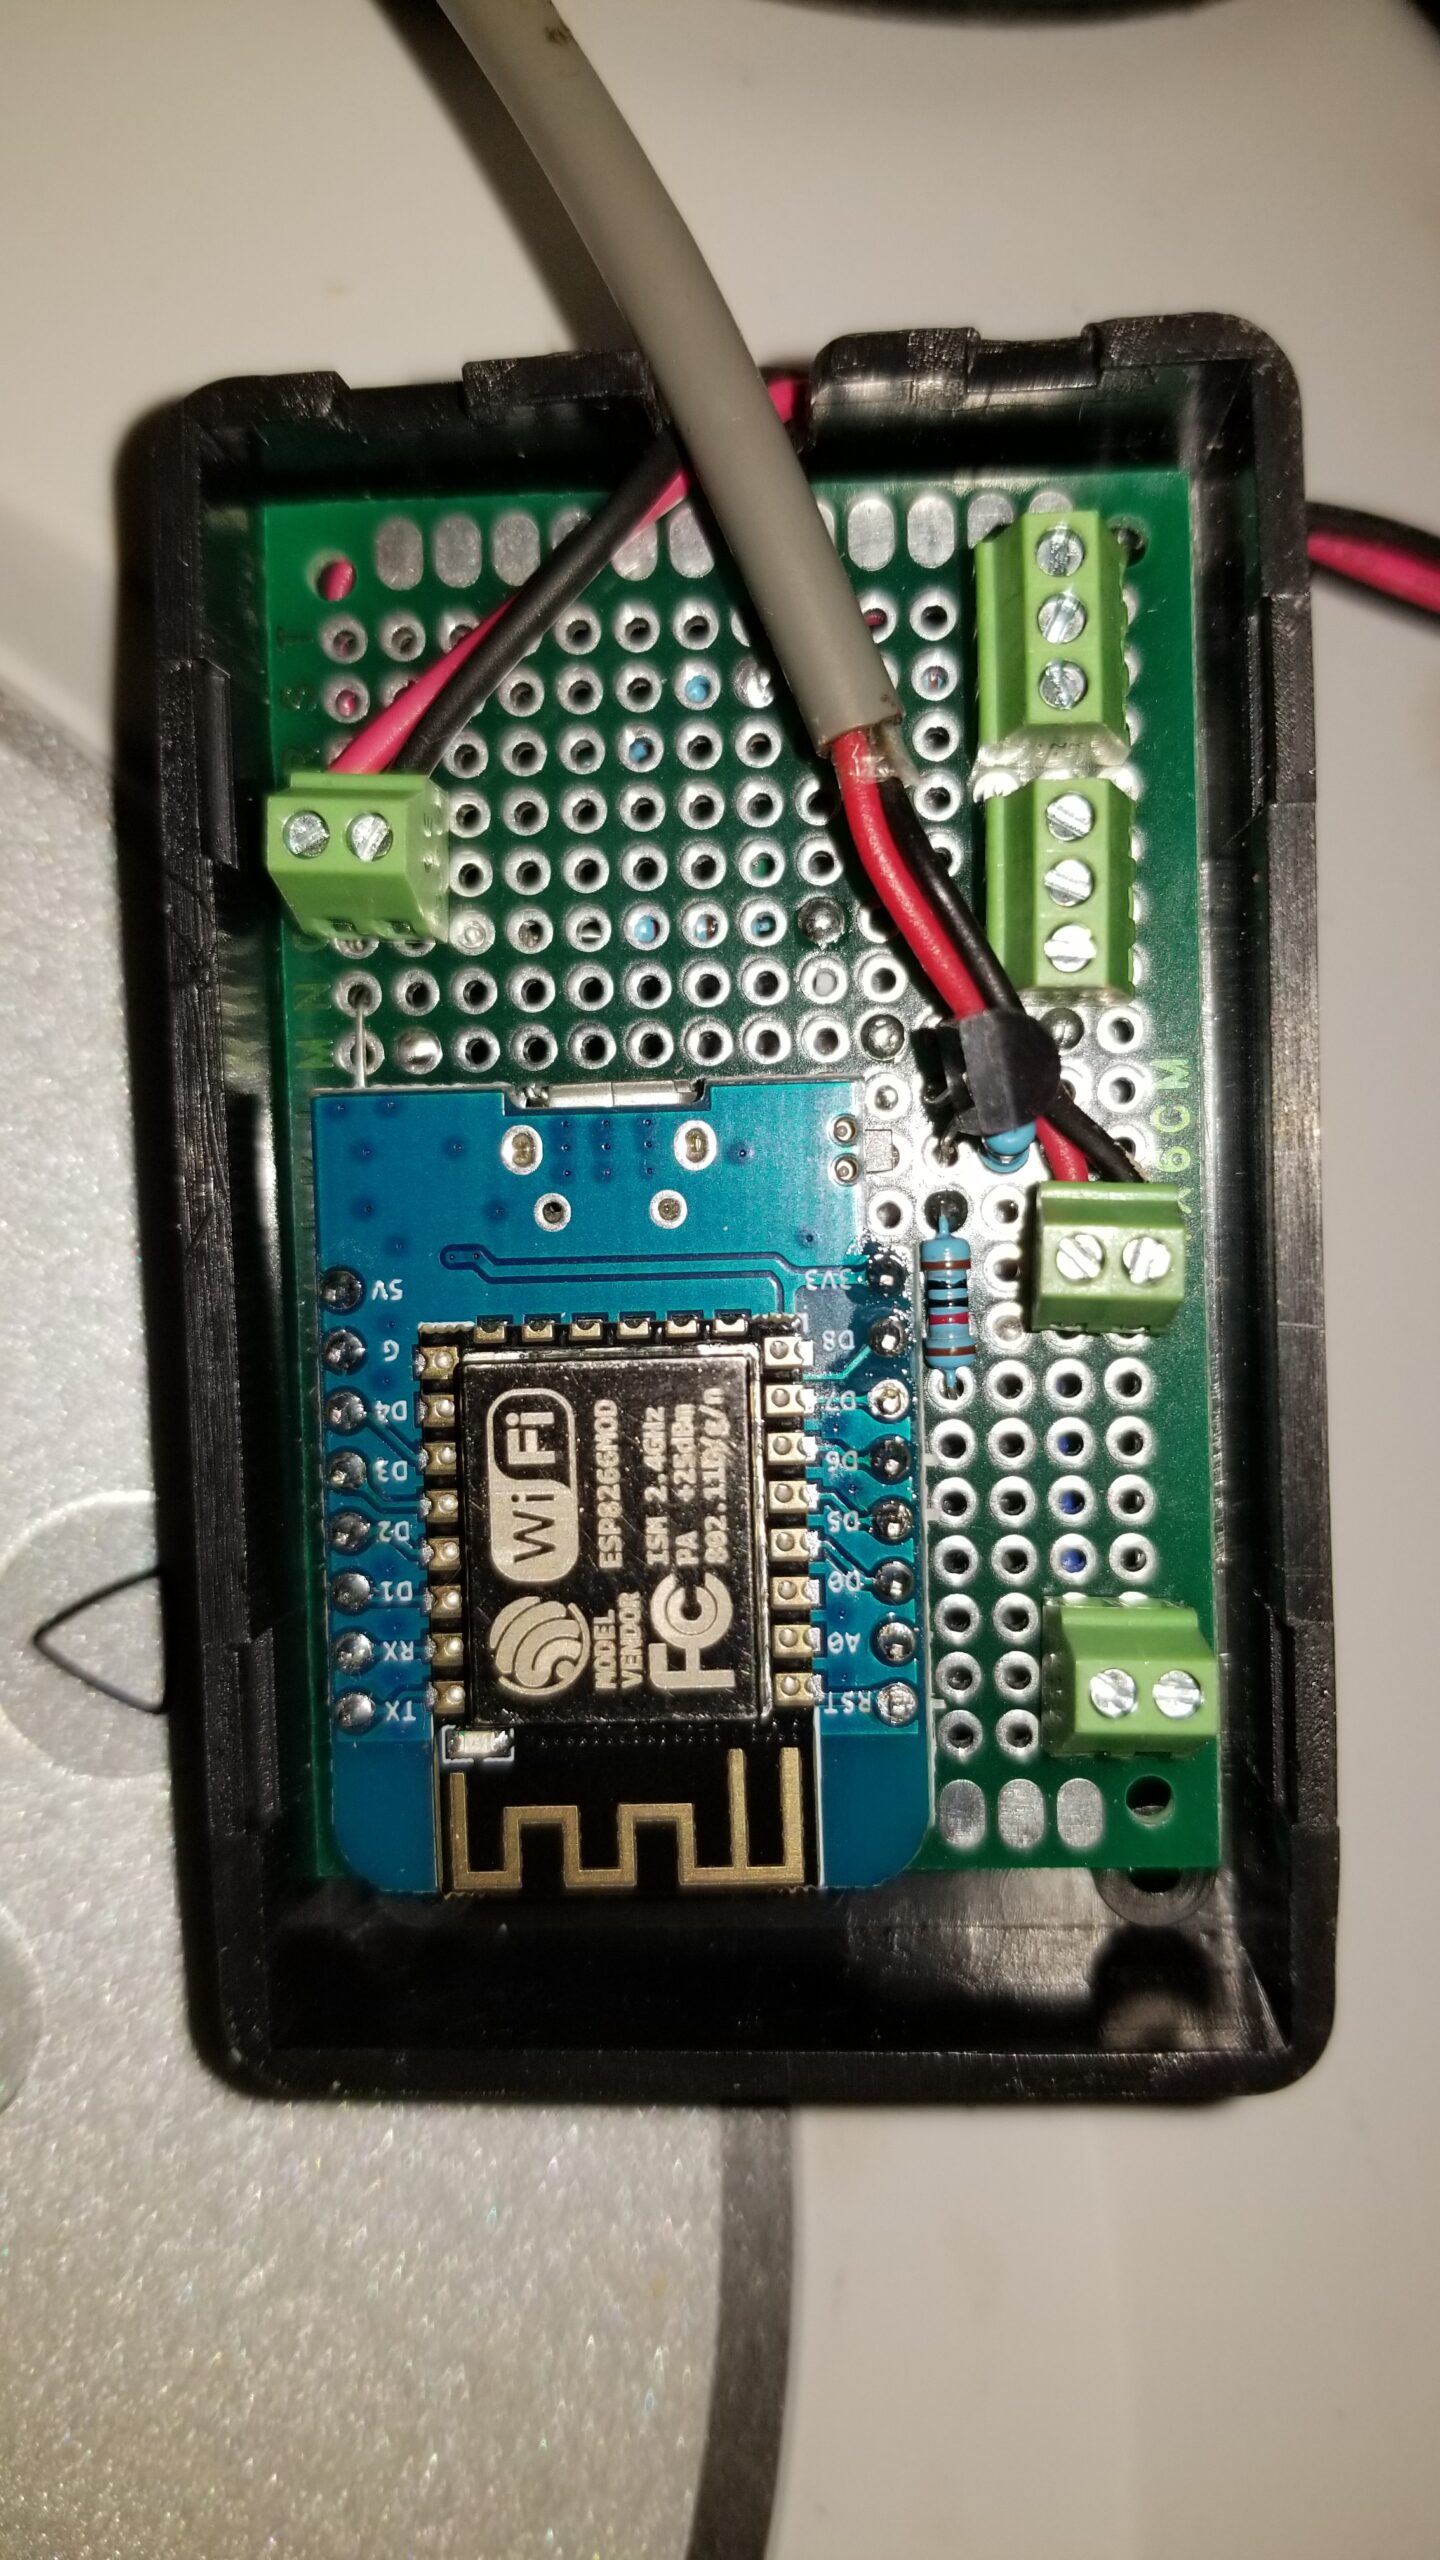
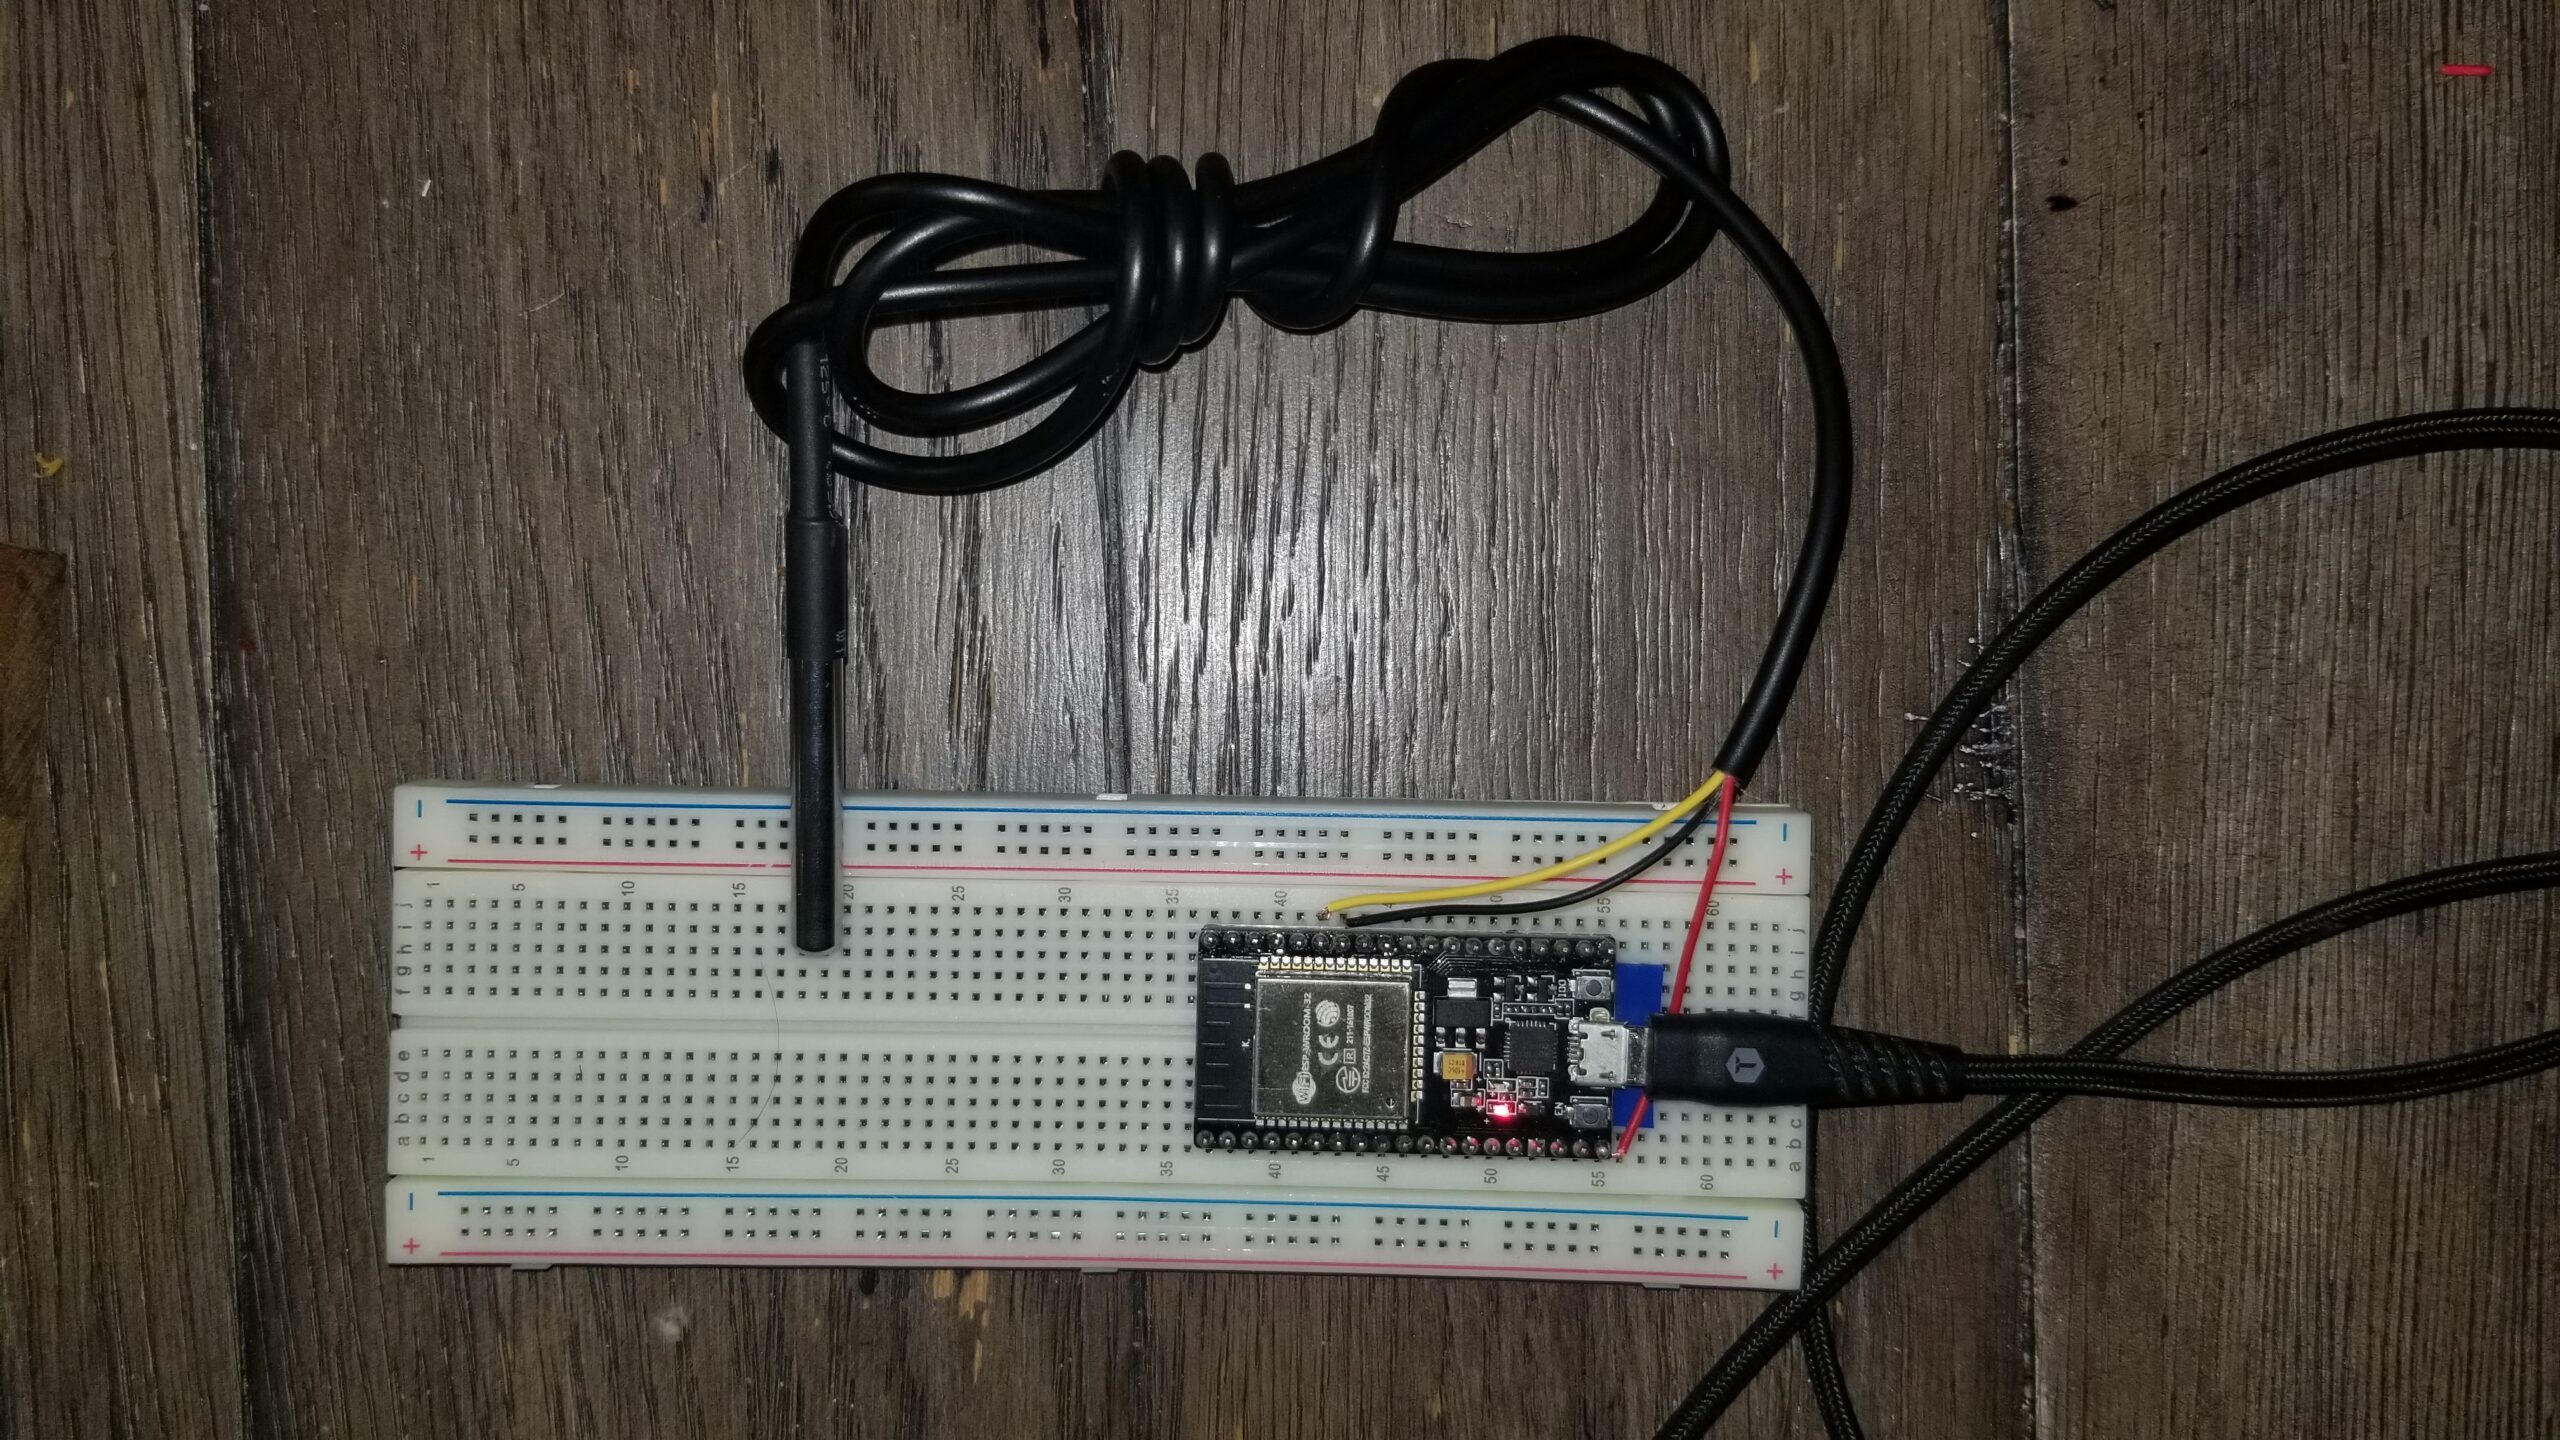
You may also note that I have a temperature sensor in the wellhouse. The wellhouse is a tiny metal building and even though the wellhouse plug router is only about 10 feet away, this temperature sensor does not work reliably at all. That may not be critical, but I do intend to automate based on the temperature *inside* the wellhouse, not just the the temperature outside. I will figure out something 🙂

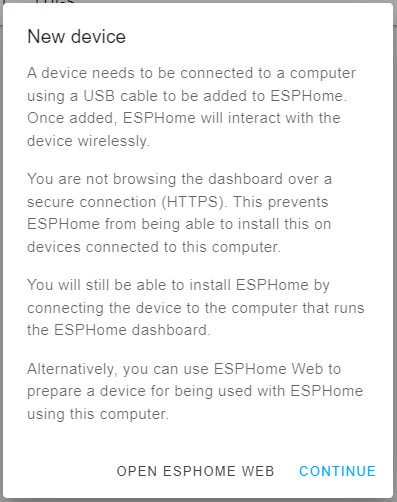
Up next, the very exciting world of ESPHome and I promise, the story about the Z-Wave debacle that I brought on myself.

Argus Panoptes

Ok, Argus Panoptes may be a little over the top since I currently only have five cameras instead of 100.

In the time we have lived out here in our largely rural property, I have had a few network cameras. My first foray into IP cameras was with a pair of DLink DCS-932 cameras, which if you follow that link, you will learn as I did that I can now only find it on D-Link’s non-US websites.

This camera served me fairly well. Its a wifi camera that can utilize, but does not require, a “cloud” presence to work. It outputs in fairly decent for it’s time 640×480 VGA, had auto night vision and built in IR illumination. It worked by a built in web server and could operate with either an ActiveX or Java applet.

I had one in the barn overlooking the stalls and one by the front door.

I still have them and so far as I know, they still work. I might add them to the mix someday.

More recently, I had an issue with a FedEx delivery. I was expecting a shipment that required a signature. I left the gate open and put a sign on the door that I work from home and to please ring the bell. Long story short, they “made” three delivery “attempts” and were about to return my goods, having not once rang my doorbell. My desk is within site of the front door and the dogs would not have slept through a doorbell.

I had to call and get a bit nasty and even then, the driver was literally walking away from my door 10 seconds after ringing the bell.

We hates them. They used to be the premier delivery service, but now I generally prefer even USPS.

That whole experience encouraged me to get a doorbell camera.

As mentioned in other blog posts, I am not exactly the best guy to try to sell on The Cloud. I appreciate the concept and my company is quite dependent on cloud services, not the least of which is RingCentral telephones, which is my particular gig within the company.

What I like about the cloud is great; it lets you export high powered data processing and storage to what the cloud really is, just someone else’s servers.

What I hate about many cloud dependent devices is that without a fast and reliable internet connection, it’s completely worthless crap that gets between you and a physical thing that you bought and are holding in your hand.

Thus was the state of affairs at our house. Our DSL was mostly worthless. That is to say, it was better than dialup. My first foray into home automation was with a Nexia z-Wave controller. I discovered it’s absolute reliance on an internet connection only once I had it installed. It worked, but the delay was unworkable. The worst case scenario was my wife hearing something while I was working out of town and hitting the button to turn on the outside lights, which, thanks to crappy DSL, would promptly turn on 20-30 seconds later, if at all. That was not gonna work.

So, I discovered Vera, which has cloud features, which are good, but it does not depend on an internet connection to work. That whole thing is documented elsewhere.

Those last few paragraphs are just to explain that I will not install something as critical as a security camera that depends on a internet connection to even work. I’m looking at you, Ring.

My shopping lead me in pretty short order to the Amcrest AD110, available from Amazon. Of course.

The installation of the doorbell camera was neat. I ordered a wedge thingy with it that pointed it more directly into the fourier that is our front entry.

The first issue I faced is that the AD110 is powered from the doorbell circuit and it requires at least 16V. It took some failures and some Googling to resolve it. Our existing doorbell transformer was only 10V, so a quick trip to the hardware store for a replacement fixed that issue.

Eventually, things settled in just fine and the next really important delivery, via FedEx of course, went better. I can’t actually claim that the camera had anything to do with it. At least the $1400 guitar my wife won from Sweetwater didn’t go back three times before they let us have it. Plus, I have Toni on camera walking out the front door right past that huge box without seeing it….

Flushed with this success, I ordered a couple more Amcrest cameras, a surface mount and a bullet mount. Both are PoE powered and have SD card slots for local recording. The surface mount ended up looking at the driveway and the bullet is in the barn looking at horse stalls.

I had some 32GB SD cards laying around and, not surprisingly, it doesn’t take long to fill this card up, especially if you don’t want to trust all recording to be triggered by motion alarms. The camera has parameters for when to start recording over older material. 32GB worked out to about 3 days. Since 256GB is 8 times the storage of 32GB, you’d think you would get 24-ish days, but instead, it only showed about two weeks.

I noticed that the camera had an option to store to Network Attached Storage and I had been thinking of building or getting one anyway, so that was all the excuse I needed.

For all the advantages of building a NAS from a Raspberry Pi or repurposing a PC or laptop, et cetera, I have reached an age and station wherein I just don’t wanna mess with stuff like that. I expired my cutting edge tech card a couple of decades ago. I like cool tech, but I just want it to work. Consequently, I shopped and decided on what is probably quite literally the lowest spec NAS that Synology currently sells, a DS120j. It is a 1 bay unit with an ARM processor. The ARM processor is the brains in a cubic buttload of smartphones, though it is not the only one. They are what most techies would call “markably powerful, within their limitations.” Good, cheap, but not the best. In any case, my DS120j, as ordered, came with a 2TB drive.

I’ll have to give it to them, though, it was a flawlessly easy setup. The NAS and the drive came in separate packaging, so the hardest thing was installing the drive into the cabinet. It took, maybe, 5 minutes. They are designed to go together, after all.

Before I even had much chance to set up a shared folder for the cameras, I noticed that one of Synology’s many available apps for the NAS is called Surveillance Station and it is basically a Network Video Recorder that is just included with a Synology NAS. It has WAY more features than the cameras alone and it bundles all your various cameras into a single interface. One throat to choke, so to speak.

One of the coolest things the NAS can do is give me access to data and more specifically, viewing the cameras, from outside of the house. This can be done with either a cloud redirect service Synology maintains or with port forwarding done in my own router. The DSCam app on my phone lets me check in remotely at pretty much any time. Plus, I just added every MP3, OGG and Apple music file I could find to the audio hosting feature it can also do.

Between the cameras and all the other stuff I have running on my NAS, such as backing up home directories on our various PCs, I was not necessarily pushing the 2TB storage, but in looking to the future, I elected to upgrade the space to 6TB anyway.

Anyway, this is night and day views of my five current cameras, four different models of cameras by Amcrest.

That magic number five turns out to be kind of an issue.

I quickly discovered that Synology Surveillance Station requires a license for each camera attached to it. The DS120j (and all models, I think) comes with two included licenses. Out of the box, you can only attach two cameras. I’m not a big fan of the license model; if you own a thing, you shouldn’t need a note from your Mom saying it’s ok to use it. I understand it, however, and I can choose to not put cameras on Surveillance Station or I can choose to buy licenses. I elected to purchase a four-pack of licenses because I could easily foresee six cameras in my system.

My next discovery was that the DS120j is limited to five cameras. It turns out that Synology, wisely, limits the number of cameras a NAS can monitor based on the capabilities of the host device hardware. The number is buried in the specs somewhere, but each model Synology NAS has a maximum number of cameras it can handle and mine can handle five. Consequently, I bought six licenses, one of which is not doing me any good.

Upgrade options are plentiful, though. Even the arguably least effective but cheapest upgrade is to the DS118, another single bay NAS, but it has significantly more processing power and it is rated for 12 IP cameras, $180 on Amazon as I write this. A more sensible upgrade would be for a two-bay system, where I could put the old 2TB together with the 6TB or upgrade for even more storage. The DS218 will do 25 cameras and the DS220 will do 20, for $250 or $300 respectively. More cameras and $50 less makes more sense to me.

In practical terms, I have captured a variety events, some planned, some not.

The very first thing I caught with the doorbell camera, which was the first camera as well, was escaped horses. I was expecting another delivery, so when the motion alarm went off, I hurried to the door and nobody was there. I went out side to see if I could catch them and what I caught instead was our two horses in the driveway. 🙂

We live in the country, so we have wildlife. A family of raccoons frequents our barn. I’ve caught them on occasion just going out there, so I did expect to see some in the barn camera and was not disappointed. I did find it disappointing that they consider my camera to be climbing hold, even after I tried to cover it with something very uncomfortable to step on. Note the old D-Link camera post. That has been removed since this pic was taken. It was yet another climbing aid.

I had purchased a camera to put by the gate, but had not yet deployed it, so I set it up temporarily in the barn walkway, pointed at a live trap.

I eventually decided I would want a permanent camera for outside the barn doors and finally deployed the gate camera at the gate.

The challenge was power. There is a gate opener out there with a small solar panel to charge it. Experience has shown that it is adequate for keeping the gate battery charged and I considered just connecting the camera to that battery. The opener pulls such a tiny bit of current unless the operators are actually moving the gate, but the last thing I want to do is have a camera pulling current 24/7 and run down the battery just in time to lock my wife in or out.

The gate camera has a USB power cord and I have ordered a 12V to USB adapter dongle to connect directly to a battery. Due to the nature of the USB power, I could feel reasonably confident it should draw 10W or less. The new solar panel is larger, a 25W panel, probably more than is needed. I also found a charge controller that has USB outputs, so I don’t even need the power dongle anymore. I already had a couple of battery boxes and elected to rob a lawn tractor battery from a mower and replace it later.

I mounted the camera, connected it to my Wi-Fi network and reconfigured it as needed.

The gate controller is other side of the board. Yeah, the fence needs painting. I painted the gate back in October, though 🙂

The camera catches any delivery vehicle, trash pickup, our own comings and goings, etc. I have the motion detection set to catch motion directly in front of the mailbox and, due to the close angle, I can get an alarm when the gate itself opens or closes.

I was not surprised to find that the Wi-Fi signal from the gate to the house is ok, but not really solid. My intent was to deploy an old Belkin Wi-Fi extender from years past. I have seen it recently, but I could not find it. I presume it is in a box that I didn’t open. Instead of continuing the search, I ordered a BrosTrend AC1200 to extend the house WiFi into the garage, which is closer to the gate. This increased signal strength somewhat. I think better positioning of the extender to expose it more to the garage window would bring it up even more.

The last camera I have on the NAS for now is another of the same model as the gate camera, mounted outside the barn with a view of the water trough and stall doors.

Sharp eyes may notice a dove nesting in the rafter, behind the minutes digits (43) of clock display.

One reason I wanted a camera out there is just to monitor the water trough, largely because one of the horses has done mischief with the equipment. That is why there is a steel guard covering the float valve. With the camera in place, it didn’t take long to catch some hijinks.

As I suspected, it’s Bonk. While you can’t see it in this still view, there is a green plastic tub that normally covers the water circulating pump. He had knocked it off earlier, then picked it up and moved it closer to the trough. The splashing he’s doing above was enough to put a couple of inches of water in the bottom of that tub. I found it entertaining.

One funny side effect of the cameras switching to night mode and turning on their IR illumination is that one camera can see evidence of another. The driveway camera can see the gate camera so well that I thought I had left the floodlight feature activated, visible here as a bright slash at the top center.

In this one, the light spilling from the stall doors is actually the illuminator on the stall camera.

Give me a lei! Its a Lua!

Sadly, no luau…. no roasted pig… no pineapples. Lua is scripting language supported by Vera. Generally speaking, it’s how you do stuff they didn’t already build in.

I mentioned that I have my pool pump turning on or off by a schedule and I have managed to get it to turn on when the temperature sensor goes below 36 degrees. That temperature may be set lower at some point, but for now, I want a margin of safety.

What is not ideal is that the schedule can turn off the pump even if the temperature is below freezing. The next time the temperature is polled, that trigger will turn it back on but that is a bit inelegant and potentially dangers. What if something suddenly stops the temperature sensor from polling for long enough for the exposed filter hoses to begin to freeze?

There are several examples of Conditional Scene Execution and I have lifted the Lua code below and attached it to the scene that turns the pump off.

local dID   = e3    — Device ID of temperature sensor
local tHigh = 37    — Highest temperature of range
local allow = true  — true runs scene when in range
local tCurrent = tonumber((luup.variable_get(“urn:schemas-micasaverde-com:device:TemperatureSensor:1”, “CurrentTemperature”,dID)))
return ((tCurrent >= tHigh) == allow)

I lifted this snippet pretty much directly from the forum then edited to be appropriate in my environment. I don’t really have range of temperatures where I want to allow the pump to turn off. It’s pretty much the one temperature. Below that, don’t turn the pump off.

I looked at the “Settings” tab of the temperature sensor to get the device ID and the “Advanced” tab to get the urn: details. I chose 37 degrees as the set point because the trigger to turn the pump on is 35 degrees. Hopefully, this ensure some hysteresis to prevent the pump from cycling back on if the temperature is hovering at 36.

Once I’m sure this is working, I will add a trigger to turn the pump off above some fairly warm temperature, say 50, to prevent it from running all day just because it happened to be chilly at 6AM when the schedule went by.

Zowie… 2 years later…

I did indeed get the VeraLite and over the intervening two years, a few devices. Incidentally, MiCasaVerde is now “Vera

Since I didn’t update this blog along the way, I kinda have a current snapshot of two years of intermittent development.

Vera’s two controllers, Vera3 and VeraLite are the same OS running in different hardware. Vera3 has more features, particularly WiFi and network routing features, whereas VeraLite does not. There may be some more connectors or lights on it; not sure. I have an established WiFi network already, so I didn’t see a reason to complicate things. VeraLite costs less as well.

Since they both run the same OS (called MiOS), they present the same web interface. The interface is reachable on the local network or through a (free) internet gateway run by Vera. VeraLite polls Vera’s website frequently using port 80, which allows you to remotely control your Vera device, usually without any special firewall configuration. This does introduce what is, to me anyway, a small but acceptable delay, especially since most of my remote operations are done with a smartphone app anyway.

The primary device that has been used consistently for almost the entire time is the 2Gig CT30 thermostat, which has since been discontinued and replaced with the CT100, which has since been discontinued and replaced with the GC-TBZ48. The CT30 and a couple of different smartphone apps has allowed us to lazily adjust the thermostat without leaving the couch or even the bed. I have played with it remotely, but mostly just because I could. I haven’t really needed it. Our schedules mean that there is not much time during the day that the house is unoccupied.

I have a couple of lamp modules and a couple of heavy duty appliance modules. I have experimented with using them in various functions around the house. The lamp modules haven’t proven to very practical. This is mostly because there needs to be a user friendly (meaning wife friendly) way to turn them on and off without going to another room or picking up the phone, etc. If she wants the lamp on the dresser on, she usually needs it *now*. Where the lamp module has shone is with the Christmas tree. I set up a schedule to turn on in the morning, off in the early afternoon, back on in the evening, and off at bedtime. In a few days, the tree will come down and i will find something else to light up.

One kinda fun application of a lamp module came when I couple of lights in the bedroom were still connected to it. My wife did not have a phone in the bedroom with her and I needed to call her, for a wakeup call if I remember correctly. When I couldn’t get her, it occurred to me to toggle that bedroom light on and off. Hopefully, she would call to find out why its going crazy.  When she called (it worked!) she was laughing and seemed to appreciate my cleverness.

The Jasco outdoor control module is a heavy duty rain proof module designed for non-dimming  outdoor lighting, but really it just switches power to anything that needs it. I originally purchased two of these to control heaters in our water well pump house and horse trough. That attempt taught me about an important limitation of Z-Wave: range. With a brick house and a metal pumphouse, even 20 feet is too far. I could not make it go. Since the power for both comes from the barn and I have network in the barn, I can at some point add a second bridged VeraLite in the barn and control the heaters (and lots else) from there.

For now, one of the outdoor modules is controlling the pump for our little above ground swimming pool. I currently just have it on a time schedule to run overnight since our Texas winter freezes overnight and thaws every day. I’d like to run the filter basically an hour on and two hours off, all day long, but also continuously any time temperatures outside approach freezing. I have a Homeseer HSM100 3 in 1 sensor (motion, light level and temperature) but I am having trouble getting it to work from outside. Maybe the metal garage door is an issue. I’ll try putting the sensor somewhere else, closer to the appliance module for Z-wave network reliability.

The light sensor in the 3 in 1 will hopefully be pushed into service to operate some outdoor lighting at some point. The motion detector, outside, will probably be useless, but I may try having it run the outdoor lighting, if its dark enough.

The final cool thing I have been playing with is video cameras. MiOS is smart enough to be able to grab images from many, maybe most, common IP cameras and can present them through the remote portal. I can monitor the doggies during the day and the horses in the barn at night, from home or away.

Another thing I want to be able to do is monitor our water system. Our well has a lot of sand, so it took a year or so to replumb enough filtering devices in line to keep it from clogging up a filter in the middle of a shower. Water comes from the well (420 feet or so deep) into the garage where the scary plumbing is.

I got pretty good at PVC piping. Sadly, not until after the incident that painted the walls with that rusty orange wash.

Water comes into the garage and splits between the pressure tank and the inlet to the large filter on the right. This is a self-flushing sediment filter. It is programmed to flush at the next 1AM each time 1000 gallons has flowed through it. This is the most frequent interval possible. Sadly, our well produces enough sand that sometimes, this is not frequent enough.  Next in line is a standard cartridge filter, which used to be the first filter in line. This gets the fine silty stuff that eludes the self-flushing filter. This cartridge has to be changed at random intervals, but monthly is not unusual and I can deal with that. Before adding the self-flushing filter, it rarely lasted more than a few days. Next in the chain (but not in the picture) is dual stage sediment/charcoal filter that was already here. Due to the previous lack of prefiltering, it probably needs to be replaced. Next is a water meter, just visible in the upper left. This is just so we can monitor our own water usage. It has a contact that closes once for each gallon, so I really would like to be able to log and report on the usage. There is a little more piping and valves to allow some or all of the filtering to be bypassed if needed and a pre-filter spigot where we can get essentially firehose flow and pressure. This spigot is before the filters, which means it is also before the meter, so I don’t get to monitor it. Adding another meter there would be easier and probably cheaper than replumbing. Again.

In any case, monitoring pressure differentials can indicate when a filter needs to changed or flushed and electronically monitoring water flow would reveal any leaks or other such issues.


Schlage / Nexia

While searching for some X-10 equipment (the only consumer automation system I was familiar with), I saw “ZWave” several times. I finally looked it over and was definitely intrigued.
For reliable communication, X10 sometimes requires some equipment in the breaker box to bridge between phases and pretty much by design, the control stream doesn’t jump between electric subscribers. In my new case, there are separate meters for the house and workshop/barn and a desire to control devices in both locations. ZWave, with it’s mesh networking protocols and fairly wide variety of devices and brandnames to choose from, seems like a good match.

I first tried the Nexia controller (formerly SchlageLink). The first thing that irritated me was a need to *pay* for an account for the privilege of controlling devices at my own home. I presumed incorrectly that there might be a local webserver on the device, but not only does it require an account to work, it requires a reliable internet connection. I can understand offloading the heavy lifting from the tiny local appliance, and system response was very good when I tested it at work and even when I moved it home. However, later that evening, my internet was slow and it took as much as 30 seconds to turn a light on; at least whenever it didn’t simply time out and never come on. It is not acceptable for my wife to randomly wait as long as 30 seconds to turn on the lights in a security issue moment, so I cancelled the account and have requested a refund on the equipment. At this point, I await an RMA. They have been kind and responsive when calling, but they do not appear to be in any hurry to pay out.
So, I kept looking for ZWave automation controllers and found the Vera line. VeraLite had *just* begun shipping. VeraLite has all the software features of Vera3, with no router and wi-fi. I don’t need those features from Vera, so I placed an order for VeraLite and a few outdoor rated switch modules.