All posts by admin

A Delicate Matter of Power

On the heels of solving one problem comes another.

We had a scary storm nearby a few days ago.

This is just a few miles north of us and it is just a tiny bit of the storm damage. It took power out for our neighborhood, though only for about two hours. That was long enough for the little CyberPower UPS feeding my network stuff to run down. It was also the first time I have had something hooked up back there that was apparently sensitive to losing power, namely my Home Assistant VM hosted on a Synology NAS.

Before I get into the rest of this story, I’ll say that my UPS does have a USB port, but it is not specifically listed on Synology’s compatibility page. Still, I will secure the proper cable and give it a try. Doing an orderly shutdown of the NAS might have avoided this whole thing. Or not; I suppose that depends on what it takes to finally fix it.

After we got power back, the Home Assistant VM would not finish booting up.

Note that it had been waiting for nearly 6 minutes for whatever it was holding up for. Deep digging seemed to indicate that a database file for something may have gotten corrupted, meta.db. About the time I was figuring this out, I also remembered that I have the Synology doing nightly snapshot backups of this VM!

Though just this moment I don’t remember why, I elected to restore the snapshot from Dec 11. I have also since then locked that snapshot so that it won’t be rolled out. I may need it again.

That process at least got Home Assistant booted up and usable, though it took me a while realize that the Zigbee controller was not up. Zwave was up and working, which was a relief after the previous debacle involving it. I needn’t have worried, though. The attempts to restore Zigbee operation would soon kill ZWave, too.

The details of both seem to indicate that the software can’t find the hardware. Almost surprisingly, however, the hardware is there.

The kernel sees them. So, why can’t Home Assistant?

My first concern is Zigbee because I have more devices on Zigbee and they include the lights in the back yard, used frequently for letting the doggies out. The oldest of these doggies has enough trouble finding the door in the daytime.

For experimental purposes, I also tried another snapshot option wherein you can configure a new VM from one of these snapshot backups. Interestingly, it generates a new bogus MAC address, so DHCP gives the new instance a new IP address. That was slightly unhandy, but easy to fix. The oldest December snapshot, from the 4th, behaved exactly the same, which leads me to believe that this is probably not a filesystem issue, so I have put back the December 11 snapshot and have been working with it.

I tried something kind of radical and deleted the Zigbee Home Automation (ZHA) integration. Home Assistant discovers the dongle like a newly installed piece of hardware:

Unfortunately, it returns an unknown error upon attempting to configure it.

If I instead choose to Add Integration and search for Zigbee, I get these options:

The first option is the same as trying to configure the new hardware. The second option complains that Zigbee integration is not yet set up, but gives an option to proceed to set it up:

It proceeded to look very normal, like it was going to work:

Then, it ground to a halt.

There is something new here, though. It looks like it has the same port in there twice, neither working.

If I click on either of those, I get the same ‘failed to set up/check logs’ message as always, so insanity.

To break the chain, I have ordered Sonoff’s *other* Zigbee device, based on the Silicon Labs chipset. It would seem they had cause to add to the Texas Instruments architecture, whether it was to help assure a diverse supply chain or in pursuit (or retreat) of some features. I hope to know soon.

WiFi Elevation

Act I: Somewhere deep in my first catchup post in this blog, I related that I had acquired a couple of nice TPLink wireless routers with the intent to mesh them together so that the house and workshop would be on the same SSID, only to discover that this particular router apparently cannot be a mesh client in that situation. Further, none of the mesh clients in that product line support ethernet backhaul, which is pretty much required for this specific situation.

Act II: Enter home automation and a sudden propagation of WiFi IoT devices. I am not in any real danger of running out of IPs in my main LAN. It would also be trivial to just expand it if I were; it is all RFC1918 address space, with the exception of dealing with the work VPN and the RFC1918 subnets routed there. However, best practices would have the IoT stuff separated from the rest of the network in case they get somehow compromised on the internet and many of the home automation devices need no internet access at all.

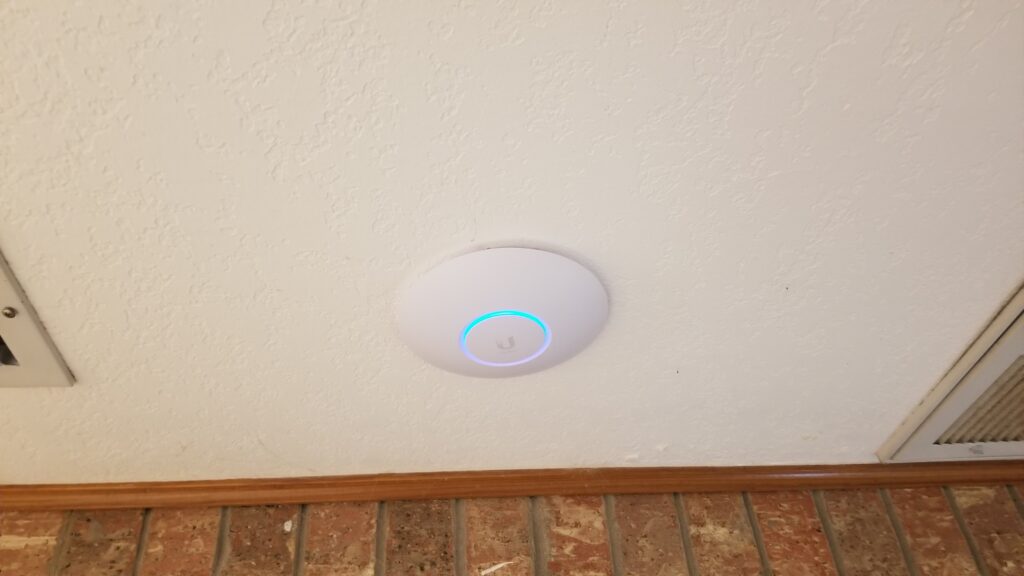
With these two related goals in mind, WiFi roaming and multiple WiFi networks, I shopped around and decided that a couple of Ubiquiti APs would serve this need. Between Ubiquiti being affected by chip shortages like everyone else and a ceiling mount not being my first choice for various reasons, I got two in-wall APs as the best compromise that was also not too expensive.

While they were enroute, I knew that I would need the controller console software running somewhere. Ubiquiti marketing really makes it sound like one of their hardware hosts is the only option, one of the Dream Machine or Cloud Key devices, but they have downloadable software that can run on a variety of OS platforms. You don’t really need the software except for initial setup unless you want to track statistics, so it can be run as needed on, for example, a Windows PC.

Another option is to run it as a Docker container in your NAS.

At one time, not that many years ago, I was an anti-VM snob. I was a hardware purist. I have pretty much gotten over that. There is almost no computer that is busy enough to justify doing only one task, especially one server task. Even modest hardware spends most of it’s time waiting for something to do. My Synology DS220+ is arguably pretty modest hardware and I have it recording six IP cameras, hosting my home automation leviathan and now its also the controller for my small collection of Ubiquiti networking components. Oh yeah, it’s still a NAS, too, backing up two computers. And it’s barely clicking over most of the time.

I digress.

There was really only one issue I had bringing them up on this controller. The APs need DHCP option 43 in order to find this controller and that took a bit of research, both in how to format the info and how to implement that in pfSense. It’s not difficult, but it did take some Googling to find the details.

The ’01:04′ tells the AP that the following info is the controller IP, then the next 4 octets are just the IP of the controller in hexadecimal format, 172.29.0.250 in this case.

The related DHCP issue wasn’t super critical, but I wanted to assign static IPs for the APs. I neglected to set the static mapping before I plugged them in, so between the option 43 stuff and changing IPs, I had to have the controller ‘forget’ them, then factory reset them a couple of times to get things settled in.

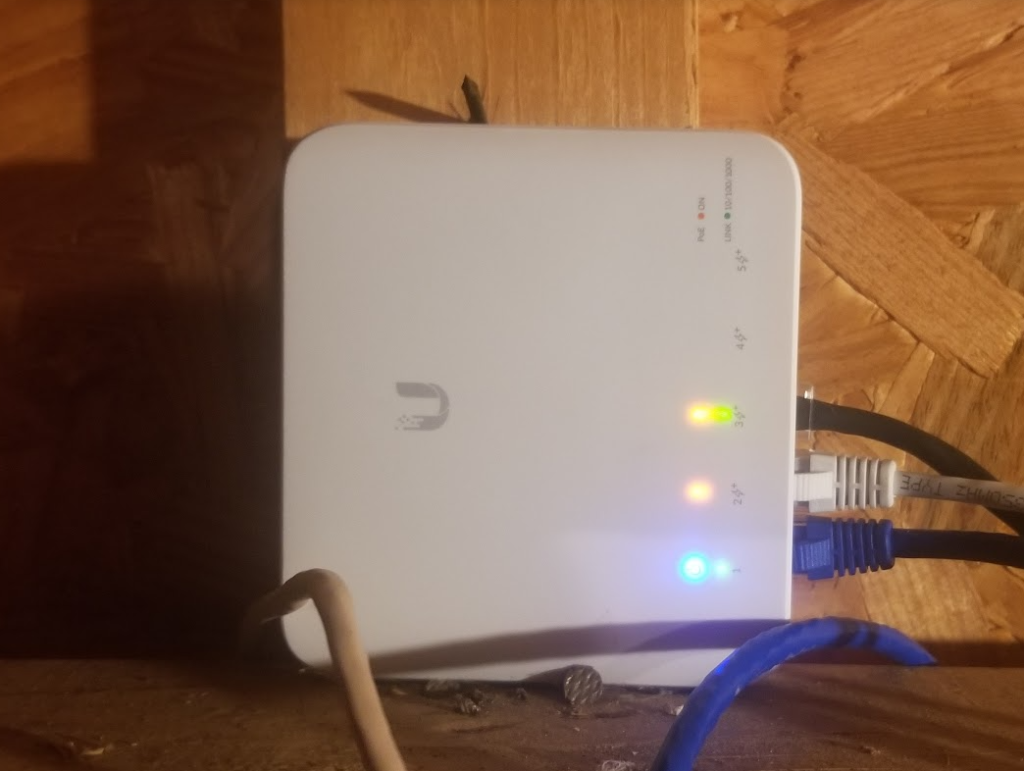
Interestingly, I had not noticed until I pasted this image that the WorkshopAP, currently in the same room with the HouseAP while we wait for a PoE switch to arrive for deployment in the workshop, for some reason connected via WiFi instead of the ethernet by which it is powered. I will look into that, but I don’t expect that to be a long term issue; that AP will be elsewhere soon.

Meanwhile, I have created my VLANs, subnets and WiFi networks for the redesign. At the time I wrote that sentence, I needed only to update the VLAN configuration in the switch for everything to get talkin’. Little did I know…

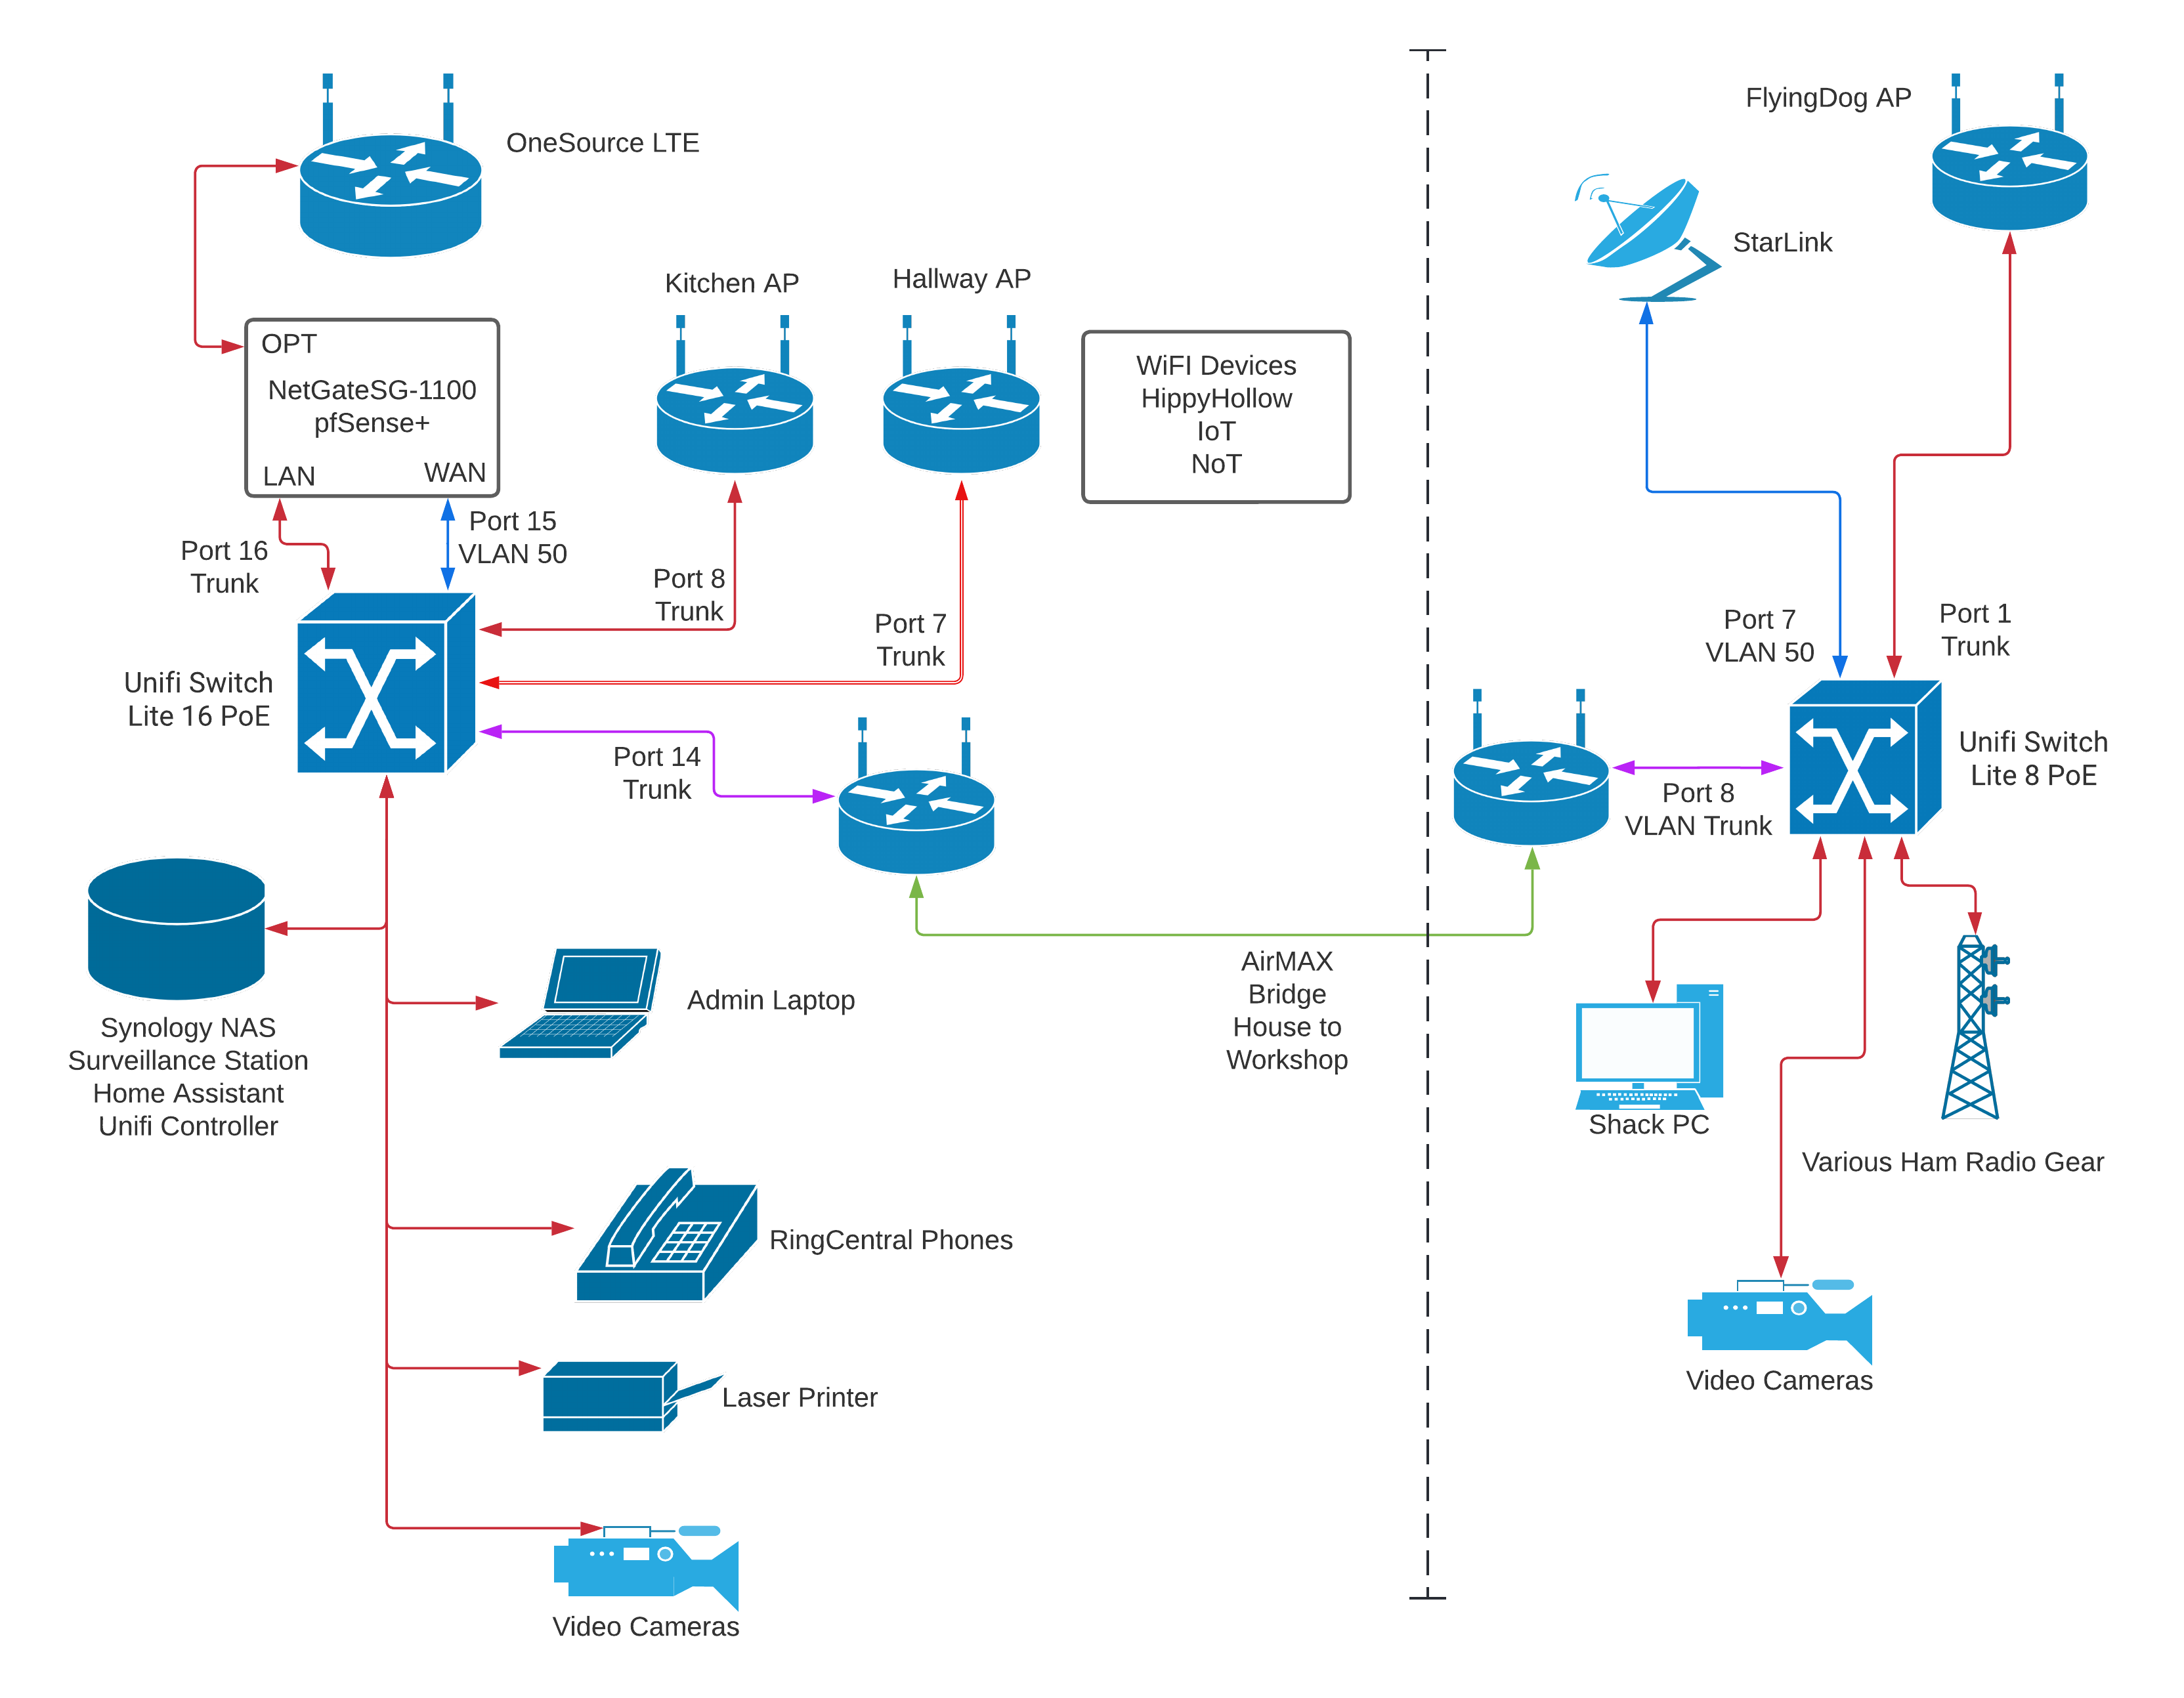
As mentioned in the Starlink saga, VLANs are not a proprietary thing, but as I discovered, not all engineering teams approach them the same way or to the same degree. To recap that experience, the TPLink switches would let me segment ports within a switch, essentially dividing it up into smaller switches, but they did not pass that VLAN tagging information on, so no connected switch was aware of any of those VLANs. I had a somewhat more sophisticated Cisco switch on hand, one that as a bonus also provided PoE for my cameras, so I found it a playmate to put in the workshop and I was able to do the VLAN task I needed in order to backhaul Starlink from the workshop to the house while keeping it isolated from the general LAN.

In this diagram, the blue lines are VLAN50, the Starlink backhaul and the green lines are VLAN1, the main LAN. The switches are able to trunk both VLANs over a connection, so whether it was a piece of wire or a couple of wireless devices, the VLAN tagging was preserved.

With the new APs, the task is similar. I want to be able to run multiple isolated WiFi networks, so it would seem to be the same task, but I could not wrench the Cisco SG200 to do the same thing between ports on the same switch after days of trying. On the other hand, I also learned that one weird trick about VLANs and pfSense on the Netgate 1100 appliance.

The path has not been a smooth one, either. During the last several days, I have lost access to the switch multiple times and to the router once. With the switch, sometimes a power cycle was in order, sometimes just moving to a port I had not accidentally lobotomized. For the router, I was able to connect to it’s serial port and restore a previously saved working configuration.

One important and telling troubleshooting step was to monitor DHCP requests with Wireshark. In that process, I could definitely see the discover messages from the AP hitting the switch port it was connected to, but they were not coming back out the switch port to the router. This largely cemented the issue as being the switch not really trunking VLANs as expected.

The solution, as is often the case, has turned out to not be free. I knew I would need a PoE switch switch for the AP in the workshop and since (I guess?) I am kinda slowly moving to the Ubiquiti ecosystem, I ordered an 8 port switch to put out there. I started doing all this VLAN stuff while it was enroute. Somewhere along the way I wondered, since all the UniFi YouTube videos depict this as a largely click and go process, if the new switch would handle it as expected.

Yes. Yes, it does.

When the switch arrived, I first did all the adoption stuff and got it stable. Leaving it with all ports set to the “All” port profile, which is the default and expected to carry all VLANs, I plugged the USW-Lite-8-PoE switch in line between my Cisco switch and the LAN port on the pfSense router, with one of the APs also on the Ubiquiti switch. The VLAN 1 WiFi came up immediately, but then, it had been working all along. I found one thing (the weird VLAN tagging thing for the internal switch in the Netgate 1100 appliance mentioned above) was not quite right due to all the desperate experimentation I had been doing, but once that was corrected, I was able to connect to the IoT WiFi with my phone and get an IP address. It was glorious. I may have peed a little.

I removed the Ubiquiti switch and put the AP back on the Cisco, just to verify that it would fail again, that I had not just finally gotten all the configurations correct, and it definitely stopped working. So, lesson learned: for all it’s other strengths, the SG200-26P just doesn’t handle port to port VLAN trunking, at least not as the AP needs it to deploy multiple WiFi networks.

I then ordered a USW-Lite-16-PoE to replace the SG200-26P. It should be here in a couple of days.

Meanwhile, I configured a port on the USW-Lite-8-PoE for untagged VLAN50 and moved it out to the workshop. It plugged in and Starlink came up working perfectly. The Cisco again handles this sort of VLAN over a trunk just fine, and it doesn’t care that it’s partner switch is not a Cisco switch.

Importantly, the AP out there came up on the main VLAN and I can roam on that same WiFi network between the house and workshop; I no longer have to swap between HippyHollow and FlyingDog.

For nostalgic reasons, I will miss FlyingDog. It was a specifically chosen name for the network. I know! I will rename the AP!! Actually, I will rename both APs to what their networks used to be called. I are silly.

Not surprisingly, though, the IoT WiFi doesn’t work from out there, further evidence that the Cisco switch just isn’t passing those VLANs to the router. I am reasonably confident that when the USW-Lite-16-PoE is in place, the various alternate WiFi networks will work from everywhere.

Of course, then I have to start moving all the IoT devices to that network…

Tweaking A Few Things

A few unrelated projects has postponed tackling the plumbing part of putting the other two water meters in service. Meanwhile, I have been tweaking the behaviors and such for a couple other bits.

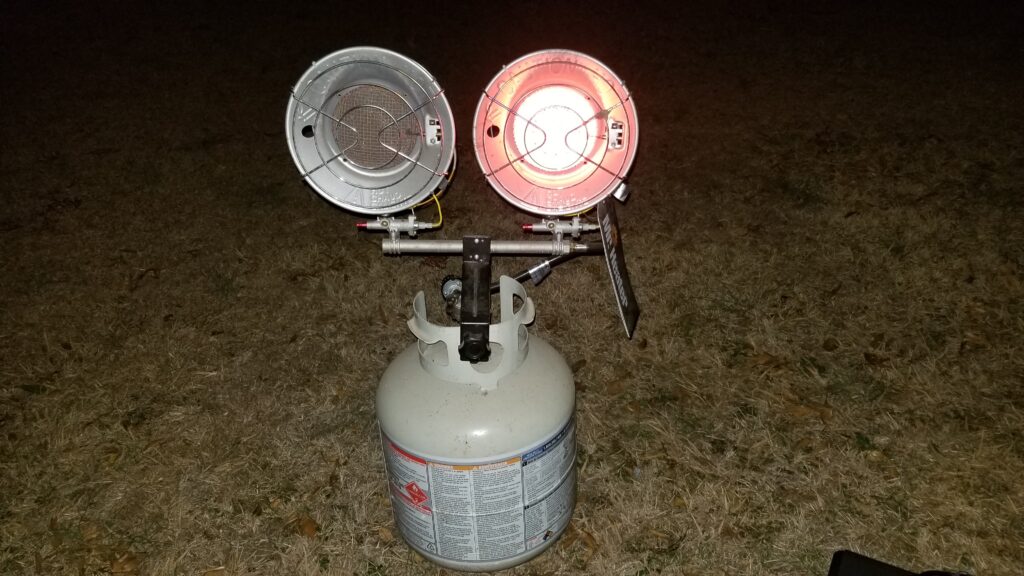
The heatlamp for the water system has turned itself on every day. It was indeed chilly for several days, so it wasn’t inconceivable that maybe it reached my low temperature trigger of 36F in the garage, but a couple of days over 50 that still had the light on every morning made me start actually checking.

I used one of the Emporia switches (cloud controlled; none of my Zigbee switches monitor power and that is a whole ‘nother conversation) so that I could monitor the power consumption of the outlet and thus detect a burned out bulb. The log showed some curious stuff though. This thing loses contact all the time.

If you look carefully, you can see the pattern. It becomes unavailable, then exactly one minute later, it comes back, appearing to change state, but I think it just renews it’s current state. That goes on as far back as you care to scroll.

However, at 6:00, something turns the switch on, then this same pattern just keeps repeating with the new status.

I checked the automation on the water temperature sensor and the outside temperature sensor, even though I had not automation for *this* switch for outside temp.

Finally, I found it. In the Emporia app on my phone, there was a schedule to turn the switch on at 6AM every day. I had originally deployed this plug out in the workshop for the horse trough and I wanted to ensure it was not accidentally turned off and left off. I disabled the scheduled.

The light was on the next morning.

I deleted the schedule and it finally stopped. 🙂

In related news, I have two CloudFree P2 plugs. These are plugs preconfigured with Tasmota and it turns out they have very extensive power monitoring capabilities and no cloud dependency. I have removed the other Emporia plug that (for reasons I don’t recall) was also deployed for the horse trough and put a CloudFree P2 in it’s place.

As you can see, it gathers a lot of power statistics. Currently, there is a recirculating pump that is running basically all the time. It is important, but not particularly critical. However, I am about to redeploy the deicing heater and if it goes out, particularly during freezing conditions, I need to know about it. The automation I have in place currently will notify me if it draws less that 10 watts for more than 10 minutes which would currently only tell me if something disconnected the pump, which one of the horses used to do on occasion. The pump draws 108W pretty much continuously. The heater pulls 1200-ish watts when heating and about about 1/2W when idle, presumably to work it’s thermostat. I presume I could script something to separate a pump failure from a heater failure, even though they run on the same outlet. I have more than once thought about separating them. At the very least, I could run them on two switch plugs.

The bad news is that I only ordered two of the CloudFree P2 units and one of them turned out to be DOA. I have contacted CloudFree about it (no reply, but it has not even been 24 hours yet) but I also ordered several more. I will have other things to control and/or monitor and especially at $10 apiece (Black Friday 2022 pricing apparently; back to $13 as I write this, but still a great price), they are a great little bit of kit.

I had some difficulties excluding and including my old Jasco ZWave switches to my new controller, but all appears forgiven now. I pulled the air gap power plug thingy on them and that seemed to properly reset them enough for them to be happy.

I dug into the wiring for a couple of 3 way switches in the kitchen. They are wired in the 2nd least favorite way for conversion to the Jasco switches I have had on hand for several years, but with some minor rewiring, I can make it work. I will post that separately one day. The one I really want to change out is a set of lights in our sunroom that is tecnically a 4 way, with one switch in the living room that is almost never touched, but is sure to complicate things, wiring-wise. I really want to deploy my Zooz scene controller where the kitchen located switch for that sunroom light is and use it to control several things.

The barn/workshop automation has to be all Zigbee or Wifi. I don’t think I can reasonably extend the ZWave network out there. That isn’t expected to be a problem; I have good Zigbee and excellent WiFI out there. I have a couple of Zigbee light switches, but I’m not sure how they handle 3 way connections as yet. I may need to deploy some wireless toggle switches for those remotes.

I put a new battery in the Ecolink tilting garage door sensor that I have had since Vera was new, along with putting a ZWave repeater in what I hope was a suitable place to extend the network into the garage, but the switch was last heard from on 16 days ago as I write this. I may try again now that the two light switches are working and helping to provide a little more network stability.

Before I discovered ESPHome, I had gotten a Zooz Multirelay with the idea of using it for the water filter project. As it turns out, a couple of it’s features are not particularly well suited to the needs of the water filter, but they are entirely suitable for automating garage door openers.

All The Water Things

Early in my Home Assistant journey, I had planned to connect something to and/or control our self-cleaning whole house water filter.

I had discovered the ESP8266 and it’s pulse_meter sensor and then planned to have a board to connect the sensors for the water meter and later the unfiltered water meter and a separate board for the water heater meter since it is a short distance away, but it is really is a very short distance.

After working with the ESP8266 for a bit, I have decided that there is no reason these functions cannot all be on the same board, thus the Home Assistant device “watermeter” has been repurposed and one of it’s identical syblings “watersystem” has be configured.

It may not win any prizes for awesome miniaturization, but it is packed in pretty tight. On the left is 5VDC power.

On the right, the pair of three terminal connectors are for the unfiltered and hot water flow meters. The voltage divider resistor networks to adapt the meters’ 5 volt output to 3.3 volts are on the bottom of the board. I have not yet connected them, but my confidence that they will operate is reasonably high.

Immediately below those is a Dallas TO92 DS18B20 temperature sensor. There is a 1/4″ hole drilled in the lid of the case to allow it to stick out a bit and measure the ambient temperature. Since all these water system components are installed in an unheated garage and it has gotten below freezing in there before, I need to monitor the ambient temperature and control a heat lamp during winter months.

Next is the pulse input for the main water meter, shown connected in this picture.

Finally, there is a connector intended to connect to the water filter to monitor when it’s cycle runs.

I have covered the details of the configuration elsewhere except for the binary_sensor.

binary_sensor:
  - platform: gpio
    pin:
      number: 15
      # D8 Filter Cycle Sense Switch
      mode:
        input: true
        pullup: true
    name: "Filter Cycle"
    filters:
      - delayed_on: 100ms
      - delayed_off: 100ms

This is the input to monitor the water filter cycle. Since the original water meter, I have learned that the ESP8266 has built in pullup resistors that can be activated, eliminating the need to add a physical resistor. In this application, I may not end up needing it at all. The filter settings are currently there assuming I would be debouncing a switch input.

The water filter has a motor that runs a multiposition valve with a cam and a single sense switch. Investigations indicate that the switch is normally open, with 5V from it’s own controller across it’s terminals when it is at rest. When the filter cycle begins, the switch closes as the valve cam moves. The filter cycle puts the valve into three positions, a flush and a rinse position during the cycle and a normal position when done. I think I can monitor the 5V signal across this switch then either simply time when it has returned to 5V for long enough for the filter cycle to have ended or possibly even count the two stops in the process. I will need to play around with that.

The one thing that might be added is to connect one more GPIO pin to a relay output in order to trigger a filter cycle remotely. There is plenty of room for a couple of wires to run to an external relay. The area in front of of the USB jack needs to remain open in case it is needed to reprogram the board if it becomes unreachable on WiFi.

Funny story there. In arranging the ESP8266 D1 Mini board on the 40×60 perf board, I dithered on whether to mount the USB jack up or down. I decided to mount the board with the jack down, mostly because all the pinout illustrations of the D1 Mini board are shown that way. However, I did not account for how thick the connector is!

I was able to slightly mutilate the connector on a cable enough to fit, though. For future boards, I will need to put a little space under the board.

Let’s Get Board

The ESP8266 boards have eight GPIO pins, though some of them are kinda hijacked early on, they should be available for more general use after the board boots up.

Leaving the bare board hanging by wires is just begging for trouble, so I want to put them in some kind of enclosure. The first ones I ordered turned out to be just a tiny bit too narrow.

Chalk that up to poor tracking of dimensions while shopping. I will keep the little boxes because they may be usable for something else at some point. That and at roughly $0.87 each, even a dozen of them are too cheap to be worth the trouble of return shipping. I think it’s planned that way.

I was more careful with the next case. I first found a small prototype circuit board of 40 x 60 mm, big enough to put the ESP32 board on with some margin around it, then found a case with internal dimensions to fit that board. If I also provide 5V power in some other form besides microUSB, I can mount the ESP8266 in the most space efficient manner on the board and inside the case. This will leave the maxium room for additional components or connections.

I think I will first rebuild the water meter device, adding an on-board temperature sensor and the sensor input and relay output that I had originally intended to put on the big water filter to let us manually trigger a filter cleaning cycle remotely. What would really be cool is if I can find 5V or even 3.3V available inside the filter and eliminate one more wall wart power supply.

While I was ordering stuff, I got too many Dallas DS18B20 in the raw TO92 package suitable for putting directly on a PC board and too many additional ESP8266 boards to connect them to. I also got a variety of little terminal blocks to make it easier to build boards for external connections and make those connections later.

Finally, I got some breakout board things which should help with prototyping all kinds of things with the ESP8266 boards. They breakout all the pins on easily accessible terminal blocks.

Hopefully, all these tools and supplies will soon lead to a bunch more ESP based peripherals to my Home Assistant instance.

Super NAS

There was really nothing wrong with my old NAS. It was largely underlutilized, other than I had hit the limit on how many cameras it could record in Surveillance Station because Synology is smart enough not to oversubscribe the hardware’s capabilities and limit the DS120j to 5 cameras. That was really the main thing I wanted to upgrade for and even that wasn’t a big rush.

Still, I had planned to upgrade once I paid off my Amazon credit card and since I had done that…

I did some comparison shopping and finally decided that I would get the most bang for my buck with the DS220+. I wanted the ability to add a 2nd drive and the Intel Celeron in the DS220+ with only 2 cores running at 2.0 to 2.9 GHz could still outperform the DS218/DS218play and had an expansion memory slot. That feature alone would turn out to be handy for me.

Well, it would be once I got the right memory module. I ordered the right stuff, DDR4. The labelling on the packaging was correct. The module in the package was a DDR3 SODIMM, different pinout. I processed the return to Amazon thinking I just ordered the wrong thing, before I looked at the packaging carefully. No matter, it’s sorted out now and the DS220+ is no maxed out at 6GB.

It was not clear ahead of time whether I could swap the physical drive from my DS120j into the DS220+ and have it work correctly. I seem to recall that once I had the hardware in hand, it became obvious that it could be done, but that the performance would suffer because of the differences in the newer and older file systems. I chose what was probably the best way, though it would turn out to be very slow. I set up the new unit fresh, then did a backup of the old unit’s files, using a share on the new unit as the destination. Then I could restore the old unit’s files from that now local source.

It took a surprisingly and irritatingly long time for that backup to complete. Then the local restoral wasn’t a whole lot faster. The whole process was most of 48 hours. On the other hand, it was also completely trouble free.

When everything was restored and settled down, I was able to move my camera license pack from the old NAS to the new NAS and although I didn’t have one immediately available, it did not complain about it when I attempted to add one more camera. Mission accomplished!

I have currently set up the old NAS as a backup target for the new NAS and set up a schedule. It just runs. I am not backing up the surveillance footage simply because that is just huge and pretty perishable anyway.

Soon, however, I would find an even better reason why I am glad I went for the more powerful CPU and full boat of RAM.

Everyone Loves A Little Probing…

One of the many tasks the ESP boards can easily do is read the Dallas Semiconductor (now owned by Maxim) 1-wire devices, particularly the temperature sensors. A popular choice is a unit embedded in a stainless steel probe at the end of a waterproof cable a meter or so long.

The Dallas 1-wire protocol is fascinating and clever, but most importantly (if someone else takes care of the fussy bits) it is really easy to use. In the case of ESPHome and the temperature probe above, it is dead simple to connect and read a temperture, but even cooler, several such devices can share a single pin on the device.

For experimental purposes, I used my ESP32 dev board, which has solderless breadboard friendly pins installed, making it even easier to throw together a test system.

Not shown in the picture is the data bus pullup resistor. Because of the distance it needed to reach, from the 6th pin from the left on the top row to the far right pin on the bottom row, I could better fit the resistor under the MCU board with no jumpers.

After a couple of false starts because the IDE for ESPHome is really sensitive to indentation, I was able to identify the unique ID for this temperature sensor then start bringing in data from it.

dallas:
  pin: 21
  update_interval: 10s

sensor:
  - platform: dallas
    address: 0x693ca0e381b17528
    name: "Testboard Temperature"
    accuracy_decimals: 2
    filters:
      lambda: return x * (9.0/5.0) + 32.0;
    unit_of_measurement: "°F"

At the time I am writing this, I don’t know if pin 21 is special, but it was the pin used in the example I followed, so I kept it.

The first thing you do is install the block with only the ‘dallas’ directive and the pin number. The logs will show the address of any devices it identifies. Then you can add the rest of the configuration, complete with the actual addresses of any and all individual devices. Apparently, one can do a ‘default’ device read, but it will understandably fail if there is more than one device.

I played with the update_interval. For my testing purposes, the shorter to better. One thing I will use this board for is testing communication limits, specifically whether I can expect reliable WiFi connectivity in certain outdoor locations from these boards. Rapid updates of the data will help determine that.

The most interesting new skill learned was the lambda directive. This is a special calculation ‘filter’ of sorts. The hardware device reports in degrees C and lambda is used in this case to convert degrees Celsius to degrees Fahrenheit.

One of the practical uses I see for this type of sensor would be to use these probes for each of our non-kitchen refrigerators, one for the freezer, one for the refrigerator and maybe one for the ambient, if some other sensor doesn’t already provide an ambient temperature. I have found the door switches I like also provide a temperature.

Another could be to put various temperature probes into the HVAC system in the attic, return air temp, duct temp, attic ambient, evaporator coil, etc.

I may add one to the hot water meter to monitor the water tank temperature.

The Little Board That Could (and that one time I was an idiot)

I haven’t been excited about a hardware project in a while, mostly because I haven’t really had a practical application that needed doing.

We have a 400-something foot deep well that produces really nice water. It does have a bit of sand that we need to filter out and all that is pretty well addressed by now. According to metainfo on the pictures I took, I installed a water meter in our water system on in May of 2012. I chose a unit that included a pulse output so that I could connect something to it to electronically track our water usage. The pulse output is really just a magnetic reed switch operated by a tiny magnet on the 0.1 gallon dial. It closes the reed switch once per revolution, thus one closure per gallon. The pulse unit is removable and not pictured here, though you can see the magnet on the x0.1 dial.

Incidentally, between May 2012 and the time I am writing this, we have used almost 247,000 gallons of filtered water.

Unfortunately, nothing really did any kind of decent job at counting and accumulating those pulses, not anything I could buy for a decent price. I had an electronic counter connected to it for a while; it was just an accumulator with no connectivity to anything. It’s battery has LONG since died, but I disconnected it to connect the board described below. I need to put a new battery in it and see how far it got. 🙂 There are professional data acquisition modules that do the task, but not for a price I was willing to pay. When I was shopping for stuff at CloudFree and saw these little ESP8266 boards, especially for $3.50 each, I looked into them. Wow.

The ESPHome project is an entire ecosystem built around a family of boards using the Espressif family of microcontrollers, ready to deploy in Home Assistant. In short, people way more brilliant than I am have done all the hard work and have modularized home automation functions so that with a few lines of configuration, one can set up these boards to do a wide variety of complex functions, interfacing with hundreds of off the shelf input and output devices. You can combine whatever you need in essentially limitless ways.

What mattered to me immediately was the Pulse Meter Sensor. It was original intended to attach to electric meters which provide a pulsing indicator for consumption, but by tweaking that default configuration just a little, it tailors it nicely for water.

After a bit of experimentation, the configuration to read my meter is as follows:

sensor:
  - platform: pulse_meter
    pin: 13 
    unit_of_measurement: 'gal/min'
    name: 'Water Usage'
    internal_filter: 100ms
    accuracy_decimals: 2
    filters:
      - multiply: 1
    total:
      name: "Water Total"
      unit_of_measurement: "gal"
      accuracy_decimals: 0
      filters:
        - multiply: 1

The decoder ring: Pin 13 is descibed in better detail below.

The ‘unit_of_measurement’ is just the text describing the units reported. It doesn’t actually change what the units are. You could call it ‘cubits of sanskrit’ and it would still give you the same numbers you configure it to deliver.

“internal_filter” is essentially a debounce timer in this application. It tells the counter to ignore any pulse shorter than 100ms.

The accuracy_decimals directive is the number is digits right of the decimal to deliver. The meter rate is calculated as a rate per minute, so it basically measures the time between pulses and calculates the rate based on that. So long as water is flowing, it’s reasonably accurate. Kinda weird that once you turn the water off and its not getting any more pulses, it still reports the same flow rate because it’s not changing. There may be a setting to address that. If you wait long enough, the rate drops to 0, so there probably is a timeout value.

Since my meter outputs one pulse per gallon, the ‘multiply: 1’ lines are redundant, but I left them in from earlier failed experiments and for clarity.

For ‘total:’ this is a running total of gallons consumed. Since it is always in whole gallons, there is no need for accuracy_decimals and again, muliply by 1 is just there for clarity.

My board looks almost exactly like this one:

There is a little confusion (for me, anyway) as to what one should call the various pins and which ones are ok to use under what conditions. Some of these pins are asserted internally at boot time; some will cause boot to fail if they are asserted externally. Some are used when communicating with the chip. Long story short, the four pins highlighted in green are generally safe to use under all conditions. I am not sure why I chose 13 instead of 15. Shrug. I am equally unsure why the board designers put D0,D5,D6,D7 & D8 for GPIO 16, 14,12,13 & 15. I’m sure there is an engineering reason. Whatevs.

I put a 10k ohm resistor between D7 and 3V3 to pull the GPIO13 pin up, then connected the pulse output between D7 and GND. It works perfectly.

Flushed with this initial success, I decided to add a second pulse meter sensor to this same card. The water meter above is after all the water filtering, right before the treated water goes into the house. I have also tapped off before the filtering to feed water hoses outside with significantly higher pressure and flow. This water is, of course, not metered. I have another meter very similar to the one feeding the house, but this is not such a critical feature and I don’t really need the ‘odometer plus pulse’ meter. I can really get buy with just the pulse counting. Besides, that other meter was really intended to be a spare for the ‘main’ meter.

I found a cheap water flow sensor on Amazon and as I write this, it (two of them, actually) are due to arrive tomorrow. Plumbing it in should be pretty simple. The ESP8266 board has 5V available to power the flow sensor. Wiring the input will be a little more complex as the flow sensor is a Hall effect device with a 5V output and the ESP8266 board has a 3.3V input. They are reputed to be fairly 5V tolerant, but even a $3.50 board doesn’t deserve to be smoked just because it’s cheap. The easiest way to accomplish this level shifting, especially with the fairly low bandwidth needed for these frequencies, is a simple resistive voltage divider network.

Whatever value chosen, R2 will be (so close as it doesn’t count to) twice the value of R1. I will probably start with the venerable 10K for R1 and likely two 10K in series for R2, because I have a cubic buttload of 10K resistors laying around. If the output of the 5V system is indeed 5V, then the junction between R1 and R2 will be 3.3V. The only factor that might affect that is if the 5V output can’t provide enough current or if the input for some reason sinks a lot more current than anticipated. In all, it’s expected to be fine.

If I understand the specs correctly, this flow meter gives a frequency output of 5.5 x the flow rate in liters per minute. Those multiply lines in the sensor config will mean something now. I have done some scratchpad math and arrived at the following pulse meter configuration:

  - platform: pulse_meter
    pin: 12
    unit_of_measurement: 'gal/min'
    name: 'Unfiltered Water Usage'
    internal_filter: 100ms
    accuracy_decimals: 2
    filters:
      - multiply: .048
    total:
      name: "Unfiltered Water Total"
      unit_of_measurement: "gal"
      accuracy_decimals: 0
      filters:
        - multiply: 20.82

As I write this, I cannot recall exactly how I came to these two multipliers, but I know that 3.78 liters per gallon and 5.5 x the flow rate were both involved. I strongly suspect that some empirical testing will be in order as well.

Also, a chart I saw indicated that at some higher flow rates, the output can be 60Hz or so. This will be getting pretty close to the 100ms internal filter pulse width. On the other hand, hopefully the Hall effect output is already debounced, so that filter may be redundant. We will see.

Furthermore, I will also be adding a flow sensor to the inlet of the water heater to monitor hot water usage, with it’s own board. Perhaps I can be clever enough to subtract that amount from the total usage somewhere.

The time has come for my confession.

I have described the ESPHome experience as it should have been, almost plug and play. It did not go that way and it was NOT because of ESPHome.

I was very excited to get that first board plugged in and make it go. The process sounded very straight forward.

Install the ESPHome Dashboard on Home Assistant. Trivial, done.

Open the ESPHome Web UI, click on Add Device…

Ooops. Well, no BIG deal. Adding an SSL certificate is something I need to do someday, but I can just do this from the PC I’m using instead, so I click on the ESPHOME WEB link.

I get this page, I plug in my cable with the board, click on the CONNECT link and this is the last time anything good happens for a looong time.

It pops up a dialog wanting to choose a device to connect to, but none of them look like anything new or appropriate. I open Control Panel and nothing in Device Manager looks like a new thing, except for that one thing that says it’s not functioning because Windows can’t find a driver for it. I unplug the board, it goes away; plug it in, it comes back. Sigh.

I Google, find the [hardly sketchy looking at all Chinese] driver download page, run the self-installing driver, hoping that all my anti-virus software is up to date. It appears to install.

No change.

I try it on what eventually turns out to be three other computers. Nothing different. And apparently no viruses. Win?

Finally, something I *swear* I saw somewhere suggested plugging it into the Home Assistant hardware to try it from there. Maybe I dreamt that. I had more ports in the USB hub, so I plug it in. I consult the VM to see if it is there and ready to be allowed over. No, just the Zigbee and the Z-Wave.

I wonder if somehow I am limited to two devices by the virtual machine manager, so I unplug the Z-Wave dongle and plug the ESP8266 back in. It still doesn’t show up anywhere.

To be completely honest, the ESP8266 and the Z-Wave dongle were alternatively plugged in and unplugged multiple times during this process, sometimes both plugged in, sometimes to the hub, sometimes to the front panel USB. I probably put one of them in my ear and the other in my anus at some point, just to see if that would help.

By this time, I have spent a few minutes here and there during three hours of the workday and four solid hours that evening trying to get this awesome little board talking and I’ve reached a point where I am both too tired and too frustrated to go on, so I put it away and do something else for a while, probably involving alcohol.

The next evening, I start in on it again, but my fresher eyes realize that I did all this testing with the same presumed good USB cable. Afterall, it definitely shows up when plugged in and goes away when unplugged, it just couldn’t find the driver for the device. So, I walk 8 feet across the room, grab a different USB cable and plug it in.

Comes right up, CH340C on COM3. ESPHome sees it, connects, uploads adoption code. Everything I do with it from this point forward works like it’s supposed to. I try the ESP32 board, works perfectly, but it’s drivers (CP210X, like the dongles, ironically) are already installed in Windows.

All because the F&*%ING USB cable was not 100% bad.

[insert all the ESP8266 success story related above here > ]

NOOOOOOWWWWW…….

A couple days go by and I notice that the driveway light switch, the lone working Z-Wave device currently on Home Assistant, is not working. I have a Zooz multirelay configured, though not deployed, but it is also not working. When I dig deeper, I find that the controller is down. As I’m sure you can predict now, I spend several days trying various things to get the stupid dongle to come back up. I even reach a point where I am contemplating abandoning all Z-Wave and going all WiFi and Zigbee. It’s not a trivial decision; I have a box full of unopened Z-Wave stuff, including a spiffy new scene controller I have just purchased that I have specific plans for.

I was able to verify that the dongle itself was working. The Silicon Labs tools included some network stat tools where you could view a count of packets send and received. I had it installed in my laptop, took a snapshot, waited, took another, waited, etc, just to verify there was no regular traffic. Then I plugged in a multirelay device and there was a burst of traffic between it and the dongle. Reasonable expectation of functionality.

Among the things I try is viewing lsusb and dmesg from the terminal of the VM. Trouble is, because this is Alpine Linux, this isn’t really lsusb and dmesg binaries but their lobotomized BusyBox equivalents, so most of the usual switches that could add more details to help figure stuff are not really there. Not that I am any kind of ace at troubleshooting Linux issues anyway. I have had the perhaps unenviable position of being more of a Linux power user rather than a sysadmin. My (mostly Fedora) systems have for the most part always just worked and I have rarely had to fix anything on them, so I don’t have just tons of breakfix experience with it. If it doesn’t break, you never need to fix it.

In any case, it turns out that the “solution” appears to have been to let something time out. The last thing I did was a reboot of the VM with the dongle removed. I added the dongle to the USB hub, but for whatever reason, I didn’t immediately allow it through to the VM. Some undetermined time later, a day or so, I sat down to prove that I am indeed insane only to discover that it needed to be allowed through to the VM. I did it and suddenly, lsusb listed another CP210 device and dmesg showed a new USB device found and Z-Wave JS UI showed /dev/ttyUSB1 available.

Now it works again.

Home Assistant: The End of Vera?

Since about 2012 or so, I have been working on some home automation, mostly using Vera (which has changed names again, kinda) and a handful of Z-Wave enabled switches. It has never really taken off like it could have at our house, but I do have a few bits in place that we have grown to appreciate, especially once I deployed a few Amazon Echo devices and we could ask Alexa to turn some stuff on and off for us.

The three things that see use multiple times every day are plug modules that run lights and a ceiling fan in our back yard, a smart bulb in a bedroom lamp and the thermostat on the house HVAC system. Less often, but still seeing occasional use are two wall switches running a driveway light and front porch light.

I do have a smart plug strip that sometimes sees seasonal use for Christmas decorations and a generic plug module that right now is running the pump for an above ground pool, but I’ve used it for other short term uses as well.

As explained in a very old post, the DSL internet we had when we moved out here was not reliable enough for a service that was 100% dependent on cloud connectivity. MiCasaVerde’s “VeraLite” product had cloud connectivity to allow one to control it from elsewhere, but the actual control is local – not dependent on internet connectivity to work at all – so it seemed a good choice.

During the decade since then, I would occasionally add a device, but what was usually the biggest limitation was a less than perfectly reliable Zwave network that needed occasional rebuilding until I installed the version of Vera controller I have in place currently.

Zwave also had some difficulties with the size of our house. Ironically, if I had replaced every switch in the house with Zwave switches, the mesh networking protocol probably would have been much more robust, but with two wall switches side by side and one thermostat 30 feet from them, there probably just aren’t enough nodes for the redundancy.

Once we had linked Alexa and had grown to “depend” on controlling the thermostat verbally, having to reconnect it to the network every month or two became tedious. The then-new replacement Vera controller had Zwave and Zigbee and more memory, so I upgraded it and got a new thermostat that connected via Zigbee. It looked nicer and was much more reliable, needing to be reconnected to the network only two or three times a year. Afterall, the thermostat was the only Zigbee device in the house, so it there was a mesh network consisting of exactly two devices.

One time when I had great difficulty getting the thermostat to reconnect, I reached the conclusion that either the radio in it or in Vera had gone bad and as the only two Zigbee devices in the house, I elected to change the thermostat again, this time going to a WiFi device. Unfortunately, and as is almost inescapable anymore, it is a cloud dependent device, at least as far as remote control of it goes. Sigh…

Now that the thermostat is WiFi , the only Zwave devices left are the two wall switches that run the porch light and driveway light. Those are thus also the only remaining need for Vera. Everything else can be, and largely is, controlled by some other means.

Not locally, I might add.

I was at a crossroads.

Do I keep adding piecemeal to the mixed tech automation I have now? Alexa *kinda* ties it together, but only because Alexa has various skills that talk to Smart Things (my WiFi switches) and Geeni (smart bulbs) and Honeywell Home (thermostat) and Vera (Z-Wave switches). They all work slightly differently and none have any real automation other than basically on or off or maybe some simple scheduling.

Do I drop Vera and replace those only two switches it still directly controls and go with all WiFi/cloud automation or do I really do the hard think and get completely away from the cloud, which would probably mean changing my thermostat *again* and implementing a local controller?

Sometimes, it takes a while for me to write a blog post; day job an’ all. When I wrote those last two paragraphs a couple of weeks ago, I must admit that I was already elbows deep in replacing Vera with Home Assistant. Vera is already unplugged. However, at that time, I was still planning to move Z-Wave over and even expand Z-Wave devices in the house. For one thing, I still have a box full of undeployed Z-Wave devices that I purchased over the years. Also, Z-Wave power switching devices seem to be more likely to include power monitoring features. Not exclusively, but Zigbee devices just seem to include power monitoring way less often.

Power monitoring for the sake of power monitoring is not my goal for most of these devices, but for two or three of my applications, I use power monitoring to verify that the device is indeed operating. I use two heatlamps to mitigate freezing of some water system components and a tank heater and recirculating pump for the horses’ water trough. If they are switched on, but *not* drawing power, they need some kind of attention. The Z-Wave smart plug devices I have used in the past have power monitoring, but Vera didn’t really give me any way to leverage that into some kind of action item if it were to suddenly go away.

I’ll stop here to describe my Home Assitant path thus far. I was made aware of it by a friend while we shared a ride to and from Colorado for a firearm competition event. The advent of regaining local control is what really sold me on it, but between the demise of MiCasaVerde (the original company controlling the Vera line of controllers) and the new Ezlo company that has largely taken over that space with what may be limited support of the older hardware and software, I prefer to go in the open source direction. Yeah, I won’t have a customer service rep to yell at, but with most big well supported open source projects, you don’t need to. Somebody somewhere has probably already had your problem and fixed it. You just need to be good at Google to find it.

Home Assistant is usually deployed on a Raspberry Pi, but it is certainly not limited to that particular hardware. At the time I have gotten interested, Raspberry Pi 4 boards are in high demand and rarely in stock anywhere for more than a few hours at most. The only Pi boards I have on hand are probably Pi 2 at best, which is not enough Pi for Home Assistant. While other hardware options might work as well or maybe even better, I chose first to try using a Docker container hosted on my Synology DS220+ NAS since it is not really worked very hard and has plenty of leftover CPU power.

It came up quickly. Almost immediately, I wanted to add HACS, the Home Assistant Community Store, for an add-on to interface with my Emporia Vue account (yet another cloud based service… sigh). Installing HACS in the container required being able to run wget from the console, which was not installed in that image, which itself took a bit to get to, so I picked up a couple of (soon to be forgotten again, I’m sure) skills there.

I ran up against other container version limitations pretty quickly, particularly when it came to adding drivers for anything I might need to plug in, like Z-Wave or Zigbee bridges, so after about 2 days, I elected to upgrade to a VM version, still hosted on the NAS. This is with it recording five cameras and running the VM:

This has worked out much better. It’s running Alpine Linux, a lightweight distro. You would almost never need to even know that unless you royally screw something up. Don’t ask me how I know.

I acquired a Sonoff Zigbee controller and an Aeotec Z-Stick 7, both from general recommendations gathered from various Home Assistant YouTube videos and generall Googlage. These are connected to the Synology NAS via a USB 3.0 hub and they are powered by the NAS.

There was one concern with the Aeotech dongle regarding a required firmware update. The process for that is convoluted, but not particularly difficult. Just a lot of steps. Basically, you download a set of tools and a firmware image file from the chipset manufacturer, Silicon Labs. This requires, of course, a free developer account with Silicon Labs. Once the pieces are in place, it’s a 3 minute job. Curiously, once done, if you try to do it again, it gives you a scary error and aborts, but apparently this just means it has already been done. It is, afterall, a tool for developers, not end users. There are tools there that would also help me later verify that I did not indeed fry my Z-Stick. I’ll get to it…. 🙂

Hardware-wise, the VM passes USB devices through to the guest OS when configured to do so.

As luck would have it, both Sonoff and Aeotec use the same family of Silicon Labs USB UART chips, which would eventually cause some confusion, but lets avoid that story as long as possible. We will continue to pretend that I was never an idiot and that Zigbee came up on ttyUSB0 and Z-Wave on ttyUSB1 and that all the stuff worked fine!

Actually, Zigbee never gave me an ounce of trouble. Well, maybe an ounce because of the geography of our place and where I want devices.

Some of the things I want to control and automate are in our barn/workshop, which is, at minimum, about 80 feet from the house. Realistically, the path from the Zigbee controller to the light switch in the workshop is more like 125 feet.

Zigbee allows exactly one controller in the network. Everything else is an endpoint or a router/endpoint. This means that to reach to my workshop, which incidentally has awesome ethernet connectivity, I must find a way to add Zigbee devices to bridge an RF route out there, completely ignoring that existing robust and reliable communication path. Remember how I mentioned that with open source, someone has usually already solved your problem? Apparently not this problem.

On the other hand, Zigbee, being a mesh network protocol, does work pretty well if you throw enough devices at it and place them cleverly.

I took two strategies to extend a reliable Zigbee network to the workshop. First, I equiped the controller with a directional antenna, pointed towards the workshop. This puts as much RF energy as is practical in that direction. So far as I can tell, the existing Zigbee devices in the house suffered no change in signal strength. Apparently the side lobes on this antenna are good enough to cover the rest of the house. This antenna alone was enough to let one test device connect out in the workshop, at the full 125 foot distance, although the signal was down in the double digits, on the scale of 0-255.

The second leg of the strategy was to pile on the Zigbee router devices and try to saturate as much of the area between the house and workshop as possible with active routing devices.

So far, every AC powered Zigbee device I have seen is also a router. Two of the WiFi cloud controlled plugs I replaced are in the back yard. Actually, it was a single WiFi device with two individually controlled plugs that I replaced with two Zigbee devices, but who’s counting? While not directly between the controller and the workshop, they are outside the brick walls and at least slightly closer to the workshop, so they added to the mesh and signal path available to a device in the workshop.

Another item for control and automation is the wintertime heat lamp deployed in our wellhouse, which is between the house and workshop. When we built out the craft shack, I included an outdoor outlet specifically to help accomplish this task. I added another outside Zigbee plug here, which further stretched the mesh towards the workshop.

As of this writing, I have four Seedan smart plugs (which identify in Home Assistant as eWeLink smart plugs, neither of which can I find much authoritative info about online) which connect and operate flawlessly and are about $8 apiece as of this writing. Most of them don’t even have anything plugged into them; I am using them primarily as Zigbee range extenders and routers.

I added one inside the RV, which is parked between the house and workshop. This means that, physically, between the controller in the house and any one device in the workshop there are as few as zero and as many as four available devices to route that entire distance.

I added one in the living room, behind where our DirecTV receiver is. That is physically between the controller and the two backyard units and hopefully helps fill in any gaps there.

The other two are in the workshop, one by the door (it was the first test device deployed out there) and other on one of the workbench plugs, more as a second router for the the workshop as anything else. The long term plan will be to deploy some Zigbee light switches out there. There is a decent need for two sets of 2 way switches. I may also plug my little air compressor into one of the plug switches and use some kind of motion detector for presence to limit the compressor to running only when someone is actually out there.

I digress somewhat. The Zigbee network as it stands today looks like this:

The mapping is automatically generated, though I did drag a few things around to make them fit the image a little better and to associate things somewhat physically.

There is, to me, an irritating feature of the map called Physics, which makes things move around on their own. It seems to seek to make the space between objects equal and consistent. It also seems to take off and do that just when I was reading something in the fine print on an object 🙂 Happily, there is a checkbox to turn it off.

The rectangle is the controller. Ovals are router devices, circles are battery devices. At the upper left is the Kitchen Refrigerator door, which for some reason shows offline in this map just now, but it is definitely working. Maybe an auto mapping anomaly. Shrug. More importantly, you can see the aforementioned complexity of the meshing that Zigbee builds between routers.

The color coding seems to be related to signal strength, red low, yellow lowish, & green great. Most links, however, show gray and numbers lower than red, which is mildly confusing, but generally those devices are working.

I was hoping that the battery units would form more than one path to the controller, but maybe I don’t understand the way they work just yet.

You may also note that I have a temperature sensor in the wellhouse. The wellhouse is a tiny metal building and even though the wellhouse plug router is only about 10 feet away, this temperature sensor does not work reliably at all. That may not be critical, but I do intend to automate based on the temperature *inside* the wellhouse, not just the the temperature outside. I will figure out something 🙂

Up next, the very exciting world of ESPHome and I promise, the story about the Z-Wave debacle that I brought on myself.

Decapping Integrated Circuits

TL;DR: I am hoping to fix a broken USB drive….

For purely scientific interest, I have been interested in chip decapping for a while. Decapping is slightly archaic because only the larger integrated circuits tend to be made with actual removable caps these days.

Instead, ICs are FAR more commonly cast into epoxy and often glass reinforced epoxy.

There are a couple of destructive ways to decap epoxy chips. Sometimes you can literal just break the package and expose all or part of the silicon die with all the interesting bits therein, but that is really random. You can also use pretty extreme heat to soften the epoxy enough to peel it off the die.

The most effective way, and one which leaves at least a chance that the chip may still operate is to use heated 70% nitric acid to *dissolve* the epoxy. This is really effective and pretty hazardous, so requires good preparation and a not insignificant list of supplies, not the least of which is the 70% nitric acid. As I am writing this, a couple of online sources sell it to individuals for about $50 for a 100ml bottle (a little less that 1/2 cup Imperial) plus a $40 HazMat fee from the shipper. You need borosilicate glass (Pyrex is a brand name of borosilicate glass) because nitric acid will react with regular soda class. There are a lot of YouTube videos on the subject. I may tackle it for scientific purposes in the future, whenever I feel like dropping a hundred bucks on a half cup of evil juice.

What brings this whole subject to light is that a) I have had a physically damaged USB drive for many years and b) I have seen a few videos lately where talented individuals have used a fiber laser to vaporize the epoxy off of an SD card to expose the factory test connections in order to recover data on that card.

Now, I don’t have a spiffy fiber laser, but I do have an xTool D1 that I have been using for a variety of cutting and engraving projects. Surprisingly, as of this writing, the laser does not have it’s own blog category. Must fix.

This USB drive was in a laptop that was dropped. Instantly, it stopped working correctly. It would kinda work, showing a drive letter in Windows, but every attempt to interact with it would produce either an error or a bunch of nothing. For example, drive E: is there, with zero bytes in use, zero bytes available, etc. The card does mount, but there appears to be a disconnect between the controller and the actual storage within the device.

So, disassembly revealed that under all that plastic was a single tiny module, completely potted in epoxy, with a visible crack across it’s width.

On the other side of this module is the 4 pin USB connector on what is pretty obviously a printed circuit board. I suspect the entire device is a small board with naked chip dies attached and the whole thing potted in epoxy. All the plastic physical packaging is just to position and protect this little module. I should mention that this is a PNY brand device and it’s been long enough that I don’t remember the capacity, but it’s likely a 16MB or maybe 32MB. It’s not big by today’s standards.

This device was dropped quite some time ago, maybe 2012 or so. I think if I ever gain access, I’ll be able to realistically time stamp it, but I’m jumping WAY ahead. During those intervening years, I have occasionally tried to access the data. Mostly, I have tried to reflex the crack enough to make contact with whatever conductors were broken by the crack, which is generally my assumption as to what is broken. Maybe the PC board cracked in the right place to deny power to the storage chips, but not the controller. I don’t recall the specific utilities I used, but at least two of them were able to verify that the controller was responding, but that it could not see the storage.

So, back to the xTool D1. My particular device is a 10W blue diode laser that will cut up to about 10mm thick plywood, but it’s much happier with thinner stuff than that. I have cut everything from copier paper to acrylic to EVA foam and, with a little experimentation with the speed and power settings, it has performed wonderfully.

I didn’t want to just blindly charge into attempting to cut away the epoxy in my lobotomized USB drive, so I found a known dead circuit board and started eroding the epoxy on a couple of it’s onboard chips. I happened to pick the dead wireless link device that I had replaced earlier this year.

I set the xTool to ‘fill’ a 11mm square and positioned the laser over the left-most chip shown in the picture above. I played with various speed and power settings until I had an idea how it would chew it away.

I am not sure if it is specifically ash or if the laser burns away everything except the glass reinforcement, but a pass or two of the laser leaves a gray/white layer and the laser seems to no longer have much affect. Maybe if I had more than 10 watts to work with, it would be simpler.

After chipping and scraping away some layers of epoxy off of that chip, I decided that I had nothing left to lose by starting with those settings and seeing how it did with the USB drive module.

For the first pass, of COURSE I didn’t have the chip lined up perfectly, so it left a millimeter or so of chip untouched on the righthand side. I readjusted and ran the fill again. I noticed that the material was less “reactive”, it tended to reflect blue light rather than glow with a bright white burning color. I removed the module and used the corner of a single edge razor blade to chip away the gray/white ash layer.

If I was very careful, I could remove fairly large chips of this ash material. After a couple of passes, it looked like this:

Note a few specifics… I think rectangle in the upper left may be a capacitor being exposed. I hope the laser does not damage it.

Next, edges of the crack seem to erode quicker, leaving a trough that follows the crack. This may be a localized thermal effect.

Finally, you can definitely detect the 0.05mm spacing I chose to fill in the pattern. My experiments with the old wireless system chips showed that the default 0.1mm spacing was pretty crude at this level, but it *was* twice as fast to run. 🙂

I ran the pattern a few more times and exposed the mother lode:

A bundle of bond wires, apparently all broken by the crack in the module.

It is good news because I am now confident I have found the problem. It is bad news because instead of maybe one or two broken power traces on the PC board, I have (I think 29) broken wires that fit roughly into a 3mm space.

I am *planning* to attempt to use fine solder paste and rework gun heat to solder bridge between the broken ends, somehow *not* also bridging the tiny 0.01mm gap between wires. I may make an attempt first to see if it will work at the current depth I have burned away with the laser. If not, I will need to tweak some laser values and try it again….