Category Archives: Praise The Load

Handloading and Shooting

Rifle Shopping

My lovely wife has gotten interested in getting her own rifle, probably a 22. This is very exciting news for me, so this weekend, we shopped at four common places for one.

On Saturday, we were going to Cabelas for minnows anyway, so that was a natural starting point.

I like Cabelas for most things, but I have had mixed results when I have had to consult with any of their personnel. Friendly and knowledgeable generally, but at the firearms counter on a busy Saturday, with NASCAR in the neighborhood, it could have been a better experience. Nothing really wrong with how we were treated or anything, but felt a little like we were interrupting his lunch or something.

The primary criteria is that she can comfortably lift and hold the firearm. Action, capacity, etc, is definitely secondary to fit.

We found that the Mossberg Plinkster 702 (which they had only in a pink camo) looks pretty promising. Also found in the used side was a beautiful bolt action 17HMR with a very nice scope. It’s nearly $500, so I’m sure it wont be on the final list, so I didn’t record the model. I am almost sure, however, that it was a Savage 93R17 BVSS with a scope. It sure was purdy.

Next on our regular rounds was WalMart, where we found a very helpful gentleman in the sporting goods department. In addition to a $99 non-pink-camo Plinkster, they had a Remington 597 with factory included scope. This was the most comfortable to hold, though it was a little bit on the heavy side. Because they were handy and we had his undivided attention, we also looked at some centerfire rifles, just to compare really. Bolt action 5.56mm and 243 Winchesters were the best candidates, even though we did keep coming back to 22s.

On Sunday, we went to Academy and found pretty much the same things, though prices were all a little higher than WalMart. I also got to see and hold a KelTec SUB-2000.

There is a new Gander Mountain store, open only about six months now, that we had not yet been into. The firearm guy there was equally friendly and helpful as the guy at WalMart, but with much more inventory. Turns out they price match *and* they offer something I have not seen anywhere, an extendable warranty on firearms that covers damages beyond normal wear and tear. Generally, firearms are ‘all sales final’, but by purchasing Summit Protection Plan with your firearm, repairs and even replacement is under warranty. Add in price matching and it seems likely that we may purchase from them.

A recurring theme emerged amongst all the salesmen. They all very highly recomended the Ruger 10/22, in all its variations.


PCC

Pistol Caliber Carbine…

I have actually been interested in this genre since Marlin introduced the Camp Carbine in 1985. The concept of pistol and rifle shooting the same ammunition was well established, but my younger self had not at that point considered it. At the time, I would definitely had been most interested in the 45 Auto version, to accompany my Llama IX-A. Those were the days…

Last week, Cross Timbers held an experimental pistol caliber carbine match. We used essentially IDPA scoring rules and modified the shooting rules to accommodate carbines. Any pistol caliber carbine was allowed, included those shooting 22LR. The Ruger 10/22 was specifically mentioned as a suggestion.

I have had several autoloading 22 rifles over the years. The most interesting was probably the AR-7. Mine is long gone, but I think it was the Charter Arms variant. I’ve also had Marlin Model 60 tube fed rifles. My favorite thus far, however, has been my Ruger 10/22. It is the stainless barrel and hardwood stock, most like this one, but mine came with the 10 round magazine.

I had a 3-9x scope, so I got some Weaver 49711 rings. These are see through rings specifically to mount on the 10/22 and allow use of both iron sights and a 1″ scope. The combination is rather effective.

shotcenter singlehole

Since the 10/22 probably has more aftermarket parts available than any other 22LR rifle ever made, it was easy to locate a cheap bullpup stock for it.

Turns out, the Muzzlelite Bullpup Stock for the Ruger 10/22 might be a little too cheap.  I had read several bad reviews of the stock (after ordering it, while awaiting its arrival), mostly about trigger issues, so when installing the rifle into the stock, I tested trigger action essentially at every step and identified some issues that I was able to address right then. Mostly, it is trigger reset problems. Flashing from the mildly sloppy injection molding of the parts can interfere with the trigger assembly return, preventing the 10/22 trigger from resetting. Removing the flashing and making sure that the rifle hardware is mounted as far rearward in the stock as it can go seems to have done the trick.

The stock 10 round 10/22 magazines are low profile and reliable, but not a quick change item. The BX-25 25 round magazine has proven to be reliable for me, but would not fit the Muzzlelite stock due to interference with the pistol grip. Consequently, I picked up two 15 round BX-15 magazines.

I fired the Muzzlelite bullpup with the 15 round magazines exactly 5 times the night before the match, which will come up again below.

I had a BSA red dot optic that I had originally gotten for a crossbow, but had not yet installed. It is supplied with reversible mounting rails that will work with 3/8″ dovetails like many rimfire and air rifles are equipped with or flip them over to mount to Picatinny or Weaver rails. The plastic Picatinny rail on the Muzzlelite worked pretty well.

I boresighted the combination. The offset between the optic and the rifle bore is pretty high, though. I had to pick *some* distance to sight in on and chose approximately the distance from the firing line to the typical target array just in front of the berm at the range.

bullpup

Match time came and it was a lot of fun. We squaded such that stage 2 was my first stage and I was glad to have gotten it out of my way early. There were 4 legal shooting positions, at least three of which had to be used. You had three ports cut in a sheet of plywood and low cover over the top of the plywood to choose from. Challenging enough, but I had so many feeding issues. Furthermore, one port was a long narrow horizontal slot. The offset between the optic and the barrel meant that I had to cant the rifle over at a significant angle in a (failed) attempt to both see the target and to shoot it without hitting the plywood.

Stage 4 was my worst. The raw time was 73.88, spent mostly clearing jams. I had actually cried uncle, but the SO encouraged me to keep working through it, so I did. When the hits on non-threat targets and simple points down were added, my 93.88 time on that stage was 1.01 seconds faster than the leader got… on all five stages combined 🙂

Next time, and I hope it’s soon, I will run the 10/22 in stock form, with the BSA optic and known reliable magazines. Those all work together. Then again, I might look into some other combination. It is mildly frightening that I find myself considering a KelTec anything, but their reputation is slowly improving and one shooter used a suppressed SUB-2000 at the match and finished very strong.

Meanwhile, I put the 10/22 back to stock and found that the Muzzlelite stock scuffed the barrel slightly where it emerges from it. It is not significant and doesn’t really bother me. It can likely be buffed out with a ScotchBrite pad, but I thought it worth mentioning.


Chrono II, The Sequel

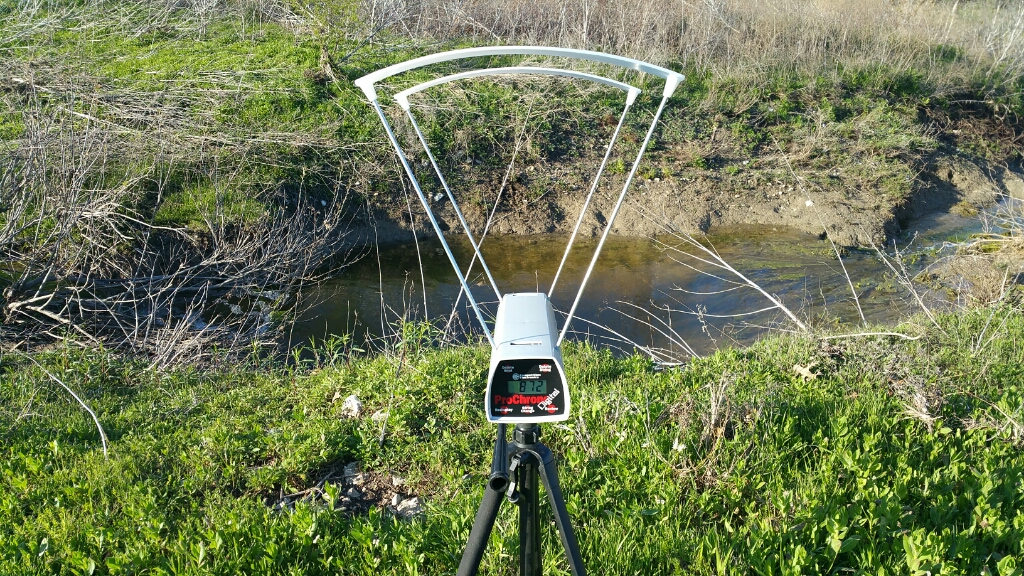
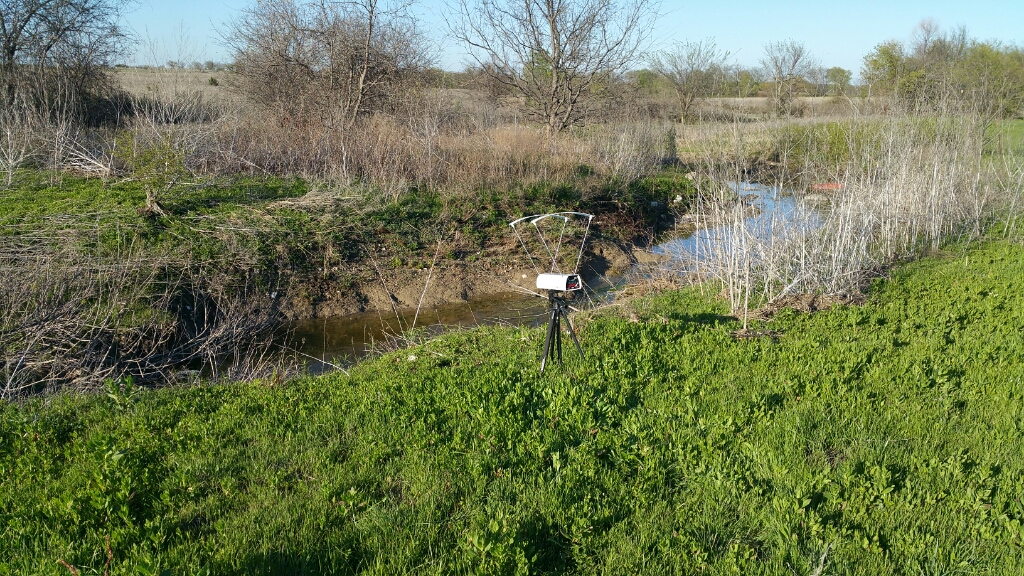
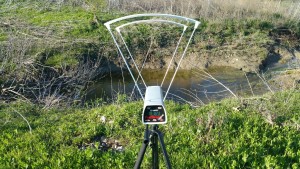
I had a few minutes Saturday morning and thought, hey, why don’t I go shoot 140-odd rounds of various ammunition through a couple of coat hangers glued to a clock?

chrono2

The object of the exercise was that, even though I’ve had the chronograph for a long time, I had not used for exactly what I had intended to use it for, evaluating the performance of my handloaded ammunition.

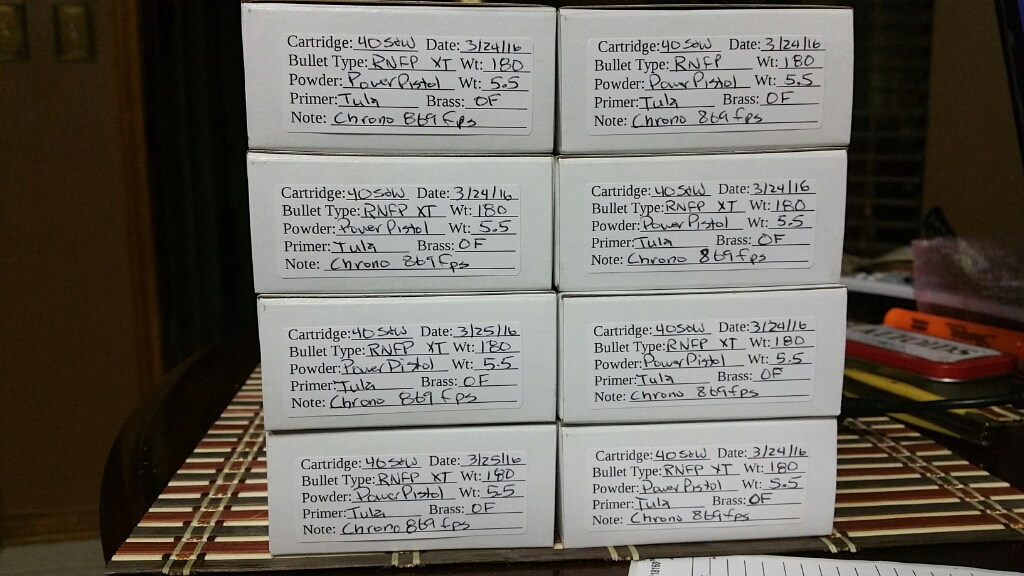
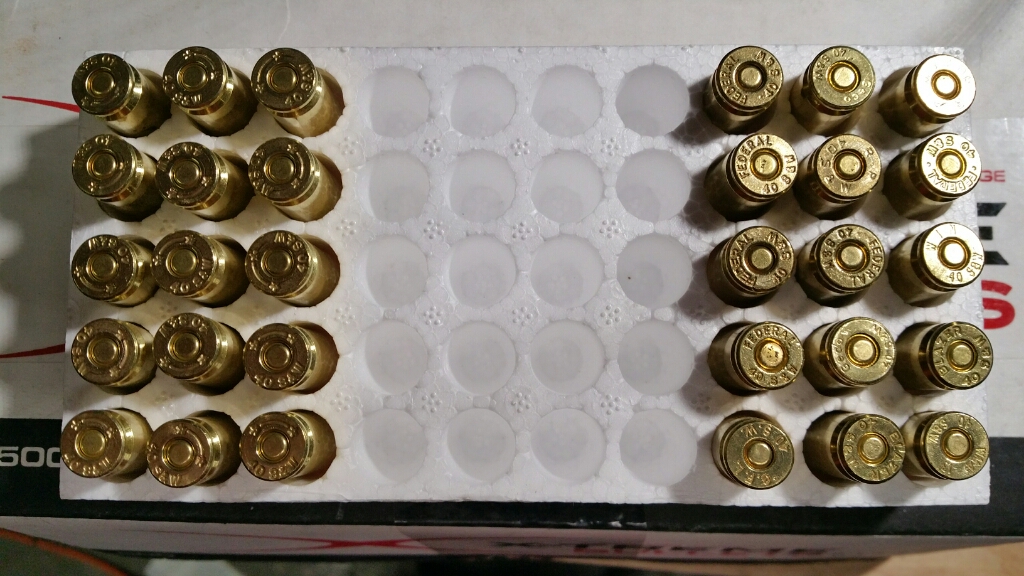
I gathered all the various handloads that I had on the shelf, (8) 40S&W, (5) 10mm Auto and (3) 45 Auto. I also grabbed a particular box of 22 to try out.

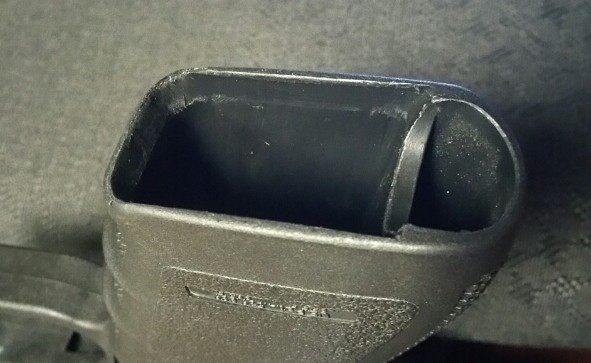
My handloads were almost all using Xtreme RNFP bullets at 155, 165 or 180 grain. The procedure was pretty straight forward. At the top of a spiral notebook page, I recorded the specifics of the load being tested, i.e. “40S&W RNFP Xtreme 180 / Power Pistol 4.40 / OF / CCI500” or some variation therein. I then list numbers 10 though 1 in reverse, Average, Spread and Standard Deviation. I then loaded the magazine with the load to test, took my position about 10 feet from the chronograph and fired a full magazine, pausing between shots to verify that the machine caught them. On rare occasions, it did not.

Once the magazine was exhausted and the pistol made safe, I would take the notebook to the chrono and review the string. The last shot is displayed then each press of the review button shows the next one back. I recorded each number, including the stats, marking the high and low velocity shots with a + or -, respectively. I then deleted the string from the chronograph and set up for the next test.

A “Err” display means that the first screen detected a projectile but the second screen did not. This is most often caused by aiming too high in the detection box, making it harder for the circuitry to catch the projectile. Honestly, I’m sometimes surprised that a chronograph works at all, let alone so well. For a 40S&W pistol round at 1000 fps, the chronograph has to notice a shadow that lasts about 40 microseconds across each detector. For the 7000 fps max velocity it is rated at, that shadow is about 6 microseconds. Light itself, which travels so fast that we only noticed in the last 300 years that it travels at all, can only go about 1 mile in 6 microseconds. In any case, I only had two Err displays in nearly 150 rounds, and statistics account for those missing shots.

I have several things to report about the results.

The oldest handloads I had for 40S&W and all the handloads for 10mm Auto were done before I discovered IDPA, so those are not particularly light loads. Most of my loads seeking a light recoil are much more recent.

A favorite load for that is 4.5g of TiteGroup, which I used interchangeably with 155 and 165 grain bullets. It is a very pleasing load to shoot. Recoil is slightly sharp, as in quick, but very light, not very forceful. It operates the pistol reliably. At a sanctioned match, they chrono’d at 960 fps. However, both weights with that load averaged 805 fps for me. I don’t know if ambient temperature can really make 160-ish fps difference or not. A quick Google reveals that on that match day, it was 83F and for my testing, it was low 50’s, 51F at 9:00AM.

Another interesting bit is that the the same powder charge with 155 and 165 grain bullets were essentially the same velocity, at least in this one narrow test, and assuming that the velocities were accurate, the power factor on both of these loads is essentially dead on minimum 125 for IDPA.

Similarly interesting is that a 7.0 grain charge of Power Pistol propels at 180 grain bullet faster than a 155, 10 out of 10 shots if the velocities are sorted.

Presented here in the order shot:

1 2 3 4 5 6 7 8 9 10 Avg
155 1121 1064 1064 1059 1107 1083 1059 1028 1063 1113 1076
180 1121 1115 1096 1084 0 1111 1102 1131 1112 1101 1108

In this chart, the velocities have been sorted, lowest to highest. Ignoring the lowest since the test on these 180 grain bullets included one of the two Err displays, the 180 grain bullets are always faster than their 155 grain counterparts:

1 2 3 4 5 6 7 8 9 10 Avg
155 1028 1059 1059 1063 1064 1064 1076 1083 1107 1113 1121
180 0 1084 1096 1101 1102 1108 1111 1112 1115 1121 1131
variance -1028 25 37 38 38 44 35 29 8 8 10

As for 10mm Auto, I fired a magazine of a commonly available factory load, Remington UMC. The Remington ammo and all four of my handloads were numerically essentially indistinguishable from the Power Pistol 40S&W load, all hitting at or just under 1100 fps. The only one that stood out much was 7.5g of Unique, which had a noticeably sharper felt recoil.

I had only 3 available 45 Auto loads to test. With either a plated Xtreme bullet or a poly coated BBI, 5.6g of Unique produced a nice 180 PF load. The BBIs were noticeably smokier.

I did not remember until I began testing a lighter 45 Auto load of 5.2g Unique that I had experienced some problems with powder dropping in the old Lee press when I was just starting out with it. Much like my experience with them before, I managed to get off two good shots before a squib stopped testing on the 1911. I had not happened to bring a rod to clear said squib, so I just aborted testing the 45 Auto. The two shots were promising, averaging 685 fps for a power factor of 158. That is too low for legal CDP division, but there is room to tweak it up to 165.

Finally, I wanted to see what the Winchester Varmint LF load looked like. This is a hyper velocity 22 LR load that uses a bullet made of tin rather than lead. They come out of my 3.4″ Walther P22 barrel at a screamin’ 1200 fps, with a high mark of 1246. Imagine how they will do with a rifle barrel or even my Ruger or H&R revolvers.

It will have to be a manual action gun because not even one shot operated the auto pistol. Some stovepiped, but most didnt even extract that well. I will try it in the Ruger 10/22, but I am almost positive they will not work it either.

I have enough variety of 22 ammo that I want to do a 22 only test, testing all the various ammo in all the various guns. Stay tuned.


Stance, Slack Out, Picture, Press!

Last Saturday, I attended the Foundations in Shooting Sports class from Texas Defensive Firearms Training. I knew that I would get a lot of good information and coaching, but even expecting it, I was surprised how much of an immediate difference the instruction would make in my shooting skills.

Before I continue, I’d like to report that my 5.5 grain Power Pistol loads functioned completely without incident, not counting one weak hand fail to eject that was likely from limp wristing the pistol. I have done that weak hand shooting before.

fairmarksmanI am a fair marksman, particularly if given a little time, and I am always willing to learn more. I listen for pro-tips, whether directed to me or just given in my presence, I observe as best I can how the more advanced shooters I see at matches prepare and when someone gives me specific advice, I am quite likely to try it and to research it and maybe modify it. One such piece of advice that made a huge difference in my control of the pistol was when someone spent some time to help me establish the grip commonly called Thumbs Forward. I have big beefy hands that were allowing me to shoot OK, even with a poor grip, but a solid grip instantly improved my shooting.

Old habits are hard to break, though, and the slightly unnatural support hand position was easy to forget to do until I was missing targets then I’d suddenly remember, correct the grip, and be instantly rewarded with better shots. Also, I was pretty bad about failing to reestablish that grip after a magazine change, or other action that transitioned my grip. I am largely over that and tend to grip consistently now, or at least more consistently. It now seems unnatural to hold the pistol wrong 🙂

That grip had been, until last Saturday, probably the single best improvement I had made in shooting skills. Now I have a few new skills to add to that list. They all tie together, too, and much of it starts with a good grip.

A good grip conducts the energy of recoil through your body and skeleton and ultimately into the ground, minimizing the movement of the pistol, giving better control and faster target acquisition. A solid stance will conduct that energy to the ground better. A poor stance will dissipate that energy into you and as noted by Newton, some part of you will move. Chances are, whatever it is will not help your shooting.

As IDPA is an action shooting sport, the shooter moves around through a course of fire to solve problems in a defensive scenario. Scoring is by time and every movement costs time. It takes pretty much a half second to take a step, whether at a shuffle, a walk or a run. A good stance lets you be positioned such that you are moving with all steps, in any direction. Otherwise, you might need to take a step to set up to move, then a step to move and 1 second is now gone from your time.

You will rarely enjoy the perfect stance, since you are subject to movement that may be restricted by obstacles, but you can make a good stance second nature. A good stance starts with your feet separated, laterally and medially. They should be about as far apart laterally as your shoulders are wide and medially, the toes of the rearward foot should be about even with the heel of the forward foot. Which foot is best to have forward varies with the situation. You should be bent at the knees and waist, with your shoulders over your knees, which both lowers your center of gravity and gives you better flexibility on directions you can move.

I learned what I knew about trigger control largely from old literature and years of practice. Get your sight picture, hold steady and slowly squeeze the trigger. Turns out, there is a better way.

The trigger has a bit of slack in it, where it takes a small amount of force to move the trigger until it reaches a point near release, where it becomes stiffer. If you are shooting something besides a Glock, the exact experience may be slightly different, but they pretty much all do this to some degree. Even the 1911 trigger has play to take up, though sometimes a gunsmith shortened that play with a trigger job. If this slack is taken out while the pistol is in transition to the next target, then you are ready to release the projectile sooner upon acquisition of the sight picture, saving precious time. Since you aren’t moving your trigger finger as much while the sight picture is in place, you have less opportunity to move the pistol as it fires. It’s a simple concept that made a surprisingly big difference in my shooting, but it’s maybe up there with the grip in it’s single cause improvement.

We covered some tips on dealing with barriers, like using your walkthrough to mentally mark where the edge of the barrier and the zero zone of the target line up so you can actually have much of your sight picture and slack out done before you emerge from the barrier and take a rapid shot, saving precious time. Similarly, if you need to move to advance around a barrier to address multiple targets in tactical priority, you want to set up the positions for your feet so that you don’t have to take any non-productive steps, saving precious time. In your walkthrough, you mentally mark where your rearward foot should land to set up any such steps ahead of time.

We covered target transitions. Until this class, I transitioned from target to target much like a tank, turning head and pistol together until the sight picture rests upon the target. A better way is to take advantage of the much higher speed at which you can move your head or eyes. As you finish one target, turn your vision to the spot on the next target to aim for, letting your comparatively slower body move to catch up and move the sights into your field of view on the target you have already acquired visually. While the pistol is moving, you can be taking out the slack in the trigger so that it’s ready to fire immediately when complete sight picture is acquired, all saving precious time.

We also covered moving, while maintaining grip, stance and trigger control. I had done some of this fairly successfully, but now armed with a better stance for moving and better trigger control, I was able to put 7 or 8 out of 10 shots onto a 6 inch steel plate at 10 yards while moving laterally. It was extremely gratifying and definitely made the day worth the price of admission!

Now I have specific drills to work on with my SIRT pistol as well as dry fire and range practice with my G20.

As an aside, I noticed today that my current classifier has expired as of March 15. I’m still Marksman in three divisions, but without a current classifier, I wont be able to shoot in any sanctioned matches. I have none scheduled before the next classifier shoot in mid-April, so that’s probably ok.

Displacement / Time = Velocity

I spent a few minutes this afternoon setting up my chronograph so I could quantify the difference between the two loads I currently have.

chrono1

The normal spot where I shoot is overgrown right now, so I set up to shoot at a low angle across the creek.

chrono2

As a control, I shot 10 rounds of Remington UMC. It ranged from 976 to 1023 fps, averaging 1002 fps, for a muzzle energy (and thus, recoil energy) of 401 ft-lbs.

The 4.4 grain Power Pistol loads, the ones that don’t run the gun well, were, not surprisingly, significantly slower. They ranged from 677 to 743 fps, averaging 705 fps, energy 199 ft-lbs. Interestingly enough, the first shot was the lowest speed and it was the only one that didn’t cycle the pistol, but several of the empties literally rolled off my knuckles on ejection.

For the 5.5 grain loads, I shot 15 rounds instead of 10, partly because I wanted to give it more chance to fail to eject. The velocities ranged from 838 to 899 fps, averaging 869 fps, energy 302 ft-pounds. That is an energy increase of 50% over the 4.4 grain. They were definitely a little sharper, but more importantly, they worked the pistol really well.

I will split the difference in a future load, seeking the balance. In the mean time, I have a stack ready for the class.

ammostack

While cleaning the pistol for the class tomorrow, I finally found and solved the issue where my magazines would rarely, if ever, drop free without being manually pulled out. I kept examining the magazines themselves, but it turns out to have been a roll/burr in the magazine well on the pistol itself. I neglected to take before pictures, but here is the repaired well.

magwell

All magazines I have drop freely now, so I can put the stock floor plates back on them, presuming I can find them. The big plates didn’t help anyway.

magazines


Running A Bit Lean

I had the first local IDPA match with ammo I loaded entirely on the Dillon press. I had several ammo malfunctions, but they were all pretty simple failure to eject the spent cartridge. I have a 13 pound spring in the pistol. I can order an 11 pound spring, and I may still, but in the mean time, I will just twiddle with the carb and richen the mixture a little.

The ammo I had is 4.4 grains of Power Pistol pushing a 180 grain plated RNFP. This load is actually below what’s shown on the chart in my Hornady book for 180 grain FMJ. The intent was to try to get something around 700 feet per second to meet 125 power factor with the softest recoil possible. Seems I may have met that last criteria a bit too well by not generating enough recoil to operate the pistol reliably. I’d say maybe 10 or 15 percent of them stovepiped or rechambered or otherwise failed to eject completely from the pistol. It was even worse on a stage shooting with weak hand while on the move.

The 11 pound spring may help, but the slide on the Glock 20 is still pretty heavy, designed to help absorb the significant recoil generated by the sometimes 700-800 ft-lbs muzzle energy from full tilt 10mm Auto, while keeping the stock 16 pound spring, versus operating on the paltry 200 ft-lbs or so that my soft shooting load is producing.

Because I need 300+ rounds of reliable ammunition *tomorrow*, I am bumping it up more than I would if I were just working up the final load. I’m going to try 5.5 grains of Power Pistol, which should run my 180 grain bullet at about 800-900 FPS.

Production Increase

Well, the extra bins definitely helped speed up production!

twobinsThe color difference is fairly apparent here. The bin in the foreground is the Akro-Mills native bin, the background is the Dillon version.

readytoloadThis arrangement with empty brass within easy reach definitely sped up the loading rate. I was able to get well over 150 rounds loaded in a little more than an hour, including some troubleshooting as detailed below. My QA fail rate is about the same, with most rounds dropping unrestricted into my gauge block, a few fitting well enough to probably work in the pistol, but I rejected them to the rework bin (since I now have enough bins to have a rework bin) and a couple that wouldn’t go in well at all. Historically, I can usually get most of those those back with the Bulge Buster, but it is not currently mounted on the bench.

I had two or three rounds where the bullet seating went badly. I probably need just a tiny bit more flare in the case mouth to address that. I set it intentionally close to help keep from overworking the brass, so I have some adjustment range. Cartridge OAL was well maintained in spot checks, 1.125″ to 1.130″ with most checked units at 1.127″.

The biggest problem was with primer feeding, mostly due to the spent primer catcher chute not pivoting freely on it’s somewhat damaged cotter pin. This chute is gravity operated. The down stroke of the ram opens the chute to allow the spent primer to fall out, but the chute would bind on the pin and not fall closed on the upstroke. The spent primer would fall into the works, frequently landing where it would prevent the slide assembly from returning forward to align the new primer with the shell plate. I reworked the pin a couple of times before I got the chute working reliably. I will add that pin to the list of minor parts I’d like to order from Dillon.

That left a much simpler issue wherein the slide itself needed cleaning and lubrication. Normally, the slide is operated by a carefully formed steel wire rod and rollers that push the slide out to pick up a new primer at the top of the upstroke. A spring pulls the slide back in, against the rollers and rod on the downstroke. It would on some occasions, snag for a fraction of a second and when the spring would overcome the friction, the slide would move suddenly, often unseating the primer from the punch assembly. This primer would most often land in the works somewhere, either stopping the slide from going all the way home, or landing where it would interfere with the shell plate platform. If by a some miracle of chaotic physics it landed clear of the works, then there was obviously no primer for the next case.

In the course of looking up the proper part names above, I did finally find the Dillon bins, for $2.95 each. 🙂


Neato Bin Ditto

Having only one bin on the Dillon press definitely slows production. I couldn’t find only the bins on Dillon’s website, but in perusing Amazon, I found the same physical bins, with even the same manufacturer’s part number (Akro-Mils 30220), offered in case quantities. I ordered 1 case of 24, about $50. They arrived today.

akro-binThough as depicted here, the color looks like Dillon blue, it’s a trick of my office lighting, for the actual color is more like Pantone 280C.

While I don’t think I really need 24 of these, it does seem as though several would be handy. I think that will make it easier to load a large batch of the same ammo without necessarily stopping to process the output bin.

They have a nice slot for a labeling card and they stack nicely.

bin-stack

The good thing is that they stack without reducing the volume of storage they provide. The bad thing is that they stack without reducing the volume of storage they require. Still, the whole case of them is 9″ x 17″ x 15″.


It’s About Time…

I finally got the Dillon RL-550B press all set up and loading ammo!

press

I reused my Lee Precision dies, partly because I had them already and partly because the Lee Factory Crimp die is highly recommended, even by many Dillon users.

On the Lee Pro-1000 press, there are three stations with dies, resize and deprime, flare and charge, seat and crimp. The Dillon is a four station press. I kept my Lee resize and deprime die on station 1 and used the Dillon flare and powder die.

For the bullet seating and crimping stations, I elected to keep my seat and crimp die, but adjusted it pretty high up so that it will only seat the bullet. I got a second die for crimping, with the bullet seating punch on it adjusted very high. This separates bullet seating and crimping operations. I may consider the Dillon seating die in the future, for it does have some interesting features, like the ability to disassemble it for cleaning without losing it’s setting. For now, I went with what I know.

I stopped using polycoated bullets, such as BBIs, because I was getting a ring of shaved material right at the case mouth, which was usually caught at the case gauge, but occasionally caused difficulties going all the way into battery. More case flare did not seem to address the issue, and I believe it was likely because the one step seat and crimp is still pushing the bullet down as the die is crimping the case. The harder copper plating on bullets like the Xtreme Bullets are just not as sensitive to it and are essentially just as inexpensive with frequently free shipping, minus BBI’s always included shipping. However, with these operations separated, perhaps I can revisit the poly ammo option.

Compared to the Lee, it is a substantially beefy press. It’s a bit more manual, though. My Lee has an automatic case feeder and the Dillon does not. The case feeder option for the Dillon is very nice, with a motorized unit up top to load loose brass into the press ready to process, whereas the Lee is really just a chute that you fill manually. With the case feeder in place on either press, one hand stays on the handle and the other handles placing bullets and, in the case of the Dillon, also indexing the shell plate.

There is much to recommend the simplicity of the Lee approach. It’s a fairly simple plastic turret with four clear tubes and a shallow funnel collator to simplify filling them, and a simple pusher to position the case into the shell plate during the upstroke of the handle. Each tube holds about 40 empty rounds of 40S&W. As each tube empties, you turn the turret assembly to bring a full tube into battery. Once empty, you reload the tubes all at once with the attached funnel and an agitation technique that causes the cases to drop, head first, into the tubes. It takes all of 20 seconds and you’re back to loading. It’s such a simple and inexpensive approach that it’s not really optional; the press ships with all the but the $12 funnel collator included.

The Dillon case feeder, however, is a large motorized contraption that costs more than the entire Lee press. Not saying I don’t want one, just thinking the $270-ish would buy a lot of reloading components right now. I wish there was an intermediate option, something between having no casefeeder and having the super-deluxe model.

No, for now I will get a few extra bins so that I can have empty brass at my right hand and and thus become the case feeder. 🙂 These trays from Amazon are the exact model provided by Dillon, though they are likely a different shade of blue and don’d have Dillon’s logo on their sides.

Since I have had some feeding problems with some ammo I made recently, particularly bullet setback while feeding, I am starting conservatively. I loaded 180gr RNFP over 4.4g of PowerPistol, 15 each with new brass and range brass. They are 1.125 OAL and crimped to 0.420, +/- 0.002. As I was setting the seating and crimping dies, I tested the crimp (with unprimed, uncharged brass) by compressing the finished round with pliers to verify that it takes substantial effort to move the crimped bullet.

tray

If these feed and shoot correctly, I will see about having a bunch ready to go for a shooting class I am attending this weekend 🙂


Dillon RL550B and First Sunday Match.

I have had this Dillon thing for several months now and I am finally getting it installed for use.

Way back, I broke the particle board work bench top with normal press operation.

IMG_01241

Even when I put it there, I knew it was just a matter of time until it would give.

I cleaned up the damage as best I could and put a piece of 3/4″ birch plywood on the top of the bench, glued down and backed up with a metal plate underneath.

IMG_01243

One the front edge, where the damage was most severe, I also sandwiched the damaged particle board with a strip of plywood underneath.

IMG_01244

This has all served really well, the press was now mounted solidly enough to reveal other problems instead 🙂

Enter the Dillon.

The Dillon has the strong mount accessory base that is wider than the piece of plywood that I bolstered the workbench with. It solves problems with some installations, but it may not be the best solution for my installation, due largely to my relatively high benchtop.

My original plan was to add a strip of 3/4″ plywood to make it a little wider to fit the Dillon. I decided that I didn’t really want to piece it together like that and thought I should just cut a bigger piece of plywood. I have a piece of exterior grade plywood I purchased but turned out not to be needed for a ham radio project.

Then I realized that the whole workbench could benefit from a plywood top. I have a bench vise on the other end of that work area. That plywood piece I have is solid, other than the holes drilled in it, but it’s kinda rough. I remembered a plywood table/bench top I made long ago that was not friendly to skin.

I then decided that if I was gonna do the whole surface, it would be worth getting a nice piece of plywood for it, so I verified that a 2×4 foot piece would fit and I went to Lowe’s for plywood, hardware and Liquid Nails adhesive.

By then, it was time to get ready for my attendance of the first official 1st Sunday IDPA match and I didn’t want to fix the workbench right then as badly as I wanted to go shoot!

Matchwise, because of the troubles I was having with the Remington primers in the Starline brass, I didn’t trust my last batch of ammo and shot with Remington UMC factory ammo. I brought a 10mm Auto barrel and some ammo for it, but elected to go with factory ammo for the 40S&W.

Stage 1 hurt but the rest of my stages were reasonably good, especially considering that it has been a couple of months since my last match. The majority of the pain was from one target. It was at the far left of the range, kinda in the dark, a vertical target with an angled non-threat in front of it. Not only did I hit the non-threat, but I aimed at the non-threat and having missed it, made up the miss. The actual target was clean and untouched. So, 10 down plus 5 seconds fail to neutralize on the target and not one, but two hits on the non-threat for 10 more seconds. I’m pretty sure there was another procedural as well, out of cover for another target. The rest of the stage was pretty normal, 1’s and 3’s.

The rest of the stages weren’t bad either. Overall, raw time 109.59, total 142.09. Stage 1 points down and penalties accounted for 22 seconds alone.

A few days later, I managed to finish the bench top and mounted the Dillon and the bench vise.

20160218_072133

Upon removing the vice, I found that the particleboard beneath it was probably only a few solid whacks from complete separation like the original Lee press did.

20160218_072207

Now the workbench is too pretty to work on…