Radioactivity is in the air…

for you and me….

I always thought it might be cool to have a Geiger counter. On the other hand, I never wanted to NEED to have a Geiger counter, ya know? Happily, it’s still optional, but the options are pretty compelling.

I was born in the early 60’s and like almost everyone else on the planet, I was quite taken with Apollo. I recall my older brother putting one of his friends’ motorcycle helmet on me and setting up a closet with a chair and few reimagined toys so that I could be an astronaut in my capsule.

While his interests ran more towards organic chemistry, I picked up more of a technological gene and I tended to build stuff. And take stuff apart. My father was a jack of many trades and I learned a lot about building from him. He was also a lapidary, which broadened my view into material sciences. By the time I was in middle school, I had long outgrown what the Radio Shack 150 in 1 electronics experimenter kit could offer. It was an absolute favorite Christmas gift.

Fast forward a bit and my career has been almost 100% technical and almost all of that has been one form or another of communications.

Having experienced the entirety of the Cold War as an observer, I was fascinated by nuclear energy. It is actually extremely low tech. Just bring a certain amount of certain metals close enough together for their base characteristics to magically generate essentially STUPID amounts of power. On the other hand, understanding and controlling this low tech challenged some of the most brilliant and gifted minds that the world has seen, before or since. It sometimes found them wanting.

I didn’t know that I liked math at that time. I think I just didn’t like the math we were being taught. I think it seemed like a lot of busy work, with no real tangible benefit. I’d rather keep designing circuits LOL. It’s amazing that a lot of what I played with worked at all, considering that I was just easter egging components and seeing what happened. I understood at some level that engineering was pretty math-y, but not in a way that triggered any interest in math. I had D’s in math class, but I calculated how many holes were in the acoustic ceiling tiles in the library at school, using what I didn’t realize at the time were statistical methods.

And it turns out, a LOT of the math in nuclear science is statistics. Whoda thunk it?

My practical interest in radiation stayed well below ionization energies. I worked in broadcast television, two-way radio, became a ham radio operator tinkering with microwaves, and implemented wireless burglar alarm systems long LONG before anything nearly as advanced as LTE or WiFi. When my career moved more into telephones, that eventually because digitized and eventually Voice over IP came along, giving me a significant shift in data rates, but no technology that I hadn’t already be working on or at least adjacent to since age 19. I’m 60-something now.

Beyond the brief but real concerns for global thermonuclear war in the middle there, ionizing radiation thankfully played very little *directly* into my life. In the burglar and fire alarm career, ionization smoke detectors are a thing. They work by measuring the resistance of a column of air that is ionized by the constant alpha emissions from a TINY piece of Americium 241. When some products of combustion enter this column, they raise the resistance of this column of air, triggering the alarm.

Photo electric smoke detectors shine a beam of infrared out into space, There is an infrared detector positioned to look at the space this beam crosses. When particles of smoke waft into this beam, more infrared is reflected into this detector, triggering the alarm.

These two technologies detect different parts of combustion. The photo electric need the relatively large particles of smoke to be detected. The ionization detector can actually miss smoke because the particles are relatively inert, but various gaseous hydrocarbons will change the resistance of that column of ionized air.

I see an ionization smoke detector in my future, but not as a fire safety device.

I have caught quite a few videos with radioactive subjects. Some of the more compelling presenters are Scott Manley, Kyle Hill and Tyler Folse.

With no small inspiration from Chris Boden, I finally started looking seriously at a modern radiation detector, specifically one of the offerings of Radiacode.

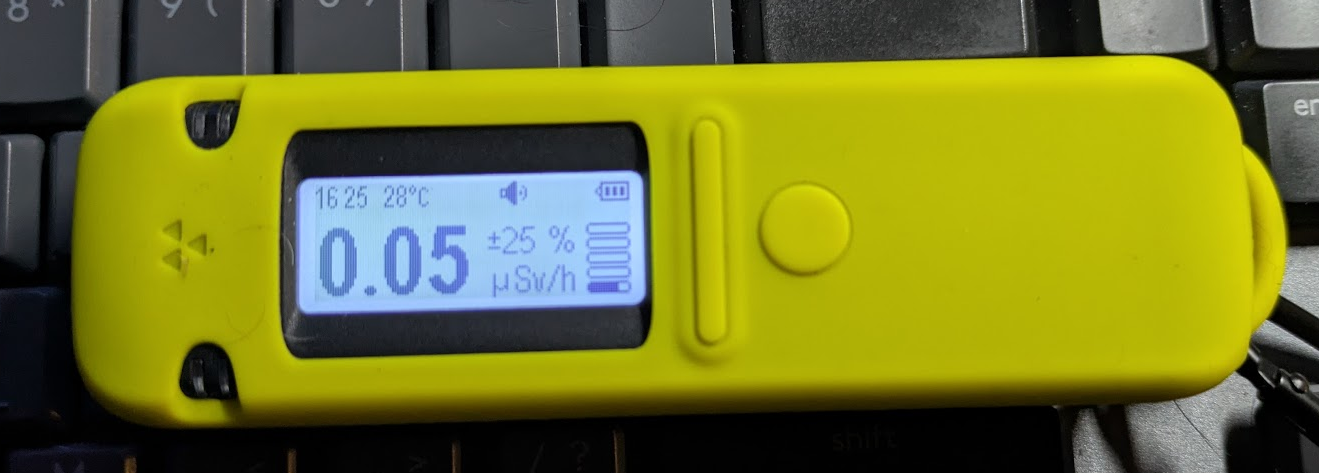
I dithered a bit, several months in fact, while I wondered if the novelty of such a device was worth the investment. My interests finally won out and I purchased a Radiacode 103. The Radiacode devices are based on a scintillator, a crystal of some sort that emits a tiny flash of light when a suitable particle or ray hits it. One advantage of this type of detector is that the flash can be measured and calibrated measurement of this flash reveals the specific energy of the detected radiation. By classifying the variation of this energy, it can identify the emitted spectrum and thus identify a wide range of elements. The Radiacode 103 is less sensitive than the Radiacode 110. Even at order time, I dithered between the two, with the 103 winning out for being a little less $, leaving me a little discretion to get a couple of accessories with it,like this stunning yellow silicone protective sleeve.

It turns out that the 103’s lower sensitivity makes spectroscopy take longer, but it is less likely to be overwhelmed in the presence of a really strong radioactive source. Lets hope I don’t get to test that out.

While the display on the unit can display a low resolution spectrum, it is much easier to deal with using the Radiacode app on a phone.

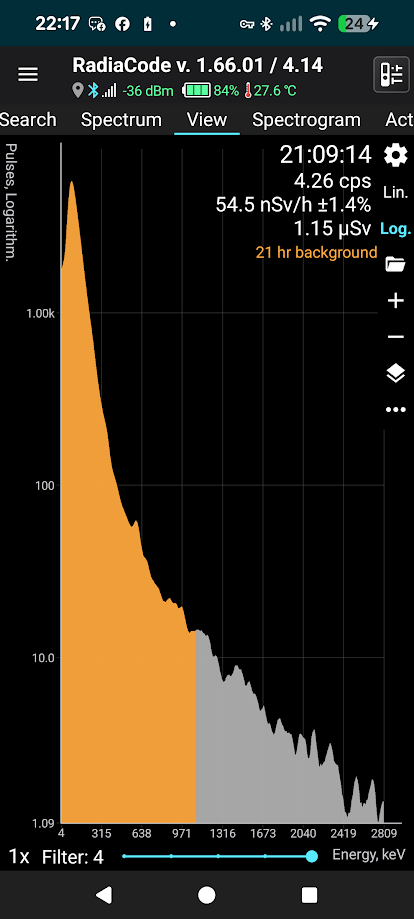
Once I understood some of the basic operating principles, I captured a pretty long background radiation baseline spectrum, 21 hours. The unit uses very little battery power. At the end of 21 hours, it had 89% charge left in its battery. I charged it anyway.

Amongst my many almost skills is TIG welding. I have quite a few tungsten electrodes. Some electrodes, for reasons that I have not adequately explored, work better with small amounts of various rare earth metals in the alloy. One of these, Thorium 232, is mildly radioactive. All radioactive elements are, by definition, unstable. They will radiate whatever particle they are prone to emit and transmute into the next lighter element in their “chain”. From a nuclear physics and quantum mechanics point of view, the decay of Thorium 232 it is a very very slow process. Thorium has a stupidly long half life of 14 billion years, meaning that, unstable or not, the vast majority of thorium in any given sample of the metal, will remain thorium for, in human terms, beyond forever.

Half life is a curious term. It is a statistical rating of how long it will take for half of the atoms in any sample of an element to have emitted whatever their flavor of radioactivity is and transmuted into the next lighter element in their chain. The decay chain of any radioactive element has a lot to do with the structure of the element, how many protons and electrons the nucleus has, how many electrons are in each electron shell, etc. For the Thorium chain, and really any alpha particle emitter, it will decay into something with an atomic mass divisible by four, four being the number of subatomic particles in an alpha particle. Duh, kinda. Next in line from Thorium 232 is Radium 228. Statistically, it will remain Radium for 5.7 years, then beta decay (lose an electron) into Actinium 232 for 6.1 hours, then beta decay into Thorium 228 for 1.9 years.

At this point, it gets into a bit of an alpha rush. Thorium 228 alpha decays to Radium 224 for 3.6 days, to Radon 220 for 55 seconds, to Polonium 216 for 0.14 seconds, to Lead 212 for 10.6 hours. That will beta decay into Bismuth 212 for 61 minutes and we finally reach a fork in the road.

Bismuth 212 can either alpha decay into Thalium 208 for 1.1 minutes, then to Lead 208 for the rest of eternity, or Bismuth 212 can beta decay into Polonium 212 for 300 nanoseconds then alpha decay into stable Lead 208.

Glossing over a LOT of details, generally, the longer the half life, the less radioactive the element is. Thorium 232 is interesting in that it has the longest half life of any element heavier than Bismuth.

I digress.

As mentioned, Thorium 232 is mildly radioactive, an alpha emitter. Alpha particles are not very penetrating. The plastic case and the silicone sleeve on my 103 are way more than enough to completely block alpha particles from getting to the scintillator in the unit. However, some of Thorium 232’s decay chain are beta and gamma emitters, which we can detect. Also, all of these, including alpha particles, can induce xrays in other elements, give us an indirect identification of alpha emitters.

The people at Radiacode are better at the math than I am, so their software knows how to identify elements based on the electron volt energies detected.

Remember thoriated tungsten welding electrodes? This is a post about thoriated tungsten welding electrodes.

I have a small variety of tungsten electrodes for my TIG welder. According to my testing with the Radiacode 103, none of them are thoriated.

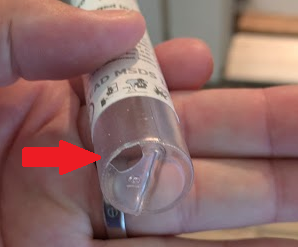
So, I ordered some from our favorite abusive uncle, Amazon. I ordered a 3 pack of 2% thoriated tungsten electrodes. It was my own screwup that I ordered 0.040″ diameter rods, which are far too small for my current setup, which needs 3/32″ (0.09375″) rods. As an aside, I am now curious about the use for 40 thousandths electrodes and I will look into that. However, upon their arrival, I found that the large clear plastic tube that the electrode (singular) was in had a hole in the bottom of it that allowed two of the three to escape. They were not in the shipping envelope, so they were lost before shipping. As I’m sure everyone is aware, I doubt the people working in an Amazon warehouse are paid enough or allowed time enough to care if the package something comes in is broken.

Since these were ordered primarily as something to use specifically to test the Radiacode with, I elected to take my lumps and not deal with returning them (it).

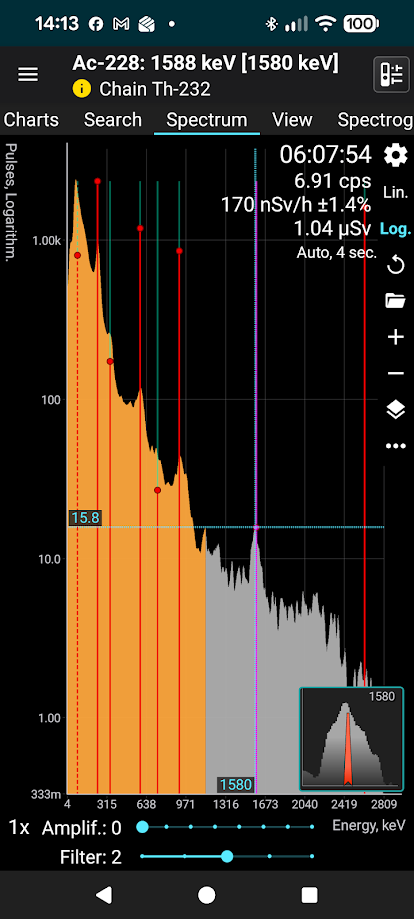
I did find that in the direct presence of this electrode, the Radiacode definitely detected higher than background radiation, but it was definitely not a lot. It took most of 6 hours to register enough peaks in particle energy to identify the Thorium 232 decay chain.

The purple line represents the specific energy level that I am looking at here, which corresponds to the characteristics of Actinium 228, but note all the red lines at various peaks. These are other “fingerprint” energies which ultimately reveal that the spectrum under test is in the Thorium 232 decay chain.

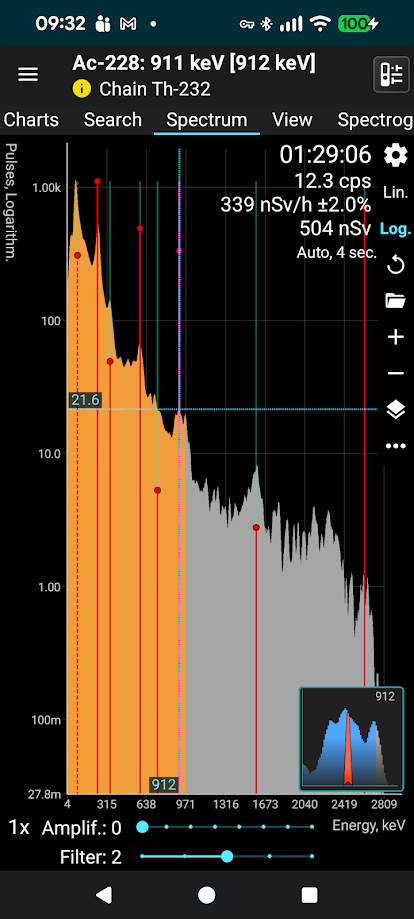
Gathering this spectrum took so long because a single 40 thousands wire sitting directly by the detector does not have a particularly high count of radiation detection events. Today, I wanted to recapture this spectrum, so I broke the otherwise unusable electrode into several pieces, five to be exact, to concentrate the signal on the detector. I was able to get a really good spectrum in about 90 minutes.

Same basic results, just a little faster because there was more material right by the detector.

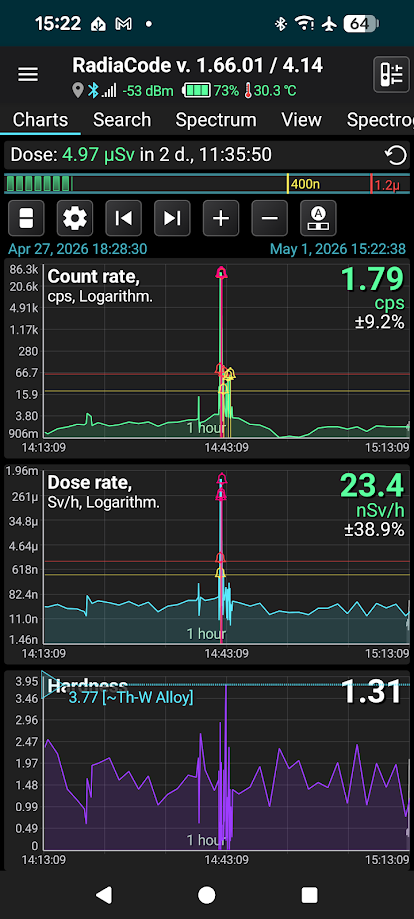
Between these two spectrum captures, I had a chance to fly to Virginia for work. For my first trick, I left the Radiacode turned on and in my laptop bag for the TSA security check. Understandably, it was briefly exposed to a fairly high dose of Xrays.

The poor thing was beeping an alarm at me when I retrieved the bag after TSA.

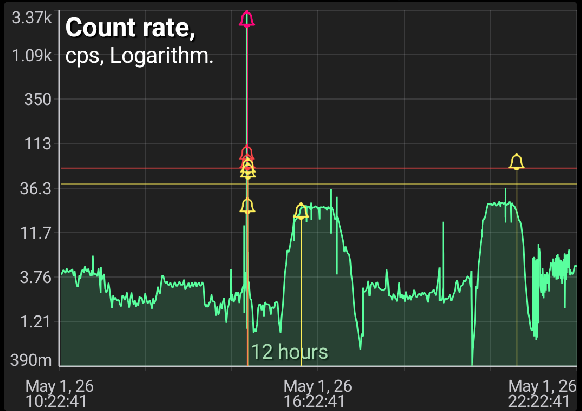
To put them all together for the day’s travel, there is at least double the count rate while in flight. This flight was Dallas to Orlando then Orlando to Norfolk.

Note the gradual slope while climbing and descending. There are also noticeable dips that appear to be while I aboard, but we were on the ground. I am not sure what causes that.

For some reason, this historical data does not show the similar dose rate. I am certain that I dinked with some setting that broke that, some scaling factor I would guess. Shrug.

Stop The Presses!

Ok, it’s not *that* important…

I have bought a LOT of stuff online. Some, such as my wife, would say I have bought too much stuff online. That isn’t exactly what I want to talk about.

Most merchants will semi-randomly send an email asking for a review of some recently purchased item. Often, may usually, they are asking for a review of some extremely mundane thing that was *also* ordered with some fairly major purchase. One of my favorites is when I ordered a CyberPower UPS for $240-something dollars and in the same order, I had a small pack of washers, not even fancy washers. Plain ole’ mild steel washer with a zinc coating. Guess which item they wanted a review for?

I had a similar thing happen recently. I ordered my ZWO EAFN and accessories from Agena Astro. The EAFN was $180 and the (arguably unnecessary) ZWO focus hand controller was $30-something. The email wanted me to review the hand controller.

So I did. Admittedly, I had Claude.ai give me a framework to build on, but here is my review of the ZWO EAF Electronic Automatic Focuser Hand Controller:

★★★★★ 5/5 — This Focuser Changed My Life (And Possibly My DNA)

I want to start by saying I was a skeptic. I’ve stared into the void of deep space with my own two trembling hands turning a focus knob like some kind of caveman, and I thought, “That’s fine. That’s good enough.” I was wrong. I was so, so wrong.

The ZWO EAF Electronic Automatic Focuser Hand Controller didn’t just improve my astrophotography setup — it recalibrated my understanding of what it means to be a person. The first time I pressed that little directional button and watched my focuser rack in and out with silky, motorized precision, I wept. Not from joy. From the sheer, crushing realization of how much of my life I had wasted twisting things manually, like an animal.

The buttons themselves are a masterclass in tactile engineering. Each press feels like a gentle handshake from the future. The step-size adjustment dial doesn’t just change increments — it changes epochs. I no longer measure time in minutes. I measure it in focuser steps.

My marriage has improved. My cat now makes eye contact with me. NGC 7000 has never looked so sharp, and neither, frankly, has my soul.

Do I need this to focus my RedCat 51? No. Did I need fire? Also no, technically. But here we are, building civilizations.

Pros: Everything. Literally everything.
Cons: I now feel deep, personal contempt for anyone still focusing by hand. I look at them differently now. I can’t unsee it.

Five stars. Would sacrifice my other astro gear to a black hole to keep this one item.

Quick Update

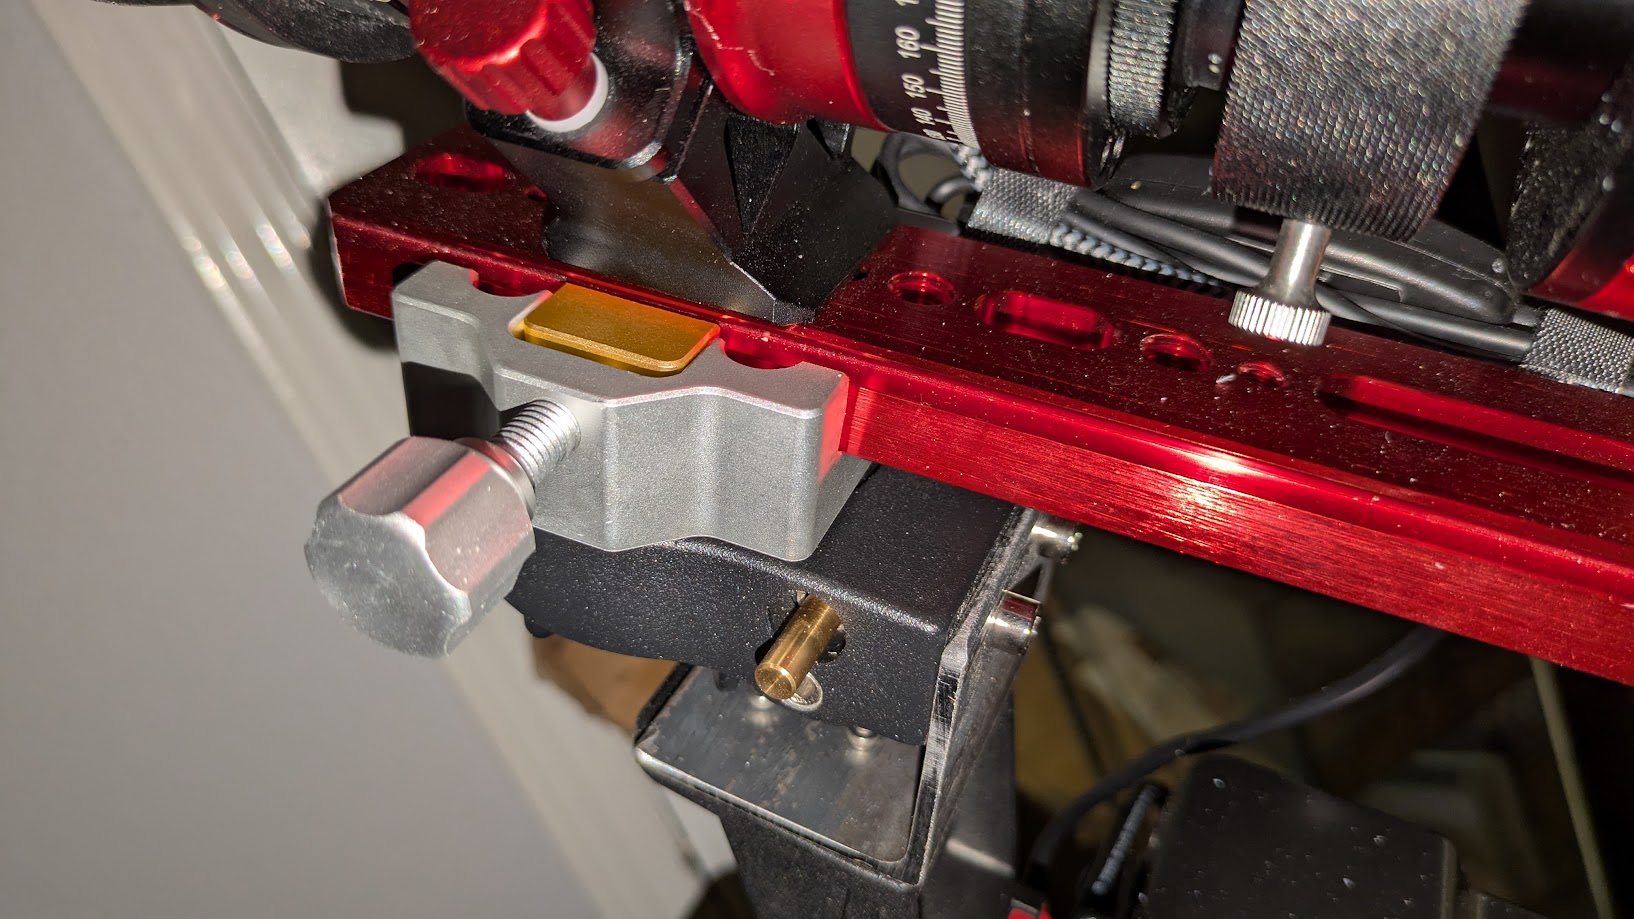
As mentioned earlier, I ordered a Vixen clamp with a 1/4-20 threaded hole to interface between the rotating platform. It’s not red, but it still works 🙂

Nothing makes dust show quite like a bright camera flash.

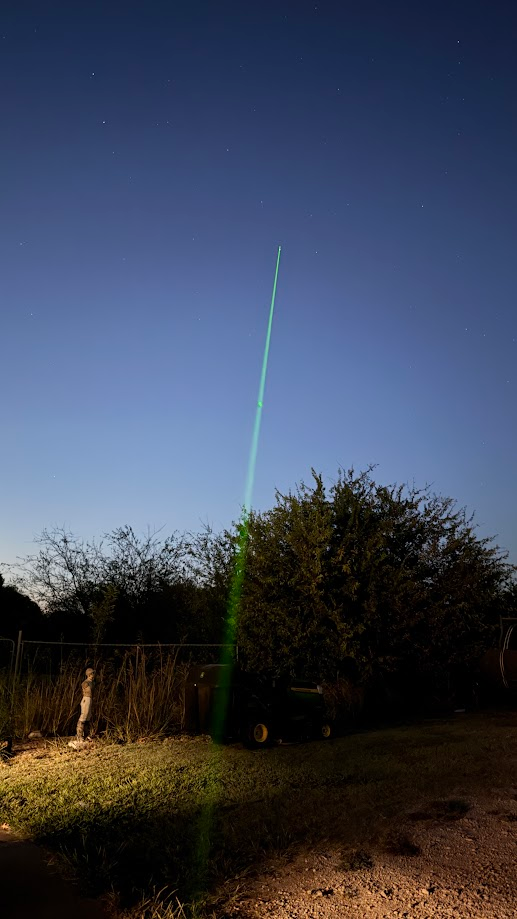
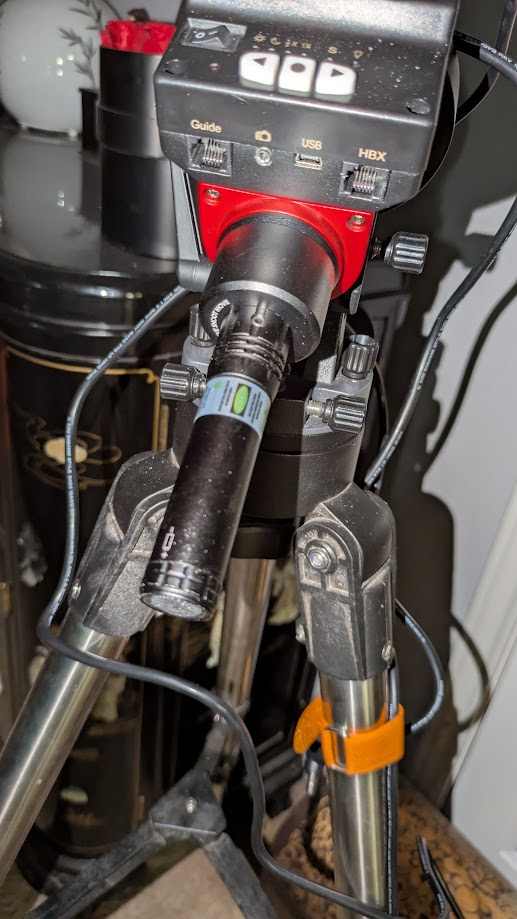
I also got a glorified laser pointer to help with rough polar alignment. This is a Move Shoot Move product specifically for the iOptron Sky Guider Pro.

Argh. The dust. Obviously, there is some cleaning to be done and when I leave the rig assembled in the living room waiting for clear nights, it needs to be covered.

Anyway, as of this writing, I have not yet tried out either accessory.

Of course, I am already considering a mount upgrade. To be honest, I have thought about it for a while, ever since it became obvious that locating targets can be challenging. It makes no sense to upgrade at all if it’s not one that is go-to capable.

The preference would be for a ZWO AM3. It wouldn’t need any counterweights, which would keep the rig compact. It is elegant. It is red. 🙂 There are, however, 1500 other reasons to shop around. Nice as they are, the price would tough for me to justify.

The most economical go-to mount today seems to be the Sky-Watcher Star Adventurer GTi. The retail for about $580. A kit that includes a tripod would be about $680. This would enable other features of the ASIAir software, as well.

I could attempt to recoup some of this cost by selling my iOptron SkyGuider Pro and tripod, and my redundant ASIAir Plus. All tolled, I invested almost $1000 for these items and the accessories they would include. Perhaps I could get $400-500 for them. That is most of the way there.

Gate Power Update

A question posted on a Facebook group this morning inspired a reply post in which I told the CliffsNotes version of the gate story. That has inspired me to update here.

In short, the OP in the group was asking for advice on providing solar power for a security camera. The generalized advice give came in three basic forms.

  1. An off the shelf solar camera. Reolink, for example, makes several models. I have been considering this option to deploy cameras where I can better monitor the horses in the pastures. I did consider this for my gate camera, but I was also already into a mild sunk cost fallacy of wanting my own system to work. Plus, eventually I needed more than just a camera at the gate and my solar system now provides power for all of those devices.
  2. An off the shelf solar power pack. Honestly, looking for something like this had not even occurred to me when I was developing this gate camera power system. While I don’t think the reasonably priced units would have worked in the long run, for just the camera, it would be pretty elegant.
  3. There was quite a lot of advice on sizing and building a solar power system. The gist of the advice was that you need 3-4 times more solar and battery capacity than your load requires in order to keep a battery charged with only 8ish hours of sunlight a day and especially for marginal cloudy days.

I think my major contribution to the conversation would be my logged battery voltage, showing the tendency for the battery to trend lower each day when there is inadequate sunlight for a full charge.

The Shelly UNI battery voltage log on Home Assistant now has nearly 9 months of data to review. Here is the year to date chart:

This is also kind of a weather log. Dark regions reflect cloudy and/or rainy days where sunlight was low. For example, the significant dip in late January corresponds to a few days of light snow, sleet and stupid cold temperatures, a low of 11F. Similarly for the low dips in early March, late April and early May, all cloudy and stormy days. Almost no significantly cloudy days since May 21. Wunderground history is a very handy resource.

The trend revealed here is that, other than the dips from cloudy days, the nightly low voltage slowly climbs from January to May, where it remains pretty stable to today.

Aiming Too, Please

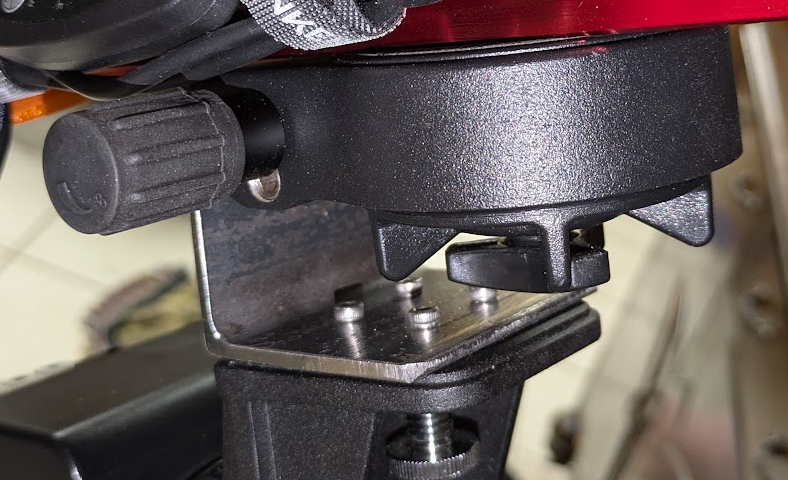
One of the things that has bothered me about the whole rig for a long time is aiming in declination. Currently, I am using a steel mounting block that came with the SkyGuider. It is pretty secure, but the thumbscrew locking method frequently results in it moving after carefully aiming it. Also, if the particular right ascension position has it leaning very much, then this mounting block can be difficult to secure because of the way the the mounting block thumbscrews want to seat in a groove, but the whole assembly is trying to wedge out of said groove.

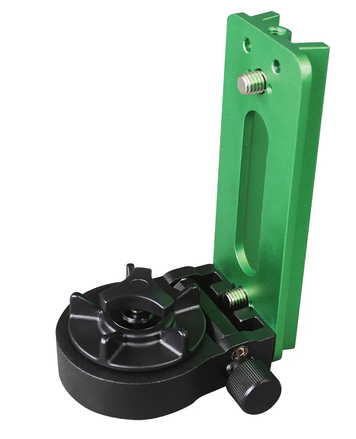
This has been a bother since day one. So much so, that three and a half years ago, I ordered a Sky-Watcher Star Adventurer declination bracket. This is designed to fit, perhaps obviously, the SkyWatcher Star Adventurer. Importantly, it has a rotating platform for the rig to mount to.

While this picture is obviously intended to spotlight the rotating platform, it is technically upside down. 🙂

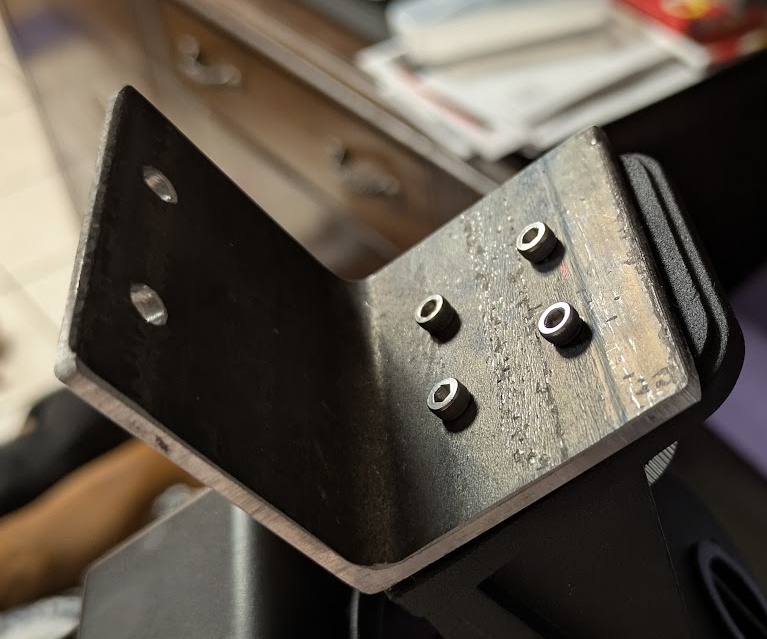
Sadly, I could not figure out a way to attach this whole assembly to my SkyGuider. I recently decided that the best way would be some kind of right angle bracket. I shopped for some suitable sort of commercial bracket, to no avail. I realized that I should just make one.

The four screws attach the bracket to the top of the iOptron dec bracket.

Then the rotator is attached to the top of the bracket.

Note the clutch ring. Loosen the clutch and your can freely rotate the rig. Tighten the clutch, then the knob on the side turns a wormscrew to fine adjust the position.

This assembly was completed just last night. Weather permitting, I hope to try it out tonight.

For the moment, I have it clamped into a 1/4-20 hole on the bottom of the dovetail rail. Happily, there is a hole very near the balance point, but I would still rather have it in a dovetail clamp.

Of course, I have a dovetail clamp of a sort. This one is made to attach to the bottom of the ASIAir Plus and connect it to a Vixen dovetail plate. It has crossed slots in it. The 1/4-20 stud on the turntable isn’t long enough to reach through the slots to a nut. I ordered one that has a suitable threaded hole, but I am prepared to modify this one if that doesn’t work out.

First… Light?

The camera arrived without drama.

Before the ink was dry on my last post, I decided to deploy an autofocus system for my rig.

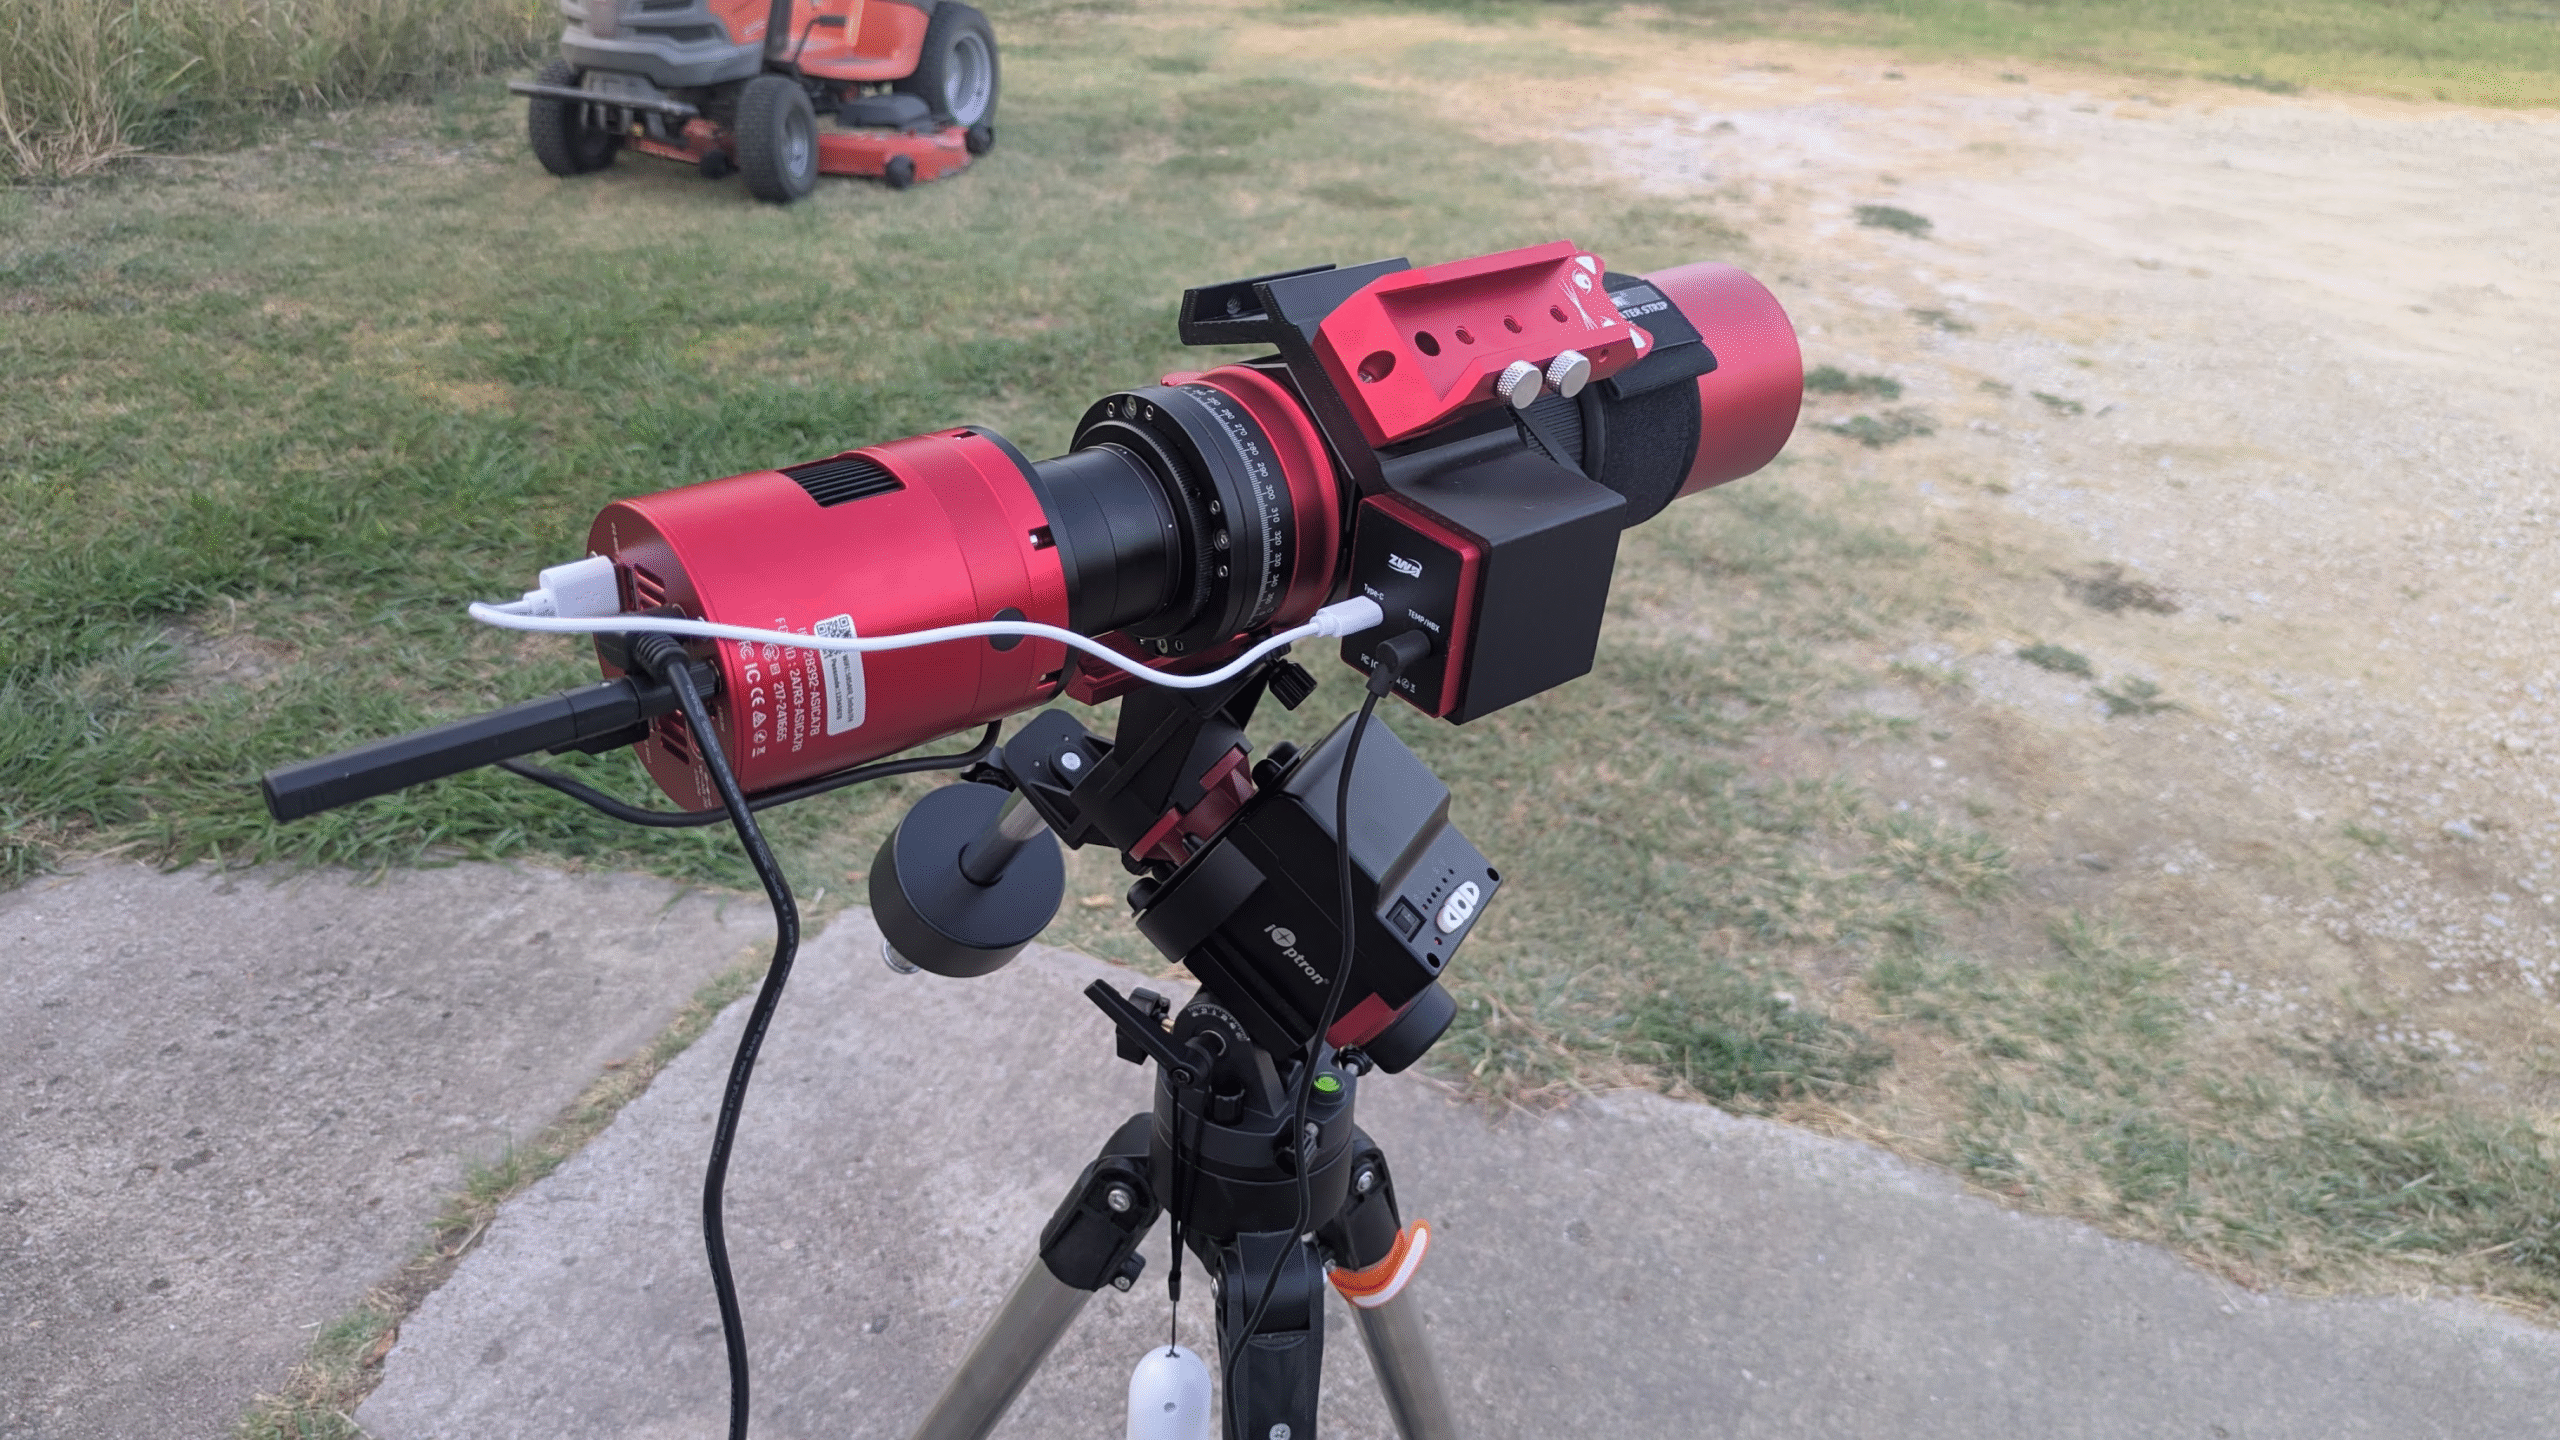
I presumed that sticking with ZWO for components that chat amongst themselves is probably a good idea, so I ordered a ZWO EAFN, a manual focus controller, a temperature sensor, and a Buckeye Stargazer mounting bracket, all from Agena Astro.

Since the ASIAir built in to the camera has its own ambient temperature sensor, this one is probably redundant. It is intended to let the autofocus elect to exercise focus based on a somewhat configurable change in temperature. This sensor is designed to plug in to a headphony looking jack on the EAFN, the same jack that the manual focus dingus plugs into, and it presumably reports to the automation via the USB. It could arguably be more true to conditions by sampling air temperature somewhere besides inside the cooling airflow for the SmartCamera, but point is to detect a rise or fall in the temperature, not necessarily the exact temperature *number*.

In any case, the stuff arrived, as did the camera itself.

Mechanically, the installation went well. I had only one real hiccup, and that was based on my own assumptions of how things should be, as opposed to how they are. 🙂

The T2 adapter to connect the Redcat to the Canon camera has an adapter ring that is secured to it’s base with three little grub screws. This has been in place ever since I first received the Redcat 51 in July 2022. More to the point, it had been on there long enough for me to forget that it was not connected to it’s own screw ring adapter. I tried for far too long to unscrew that single piece of nicely machined aluminum.

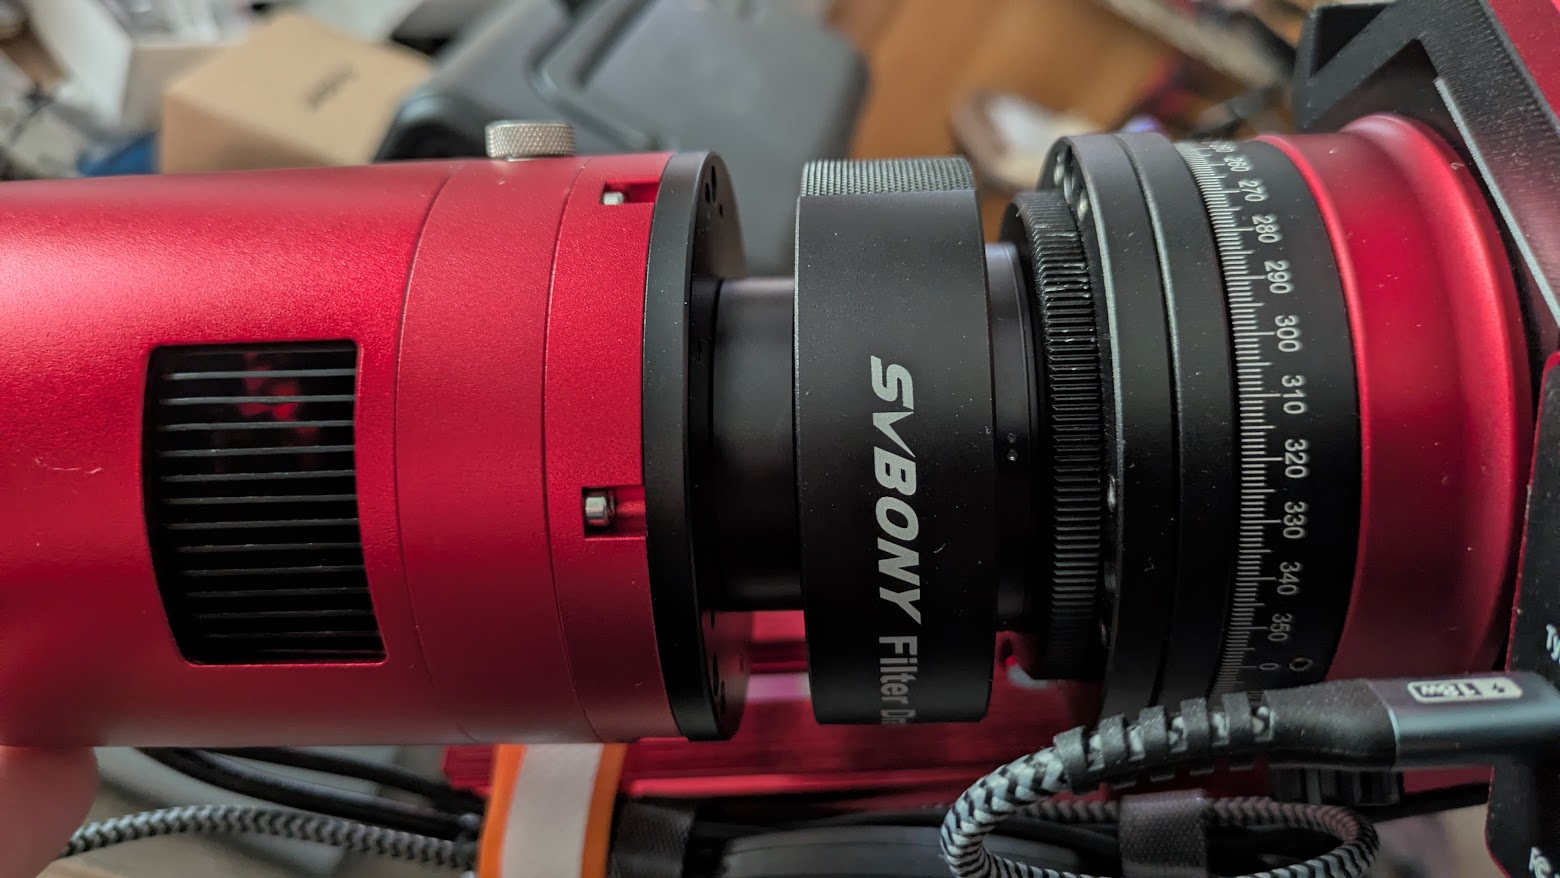
In the end, there is a 48mm to 42mm adapter ring that steps down the tube size between the telescope and the new camera, connected to a 21mm extension and a 16.5mm extension.

The focuser was generally a very easy installation. The Buckeye Stargazer mount components are all quite obviously 3D printed, but are also quite sturdy. The ring that goes around the helical focus ring is printed in TPU or some sort of flexible filament, so it has a tight but compliant fit over the focus ring’s rubber grip. The only thing I didn’t care for is that the rubber on the focus ring tended to flow and bunch up in front of the TPU ring while I was pushing it into place. Installation was thus a little bit fussy, but in the end, it is on there quite solidly.

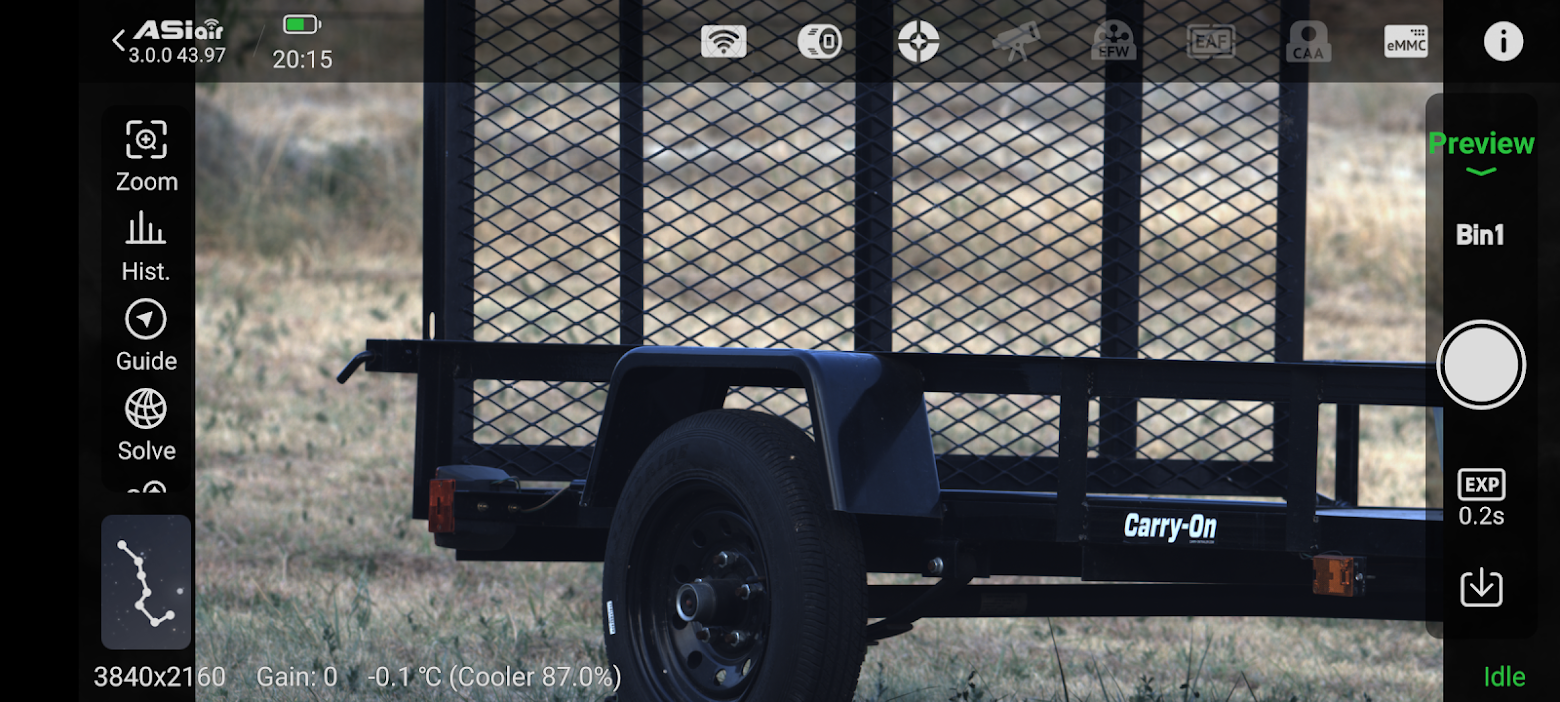
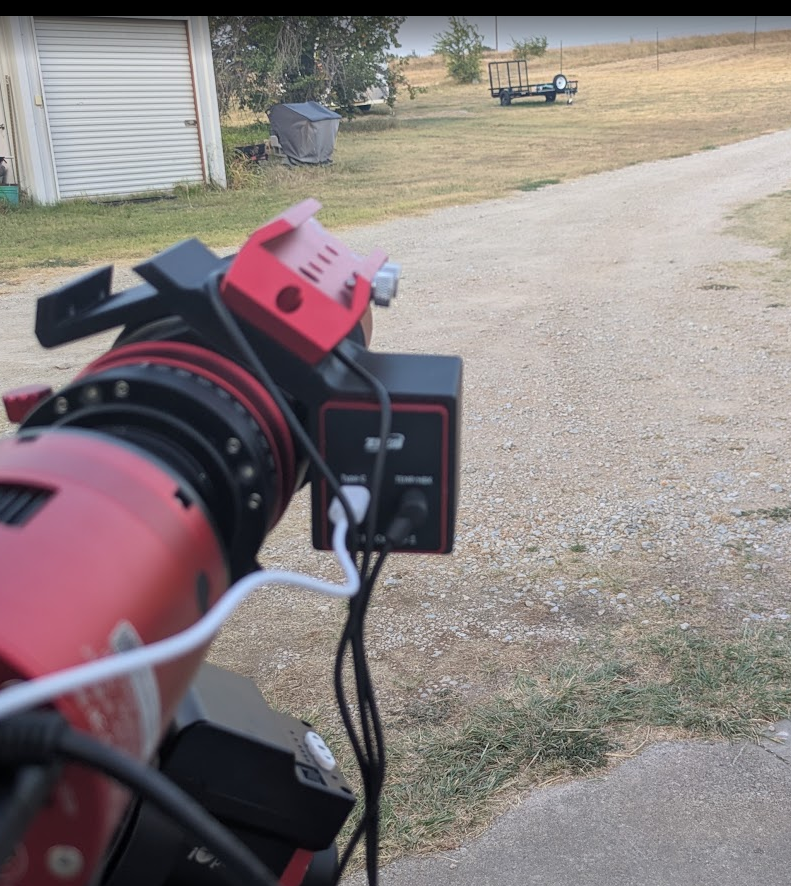
I had the rig outside setting up and getting ready for nightfall. While I had it out, I played with terrestrial images for a bit, mostly to get familiar with the camera and ASIAir. It works quite well.

Happily, it was a clear evening and polar alignment was successful, other than the procedure’s affect on my knees. 🙂

Unfortunately, focus turned out to be the problem. The autofocus procedure needs some contrast to work with, so you need to manually focus to at least where you can see stars. It took me a while to nail down that with the focus ring nailed to lock beyond infinity, I still had fuzzy round blobs.

I took the rig inside and starting measuring stuff, backfocus in particular. Backfocus is the required distance between the sensor and the final ocular lens. Most other telescopes have a corrective pack of lenses called a field flattener. This is to ensure a sharply focused image across the flat sensor in the camera. By some agreed standard, this distance is typically 55 millimeters. The Petzval optical train design produces a flat image as is, so is not particular sensitive to the specific backfocus distance, and that if you can achieve focus, all is good. That said, most forum posts said to basically don’t worry about it as long as you can focus. There was the occasional mention of a 59.X mm distance involved with the Redcat 51. With the extension tubes I had in place, mine added up to 55mm, which *should* work but obviously wasn’t.

I elected to order an extension tube set to stretch it out. The SVBONY set from Amazon was inexpensive and includes, 5, 10, 15 and 20 millimeter tubes.

i had also ordered a filter drawer so that I would not need to disassemble everything to install a 2 inch filter inside the telescope. They are purposefully designed at 21mm to replace a 21mm extension, which is exactly what I did.

I went conservative and added only the 5mm for the next night. Turns out, I could not get it even to the round blob stage. It simply didn’t occur to me the night before to try *shortening* the extensions. I removed the 5mm and 16.5mm tubes, replacing them with a 10mm tube and tried again.

Success!

Now to try out autofocus.

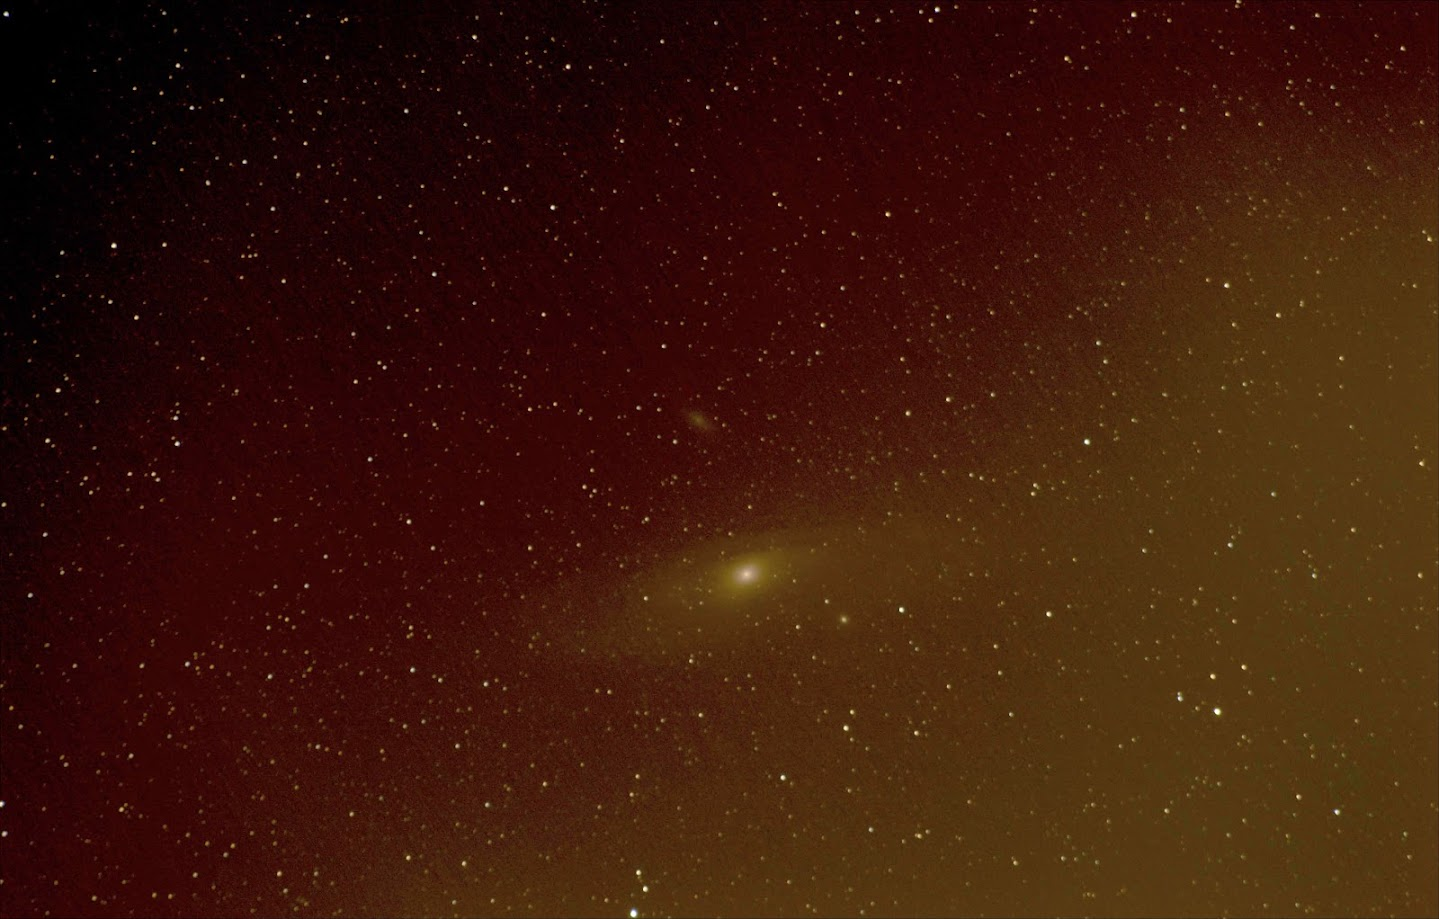
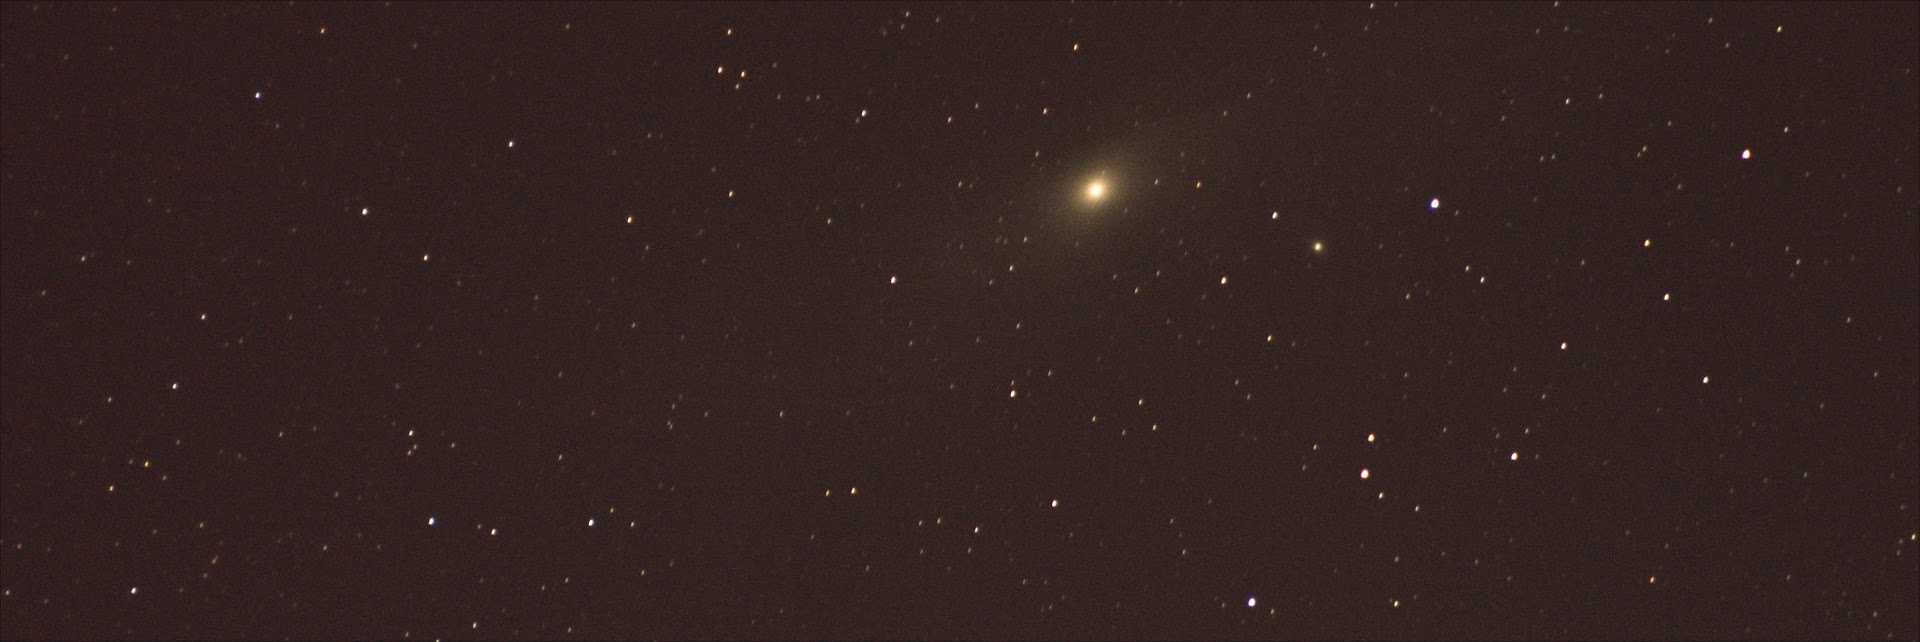
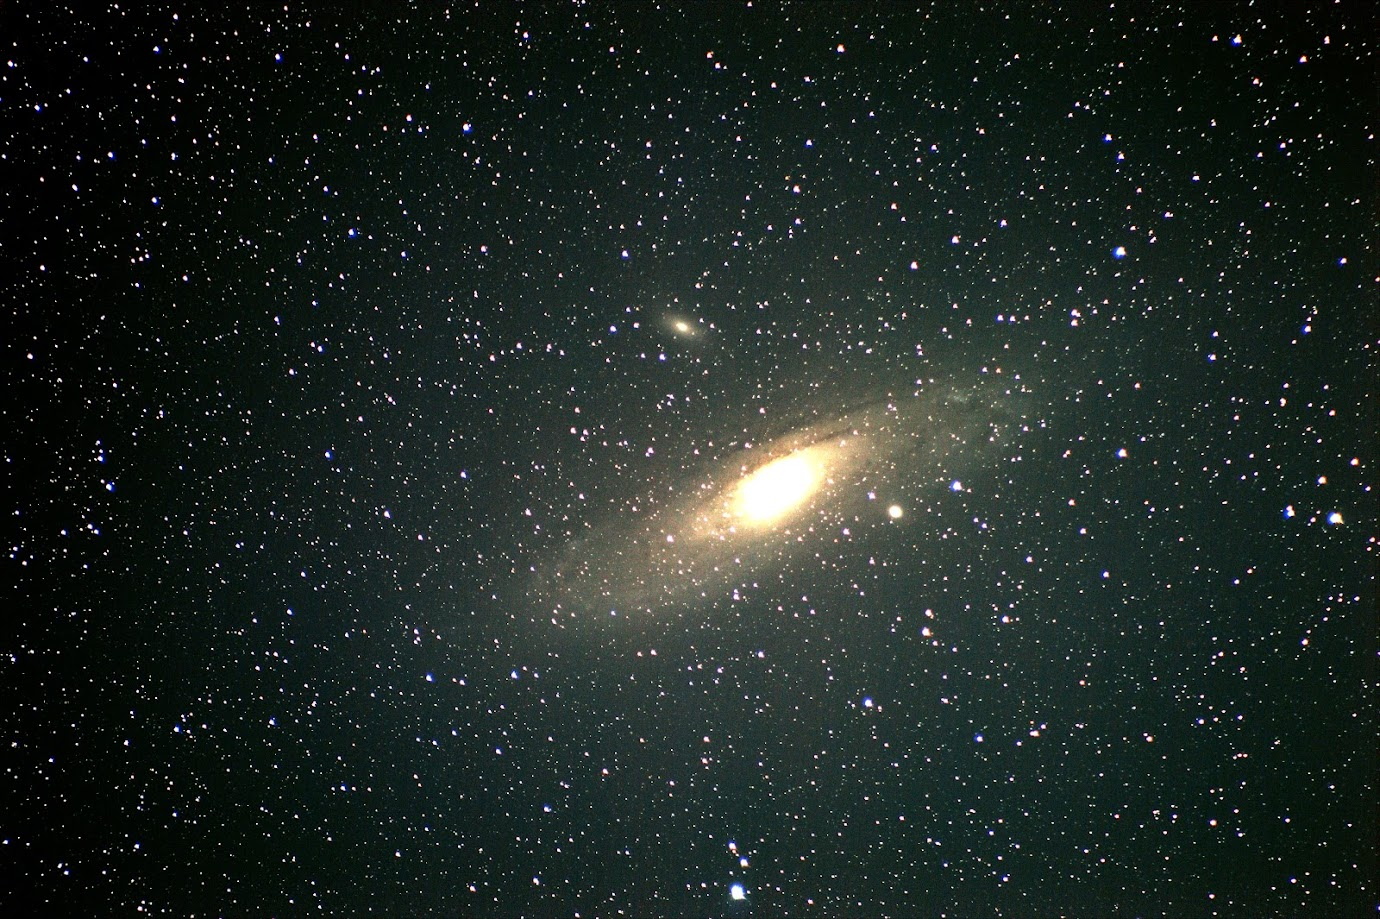
Now I started taking a few randomish shots looking for the Andromeda galaxy. Upon reflection, I probably should have tried for a nebula, but the sensor size on the 585MC camera gives the rig an effective crop factor of 3.4. Crop factor is ratio of the sensor size you are using compared to the “standard” sensor size that is basically identical to 35mm film. In DSLR cameras, this is the “full frame” sensor. Because a smaller sensor is exposed to a smaller portion of the image, it is effectively magnified, assuming the pixel sizes are appropriately small. The crop factor can to applied to the focal length of the lens to determine the effective focal length of the combination. My Canon Rebel T6 has an APS-C sensor. APS-C is “Advanced Photo System type C”, something I learned today days ago. Anyway, the formula to calculate crop factor takes the pixel size as well as the height and width of the pixel field into account. The APS-C sensor gives a crop factor of 1.6. In practical terms, my 250mm Redcat 51 will perform like a 400mm lens (250 x 1.6) on the Canon. Similarly, the smaller sensor in the ZWO, with its even smaller pixels, will perform like an 850mm lens (250 x 3.4). Thus my interest in capturing Andromeda, to compare it to my previous Andromeda captures.

The plate solve feature in ASIAir turns out to be handy, though not quite as handy as I wish. Using Stellarium, I found the Ra/Dec coordinates for Andromeda. Using the plate solver, I found where I was pointed. This helped me walk my way to Andromeda maybe a little quicker. In any case, I found it.

I am new at the ASIAir thing, so I may or may not have done this the best way. I configured Autorun to get 40 bias frames, 40 flat frames, 40 dark frames then 480 light frames. The bias frames were easy, just leave the cap on the lens and pause the Autorun when they were done. For the flats, I didn’t want to move the rig since I had found Andromeda, so I used a white cloth illuminated by my LED flashlight, again pausing Autorun when they were finished. Darks were super simple, cap on and just watch the progress for 20 minutes until those were done, then simply remove the cap and let the lights go. I set it for 480 x 30 second frames.

Too bad my polar alignment wasn’t that great. It appeared solid when I set it. I generally set in in the polar scope then check it 5 or 10 minutes later to ensure that Polaris is still in the proper place within the reticle. I suspect that I unknowingly bumped the tripod after that, maybe in capping and uncapping the lens.

It wasn’t off by a gob. Andromeda slid off the screen very slowly, about an hour the first time, as in by the time I had noticed. I went out, paused the Autorun, reaimed and started it again, understanding that the capture was going to be compromised. It was, however, midnight, and I didn’t want to start over completely. This was largely going to be a shakedown cruise anyway. Looking at the lights, it seems like it took it about 2-3 hours for Andromeda to ooze out of frame. While not ideal, I suspect most of them will still be able to stack, even with very slightly elongated stars. Shorter exposures, even a lot more of them, may have avoided the TicTac stars, but the target would still have crawled off the frame.

And in the interest of full disclosure, I still haven’t processed that session.

The next morning, I found the telescope pointing very high in the sky, but the power cord had snagged on the top of the SkyGuider. It might have been able slip off had the power switch not been raised. I mused about how funny it might have been had it actually powered itself off. Sadly, it did not.


My State of the Art

It has been a bit more than a year since I posted the October 2024 eclipse story. I have not been super active in astrophotography, but I keep informed via YouTube and Discord.

Last night was the first astro attempt for several months. Short version, skies were mostly clear except about where Polaris is, so polar alignment did not happen within the hour or so before I gave up on that.

Instead, I turned to the almost full moon. (Yes, even with a full moon, I was going to try for a nebula somewhere) I had recently looked up some tips on lunar photography with my Redcat 51 and wanted to give it a try. The short version of that story is that I was able to snap a couple dozen frames. The previews or thumbnails looked promising, but the actual images were really blown out 🙁

Discussing this with friends in a Google chat, it occurs to me that, while astrophotography can start pretty cheap, especially if you already have a DSLR, the vaguely defined rules of time-effort-money apply. You can generally save one, but not all three.

Much of this chronology was discussed in an earlier post, but this time, the theme is the costs.

In my case, I started, with no concept of hobby astrophotography, with a Canon EOS Rebel T6 that I bought from Meh in 2017. Meh frequently has weird deals. I think they basically buy closeouts and get what they can for them. Sometimes it’s some protein bar, sometimes is a backpack, sometimes some oddly specific smart home light bulb. Almost always something that probably didn’t sell somewhere else. I’m not sure why they had a truckload of not really that out of date Canon cameras, but it was a bundle that would be $550 retail that they were selling for $340-something. For me, it was really intended to replace my film photography hobby from decades earlier. I did some minor accessorizing, such as getting a 70-300mm lens, a 500mm reflector lens which is actually not a great lens, a tripod, etc. I would take a number of decent pictures with it, but it didn’t really light me up until 2021 when I discovered the decoder ring that was Nico Carver’s “Nebula Photos” YouTube channel. I am not sure how the algorithm linked me up with astrophotography, but it did. The thrust of the video was how to do this on almost no budget, assuming you already had a DSLR camera.

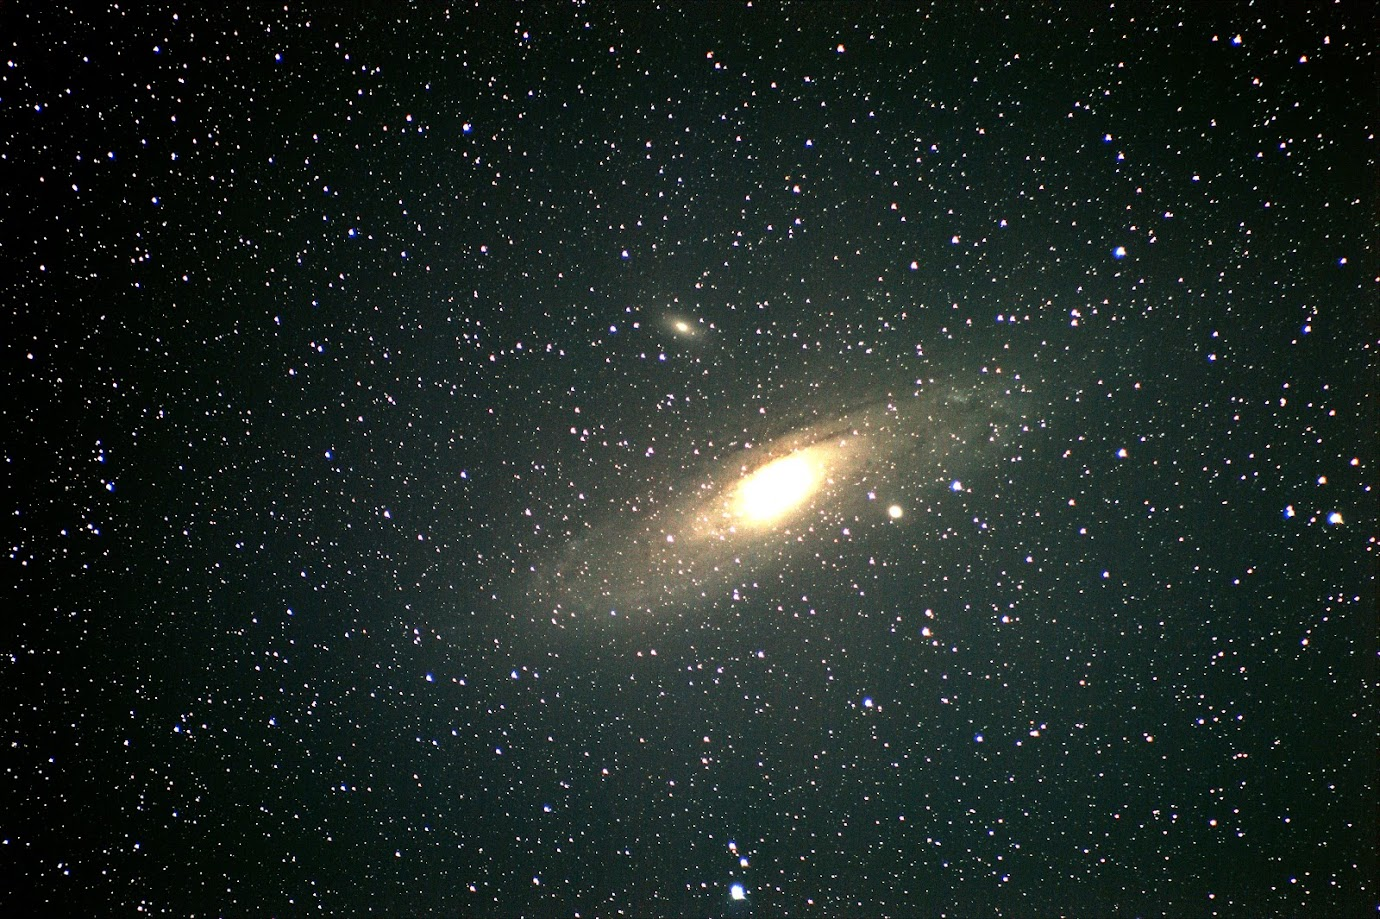
Using the Rebel and a tripod, I followed the advice in probably this video to capture a very basic but not terrible picture of the Andromeda galaxy. This was untracked, stacked with Deep Sky Stacker and tweaked with GIMP. It was fun, but untracked, with a not particularly awesome 300mm zoom lens meant short exposures. Still, I was hooked.

The first dedicated astro gadget was a tracker, the iOptron SkyGuider Pro. It was $488 in July 2021. Now I could do much longer exposures and generally had better luck. I think it took a couple of sessions to get a decent Andromeda.

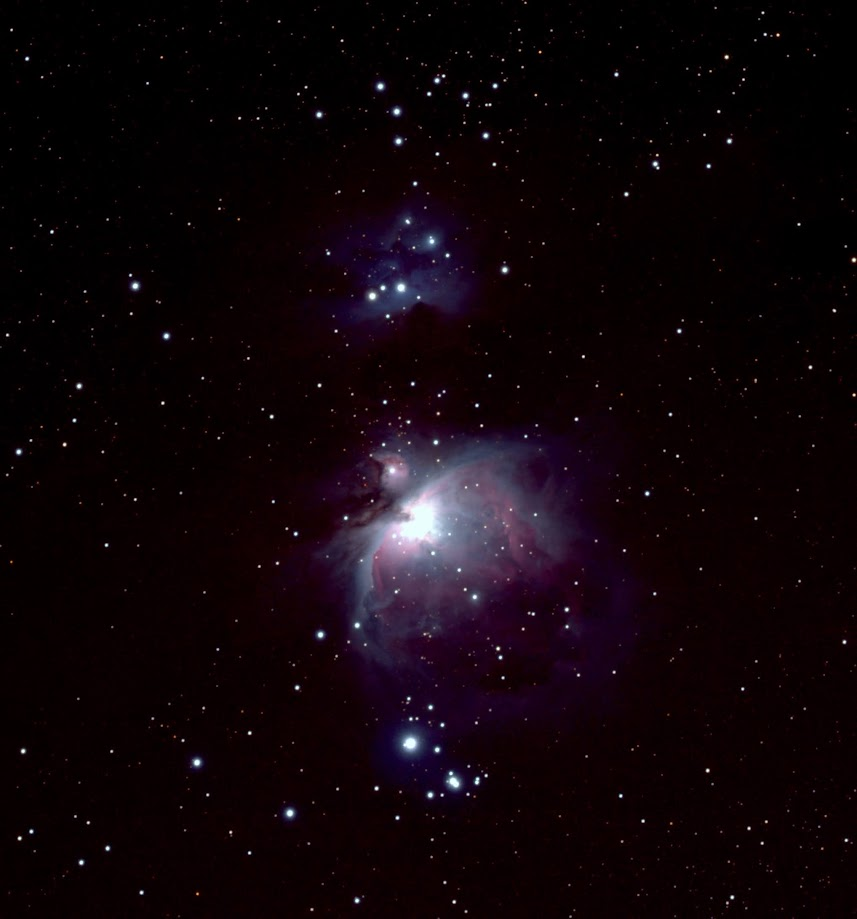
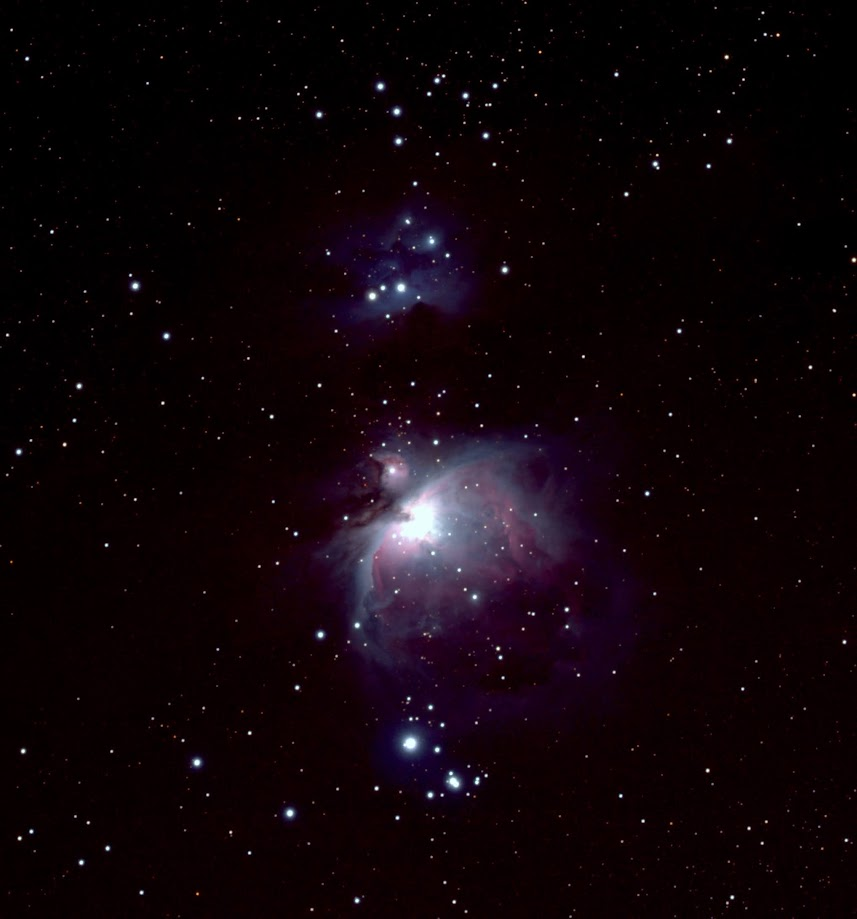
I also seem to do my upgrades in the summer and maybe July specifically. July 2022 brought the really big upgrade to the William Optics Redcat 51 telescope, the older one with the helical focus ring. It was $844, which for me was quite the sphincter pucker. I would not have much to show for it until January 2023, when I got my most favorite capture thus far, the Orion Nebula.

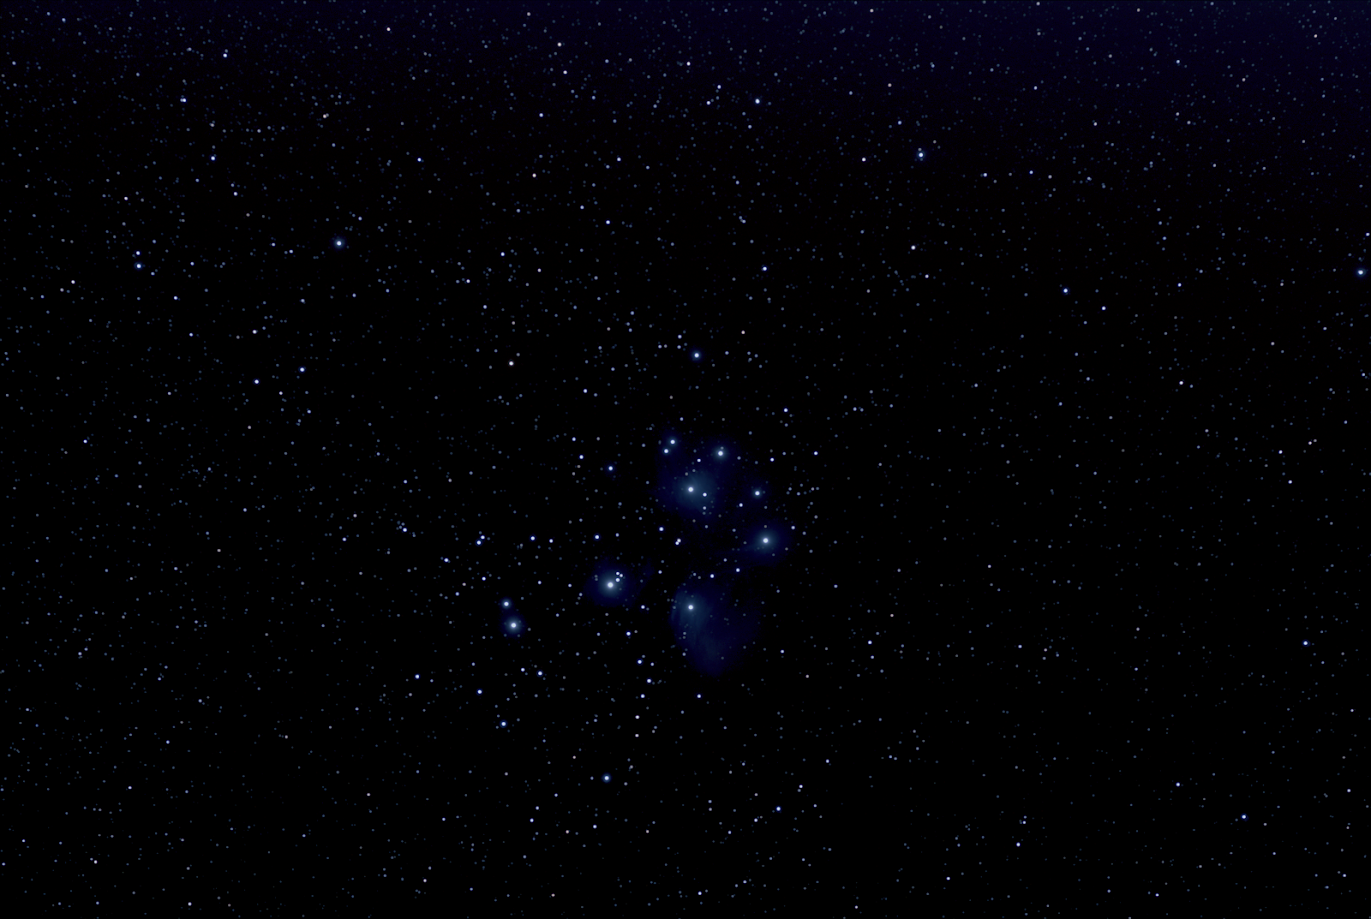
January 2023 also got me very nice picture of the Pleiades cluster.

The heavier Redcat was slightly more sensitive to my plain Jane tripod. It was a nice enough tripod, just not as solid as was needed for astro work. I ordered the iOptron tripod to fit the SkyGuider Pro in November of 2022, for just over $100. It was backordered and didn’t ship until January 2023.

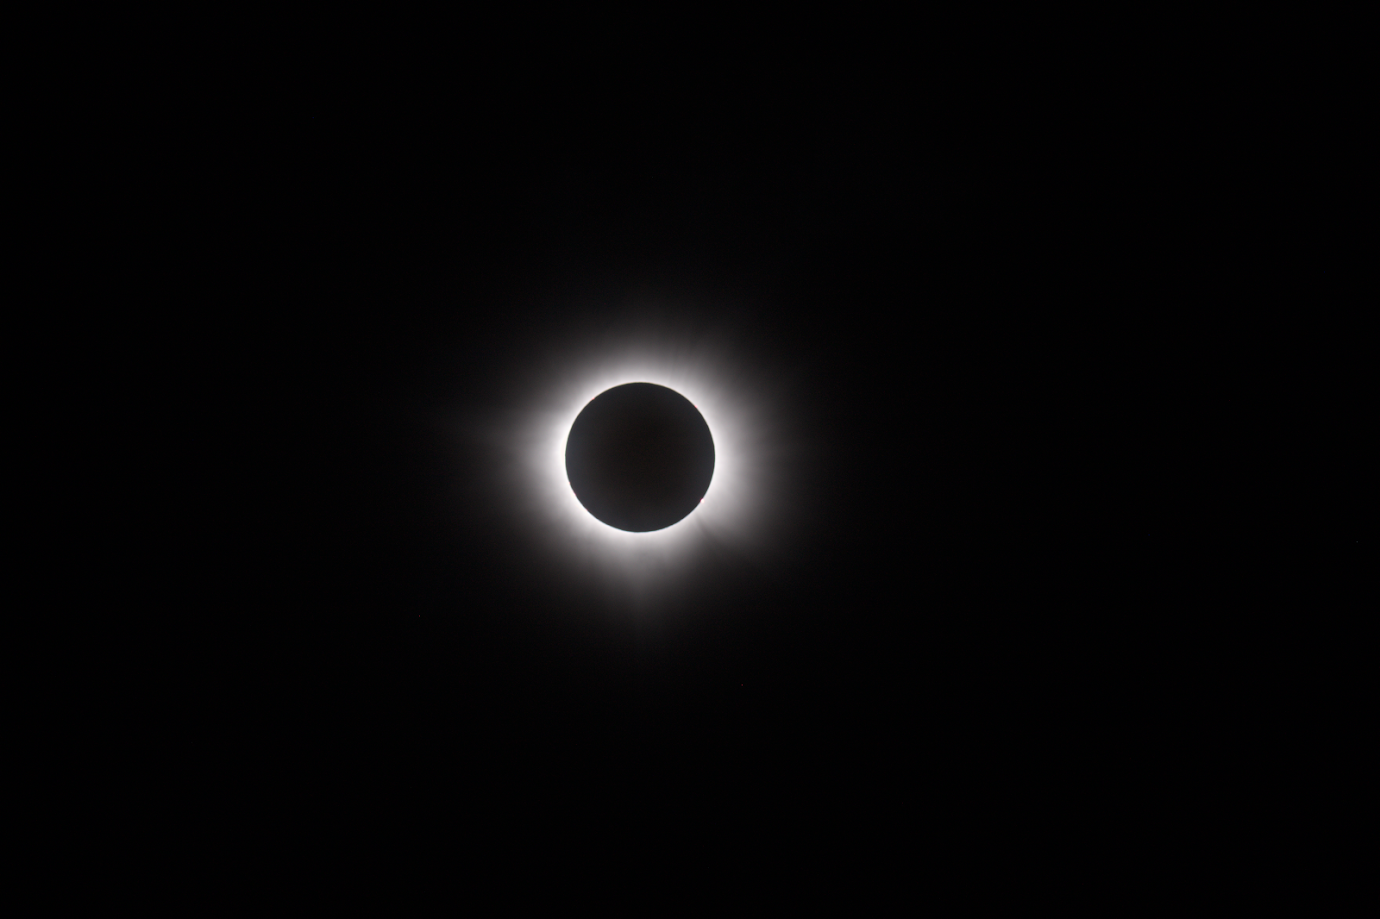
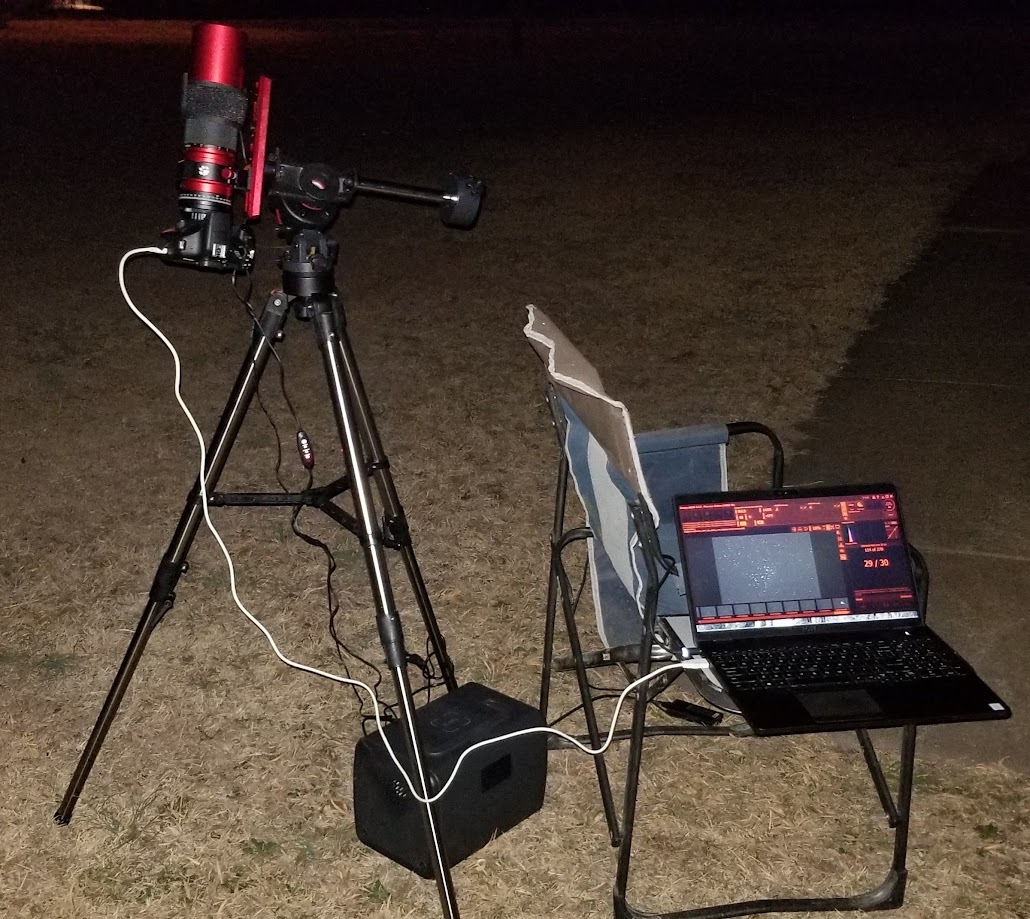
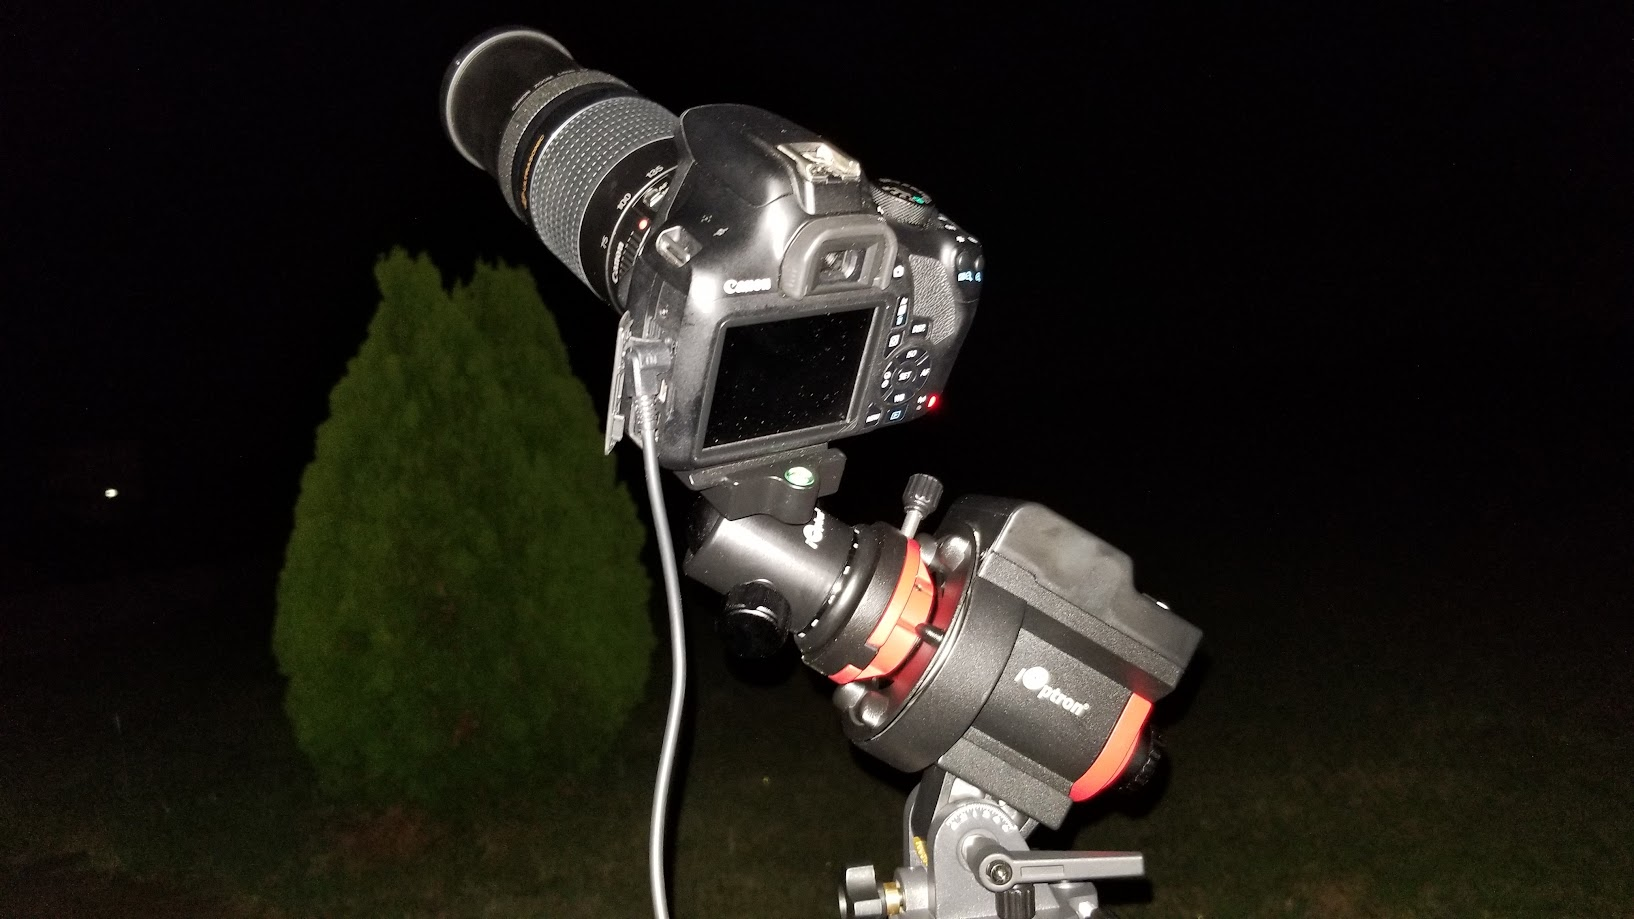
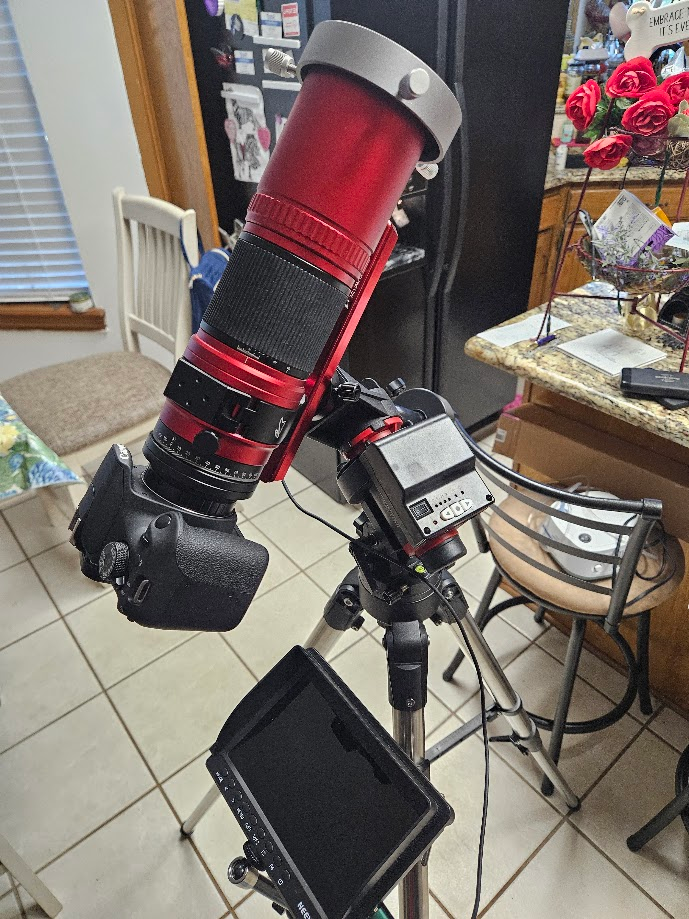
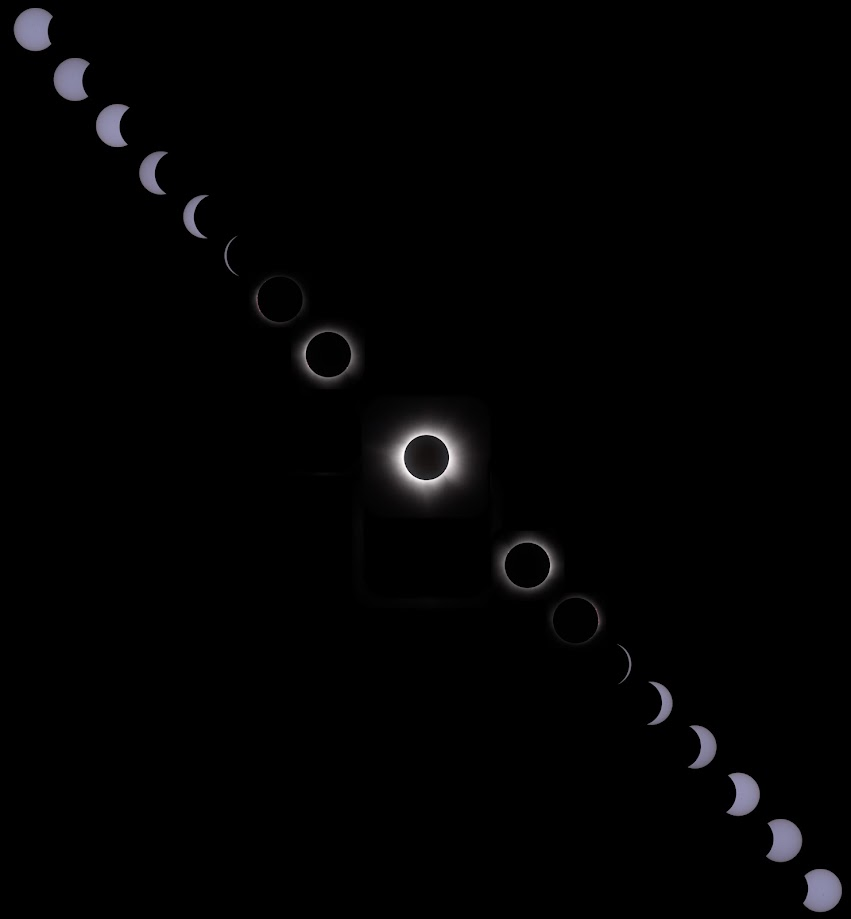
The rig was pretty stable for a while. This is is the basic rig used for the October 2024 total eclipse. The external monitor was very nice for the eclipse, keeping me from bending in unlikely directions to view the camera screen. I don’t often go to the trouble of setting it up.

I took a bit of poetic license in assembling this composite. There were some passing clouds between third and fourth contact, so I used the sequence from first contact to totality, then mirrored them for the bottom half of the pic. I have also just noticed that this specific version shows an artifact of my manipulation. I have a version that is clean. 🙂

As mentioned in a different post, I picked up a Canon EOS Rebel T5 camera body. It was just under $100 from Adorama. I have used it mostly as a “replacement” for the T6 for casual photography, but I have always thought I might send it off for a full spectrum mod.

From here, I spent a good deal of time and some money on storage, mostly in the form of knock-off Pelican cases, some from Harbor Freight, some from Amazon. I currently have a case that holds the Redcat and the stuff attached to it, a case for the SkyGuider Pro, a biggish rolling case for most of the accessories and the camera itself. The accessories have not specifically been inventoried or priced out, but it’s stuff like battery eliminators and chargers for the Canon cameras, intervalometers, filters, cables, cable management stuff. Probably a couple hundred bucks worth of stuff, but I haven’t gone to the trouble to add them up. I predict that I probably will someday.

The next upgrade was something that I had watched for a long time and nearly purchased several times, a ZWO ASIAir controller. I ended up with the ASIAir Plus with 256GB of storage. I already liked using laptop software to control the capture, even if I had only done it a few times. The idea of being able to set up the rig and retire indoors, away from winter’s chill or summers insects was very attractive.

Most of the astro specific gear I have purchased thus far was from High Point Scientific, or sometimes Amazon, but the ASIAir came from B&H Photo. The controller was $350, but the whole order came to about $500 because of accessories, like a dovetail clamp for the ASIAir and some high performance SD cards. As befits my habit, this was ordered in July 2025.

It would be February of 2026 before I actually tried to capture anything using it. My stepdaughter and her hubby came out, ostensibly to see the planetary alignment, but we wanted to try to get some nebula or another while they were here. There was a bit of a learning curve with the ASIAir, but the ultimate failure of the capture session was down to bad viewing conditions. Often, the world fails to meet my expectations.

Work has kept me busy enough to not have much astro time since then. However, it’s July again, so…

Although I haven’t specifically had any *problems* with tracking, I have still been low-key shopping for a guide camera to further improve tracking and maybe up my exposure times another notch. Longer exposures mean more light on the sensor and more light means improved signal to noise ratio. Some guiding options are actually not terribly pricey, at least compared to $500 for this or $800 for that. It should be obvious that plan won’t work for me.

I weighed what I was willing to spend on a payment plan vs what was available. In the long run, I have decided to shrink the rig a little more by going with a smart camera, the ZWO ASI585MC-Air. I found an open box deal, so it came to, you guessed it, about $800, including an accessory or two. The ASI2600MC-Air, with its huge 21MP sensor, would have been my preference, but I wasn’t ready to pay nearly double for it.

This little monster has an 8MP cooled color camera and a 2.1MP guide camera that both sit in the same focal plane, eliminating the need for a separate guide scope and camera and the attendant cabling. Furthermore, it has an ASIAir controller built in, eliminating the ASIAir controller, the Canon camera and their power and control cabling. All in all, it should be a clean and compact deployment.

On paper, the 8.1MP ‘585 sensor is arguably less impressive than the 12MP sensor in the Canon, but the ZWO camera has two feathers in its cap. First, the WxH resolution is smaller, but the pixel size is significantly smaller, meaning a sharper image in that resolution. A Canon image cropped to the same width and height would still not be as sharp. Also, it doesn’t have the kind of infrared filtering that a DSLR has, making it better suited to the red and near infrared from emission nebulae.

On that subject, after I placed that order, I remembered that I wanted to get a dual narrow band filter with it. Our property used to show as Bortle 4 on the common light pollution maps, but in the last year or two, that has gone up to Bortle 5. That, and we have sodium and mercury lights in the neighborhood, especially including a sodium light on our property. These and my interest in emission nebulae have informed a desire to try out a dual narrow band filter. I ended up ordering an SVBony 7nm filter from Amazon. So there went my open box savings 🙂

The filter will probably arrive Wednesday, but the camera will be Saturday.

As for any future upgrades (and lets not pretend I won’t) I think it will either be a mount upgrade, which would require some kind of a go-to capable mount or, perhaps cheaper and more likely to come first, an electronic focuser. Focusing the Redcat, with the helical focuser, can be tedious. Automating that should help minimize setup time. I don’t really see a need to change telescopes to something with a rack and pinion focuser. Although… if I were to do that, it would also have to be an upgrade otherwise. Just getting the newer Redcat 51 wouldn’t make sense, but a telescope with a bigger objective *and* rack focus…

Stay tuned.

Too Many Variables

I am not prepared to panic, not yet anyway.

I have left the gate camera battery alone, other than monitoring it, for 10 days. Love the Shelly. More on that someday. Anyway, 11 days, technically. Today isn’t over, but 10 nights for sure.

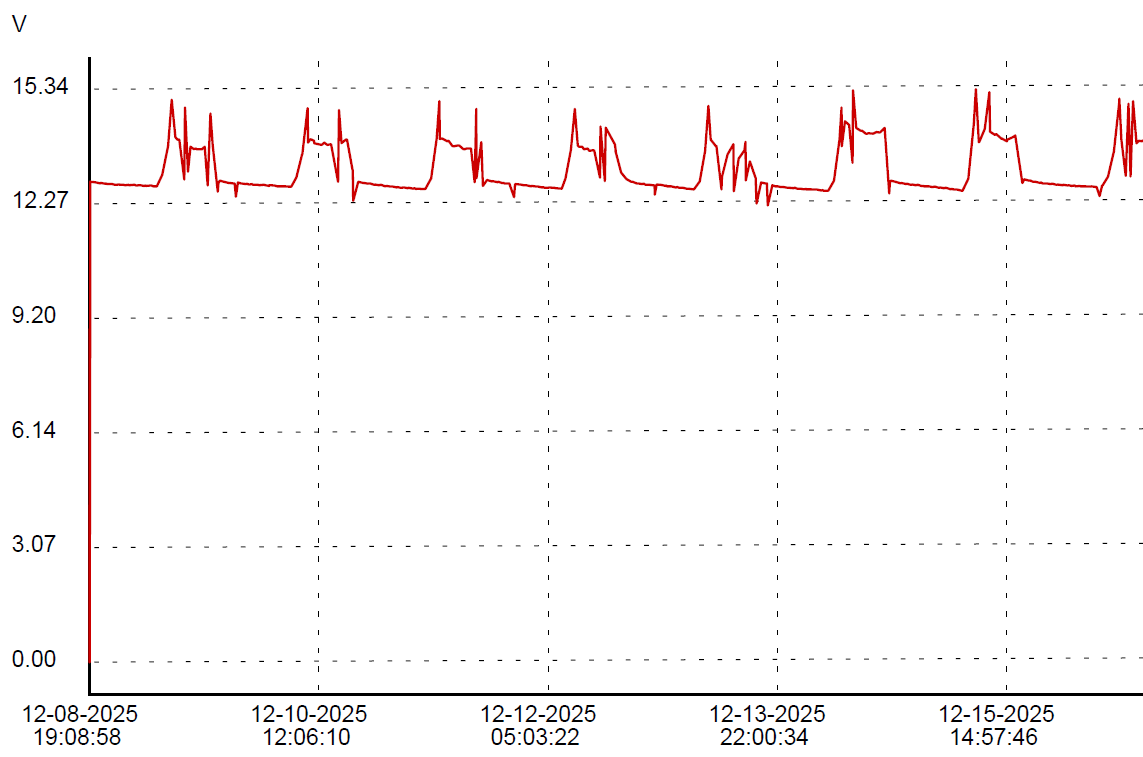
You may need to click on that image to see the detail, but there is a pretty much linear decline in the “peak” nightly discharge. Overnight December 9-10, it discharged to 12.65 volts before a sunny day recharged it to 13.5 volts. Every night, it would discharge a little lower, then a sunny day would bring it back to 13.5 volts. December 13 was cloudy for much of the day, so we didn’t get a 13.5 volt peak, but the 14th and 15th were sunny enough. The 17th was dreary and today, the 18th has been sunny thus far.

However, each night, the battery discharges a little lower. 12.65 volts the first night, then 12.53, then 12.46. Each night lower until last night, 12.03 volts.

Here’s the rub. I don’t know if this is just a normal decline after the sorta mega charge from the AC powered smart charger and it’s just slowly settling back after that, or if it’s a symptom of a problem and I just happen to have a big enough battery to help make it take a long time to show up.

I do have an apples to pears example to compare with. I put the Triplett logger on the gate opener battery for week or so.

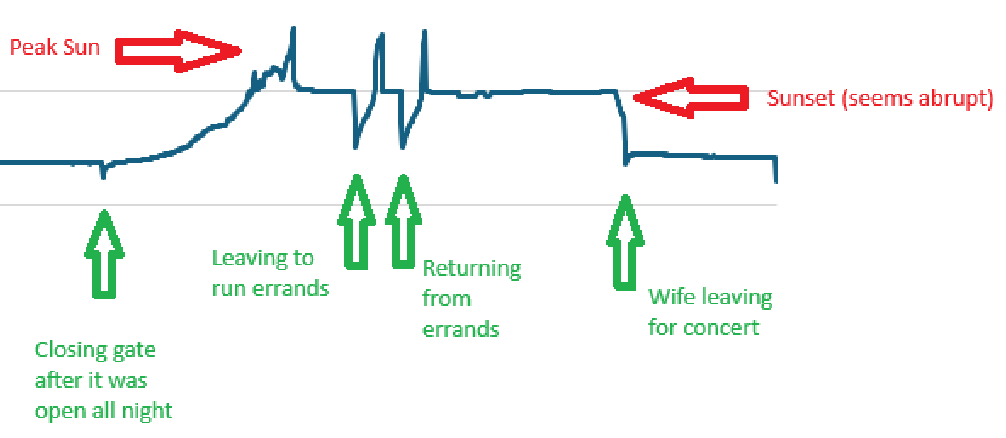
First, I love the sharp little peaks that (probably) show gate usage. If I get ambitious before this gets posted, you’ll never see this sentence, and will instead see my evidence that the little jabs in the opener chart correspond with gate operations. Or maybe because I just like this paragraph I’ll leave it anyway. You’re not the boss of me!

See, I told ya.

Dec 16 gate activity:

I am not sure what causes the positive spikes. There is nothing obvious in the gate camera at those times.

The two battery deployments are exactly the same thing except that the gate opener has an unknown but likely minimal charge control built in instead of a purpose designed solar charger controller, it has a small lawn tractor battery instead of a large deep cycle battery, it’s only a 10 watt solar panel instead of a 100 watt panel and the load is almost nothing most of the time instead of a camera, a WiFi AP and a Shelly UNI running 24/7. Both batteries are black plastic, made by the lowest bidder, so there’s that…

Since the data from both logging sources are available in CSV format, I thought I would try to match up the charts in a spreadsheet, but there are significant enough differences between the data sets, due mostly to the delta method employed by the Shelly UNI, that it is not trivial to match them up. The Triplett has even time between samples, the Shelly samples only when a significant enough change occurs. I am certain I *can* match up the data, but I’m not sure it’s worth the effort.

Even so, one can kinda look at the data and, even if I can’t easily share a spiffy visualization, I can report that the opener battery bottoms out at 12.67 volts consistently, give or take a couple of 100ths, each night in the logged data, unlike the big battery with the big panel, that seems to progressively lose ground every night.

Then again, maybe 10 nights isn’t enough to know the bottom of the pattern yet.

And who knows what spring and summer, with the sun higher in the sky will bring.

Too many variables.

The Last Gate Battery Chapter… For Now… Probably.

My last post was last Friday. This is Monday. The gate battery had an exciting weekend.

Late Saturday morning, I finally got the official Renogy Solar Panel Mount Brackets deployed.

It is adjusted approximately to the theoretically ideal angle, which somewhat understandably matches the latitude of the location, in this case 33-ish degrees. That doesn’t account for the few degrees off level where it is thrown on the ground, but its more of a rule of thumb anyway. Longer term, I think I will attach it more firmly to the ground than with the gravity afforded single cinder block cap. Also, the cabling is still far from safe from any mowing implements.

For the rest of Saturday, we did unrelated stuff. Sunday, however, I set up our usual fence Christmas decorations, which is modest, but enjoyable. Lighting on the fence and gates, plus a couple of inflatable elfy dachshunds.

One nice side effect of these decorations is that I run a extension cord from the house all the way out to the gate, so for a couple of months, I have mains power available at the gate. So, once I had the basic power distribution in place, put my smart charger on the gate battery and left it.

I deploy a Home Assistant controllable switched outlet for these decorations, along with automations to turn them on a sunset and off at 2:00AM. Since I wanted to leave the charger running, I disabled the automation to turn off the decorations.

Leaving the charger on overnight definitely had the desired effect.

There is a lot going on here. Click on the image below for details.

Of a mildly entertaining nature, the outlet switch I run these lights on reports power use. Right now, with just the lights and the dachshunds, it is drawing a little less that 200 watts. Interestingly, it varies quite a bit, between 170 to 192 watts. I suspect some variation from wind affecting the inflatables, but I would have to care enough to investigate to know for sure. However, while the smart charger was connected, it ramped up to 420 watts peak around 10PM, then back down to baseline 180ish by 5AM or so, including a decided bump down at 5:20AM that corresponds with a bump down in Gate Battery voltage, which I presume to be the Battery Full mark notated above.

Of a even more mildly entertaining nature, when I installed the Shelly UNI on Friday morning, I apparently knocked one of the Triplett clips off the battery terminals and didn’t notice it until Saturday when I was attaching the mounts to the solar panel. The two logs are otherwise very close, within their respective limitations.

Since I now have essentially live logging on the gate battery, I redeployed the Triplett onto the gate opener battery, which is a separate thing. The Mighty Mule gate controller has its own small solar panel, probably 12-15 watts, to maintain it’s rather modest requirements. The opener draws nearly nothing until called upon to open and close the gate, which doesn’t happen very many times per day, often not at all some days. Upon connecting it, it was reading 12.89 volts, so it’s probably pretty healthy. I will try to leave that logger on there for several days to see what that battery does.

Speaking of gate opener, this is what I will probably connect one of my Shelly UNI outputs to, to be able to open the gate from Home Assistant.

I need to nail down the behavior of these outputs. It sounds like I can have it momentarily close with a button push, but the verbiage is not stupid clear 🙂

Moby Gate

Ok, I still have my legs, but I am kind of obsessed with this battery thing.

It has been about a week since my last confes… post.

Some of this post will go back and forth, time-wise. I am more interested in covering each subject rather than rigorously maintaining a timeline.

The plan was to leave the new 100 watt solar panel in place as long as possible to see if it can catch up charging the new battery. Unfortunately, the weather saw through my ruse and has conspired to be cloudy and sometimes rainy, limiting the solar flux.

By Tuesday, I decided to help the battery along by connecting a mains powered battery charger, using a 800-ish watt-hour power bank. I knew it would not last all day, but I also knew it would be a powerful boost for the battery.

Wednesday morning, I pulled the voltage logger history, then put it right back on to continue logging.

There were a few key moments in the data:

When the battery voltage dropped to 11.3 volts by about 11:45PM, the charge controller shed the load, resulting in a small voltage boost. Interestingly, it did not restore the load until 5:45PM Monday, well after the peak battery voltage well over 12 volts.

By 11:45PM Monday night, it had again shed load, but it seems important that it shed load at 11.11 volts. This is, to a lead acid battery, significantly lower voltage than the 11.3 volts where load was shed the night before. Very curious.

Around 8:00AM, we actually had a sunny day the solar panel began adding a sharp rise to the battery voltage.

At 8:56, I connected the external charger. The screen display on the power box estimated 3 hours of runtime, but it was wrong. The box was depleted at just over an hour and a half. Since I had set an alarm to check on it in three hours, it was well shut down by the time I checked it. I pulled the charger off and put the power box in the garage to recharge it, but I left the logger in place until Wednesday morning.

When I reconnected the panel on Tuesday, I was smart enough to take my 2nd string cheapy meter up there to see what the open circuit voltage was on the solar panel, which was 23.9 volts. Ironically, I kind of noticed at that time that the charge controller and the voltage logger were slightly different and I remembered the voltage logger as being about 1 volt lower than the charge controller. However, with a meter in my hand, I did not think to check it and compare at that time. Typical.

Early Thursday evening, I took my good meter out there and compared the three readings. They were all close enough to not really matter, though the charge controller reads the lowest by 0.2 volts, possibly a significant number when dealing with lead acid chemistry.

The coolest development is something I have wanted for a long time, a way to monitor the voltage remotely. I had mentioned using an ESP-Home device, which would be inexpensive and pretty easy to build, plus I have already made a few similar devices and likely have everything I might need on hand.

Then again, I discovered that Shelly makes an affordable device that does what I need right out of the box.

For my purposes, it is a WiFi device that talks to Home Assistant using MQTT, runs on 9-28 volts DC and can measure 1-30 volts DC.

It also has two digital inputs, a pulse counter input, two digital outputs that can drive 300ma, and it can operate a variety of one-wire devices, such as temperature and humidity sensors. I see a Home Assistant gate opener in my future. I only wish one unit could monitor two voltages so that I could almost monitor the gate opener battery without deploying a second unit.

It was almost trivial to get it working. This is not really a tutorial, but… I put the Shelly app on my phone and give it Bluetooth permissions. I powered the UNI with a 12V battery pack that I use for various things. The app found the UNI device immediately. I configured it to join my IoT WLAN, then browsed to it to set it up.

First, I set up MQTT. All I had to provide was the IP and MQTT port of my Home Assistant and it pretty much immediately showed up in devices.

I noticed that there was no voltage sensor showing. To enable that, I had to go to Peripherals in the UNI setup menu, click the + button to add a peripheral and add Voltmeter. There are several useful settings, such as a friendly name, measurement range and some custom math and units that can be applied to the measurement before it is reported. For example, you might measure 4 volts, but 4 volts from a strain gauge might mean 9 pounds of grain left in a hopper, so you can do some math and report 9 pounds instead of 4 volts. You can also set up automations from within the UNI device itself

“Delta Threshold” is worth spending a little time on. The Triplett logger takes a voltage reading once every configurable time period. The longer the duration between samples, the longer you can collect data before the memory fills up. The Shelly UNI instead watches the voltage and only reports when the voltage changes a certain amount. The minimum and default is 0.1 volts. This makes for a much more efficient use of database space, but a blockier uglier graph.

Everything else was just minor tweaking of Home Assistant stuff.

I left it connected to the battery pack overnight.

It was several hours between 0.1V drops, from 12.14, to 12.03, to 11.92 volts.

This morning, I added a little more wiring and connected it to the gate battery. We’ve had a reasonably sunny day.

It’s only one day, and the first semi-sunny day in several, but I am disappointed in how rapidly the battery voltage is dropping. Of course, it didn’t peak very high, so that could be a factor as well.

I am thinking of running a cord out there and running the charger for 3-4 days to put a real solid charge on this battery so that the solar can really do just maintenance charging.

It is now Saturday morning and rather than add a whole post just for this, I though I would append to this one.

I took the 30 minutes or so that it took to build and attach the mounting brackets to the panel.

This is set to the reasonably ideal angle for a panel that is the same as the location’s latitude, 33ish degrees in this case, measured imprecisely with a speed square during assembly and using the holes that came closest to that imprecise measurement.

It is a cloudy day and it was a foggy morning, so I can’t expect a lot of energy today. I did find the little dip from the removal of the panel during construction of the brackets a little chuckleworthy.

Sluggy Blogs All The Subjects