There have been amateur radio satellites in orbit for literally my entire life. Hams were in space only four years behind the Russians, less than a year before I was born. It also was the first satellite deployed as a secondary payload from a primary launch… ejected using a spring purchased from Sears. Remember, it doesn’t *have* to be expensive to work, but if *my* life is in the balance, I’d rather it was. It should at least be a McMaster-Carr spring…
The first time I heard of amateur radio satellites, I presumed that was an exotic part of the hobby that only the ham elite (read: rich hams) would ever have access to. I think a big part of that was the math needed to predict orbits and the presumption that exceptional precision would be needed. Turns out that it’s not particularly difficult, but neither is it trivial. Johannes Kepler figured it out on paper by candlelight. With the advent of personal computers in general and the ubiquitous smart phone in particular, much of that number crunching is a few finger swipes away. Now working satellites seems to be reduced to learning the idiosyncrasies introduced by chasing a slowly tumbling 1/2 watt transceiver 300 miles away while it flies by at 17,000 miles per hour. Piece o’ cake.
I exaggerate the difficulty, though not the conditions. As rough as that sounds, it can be done with as little as a handheld antenna and a dual band HT, assisted by some tracking software.
Armed with some basic tips obtained from various YouTube sources (which I will detail below) and an Android app, I was able to pick up the beacon on a couple of satellite passes with only my existing base station gear, an Icom IC-7100 and a Diamond X-300A. This is a fixed base station antenna optimized for transmitting and receiving towards the horizon.
Undocumented Satellite Beacon Pass
Note that I am chasing the Doppler frequency shift, which is one of the two biggest idiosyncrasies. Satellites are moving fast enough for Doppler frequency shift to matter. Most satellites operate crossband, with an uplink that is either 2M or 70cm and a downlink that is the other band. Obviously both are affected by Doppler shift, but as it is a percentage effect, the higher the frequency, the larger the effect, so 70cm is more affected that 2M.
Having now heard such a birdie tone intentionally, I am reasonably sure that I have accidentally heard them before and perhaps just didn’t realize it was a satellite! How simple must it be if I can do it accidentally?
I have tried a couple times since then to hear QSOs and I can *just* tell there *might* be something there, maybe the tiniest bit of a beat tone tuning the range, but not enough to pull out of the noise.
To give myself the best chance of success, I ordered an Arrow 146/437-10WBP antenna. This is a 3 element 2M and a 7 element 70cm on a shared boom. The BP suffix is the split boom (back pack) version which breaks down easily for transport, so I also got the carrying bag for it. At this writing, it has not yet arrived. Being a handheld antenna, it helps with the other major idiosyncrasy, polarization fading. As the satellite tumbles in microgravity, the antennae are changing orientation and being able to rapidly change polarization is one strategy for coping with that. Antennas built with circular polarization is another.
My plan to start is to try FM using two handhelds. I have 2 each Baofeng UV-5Rs, RD-5Rs and an Icom ID-51, so I can mix and match as necessary.
I also used this as an excuse to picked up an SDRPlay receiver, the SDRdx model. I have nearly purchased an SDRPlay receiver a few times over the last few years, but never pulled the trigger. I’m not sure if it will actually be used for satellites or not, but I imagine I will at least experiment with it. Plus, everything else you can do with an SDR 🙂 Not necessarily only for satellite use, but for very wideband SDR reception, I got an MFJ-1866 discone antenna. This will be my first experience with a discone. This model can do double duty as a 200W transmit antenna for 2M to 23cm as well. It might become the first antenna mounted on the house, as opposed to the workshop.
I have done a few things ham related in the last three years, but I haven’t really been very active on the air. Bad ham!
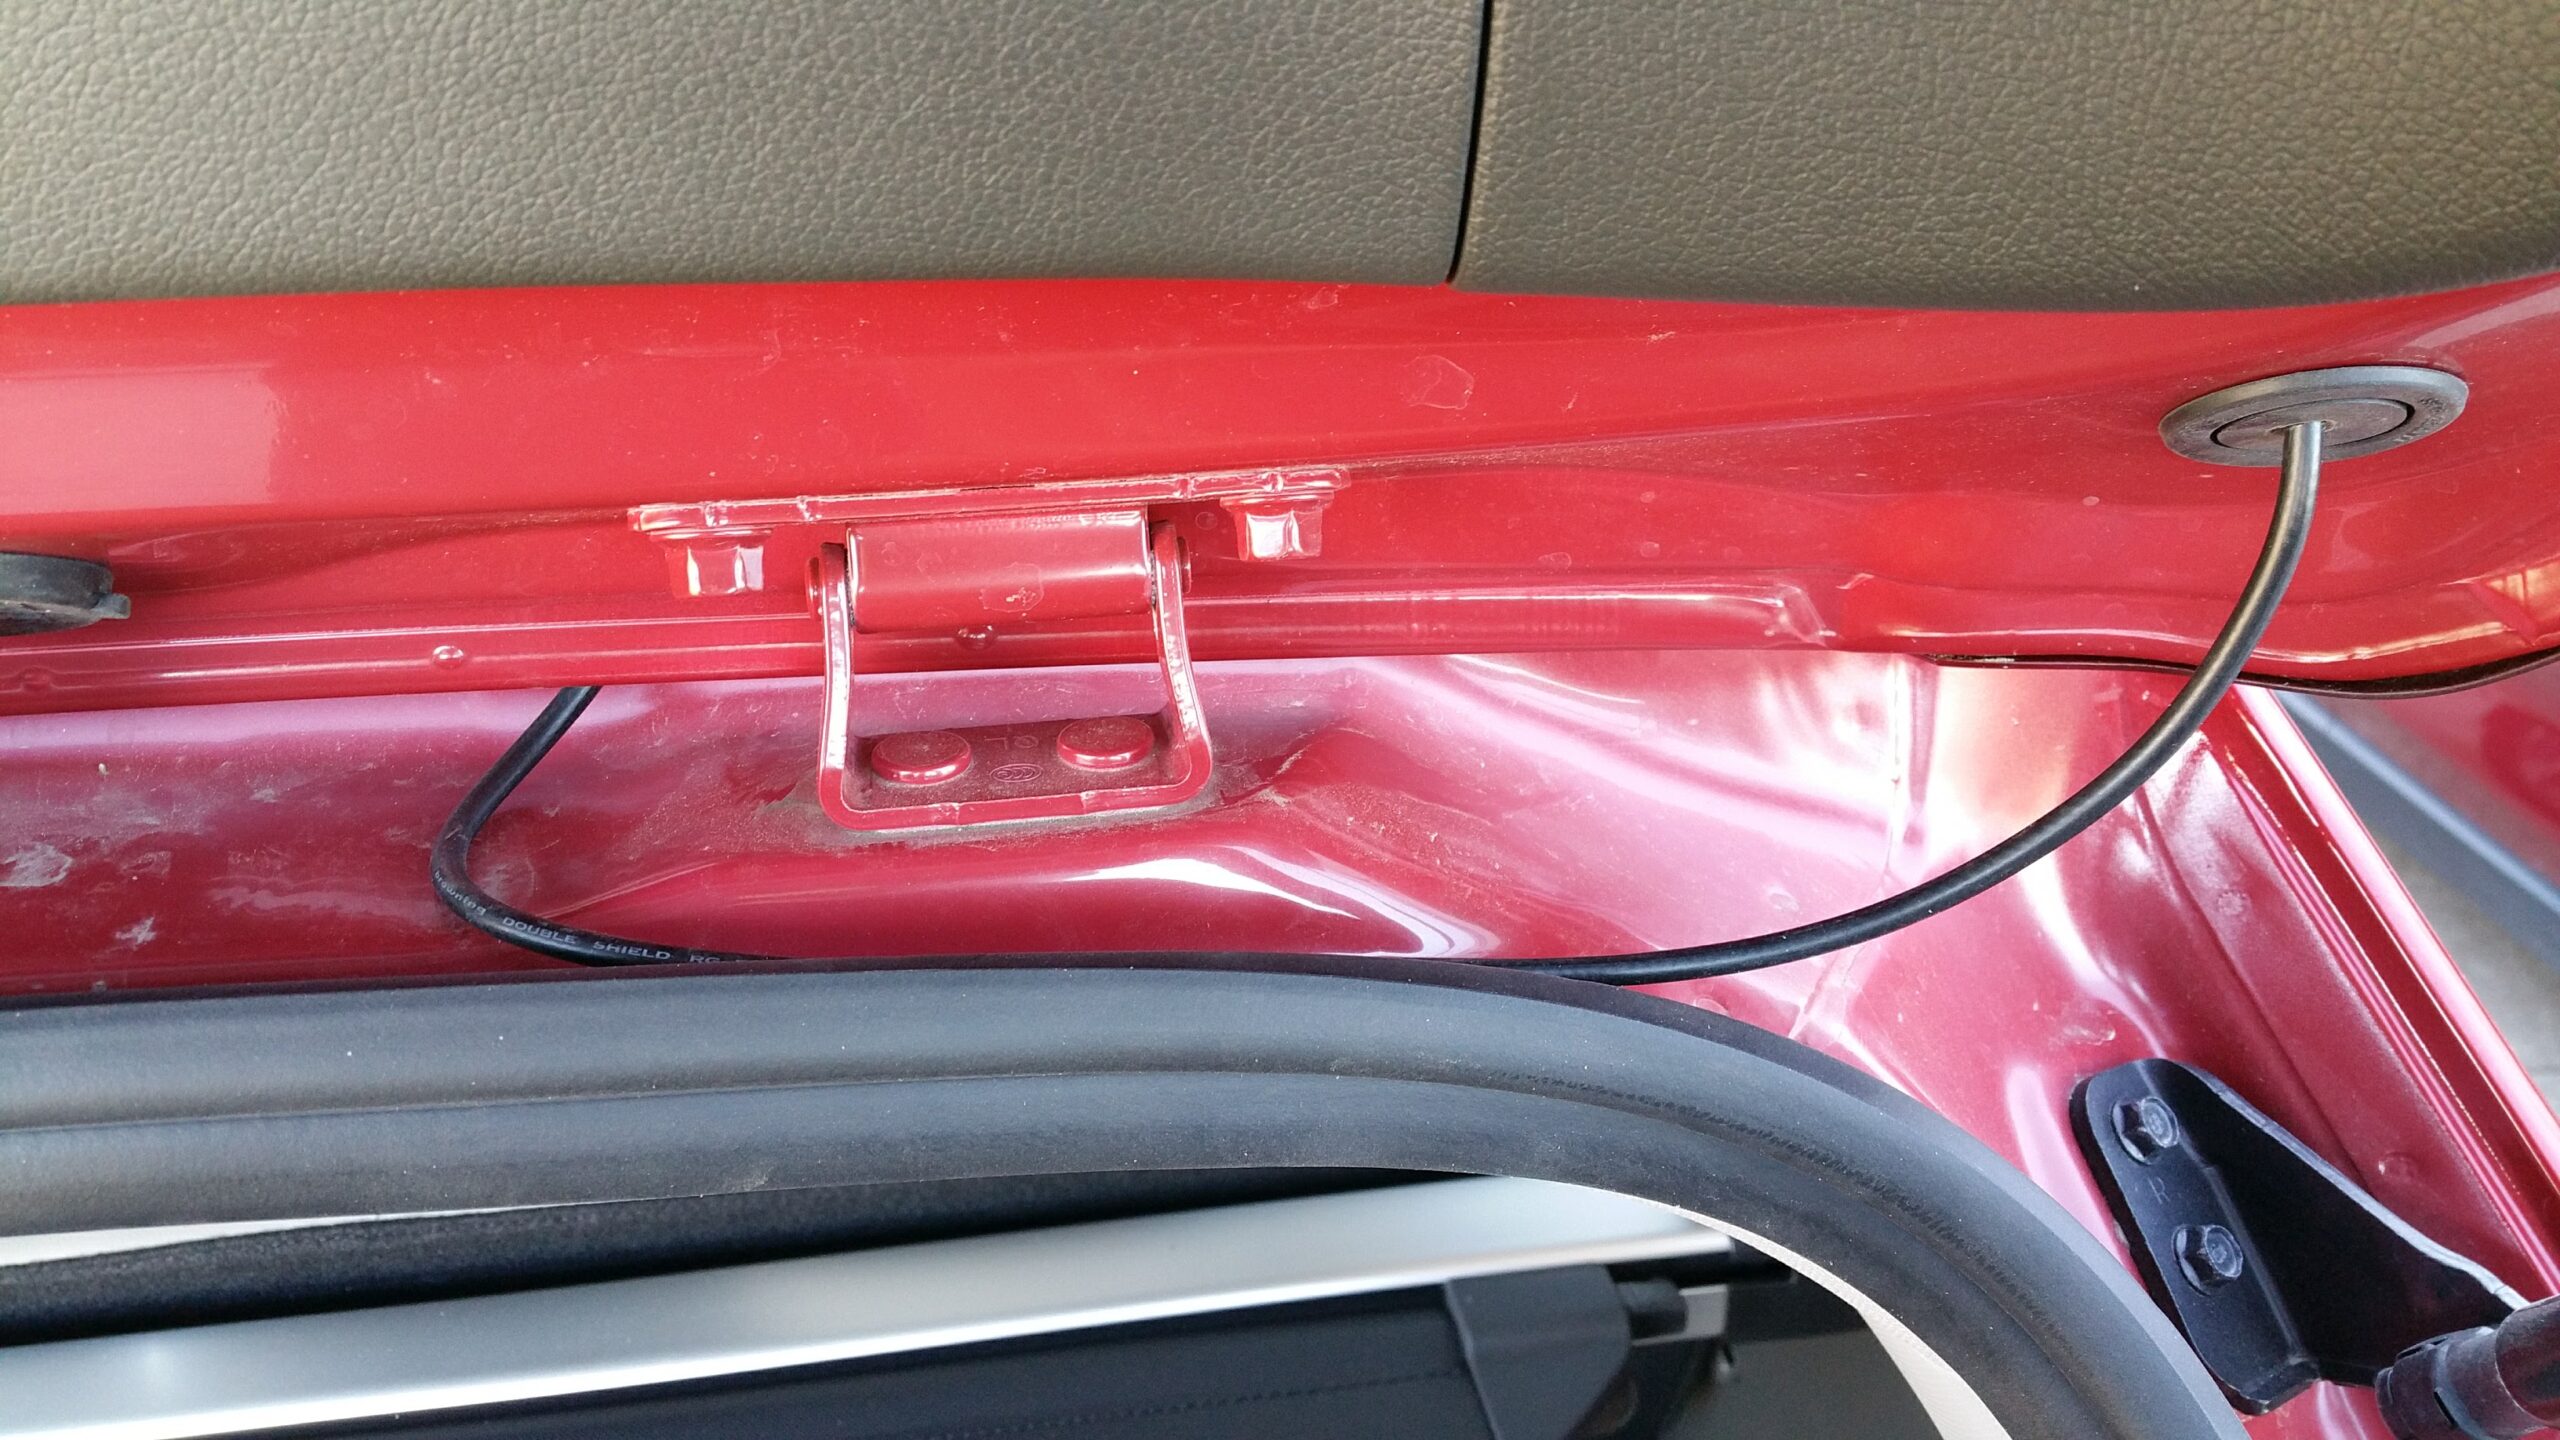
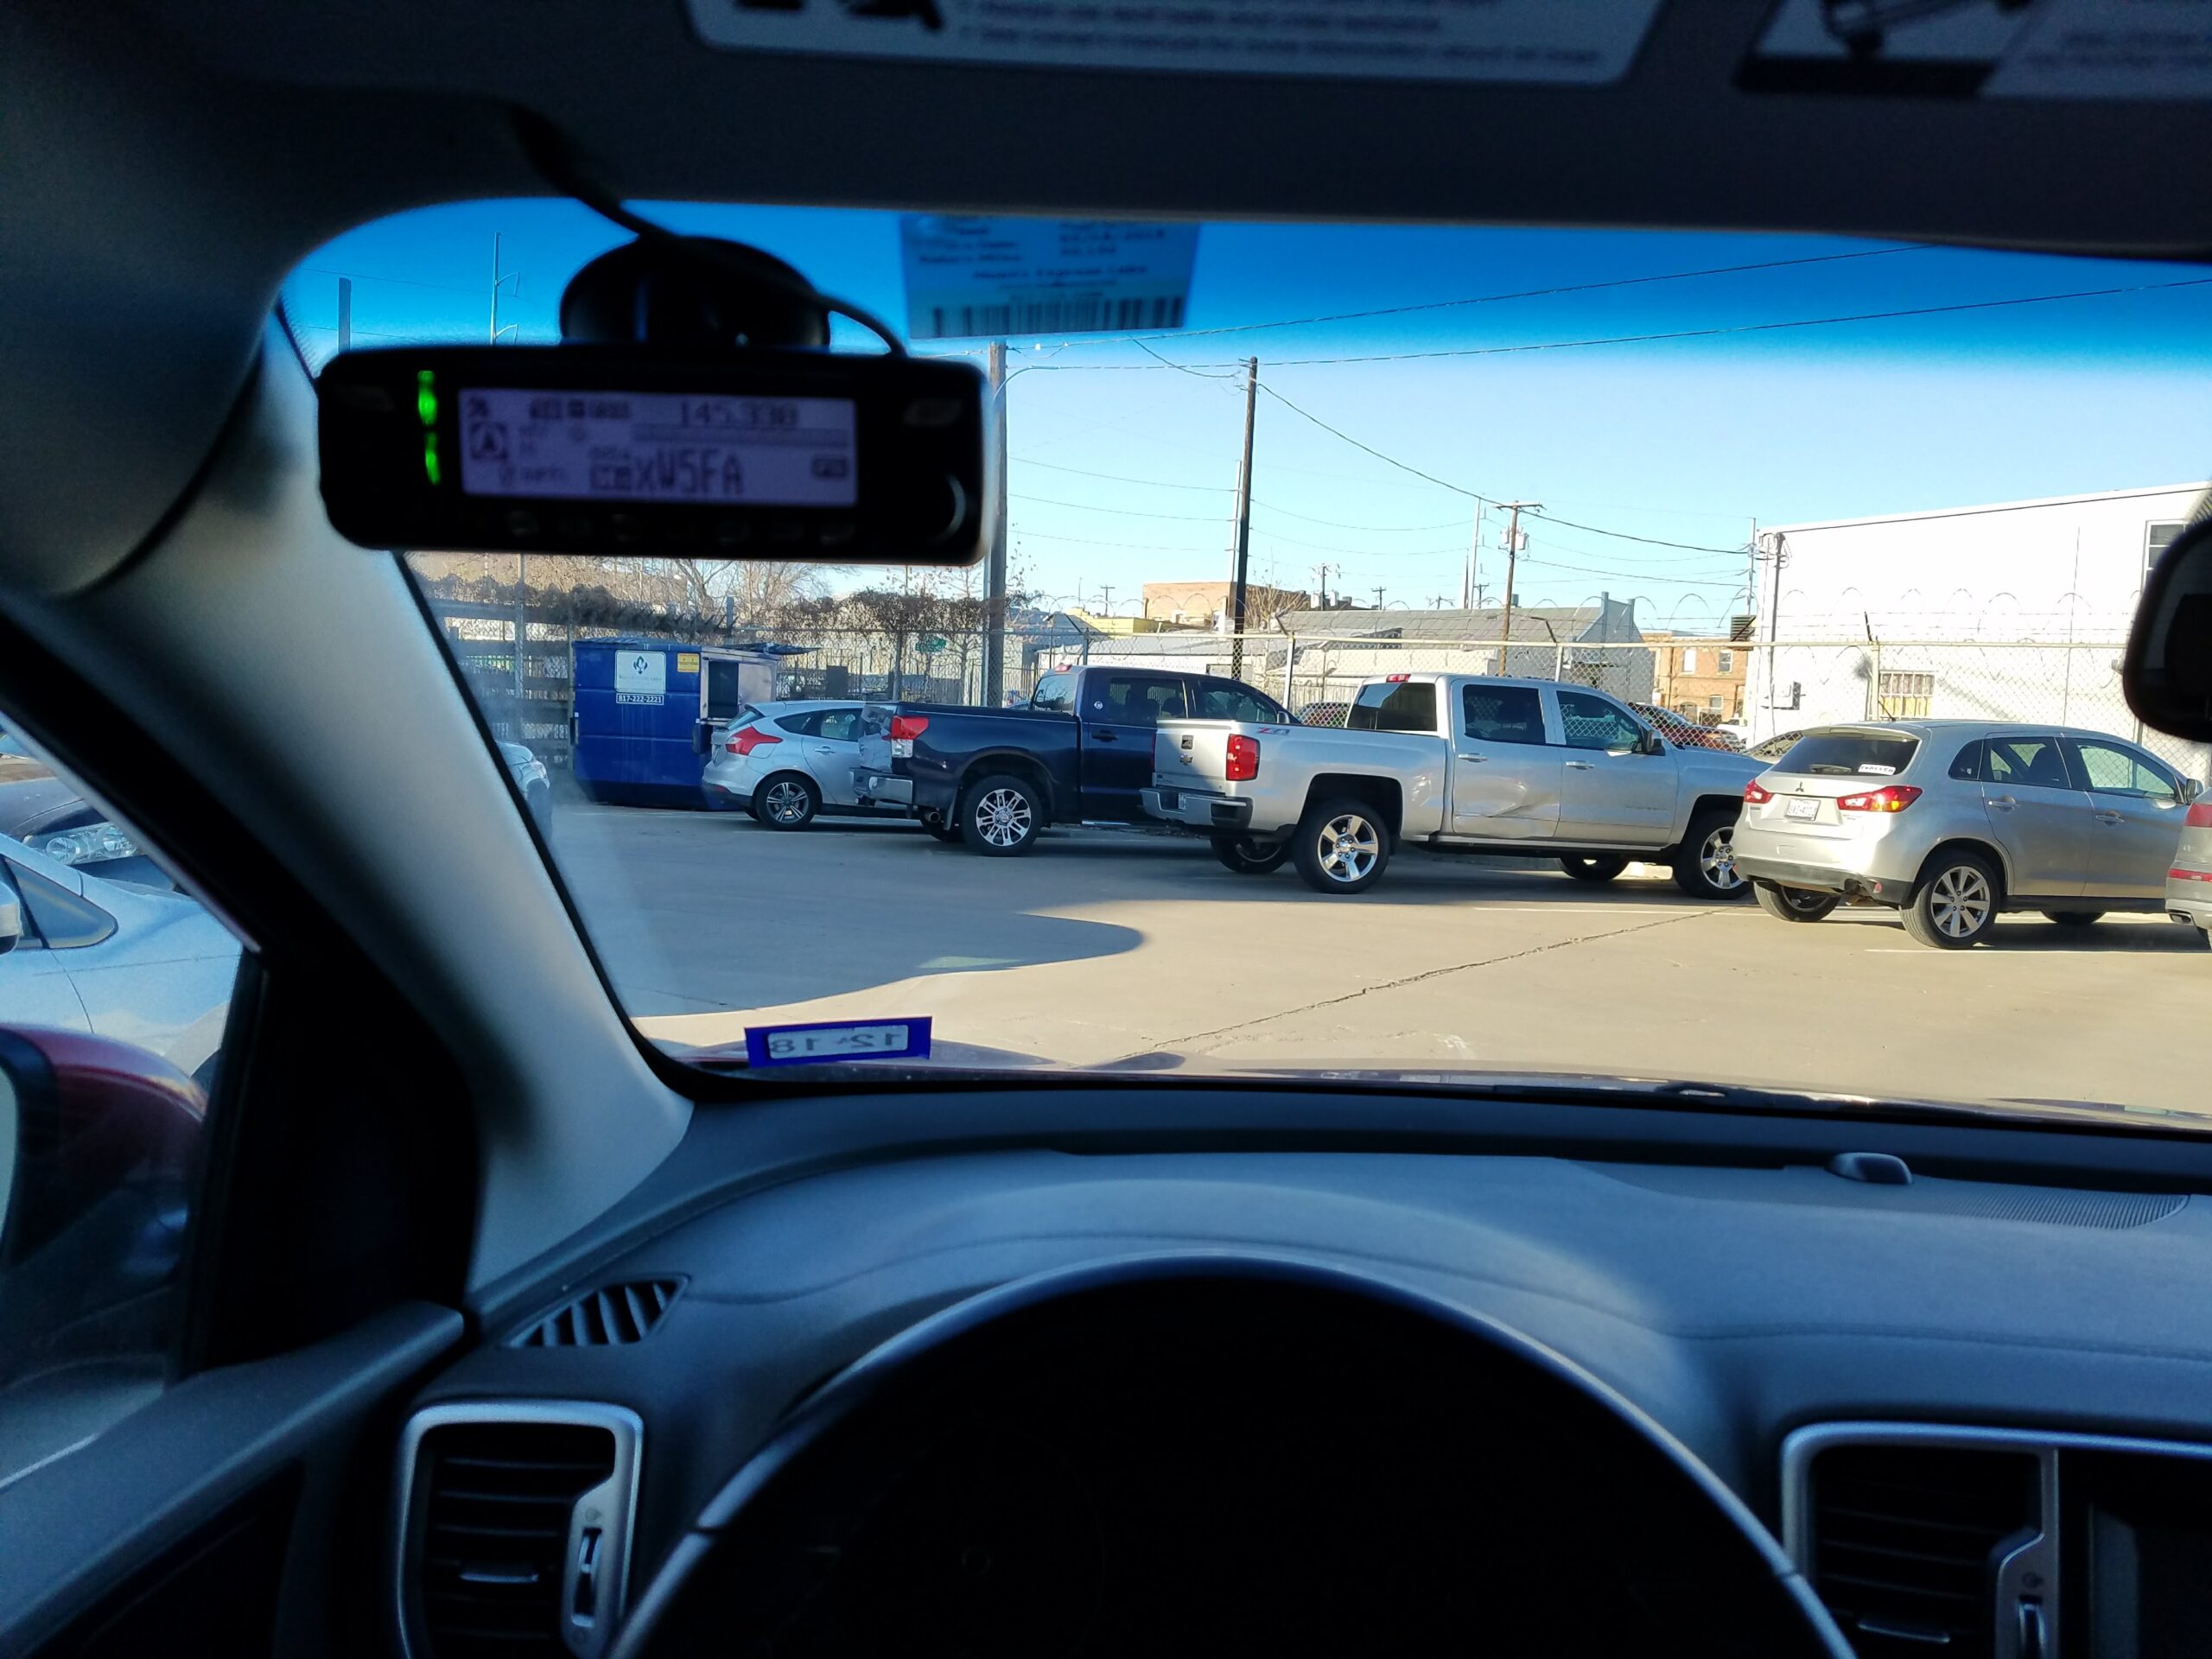
In February of 2017, I installed the FTM-100DR in my new Kia Sportage. I did not want to drill the roof for the antenna, so I used a magnetic mount, but I found a clever way to route the cable into the car.
There are rubber plugs on the rear gate.
And a cable passthrough from the gate to the body of the car to fish the cable through…
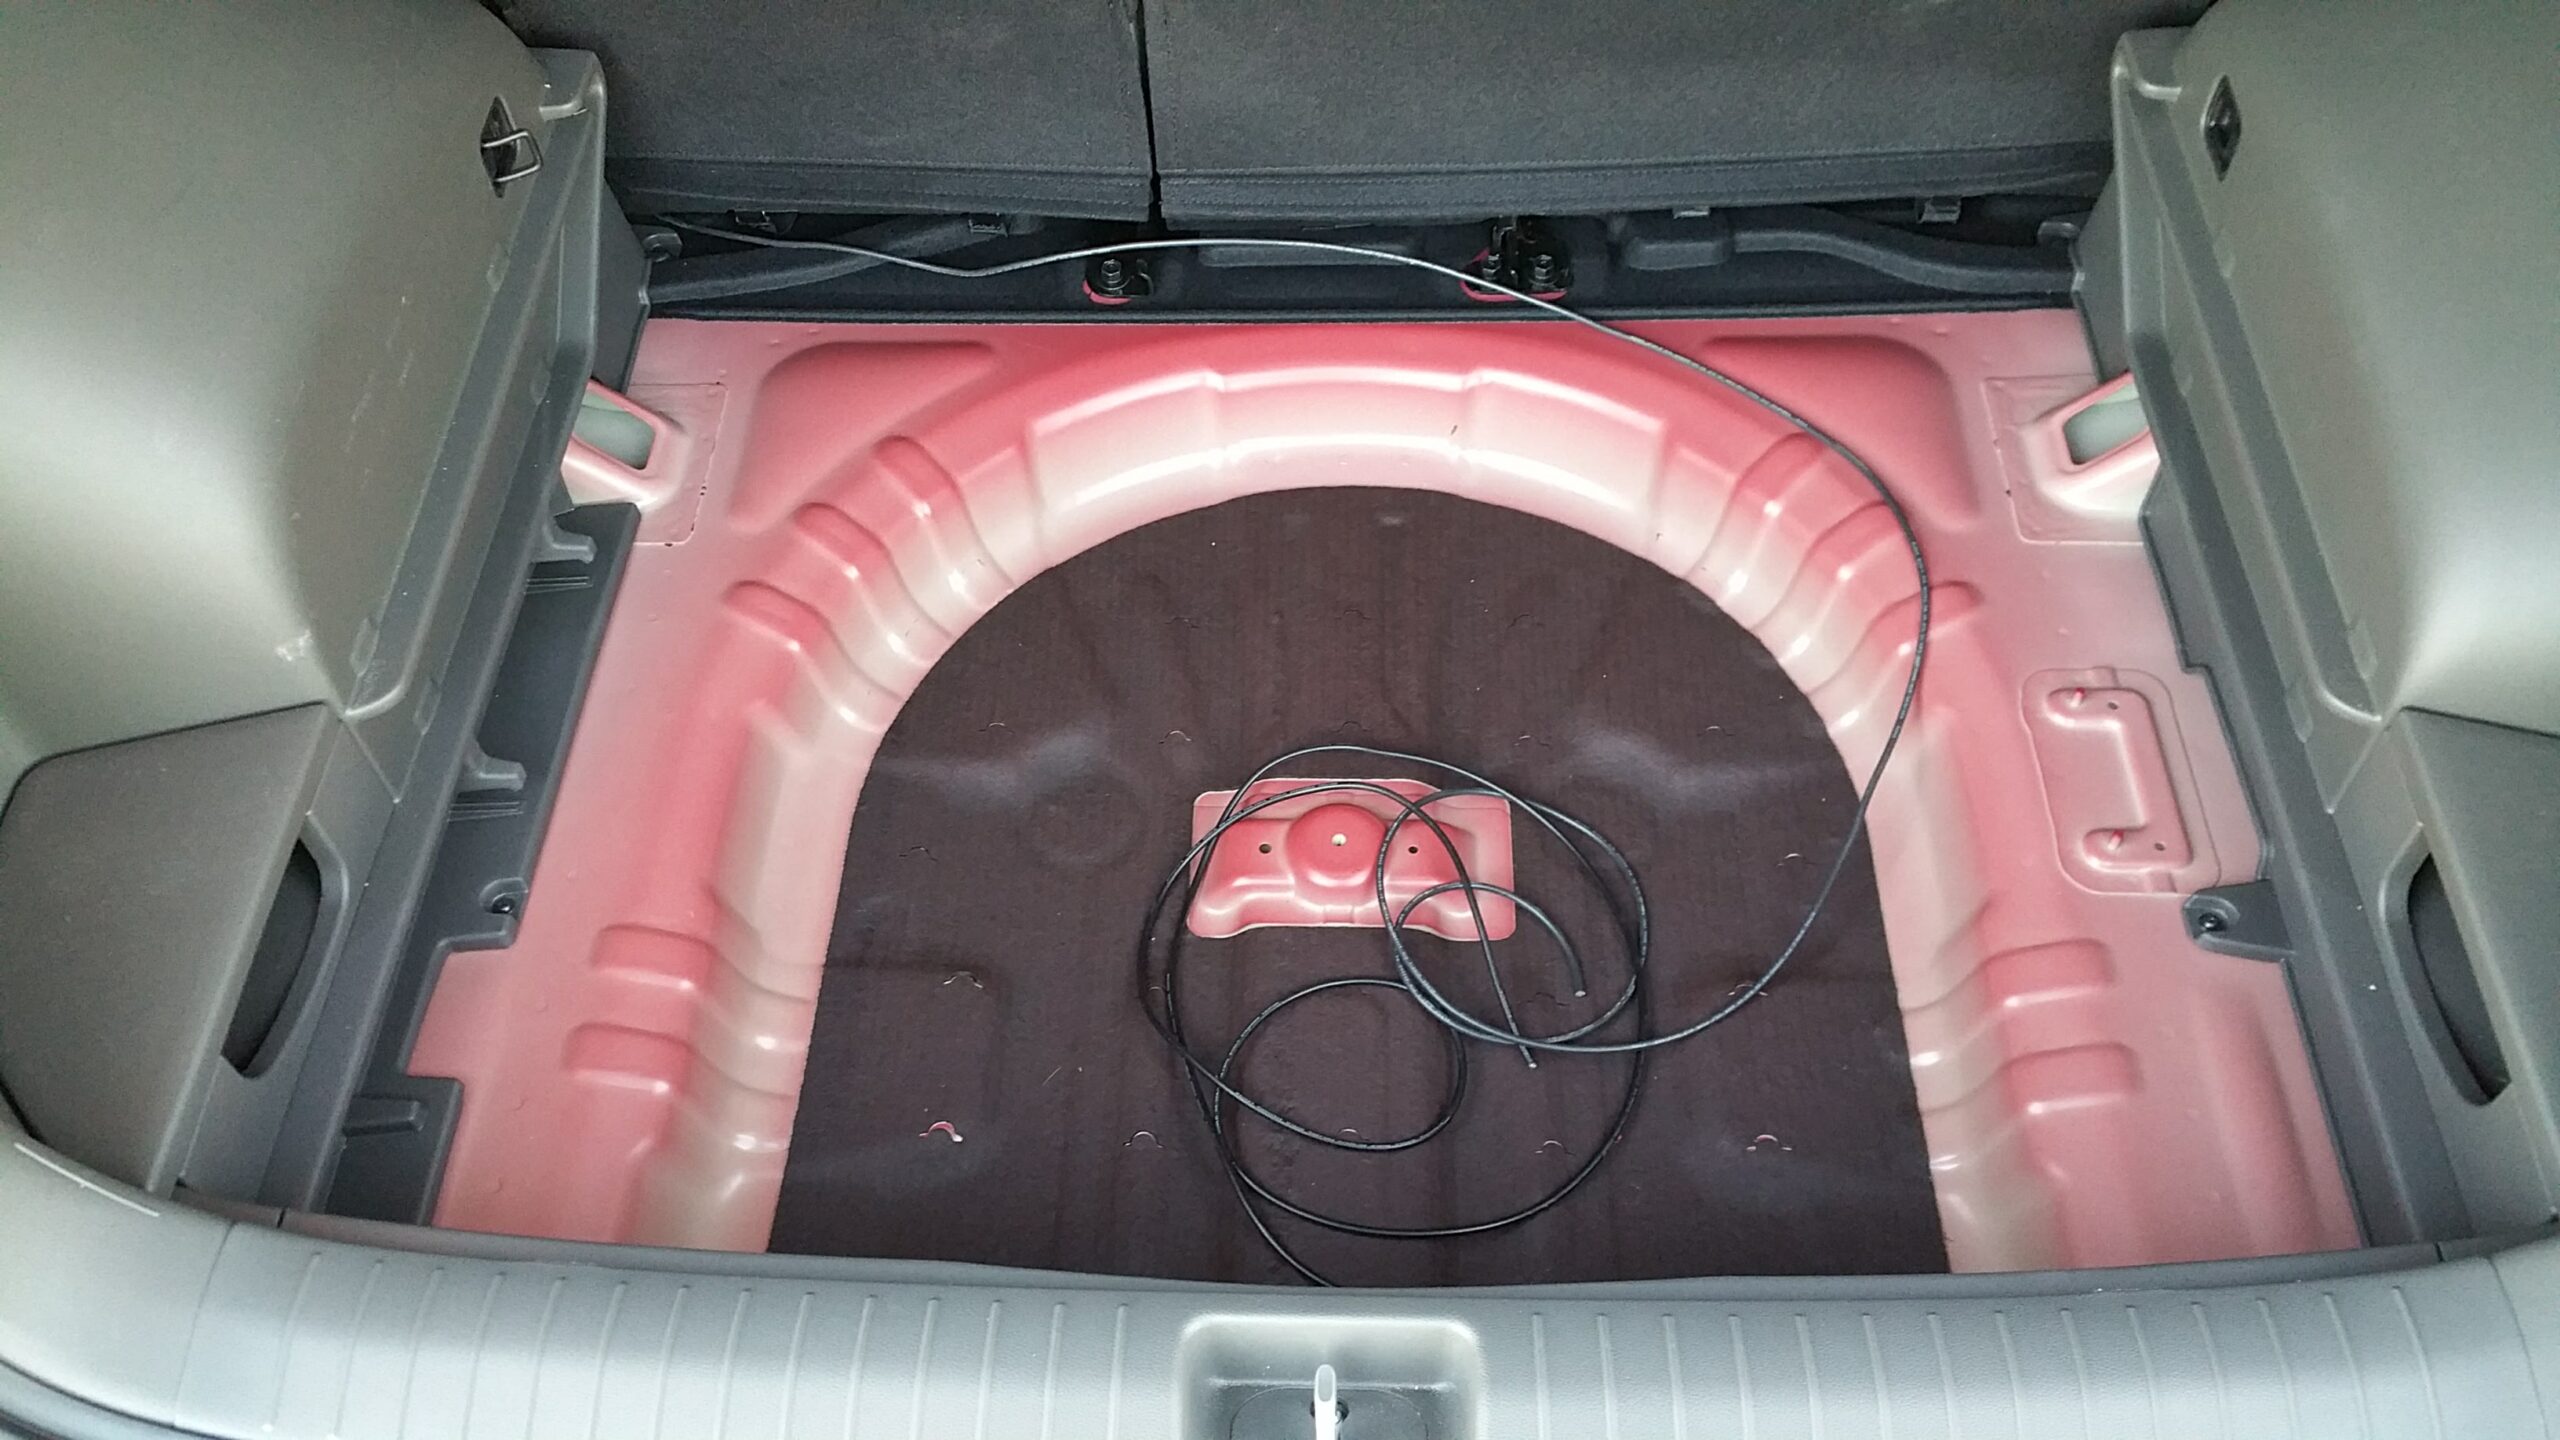
From there, I don’t have any good pictures of it, but I fished the coax from there down to the spare tire well.
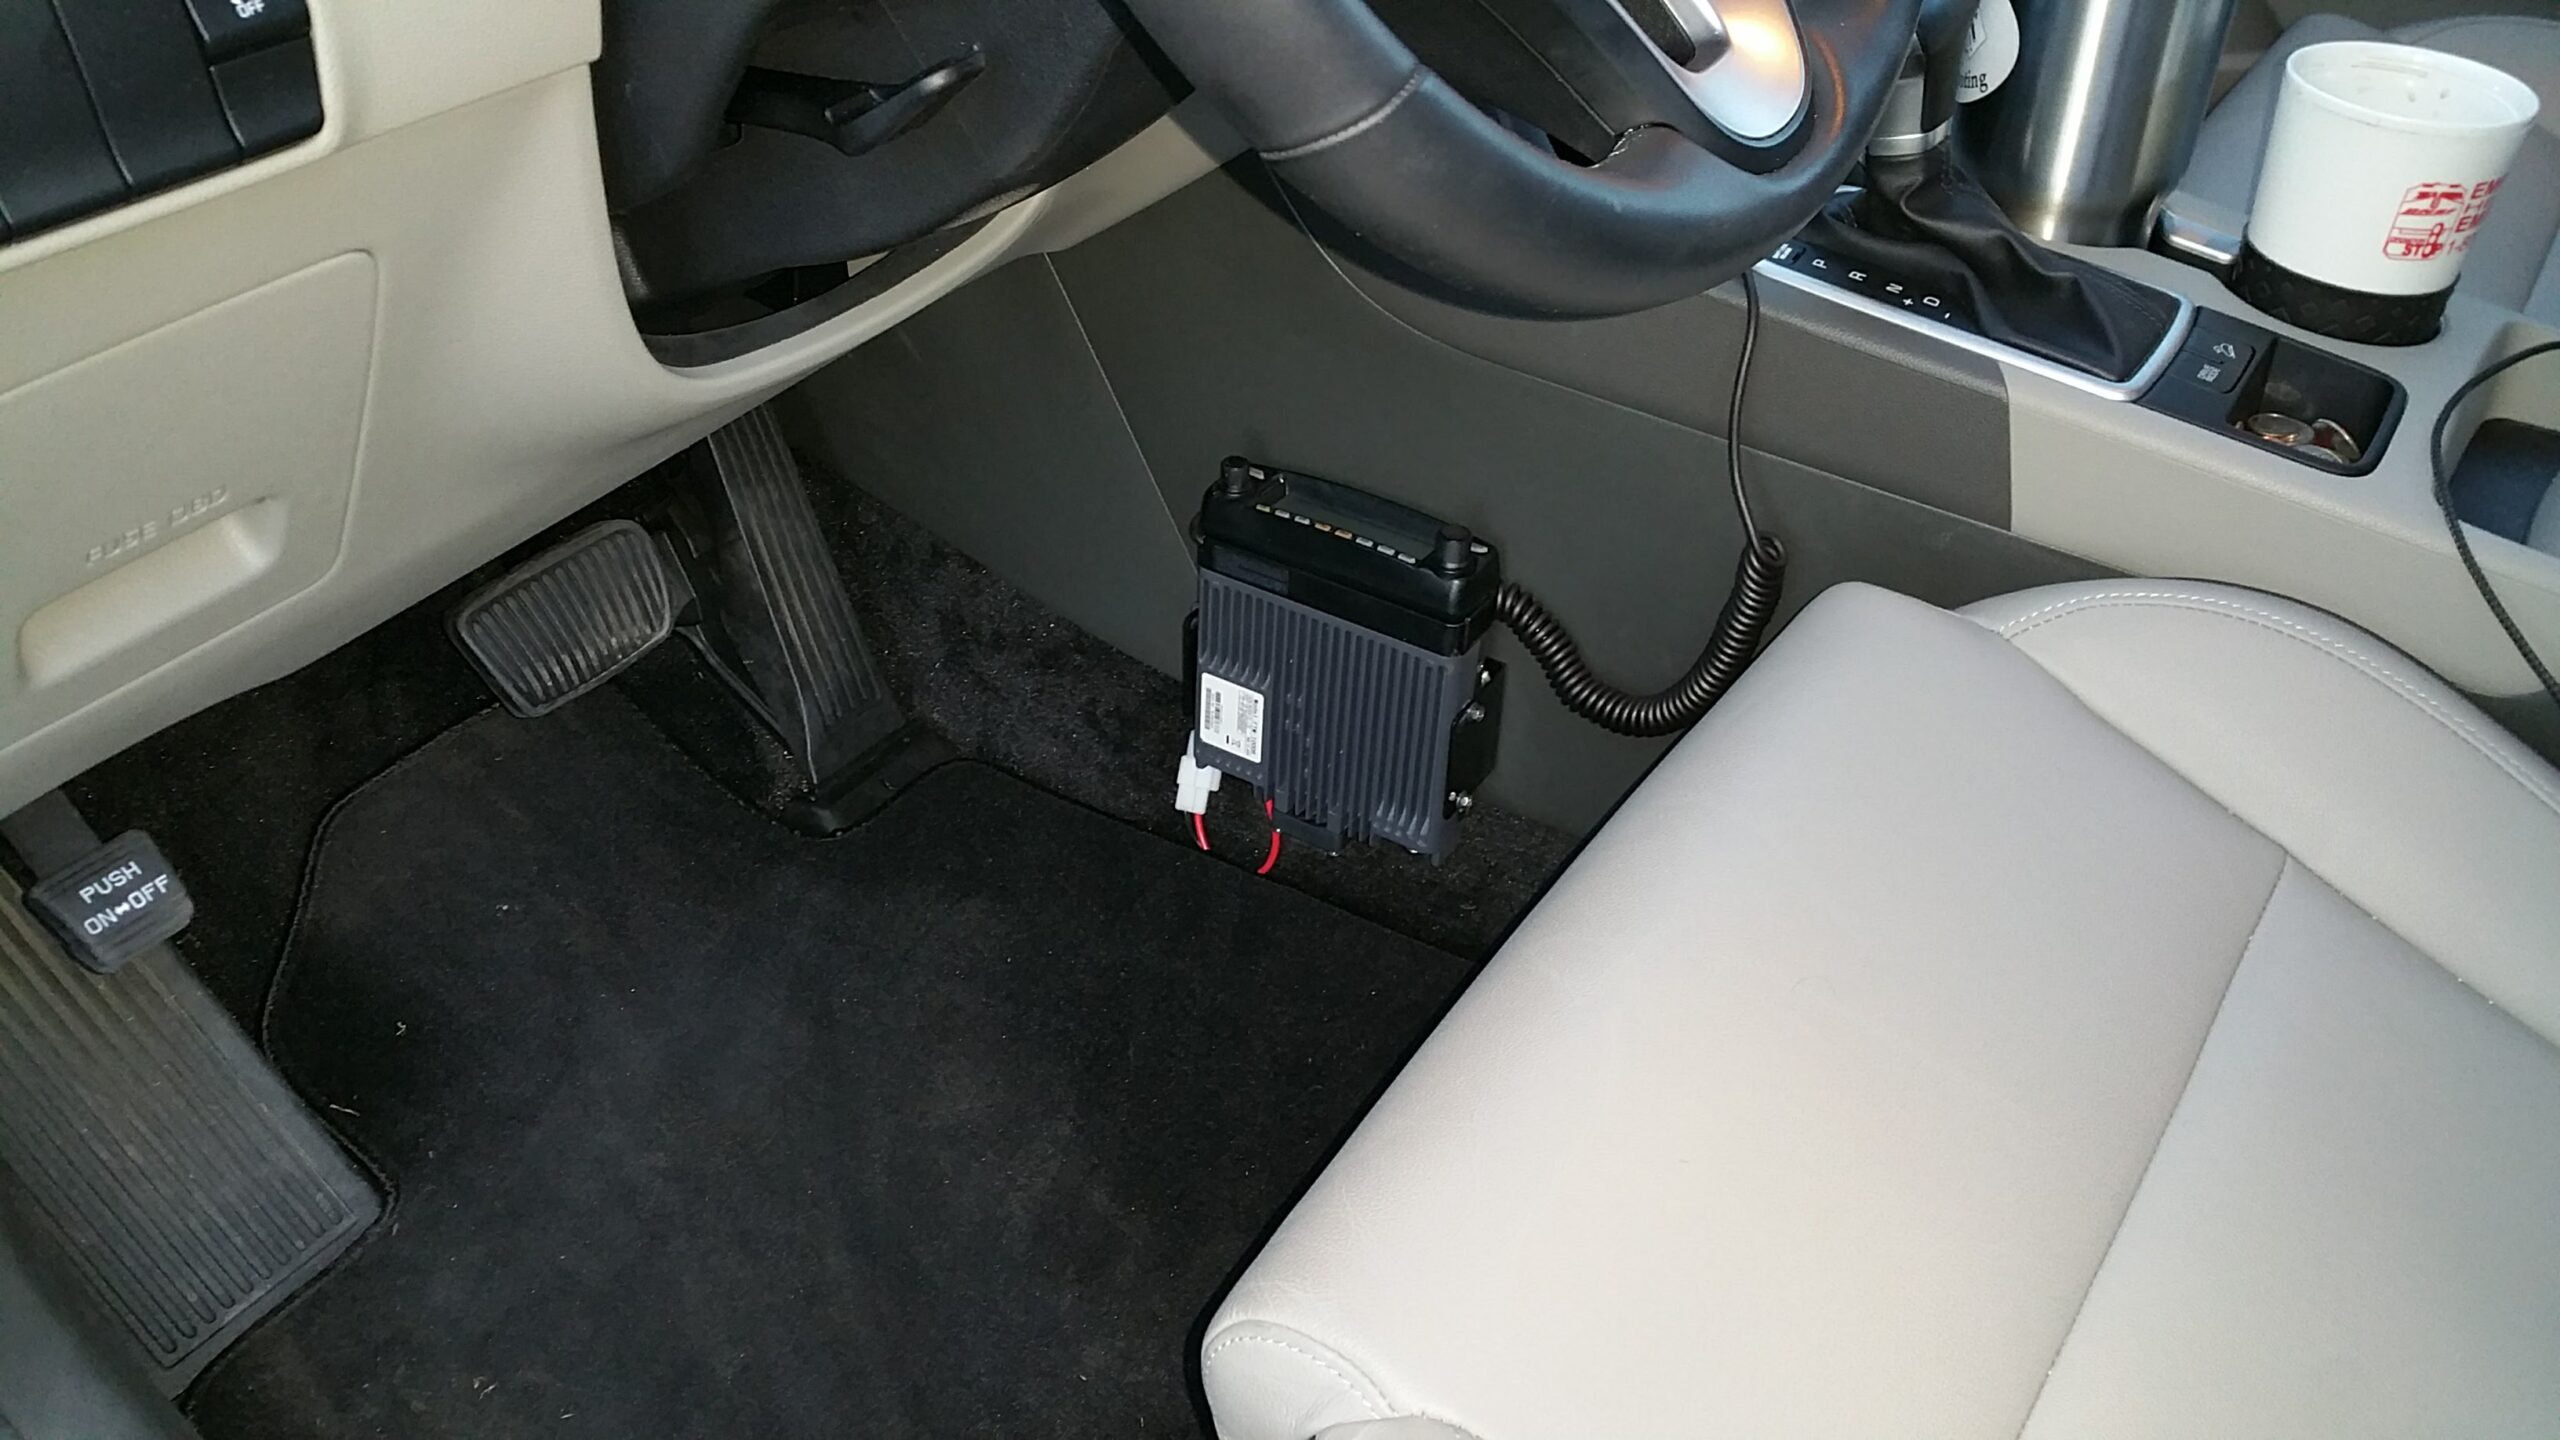
By then, the end of the coax was reached and I had to add a connector and more coax to make it reach the front of the car. From there, it’s a pretty normal tuck under the floor mats to the driver side console.
About a year later, I ran the wire to remote mount the control head on the windshield. Sorry about the focus. 🙂
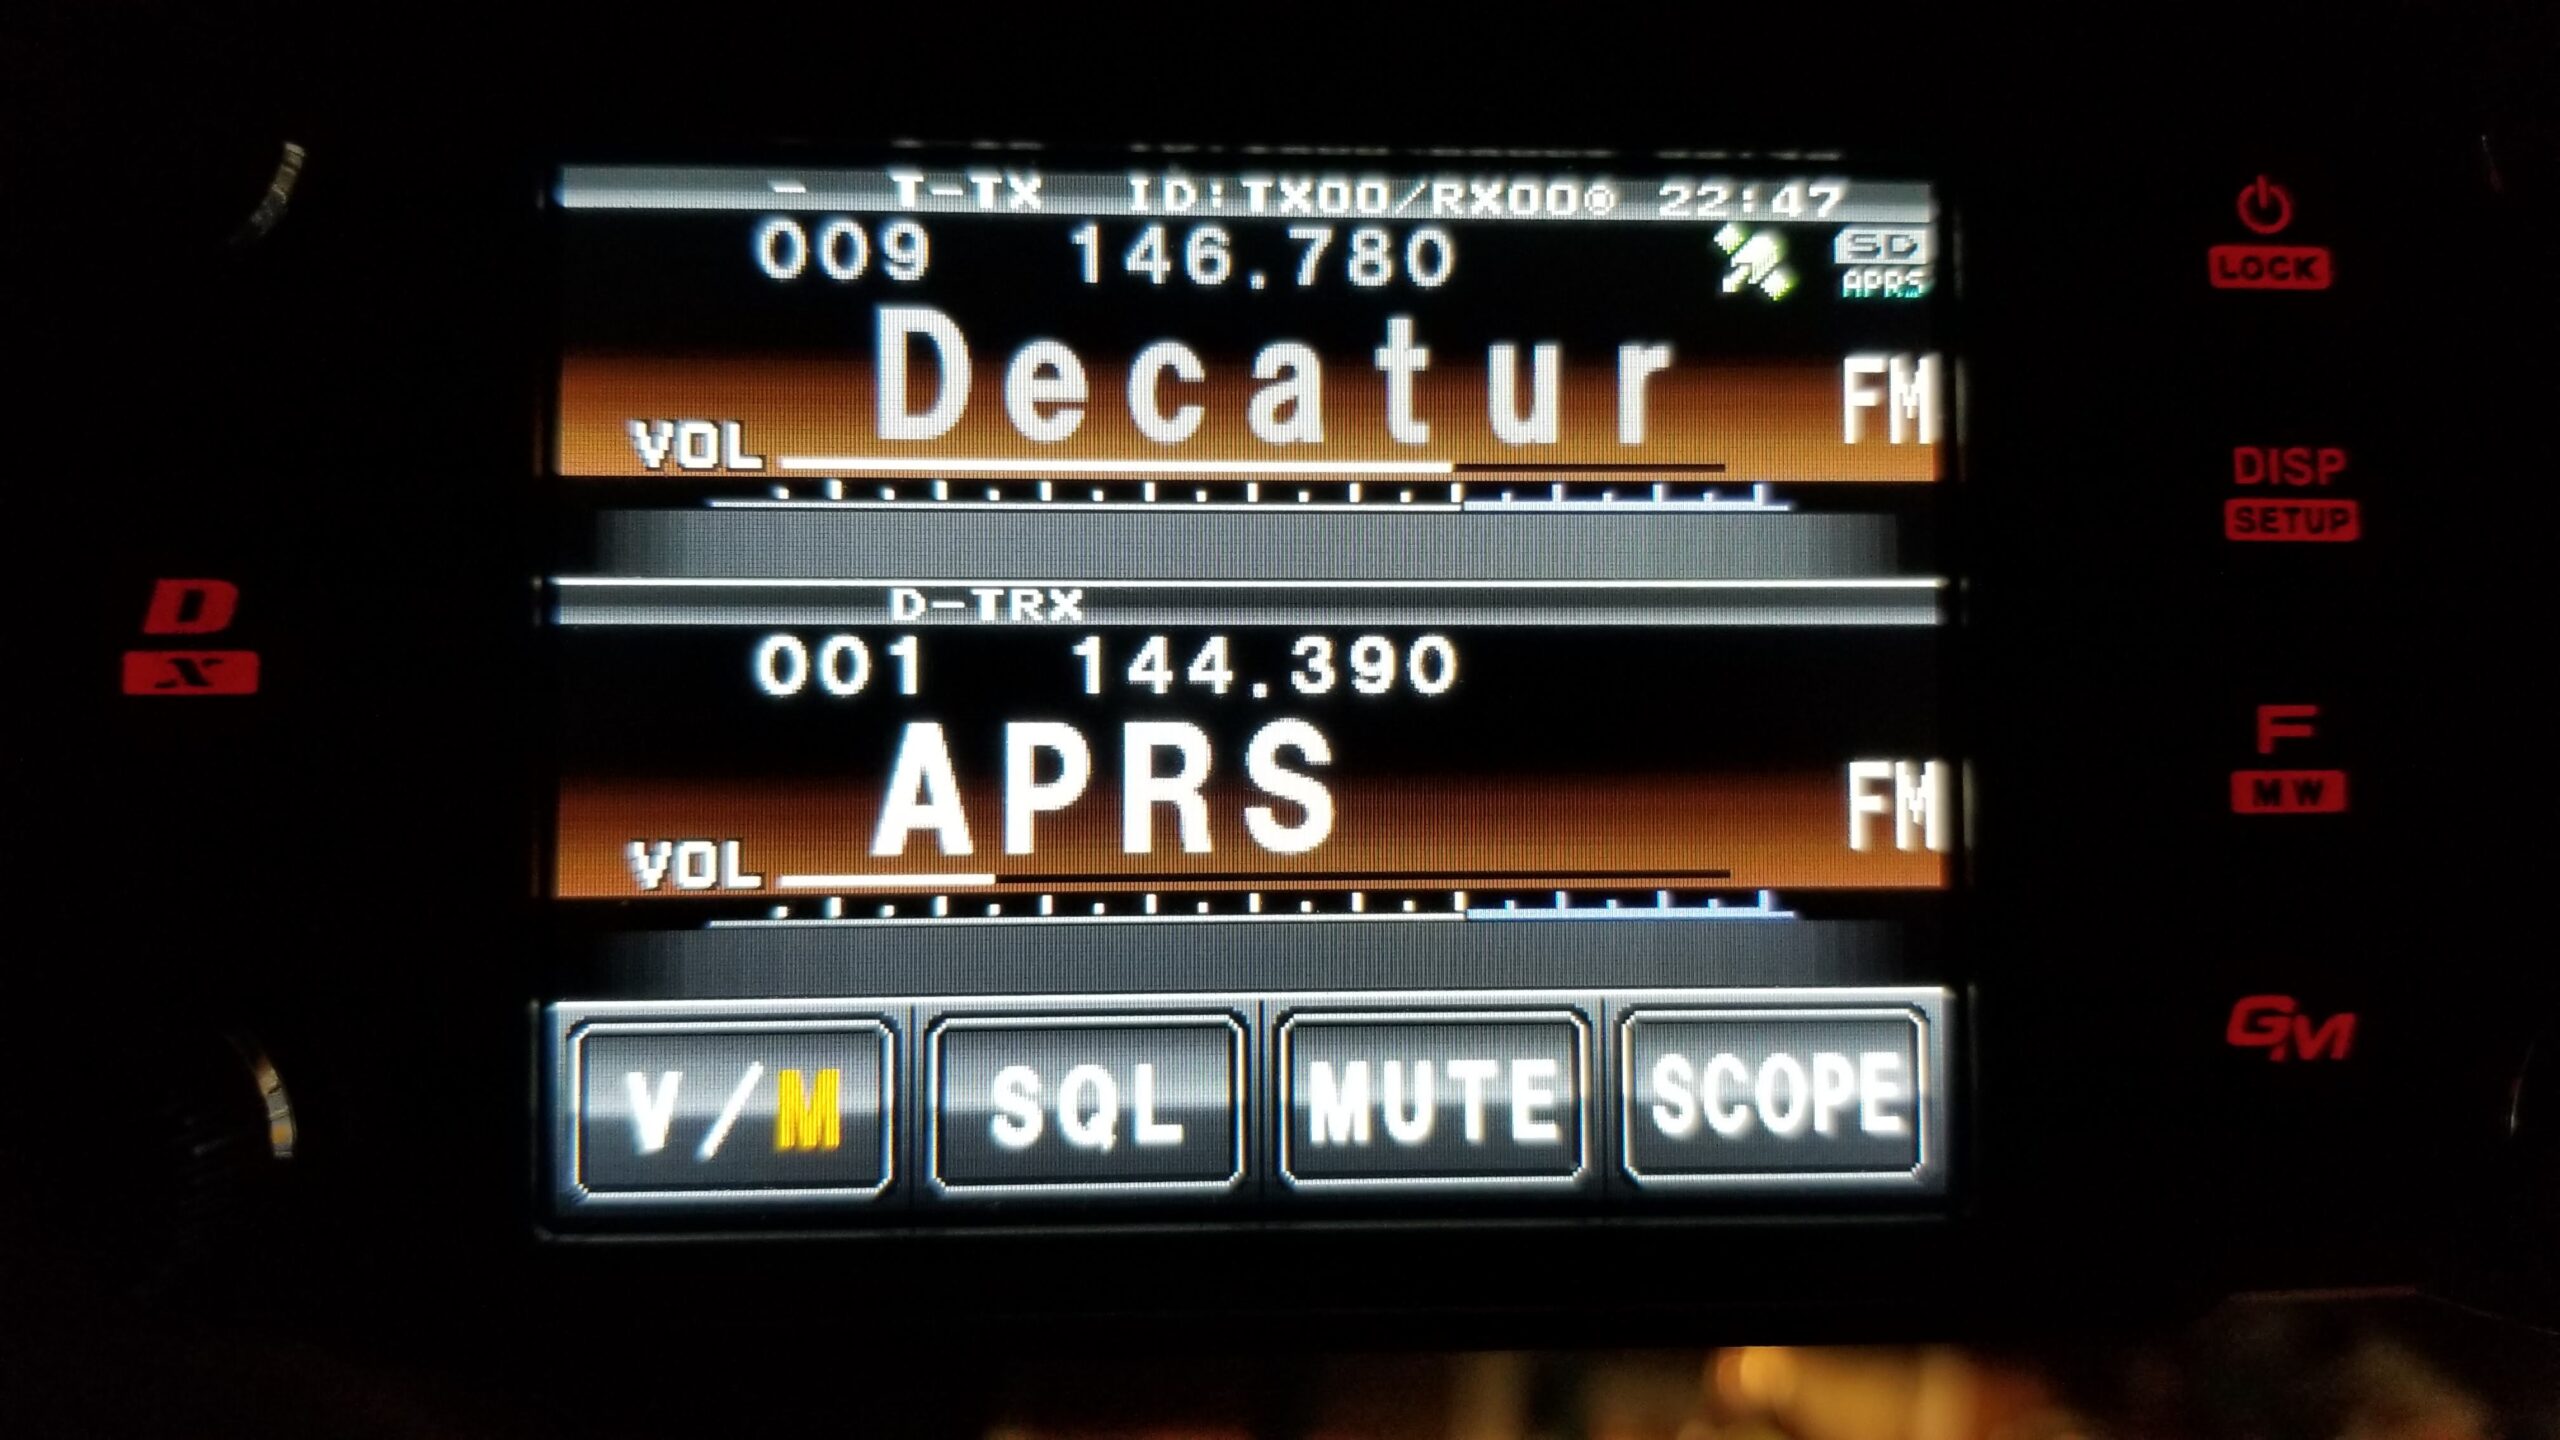
Among the things I enjoyed with the FTM-100DR was playing with APRS. The FTM-100DR can do APRS or something else, but not really both. It can sort of receive APRS messages while being set up to transmit voice, but if it is beaconing APRS data, it’s beaconing data. This was only one factor driving my desire to upgrade, so it was natural to choose the FTM-400XDR. As a side benefit, it was a drop in replacement in the car. Same mounting bracket and power cable for the main unit, same remote cable and suction cup for the control head. And now, APRS is a fully supported feature that can be turned on and off at will with almost no effect on voice operations.
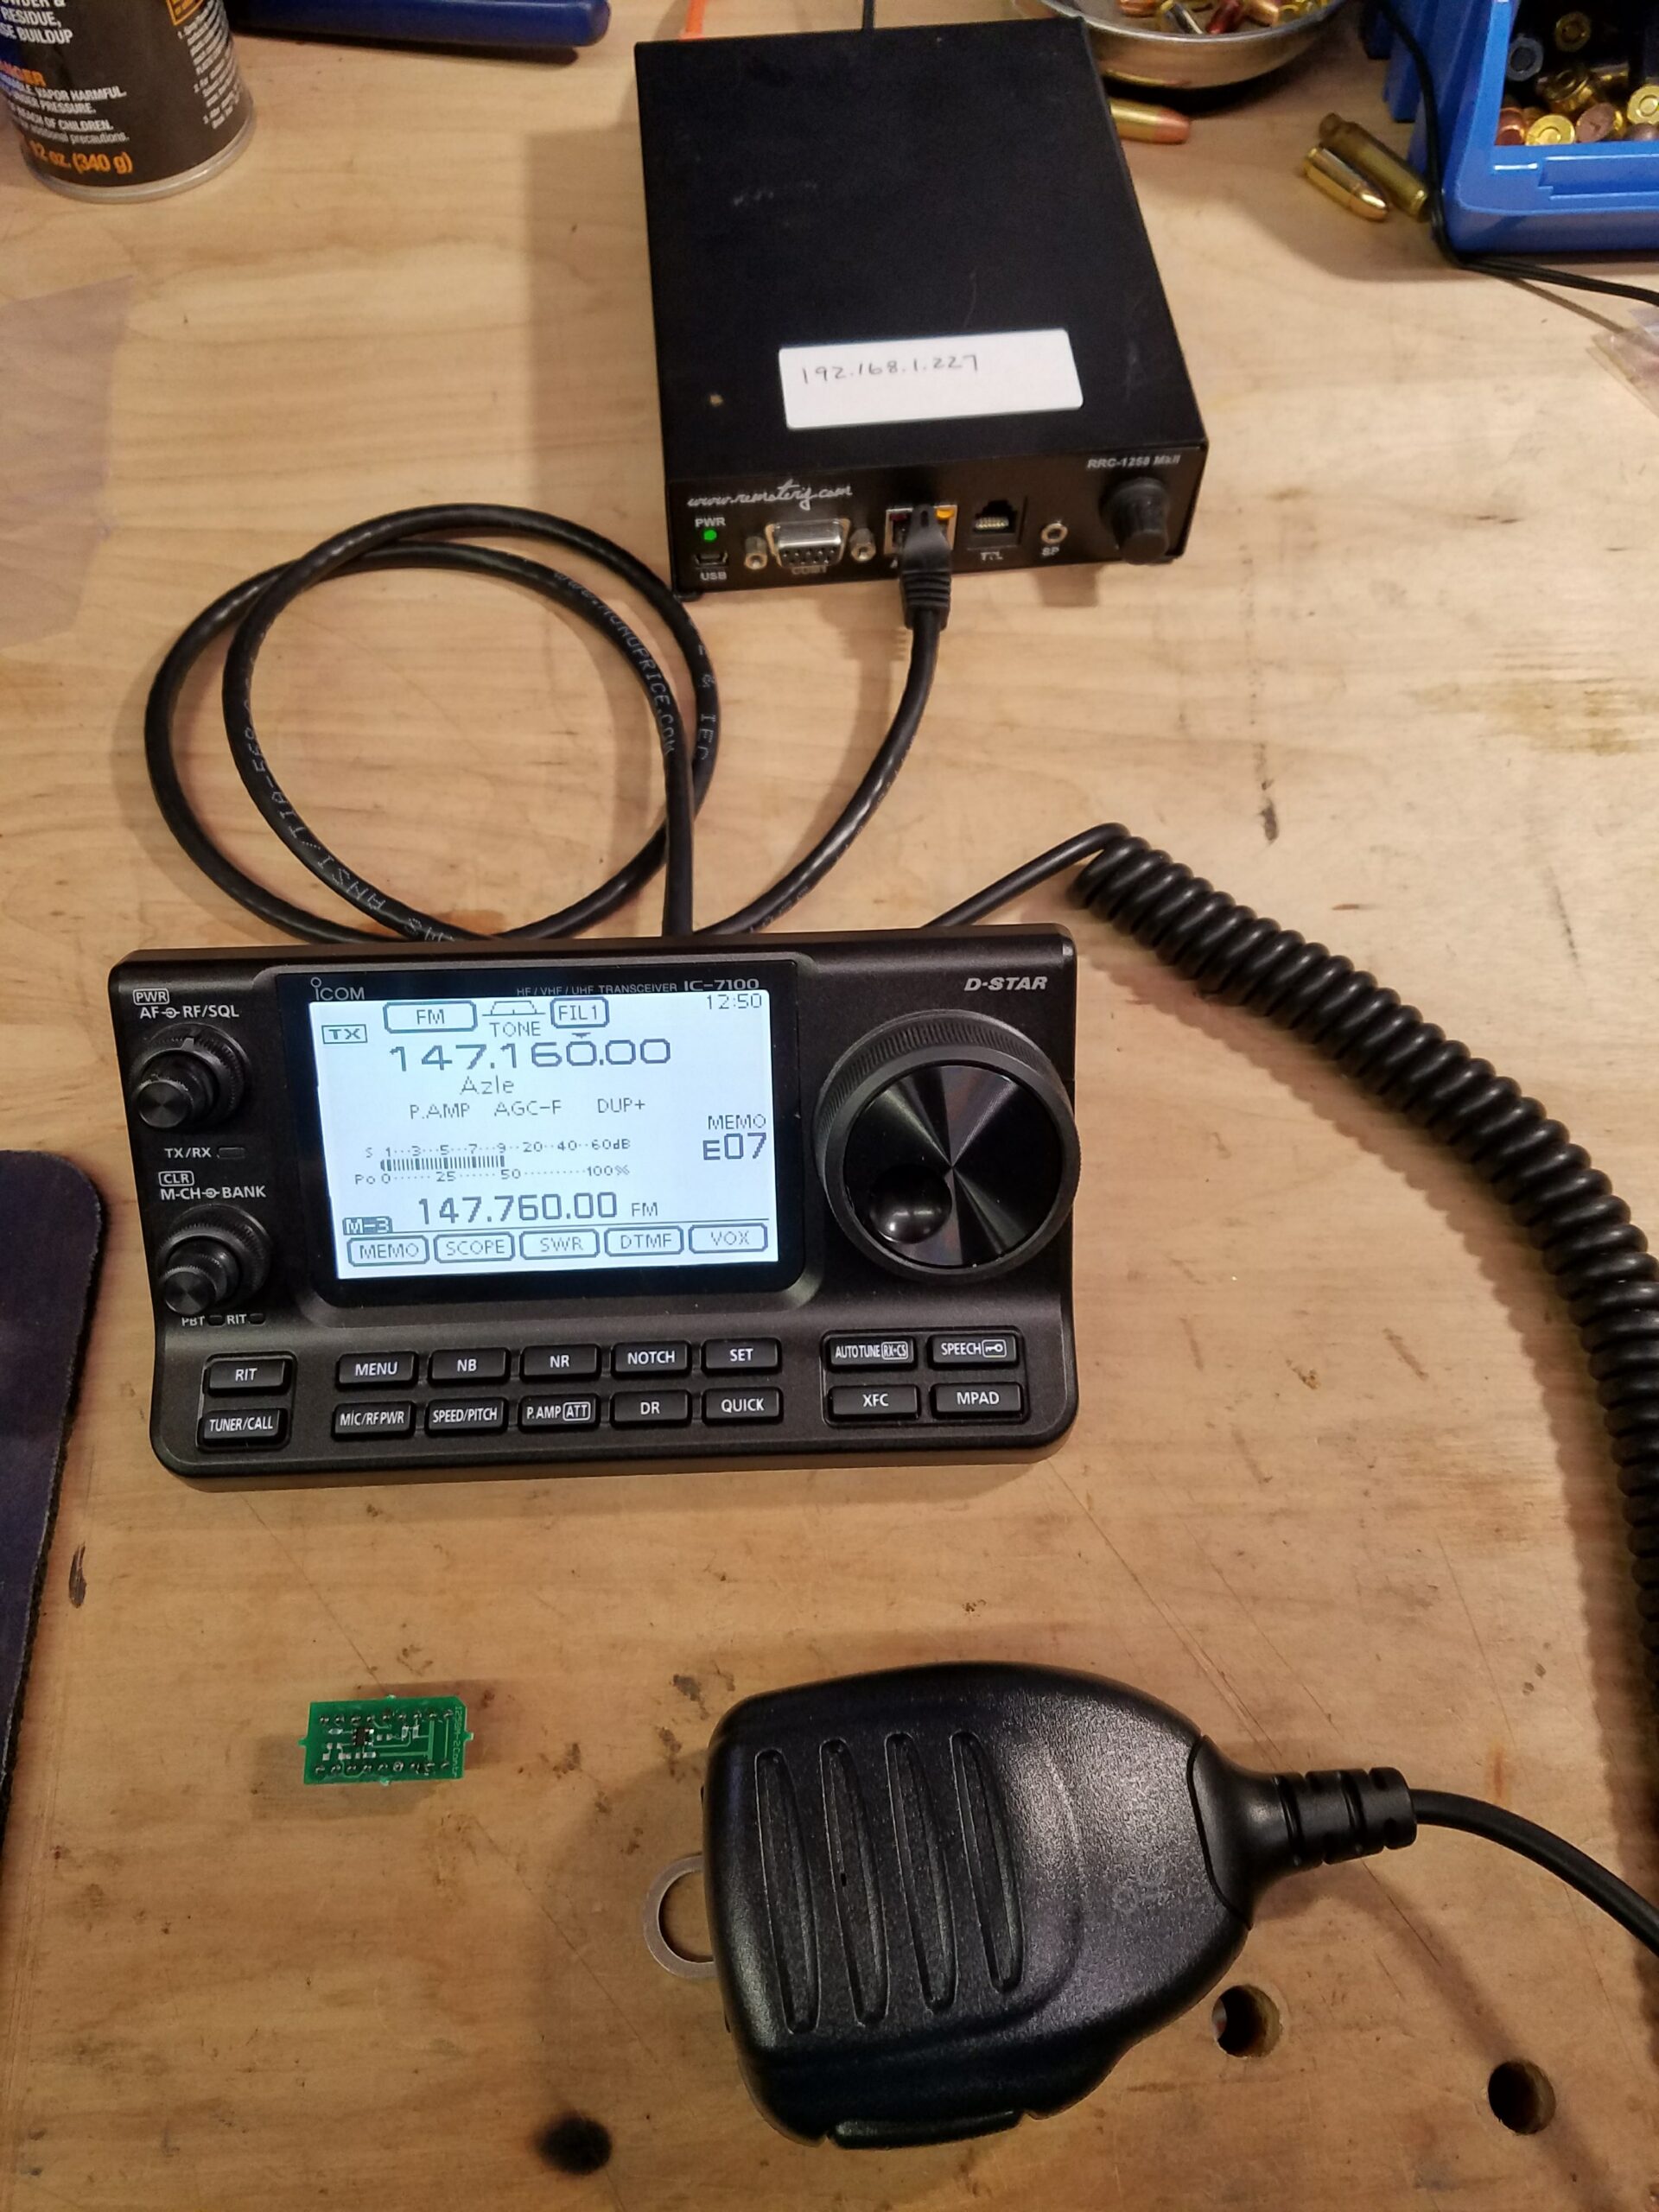
My IC-706MkIIg had been a great rig, but had developed an intermittent transmit problem. Since I generally use it with RemoteRig, I can’t do anything physical to the radio when this issue comes up. I don’t operate often enough to want to deal with a troublesome rig, so I bit the bullet on getting another. I didn’t want a used rig, so I shopped around a bit. I was looking for another rig with with a detachable head for use with RemoteRig; I like that paradigm. I did not have any particular bias for Icom, but I did like the control head for the IC-7100. It seemed well suited to remote operation on a desktop.
Ironically, when I was ready to connect it to the RemoteRig, I found that the radio end unit was non-functional. It had been a while since I’d used it, so I don’t know if it was a storm or long term heat out in the shop that killed it. Long story short, it had no signs of life and the voltage regulator on the board ran super hot, not enough to melt anything, but definitely not right. I contacted Microbit and after a couple of emails and tests back and forth, it was determined to be unrepairable. They sold me a replacement board at a discount price, which was fine with me. It was relatively trivial to get the IC-7100 working over RemoteRig.
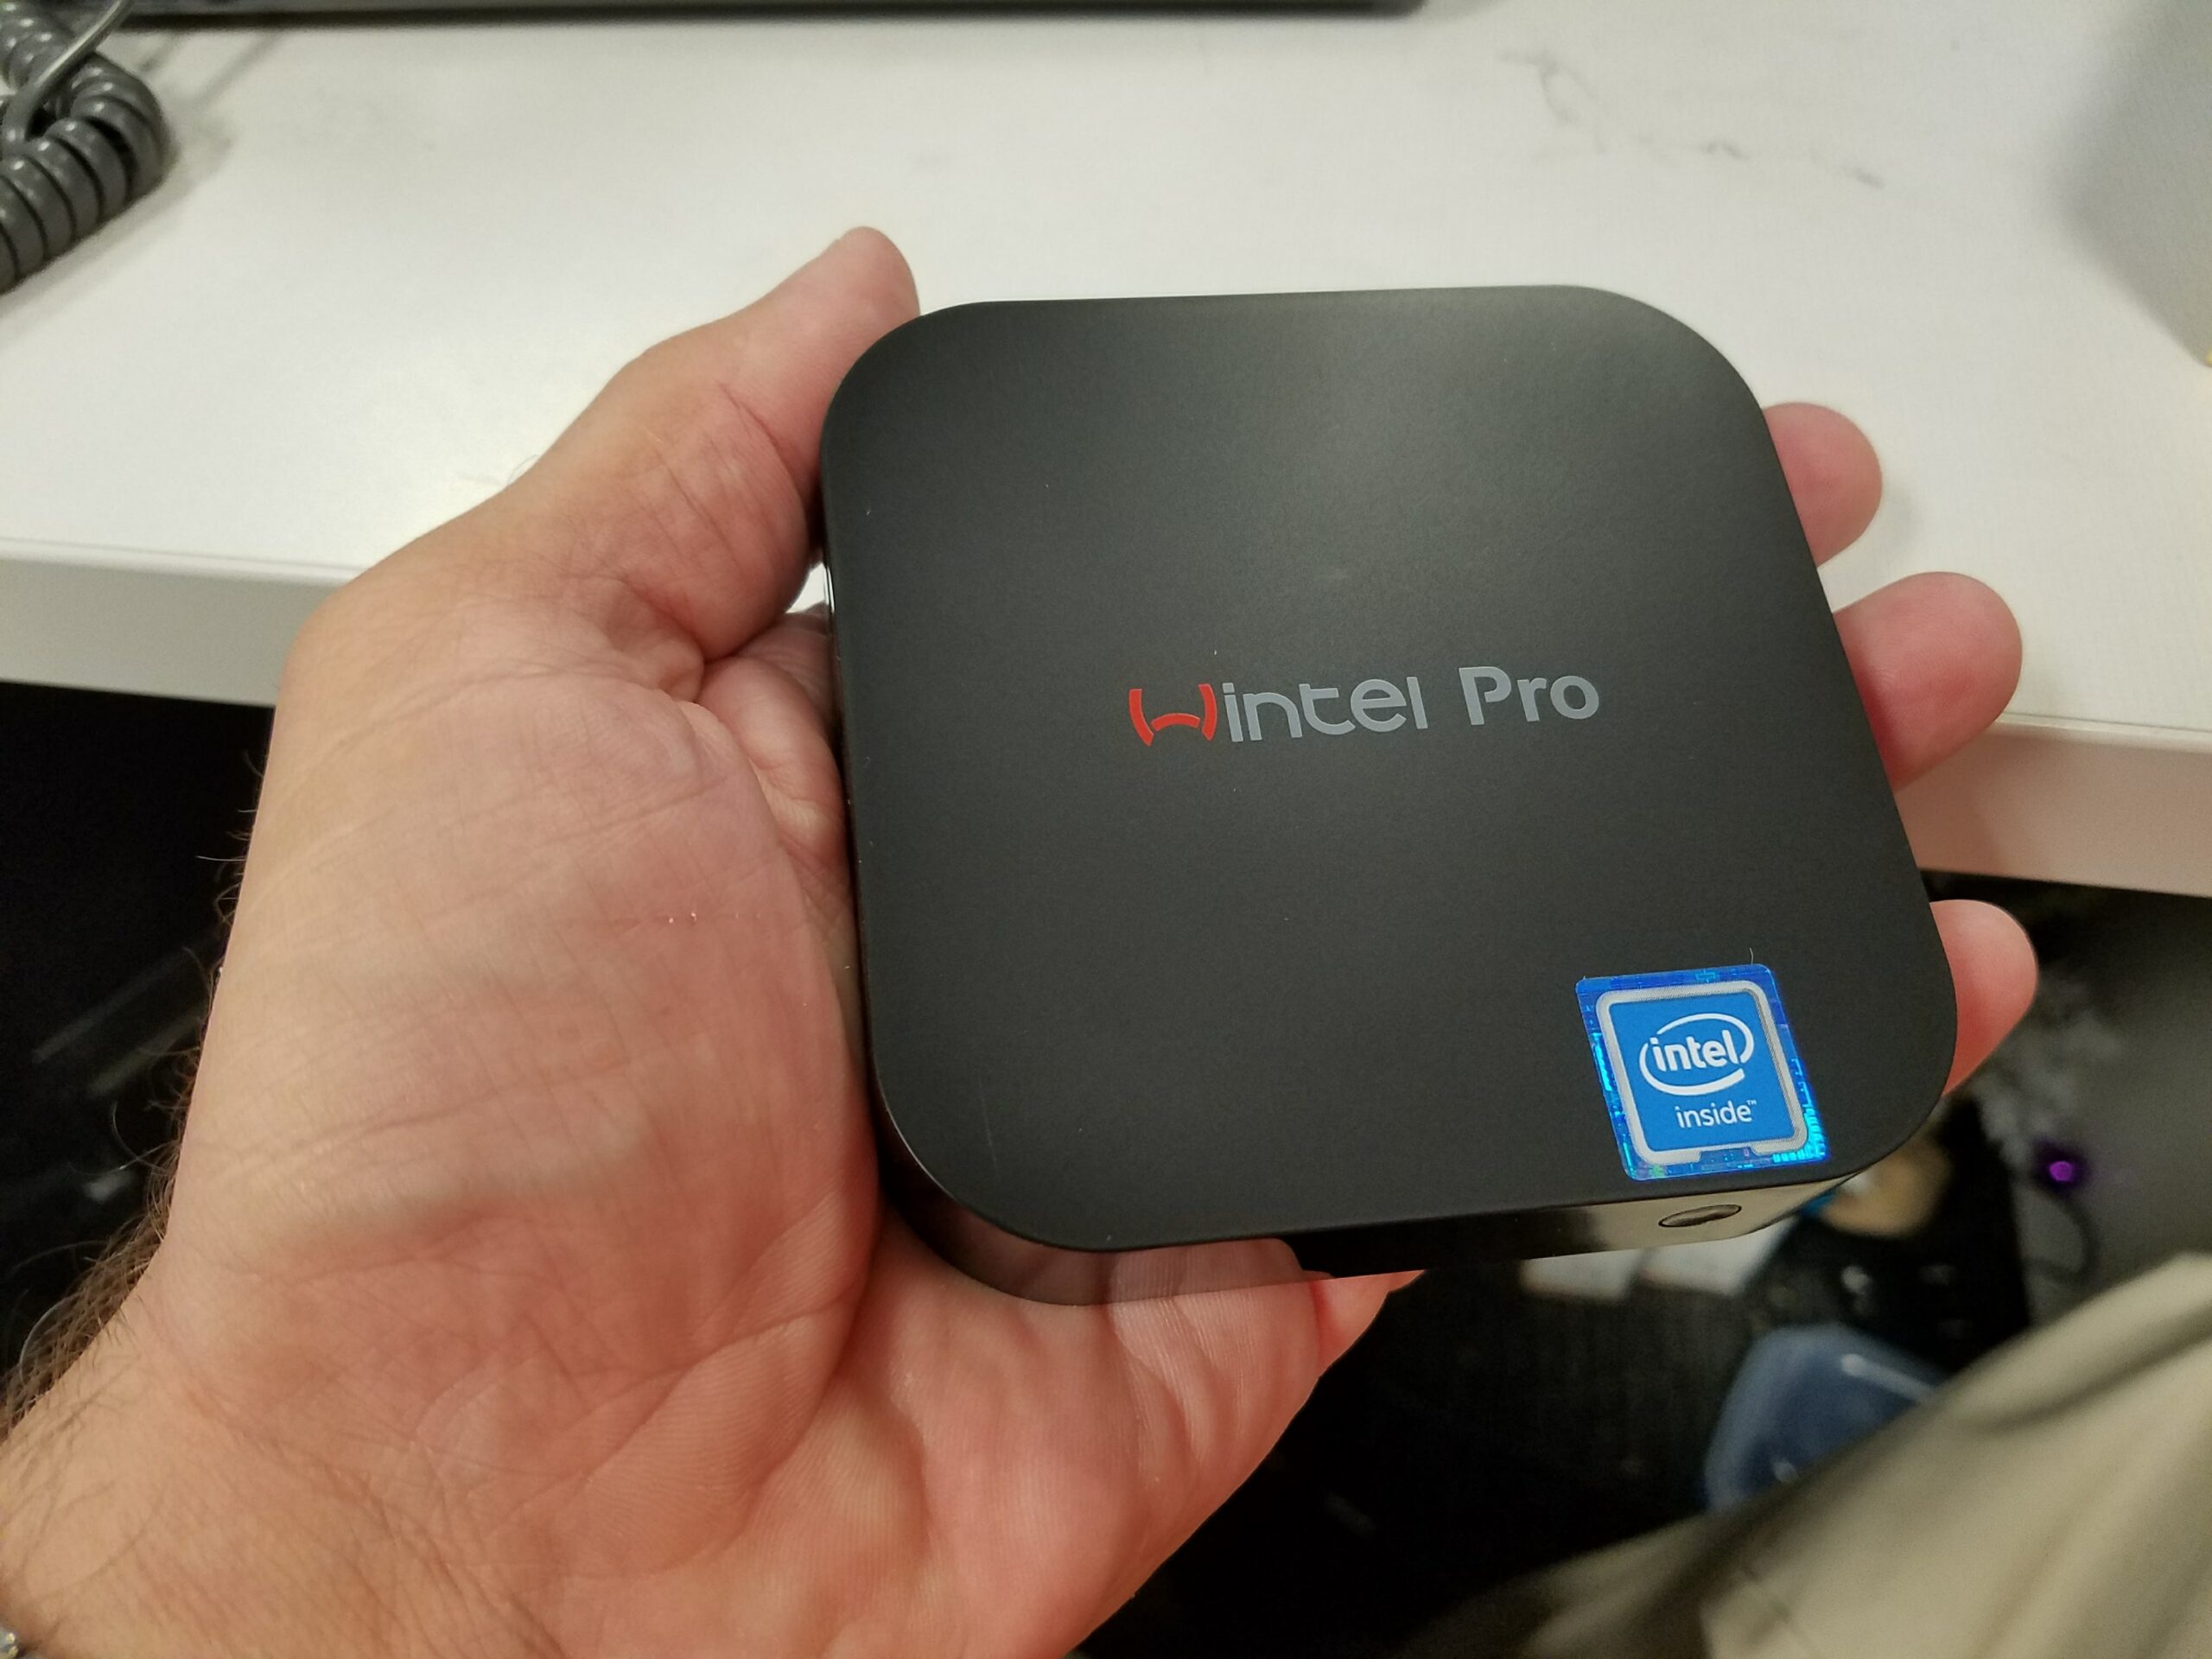
Since the IC-7100 has a built in USB soundcard for digital modes, I wanted to look into that. The connectivity with RemoteRig and the USB port is complicated, so I also looked into Icom’s RS-BA1 remote software. To operate *that* remotely, I needed a PC that was local to the radio and it seemed like a tiny fanless PC would suit the purpose.
It worked mostly, but I had a lot of trouble getting it to stay awake long term, no matter what BIOS settings I use. It would be fine for a couple of days then it would go to sleep. I would have go out there and touch it to wake it up. Within a few months, it went belly up as well. I have not revisited it as yet.
Some time back, I bought a new Icom ID-51 handheld. After a couple of years, I decided to sell it because I just had no real use for one out here in the country. Then around January 2018, I decided to get another for access to D-Star. Shrug. Make up my mind!
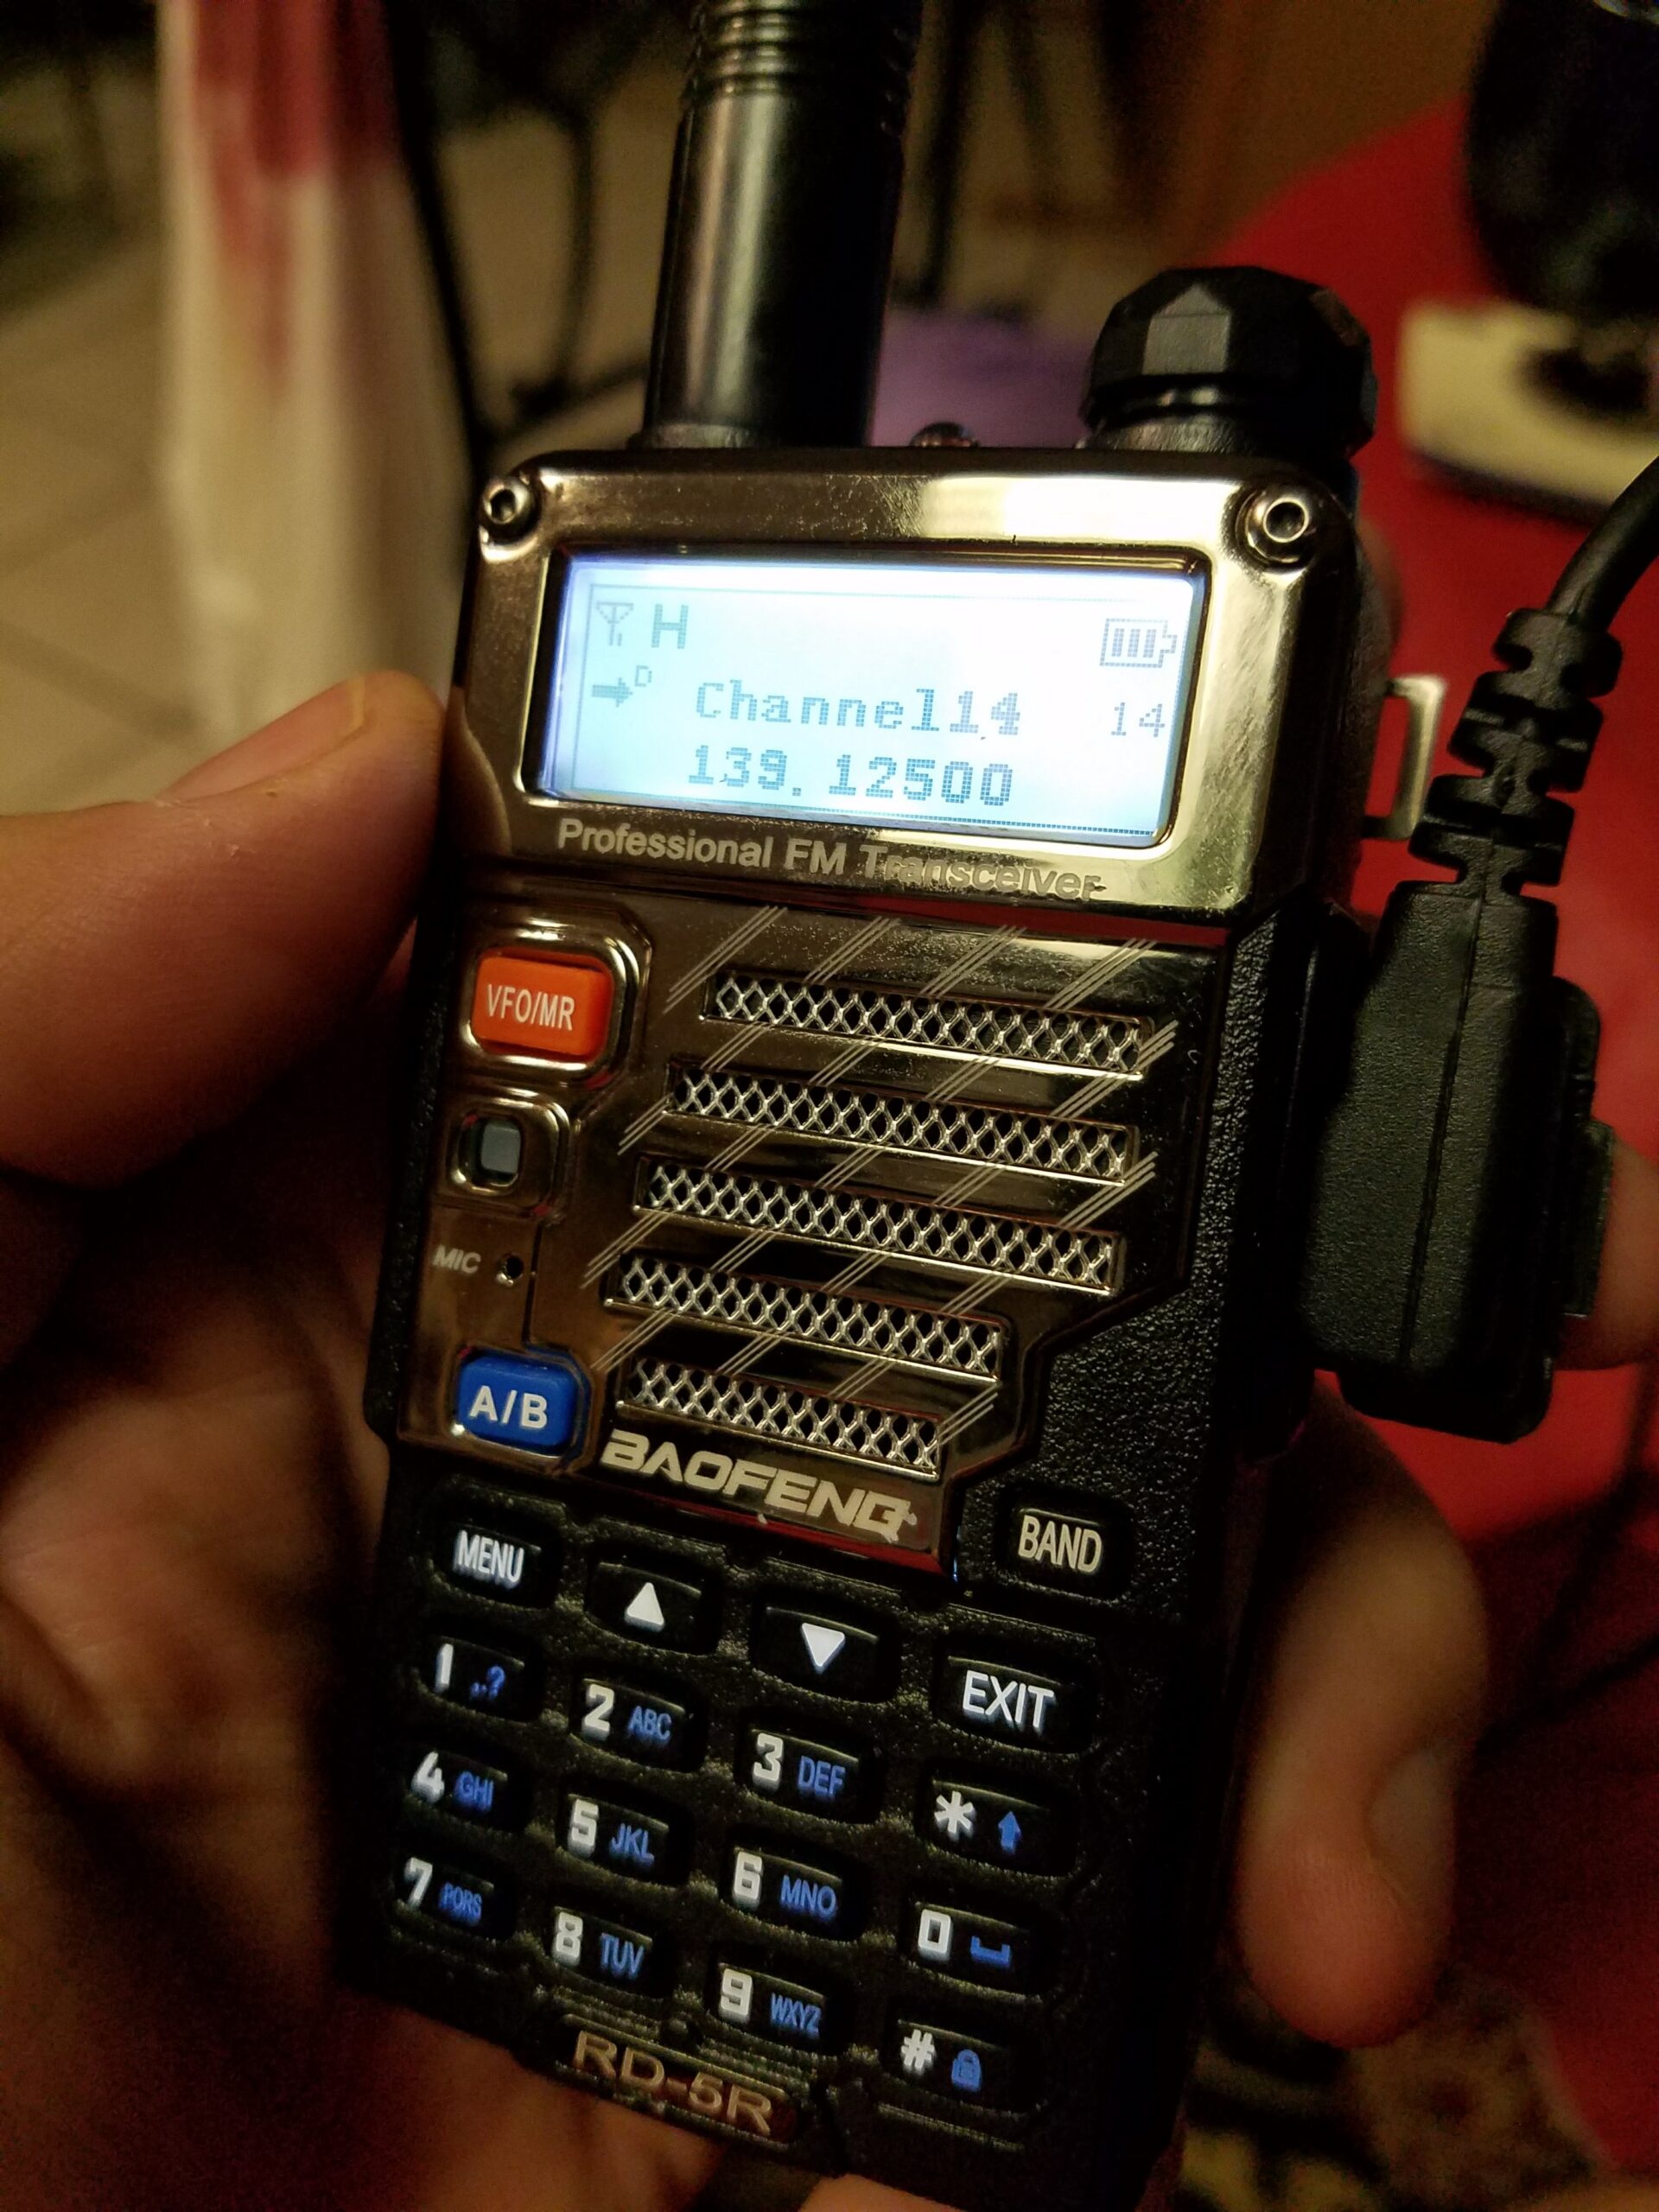
Speaking of handhelds, inspired largely by Radioddity review and tutorial videos from Dave Casler, I got interested in DMR. Of course, no DMR repeaters in handheld range out here, but Radioddity BaoFeng radios are cheap enough to get two and set them up for simplex operation between the two. It works pretty well, so whenever I do find some DMR repeaters somewhere, I should be able to join in. Plus, there’s always the DMR hotspot angle. Pay no attention to whatever that frequency is there. It was in the radio when I turned it on.
I have never been truly active enough to *justify* QSL cards, at least not in my mind, but I still wanted some. I finally had an epiphany and figured out what would be the best QSL card for me. I found a caricature artist service online and had them produce a portrait suitable for QSL cards.
It may seem that forging is a new hobby for me, but it’s not, really. I just haven’t had enough activity to justify it’s own blog.
A million years ago, I started a dagger using a friend’s well equipped shop. Somewhere I have some pictures of that happening. Somewhere, I have that partly completed blade.
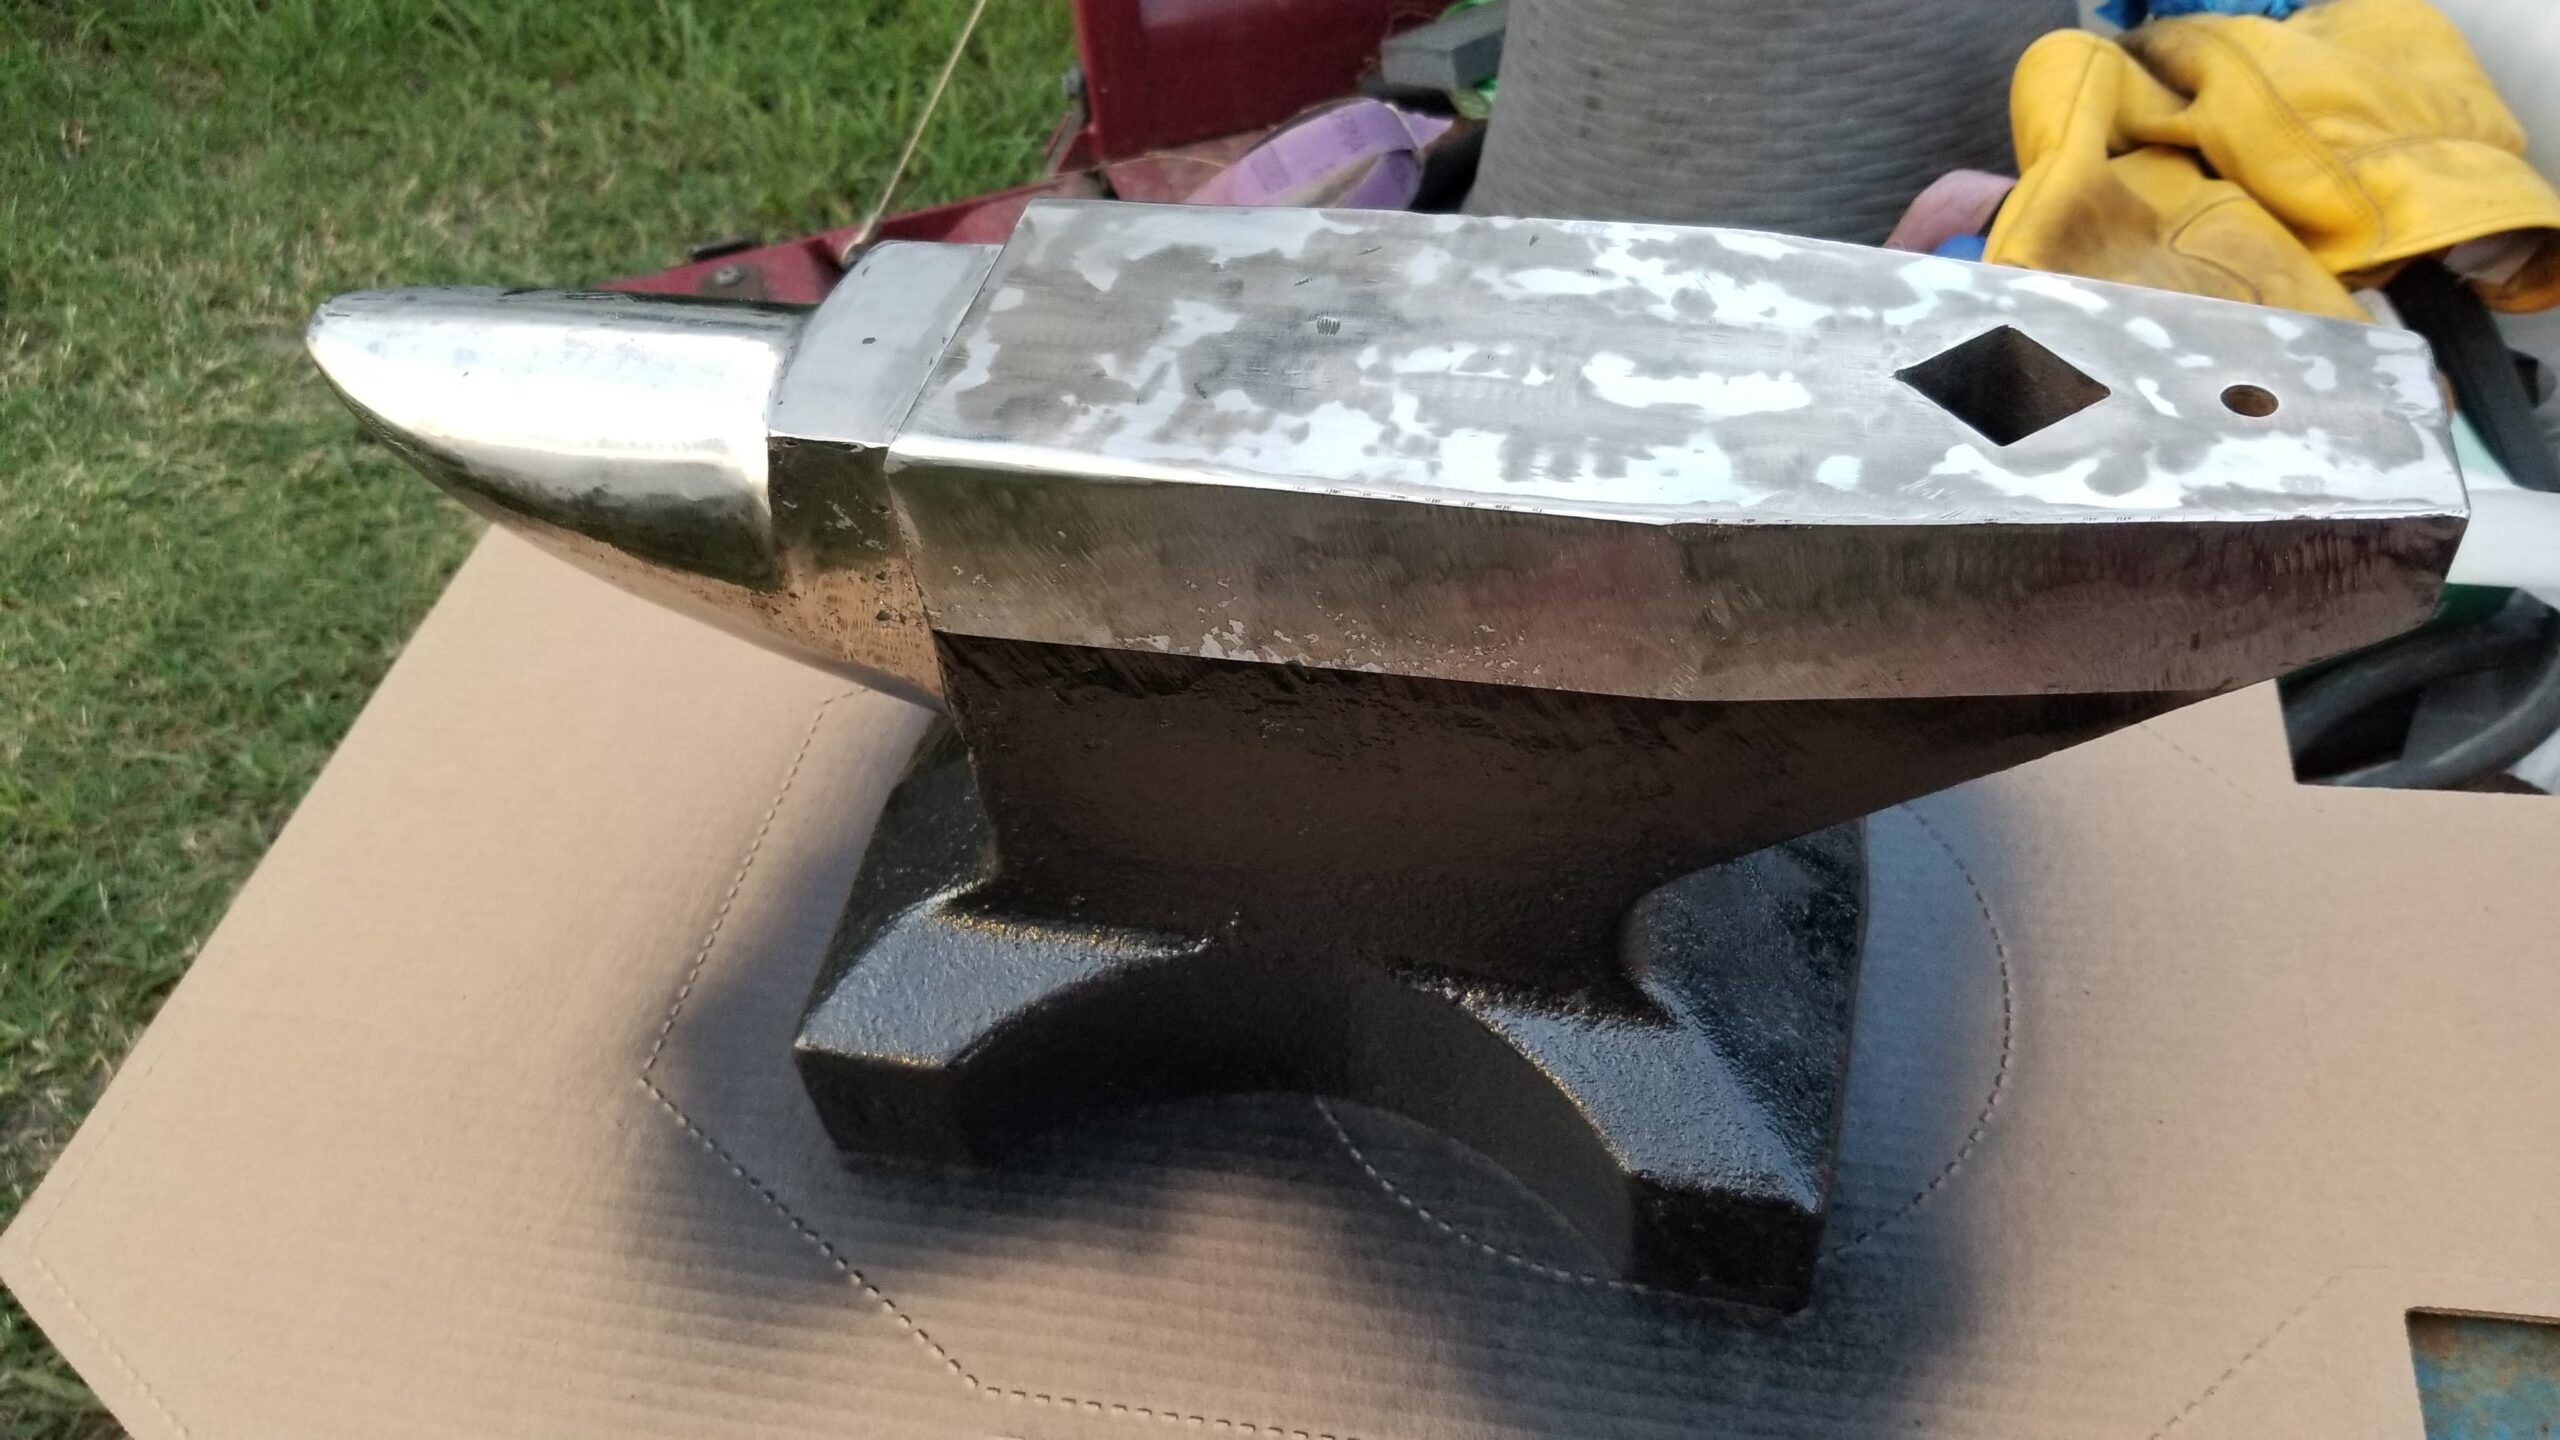
Quite a few years ago, my wife gifted me with a Harbor Freight anvil. For a brief period, they carried a Russian made 110 pound (50 kg, really) anvil that is really decent steel, not the usual anvil shaped objects that are largely much softer cast iron generally available from the Usual Suspects. It rings. Maybe an amount of ring that needs addressing hehehe.
This anvil has been used for all kinds of almost-but-not-quite forging operations over the years. One always needs a heavy chunk of steel for straightening the support rod on your chronograph when it gets shot.
But it had not done proper forging.
In March 2019, I ordered a Majestic Knifemaker propane forge, but it would be mid June 2020 before it would finally be lit.
Leading up to the fire, the anvil had suffered some degree of use and abuse, even serving briefly as extra weight on the front of our tractor when we had to unload some extra heavy round bales.
Even before serving emergency ballast duty, it needed some TLC.
Using mostly flap discs in the angle grinder and a flat stone that was WAY more effort that it seems to have been worth, the light coat of rust and the rough machine marks yielded. I followed up with some masking tape, black paint and finally a coat of CorrosionX.
The mottled coloration is from the difference in finish between the flap disc and the flat stone. It is all smooth to the touch.
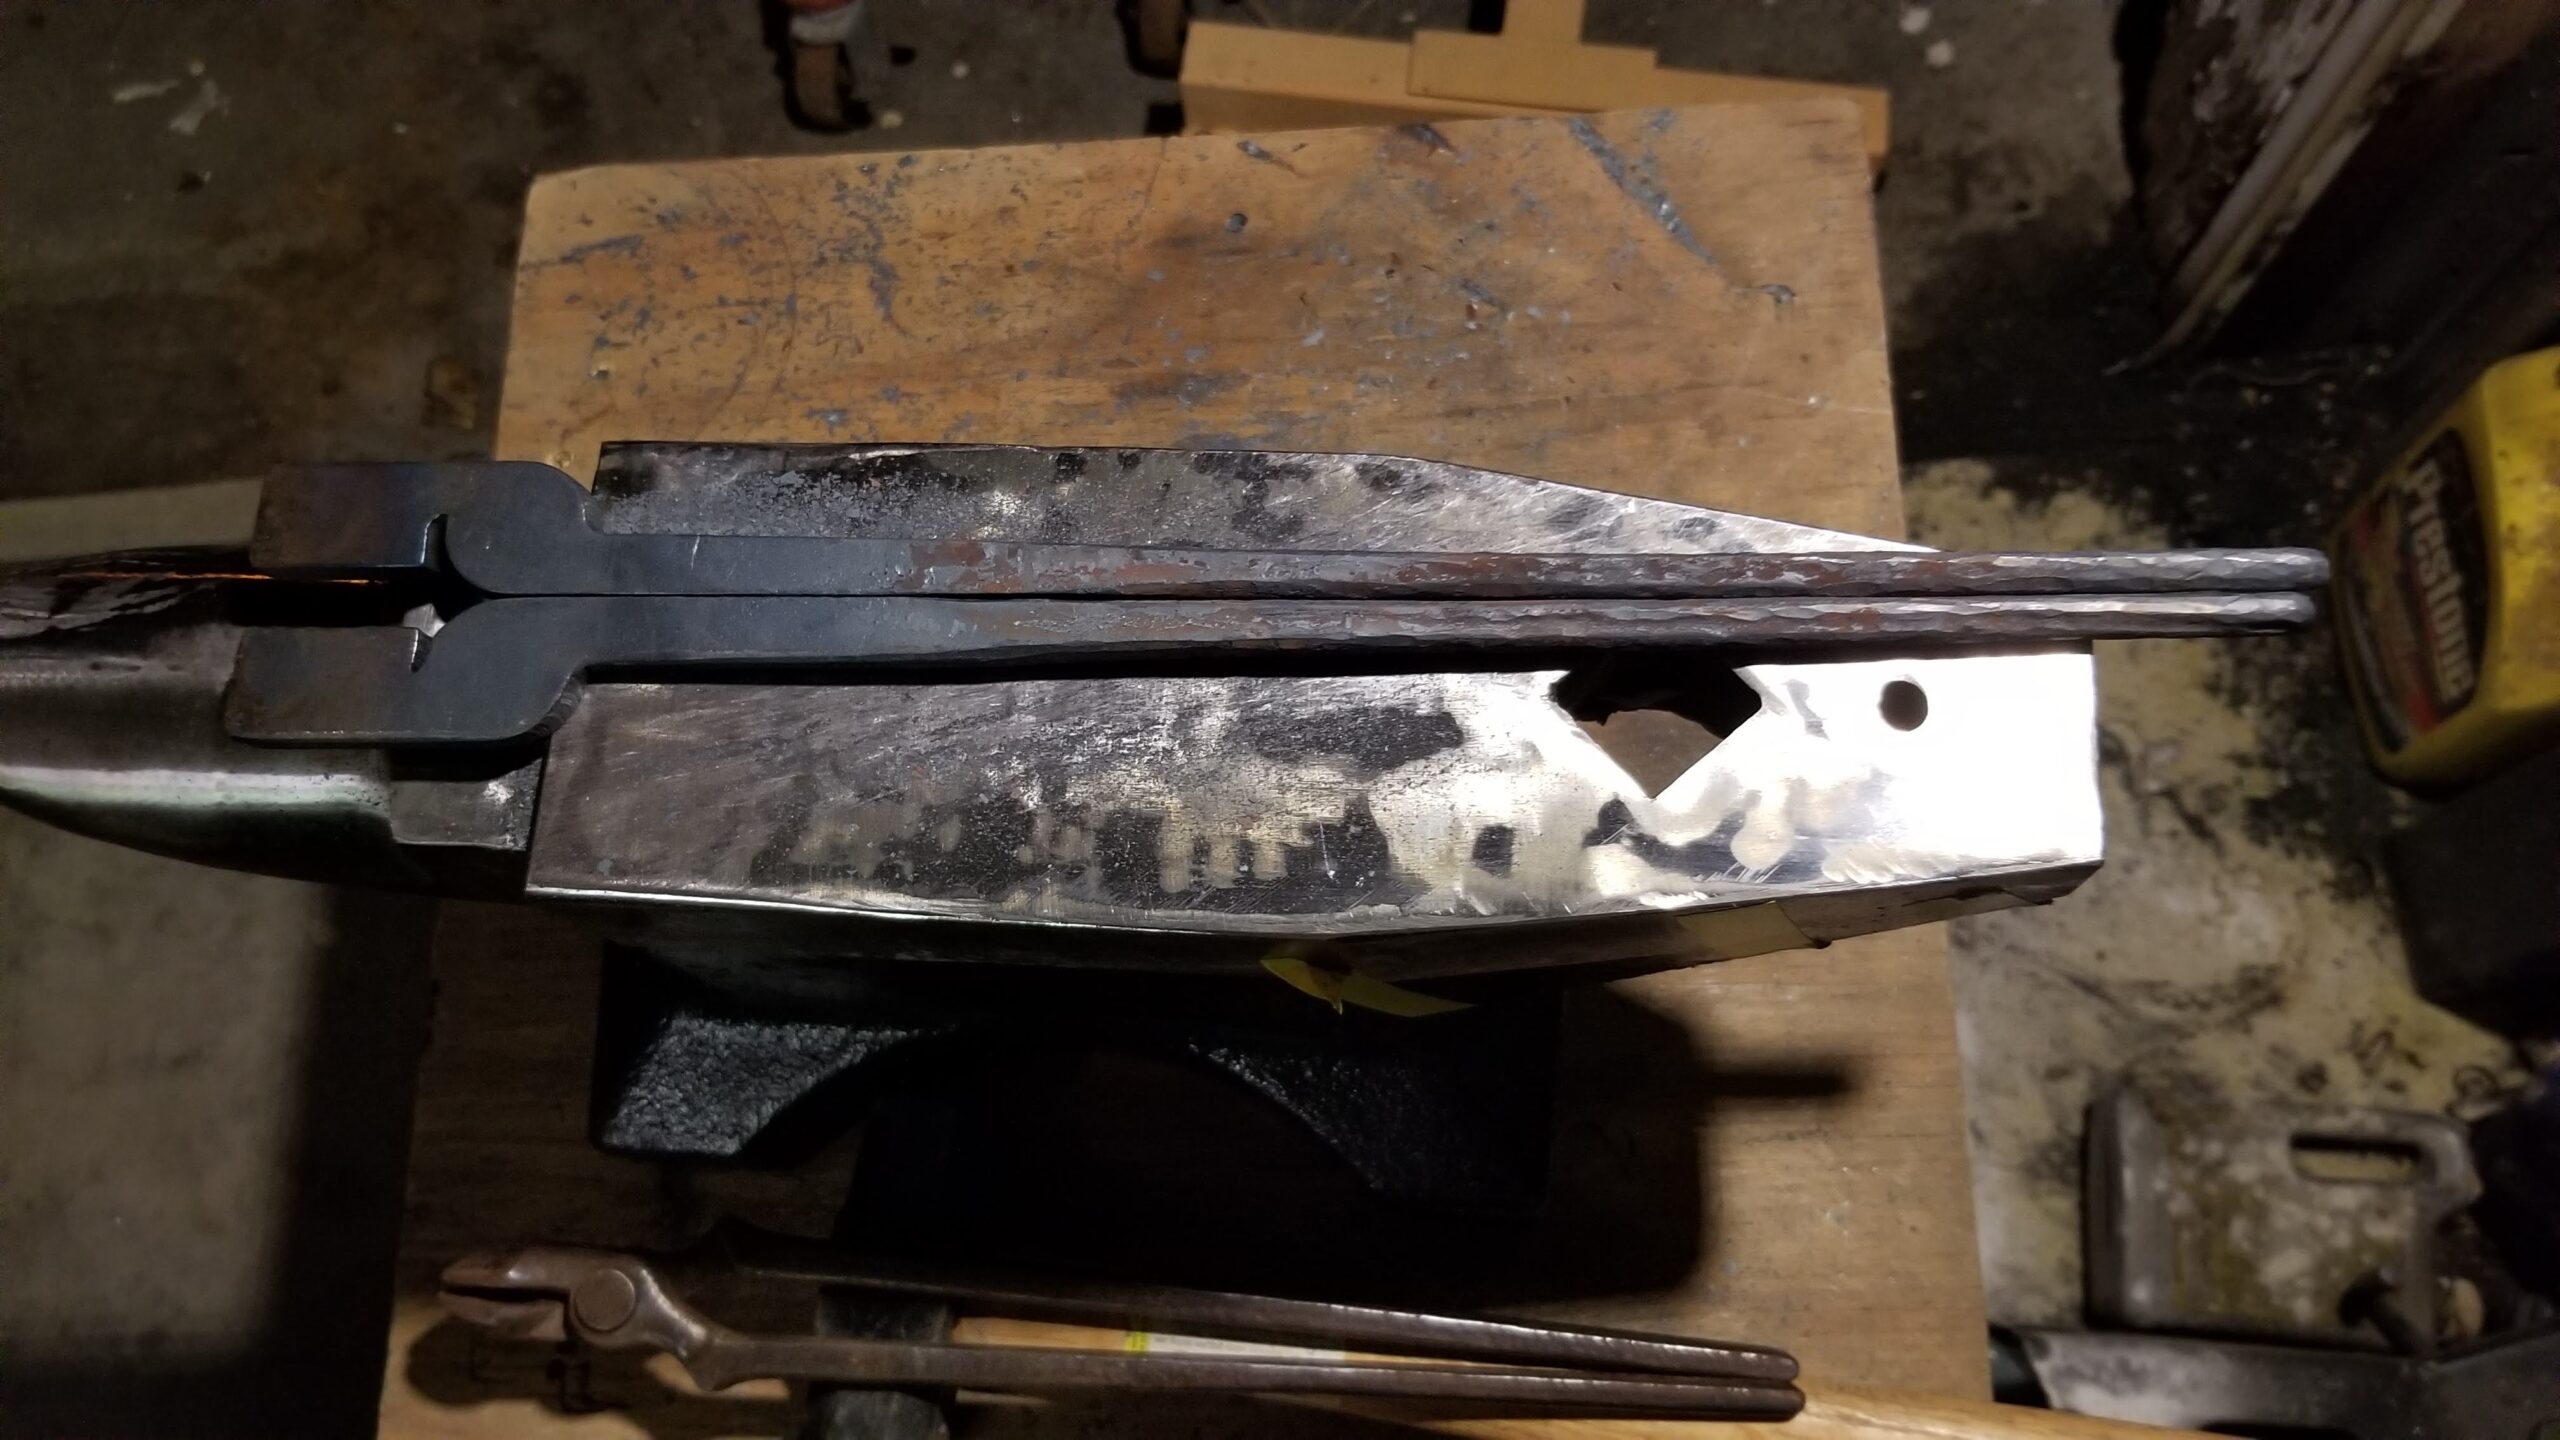
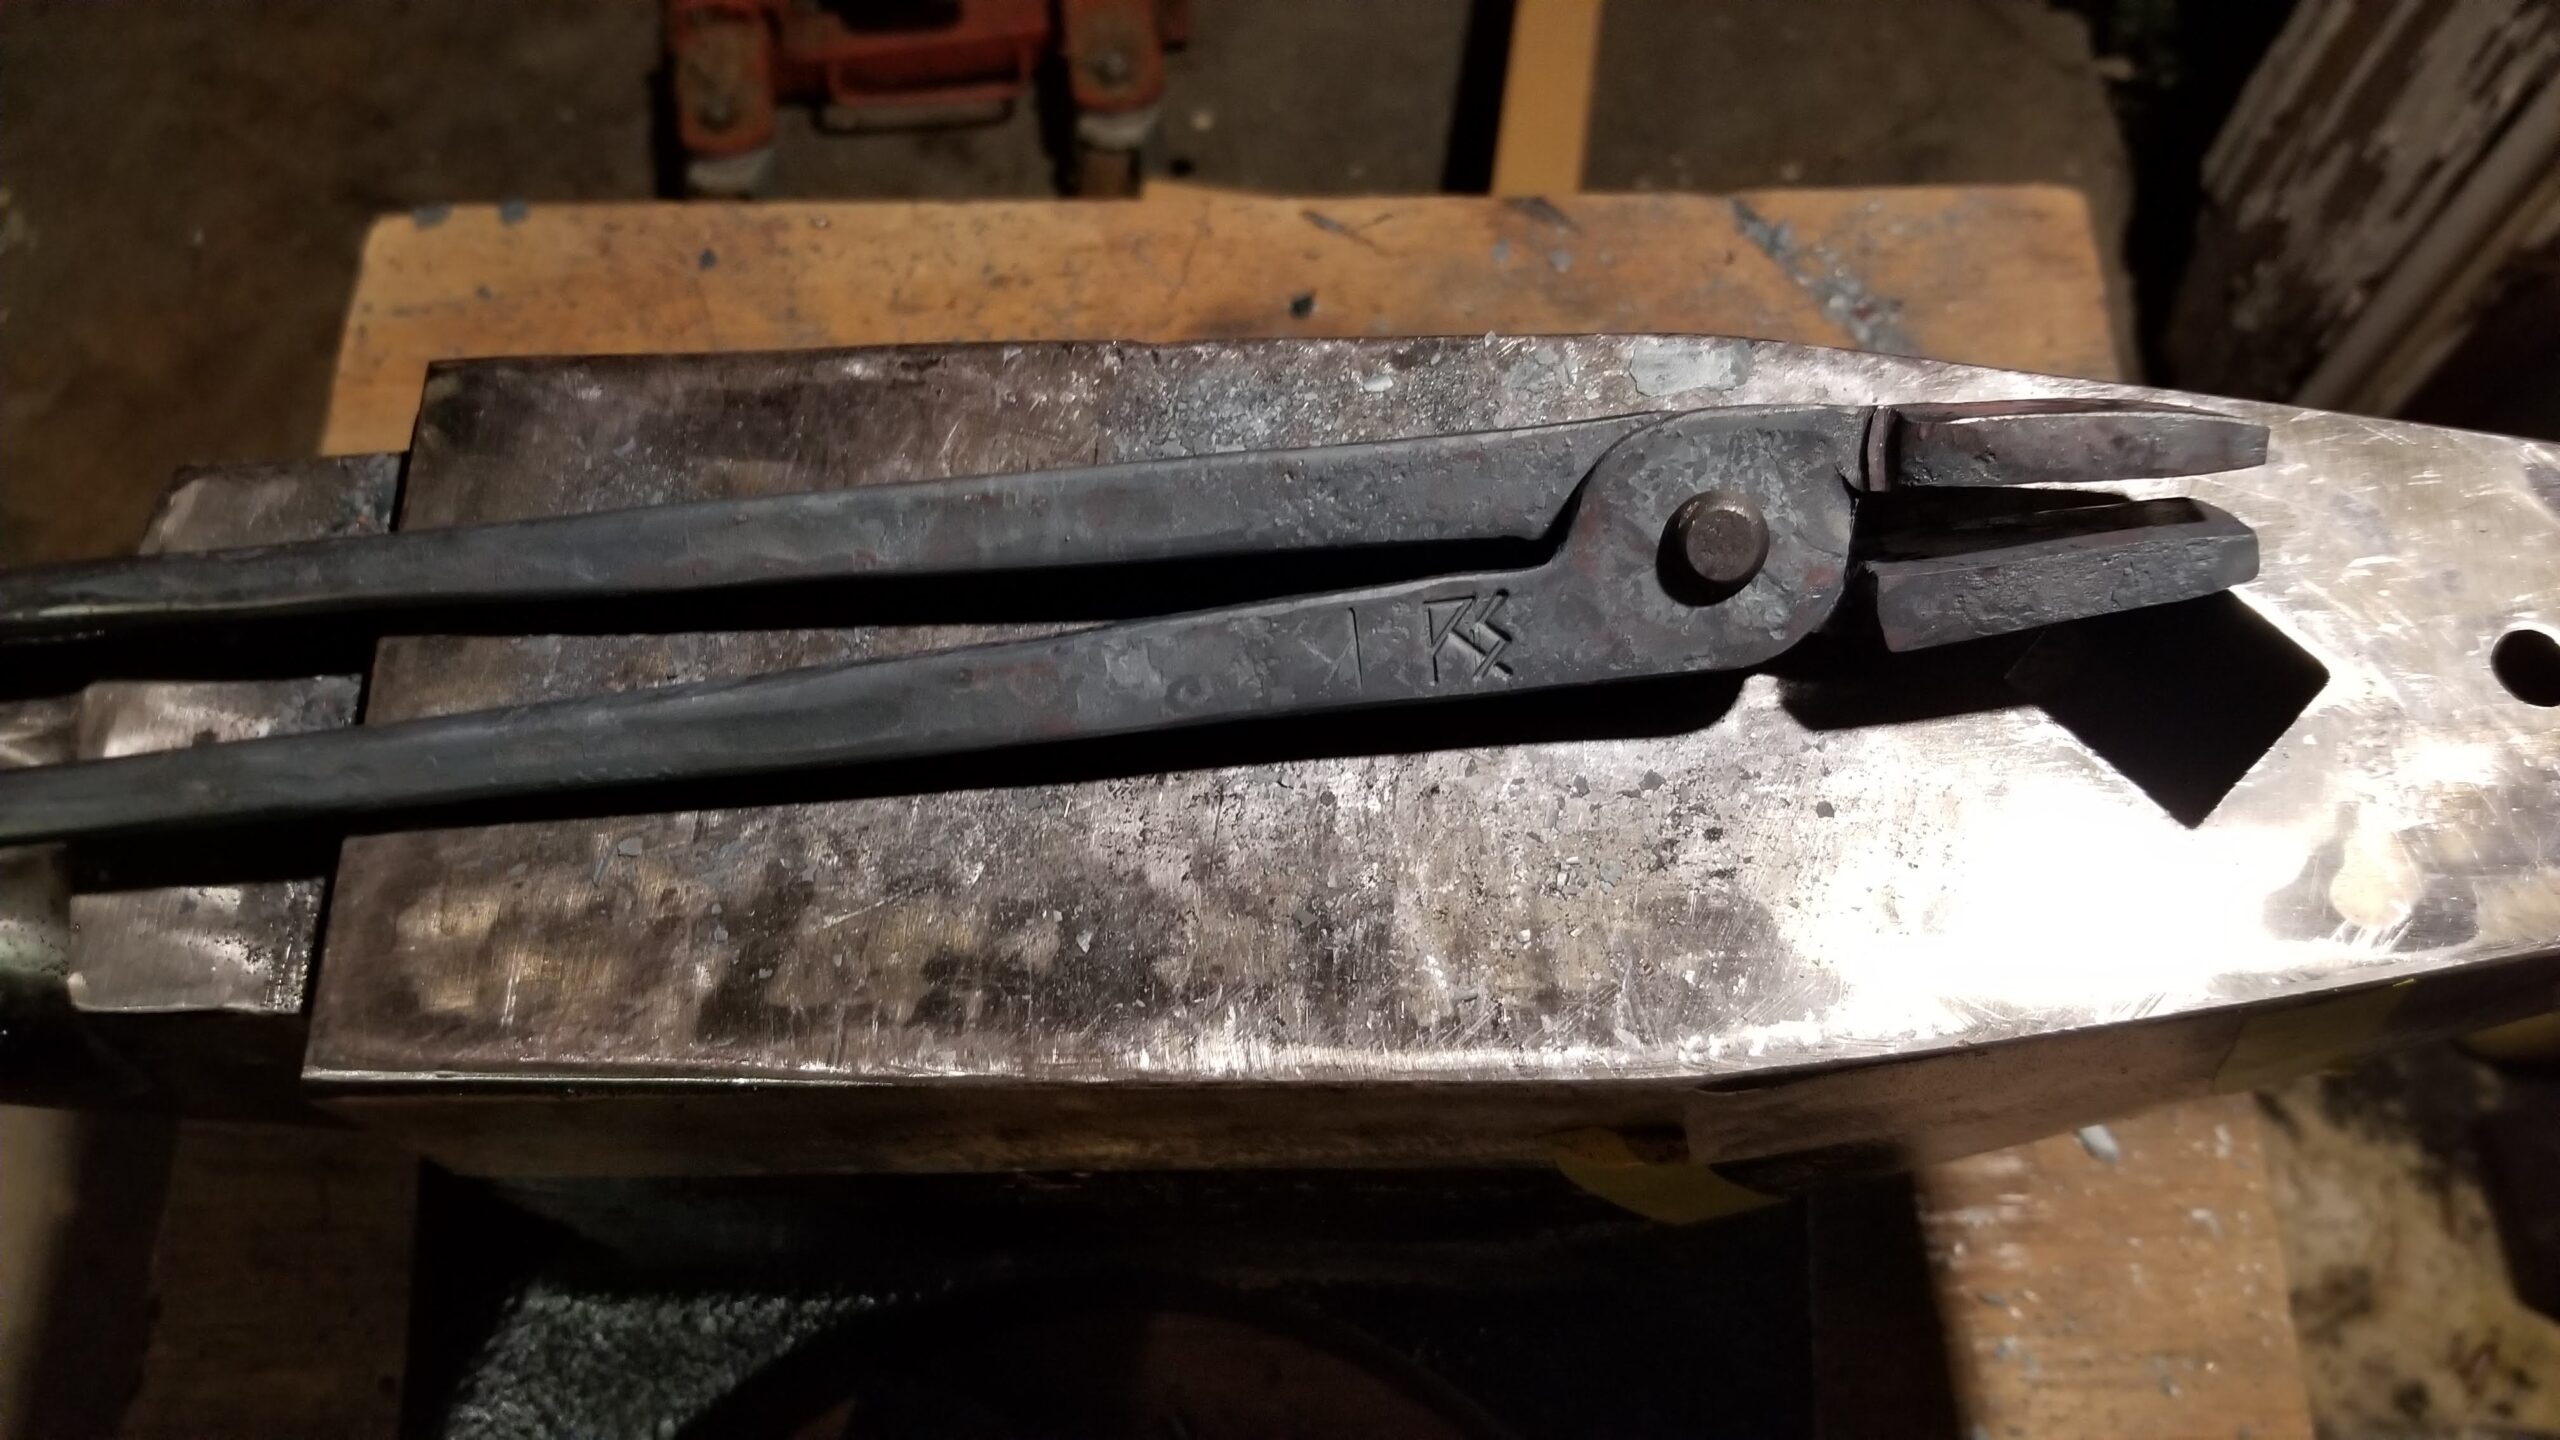
As is often the case, the first thing to make was tongs. My farrier loaned me a couple pair of tongs for the purpose of making tongs, as well as gifting me with a decent stack of discarded rasps.
I chose to start with the Rapid Flat Jaw Tongs from Ken’s Custom Iron, available as an affordable bundle of five pairs. These tongs were among several reviewed and recommended by John at Black Bear Forge.
These start as CNC plasma cut blanks of 5/16 plate steel. You draw out the reins first.
Then turn and shape the jaws
Drill, rivet and fine tune. Somewhere in there, I applied my touchmark. I’m pretty happy with how they turned out.
The next major tool needed/wanted was a 2×72 belt grinder. Like almost everything else, there are two basic ways to do these, build or buy. Building is obviously the cheapest. Buying is the fastest. The trick is deciding what your time is worth, how much is too much to pay for someone else to build it for you.
I knew that my welding skills are good *enough* to build one if it comes in a kit form. I’m not really comfortable enough with my fabrication skills to build one straight from scratch. By the time I gather all the right parts, cut, weld, grind, etc., it would have to be really cheap to offset the advantages of unboxing it, plugging it in and turning it on.
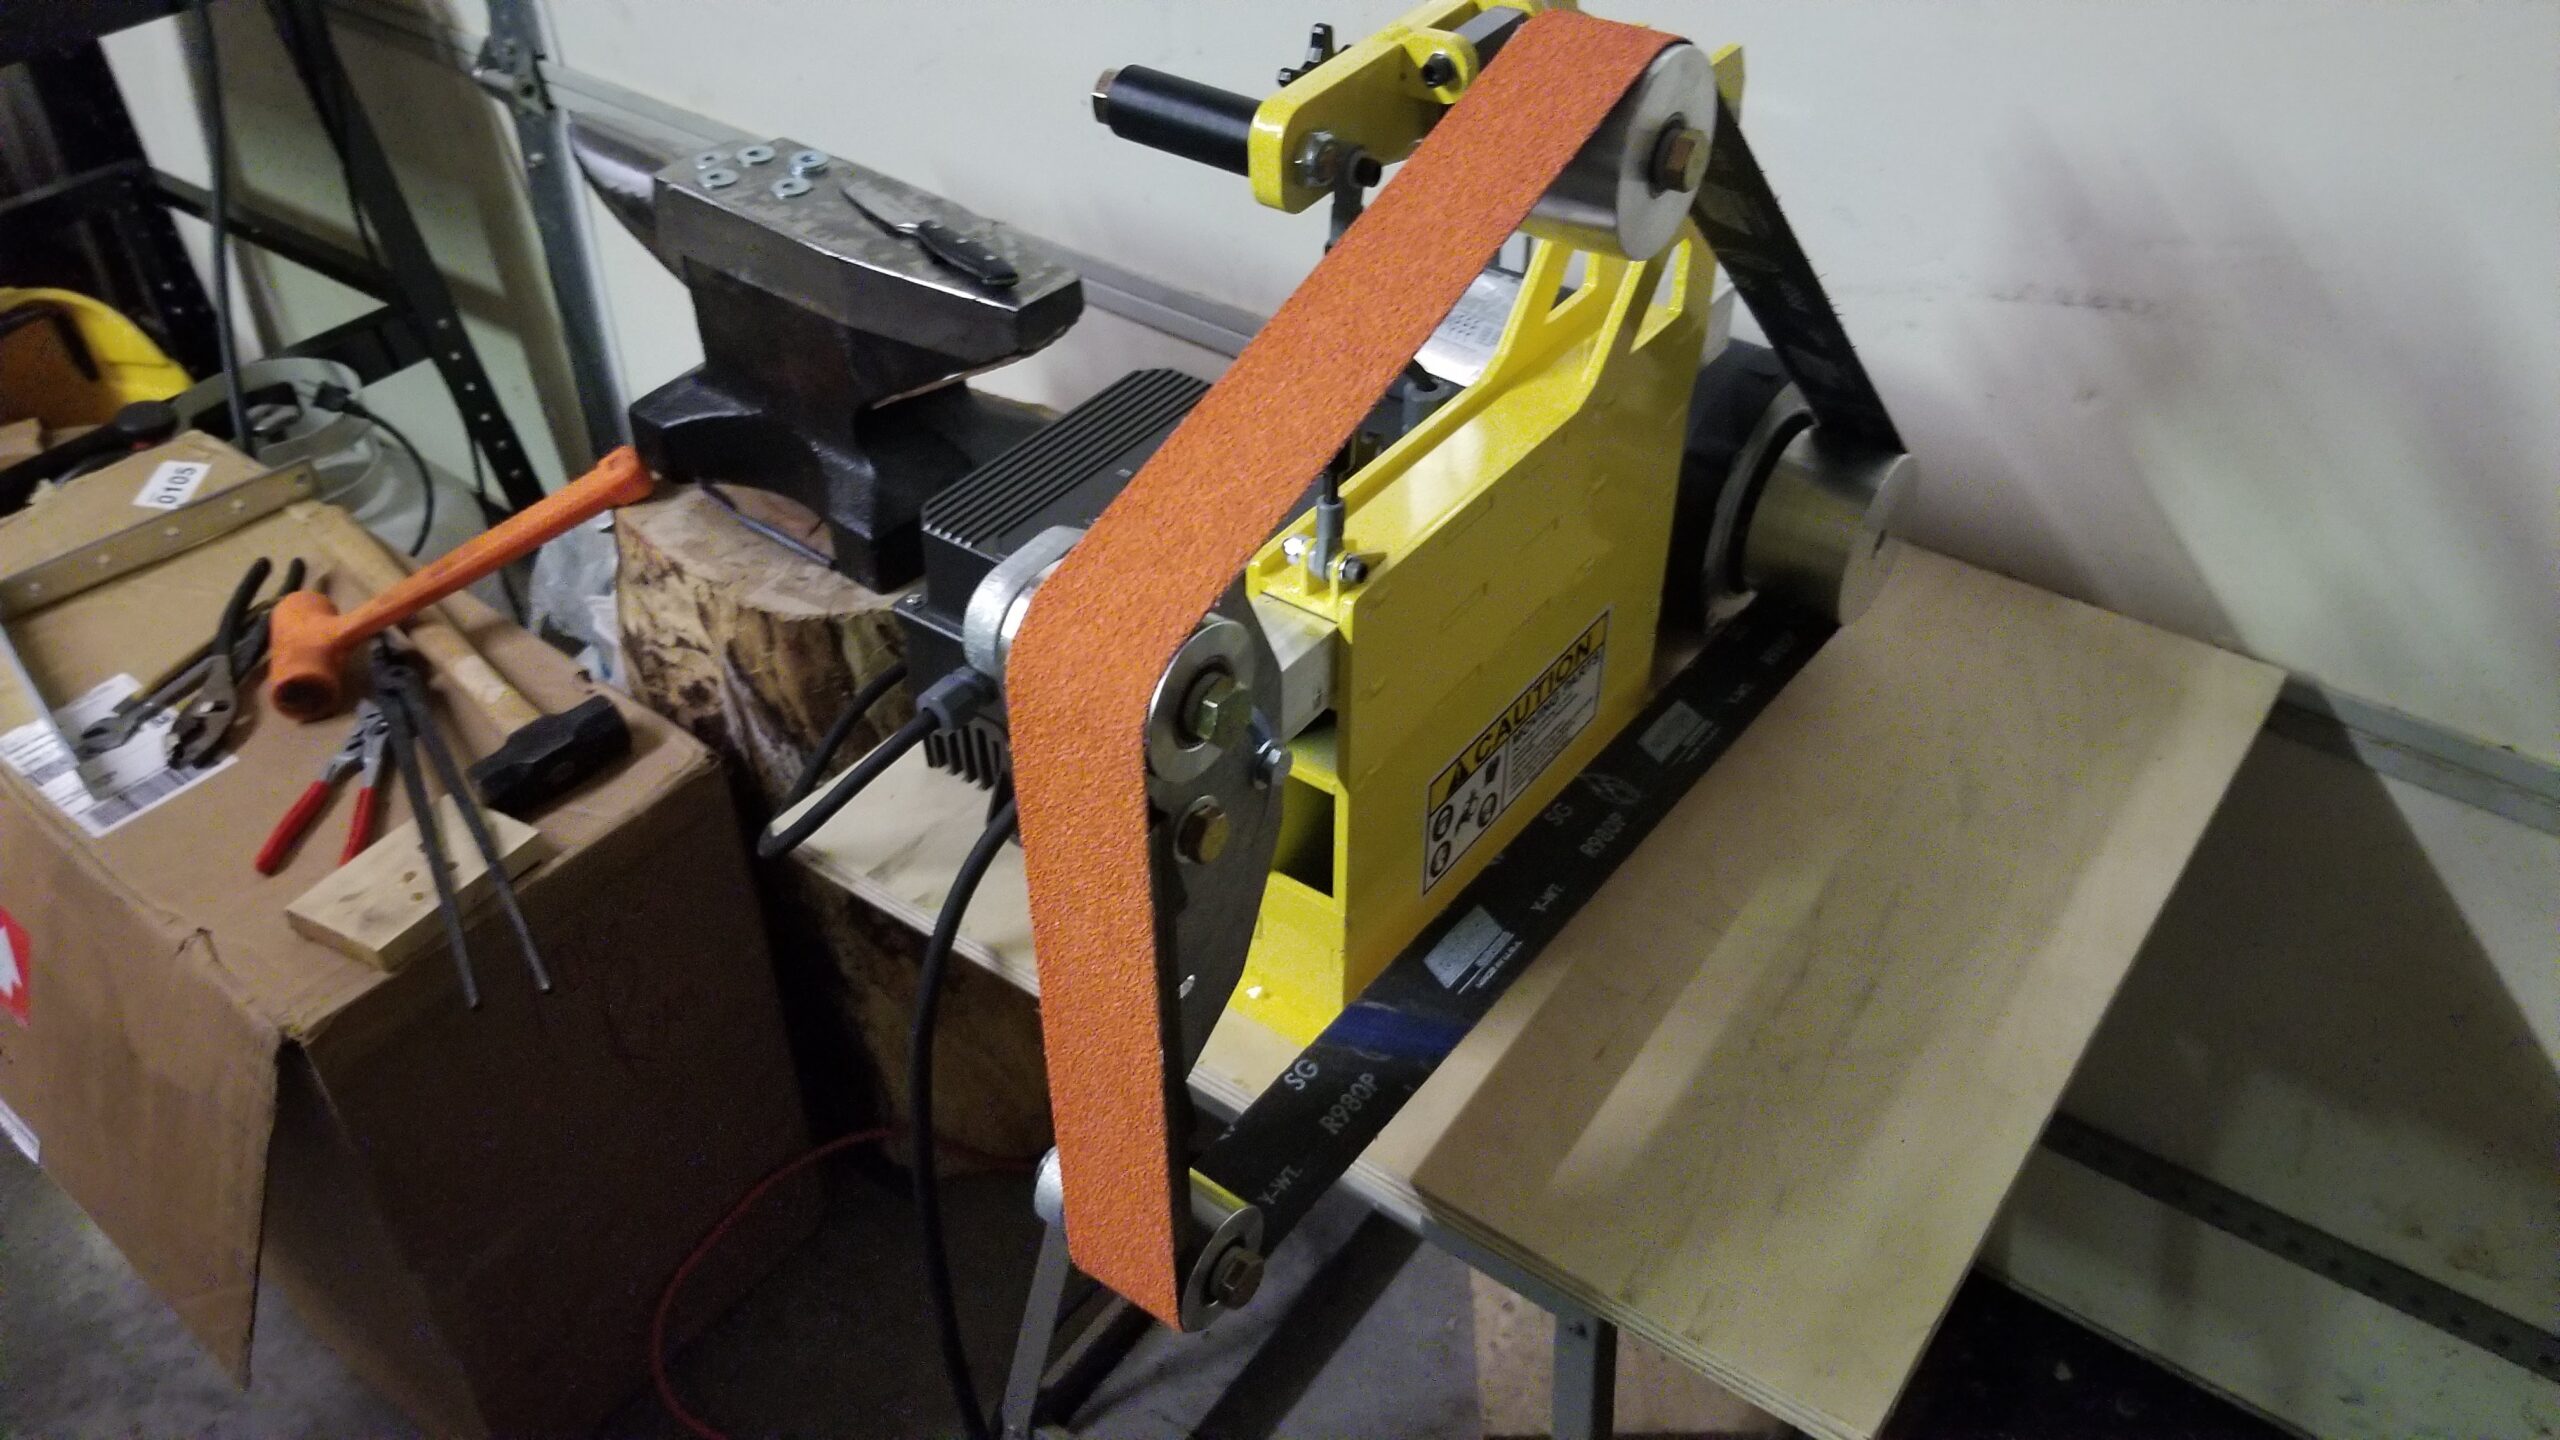
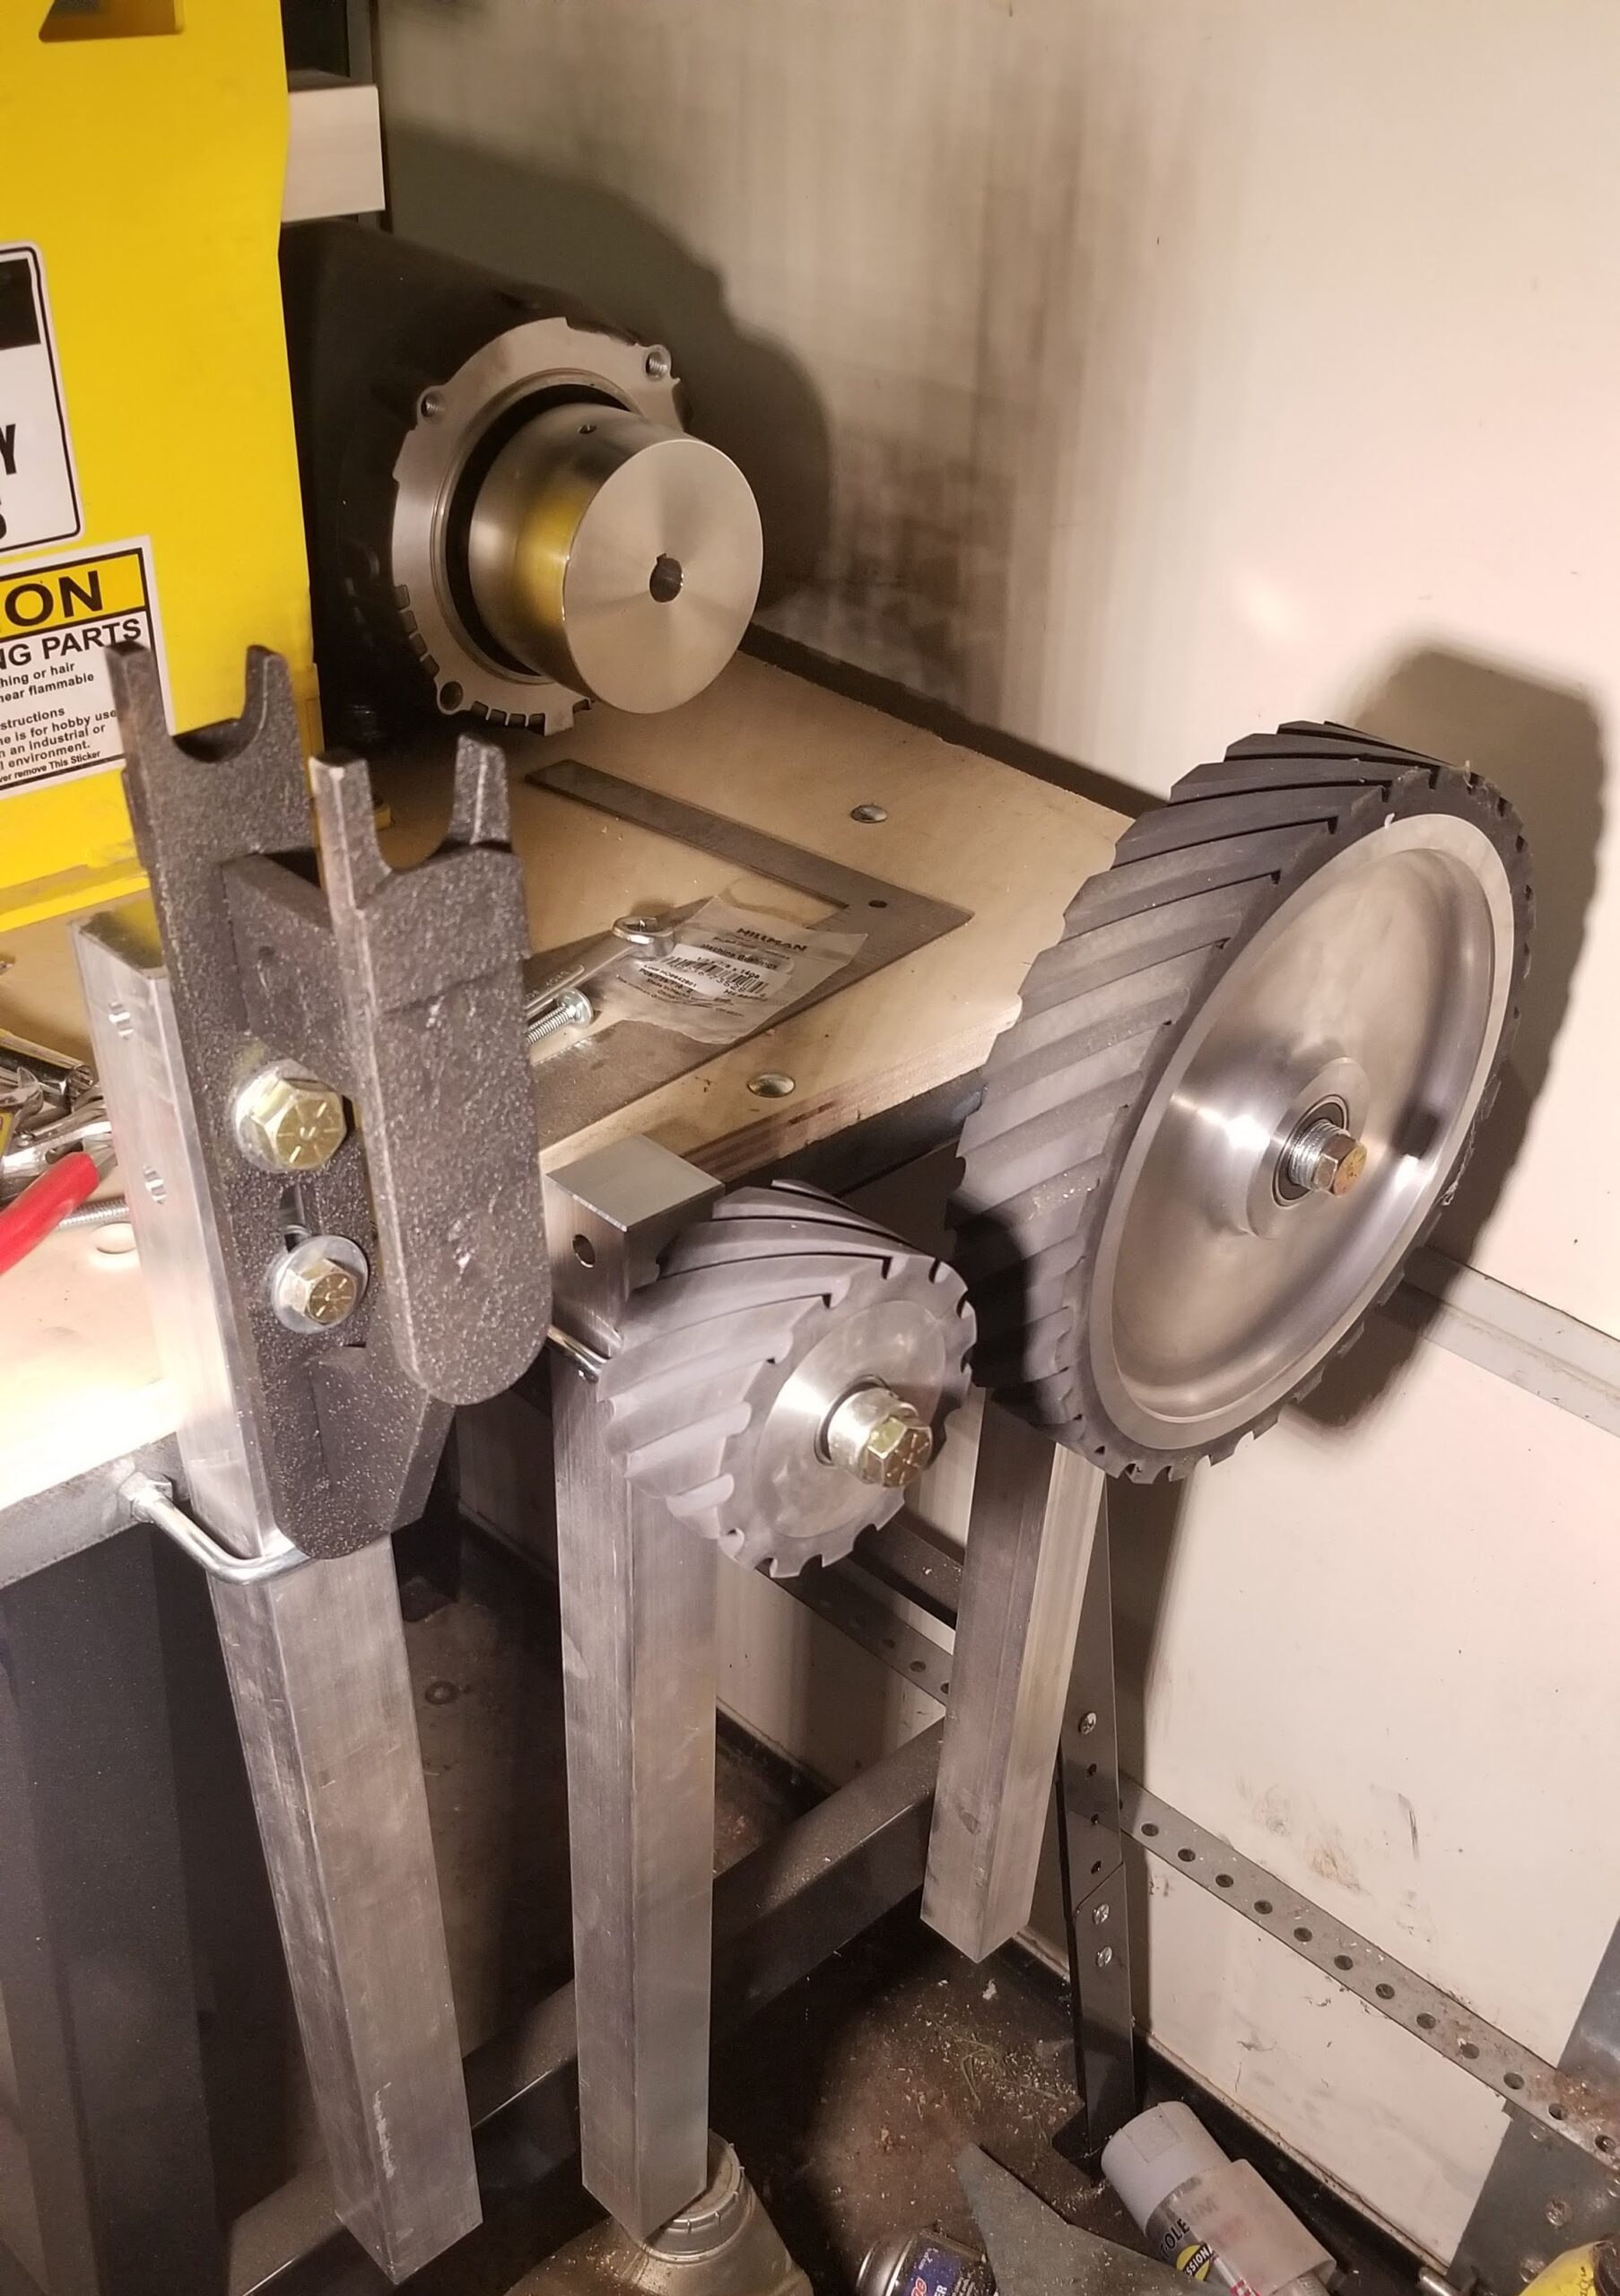
I shopped quite a lot. For the most part, bare bones grinders tend to start, in 2020 at least, at about $1800 and generally, that is without a motor, speed control, etc. So, when I found Origin Blade Maker and a package that had a turnkey ready to grind package for $1800, it got my attention. This package has the grinder frame, a 2 horsepower motor with VFD, platen with idler wheels, 10 inch contact wheel and set of small wheels with small wheel holder. Many of the grinders I found are $1800 for just the grinder frame and platen and everything else is extra.
I ordered that package and a few accessories so that in total, I have all that plus 4 inch and 2 inch contact wheels, three tool rests and enough tooling arms for all of them to be quick change.
I mounted it on a dedicated table and mounted ubolts on the edges of the table to hold the tooling arms.
There are similar rings on the other side of the table as well.
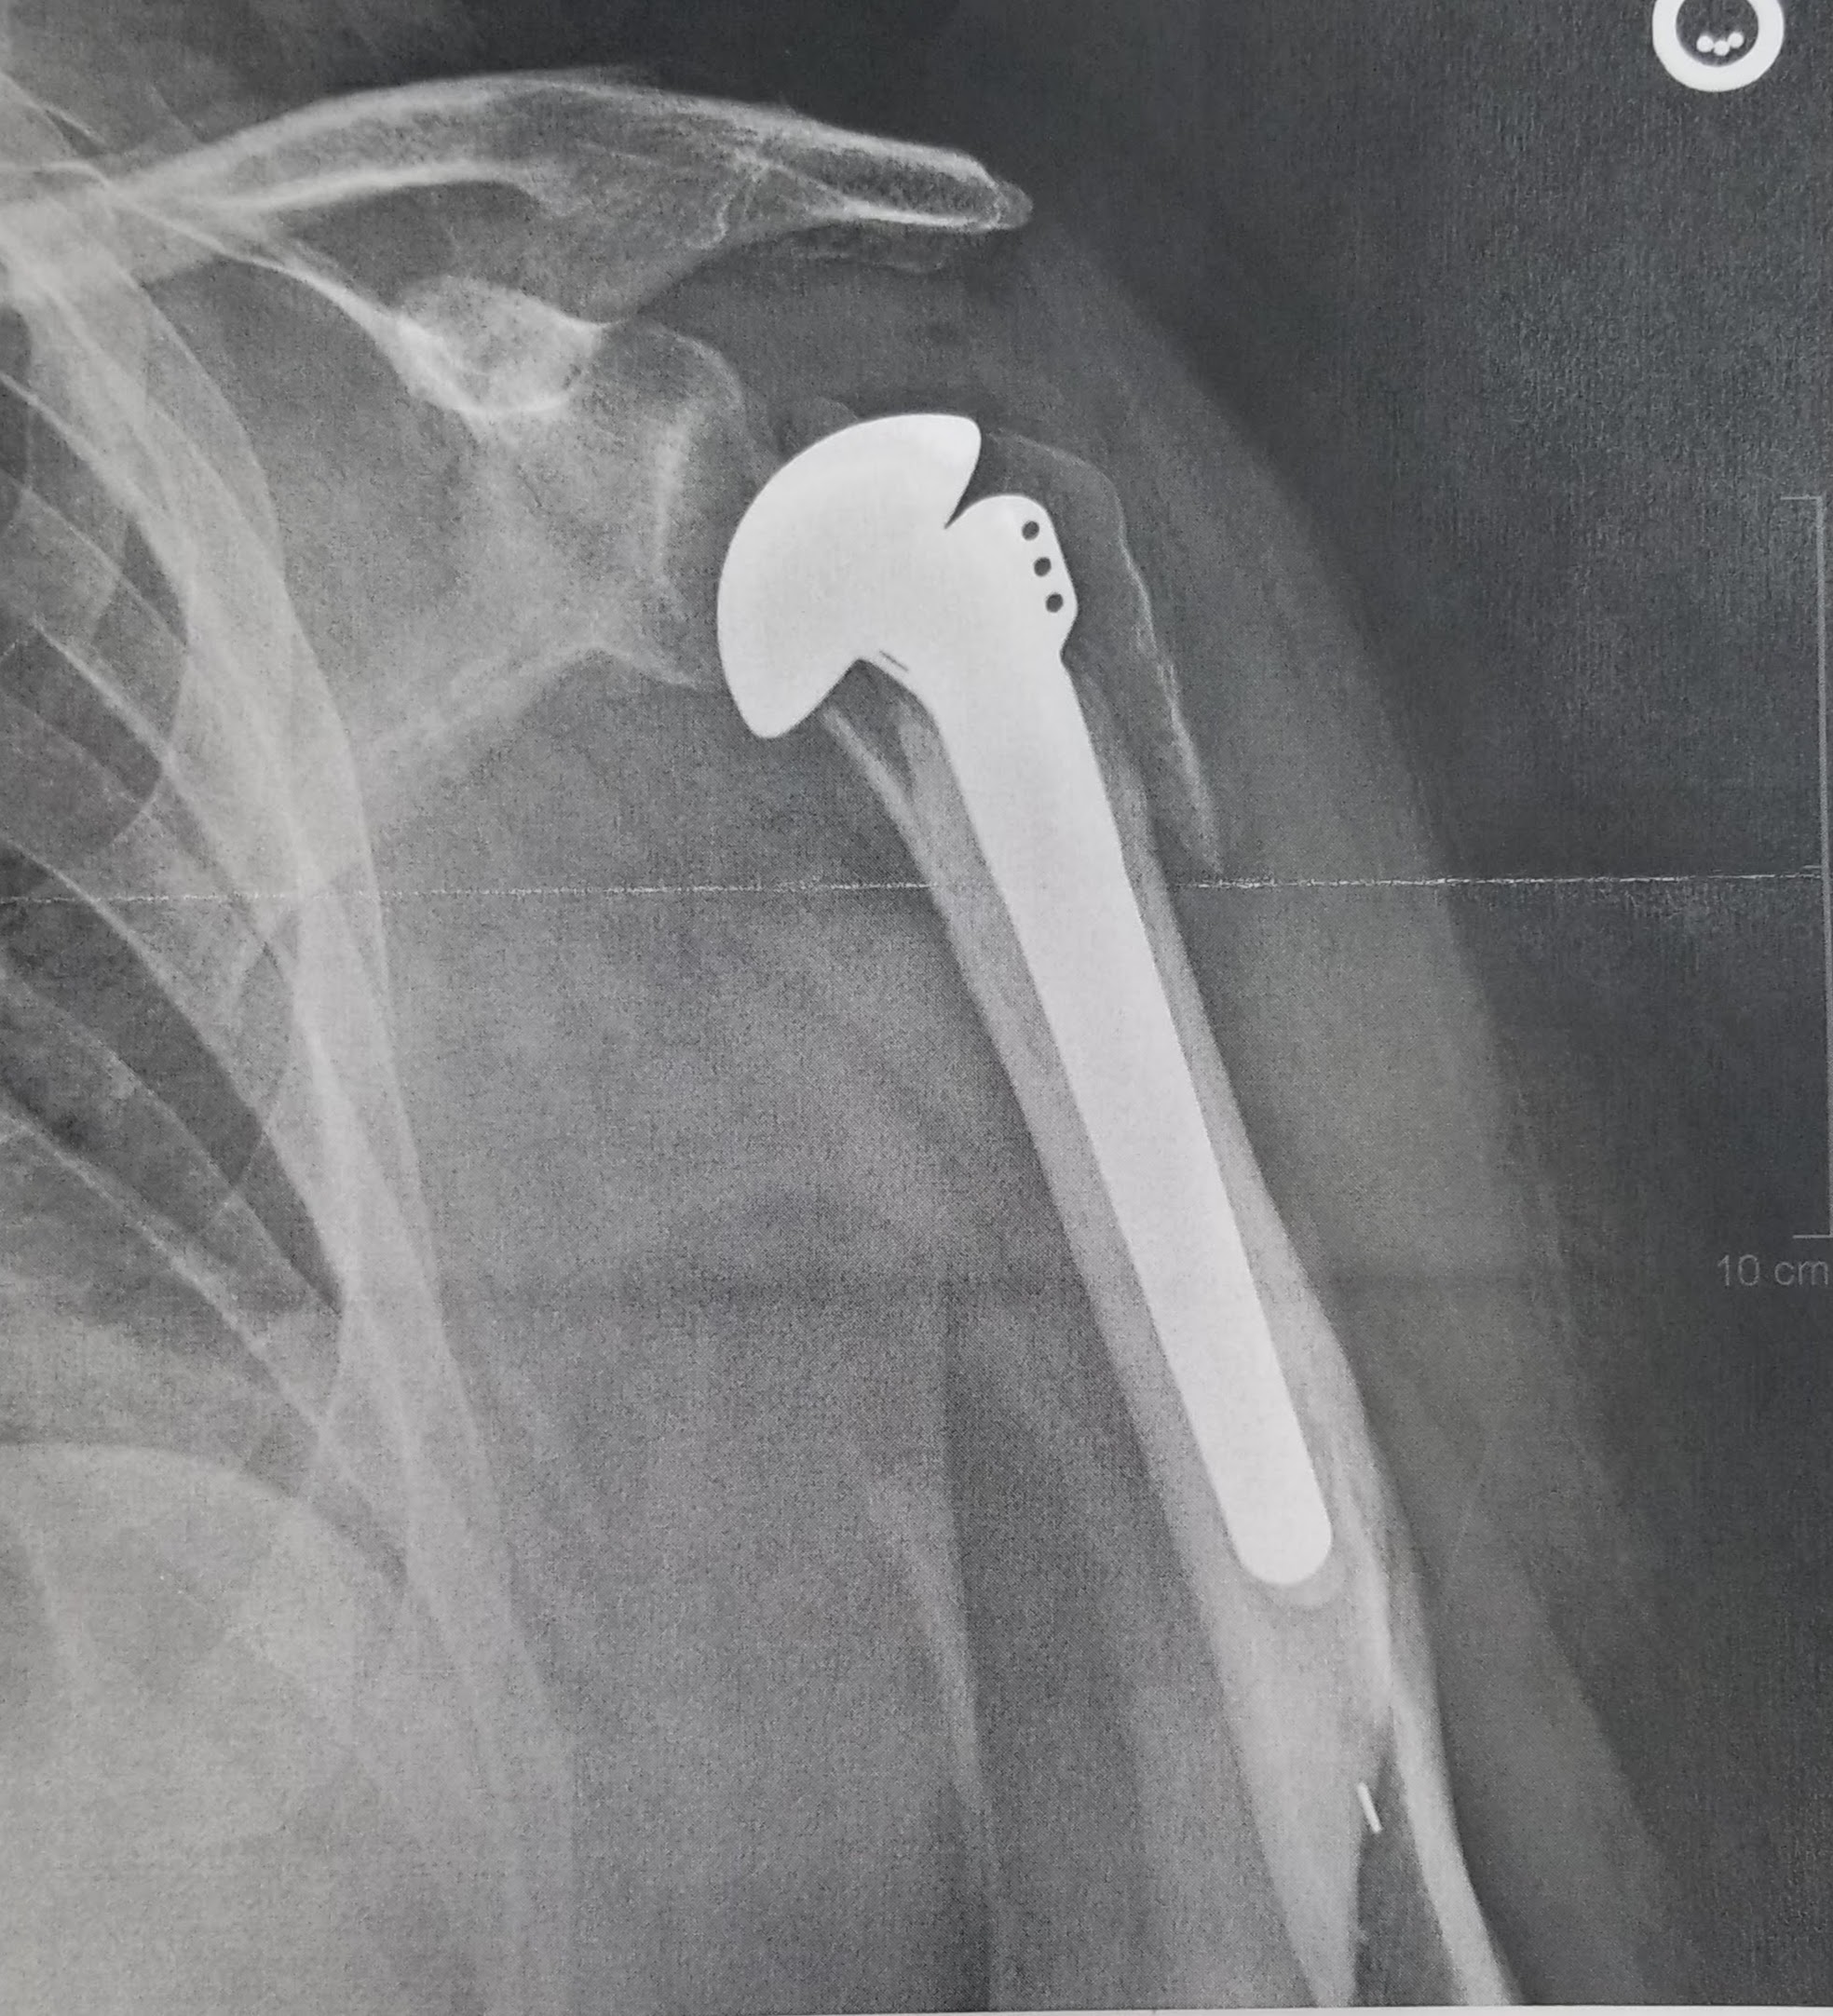
I’ve mentioned this elsewhere, but it bears detailing here as well. In mid November, I slipped and fell HARD on my left side, breaking my shoulder. Specifically, “comminuted fracture of the humeral head and a fracture of the humeral neck” which basically means that not only was the ball joint broken off, but it was split in half as well. I saw an orthopedic surgeon the following week. The surgeon didn’t even need his own imagery; the ER xrays were good enough for him to say, “we’re replacing that.”
This is my left arm, so at least its not my hammering arm, but even so, no forging was going on through the end of 2020. My recovery is marching ahead nicely and I hope to be back at it soon.
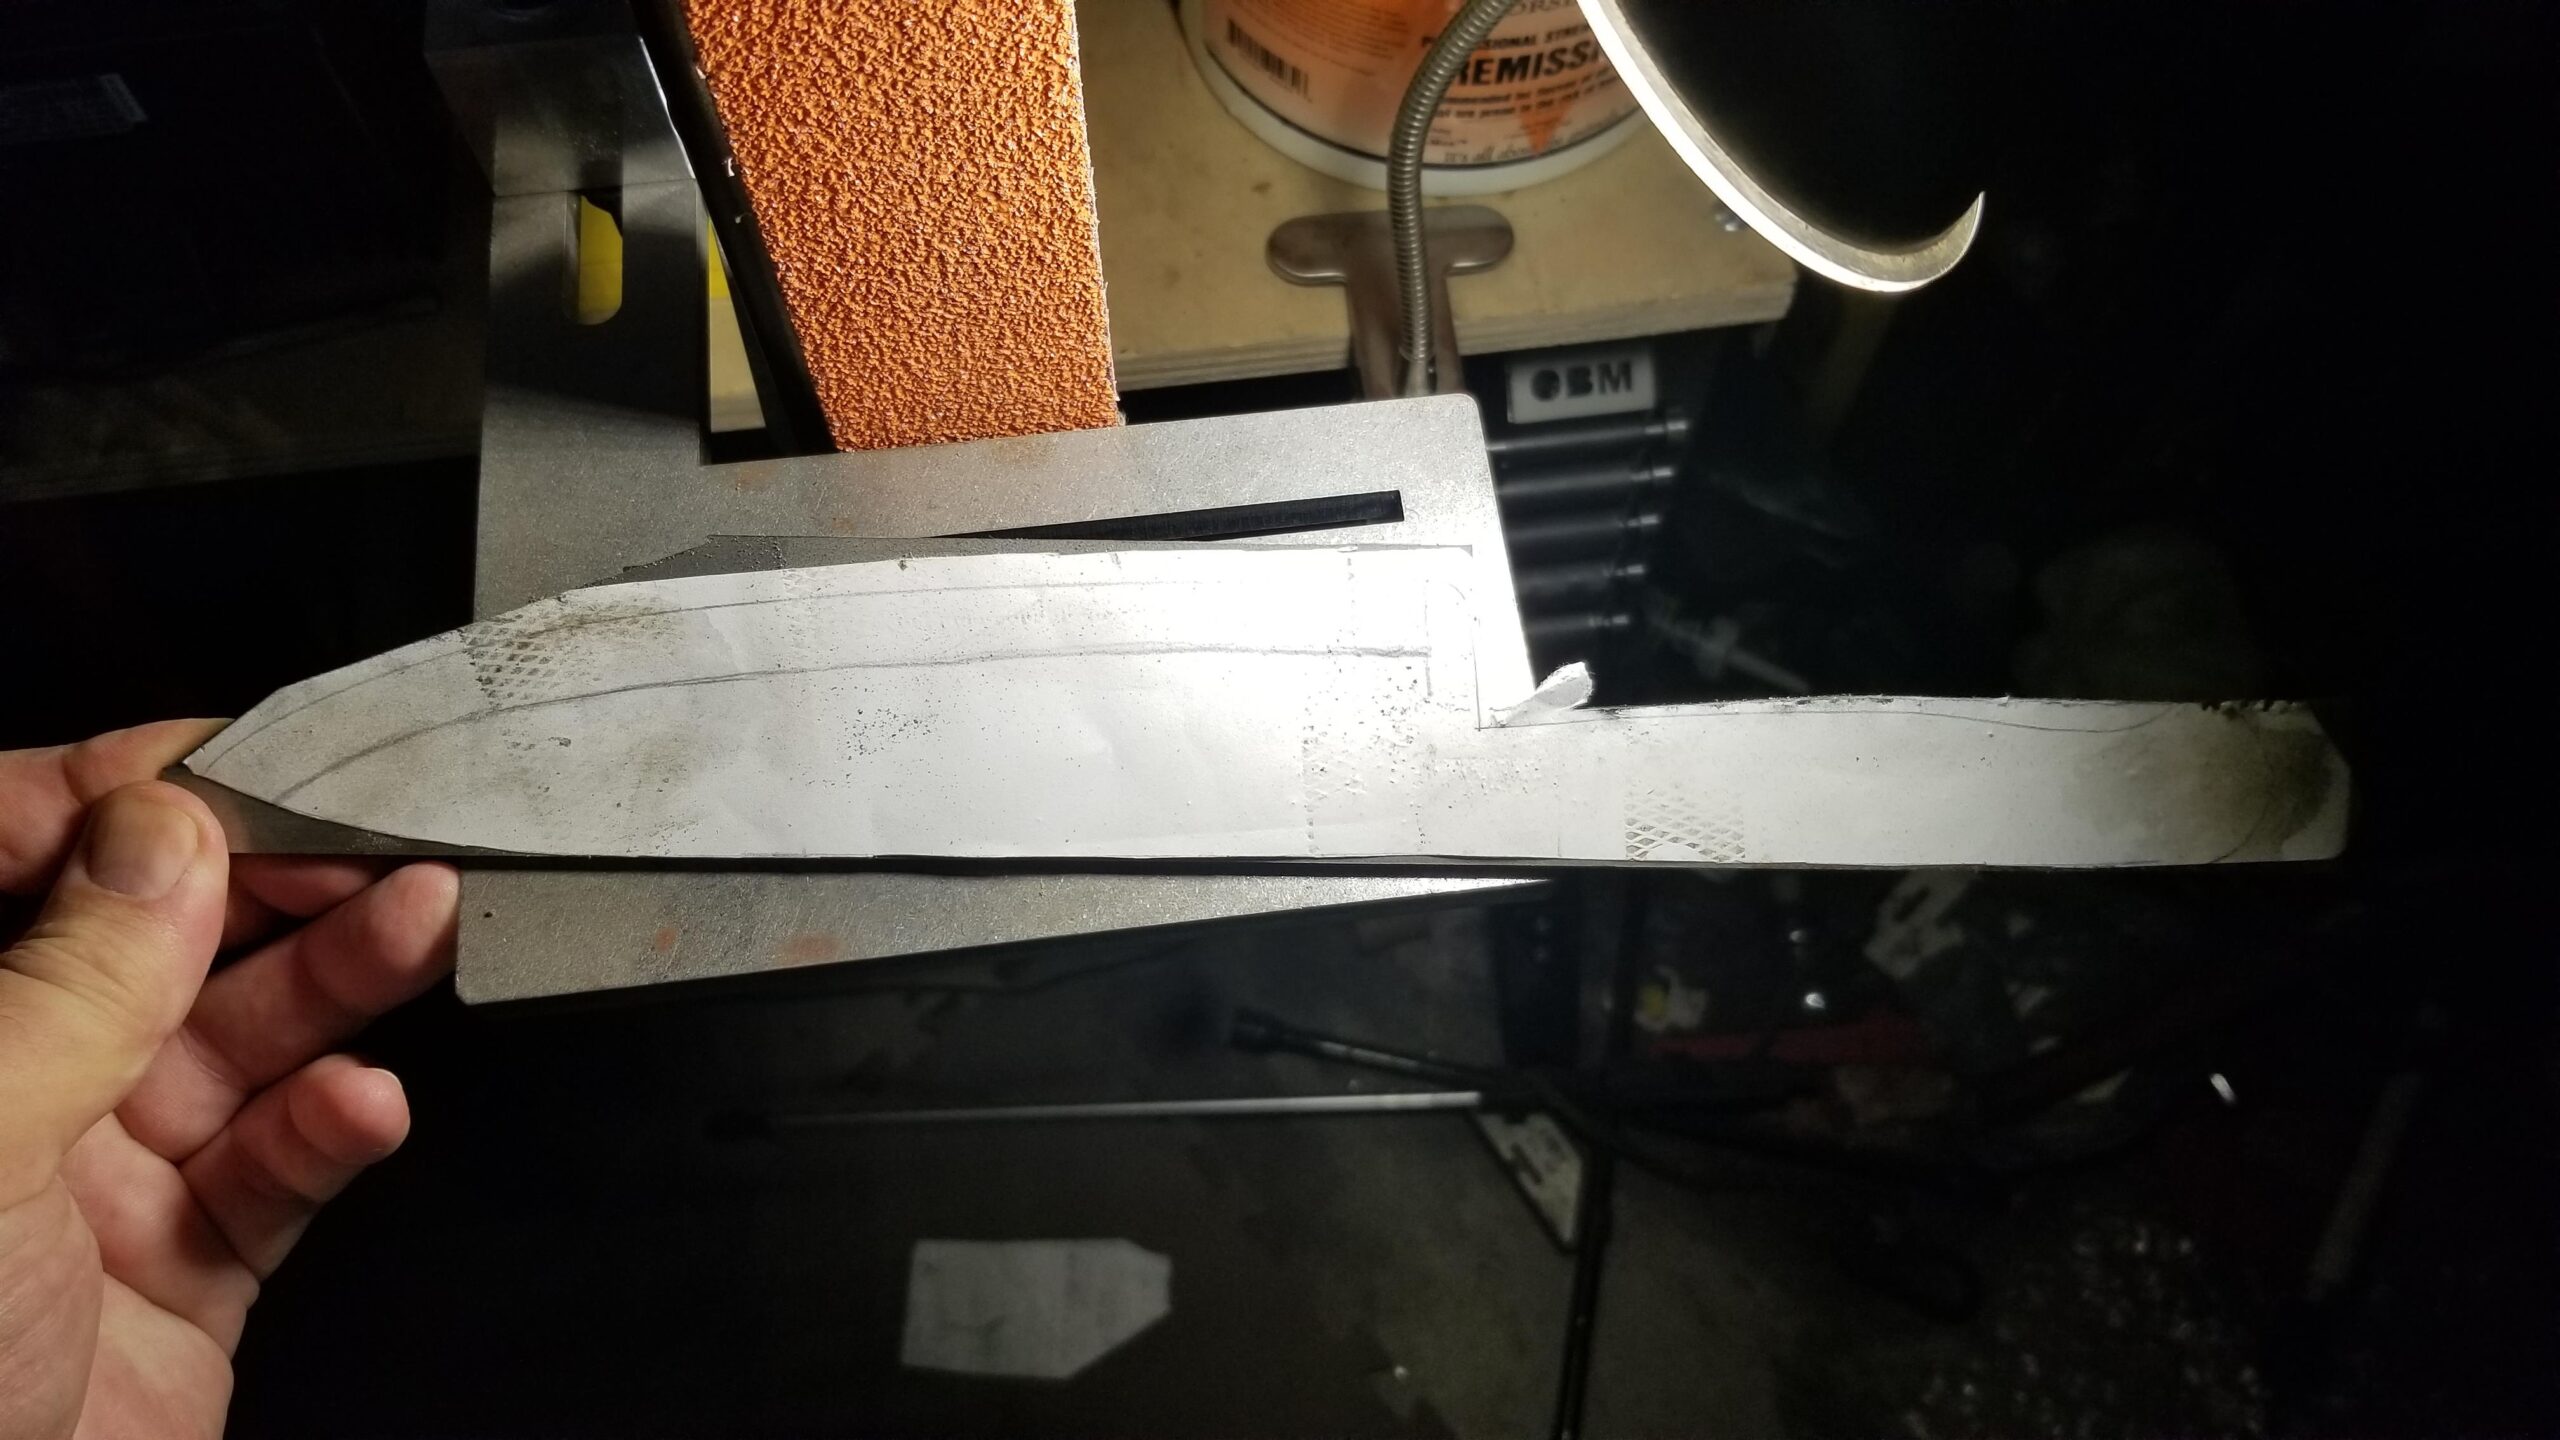
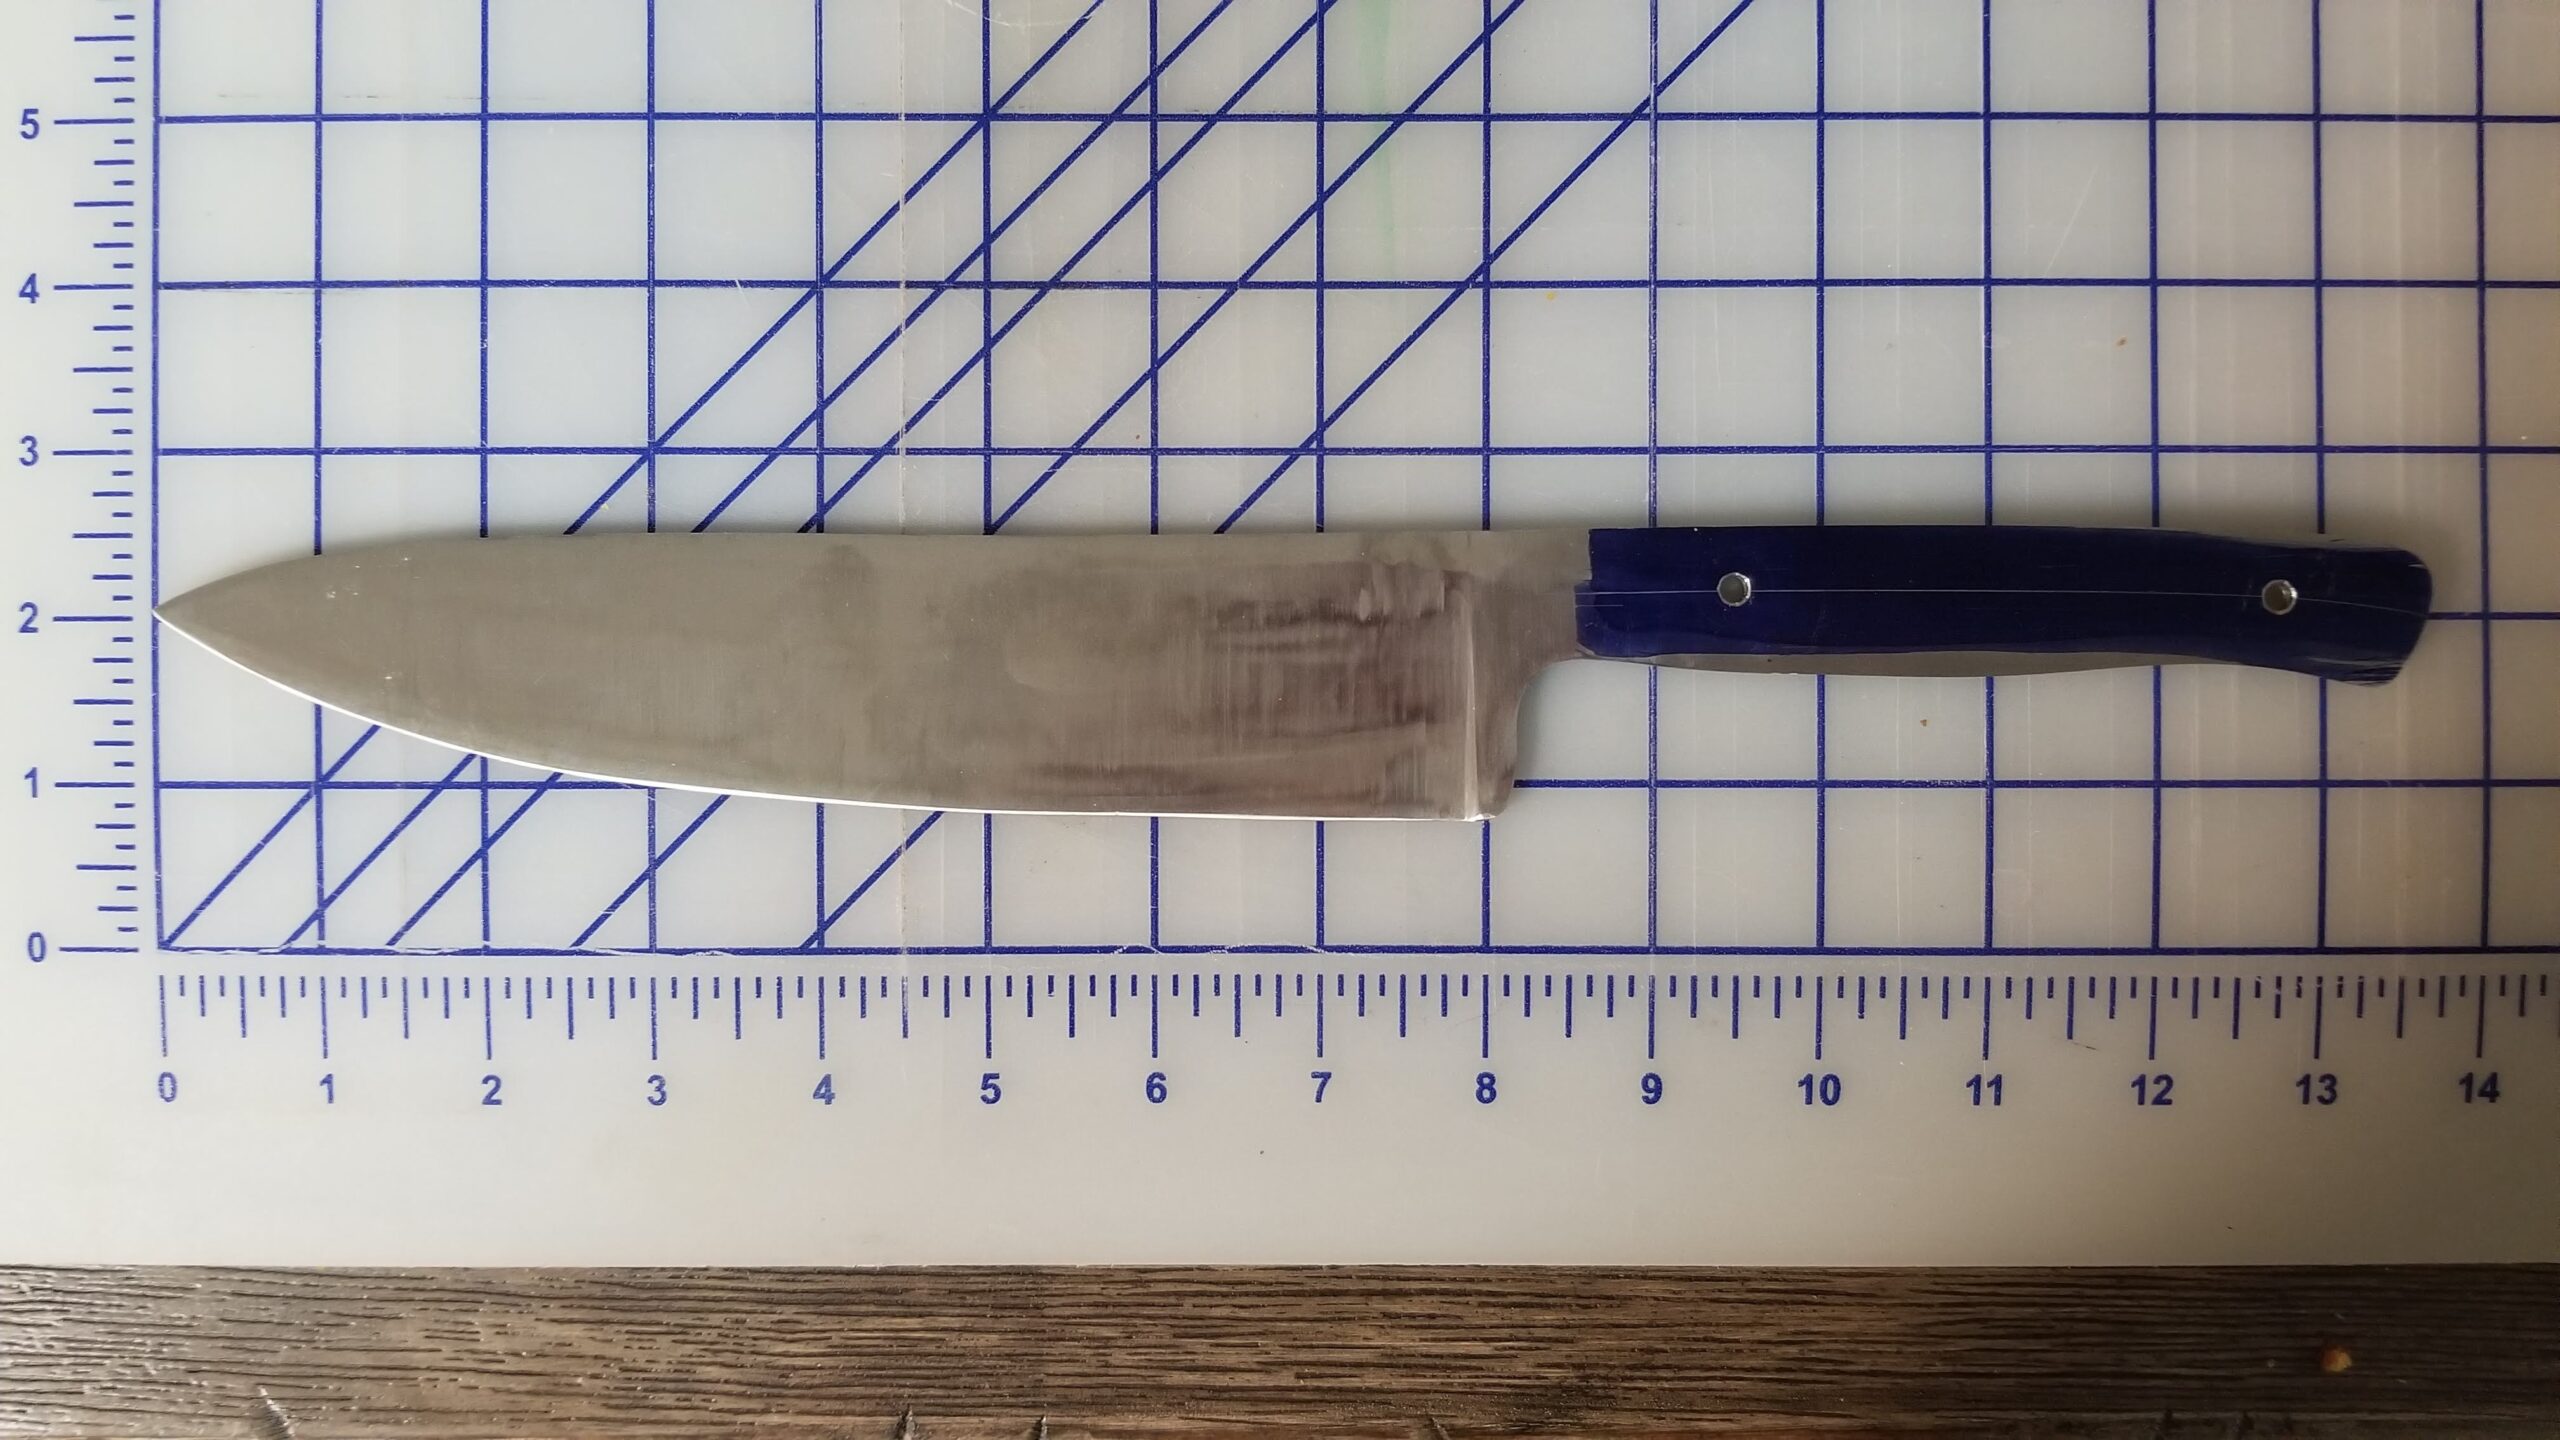
Meanwhile, I have not let it completely stop me and I chose to make a material removal chef’s knife, based on an existing knife we have. Obviously, the grinder figures heavily in that.
I cut a blank out of 1/8″ 80CRV2.
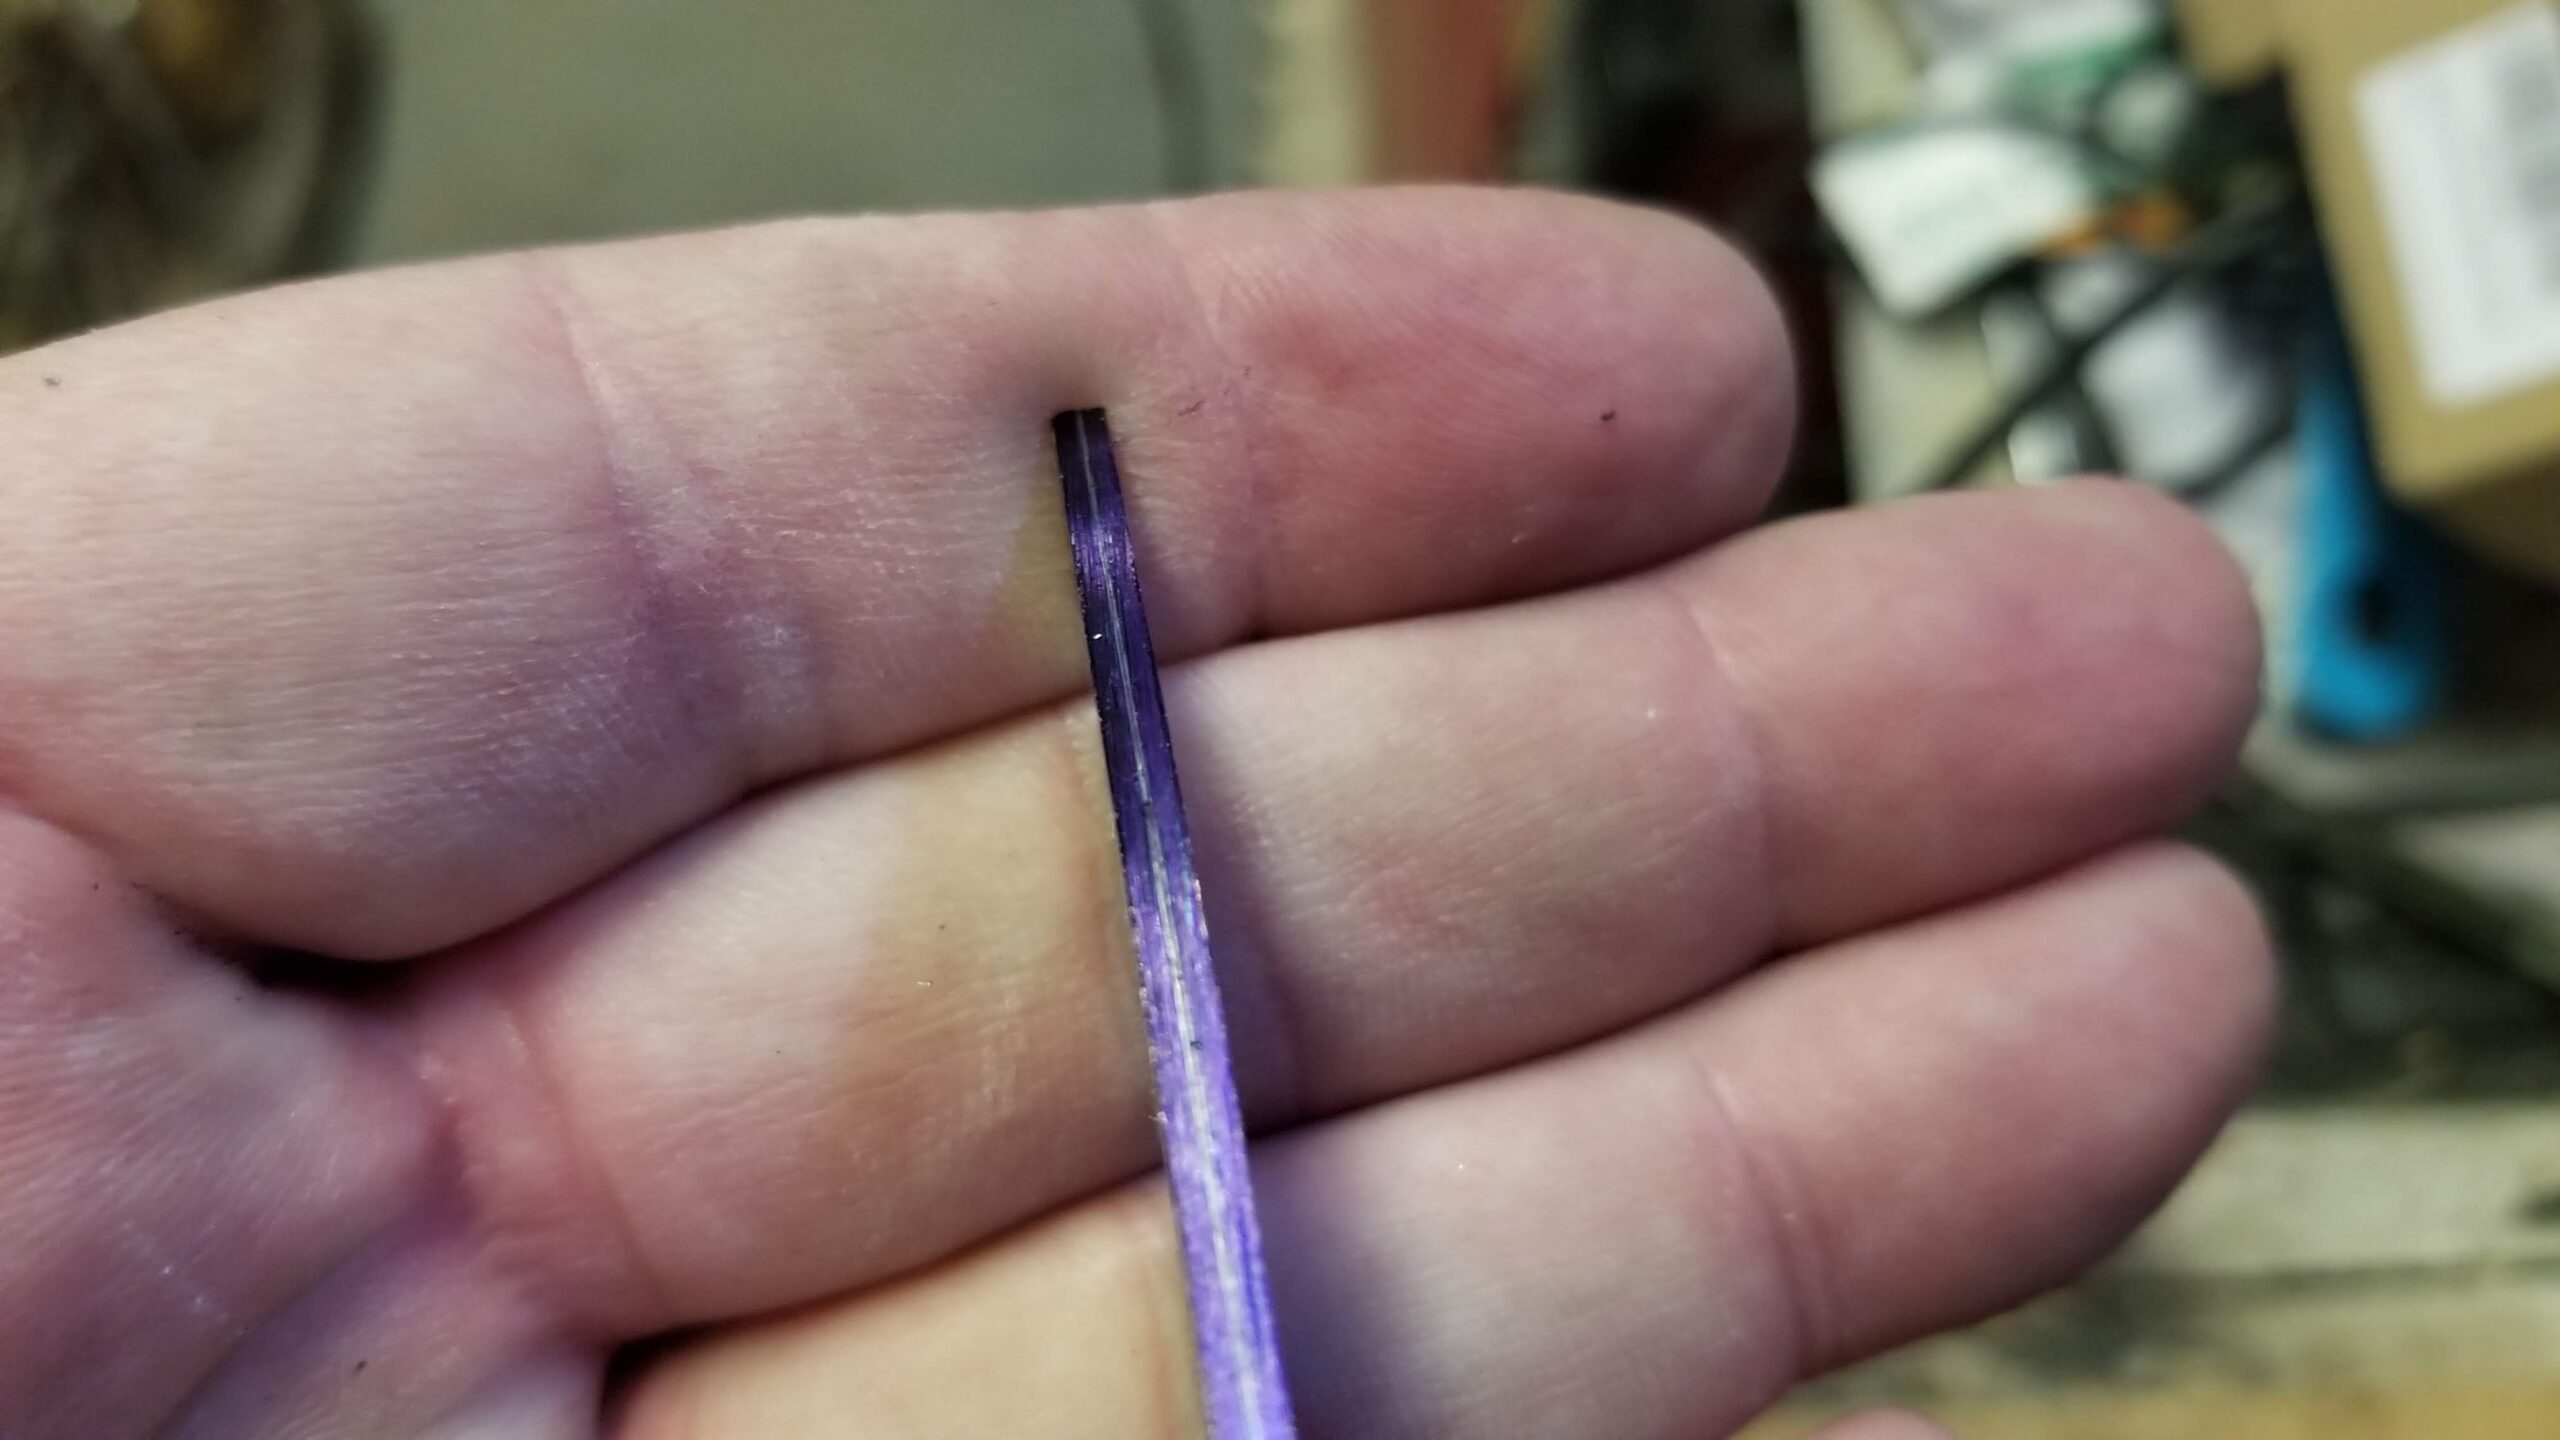
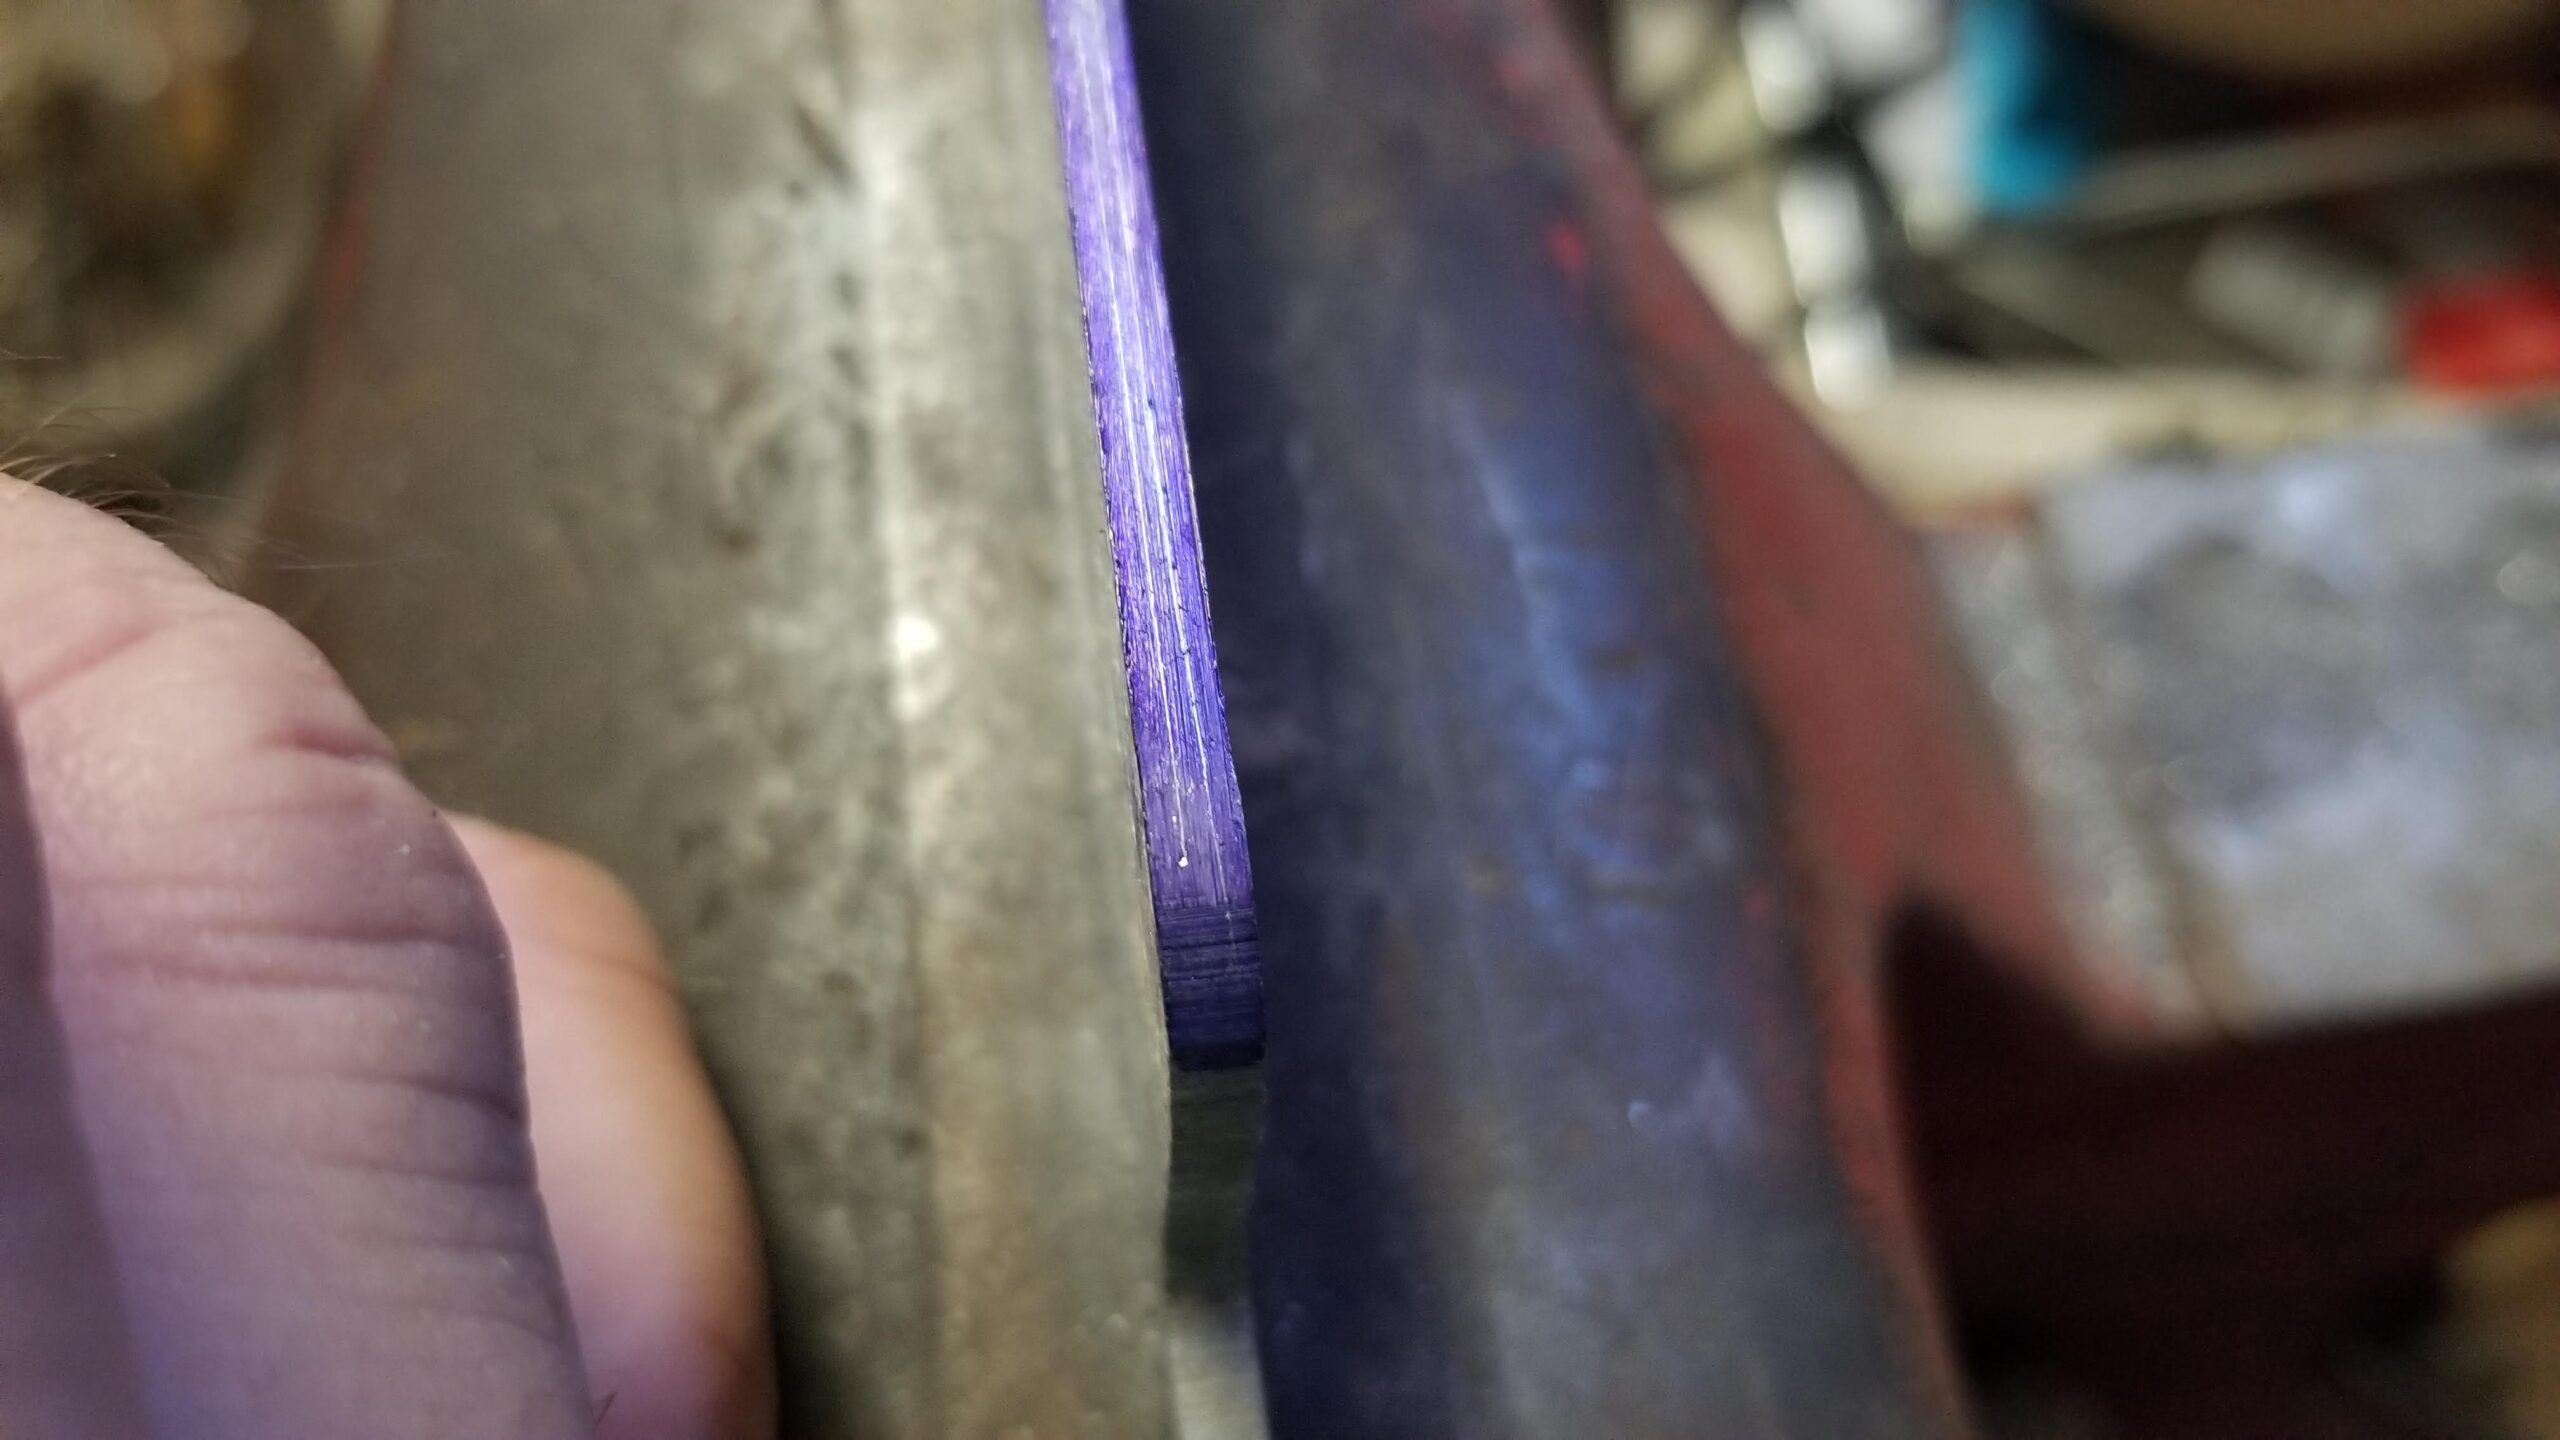
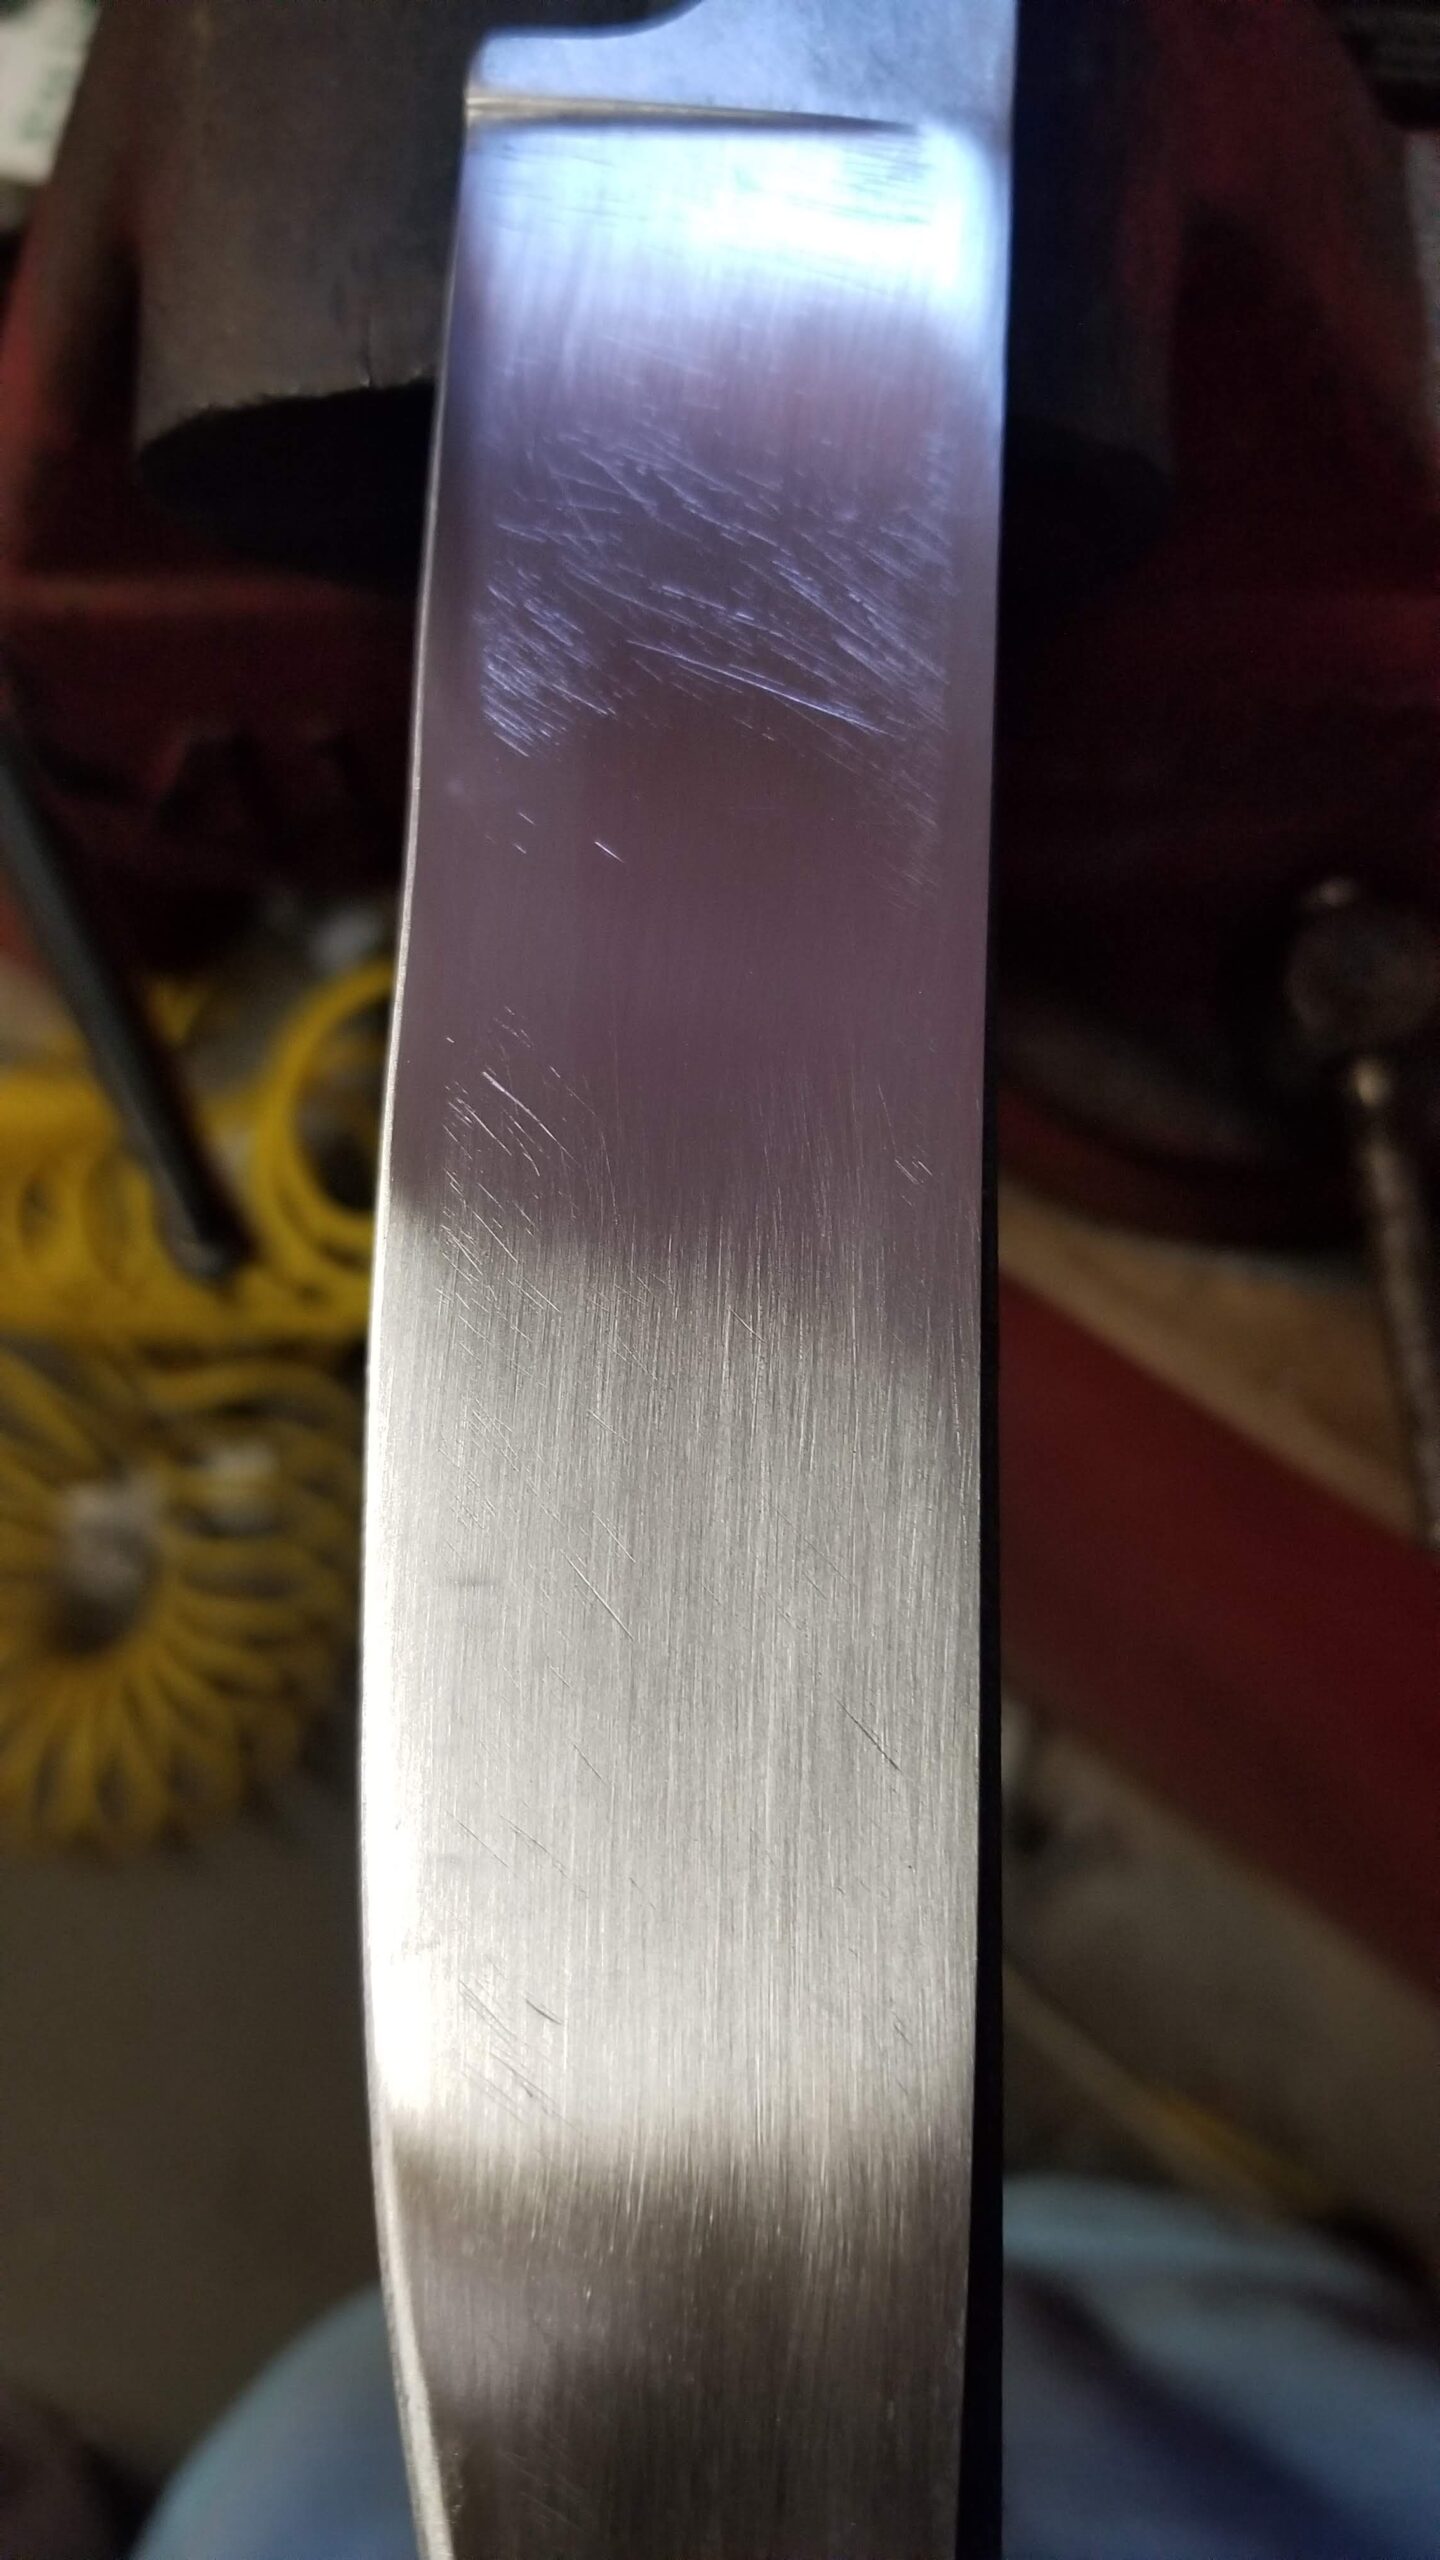
I ground a distal taper into the blank. I didn’t measure the actual taper, but it’s slightly visible here as I am marking the edge.
I marked the edge with this edge scribing tool, one of the extra accessories I picked up from Origin Blade Maker. It is set to bisect the tip.
It makes the distal taper especially obvious. The heel is about 50% thicker than the tip.
As I was approaching this point in the grinding, it occurred to me that I had ground too far. The edge was going to be too thin for heat treatment!
It was too late anyway, so I drilled the tang and prepared to heat treat in a day or two.
I didn’t get enough pictures of the early parts of the heat treatment process. First, I heated the blade up enough to apply my touchmark. Then I heated to an even orange heat and checked with an IR thermometer for 1600F. I let it soak at that color for about 5 minutes then quenched it in cheap 30W motor oil. Why, yes, that does smell perfectly yummy.
And, as predicted, the really thin edge of the blade came out not just warped but completely wavy.
There’s always a slim chance it might relax some in the temper, so I put it in the toaster oven for a two 60 minute cycles at 450F, cooling to room temperature between.
There was no perceptible reduction in the warping.
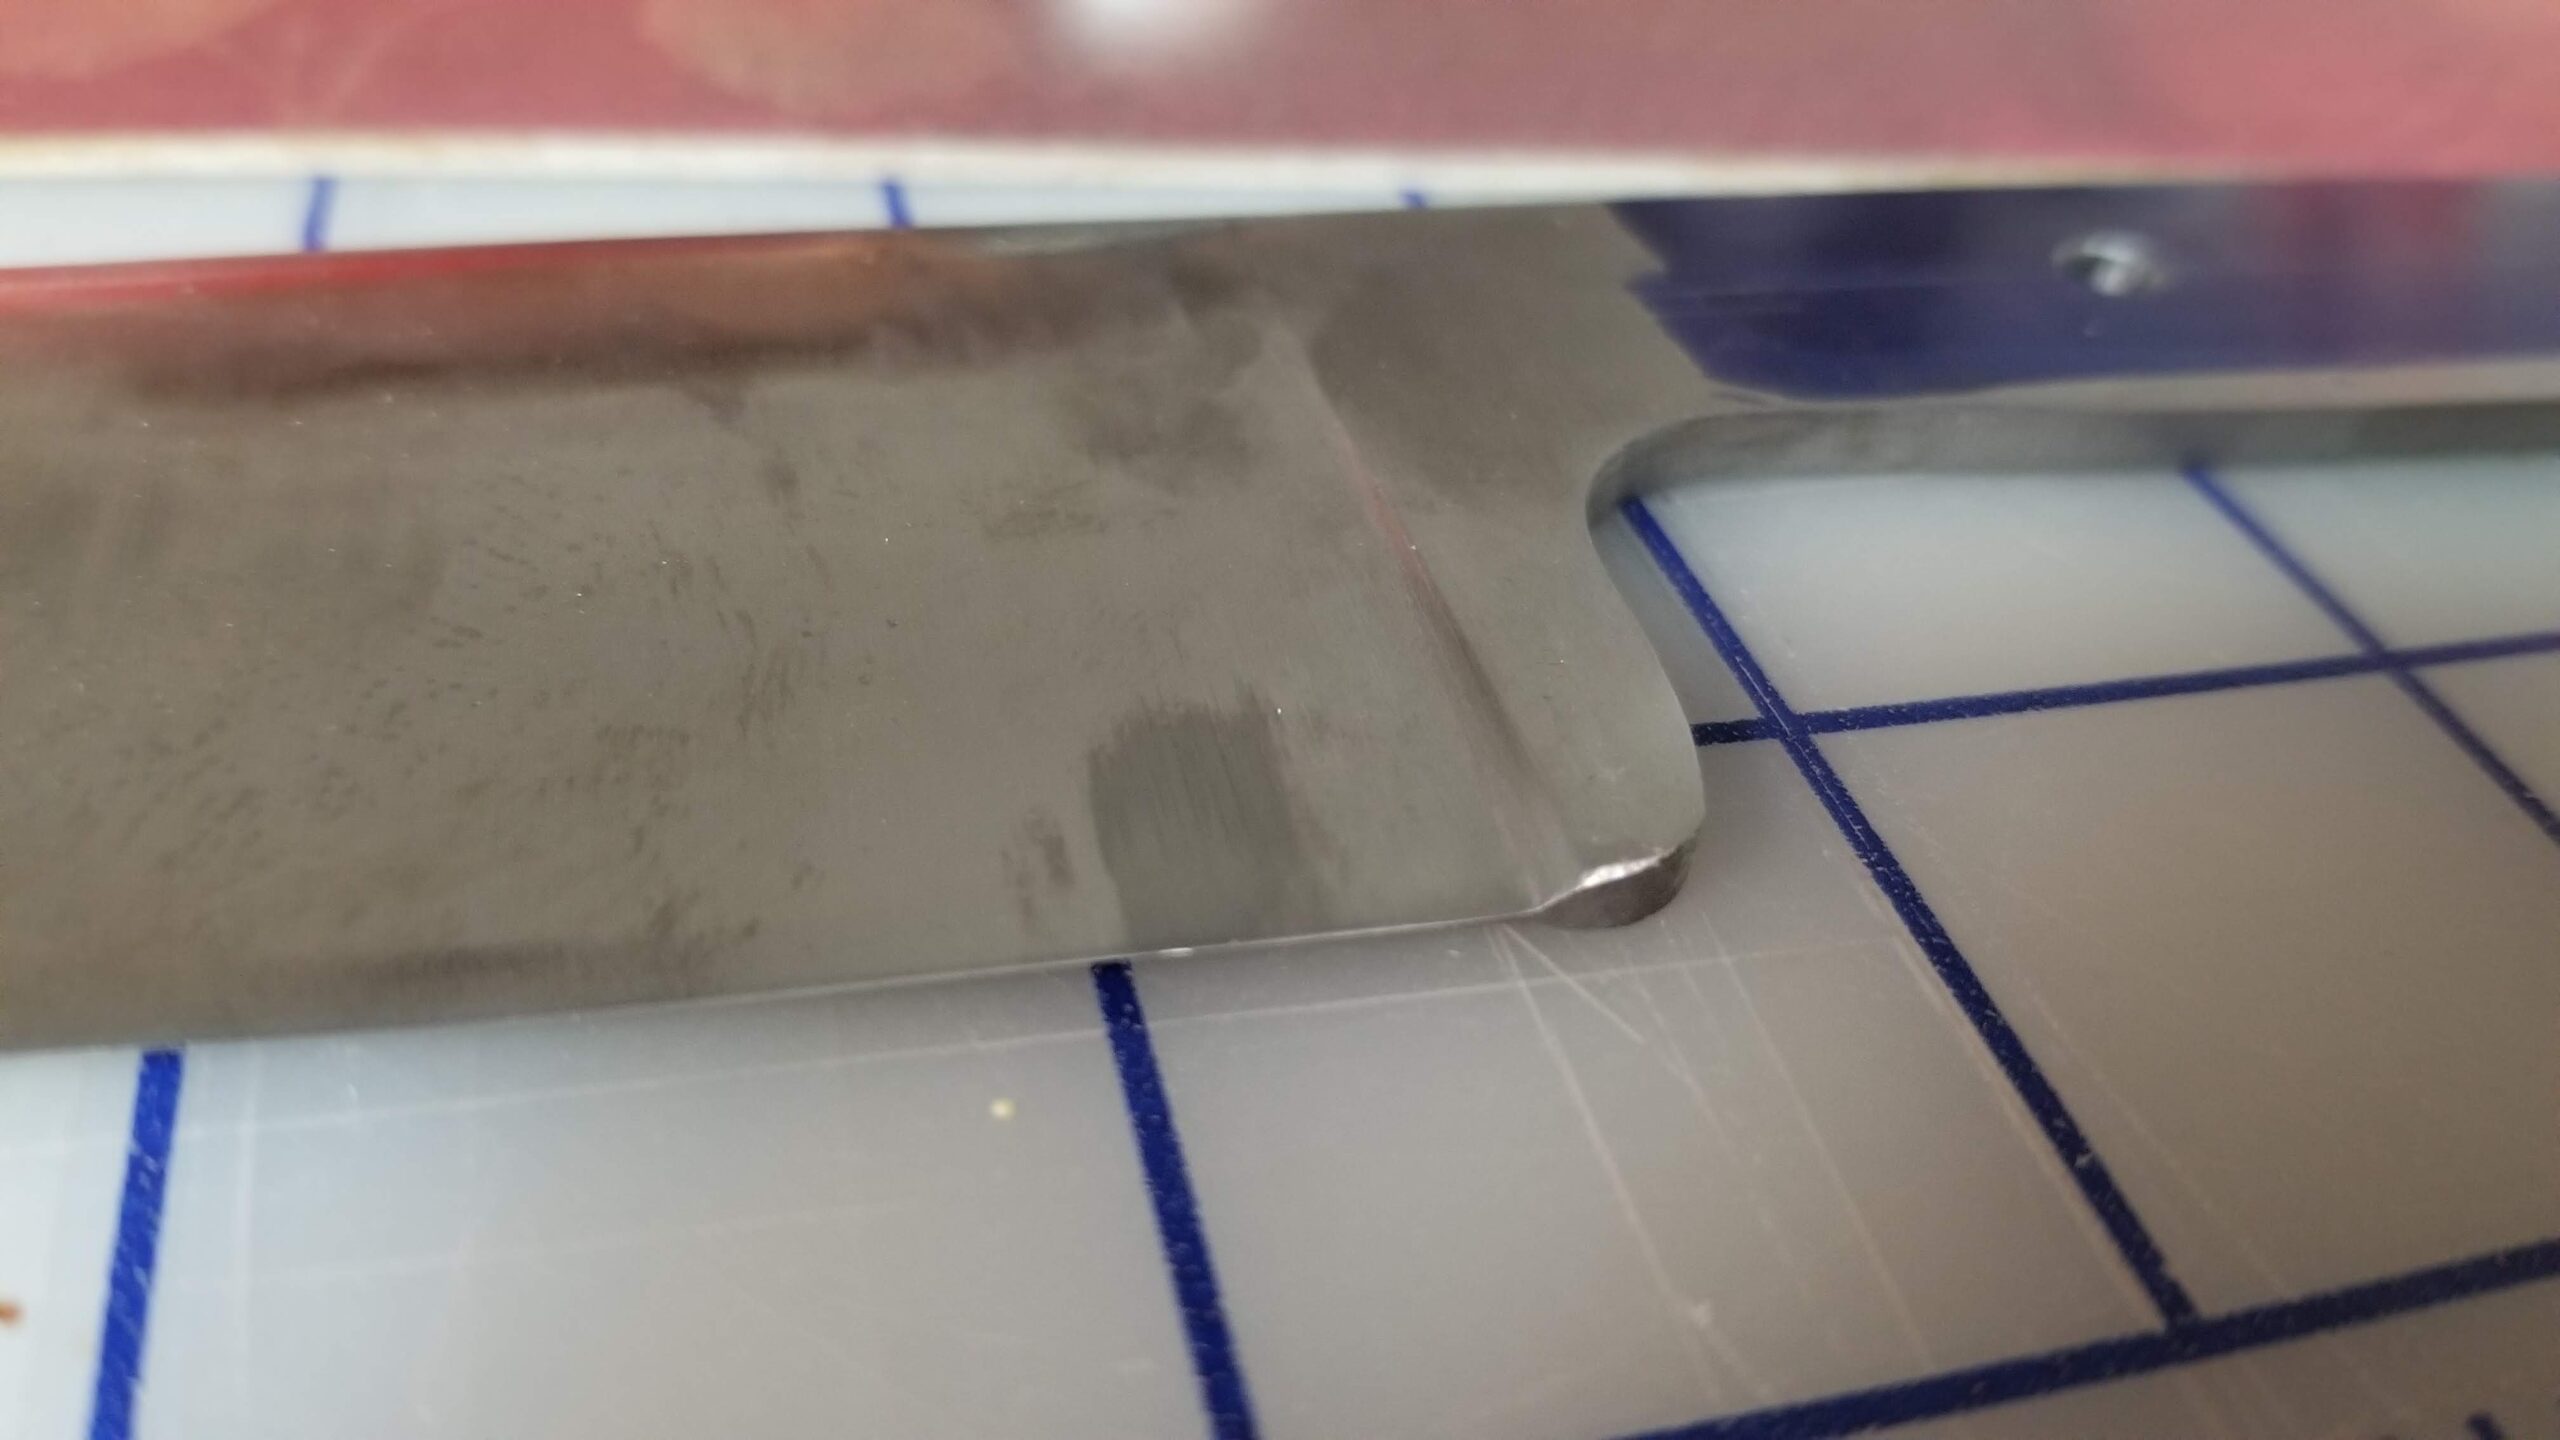
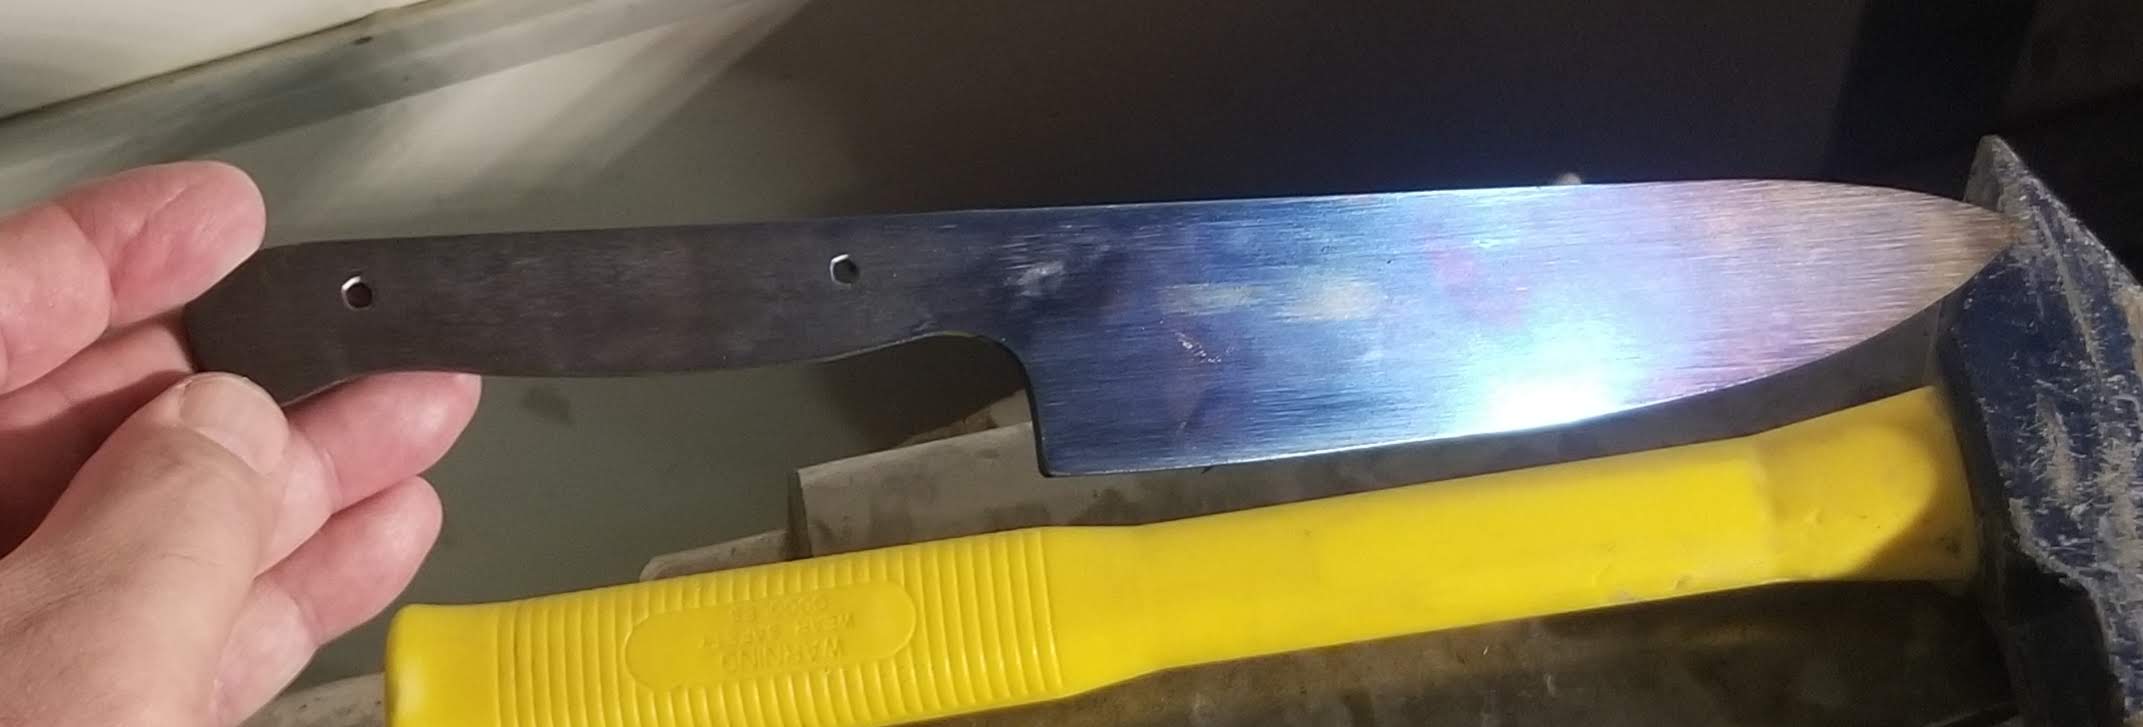
The tempering cycles took the evening and overnight, so I immediately started on another blank that I would not make *that* particular mistake on. This time, I would heat treat the tapered and drilled blank, before grinding the bevels.
Here’s that one, after tempering, ready to grind.
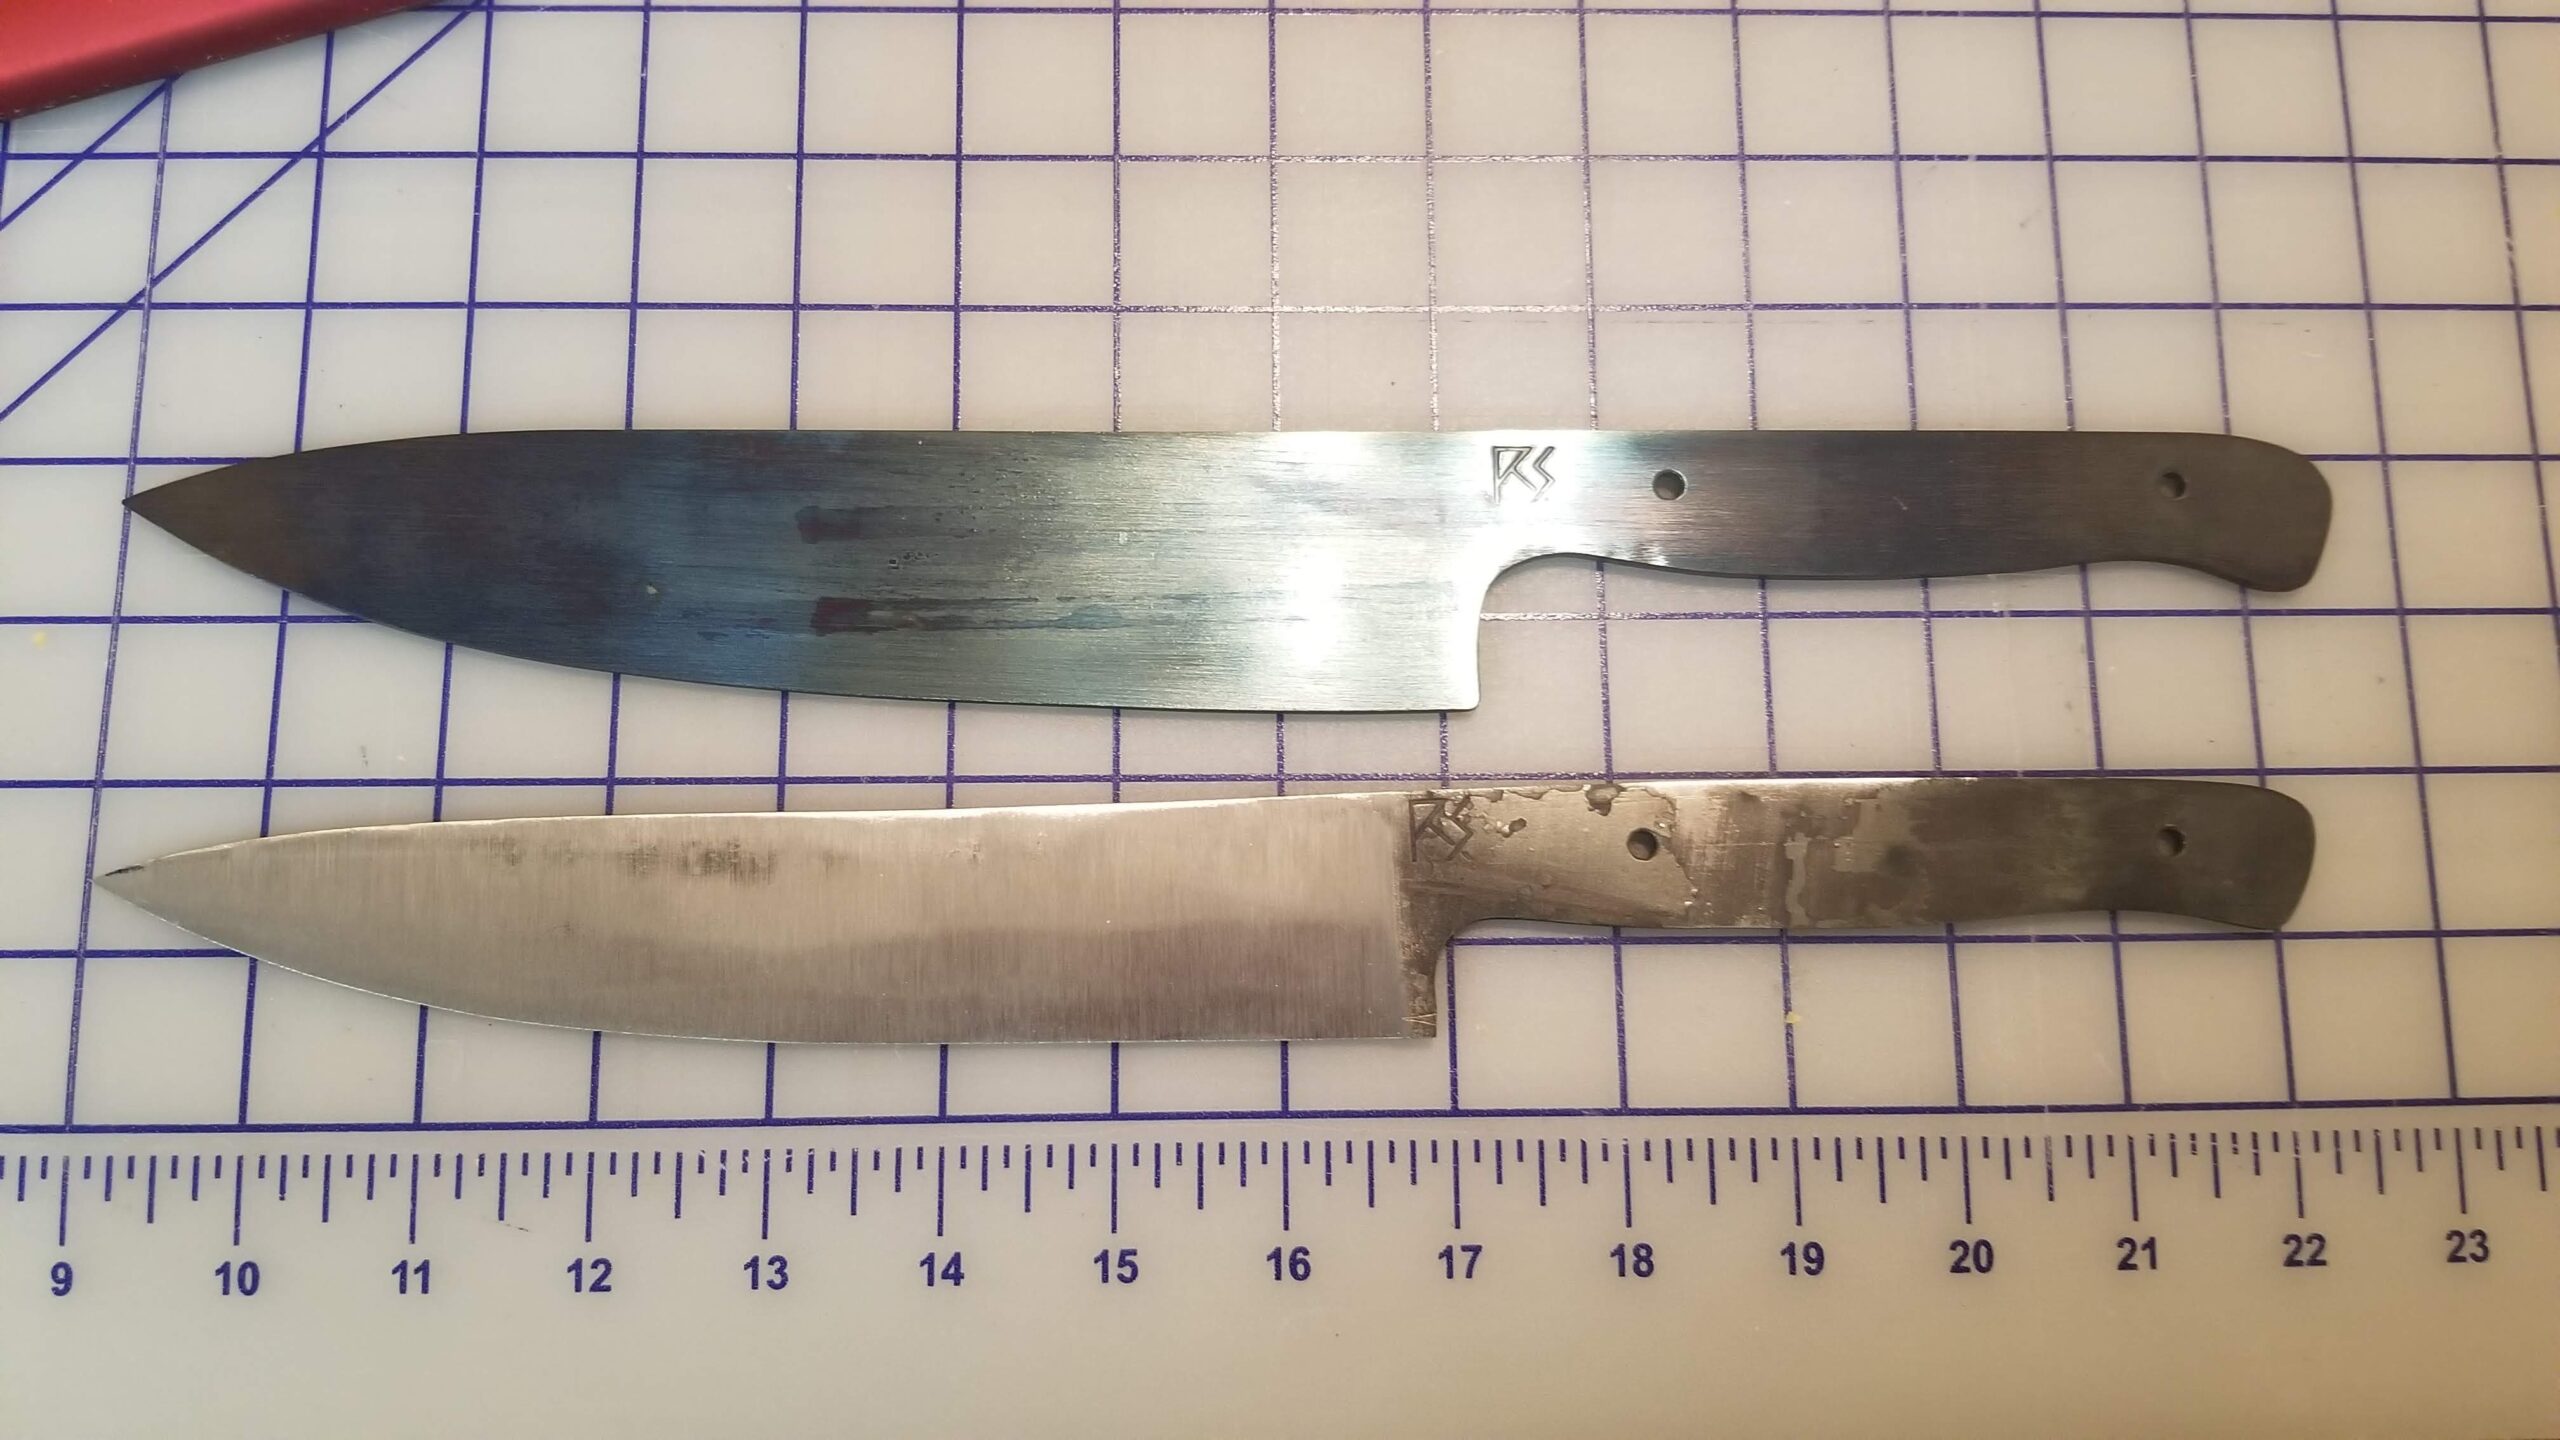
As for the first blade, I just scribed a line describing it as a narrower blade, less a chef’s knife and more a carving knife.
I ground the new profile, reground the bevels and hand sanded it.
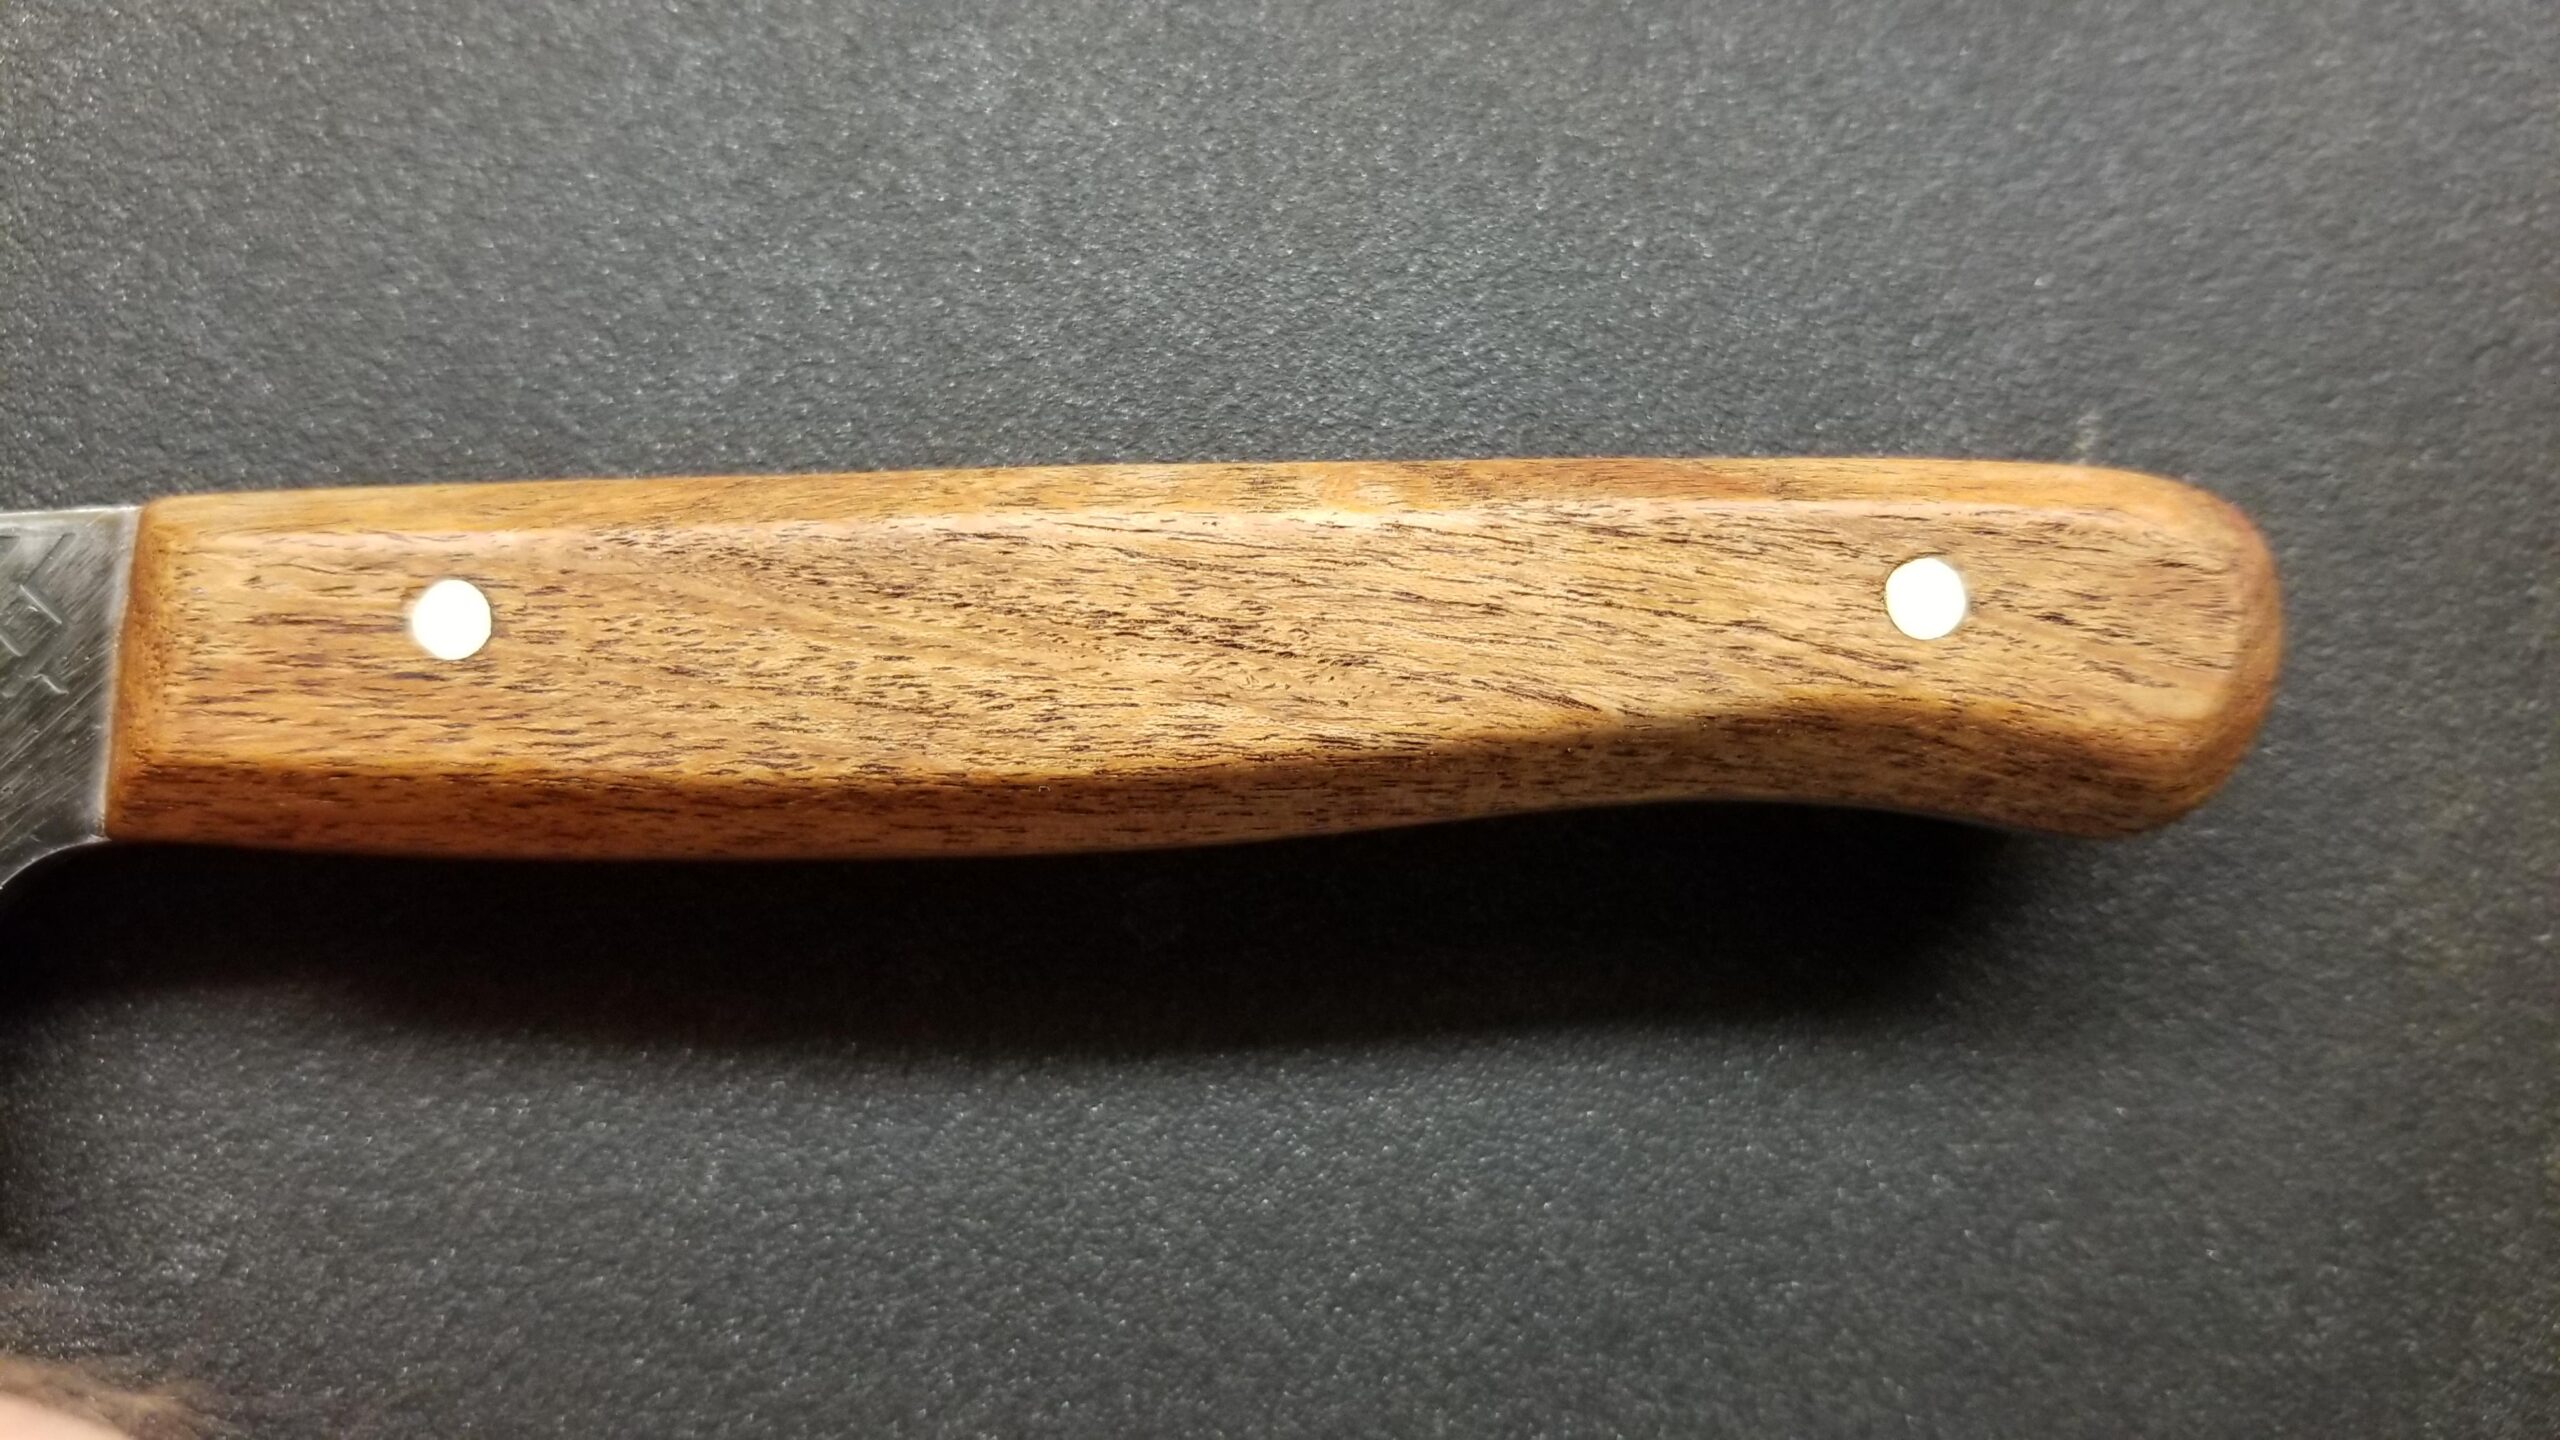
I put mesquite scales on it. It is perilously close to finished.
I started this post September 2020…. I’m typing this sentence January 2021. It was February 2019 when I posted last.
It’s been a busy couple years since my last confession post.
Using a method that has worked for me before, I browsed through the pix from my phone for reminders of significant events in since the last update.
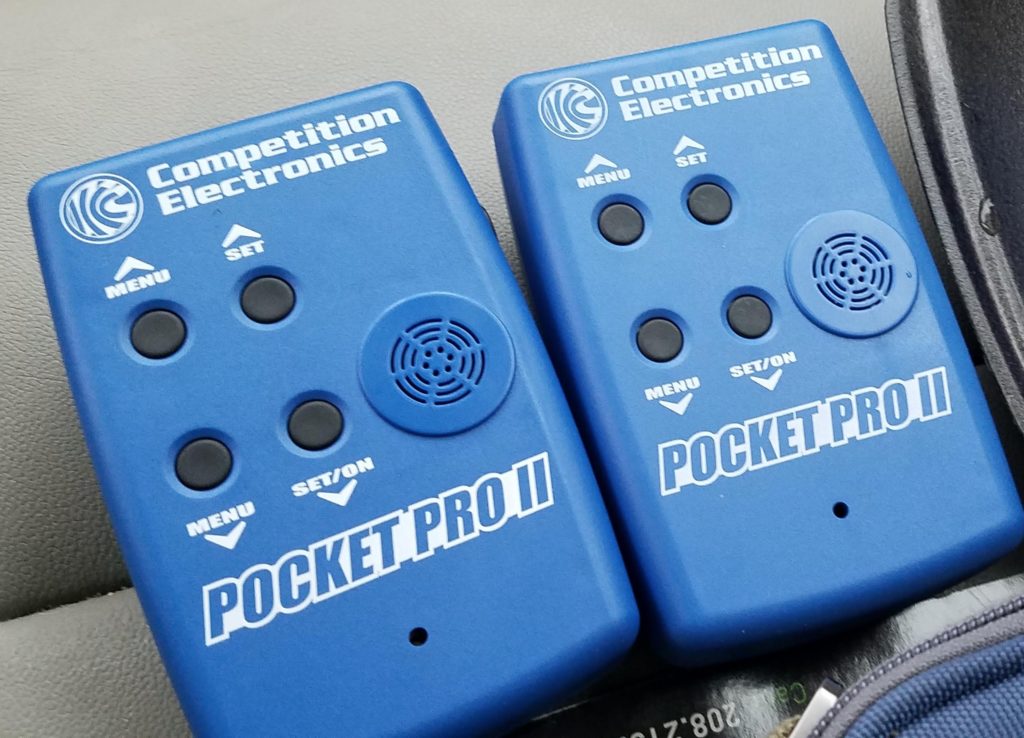
I decided long ago that I don’t particularly like the common and inexpensive CED shot timers. They work well enough and are quite compact, but my old-guy eyes have trouble reading the display. So, I wanted something with a bigger display and decided to get a Competition Electronics Pocket Pro II. I found one on Amazon and I was kind of expecting it to not be super cheap, so I purchased the one with a short shipping time and went about my life.
The next day, I was going to share the link to the factory website with someone and noticed that it was available for about half the price directly from Competition Electronics. I quickly ordered one from there and only then realized that I had bought the Amazon one, not from Amazon, but from a third party seller. I requested cancellation, but the timer arrived before I heard back from the seller, who then said “Sorry, but we only offer the present deal.” I did not trust them to not make it worse in the return process, so I decided to keep it and chalk it up to an expensive lesson learned. Also by then, the order from Competion Electronics had arrived. I decided that having two timers was a good idea and just put it out of my mind that I had way overspent on half of them. Hey, they are nice timers. Can you tell which one has the gold circuitry?
I started carrying my Glock 19 more often, mostly because I like the idea of having more ammo if needed. I know that statistically, I am astronomically unlikely to become involved in a firearm altercation at all, and if I do, it is also unlikely to need more than a couple of rounds to resolve it.
But what if I’m in that situation where I am the only armed person around and it does take more than a couple rounds to protect those around me?
Ammunition is kind of necessarily heavy. It’s how the physics works. You need something heavy or something fast and with handguns, fast (actually fast) is almost never a realistic option. There are a couple of fringe exceptions, but generally, big heavy slow is how pistols go.
Heavy ammo can add up if you want to carry more of it. One of the arguments for the adoption of 5.56mm back in the late 50’s was that a soldier could carry about 3 times the number of rounds in the equivalent volume for the same weight of 30.06. In my case, a Gen 3 Glock 19 with an empty magazine weighs 23.63 oz. 15 rounds of Hornady Critcal Defense adds 6.8 oz, for a pistol carry of 30.48 oz. A second 15 round magazine is another 9.32 oz to carry.
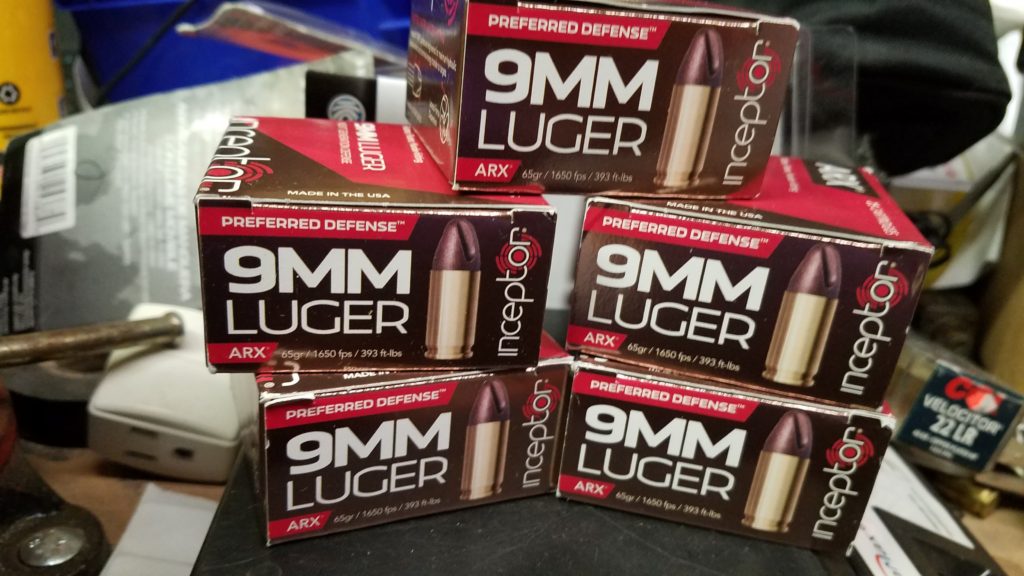
Inceptor is a polymer copper projectile ammunition. I’ve discussed it before, handloaded the projectiles and even won a 5th place trophy shooting it. It is lead free, and is good for all the reasons lead free ammo is good, plus it’s lightweight. The individual 9mm projectiles are 65 grains, compared to 115 for the Hornady. They get the muzzle energy from smokin’em out of the barrel at 1600+ fps. They are frangible, so they don’t overpenetrate and the use a clever shape and that velocity to make terminal performance in soft, wet targets.
From a carry ammo point of view, the 9mm Inceptor ARX ammo is lighter. Still has a brass case, but the bullet is only 55% as heavy. That works out to 4.47 oz less per 15 round magazine or 9 oz less for the whole rig.
The Glock loaded with Inceptor ARX is not necessarily my*every* day rig, but it is definitely the most days rig.
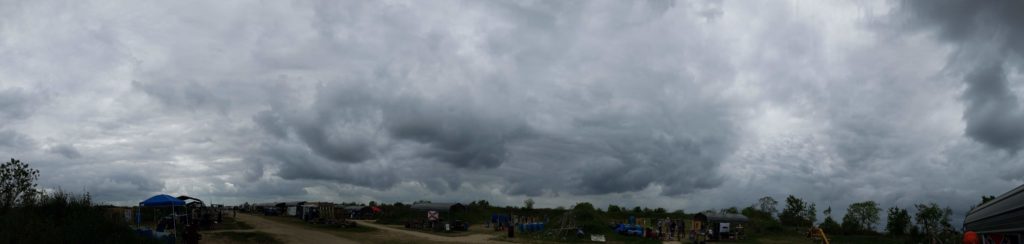
The 2019 Gulf Coast Championship was a fun match. The weather was a little chilly and threatening, but it never really rained on us.
As always, they put together a fun and challenging match. One of the fun stages (that I also happened to have done pretty well on) was also caught on video. I didn’t place, but I won a MantisX in the raffle! I already had one and I was able to sell one of them to a coworker. 🙂
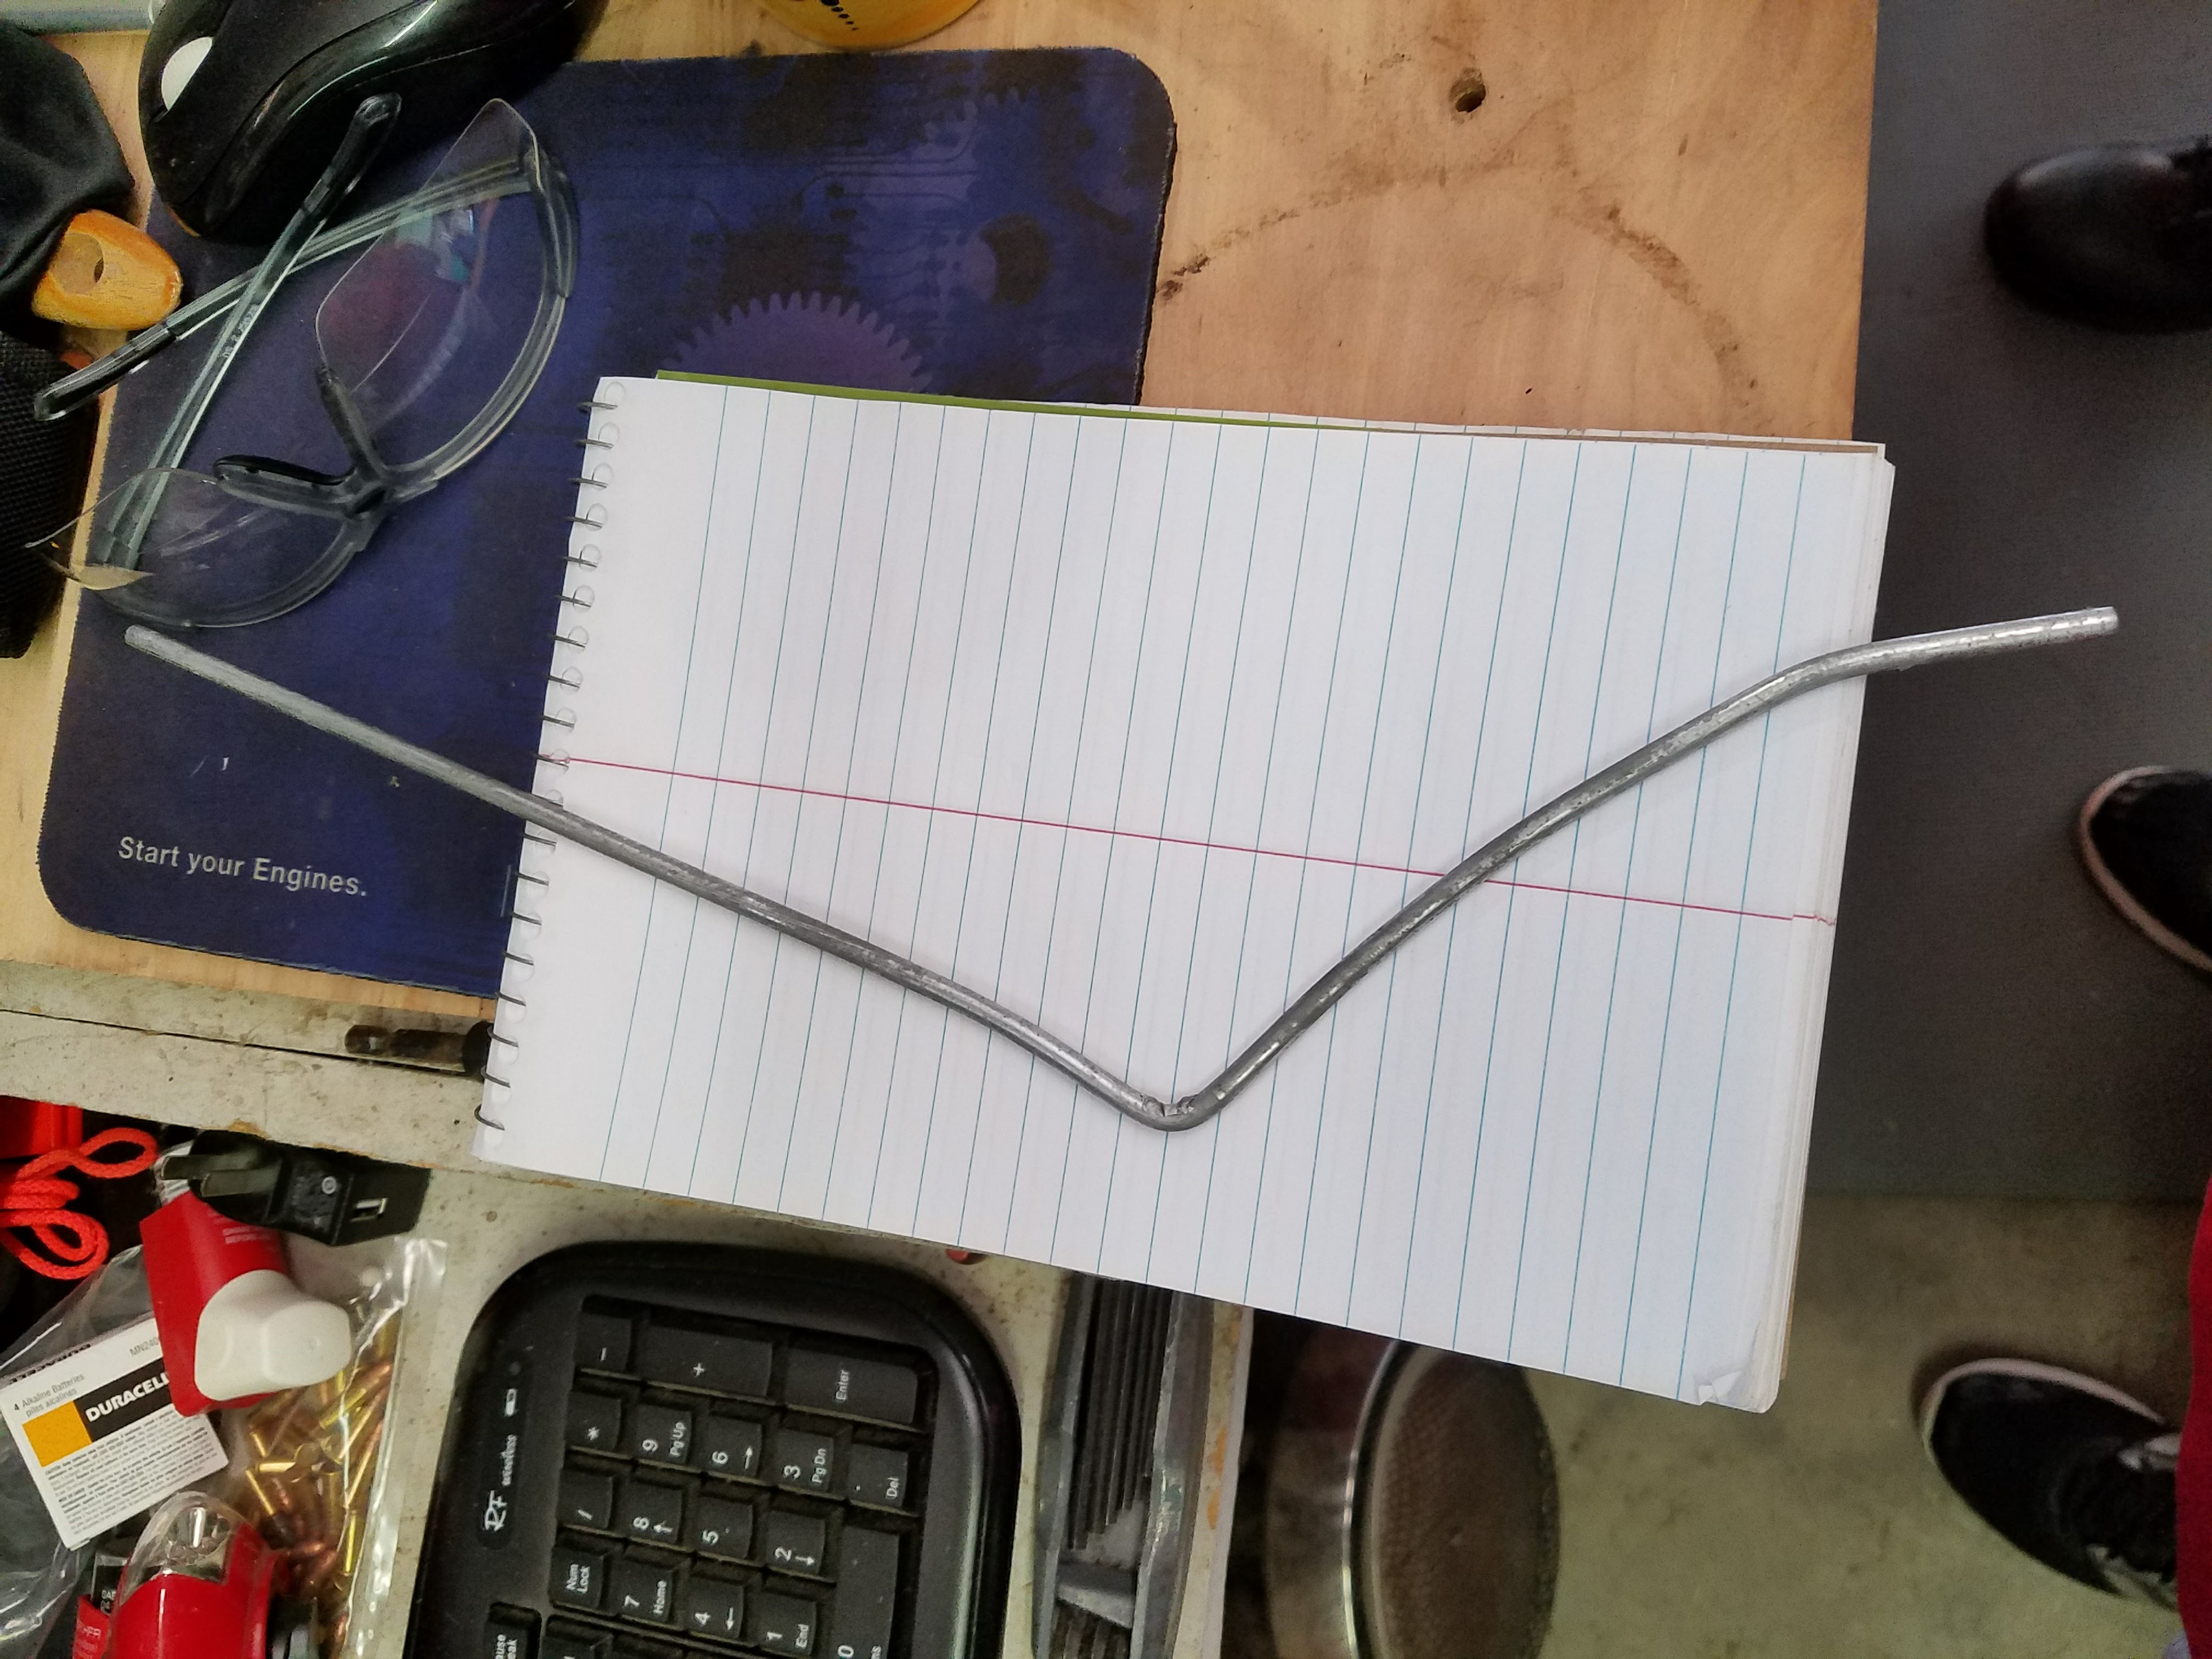
I built a slider target. I completely stole the idea, but my victim advised, so it’s probably ok. I streamlined some of the design elements by having a custom bend done on some metal. I actually made this thing back in October of 2018 and I’ll probably document that separately, but we finally tested it
The CoolFire training system is an awesome way to “dry” fire that’s not really dry firing. You get some recoil, some realistic action and you are using *your* pistol to train with. If I were to make one complaint, it would be that it would cool if there was a way to make it lock the slide back after some arbitrary number of shots for the most realistic simulation possible. All I have to do as actually use it on occasion. Once I had it, I ordered a laser module for it. Being less than careful, I ordered to wrong one. I happened to take the unit to IDPA World Championship (more on that later) and the CoolFire rep there swapped my module fwithout question. I’ve heard a couple of similar stories of high quality customer service from them.
Defender Outdoors added a Glock 18 to their fleet of rental guns. When it first arrived, they gave members an opportunity to reserve an appointment to shoot it before it went into normal rental rotation and I definitely had to do that. It was not uncontrollable by any means, but it was definitely a handful. 5 stars, would do again 🙂
I have been handloading since the 1980’s, though back then, 100 rounds was a major project. Now 100 rounds is what I need for a local match. In all that time, I’d never had a primer detonation. Note the past tense.
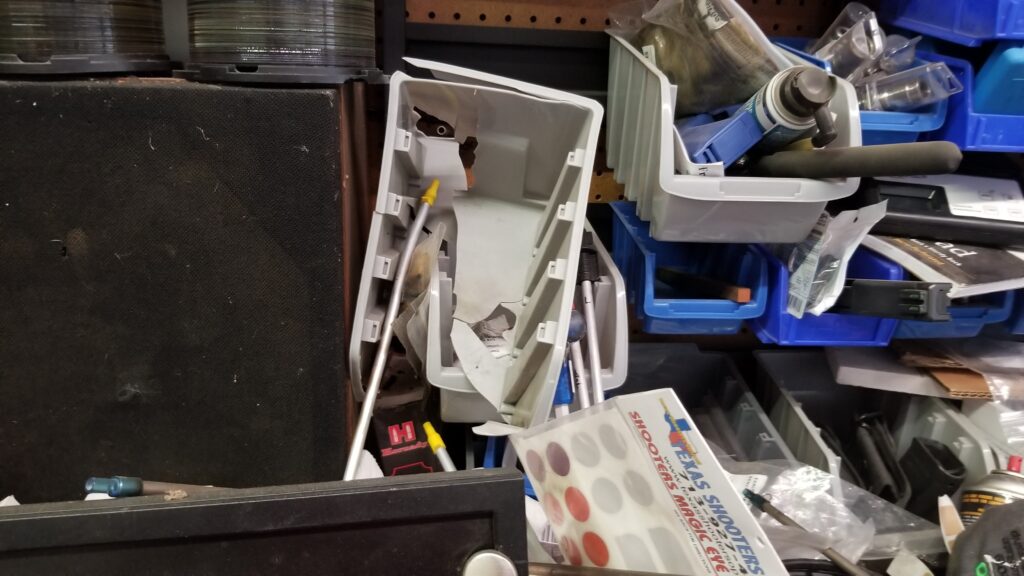
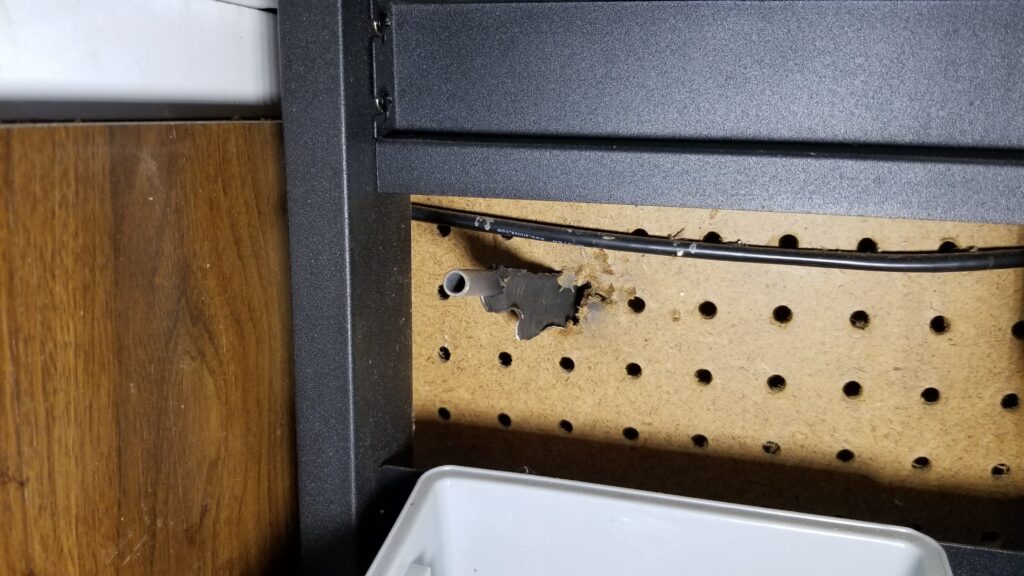
I’ve been using the Dillon RF-100 to fill primer tubes for a while now. Also, I’ve been loading 9mm almost exclusively for a couple of years. Consequently, the trap I set for myself had been dormant for a long time. I was working on some metalworking project that involved using a handheld angle grinder at my bench vise. I had been grinding on and off for an hour or two when something went off, POW! Obviously, I stopped immediately. My first thought was that somehow, sparks from the grinder had set off a cartridge, as unlikely as I considered that to be. As I began looking around and saw where the damage was centered, it dawned on me what had happened.
Before I filled them one at a time with the RF-100, I kept a stock of filled primer tubes in a bin above the workbench, coincidentally directly behind the vise. Sparks had apparently gotten into the one and only tube of larger primers that was in that bin, left from the last batch of 45 Auto I had loaded. When the one primer on the end set off, it set off the rest of the tube.
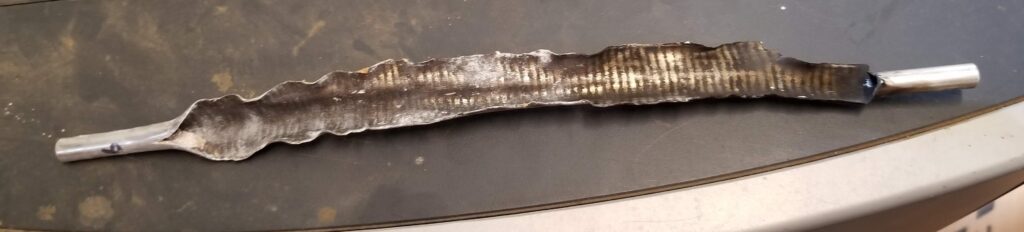
Note the tube still in the bin is bent. All the empty tubes in that bin were bent to some degree and are now aluminum scrap.
Note also the little circle visible in the upper lefthand corner of the bin.
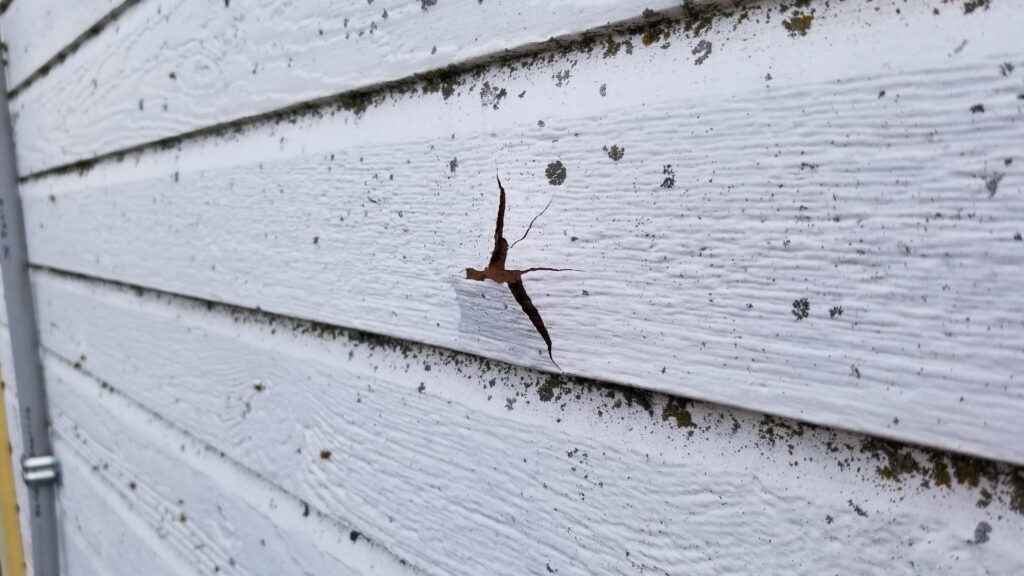
The tube launched through the back of the bin, through the pegboard, the sheetrock, the insulation….
… and tried it’s best to continue outside.
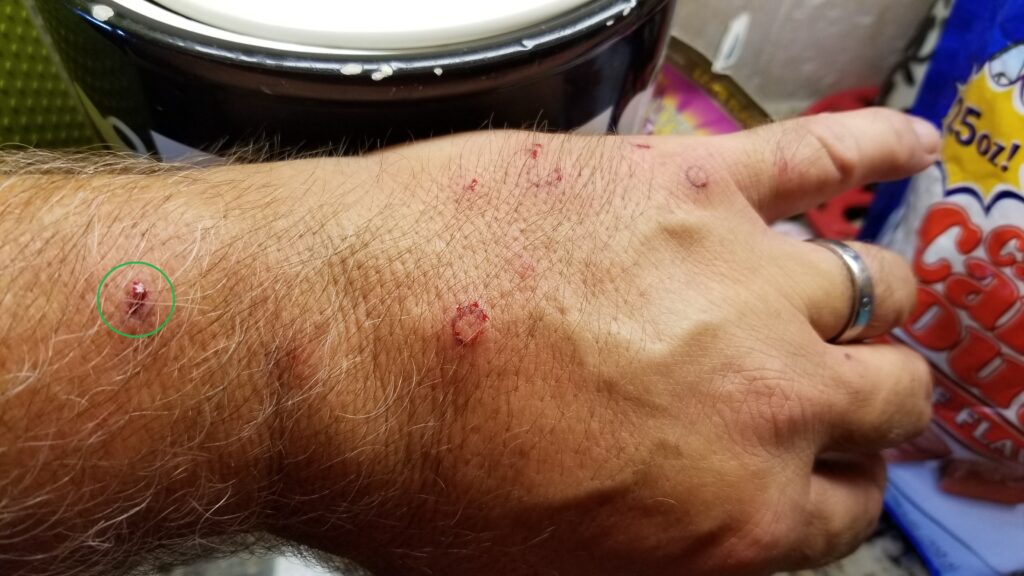
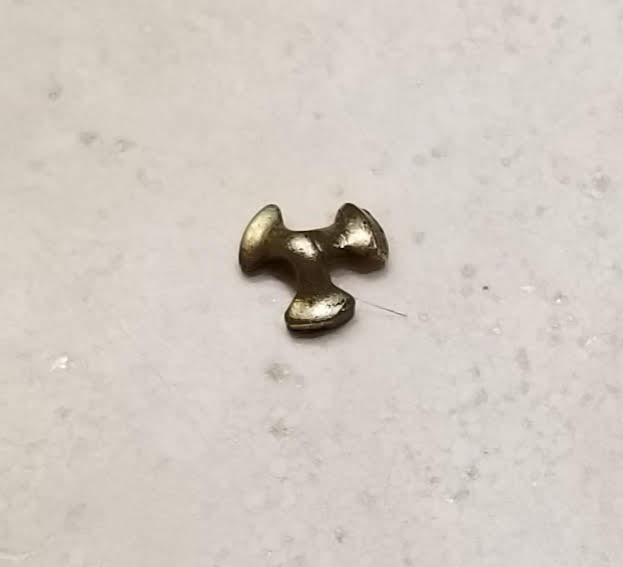
Inside, there were spent primers everywhere, including peppering my arm.
The spot marked in green would turn out to be most interesting a couple days later as the primer anvil that was lodged in there finally revealed itself. It hurt but didn’t really feel like anything was in there at first, but eventually, I saw a glint of brass and worked it out.
Primary lesson reinforced: Turns out primers shouldn’t be stored near sparks or flame. Who’da thunk it?
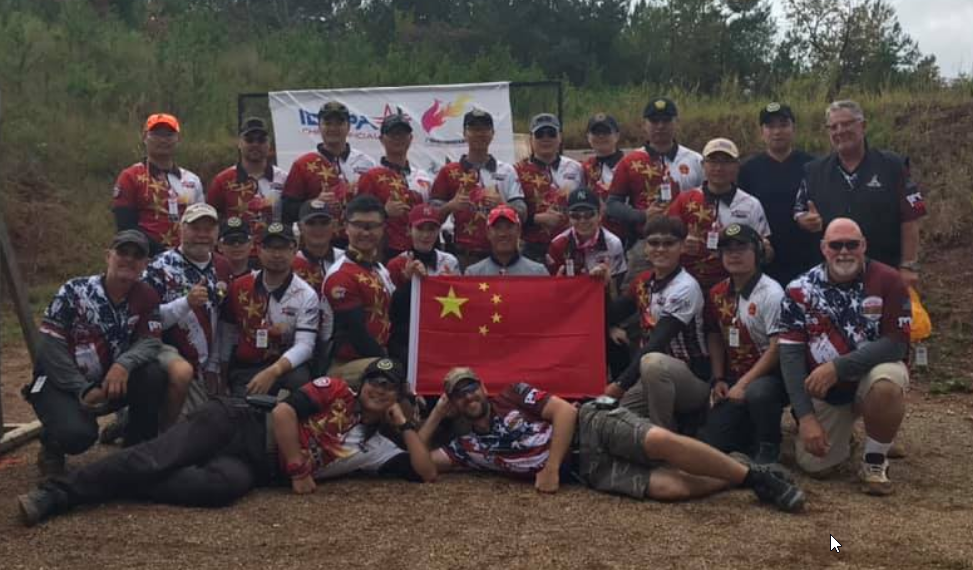
I got to attend and/or work my first IDPA Nationals and it was a special one, World Championship and Nationals combined *and* innaugural PCC Nationals. So, by submitting and having accepted my application to work that match, it was basically a two week long match at the Civilian Marksmanship Program range near Talldega, AL.
For the pistol match, the first day it seemed I could not hit ANYTHING. The morning of the 2nd day, I noticed that the rear sight on my pistol was WAY off to the right. It was loose. I used some improvised tools (a tent stake as a hammer, for example) and set it straight, but it was far too late to place. Since it was two matches, I got to run over 400 shooters during the entire event. I got pretty good at it.
Being as it was the World Championship, there were several teams from various countries. Our stage was sponsored by IDPA China and we got a great picture with the whole team.
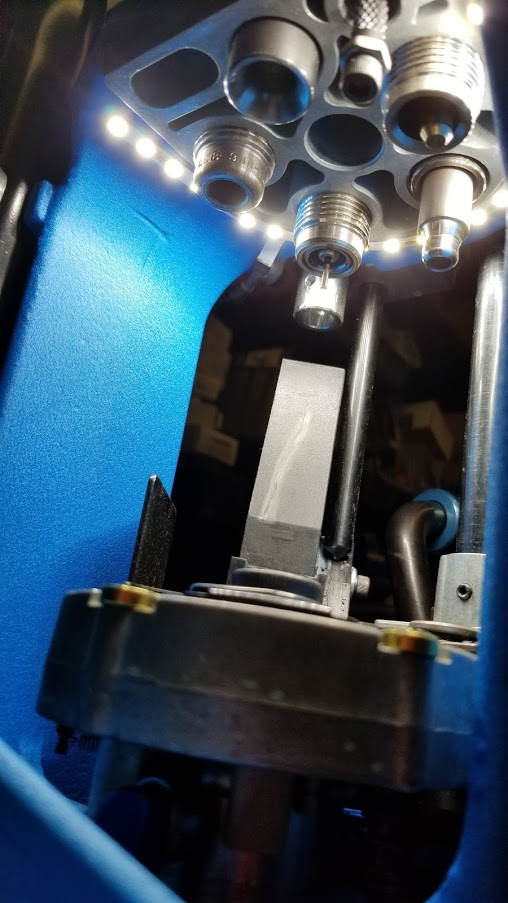
I love my Dillon RL550B. It was my first Dillon press. I bought it from someone, who in turn had bought it used from someone else. Between the (at least) three of us, it has loaded probably several hundred thousand rounds. I had a part break on it and experienced the legendary Dillon customer service for that repair and refurbishment.
I was not *looking* for an upgrade, but a deal on a 650 came to me and I grabbed it.
I don’t care for the primer system. It works flawlessly, but it does not tolerate interruptions in production. It works exceptionally well, but it delivers primers with every stroke of the handle, whether you need a primer just then or not. Same for the case feeder. Sometimes, a case will feed upside down and when it gets to the plate, it jams things up. It generally takes a couple of strokes to clean up the mess. Meanwhile, a couple more unneeded primers have been fed…
All that having been said, I can loaded about 50% faster on the 650 than the 550, basically a couple hundred rounds per hour. A match worth of ammo takes about 30 minutes.
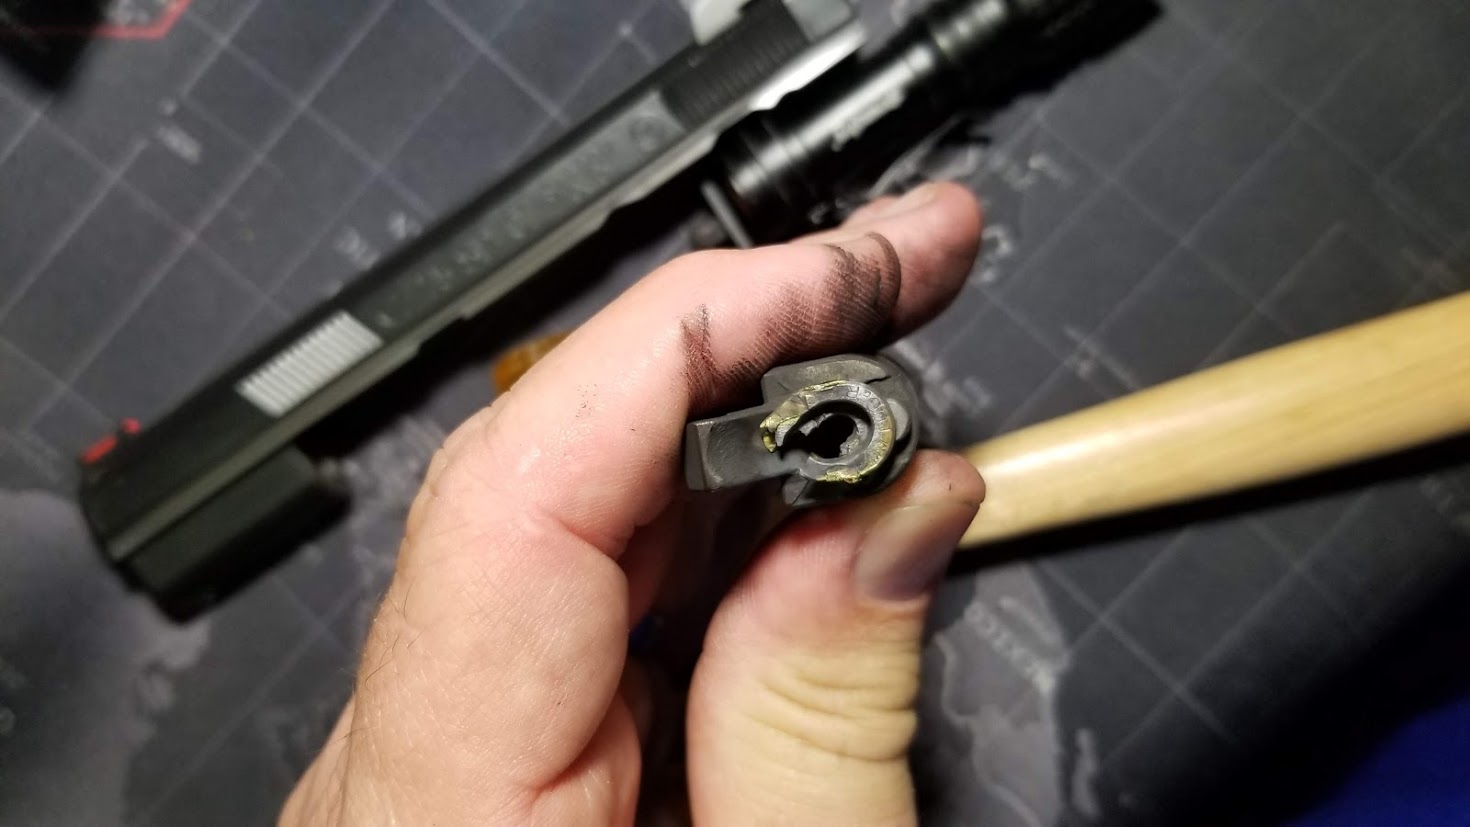
Sometimes, the case jam up can result in a partial or double powder drop. Most of the time, it’s easy to catch, but at least once, I missed it. I had my one and only kaboom.
So, the rule is: If you are going to have a double charge, at least it should be a double light load in an all-steel gun.
Neither me nor the pistol suffered any permanent damage. The event was merely days before Gulf Coast Championship and I was sweating bullets about it until a fellow CZ shooter offered his almost identical pistol for me to use in the match.
Gulf Coast Championship is always a blast and 2020 was no different, although timing-wise, it was kinda the last match most of us got to go to for a long time.
My own experience was unique in a couple of ways. Remember my kaboom and my concerns about my pistol. Turns out, all that worry was misplaced. I should have been worrying about having not practiced PCC, since *that* was what I had signed up to shoot at GCC. It was my 2nd major match shooting PCC (first was Nationals, so there’s that) and my otherwise solid performing PCC had a mechanical failure partway through. It was not my week.
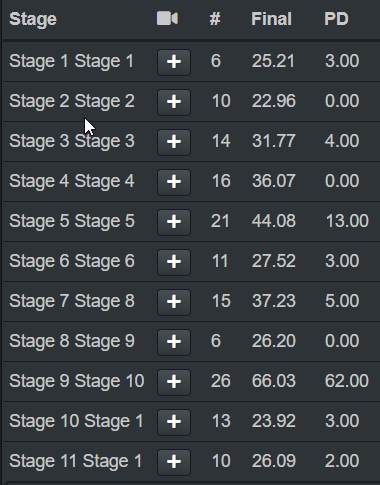
See if you can tell from points down which stage it was…
The issue was that the firing pin retaining pin, a known issue on this firearm, had finally failed. Now. Of course. I was able to borrow a PCC from a fellow Rudy Project Team member to complete the match.
Here’s the funny bit. Even with that, I was 4th in my class and division and without that 62 down, I would have come in 2nd.
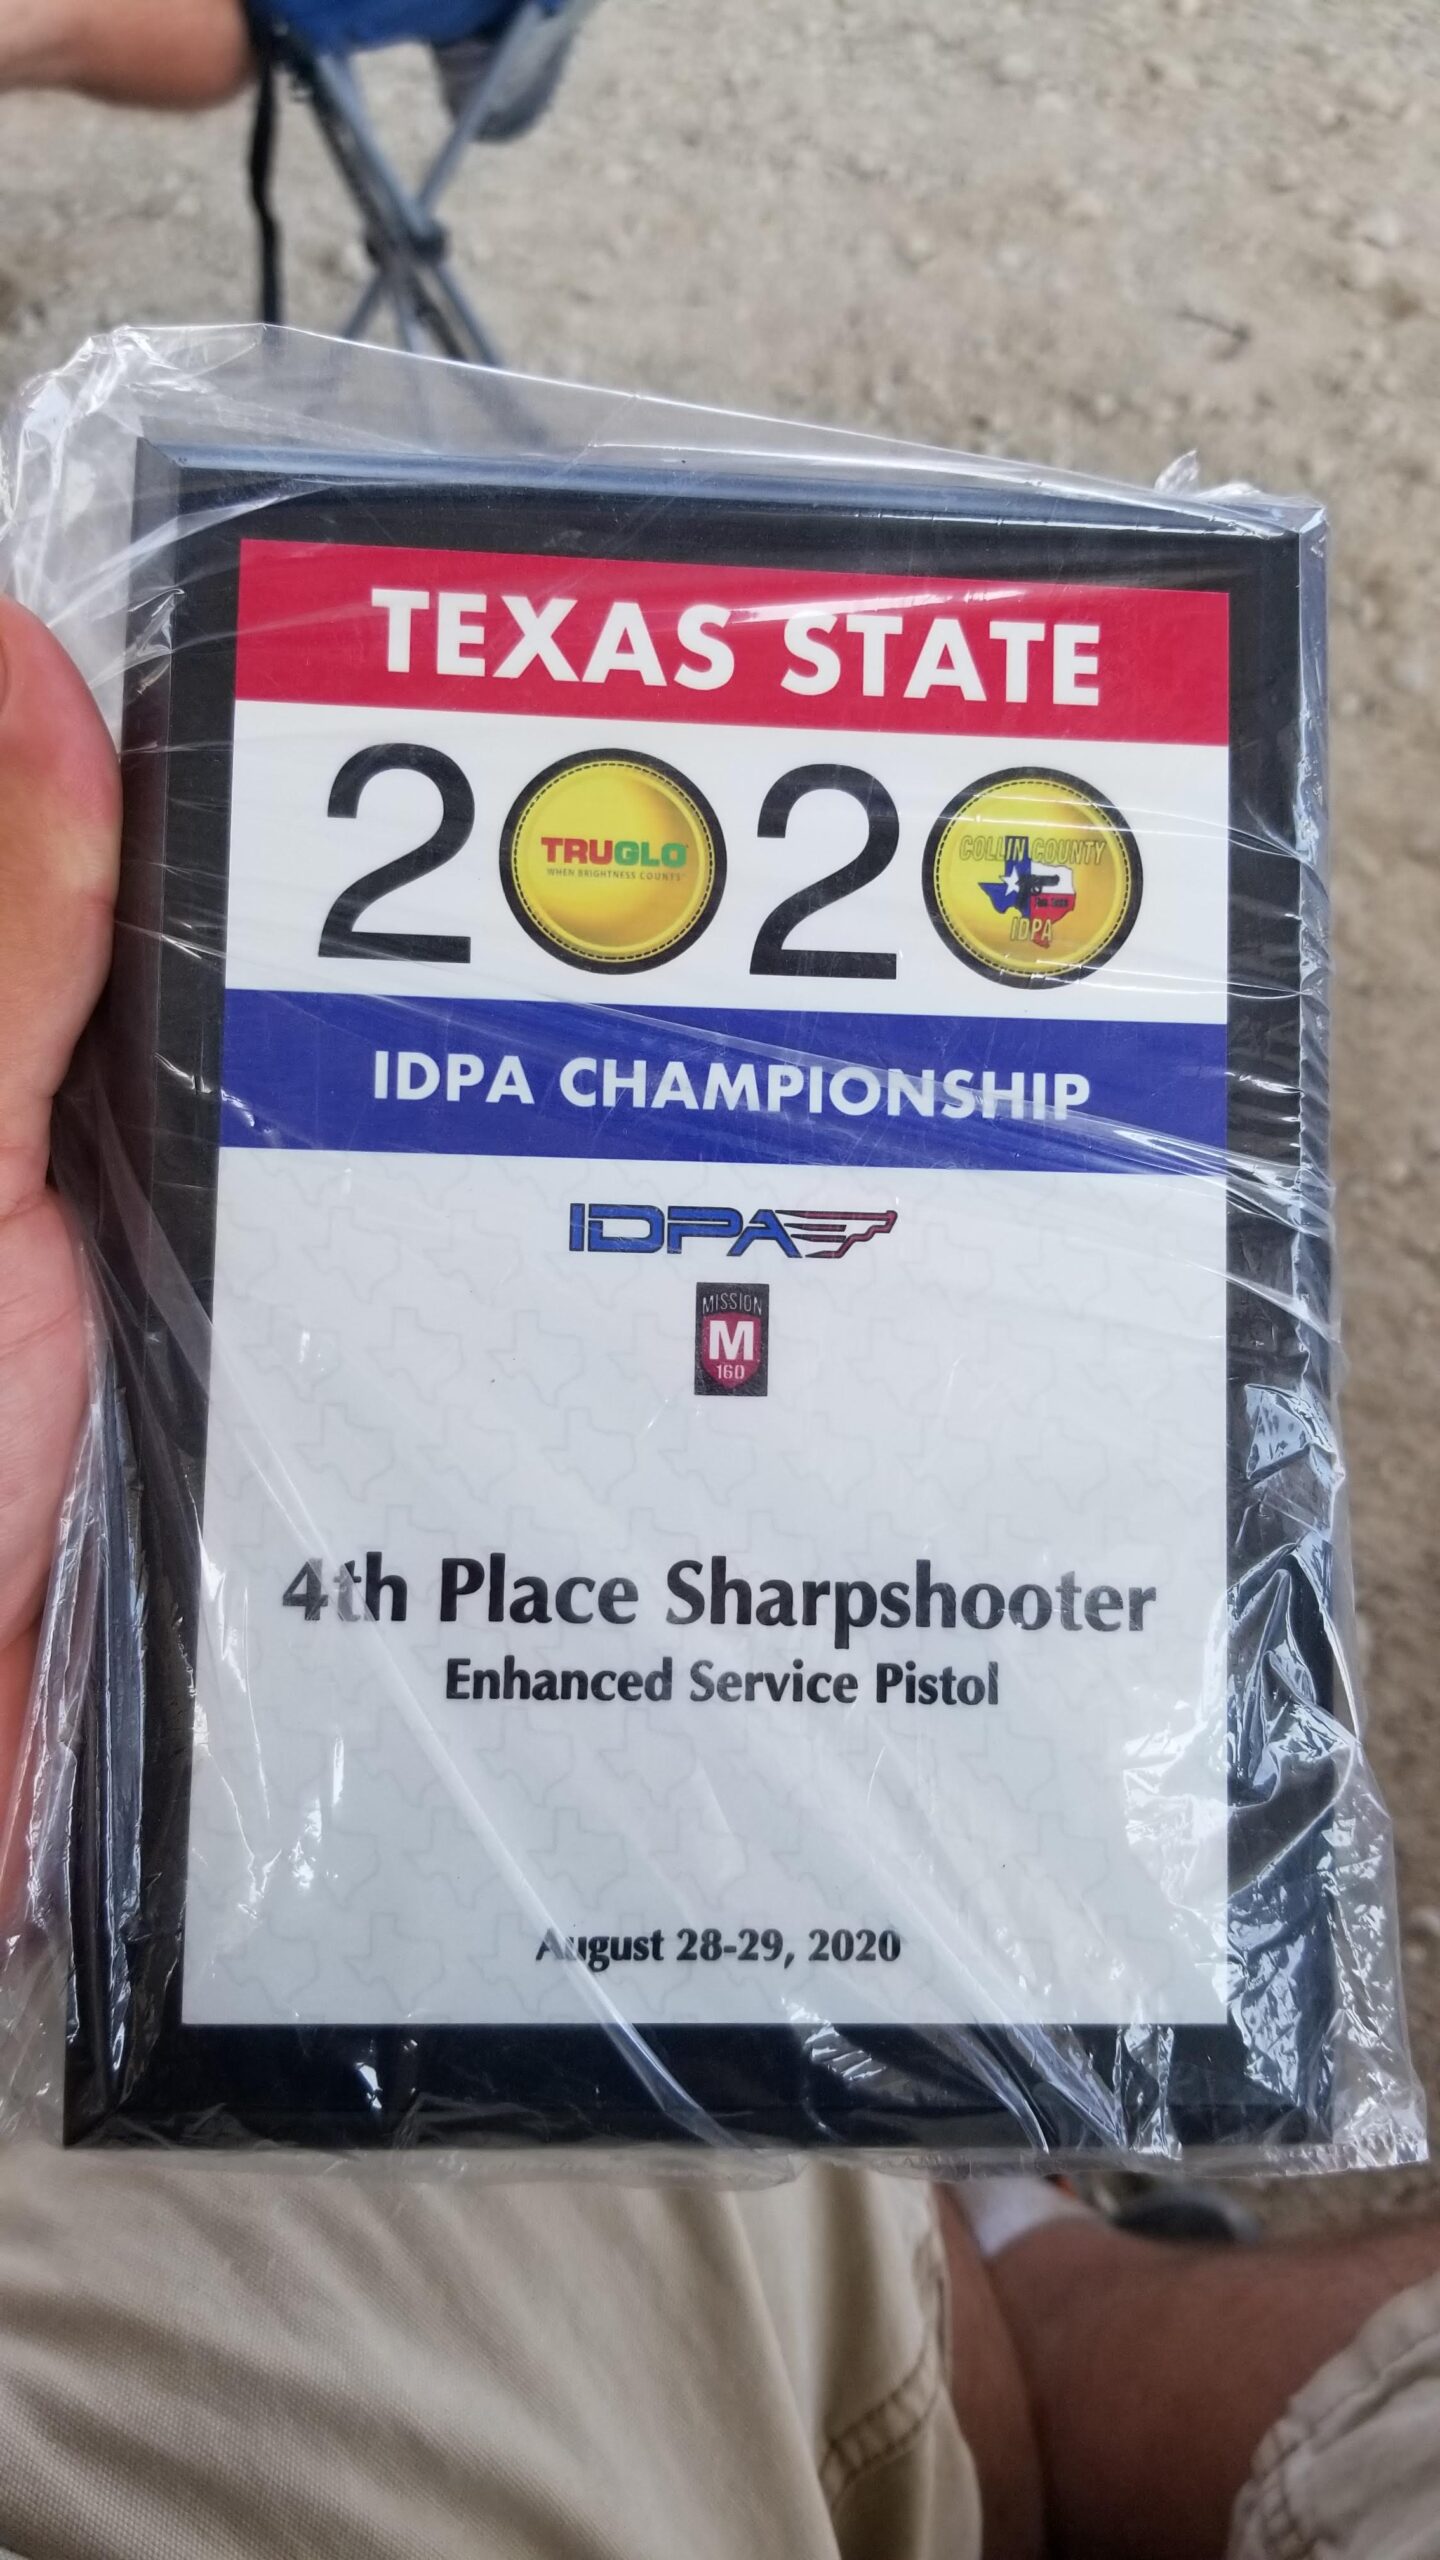
It was about now that COVID-19 really started having a big impact on gatherings, the daily commute, shopping… pretty much everything. From the end of GCC 2020 on March 14, I did an absolute TON of stuff, just almost none of it was shooting related until August 28, where I managed to place 4th ESP Sharpshooter at TRUGLO 2020 Texas State IDPA Championship. Considering the dearth of practice opportunities, I was really pleased with that.
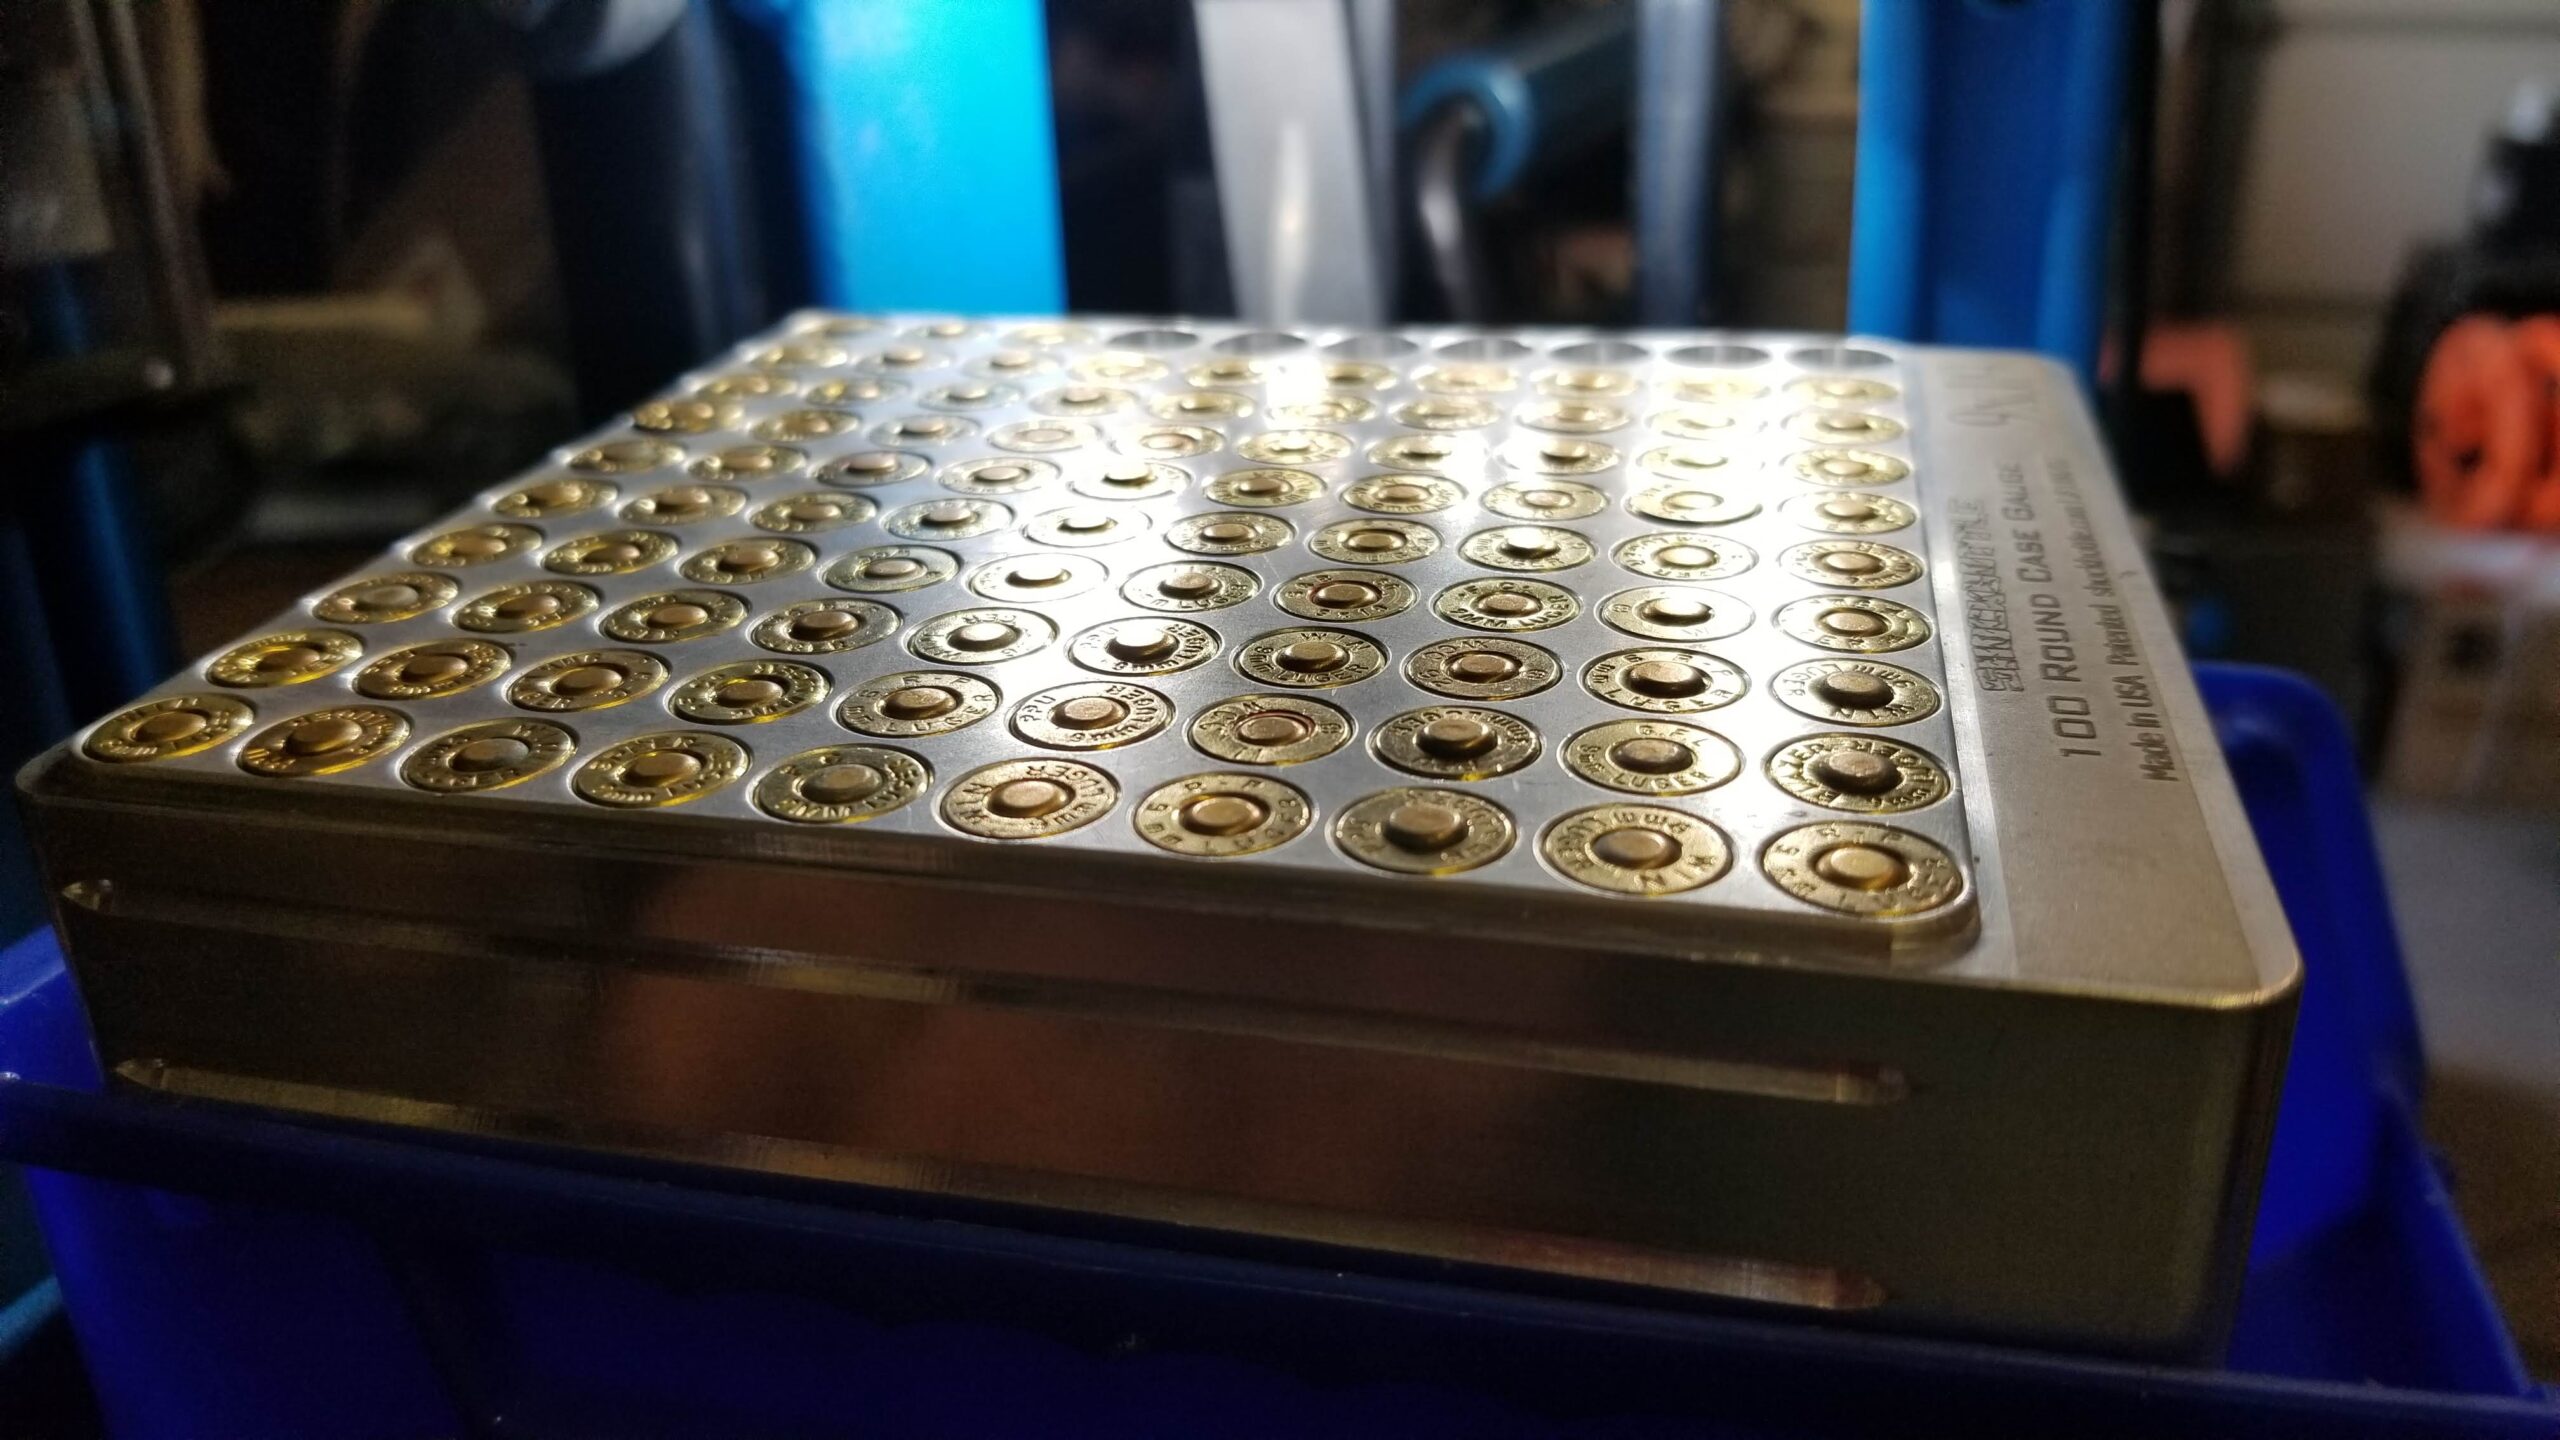
Finding primers is still a challenge for everyone. A friend pointed me to a deal of sorts for some surplus Fiocchi small rifle primers. They were not exactly free, but considering their condition and that it was 12000 to a box, they were reasonable. The seller revealed that they had been stored near a vent or some such and thus had some humidity related damage, but that in their testing, they had not had any failures.
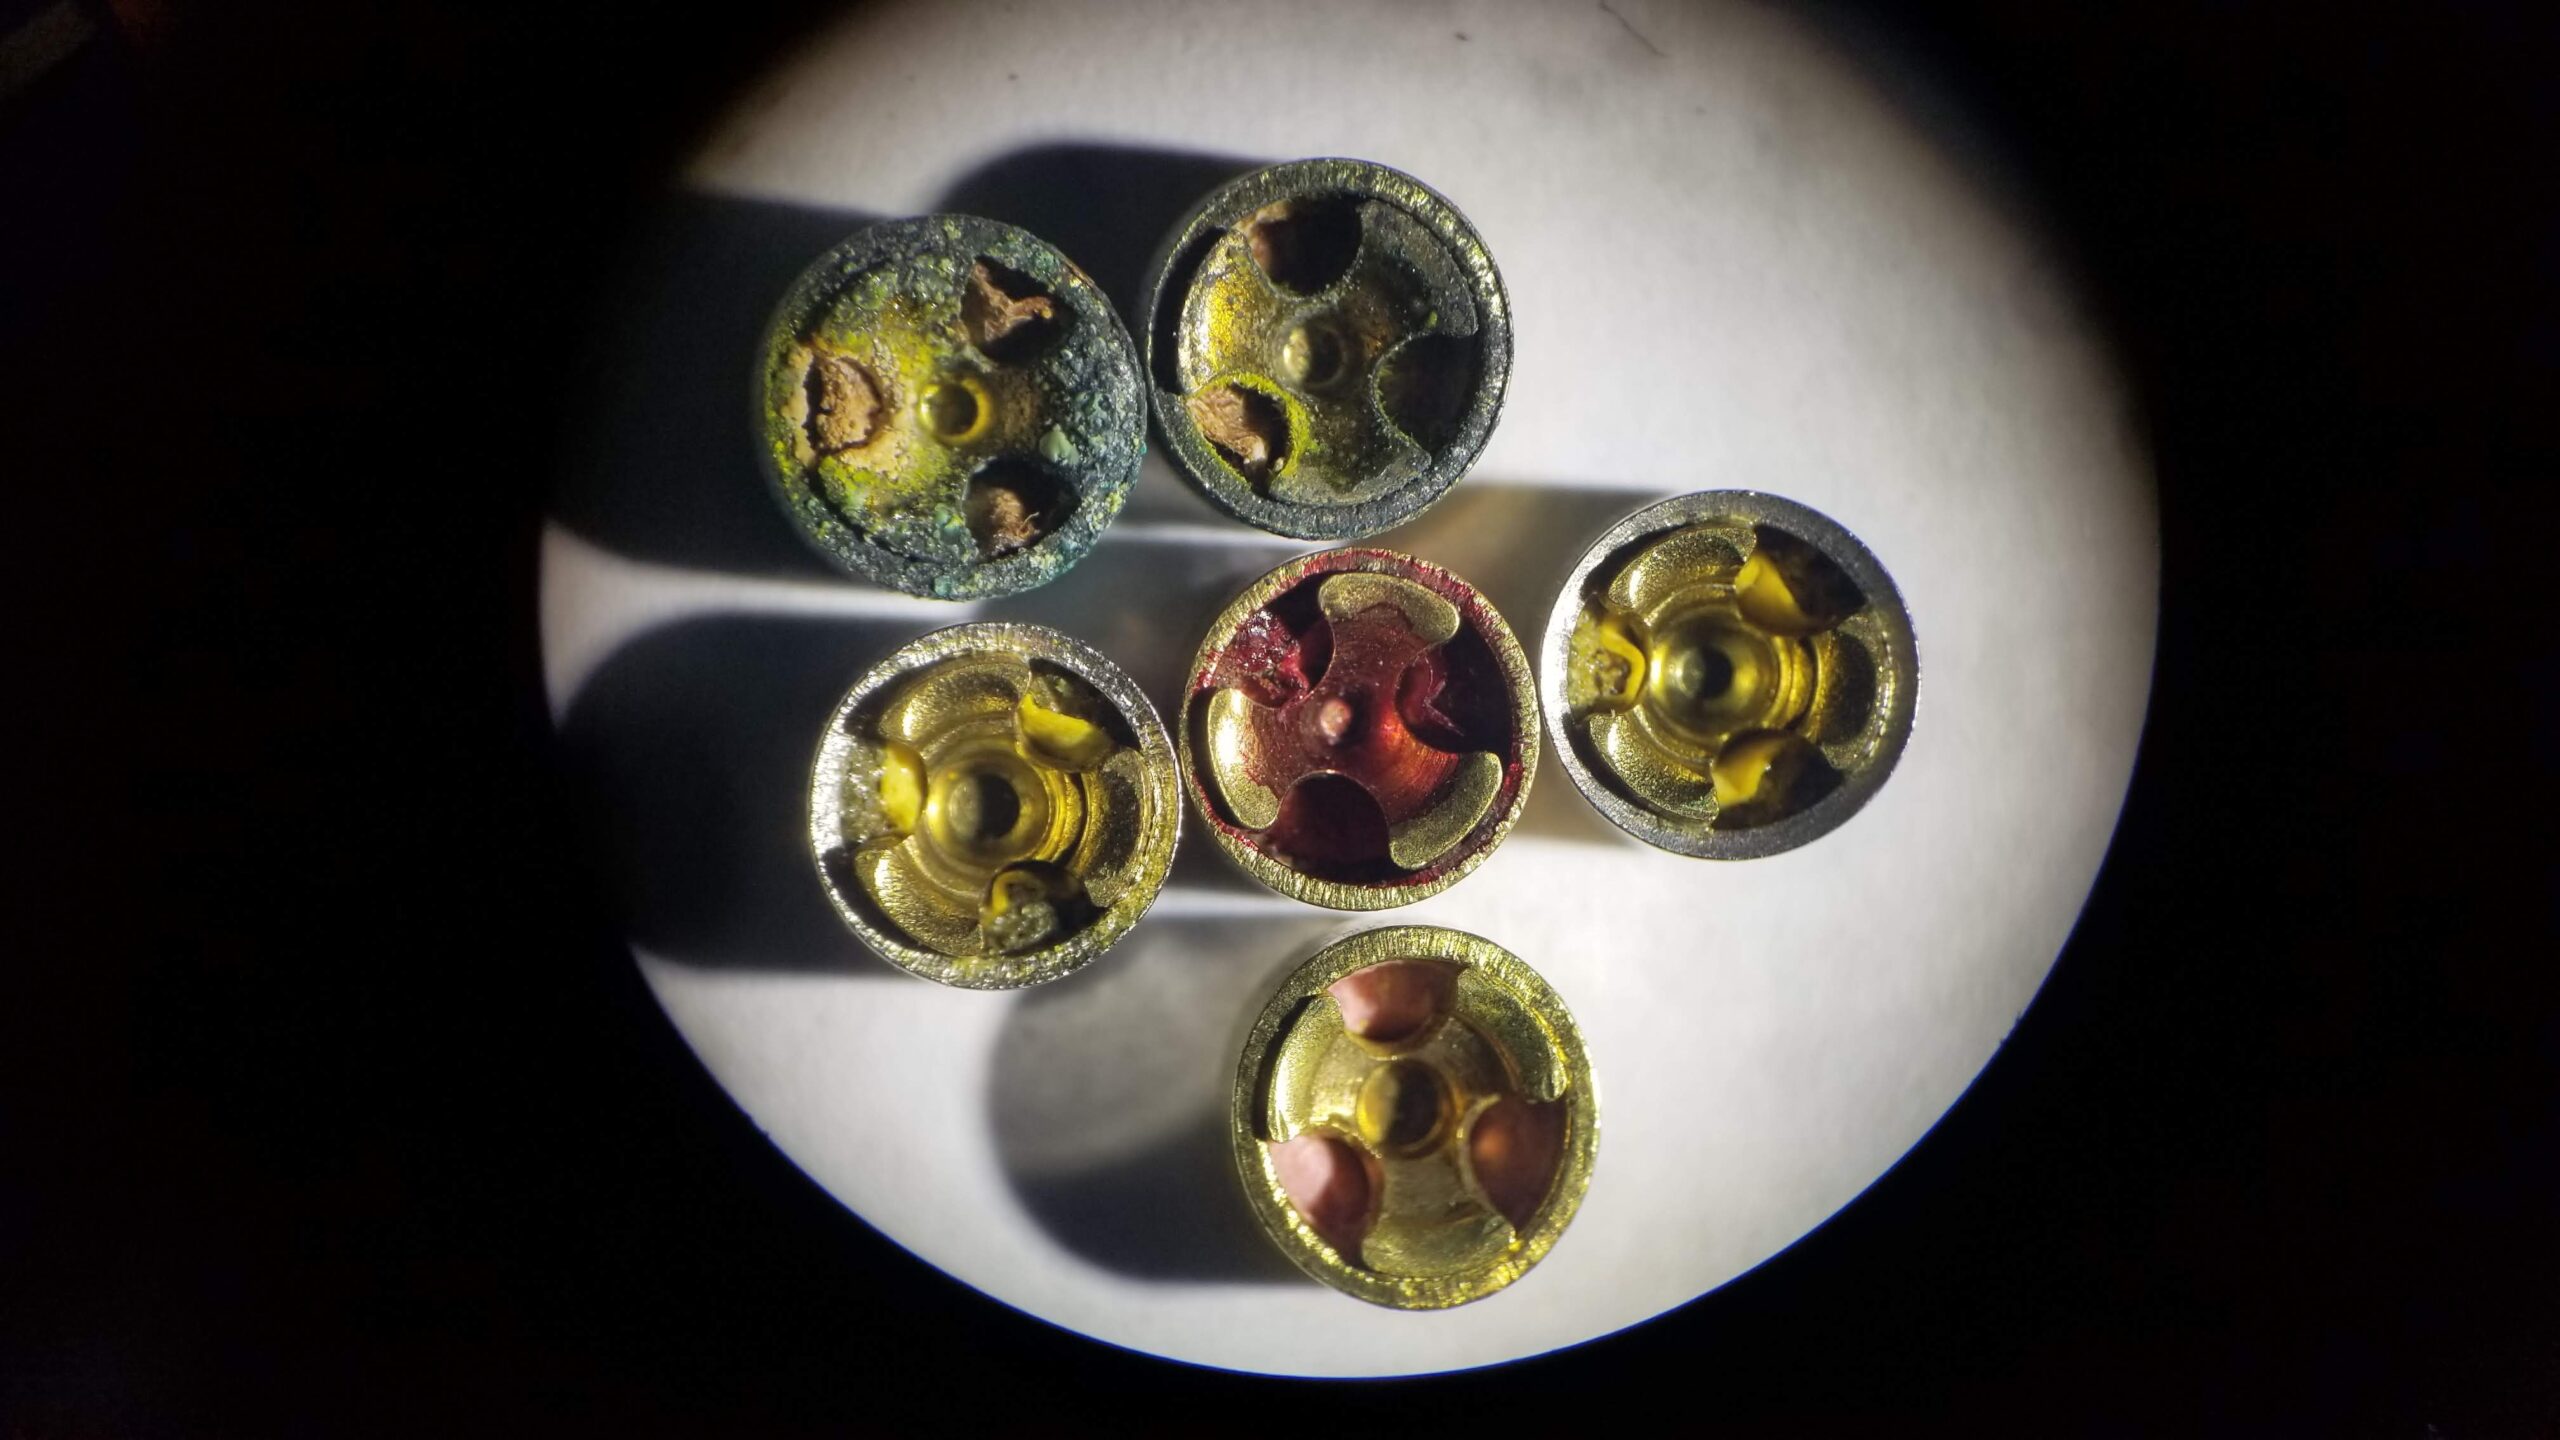
Here is a closeup of these and some other primers.
The top two are the Fiocchi primers. One is an example of a pretty bad one, one pretty clean. The rest of the primers are new primers, a mix of pistol and rifle primers.
My own testing concurs with the seller’s. Regardless of their ugly duckling status, they tend to always fire, so long as they are hit hard enough. They *are* rifle primers, so the thicker cup needs a harder whack. If you have tweaked your trigger, you probably are striking your primers lighter than stock and even stock might be lighter than needed for rifle primers.
There is an issue, though. I sometimes have trouble getting them to seat all the way and *that* can cause them to fire going into battery. No, not good.
Speaking of COVID delays, I was accepted as a member of Dallas Pistol Club in April. I had to cancel my first new member orientation not directly because of COVID, but because I ended up working all that Saturday setting up remote users for my company. A couple more opportunities arose, including one the same Saturday as the TRUGLO match. Finally, October 18, I got to get my gate code and keys!
Also around October or November, we got back to doing limited indoor matches at Texas Gun Experience. In particular, on November 16, I had a match with a DNF. It’s hard to finish with a broken shoulder. I slipped and fell HARD on my left side. Ouch. Ambulance. Xrays. “Comminuted fracture of the humeral head and a fracture of the humeral neck” which basically means that not only was the ball joint broken off, but it was split in half as well. I saw an orthopedic surgeon the following week. The surgeon didn’t even need his own imagery; the ER xrays were good enough for him to say, “we’re replacing that.”
I’m well into the Physical Therapy phase of my recovery. I’m nowhere near 100%, but I think I’ll be able to safely attempt a pistol match in the next 30 days or so.
So, that catches us up, shootin-wise. You’ll have to check out the other blogs, including the new one, to see what *else* I’ve been up to.