After I finally beat the dongles into submission, it took a little while to discover that many of my devices did not seem to be operating, but in reality, they were just not responding to verbal commands via Alexa.
Complicating things is that I was also dealing with some WiFi trauma while settling in the new Ubiquiti gear. I was suffering a lot of disconnections and I could not be 100% sure that the WiFi devices that I was trying to control may not have just been switching on and off like a crazy monkey. Short version on that seems to have been overzealous roaming defaults with only two fairly distant APs, but that is a story for that blog.
Once the WiFi was settled down, if not solved, it was obvious that Alexa could definitely see all the devices. I could change a device name and it would be detected, but I still could not control any devices with verbal commands. There were a couple of responses but by far, the most common was that there was no <device> in my profile. Sometimes, I would get that the device was not responding. What I would never get is a device that was controlled.
The timing for this failure is abysmal. My wife just had knee surgery and in preparation for that, I made sure the lamp in the bedroom where she would be staying (she must avoid the dogs for a while) had a smart bulb in it that she could control verbally, except that verbal control wasn’t happening.
After trying no shortage of useless stuff and random restarts of various services, I was getting to be on the right track and had tried removing the skill from Alexa. In Googling about that, I stumbled across a forum posting where someone suggested removing one file and restarting home assistant. I chose instead to rename that one file, just in case. Well, praise Jack Bauer because it worked. All the Alexa stuff works again!
Well, I had to re-re-rename some things back to normal, basically clean up the messes I made troubleshooting. I’ve had to do that a lot lately.
The file in question is /config/.storage/cloud. My old one was 3 times the size of the new one that the system created automatically to replace the missing one. It had several blocks that seemed to be associated with Google devices (of which I have zero, so far as I know) but generally, it was just a bigger file with more stuff in it. I’m sure there was redundancy or perhaps one scrambled line in there.
Now that I can tell Alexa to turn on the Christmas tree and she does, of freakin’ COURSE the rotating base for the tree would stop passing power through to the lights. It is always something.
My new WiFi is argubly worse than my old WiFi, but I think there is a reason.
I recently completed a pretty major [up|cross]grade of my home LAN. There were two main goals. First is to add some additional wireless VLANs so that I can help isolate my growing network of IoT devices and thus protect them and the rest of my devices from them. Second, and this is admittedly not a super important thing, it would also be nice if I didn’t have to connect to a different SSID between the house and workshop.
As detailed elsewhere, that was a journey of discovery, ending with the eventual replacement of two TP-Link APs and two Cisco switches with new Ubiquiti devices. Between the interopterability and easy of configuration, it was a good, though not particularly cheap, move.
Or so I thought.
A week or so later, it appears that I have a lot of connectivity issues. Once I really noticed it and started looking into it, I think I know what’s happening and at least a good bit of the solution, the full spectrum of which of course involves helping someone at Ubiquiti buy another Bentley.
I put the new APs exactly where the old ones were, but the old ones were perhaps a little more sophisticated, RF-wise. The TP-Link APs had an array of four large antennas and, sadly, physics matters. The UniFi APs look like oversized light switches and simply cannot have the same antenna performance. However, the one in the house seemed to work just fine until I had a compelling reason to move it. I wont go into those details, but it had to move from about the center of the house to one side of the house. As I am typing this post, the UniFi controller reports my WiFi experience as “Good”, rather than excellent, along with everything else here on this, the opposite side of the house from the AP.
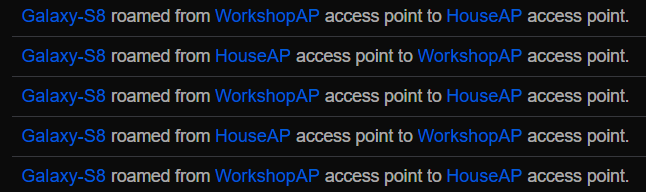
The real issue comes about when, for reasons I have yet to determine, the experience gets enough worse that the connection is lost and the device, most noticeable to me when it is my laptop, sees the other AP, all the way out in the workshop, but with a marginally ok signal, at least compared to the one it just dropped and it roams to that AP. Now that weak signal results in a substantial slowdown and maybe it drops that connection, too. Then it sees the original AP and connects to it again. This vicious cycle continues.
Once I figured out that this seems to be what is happening, I set the workshop AP to lower power. This makes is a less viable alternative to reconnect to and at least stops the toggling. It does not, however, address the actual problem, which is that the new Ubiquiti APs I chose simply don’t have the coverage that the TP-link devices have.
So, I ordered a couple more APs, ceiling mounts this time. I think I can justify a unit in the hallway between the bedrooms and the livingroom and another in the kitchen. If those two provide dense enough coverage in the house, I can deploy the other wall mount in the workshop, to have two out there as well. If needed, however, I can find a place for a third in the house. One has seemed to be enough for the workshop thus far. Everything WiFi out there is within about 20 feet of the AP.
Update: The power setting on the workshop AP has definitely reduced the number of roaming events in the logs. [facepalm] Now they just disconnect instead. [/facepalm]
Full disclosure. I am still not entirely sure exactly which of the myriad steps finally worked or what order of steps I finally accidentally hit, but the Zigbee and Zwave dongles just came up working again. Furthermore, it’s actually been a few days since that happened, so my memory of it is imperfect as well.
The all critical final step, however, is emblazened in my retinas forever. After doing this SEVERAL times already, removing and adding back the USB devices at the virtual machine level in the Synology NAS, with at least some number of minutes/hours/decades delay seems to let something reset enough that the device is not only detected (which it has been all along) but also works.
Of course, the damage I had done troubleshooting needed to be undone. Some devices had lost their names and almost worked. They had reverted to the default names given when the devices are first interviewed, generally some variation of their brand and model number.
Most of these were pretty easy to figure out, either by being relatively unique (at that point, I had deployed only one Third Reality motion sensor) or by what automation was still associated with the device. Curiously, those automations didn’t work until the name of the device was adjusted. For the afore mentioned motion detector, I had set up a fairly sophisticated timer automation as suggested by Smart Home Junkie and parts of the automation needed to adjusted with new device names as well.
I have all but one or two of those names resolved now, mostly because I just haven’t walked to the doors or plugs in question and verified which was which. Soon.
This power event did inspire me to look into moving Home Assistant over to dedicated hardware. Whether that is really justified depends on whether the advantages of dedicated hardware outweigh the advantages of hosting it as a VM and that really comes down to how it handles USB hardware under unusual conditions like an unplanned power loss.
Raspberry Pi hardware is still very hard to obtain, but I have an Celeron N4100 based fanless PC that is more than adequate to the task. I had a false start (not all the installation methods install identical versions), but did manage to get a suitable Home Assistant image on it and was able to restore a backup of my current configuration. For personal reasons beyond merely being the week of Christmas, I don’t want to tear into the actual move of all these devices to that hardware just this moment. After the holidays, I will revisit it.
You load 16 ports, what do you get? Another day older and deeper in debt
The 16 port PoE switch arrived today. With the exception of one adoption hiccup, it works really well and finally, all the VLANs are doing (mostly) what they are supposed to do. Now that the layer two works, I do still need to write firewall rules for them.
I configured DHCP to statically set the IP I wanted to use, so the switch came up where I wanted it to and I clicked Adopt and away it went. About 30 minutes later, it was obvious that it wasn’t going to complete that process, so I did a factory reset and had the controller forget it and this time, it completed the adoption process without further drama.
The only configuration I really needed was to make that one port where Starlink pops out on this end into a native VLAN 50. All the other ports would be just trunk ports. I did label a few ports.
I moved four cables over, the link to the workshop, the Starlink/WAN to the router, the LAN to the router and the laptop I was working from. The router had noted the loss of ping from Starlink and has switched to OneSource, so I had to jump in and force it to switch back, but otherwise everything worked perfectly and I moved the rest of the cables over and powered down the Cisco SG200.
I almost forget to test connecting my phone to the IoT WiFi, but I did and it worked, as expected. This is, afterall, one of the reasons I began this whole exercise. Victory dance!
I think the only thing left now is really more of an irritation than an issue.
When I moved the wiring over, I moved most of them over jack for jack, so port 4 happened to have the NAS connected to it and the controller (presumably) discovered it and helpfully labeled it. I decided to move it to port 10 to free up a PoE port, but it apparently is finished discovering and from what I can find thus far, it does not appear to be an end user editable field. That seems very unlikely but, so far, that is what I see so I am stuck with an empty port labeled with something that has been moved to another port which remains unlabeled.
On the heels of solving one problem comes another.
We had a scary storm nearby a few days ago.
This is just a few miles north of us and it is just a tiny bit of the storm damage. It took power out for our neighborhood, though only for about two hours. That was long enough for the little CyberPower UPS feeding my network stuff to run down. It was also the first time I have had something hooked up back there that was apparently sensitive to losing power, namely my Home Assistant VM hosted on a Synology NAS.
Before I get into the rest of this story, I’ll say that my UPS does have a USB port, but it is not specifically listed on Synology’s compatibility page. Still, I will secure the proper cable and give it a try. Doing an orderly shutdown of the NAS might have avoided this whole thing. Or not; I suppose that depends on what it takes to finally fix it.
After we got power back, the Home Assistant VM would not finish booting up.
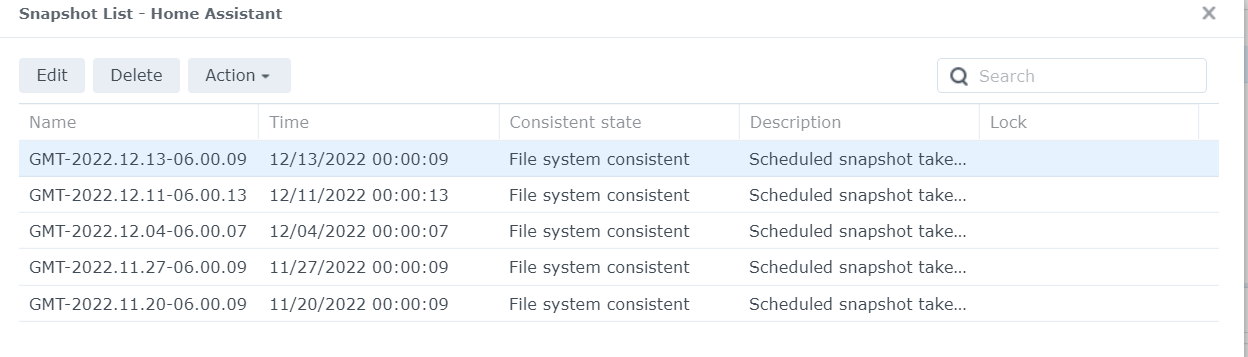
Note that it had been waiting for nearly 6 minutes for whatever it was holding up for. Deep digging seemed to indicate that a database file for something may have gotten corrupted, meta.db. About the time I was figuring this out, I also remembered that I have the Synology doing nightly snapshot backups of this VM!
Though just this moment I don’t remember why, I elected to restore the snapshot from Dec 11. I have also since then locked that snapshot so that it won’t be rolled out. I may need it again.
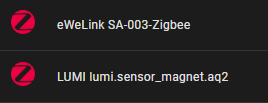
That process at least got Home Assistant booted up and usable, though it took me a while realize that the Zigbee controller was not up. Zwave was up and working, which was a relief after the previous debacle involving it. I needn’t have worried, though. The attempts to restore Zigbee operation would soon kill ZWave, too.
The details of both seem to indicate that the software can’t find the hardware. Almost surprisingly, however, the hardware is there.
The kernel sees them. So, why can’t Home Assistant?
My first concern is Zigbee because I have more devices on Zigbee and they include the lights in the back yard, used frequently for letting the doggies out. The oldest of these doggies has enough trouble finding the door in the daytime.
For experimental purposes, I also tried another snapshot option wherein you can configure a new VM from one of these snapshot backups. Interestingly, it generates a new bogus MAC address, so DHCP gives the new instance a new IP address. That was slightly unhandy, but easy to fix. The oldest December snapshot, from the 4th, behaved exactly the same, which leads me to believe that this is probably not a filesystem issue, so I have put back the December 11 snapshot and have been working with it.
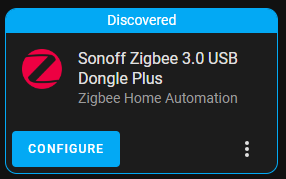
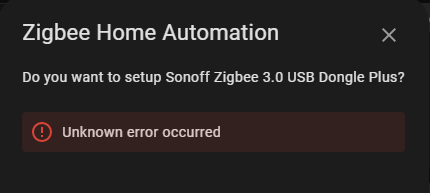
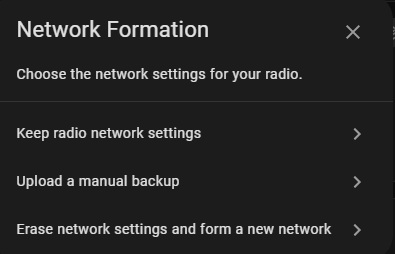
I tried something kind of radical and deleted the Zigbee Home Automation (ZHA) integration. Home Assistant discovers the dongle like a newly installed piece of hardware:
Unfortunately, it returns an unknown error upon attempting to configure it.
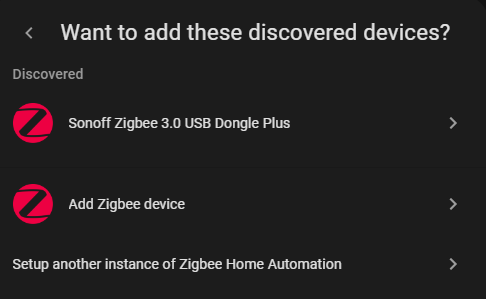
If I instead choose to Add Integration and search for Zigbee, I get these options:
The first option is the same as trying to configure the new hardware. The second option complains that Zigbee integration is not yet set up, but gives an option to proceed to set it up:
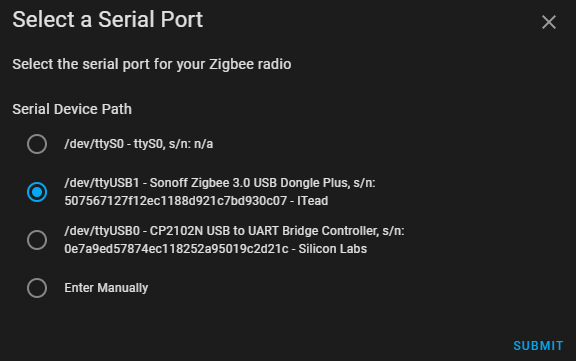
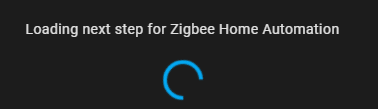
It proceeded to look very normal, like it was going to work:
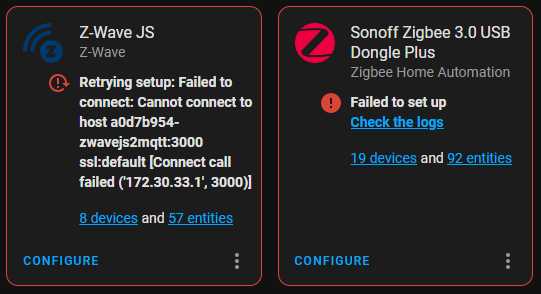
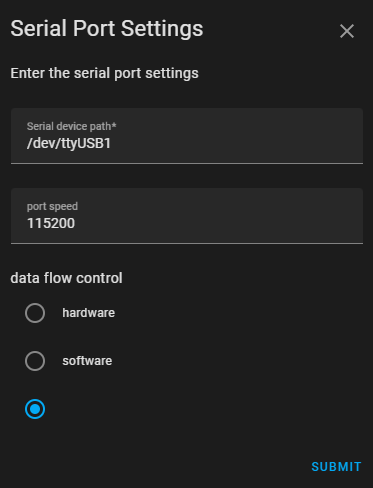
Then, it ground to a halt.
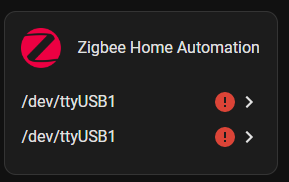
There is something new here, though. It looks like it has the same port in there twice, neither working.
If I click on either of those, I get the same ‘failed to set up/check logs’ message as always, so insanity.
To break the chain, I have ordered Sonoff’s *other* Zigbee device, based on the Silicon Labs chipset. It would seem they had cause to add to the Texas Instruments architecture, whether it was to help assure a diverse supply chain or in pursuit (or retreat) of some features. I hope to know soon.
Act I: Somewhere deep in my first catchup post in this blog, I related that I had acquired a couple of nice TPLink wireless routers with the intent to mesh them together so that the house and workshop would be on the same SSID, only to discover that this particular router apparently cannot be a mesh client in that situation. Further, none of the mesh clients in that product line support ethernet backhaul, which is pretty much required for this specific situation.
Act II: Enter home automation and a sudden propagation of WiFi IoT devices. I am not in any real danger of running out of IPs in my main LAN. It would also be trivial to just expand it if I were; it is all RFC1918 address space, with the exception of dealing with the work VPN and the RFC1918 subnets routed there. However, best practices would have the IoT stuff separated from the rest of the network in case they get somehow compromised on the internet and many of the home automation devices need no internet access at all.
With these two related goals in mind, WiFi roaming and multiple WiFi networks, I shopped around and decided that a couple of Ubiquiti APs would serve this need. Between Ubiquiti being affected by chip shortages like everyone else and a ceiling mount not being my first choice for various reasons, I got two in-wall APs as the best compromise that was also not too expensive.
While they were enroute, I knew that I would need the controller console software running somewhere. Ubiquiti marketing really makes it sound like one of their hardware hosts is the only option, one of the Dream Machine or Cloud Key devices, but they have downloadable software that can run on a variety of OS platforms. You don’t really need the software except for initial setup unless you want to track statistics, so it can be run as needed on, for example, a Windows PC.
Another option is to run it as a Docker container in your NAS.
At one time, not that many years ago, I was an anti-VM snob. I was a hardware purist. I have pretty much gotten over that. There is almost no computer that is busy enough to justify doing only one task, especially one server task. Even modest hardware spends most of it’s time waiting for something to do. My Synology DS220+ is arguably pretty modest hardware and I have it recording six IP cameras, hosting my home automation leviathan and now its also the controller for my small collection of Ubiquiti networking components. Oh yeah, it’s still a NAS, too, backing up two computers. And it’s barely clicking over most of the time.
I digress.
There was really only one issue I had bringing them up on this controller. The APs need DHCP option 43 in order to find this controller and that took a bit of research, both in how to format the info and how to implement that in pfSense. It’s not difficult, but it did take some Googling to find the details.
The ’01:04′ tells the AP that the following info is the controller IP, then the next 4 octets are just the IP of the controller in hexadecimal format, 172.29.0.250 in this case.
The related DHCP issue wasn’t super critical, but I wanted to assign static IPs for the APs. I neglected to set the static mapping before I plugged them in, so between the option 43 stuff and changing IPs, I had to have the controller ‘forget’ them, then factory reset them a couple of times to get things settled in.
Interestingly, I had not noticed until I pasted this image that the WorkshopAP, currently in the same room with the HouseAP while we wait for a PoE switch to arrive for deployment in the workshop, for some reason connected via WiFi instead of the ethernet by which it is powered. I will look into that, but I don’t expect that to be a long term issue; that AP will be elsewhere soon.
Meanwhile, I have created my VLANs, subnets and WiFi networks for the redesign. At the time I wrote that sentence, I needed only to update the VLAN configuration in the switch for everything to get talkin’. Little did I know…
As mentioned in the Starlink saga, VLANs are not a proprietary thing, but as I discovered, not all engineering teams approach them the same way or to the same degree. To recap that experience, the TPLink switches would let me segment ports within a switch, essentially dividing it up into smaller switches, but they did not pass that VLAN tagging information on, so no connected switch was aware of any of those VLANs. I had a somewhat more sophisticated Cisco switch on hand, one that as a bonus also provided PoE for my cameras, so I found it a playmate to put in the workshop and I was able to do the VLAN task I needed in order to backhaul Starlink from the workshop to the house while keeping it isolated from the general LAN.
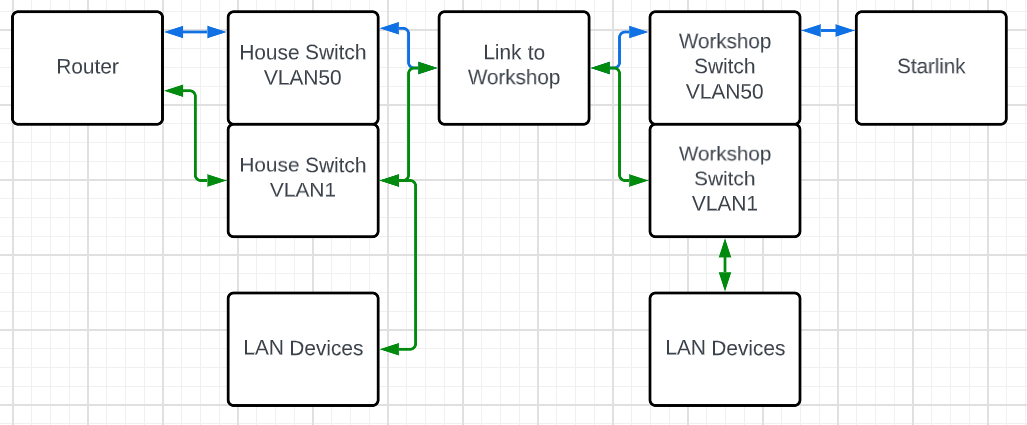
In this diagram, the blue lines are VLAN50, the Starlink backhaul and the green lines are VLAN1, the main LAN. The switches are able to trunk both VLANs over a connection, so whether it was a piece of wire or a couple of wireless devices, the VLAN tagging was preserved.
With the new APs, the task is similar. I want to be able to run multiple isolated WiFi networks, so it would seem to be the same task, but I could not wrench the Cisco SG200 to do the same thing between ports on the same switch after days of trying. On the other hand, I also learned that one weird trick about VLANs and pfSense on the Netgate 1100 appliance.
The path has not been a smooth one, either. During the last several days, I have lost access to the switch multiple times and to the router once. With the switch, sometimes a power cycle was in order, sometimes just moving to a port I had not accidentally lobotomized. For the router, I was able to connect to it’s serial port and restore a previously saved working configuration.
One important and telling troubleshooting step was to monitor DHCP requests with Wireshark. In that process, I could definitely see the discover messages from the AP hitting the switch port it was connected to, but they were not coming back out the switch port to the router. This largely cemented the issue as being the switch not really trunking VLANs as expected.
The solution, as is often the case, has turned out to not be free. I knew I would need a PoE switch switch for the AP in the workshop and since (I guess?) I am kinda slowly moving to the Ubiquiti ecosystem, I ordered an 8 port switch to put out there. I started doing all this VLAN stuff while it was enroute. Somewhere along the way I wondered, since all the UniFi YouTube videos depict this as a largely click and go process, if the new switch would handle it as expected.
Yes. Yes, it does.
When the switch arrived, I first did all the adoption stuff and got it stable. Leaving it with all ports set to the “All” port profile, which is the default and expected to carry all VLANs, I plugged the USW-Lite-8-PoE switch in line between my Cisco switch and the LAN port on the pfSense router, with one of the APs also on the Ubiquiti switch. The VLAN 1 WiFi came up immediately, but then, it had been working all along. I found one thing (the weird VLAN tagging thing for the internal switch in the Netgate 1100 appliance mentioned above) was not quite right due to all the desperate experimentation I had been doing, but once that was corrected, I was able to connect to the IoT WiFi with my phone and get an IP address. It was glorious. I may have peed a little.
I removed the Ubiquiti switch and put the AP back on the Cisco, just to verify that it would fail again, that I had not just finally gotten all the configurations correct, and it definitely stopped working. So, lesson learned: for all it’s other strengths, the SG200-26P just doesn’t handle port to port VLAN trunking, at least not as the AP needs it to deploy multiple WiFi networks.
I then ordered a USW-Lite-16-PoE to replace the SG200-26P. It should be here in a couple of days.
Meanwhile, I configured a port on the USW-Lite-8-PoE for untagged VLAN50 and moved it out to the workshop. It plugged in and Starlink came up working perfectly. The Cisco again handles this sort of VLAN over a trunk just fine, and it doesn’t care that it’s partner switch is not a Cisco switch.
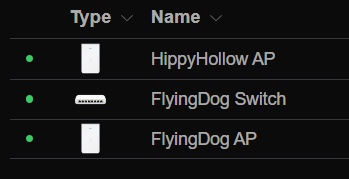
Importantly, the AP out there came up on the main VLAN and I can roam on that same WiFi network between the house and workshop; I no longer have to swap between HippyHollow and FlyingDog.
For nostalgic reasons, I will miss FlyingDog. It was a specifically chosen name for the network. I know! I will rename the AP!! Actually, I will rename both APs to what their networks used to be called. I are silly.
Not surprisingly, though, the IoT WiFi doesn’t work from out there, further evidence that the Cisco switch just isn’t passing those VLANs to the router. I am reasonably confident that when the USW-Lite-16-PoE is in place, the various alternate WiFi networks will work from everywhere.
Of course, then I have to start moving all the IoT devices to that network…
A few unrelated projects has postponed tackling the plumbing part of putting the other two water meters in service. Meanwhile, I have been tweaking the behaviors and such for a couple other bits.
The heatlamp for the water system has turned itself on every day. It was indeed chilly for several days, so it wasn’t inconceivable that maybe it reached my low temperature trigger of 36F in the garage, but a couple of days over 50 that still had the light on every morning made me start actually checking.
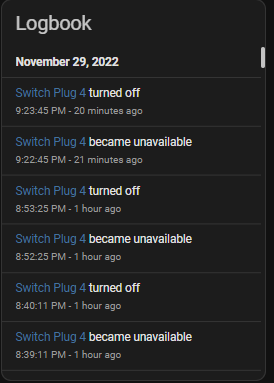
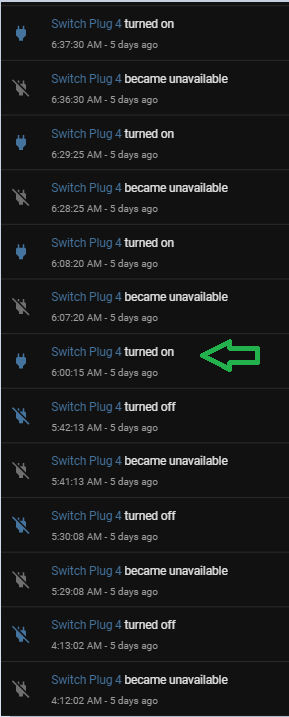
I used one of the Emporia switches (cloud controlled; none of my Zigbee switches monitor power and that is a whole ‘nother conversation) so that I could monitor the power consumption of the outlet and thus detect a burned out bulb. The log showed some curious stuff though. This thing loses contact all the time.
If you look carefully, you can see the pattern. It becomes unavailable, then exactly one minute later, it comes back, appearing to change state, but I think it just renews it’s current state. That goes on as far back as you care to scroll.
However, at 6:00, something turns the switch on, then this same pattern just keeps repeating with the new status.
I checked the automation on the water temperature sensor and the outside temperature sensor, even though I had not automation for *this* switch for outside temp.
Finally, I found it. In the Emporia app on my phone, there was a schedule to turn the switch on at 6AM every day. I had originally deployed this plug out in the workshop for the horse trough and I wanted to ensure it was not accidentally turned off and left off. I disabled the scheduled.
The light was on the next morning.
I deleted the schedule and it finally stopped. 🙂
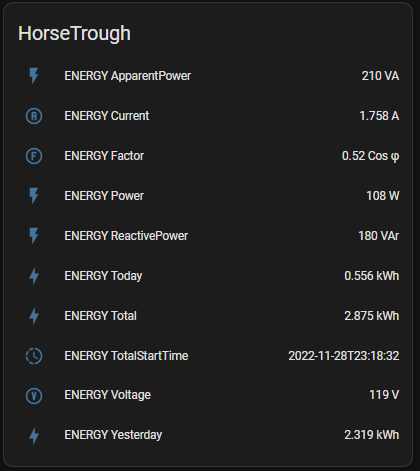
In related news, I have two CloudFree P2 plugs. These are plugs preconfigured with Tasmota and it turns out they have very extensive power monitoring capabilities and no cloud dependency. I have removed the other Emporia plug that (for reasons I don’t recall) was also deployed for the horse trough and put a CloudFree P2 in it’s place.
As you can see, it gathers a lot of power statistics. Currently, there is a recirculating pump that is running basically all the time. It is important, but not particularly critical. However, I am about to redeploy the deicing heater and if it goes out, particularly during freezing conditions, I need to know about it. The automation I have in place currently will notify me if it draws less that 10 watts for more than 10 minutes which would currently only tell me if something disconnected the pump, which one of the horses used to do on occasion. The pump draws 108W pretty much continuously. The heater pulls 1200-ish watts when heating and about about 1/2W when idle, presumably to work it’s thermostat. I presume I could script something to separate a pump failure from a heater failure, even though they run on the same outlet. I have more than once thought about separating them. At the very least, I could run them on two switch plugs.
The bad news is that I only ordered two of the CloudFree P2 units and one of them turned out to be DOA. I have contacted CloudFree about it (no reply, but it has not even been 24 hours yet) but I also ordered several more. I will have other things to control and/or monitor and especially at $10 apiece (Black Friday 2022 pricing apparently; back to $13 as I write this, but still a great price), they are a great little bit of kit.
I had some difficulties excluding and including my old Jasco ZWave switches to my new controller, but all appears forgiven now. I pulled the air gap power plug thingy on them and that seemed to properly reset them enough for them to be happy.
I dug into the wiring for a couple of 3 way switches in the kitchen. They are wired in the 2nd least favorite way for conversion to the Jasco switches I have had on hand for several years, but with some minor rewiring, I can make it work. I will post that separately one day. The one I really want to change out is a set of lights in our sunroom that is tecnically a 4 way, with one switch in the living room that is almost never touched, but is sure to complicate things, wiring-wise. I really want to deploy my Zooz scene controller where the kitchen located switch for that sunroom light is and use it to control several things.
The barn/workshop automation has to be all Zigbee or Wifi. I don’t think I can reasonably extend the ZWave network out there. That isn’t expected to be a problem; I have good Zigbee and excellent WiFI out there. I have a couple of Zigbee light switches, but I’m not sure how they handle 3 way connections as yet. I may need to deploy some wireless toggle switches for those remotes.
I put a new battery in the Ecolink tilting garage door sensor that I have had since Vera was new, along with putting a ZWave repeater in what I hope was a suitable place to extend the network into the garage, but the switch was last heard from on 16 days ago as I write this. I may try again now that the two light switches are working and helping to provide a little more network stability.
Before I discovered ESPHome, I had gotten a Zooz Multirelay with the idea of using it for the water filter project. As it turns out, a couple of it’s features are not particularly well suited to the needs of the water filter, but they are entirely suitable for automating garage door openers.
Early in my Home Assistant journey, I had planned to connect something to and/or control our self-cleaning whole house water filter.
I had discovered the ESP8266 and it’s pulse_meter sensor and then planned to have a board to connect the sensors for the water meter and later the unfiltered water meter and a separate board for the water heater meter since it is a short distance away, but it is really is a very short distance.
After working with the ESP8266 for a bit, I have decided that there is no reason these functions cannot all be on the same board, thus the Home Assistant device “watermeter” has been repurposed and one of it’s identical syblings “watersystem” has be configured.
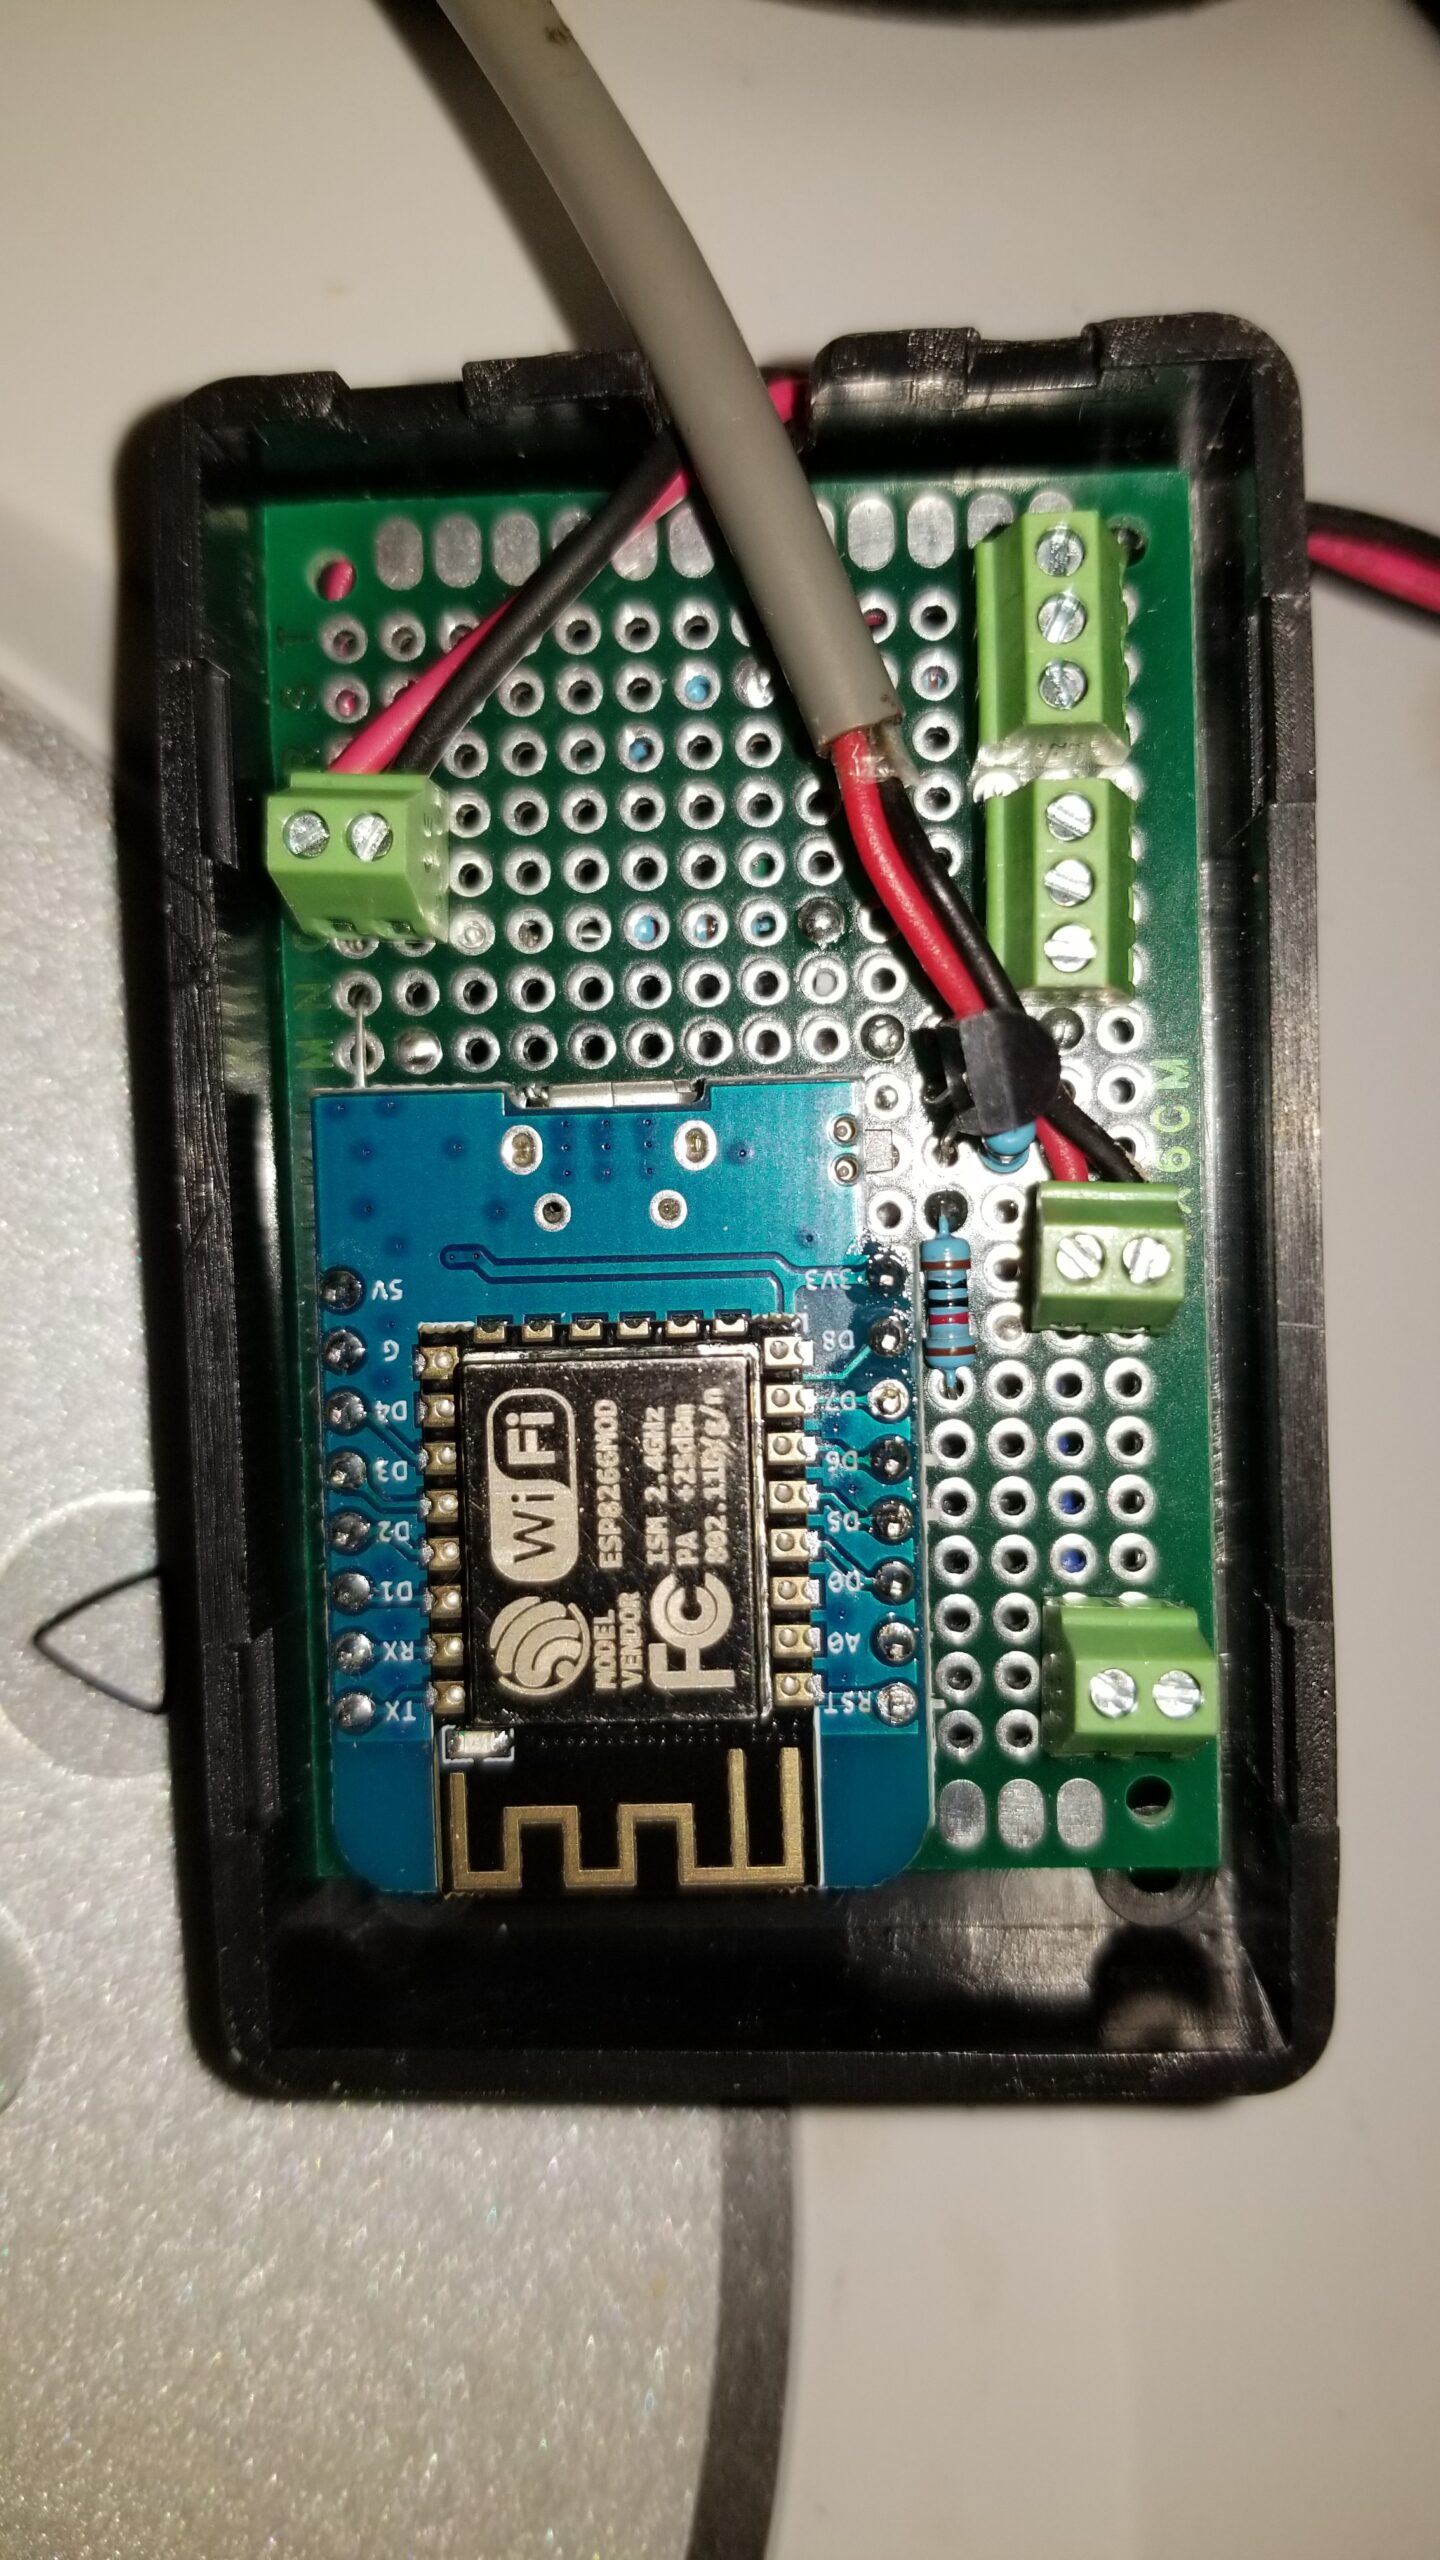
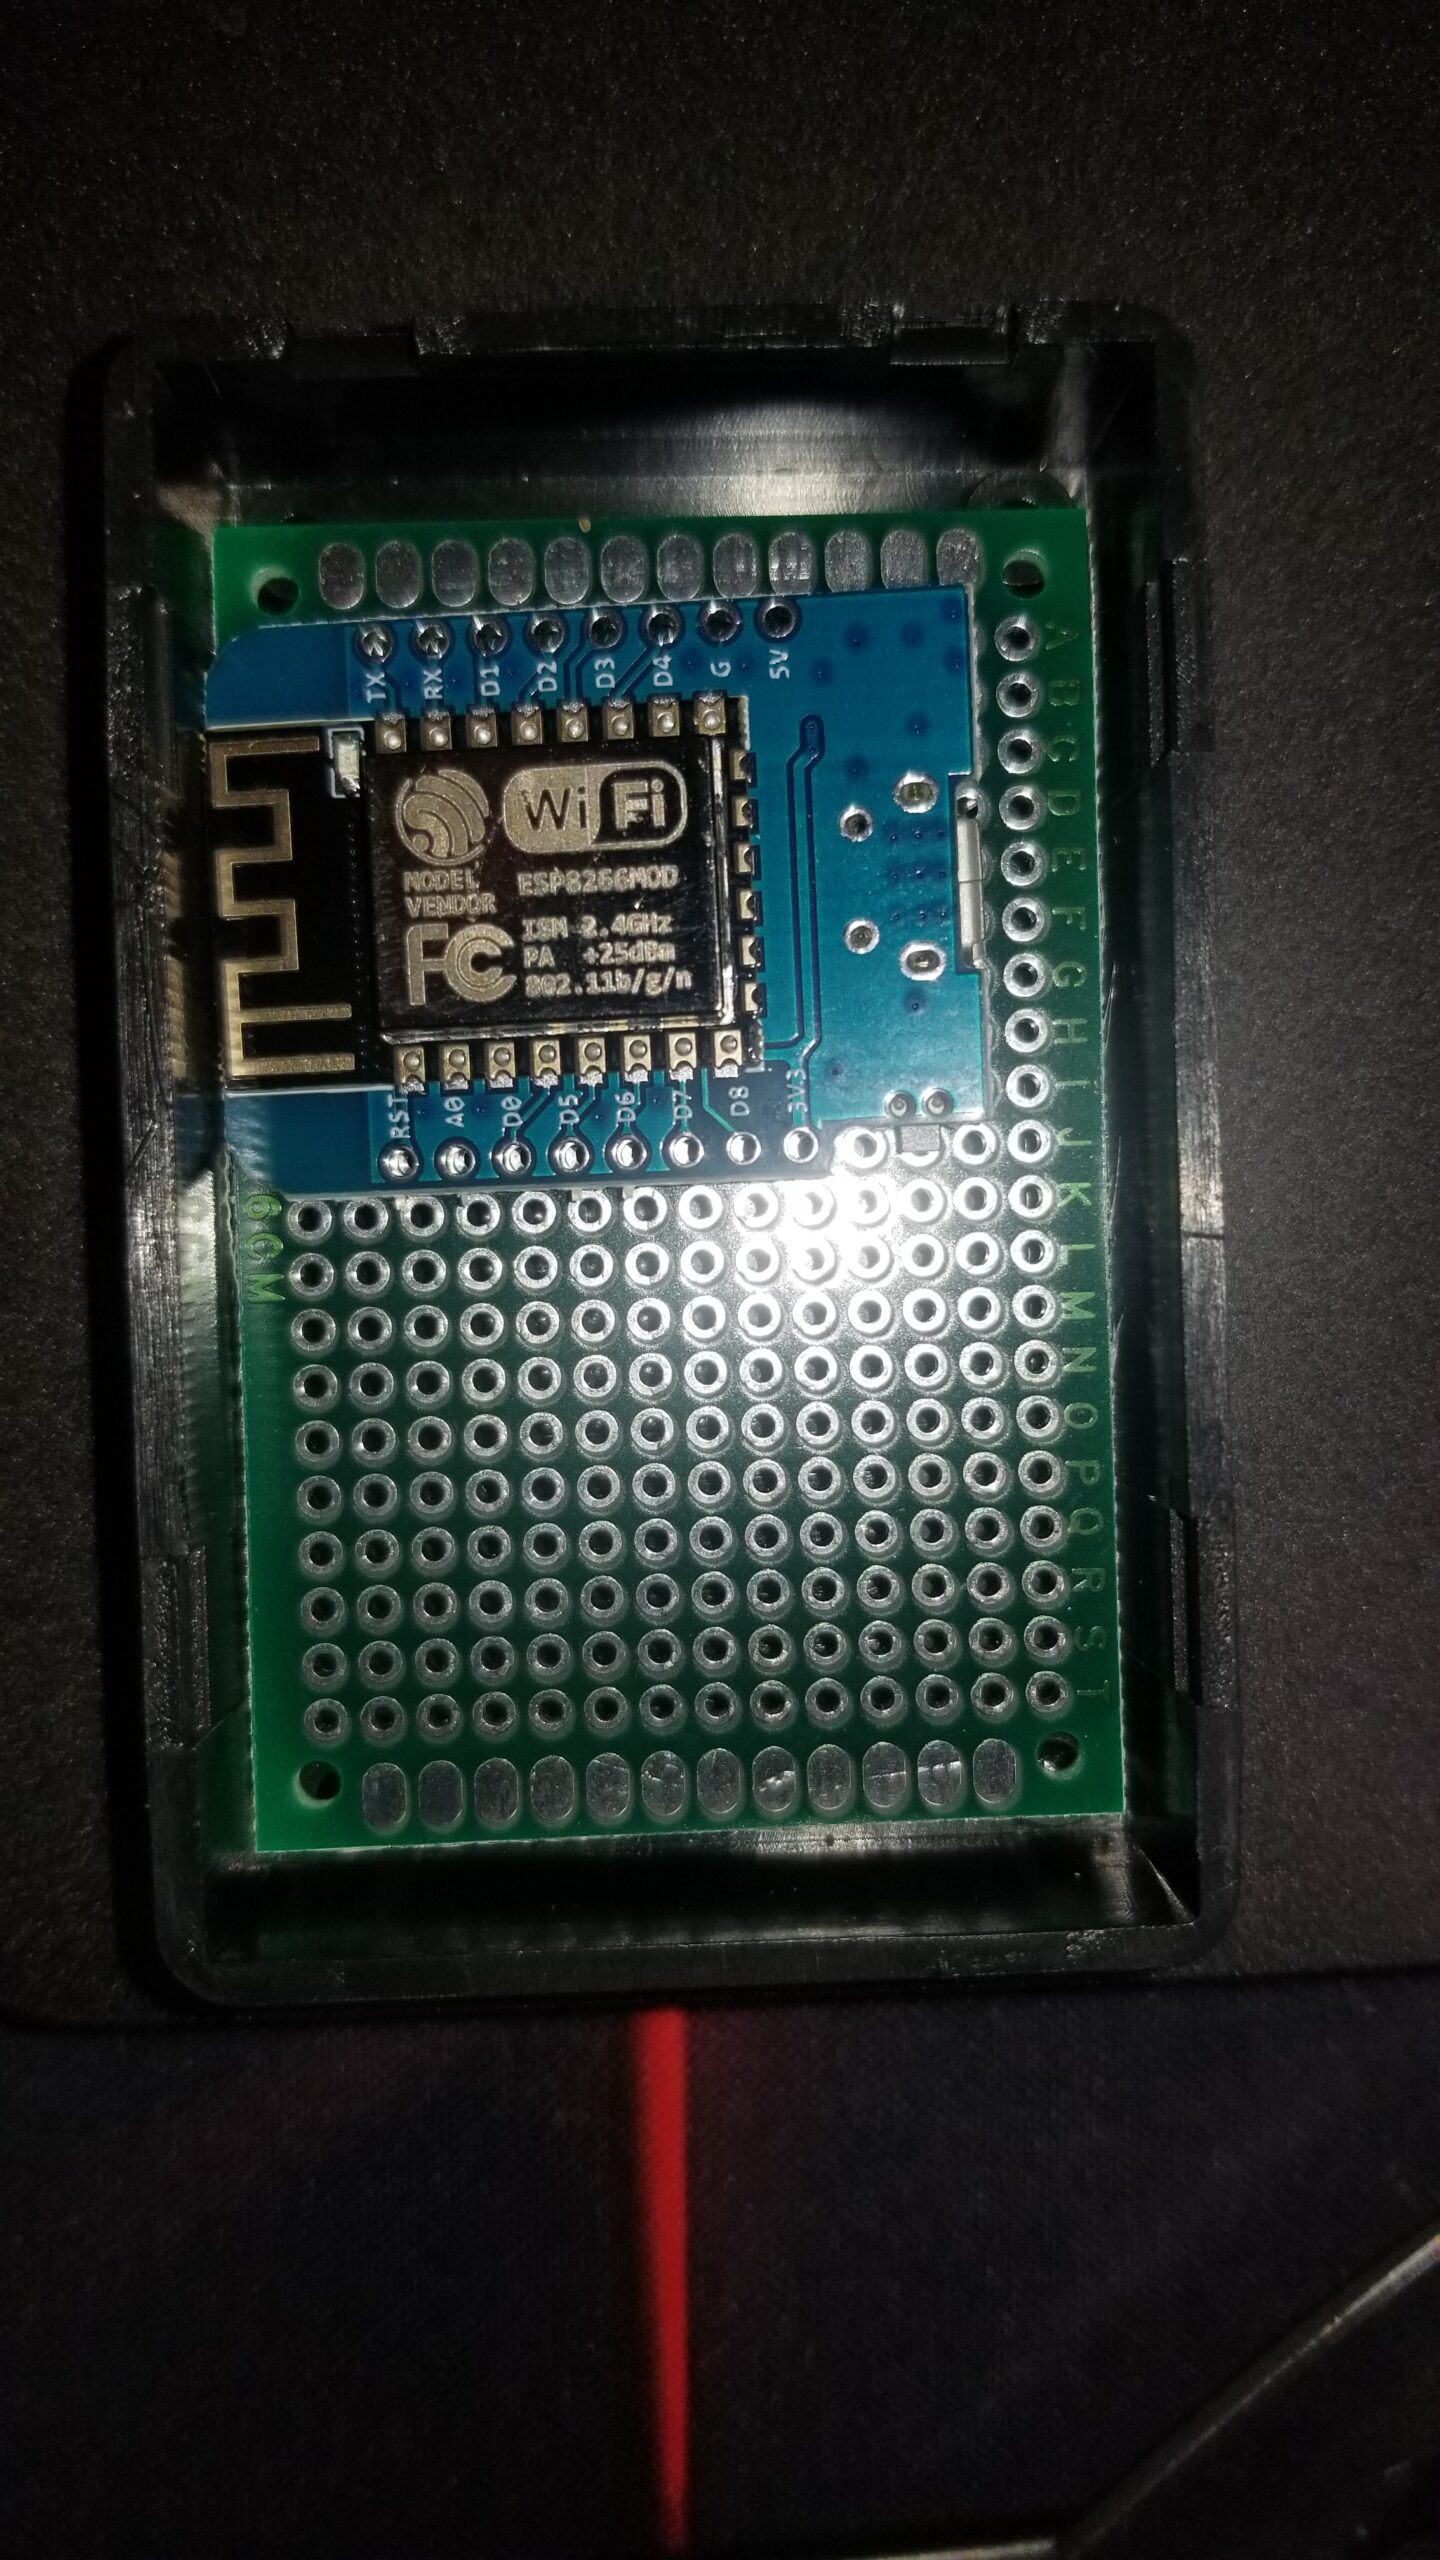
It may not win any prizes for awesome miniaturization, but it is packed in pretty tight. On the left is 5VDC power.
On the right, the pair of three terminal connectors are for the unfiltered and hot water flow meters. The voltage divider resistor networks to adapt the meters’ 5 volt output to 3.3 volts are on the bottom of the board. I have not yet connected them, but my confidence that they will operate is reasonably high.
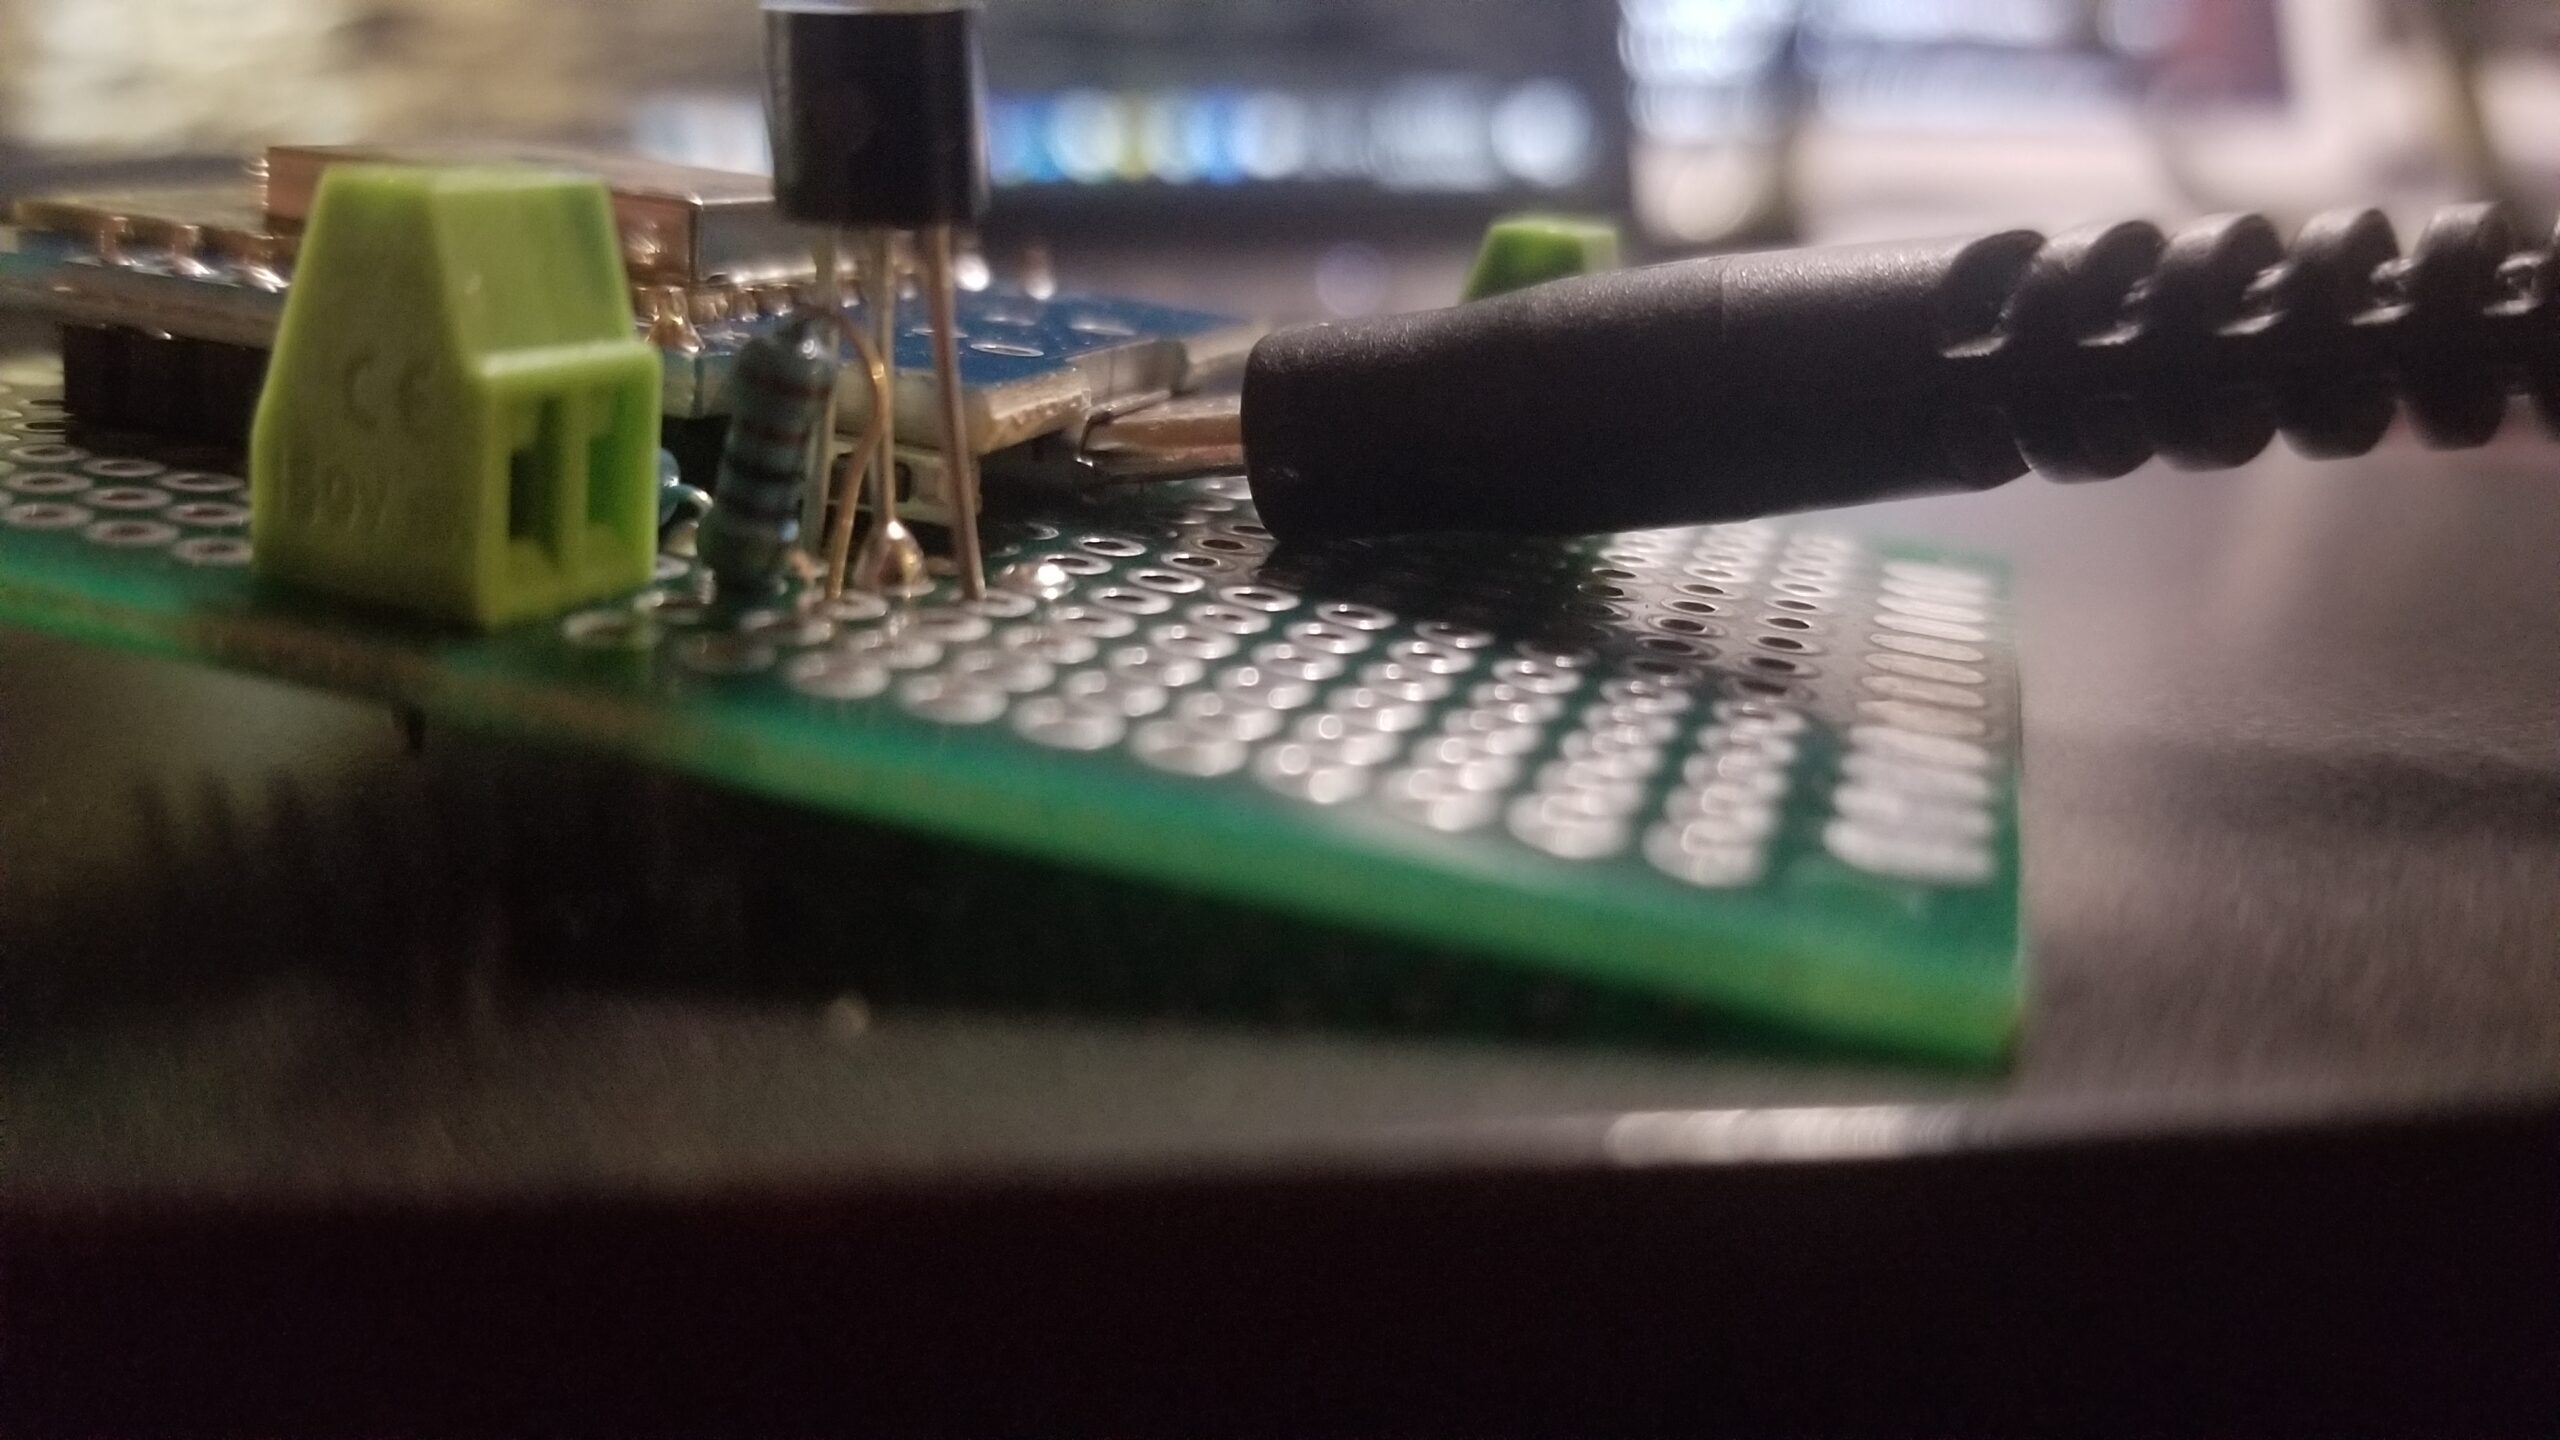
Immediately below those is a Dallas TO92 DS18B20 temperature sensor. There is a 1/4″ hole drilled in the lid of the case to allow it to stick out a bit and measure the ambient temperature. Since all these water system components are installed in an unheated garage and it has gotten below freezing in there before, I need to monitor the ambient temperature and control a heat lamp during winter months.
Next is the pulse input for the main water meter, shown connected in this picture.
Finally, there is a connector intended to connect to the water filter to monitor when it’s cycle runs.
I have covered the details of the configuration elsewhere except for the binary_sensor.
This is the input to monitor the water filter cycle. Since the original water meter, I have learned that the ESP8266 has built in pullup resistors that can be activated, eliminating the need to add a physical resistor. In this application, I may not end up needing it at all. The filter settings are currently there assuming I would be debouncing a switch input.
The water filter has a motor that runs a multiposition valve with a cam and a single sense switch. Investigations indicate that the switch is normally open, with 5V from it’s own controller across it’s terminals when it is at rest. When the filter cycle begins, the switch closes as the valve cam moves. The filter cycle puts the valve into three positions, a flush and a rinse position during the cycle and a normal position when done. I think I can monitor the 5V signal across this switch then either simply time when it has returned to 5V for long enough for the filter cycle to have ended or possibly even count the two stops in the process. I will need to play around with that.
The one thing that might be added is to connect one more GPIO pin to a relay output in order to trigger a filter cycle remotely. There is plenty of room for a couple of wires to run to an external relay. The area in front of of the USB jack needs to remain open in case it is needed to reprogram the board if it becomes unreachable on WiFi.
Funny story there. In arranging the ESP8266 D1 Mini board on the 40×60 perf board, I dithered on whether to mount the USB jack up or down. I decided to mount the board with the jack down, mostly because all the pinout illustrations of the D1 Mini board are shown that way. However, I did not account for how thick the connector is!
I was able to slightly mutilate the connector on a cable enough to fit, though. For future boards, I will need to put a little space under the board.
The ESP8266 boards have eight GPIO pins, though some of them are kinda hijacked early on, they should be available for more general use after the board boots up.
Leaving the bare board hanging by wires is just begging for trouble, so I want to put them in some kind of enclosure. The first ones I ordered turned out to be just a tiny bit too narrow.
Chalk that up to poor tracking of dimensions while shopping. I will keep the little boxes because they may be usable for something else at some point. That and at roughly $0.87 each, even a dozen of them are too cheap to be worth the trouble of return shipping. I think it’s planned that way.
I was more careful with the next case. I first found a small prototype circuit board of 40 x 60 mm, big enough to put the ESP32 board on with some margin around it, then found a case with internal dimensions to fit that board. If I also provide 5V power in some other form besides microUSB, I can mount the ESP8266 in the most space efficient manner on the board and inside the case. This will leave the maxium room for additional components or connections.
I think I will first rebuild the water meter device, adding an on-board temperature sensor and the sensor input and relay output that I had originally intended to put on the big water filter to let us manually trigger a filter cleaning cycle remotely. What would really be cool is if I can find 5V or even 3.3V available inside the filter and eliminate one more wall wart power supply.
While I was ordering stuff, I got too many Dallas DS18B20 in the raw TO92 package suitable for putting directly on a PC board and too many additional ESP8266 boards to connect them to. I also got a variety of little terminal blocks to make it easier to build boards for external connections and make those connections later.
Finally, I got some breakout board things which should help with prototyping all kinds of things with the ESP8266 boards. They breakout all the pins on easily accessible terminal blocks.
Hopefully, all these tools and supplies will soon lead to a bunch more ESP based peripherals to my Home Assistant instance.
There was really nothing wrong with my old NAS. It was largely underlutilized, other than I had hit the limit on how many cameras it could record in Surveillance Station because Synology is smart enough not to oversubscribe the hardware’s capabilities and limit the DS120j to 5 cameras. That was really the main thing I wanted to upgrade for and even that wasn’t a big rush.
Still, I had planned to upgrade once I paid off my Amazon credit card and since I had done that…
I did some comparison shopping and finally decided that I would get the most bang for my buck with the DS220+. I wanted the ability to add a 2nd drive and the Intel Celeron in the DS220+ with only 2 cores running at 2.0 to 2.9 GHz could still outperform the DS218/DS218play and had an expansion memory slot. That feature alone would turn out to be handy for me.
Well, it would be once I got the right memory module. I ordered the right stuff, DDR4. The labelling on the packaging was correct. The module in the package was a DDR3 SODIMM, different pinout. I processed the return to Amazon thinking I just ordered the wrong thing, before I looked at the packaging carefully. No matter, it’s sorted out now and the DS220+ is no maxed out at 6GB.
It was not clear ahead of time whether I could swap the physical drive from my DS120j into the DS220+ and have it work correctly. I seem to recall that once I had the hardware in hand, it became obvious that it could be done, but that the performance would suffer because of the differences in the newer and older file systems. I chose what was probably the best way, though it would turn out to be very slow. I set up the new unit fresh, then did a backup of the old unit’s files, using a share on the new unit as the destination. Then I could restore the old unit’s files from that now local source.
It took a surprisingly and irritatingly long time for that backup to complete. Then the local restoral wasn’t a whole lot faster. The whole process was most of 48 hours. On the other hand, it was also completely trouble free.
When everything was restored and settled down, I was able to move my camera license pack from the old NAS to the new NAS and although I didn’t have one immediately available, it did not complain about it when I attempted to add one more camera. Mission accomplished!
I have currently set up the old NAS as a backup target for the new NAS and set up a schedule. It just runs. I am not backing up the surveillance footage simply because that is just huge and pretty perishable anyway.
Soon, however, I would find an even better reason why I am glad I went for the more powerful CPU and full boat of RAM.