Short version: I used my laser engraver to cut a custom Bahtinov mask for a particular camera lens I have.
Ripping pretty much directly from WikiPedia, a Bahtinov mask consists of three separate grids, positioned and angled such that the grids produce three angled diffraction spikes at the focal plane of the instrument for each bright image element.

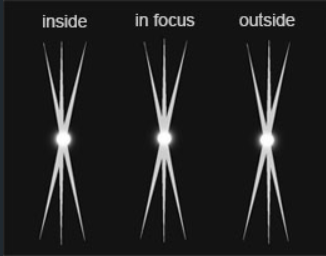
As the instrument’s focus is changed, the central spike appears to move from one side of the star to the other. In reality, all three spikes move, but the central spike moves in the opposite direction to the two spikes forming the “X”. Optimal focus is achieved when the middle spike is centered between the other two spikes.
It didn’t take much searching to find webpage where someone much more brilliant than me had created a Bahtinov mask generator. This site takes various parameters and outputs SVG code/file that will import directly into LightBurn to run my laser.
Sidenote: The links on the Bahtinov mask generator page lead to some other versions of the mask and discussions about them and their development. It is an interesting read, though much of it was about colimating the optics on larger telescopes, so a bit off topic for me. Still, interesting stuff.
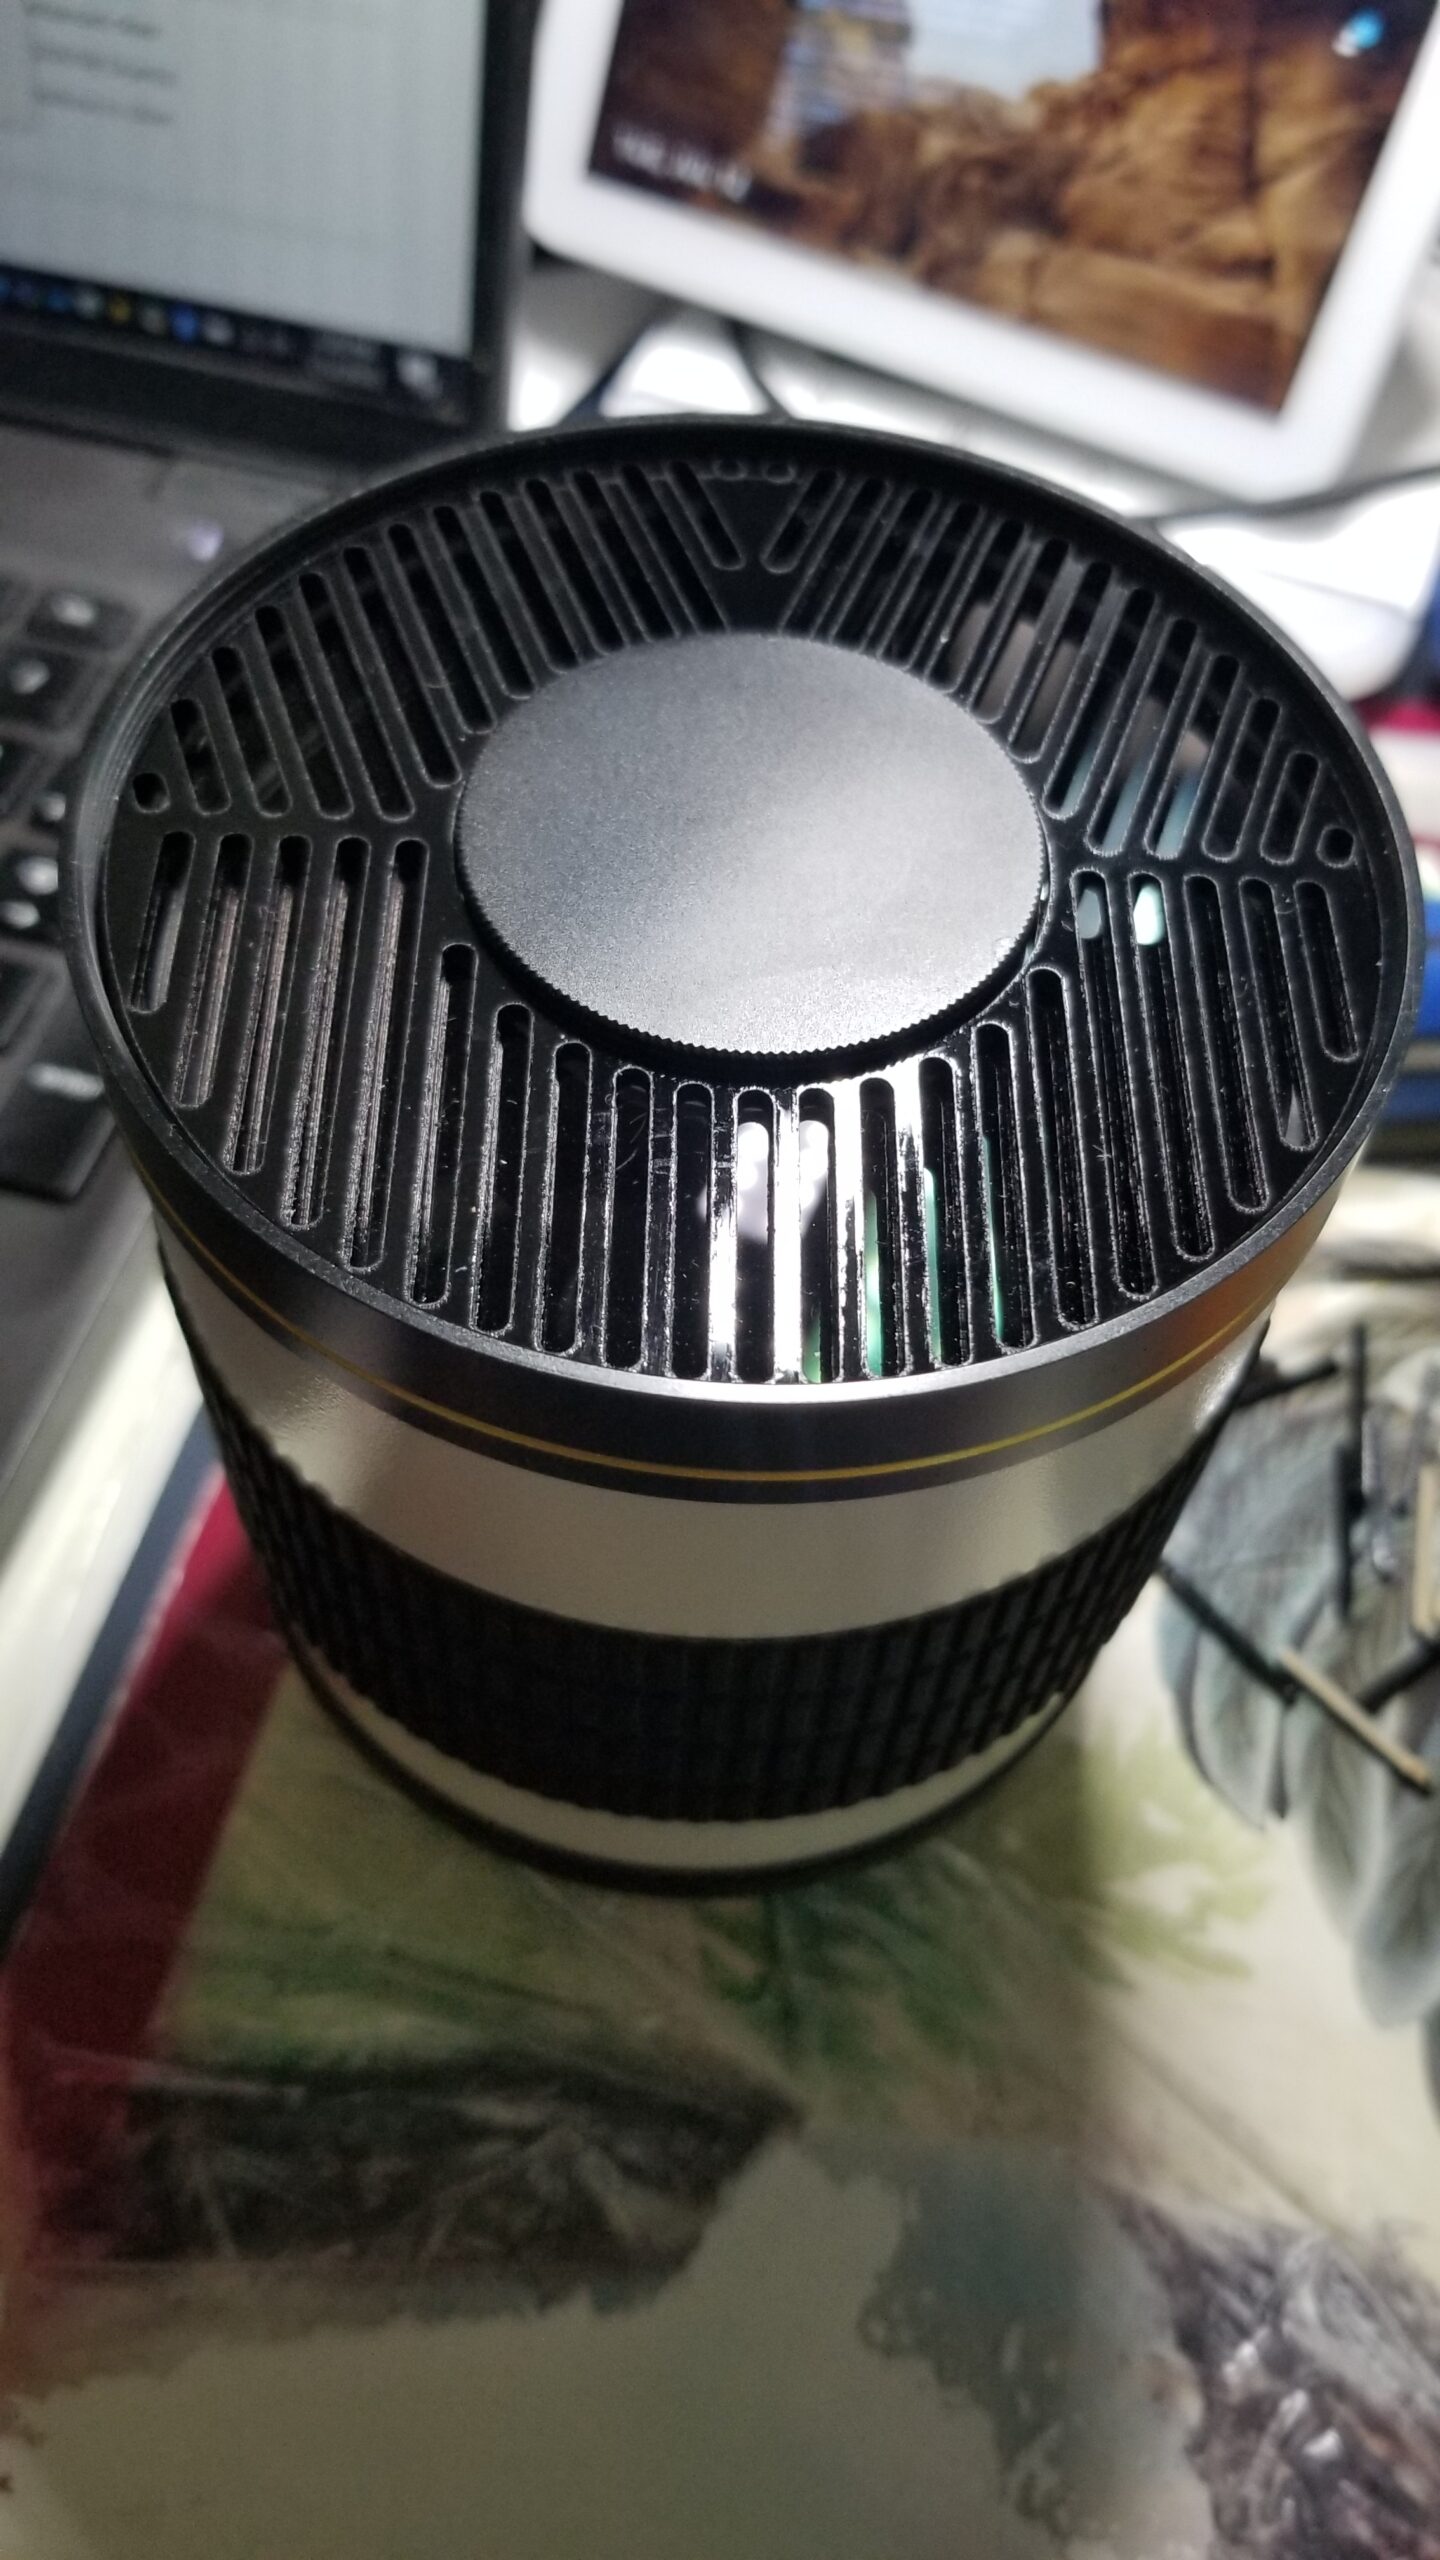
The target lens is a (cheap) Opteka 500mm reflex lens. I did not even know about astrophotography when I bought it; I was hoping to catch some wildlife around the house. There are mixed reviews about it and it’s stablemates, but it’s still the longest lens I currently have. It is an EF full frame lens, so a crop factor of 1.6 makes it perform on my Canon Rebel T6 as if it was an 800mm.

The default mask parameters appear to be for a largish telescope, 8+ inches in diameter. The parameters for my lens were:
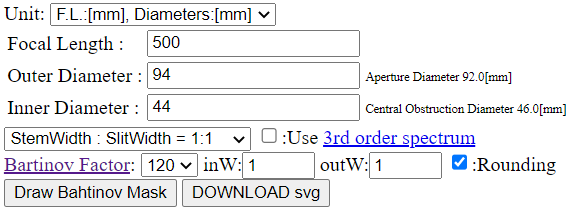
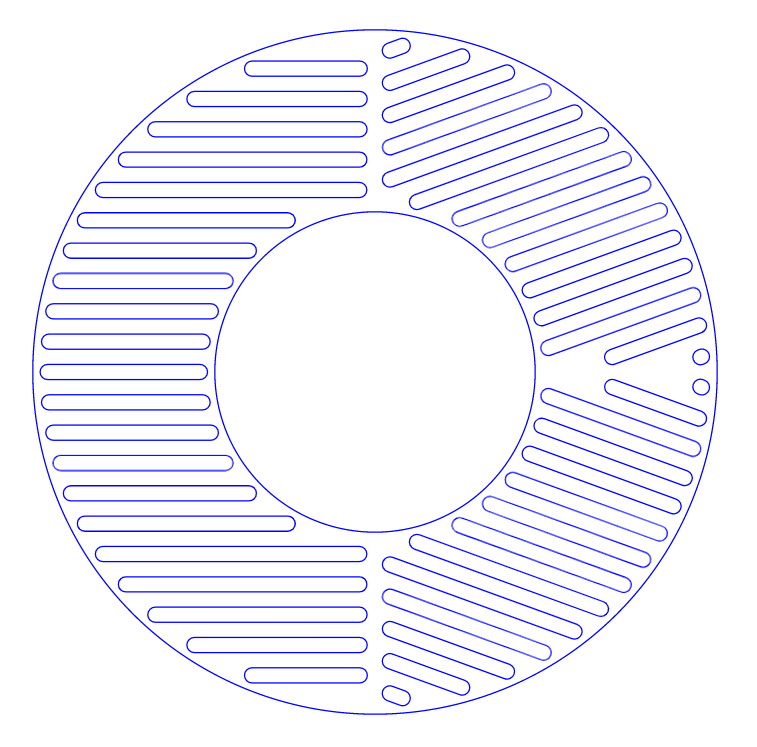
The “Outer Diameter” is actually the inner diameter of the ring at the front of the lens. The “Inner Diameter” is the outer diameter of the center mirror. Stem/Slit width is the ratio between the elements of the grid. 1:1 means the slits and stems are the same width. Checking the “3rd order spectrum” increases the size of the stems and slits and makes the most sense with really large masks. I left mine unchecked. The (typo’d) “Bartinov Factor” is used in the math somewhere to determine the size and thus number of stems and slits, or basically how fine the elements are. I chose 120 experimentally. It yielded stems and slits that were about as wide as my black acrylic is thick. This is a fine pattern that seems strong. “inW” and “outW” is the margin between the inner and outer diameters and the elements of the Bahtinov pattern. I originally chose 1mm, and that’s probably ok, but I think 2mm would mask a little stronger, more robust mask. Finally, “Rounding” determines whether the ends of the slits are cut square or rounded. I chose rounded. Click on “Draw Bahtinov Mask” and you get:
I downloaded the SVG file, opened it in Lightburn and then proceeded to experiment with cut speed and power.

I have a 10 watt laser, which is adequate for every task I have asked it to do thus far, though I do need to experiment a bit for best results, especially with cutting, as opposed to engraving. For this material, I eventually landed on 100% power and a cutting speed of 8mm per second, with 2 passes. About 70% of the cutouts could be removed with the least pressure and the rest didn’t take much more work. I think I may try again with 6-7 mm per second to see if I can make them all fall free.
Of course, the first one did not go perfectly.
When I started cutting these, I had my wooden surface under the laser. it has a grid of alignment markings on it to help align targets for things engraving. When the laser would cut through the acrylic, it was marring that grid surface. I had the acrylic suspended on wooden blocks about 1-1/2″ above the grid, so I grabbed a piece of waste stock and was going to slip it under the acrylic, but I bumped the block and it moved the acrylic. I decided to let it finish so I could still test removing the cut parts, but it was not a pretty piece.

Note the off center cut, with no margin at the top and the overlapping cuts on the right side. I put the proper honeycomb aluminum cutting surface under it for the final cut.
As eluded to in the parameters section above, I think I would prefer a heavier margin between the edges and the grid. If I have cause to recut this one, I will make that adjustment. Also, I presume this is an artifact of the kerf for the laser, but note that stem/slit width ratio is not 1:1, as the parameters would suggest. A future mask may need that adjusted as well.
In any case, here is the completed mask, cleaned up and in place. All I need now is a night to test it. Interestingly, it fits under the lens cap, so I have a place to store it when it is not in use.