It’s not my fault, really. The seller made it too easy….

It’s not my fault, really. The seller made it too easy….
I finally swapped out the Burris red dot sight on my G20 non-compensated slide for a set of TruGlo fiber optic sights. I got a compact sight pusher tool from RST. It’s a simple & clever “I could have made that” design but I didn’t have to.
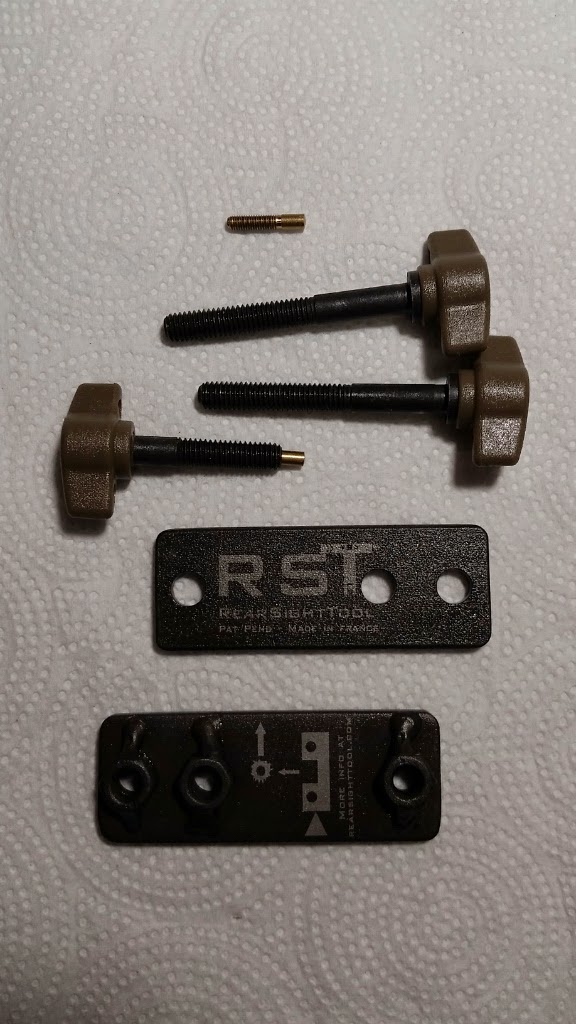
The pusher consists of two steel plates, both with holes and one with nuts welded in front of them. There are two long thumbscrews for clamping the slide between the plates and a shorter one with an interchangeable tip that does the actually pushing work.
Clamping the pusher to the slide is pretty trivial, beyond aligning the pusher screw to hit the sight but not the slide.
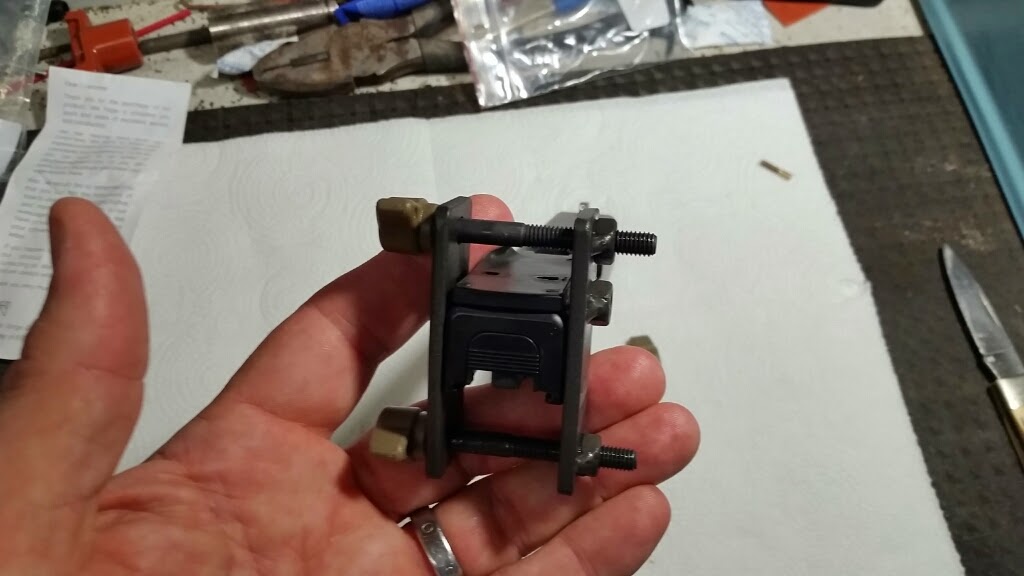
The base plate of the Burris sight is only slightly narrower than the slide, so all this pusher could do was pop it loose and start it moving. I put the slide in a vise and tapped the sight the rest of the way out with a handy deadblow hammer, which was bigger than needed. I have no doubt that I could have completed the removal without the vise if required.
Installing the new sight was pretty much exactly the reverse of removing the old. I had to tap the new sight far enough into the dovetail for the RST pusher plate to be able to clamp to the slide, then the pusher very easily and precisely moved it into place.
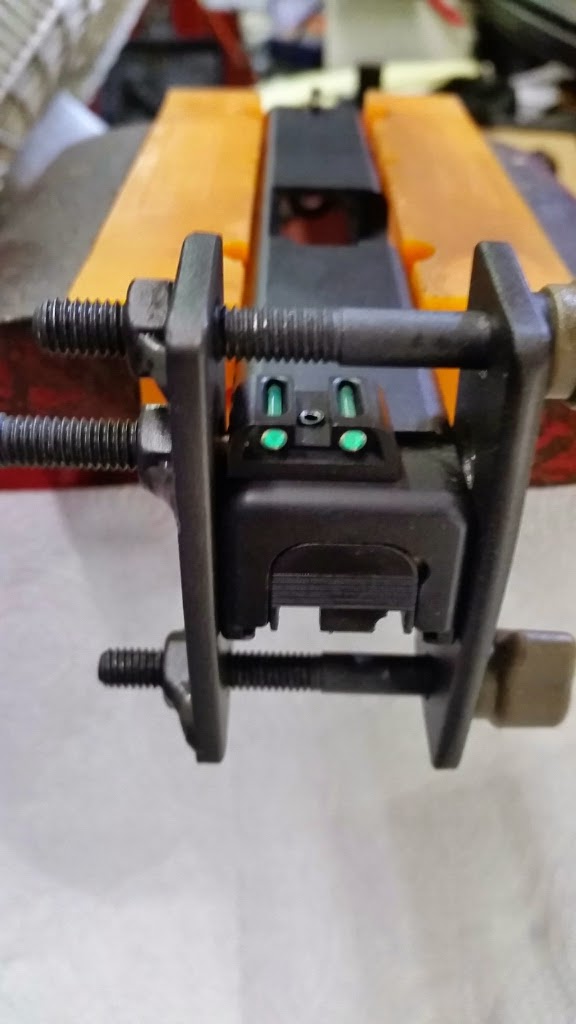
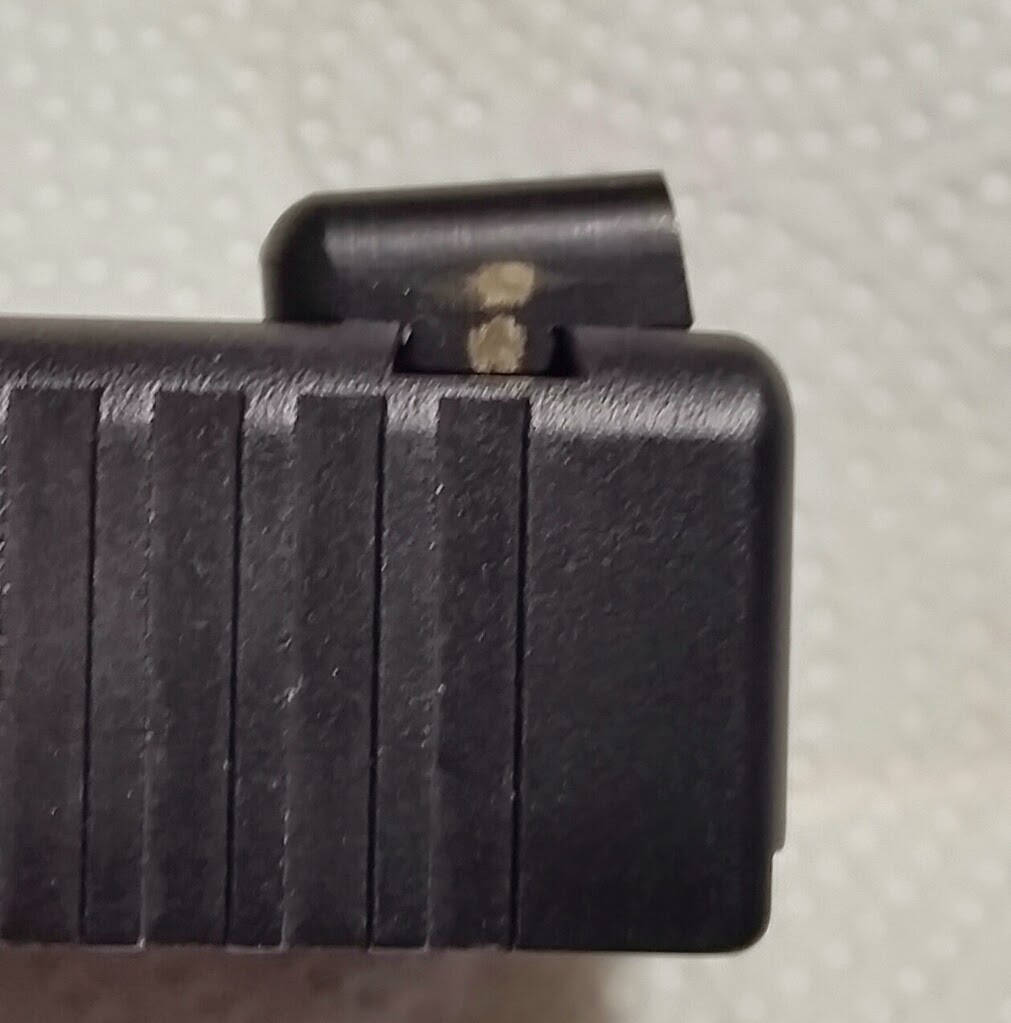
That pic was deceptively hard to get. The focus depth of field on my smartphone is narrow enough that I had to hold it almost at the limit of my reach for front and rear sight to both be in focus. Since I needed to crop most of the pic, I had to turn the resolution up to max. Pretty happy with it, actually.
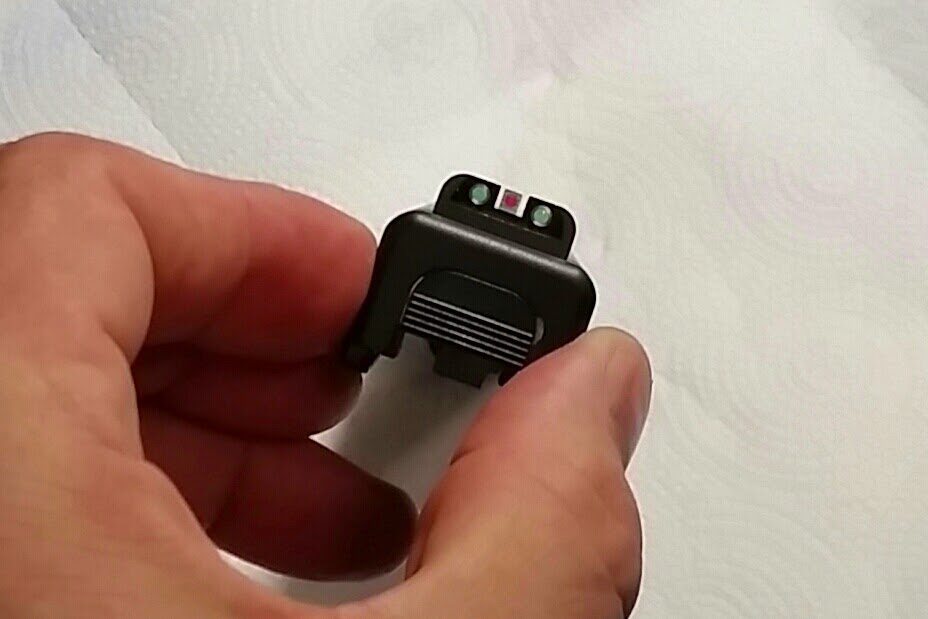
The one complaint about the RST was something I might have been able to avoid, but the soft brass pusher tip left brassy colored scuff dots on the black finish on both sights. This is mostly removable, but particularly on the Burris plate, cleaning the brass dot off left a slightly polished finish. I think that is because the Burris plate has a paint/powdercoat finish and the TruGlo is some sort of chemical finish like anodizing.
The tool comes with a spare brass point and a steel point. The steel point may have actually been better for not leaving these marks. If I need to adjust the TruGlo sight, I will test the steel point for that.
Though it is a fairly common “mod”, I had not taken the time to paint fill the imprinted lettering on my magazines and the slide of the pistol.
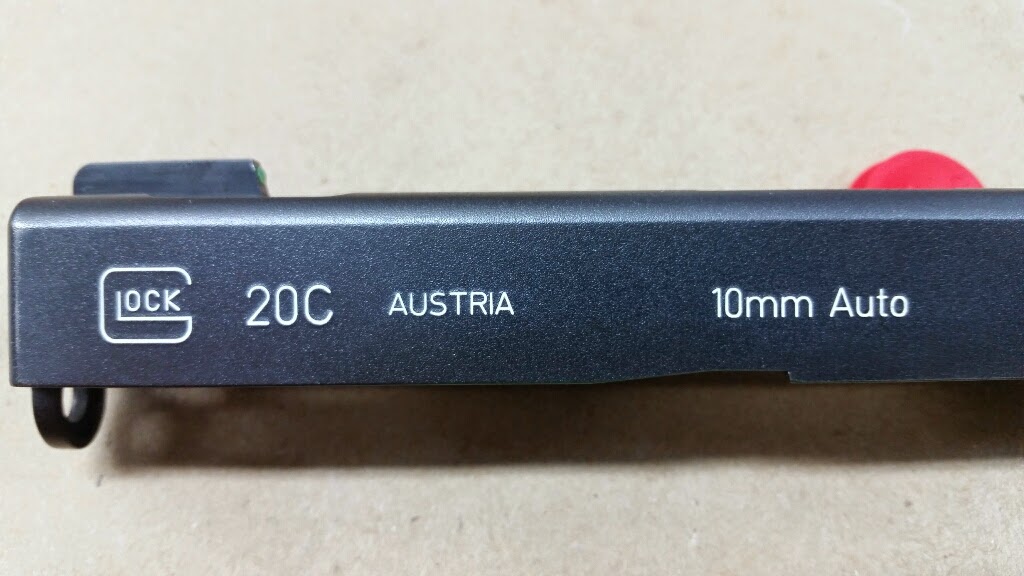
Pretty happy with the added contrast. It doesn’t help it shoot any better, but it was a nice project that I could do in a couple of hours with a bonus of spending time with my Love in the craftroom.
As an aside, I noticed while doing this work that the screw holding the front sight is loose. It will be an easy enough fix, removing the screw and sight, cleaning with acetone and reassembling with Locktite.
There are many descriptions on the web as to the lettering procedure. In my case, I first cleaned the slide and magazines with acetone. Next, I used plain ol’ Testors model white enamel and a size 0 detail round brush. Technically, I was globbing it on to fill all the lines, but I tried to keep the glob in the lines and the part outside the lines as thin as reasonably possible. I filled all the lettering except for #10, which I went back and did in red. I wish I’d had a brighter red, maybe a fluorescent red or orange, even green. The point is that #10 is also filled but in another color. In IDPA shooting, magazines in my divisions are typically loaded to 10 rounds and since I am corrected to slightly farsighted with my contact lenses, it is hard to make out even the higher contrast lettering to read the actual number. Making the 10 another color makes it easier to check the magazine capacity.
Once all the paint was well dried came the somewhat tedious bit. I used the Testors thinner on bits of paper towel. It took a couple of magazines to refine the technique, but what seemed to work well was to put a drop of thinner on a small piece of paper towel and quickly rub it over a small area of lettering, checking between each stroke. When only the desired coloring is left, buff the area with a dry paper towel. This was the fastest way and required the least retouching cleanup. The thinner needs to be really light on the towel. Too much on the towel and it wets the paint too much and too much is removed from the lettering. I did all the white then came back to the red with fresh towels to keep the white from becoming kind of pink.
I pretty pleased with how they turned out.
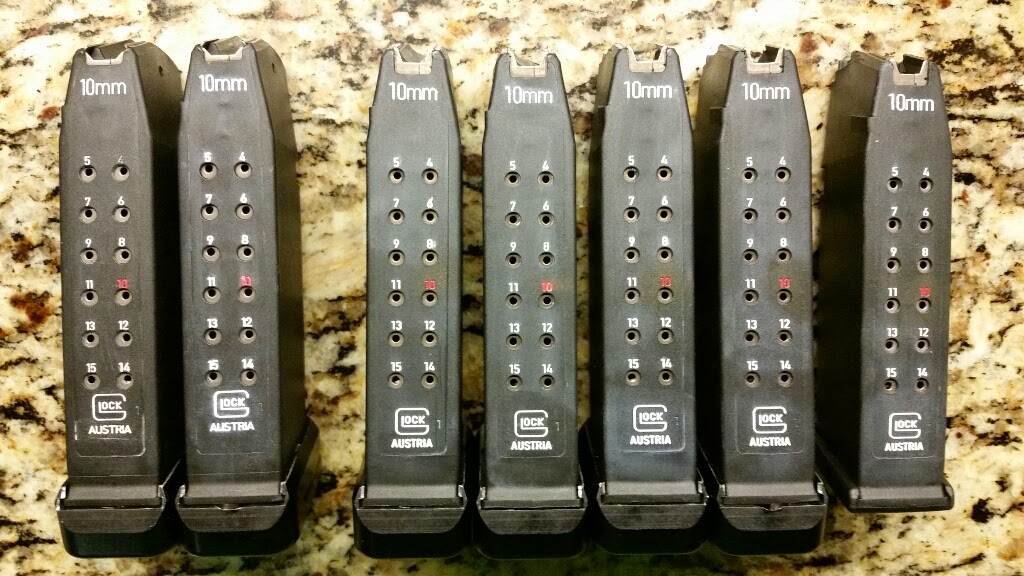
In a previous post, I noted that I had a magazine that did not easily drop clear at reload time. Since I had numbered the magazines, I knew which one it was. While I was preparing the magazines, I had them all in one place and wanted to compare this troublemaker with it’s stablemates. I found a couple of differences that I am sure are documented online somewhere else, but here goes….
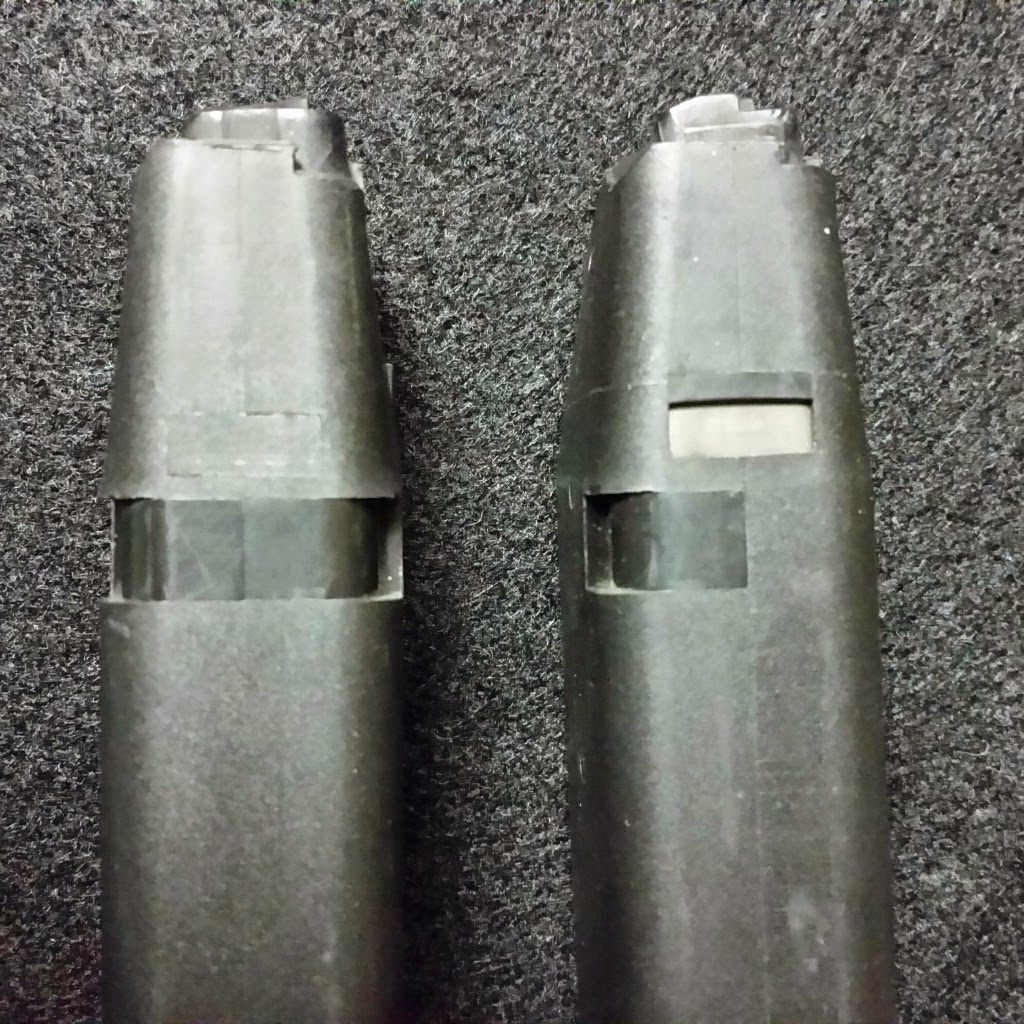
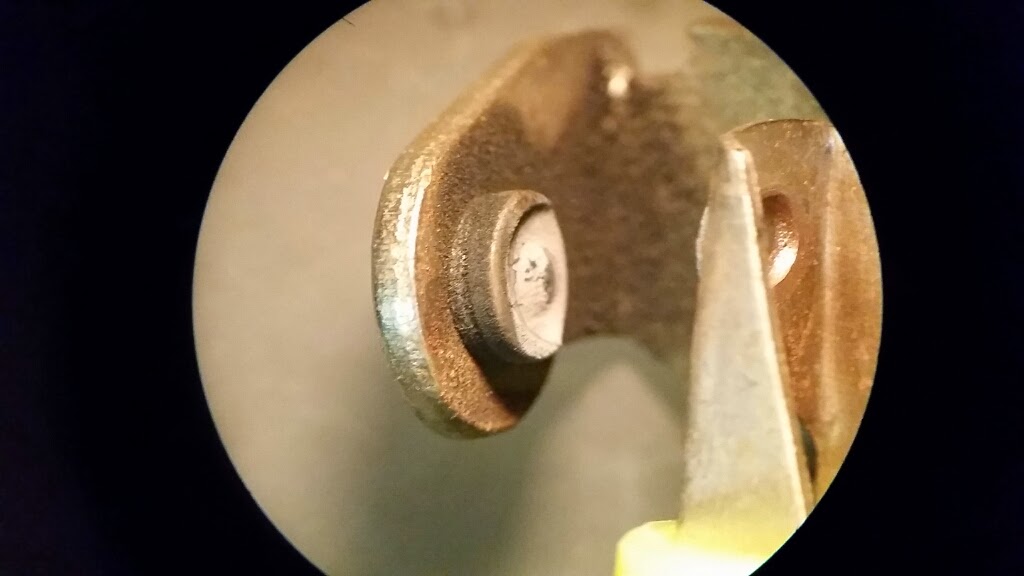
Since the empty magazine wasn’t dropping well when released, I first wanted to compare the latching notch. It turns out that there was a pretty big difference immediately visible. The magazine on the right is the one that doesn’t drop well.
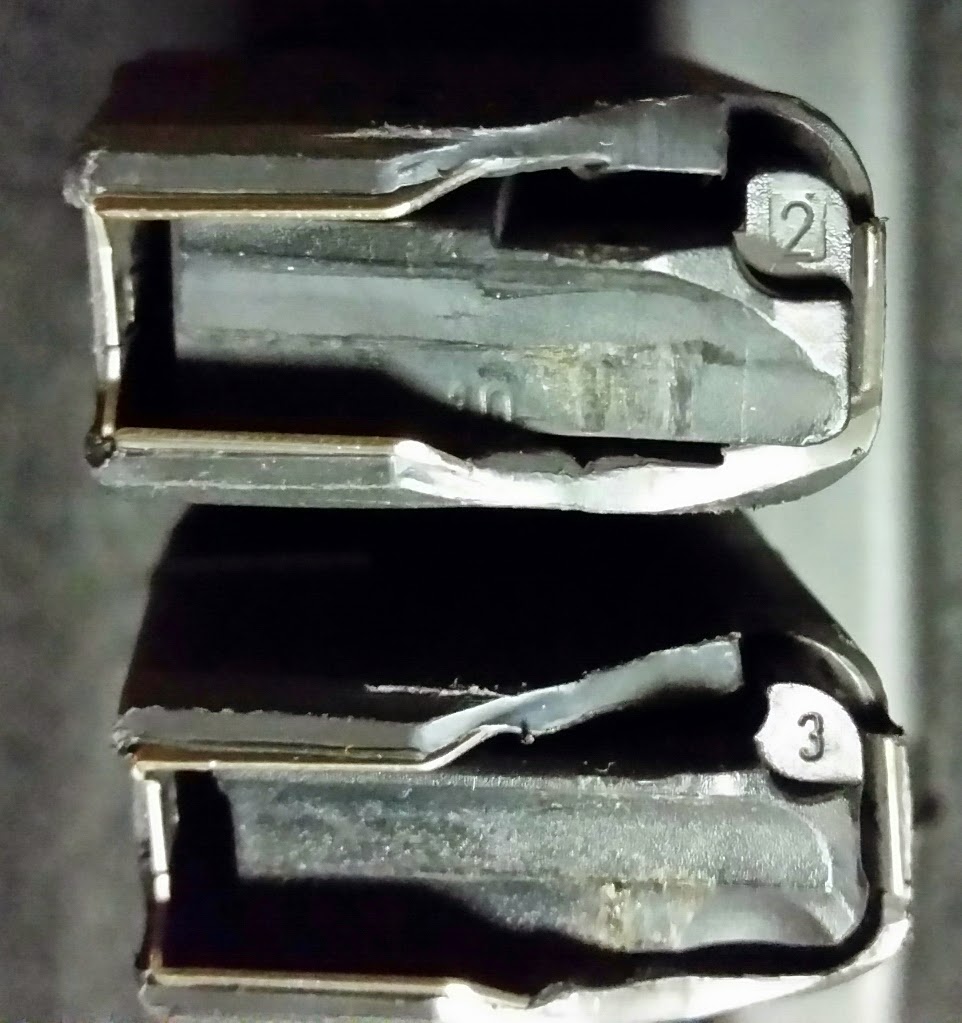
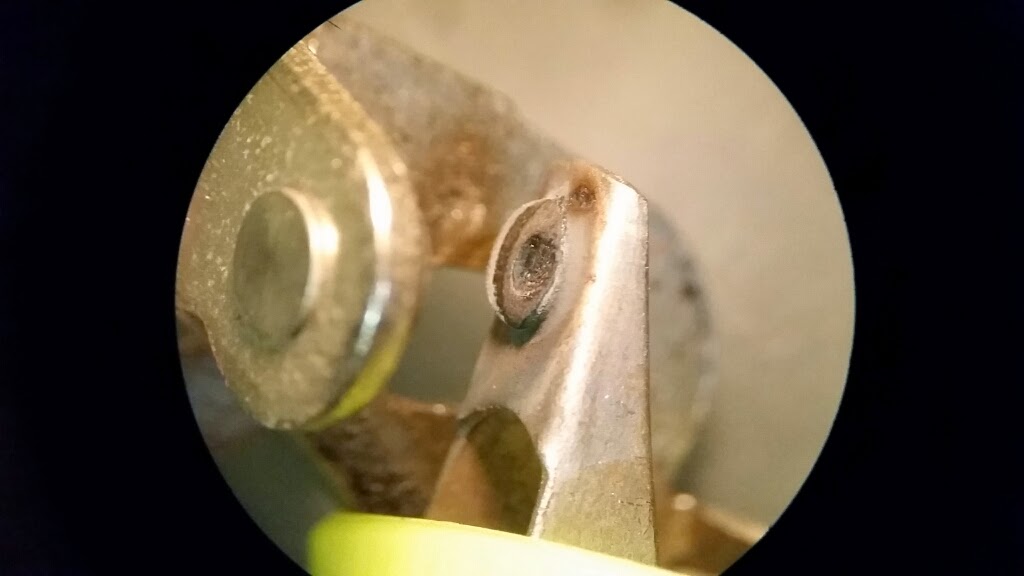
In further digging, I noticed a difference in the followers as well. The one marked with a 2 is the one that doesn’t drop well. Due to the shadow, it’s hare to see, but the top magazine follower has a simple ’10’ on it while the bottom one has ’10 mm’ completely obscured by the shadow.
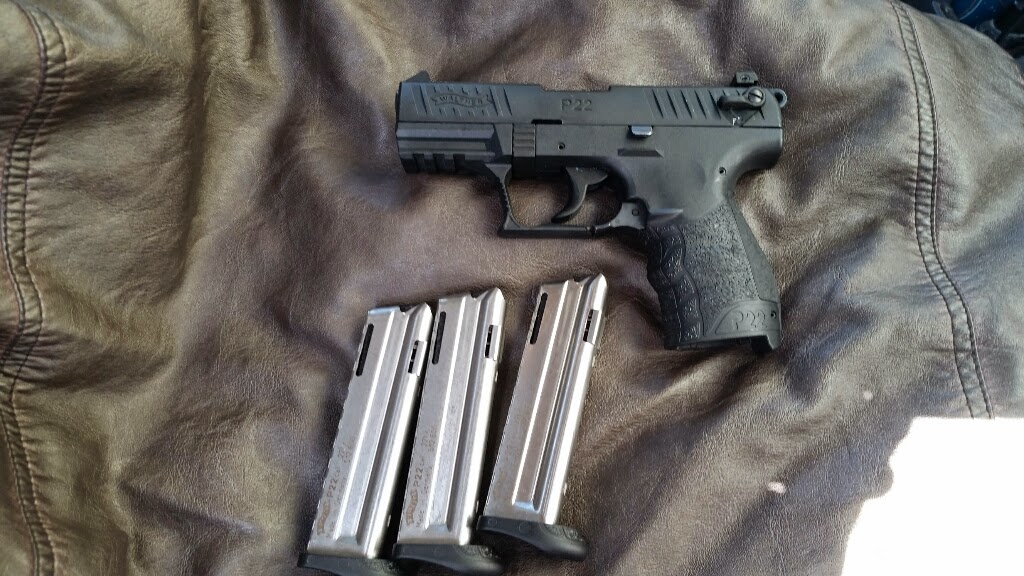
Referring back to the pic above of all the magazines, note that the two on the left are slightly different in the placement of the Glock logo. Yes, I have two magazines of this different model. In the original numbering order, these were magazines 0 and 2. The first was easy to remove from the magazine order. I did all other shooting with magazines 1, 2 and 3. However, I have so rarely had to drop mag #2 on the clock that I haven’t noticed if it also had trouble dropping clear.
Partly to address this issue and partly because I just have them, I decided to install the six magazine extension floor plates that I got in the box of goodies that included, among other things, most of these magazines. The previous owner found that, with all other equipment on his pistol, these extension floor plates in stock condition made the overall weight of the pistol perilously close to overweight for IDPA. He drilled out some material from the inside of the plates to reduce the weight. I hope my combination of parts fits under the wire because the added weight to the magazine makes all six thus equipped drop out of the pistol nicely. I have put them on both of the ‘odd’ magazines for the acid test.
The pistol is a close but passing fit in the IDPA box with the extensions.

Well, I didn’t get to attend the SO class. I will try harder to make the next one!
A few of my coworkers and I have begun a lunchtime range trip. Three Thursdays in a row have had us going to three different local ranges. For the last two, I have also attended IDPA matches that evening and I think it has helped. Last night’s match was particularly gratifying. I like all those 0’s and 1’s. In fact, there was a single 3 and all other targets were 0’s and 1’s. Oh, and one procedural for taking a step when I was supposed to be flat footed for those targets. I didn’t even know I did it. 🙂
At yesterday’s shooty lunch, I was was shooting hot ammo. Power Pistol handloaded 40’s and some bulk 10mm I bought some time ago that are pretty peppery. I need to chrono those someday. Then for the match, I was back to my usual semi-mild 155/165 grain TiteGroup loads. While I didn’t specifically train with big ammo and shoot with lighter, that’s how it worked out. It was quite a confidence booster.
At the match, I had one magazine that didn’t drop free very well. Because I only yesterday numbered my magazines with some skate tape stickers from Dawson Precision and I kept track of which ones I was using last night, I know which one it was. I will see what I can figure out, but I suspect it will be a slight burr on the notch where the magazine engages the release.
Having loaded up a good inventory of IDPA ammo, I took time to inventory my reloading components and find that I am in pretty decent shape there. Since I am consuming more 40S&W than anything else, it makes sense to have some extra for components needed for 40. I was gifted with a big heavy bag of 40S&W brass. I haven’t weighed it, but I imagine its in the 10 pound range, which puts it at about 1000 rounds. Add that to the stock I already had and I should be able to practice enough to help. 🙂
Speaking of practice and chronographing… Begining at about 2:40 into this Jerry Miculek video about a cool shotgun speedloader (interesting in its own right), I noticed a piece of equipment in the background. It seems obvious to me *now* but it had simply not occurred to me that a bullet trap could be sized to be mounted on a trailer. In my mind, a bullet trap small enough to be portable was just a safe area tool and all others were part of a permanent structure, typically an indoor shooting range. Now I want one.
I see a small unit with a 24″ square opening as adequate to my most common need, a safe place to chrono handloads and otherwise test firearms. Other than a lotto win purchase, I think I’ll have to just keep my eyes open for something for sale or make one.
I haven’t updated the ol’ blog in a while, but I have still been shooting!
The intervening time included one major match, a bunch of local matches and a couple of months fighting off a return of my childhood nemesis, asthma.
Asthmatically speaking, it’s now well controlled. I’m essentially symptom free once we found the right combination of treatments, which turned out to be Singulair, Breo Ellipta, albuterol and occasional Allegra for good measure. Once I was able to get it under control with medication, I have been able to wean completely off the medication once more.
I haven’t stopped tracking all my matches, but I have stopped deeply analyzing bad stages. A tip from With Winning In Mind is to make note of bad stages and their general causes, but to not exhaustively analyze them as I have been. That actually reinforces bad behaviors by dedicating a lot of mind-space to them.
As I have begun looking at stages that way, I have also realized that, while the actual details may vary, the root cause of…. I’m going to go out on a limb and say probably all…. of my bad stages is…. prepare yourself for this nugget of wisdom…. not doing everything right.
What looks like a quote from Captain Obvious is more subtle than it seems. Obviously, I didn’t do everything right or I would not have scored badly on the stage in question. But the subtle bit is that rather than agonize over what I did *wrong*, I need to add to what I did right.
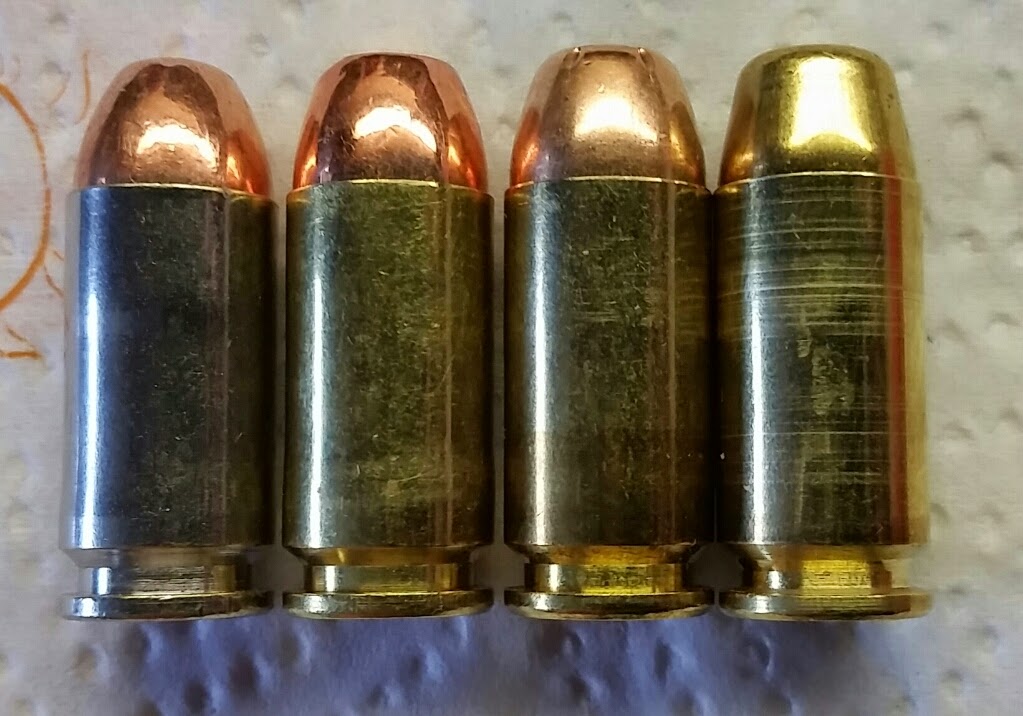
I have cranked out a lot of ammo lately, about 2000 rounds of 40 S&W, split between 155 and 165 grain bullets. 155/165 grain bullets on 4.5 grains of TiteGroup has become my routine ammo. It makes about 140 power factor from the Glock, so it should make better than 125 even in the Kahr.
My press issues have all been addressed, as have the quality assurance issues. I have not had a single ammo issue since before June of 2014. I like having a sizable inventory because I can just go shoot without being overly concerned with whether I have suitable ammo.
I *have* had troubles with misfeeds that seem clearly to be caused by a limp wrist when shooting weak hand. At least two matches in the last couple of months featured a course of fire requiring shots fired weak hand only and on both occasions, I had ammo feed problems with the weak hand only element and full reliability with all other shooting. Reliability, not necessarily decent scoring 🙂
This weekend, I am taking the IDPA SO course. I’ve been with IDPA for over a year, shooting almost every week, so no excuses not to take on a little more responsibility.
I’ve been away from my two blogs for a little bit, though there have been some developments in both, especially this one.
Biggest news, Gabby got a CanAm Spyder RT!

One of her friends at work needed to sell his just as she was shopping for one, so good news for them both. It’s a 2010 model with a 5 speed manual transmission. It will flat scoot if you ask it to.
Last time, I was talking about the trials I was facing with the tank that does not end. I requested a quote from Boyd Welding and at just under $200, it is not a cheap tank by any means. It is competitive with commercially available racing fuel cells and none of them are the right shape. In any case, I went for it and it’s expected around the end of the first week in October.
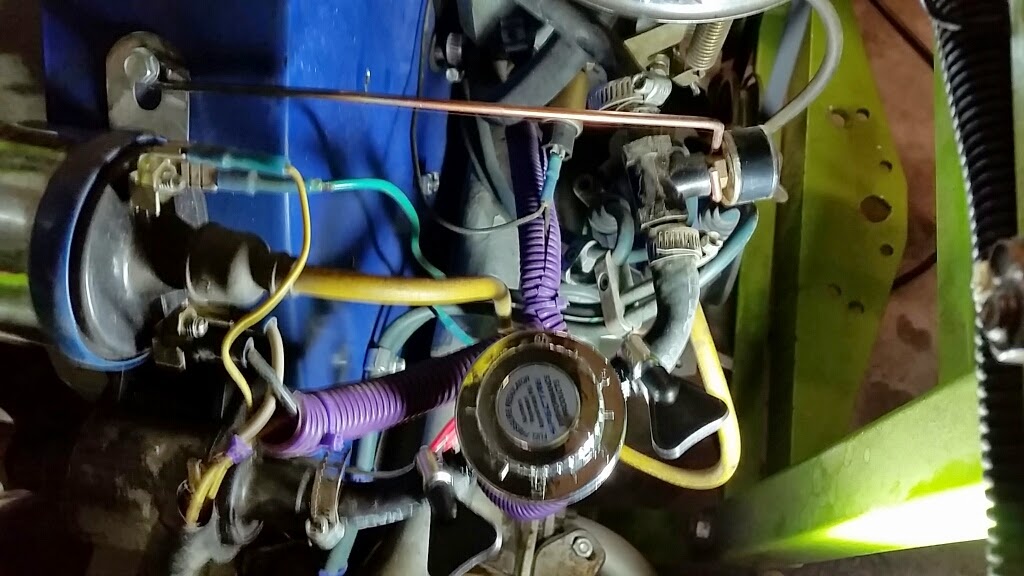
Before Labor Day weekend, we participated in school supply benefit run. Kermit had some reliability issues wherein he would occasionally flood out and die at a stop. One of these times involved her being towed the last mile or two to the school, an activity she is glad to never repeat. Long story short, it seems to have been that the 5 PSI fuel pump overwhelmed the 3 PSI float valve. The installation of a fuel pressure regulator seems to have abated the problem.
Since it worked without difficulty for a long time, I suspect the overrating has probably mildly damaged float valve. I have carburetor rebuild kits waiting for me to install them.
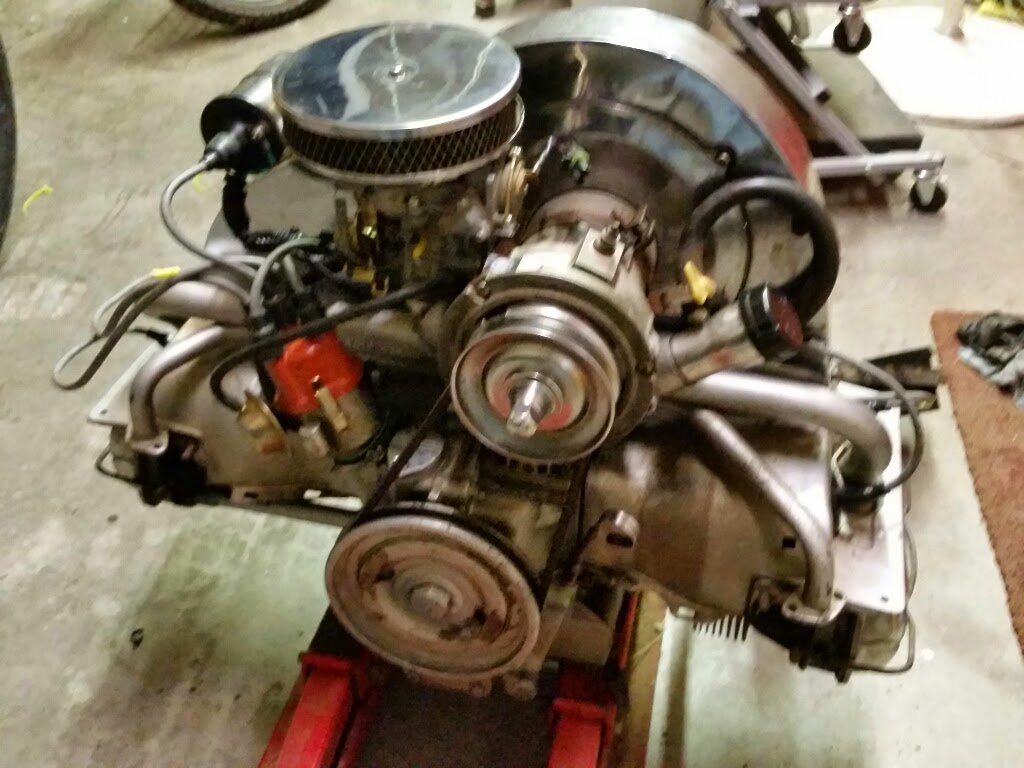
That same day, SpongeBob was running ok, but not great. It was taking wide open throttle to reach freeways speeds. I tolerated it for the day, but over the next few days, I did some troubleshooting, including new distributor cap, wires and sparkplugs, to no avail. The troubleshooting seems to indicate that he had lost power in cylinder 4 and that either 3 or 4 was filling with oil when it sat overnight, which can’t be good.
I shopped for another engine, and not really finding anything I wanted to pounce on, I decided that I would put the old engine from Kermit in SpongeBob and rebuild SpongeBob’s engine. It’s a slightly better candidate since it’s crankshaft pulley isn’t welded on and the mild oil leakage from Kermit’s old engine would be tolerable in the short term.
So, I moved all the bits over, alternator, intake, carburetor, distributor, oil cooler.
Started it up.
Hmmm. It runs almost exactly the same, no power from cylinder 4 and that pipe is barely warm. It runs just was well with our without a plug wire on 4. I connect a spark plug to the #4 wire and there *is* a spark, though admittedly, it looks a little weak. I dug deeper and found that the contact on the points was far beyond merely worn. They were eroded almost away, essentially missing.
I had a new set of points and changed them out. Fired right up and after a few minutes tinkering with the gap/dwell and timing, SpongeBob runs great!
Lesson learned: Severely worn points can make a single cylinder loose power. Essentially, the dwell was short and contact resistance was high, so the coil likely was not able to saturate. This provided a weak spark on all cylinders and probably a very weak spark on cylinder 4, probably due to very small dimensional differences between the lobes in the distributor. I may have been able to adjust the points such that it would have worked, but they needed replacing anyway. Tinker tells me that this is what points look like when the key is left on for an extended time without the engine running.
The oil in the cylinder still means a rebuild of the engine is advised, but I might have been able to put off swapping engines.
Urban Dictionary seems to summarize it well for me:
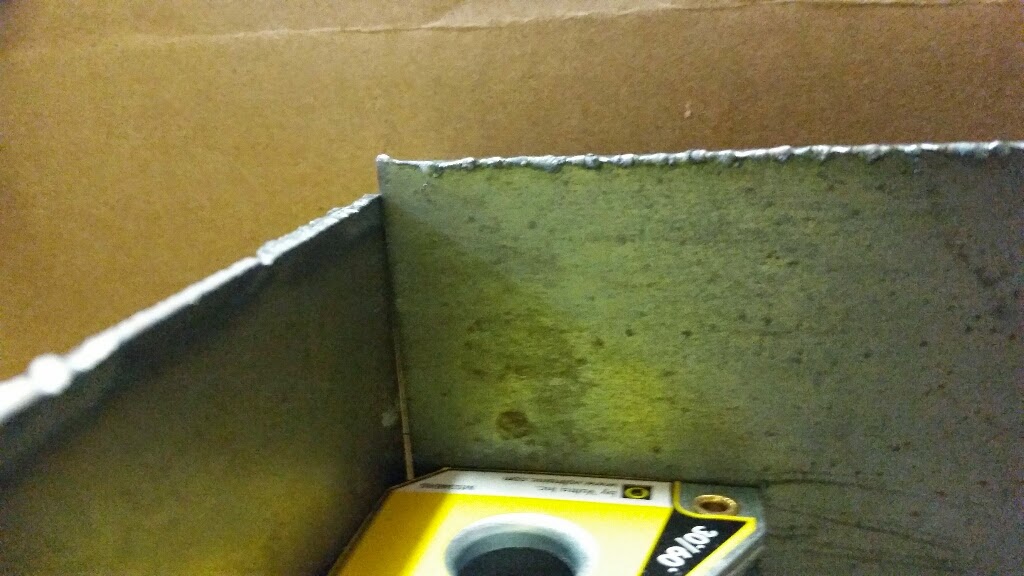
The new tank is largely finished, shown here after tacking the panels together and before welding.
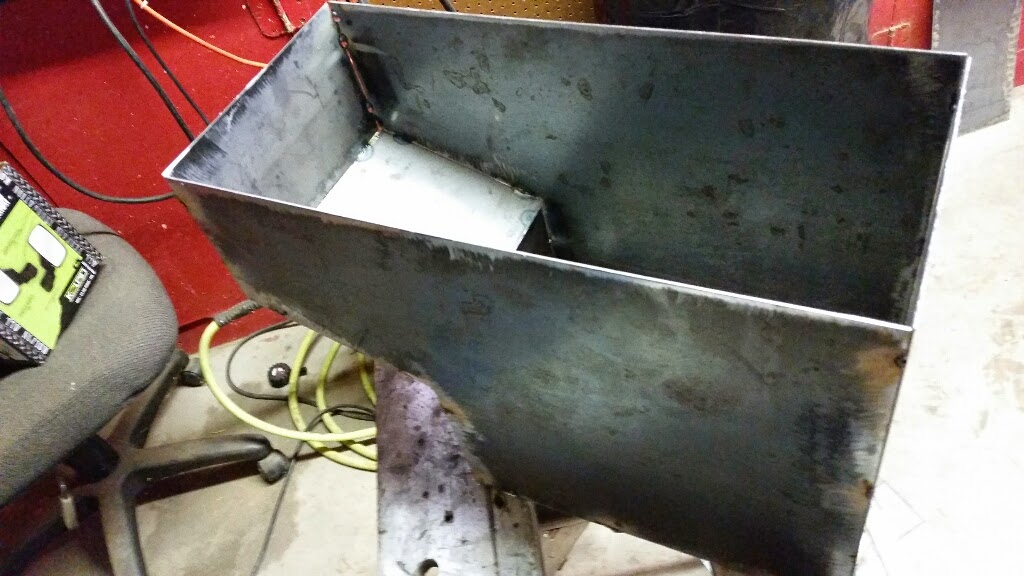
I am disappointed with how rusty I was welding. I had to re-weld almost every seam.
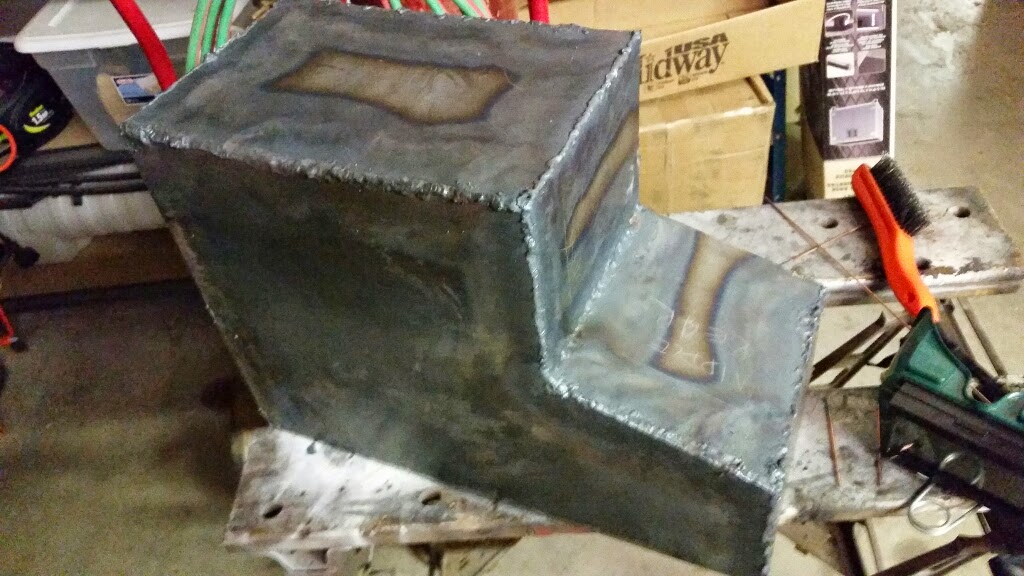
You can see how rough and blobby they are here. I spent much of Saturday grinding them clean and retouching all of them. Once I had done a few of them, I seemed to get my groove back.
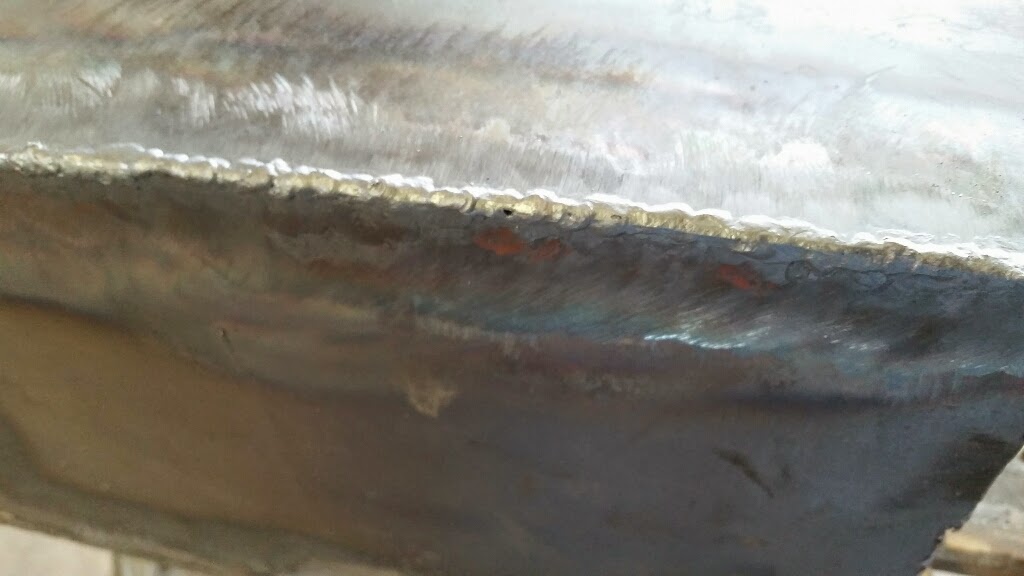
Had I started with nice welds, I would not have had to grind NEARLY as much. Pay no attention to the pinhole in the middle of the pic. It’s gone now.
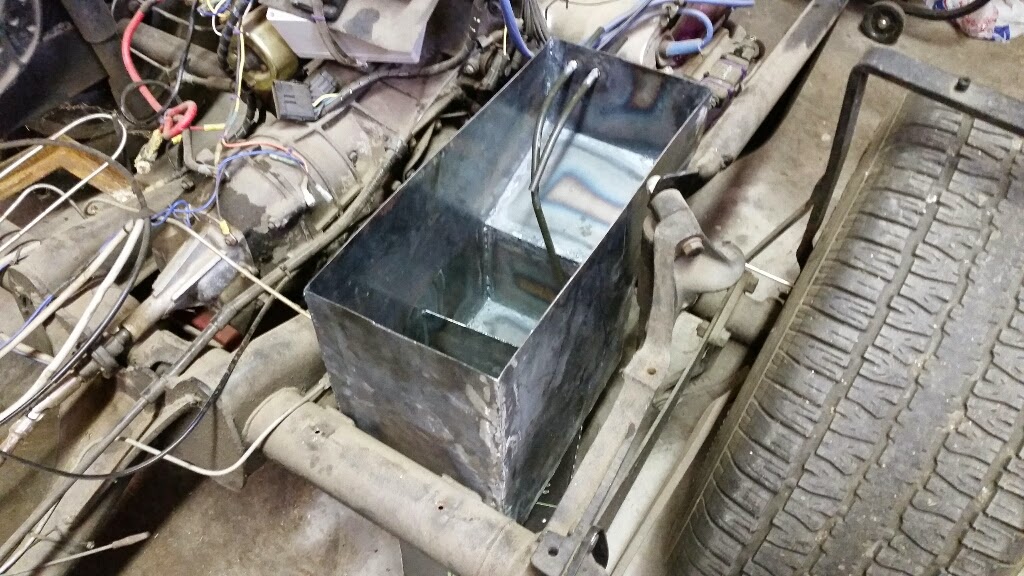
I have decided to go with an external fuel pump, so I added plumbing for pickup and return. Sharp observers may note that the pickup tube takes off at an angle. That was easier that rebending it or cutting it. Deal with it 🙂
Also visible in this picture is a baffle added to the tank. It is tacked to the sides of the tank with about 3/8″ gap between it and the bottom.
Sadly, it is at this point that I also reach another decision, or more accurately, the legacy of an earlier decision, and it turns out to be a bit painful.
I have opted for external plumbing so that I can remove the in-tank fuel pump and lower the tank in the frame. This will in turn let me lower the body, which needed to be raised to clear the top of tank. By not thinking this option through way back when I drew up the design for the tank, I didn’t account for the tank extension interfering with the axle in the lower position. It almost sits on the axle in the lower position.
After much hand wringing, I have decided that the lower tank and subsequent lowering of the body is more important than the extended capacity of the tank. So, I will lob off most of the extension.

The single vertical line is where I will cut. This will still add at least a tiny bit of capacity and will under no foreseeable circumstances interfere with the axle. I had considered moving the bottom of this section up, which would allow only a little bit more capacity and would let me keep the plumbing as it is, but would still have a chance of interfering with the axle.
And to be clear, it’s not the axle I presume would be damaged in the collision, but the fuel tank, right there over the exhaust pipe for cylinder 3 and right next to the spark plugs. Lets keep the fuel encapsulated until it’s in the cylinders.
In a related design shortcoming, the fuel level sender, as layed out recently, is directly under the same body brace that I need to lower the tank in order to clear. On the plus side, with the new shorter top, I can cut from both the front and the back of the top to make it fit and in the process move the sender forward or backward away from the brace, whichever seems best.
This change will also hurt my plans to make a nice extended fuel filler neck. I will need to simply move the neck off the old tank. I have looked for a new neck. The only ones better than the one I have are weld in parts for aluminum. Maybe the next tank can be aluminum.
This delay has allowed me to come up with a checklist for what is needed to get this trike well on the road and I’d be fibbing if I didn’t say it will be tough to make it by Labor Day. They are in no particular order:
1. The fuel tank completed, duh. Finish cutting, welding and lining. Includes new plumbing, cleaning of fuel lines and probably the injectors.
2. Wiring issues resolved; there were a couple of emergency repairs made because wires were so short that they pulled loose from the back of the fuse block and were pretty much unreachable for repair.
3. Wiring diagram; optional but almost a requirement to get all back working.
4. Brake master cylinder reinstalled.
5. Brake slave cylinders replaced (optional, but highly desired; need front wheel cylinders instead of rear)
6. Footpegs painted/powder coated and mounted; will involve cleanup grinding of attachment area on frame tube and possible refitting of mounting flange to tube.
7. Replacement of shifter; most likely, I can just take the shift lever from the new unit and leave the rest of the old one in place.
8. Ignition switch placement. This should go in the fiberglass, but I am afraid it will not be a simple project and may do extensive damage to the paint if not done perfectly. Considering putting it down by the shifter. May end up with temporary alternative, probably using the headlight switch on the control pod.
Last night, I rough cut the rest of the fuel tank panels.
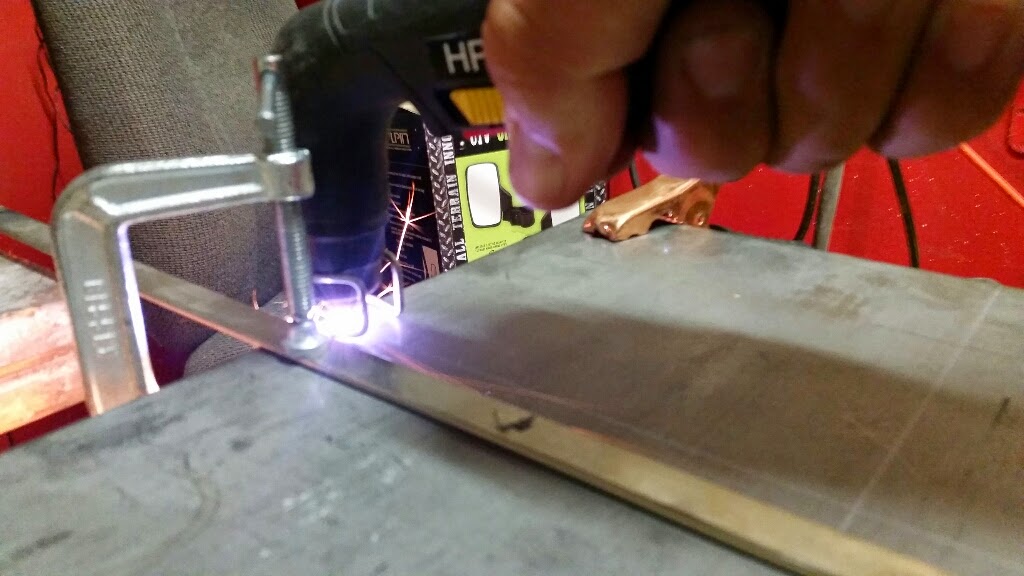
I was able to clamp on a straight edge and follow it for all cuts.
I haven’t perfected the offset yet, so I do have some parts that might need a little more trimming.
A simple straight edge, clamped at an offset from the cut line, works pretty well. The wire standoff guide is far from ideal, though.
In any case, I have a stack of panels, ready to trim, clean and assemble!
I have, after MUCH delay, began the construction of the replacement fuel tank for Puff, the dragon trike.
Stacked two 2′ squares of 16ga mild steel and plasma cut them simultaneously….
Here is the basic plan:
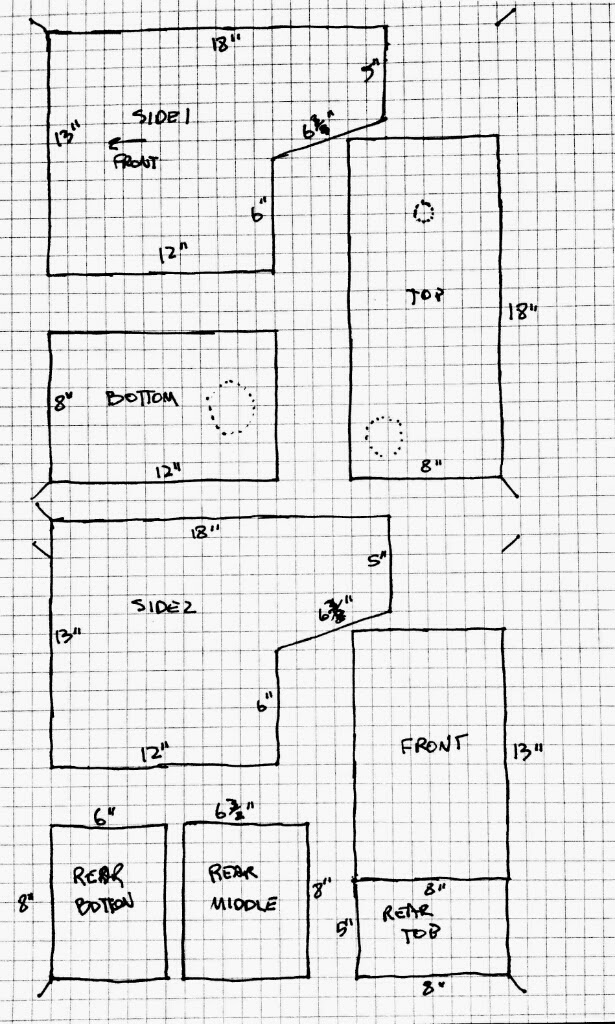
The layout is intended to use as many of the factory sheared edges as possible to help keep the parts as square as possible. I would love to have used one 5′ long 8″ wide strip for the top, bottom and ends, but I don’t have a bending brake. I have found many inexpensive brakes, but they tend to be limited to 20ga and smaller material. There is a substantial jump in the cost of tools that can bend 16ga. So, instead of about 11 feet of seams to weld, it will be more like 25 feet.
The dotted circles on the top piece are for the filler neck and fuel level sender.
There is a dotted circle shown on the bottom piece is intended for the in-tank fuel pump I am currently using, but I don’t like it hanging out of the bottom of a tank that is already pretty low to the ground, so I am considering plumbing this tank for an external fuel pump. On the other hand, I already *have* the in tank pump, it has a pressure regulator attached and it needs no return line plumbing.
Not shown in this drawing are a couple of baffles to be added to the bottom to minimize sloshing. These will simply be panels tacked to the sides and bottom of the tank, arranged and/or cut to allow free flow of fuel, but not totally free movement.