Rack’em Up

I finally put together a desktop 19″ rack that I have wanted to put together to put all the RemoteRig Radio end equipment into. It went pretty quickly. The shelves came with hardware that didn’t fit the threaded holes in the rack. Luckily, I did have enough of the right size to assemble everything, though I need a few more to make all components attached with the right number of screws.

upload_-1

Please pardon the workbench.

At the top is an AC plug strip with individually switched outlets. At some point, I hope to have some other equipment in this rack, so the lone device connected to it on switch 1 will have buddies.

Switch 1 powers the JetStream 25A switching power supply.

The DC output connects to the input of the RIGrunner 4008H distribution panel. I connected one of the 25A outputs to the Icom and one of the 1A outputs to the RemoteRig. I made up a spare power cord to use with either the Kenwood TM-731 or the Yaesu FTM100DR, as they both use the same T-style connector.

After that, it was just connecting the grounds and antennas back to it. For the time being, I have left it in the center of the workbench because it’s permanent home still needs a bit of work to clear out. We’ll see what the evening allows.

Altitude is Relative

I have had some trouble getting a signal all the way back to Fort Worth. In fact the repeater I frequent is pretty much exactly 28 miles away. 50 watts into a 6.5 dBi omni antenna *should* look like 136 watts, but that doesn’t account for the hillside between here and there.

Our property is downhill from the street, but today I used a builder’s level to quantify what I believe to be a significant factor in my limited range towards Fort Worth.

For those unfamiliar with a builder’s level, it’s a piece of surveying equipment used most often to ensure structures are level over long distances, particular stuff like driveways or drainage ditches or houses. I first used one when we were building a sand pad for an above ground pool.

IMG_01065

The ground within this circle is 10 inches lower on the left side than the right.

You set up the level on it’s tripod and either leave it where you put it throughout the project or mark precisely where the legs are. Using the bubble level on the device and the adjuster wheels, you set the unit itself level, then using the graduated measuring stick, you look through the little telescope and get the height of the measured point relative to the level plane described by the tool.

IMG_01064


IMG_01061

This pic shows the view through the view scope. The ‘6’ is very dim, but in this view, the ground at the measured point is just under 6′ 8″ below the crosshairs in the level.

Well, I did not use the measuring stick because I was looking for much more of a thumbnail measurement (and it’s a pain to do without an assistant), but I set the level up on the street out front and took a sighting off the antenna on the workshop.

The level is 5 feet up from the street. Once set, the level sighted the workshop just a few inches below the roof peak. Go down 5 feet from there and it’s about the bottom of the antenna mast.

upload_-1.12

So… the antenna mast is essentially sitting at street level, meaning the base of antenna itself is only about 9 feet above the ground in the direction of the repeater.

Even with a beam, I will probably need to get some more height.


Manual Import, Phase I Complete!

I manually moved all the posts on two Electronic Fuel Injection projects from the MSRuns projects forum. They are categorizes here as 1982 Yamaha Maxim XJ550 and 70-something Stires Trike respectively.

Since I manually copied and pasted them and most of them are 5-6 years old, there may be the occasional link that goes nowhere. I will need to audit it, which will obviously take a while.

Also, I just posted the original date in the text of the post. The posting date will show today or yesterday. That can be edited, but with 120 posts, that too will obviously take a while.

In any case, there they are!

A Mostly Good Day

Lots of little things today.

On the way out of the neighborhood this morning, I had my little SDR running, centered on 145.33. At the house, I saw a pretty strong birdie at exactly 144.000 and it never went away all the way to work, so I presume it’s an artifact from the laptop or perhaps in the radio itself. There was a tiny peak just above the repeater at 145.4125, but it went away by the time I got out to the truck, so it was probably something in the kitchen.

rfi-1


Interestingly, Oncor called me today with an update. Basically, my incident has been assigned to an RFI tech. I can expect to hear from them maybe Friday, but probably next week.

There was talk on the repeater today about a short Fusion Digital net right after the regular Six Shooter Net, so I put the FTM-100DR on the workbench so I could use the big antenna and have the best chances of joining in.

On the FM net, I tried to check in on *every* round and was never heard. I guess I need a beam or some more altitude. With the assistance of GoogleMaps, I have determined that I am 28 miles line-of-sight from the repeater. I am considering a three element beam. It would definitely have enough gain going that direction and would likely be wide enough to reach other Fort Worth area repeaters as well.

I eventually gave up and used the time to upgrade the firmware in the radio. I had plenty of time because it was the first time for a particular lady ham to run the net and people came out of the woodwork to check in for her. By the end of the net, she broke both standing records for length of a Six Shooter Net by three minutes and number of unique checkins by ten, even without mine!

So, the FTM100 firmware update procedure is split into three separate elements, the system, the display/control panel and the DSP. Before any of them, you connect the data cable to the PC and run the update program. It shows directions, which are also explained in an accompanying PDF in greater detail.

For the main firmware, you remove power, set an update switch reachable behind a rubber plug on the top of the radio and apply power. The weird part is that the radio in this mode shows no signs of life. You just click the OK and it starts loading. After it finishes, you are to remove power, set the update switch back, power up, perform a factory reset then verify the version.

The panel is different in that you hold down a two key combination on the panel as you power on the radio. It puts the radio into a mode specifically for panel updates. Then you flip an update switch and press a reset button reachable behind a rubber plug on the back of the control panel. Click ok and it starts loading. When it finishes, you again power cycle, do a factory reset and verify the version.

The DSP is similar to the panel. You hold down a different two key combination on the panel as you power up, then press a key on the panel to get to the DSP update mode and click OK. Interestingly, the DSP update didn’t claim to need a factory reset and definitely showed to be updated by the version numbers.

After the factory reset, you lose the callsign and all your channel memories and any other settings. It’s probably best to backup all to an SD card before the updates then restore from SD afterwards. In my case, I had both the SD card and the programming software.

So far as I can tell, the updates didn’t fix anything that I was aware of 🙂

So by that time, the record-smashing Six Shooter Net on FM had concluded and they had anyone who could do digital do a quick checkin with their location. Not surprisingly, I couldn’t make it, but 16 others did.

Oncor RFI Saga

Tiny update:

Thank you for contacting Oncor regarding radio interference. Your request has been assigned to the appropriate department. One of our representatives will contact you within the next 2 business days.

So, maybe something will come of it afterall…

Mostly Moved

Blogger has an XML export and WordPress has a Blogger Import plugin that can read the export, so moving the posts over was generally pretty easy.

Everything defaulted as Uncategorized. There is a a bulk edit facility where I could *add* another category, but I had to touch each post to remove the Uncategorized tag. Once all the posts were properly tagged, I added a menu that lets me put all the posts from five separate Blogger blogs and use the menu to view only the specific subjects.

The other caveat to the export/import process is that images came across on the import as URLs pointing back to Blogger. I will need to copy those actual images over here and edit the links in the posts. I think I can massage the XML files themselves to facilitate it…

All in all, though it is not yet 100% finished, it was much easier than I expected, especially with 190+ posts going back 6 years.


WordPress

Thanks to Google’s decision to move PicasaWeb galleries under the Google Photos banner, and more specifically the likely effect that may have on my few years of Blogspot blogging posts and the access to those photos, I have elected to move all my blogs to a WordPress server. Rather than using the WordPress hosting service, I have chosen to use WordPress on a server is hosted by GoDaddy. In a way, I am again dependent on another entity for my internet real estate, but this is a paid service and I don’t think GoDaddy is as likely to make such far reaching decisions without input from their paying customers. Besides, it’s easier to have GoDaddy host all this stuff as well as register my domain names. Well, most of them are here, anyway.

Google is great (if maybe too connected) and I foresee keeping my gmail accounts and my Google voice number for as long as they offer them. My preferred mobile phones are Android, so there will always by a Google connection there. Google is also a private business and they are completely free to make whatever decisions they see fit to operate their business. Those of us who enjoy the services that they offer for no direct renumeration must be willing to accept that we really have no say in their decisions, not like their board of directors does.

My blogging, even if only seen by a small number of people, is a deeply personal investment of my time (on Blogspot since 2009, before Google bought them) and I am trying to insulate myself from the decisions that Google may make.

Thus, I am moving my blogs over here where at least I have a contract with GoDaddy and they have accepted my renumeration in exchange for specific services.

I have five Blogger / Blogspot blogs, though really only three of them have any reasonably current activity. As I learn how things work in WordPress, I imagine I will build replacements for all five blogs, plus a couple on MSRuns and, who know, maybe some new ones. It should be an interesting ride, for me anyway.


Curious Noise, Cont.

Actually, before I update on the noise, I spent literally single digit minutes remotely mounting the control head of the Yaesu.

When I got the radio, I also got the  MMB-98, a universal(ish) suction cup mount that fits several models of Yaesu radios.

I moved my GPS to the windshield, to the right of the rearview mirror, which left this space open on the dashboard. The mount uses a single screw through a pad of fixed radial teeth to provide a secure and adjustable angle. Unfortunately, there is not an angle that precisely matches the angle of my dashboard, but it is reasonably close to level. More importantly, it’s WAY easier to see and operate up here than it was down there.

I am quite pleased.

So, the noise…

I asked on a Thursday night net if there was anyone near my experiencing the interference. There are hams nearby, but none really close. However, on person suggested contacting Oncor Energy about the noise, as such noise is frequently power line equipment related, generally easy for them to locate and resolve and they are apparently pretty good at it.

I chose to contact via a general email. In short, I explained how I noticed and my investigations thus far. For what it’s worth, their email robot replied pretty quickly, assigned me an incident number and suggested that the request will be processed within 48 hours.

Dillon RL550B and First Sunday Match.

I have had this Dillon thing for several months now and I am finally getting it installed for use.

Way back, I broke the particle board work bench top with normal press operation.

IMG_01241

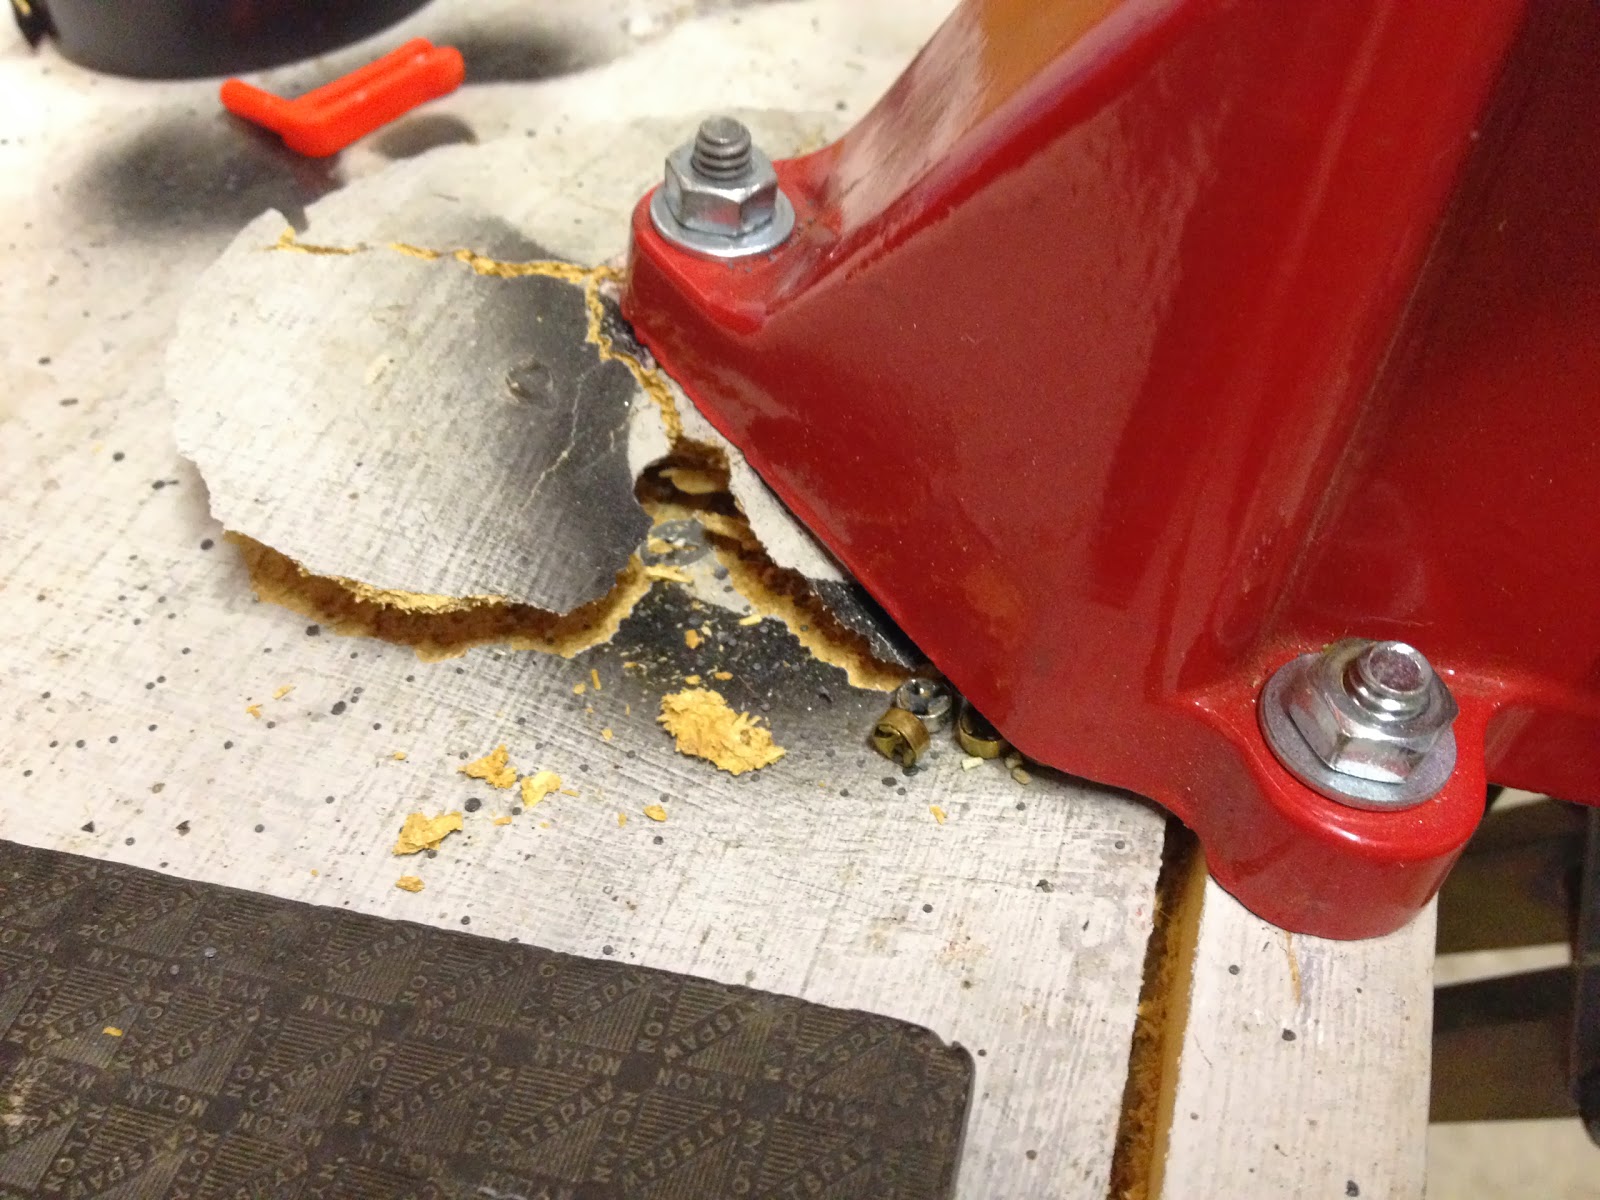
Even when I put it there, I knew it was just a matter of time until it would give.

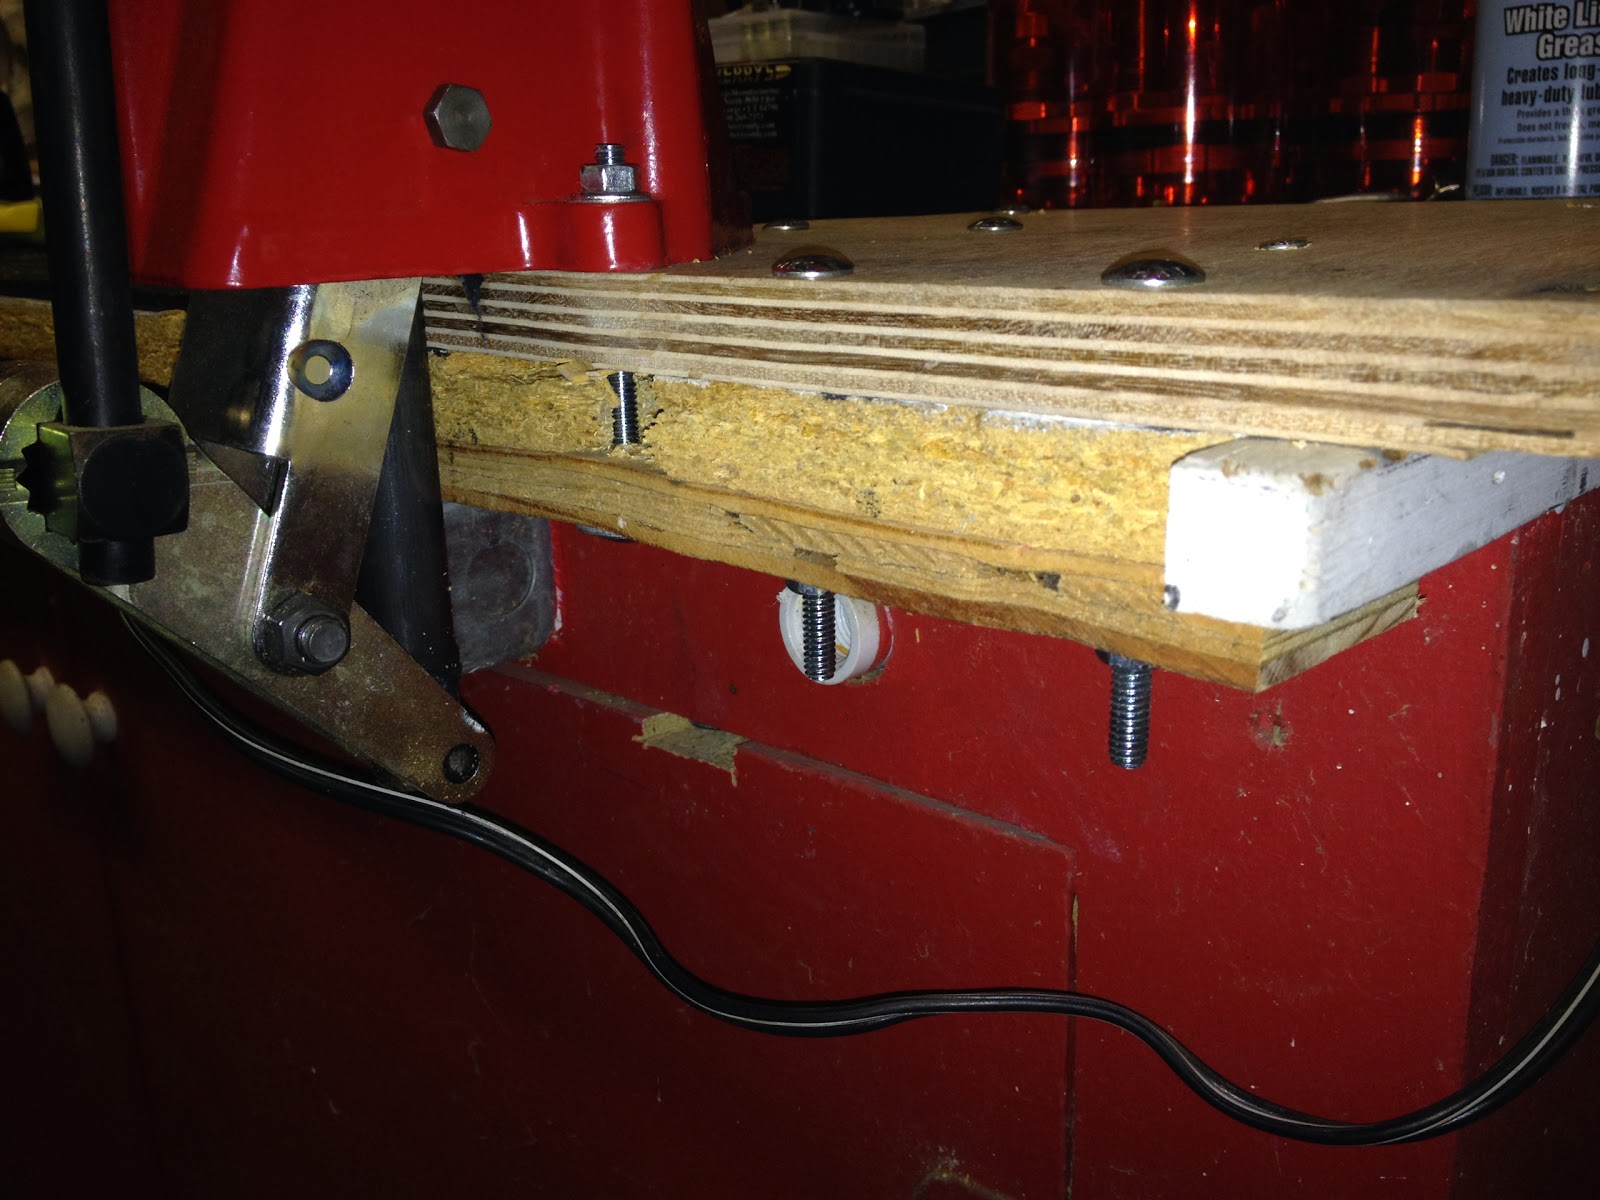
I cleaned up the damage as best I could and put a piece of 3/4″ birch plywood on the top of the bench, glued down and backed up with a metal plate underneath.

IMG_01243

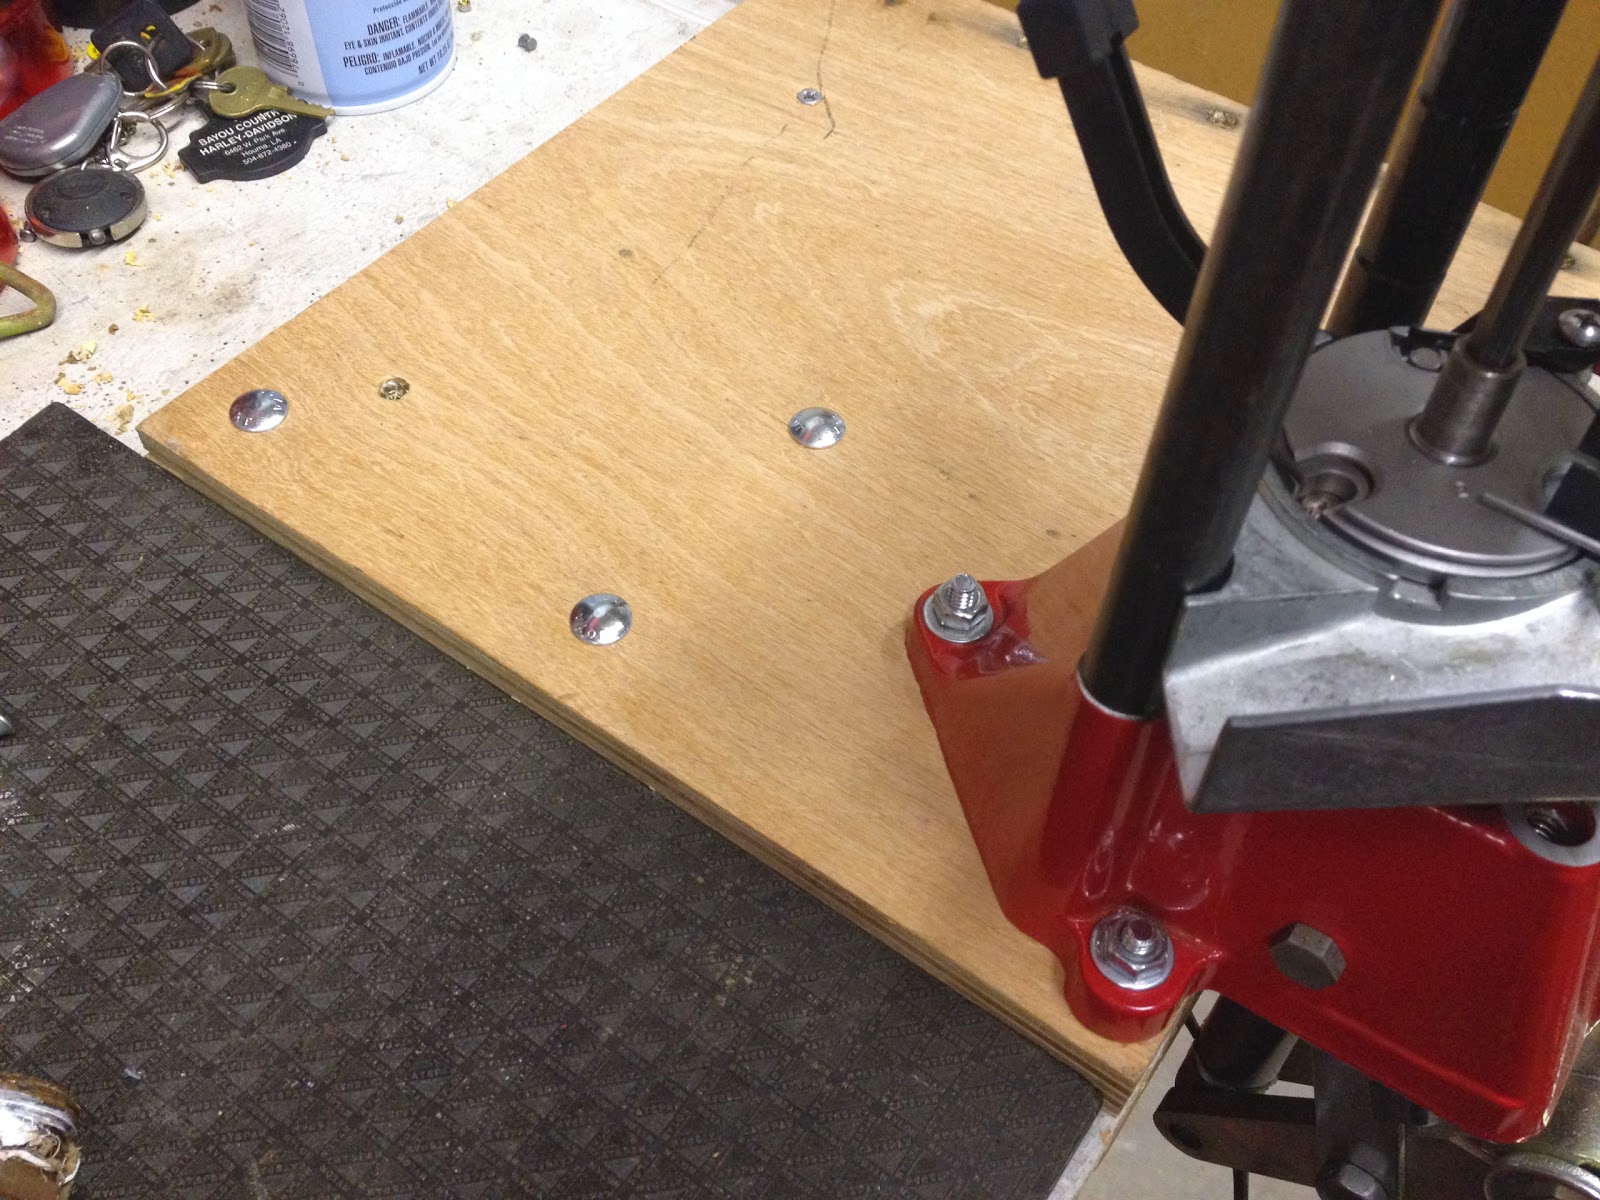
One the front edge, where the damage was most severe, I also sandwiched the damaged particle board with a strip of plywood underneath.

IMG_01244

This has all served really well, the press was now mounted solidly enough to reveal other problems instead 🙂

Enter the Dillon.

The Dillon has the strong mount accessory base that is wider than the piece of plywood that I bolstered the workbench with. It solves problems with some installations, but it may not be the best solution for my installation, due largely to my relatively high benchtop.

My original plan was to add a strip of 3/4″ plywood to make it a little wider to fit the Dillon. I decided that I didn’t really want to piece it together like that and thought I should just cut a bigger piece of plywood. I have a piece of exterior grade plywood I purchased but turned out not to be needed for a ham radio project.

Then I realized that the whole workbench could benefit from a plywood top. I have a bench vise on the other end of that work area. That plywood piece I have is solid, other than the holes drilled in it, but it’s kinda rough. I remembered a plywood table/bench top I made long ago that was not friendly to skin.

I then decided that if I was gonna do the whole surface, it would be worth getting a nice piece of plywood for it, so I verified that a 2×4 foot piece would fit and I went to Lowe’s for plywood, hardware and Liquid Nails adhesive.

By then, it was time to get ready for my attendance of the first official 1st Sunday IDPA match and I didn’t want to fix the workbench right then as badly as I wanted to go shoot!

Matchwise, because of the troubles I was having with the Remington primers in the Starline brass, I didn’t trust my last batch of ammo and shot with Remington UMC factory ammo. I brought a 10mm Auto barrel and some ammo for it, but elected to go with factory ammo for the 40S&W.

Stage 1 hurt but the rest of my stages were reasonably good, especially considering that it has been a couple of months since my last match. The majority of the pain was from one target. It was at the far left of the range, kinda in the dark, a vertical target with an angled non-threat in front of it. Not only did I hit the non-threat, but I aimed at the non-threat and having missed it, made up the miss. The actual target was clean and untouched. So, 10 down plus 5 seconds fail to neutralize on the target and not one, but two hits on the non-threat for 10 more seconds. I’m pretty sure there was another procedural as well, out of cover for another target. The rest of the stage was pretty normal, 1’s and 3’s.

The rest of the stages weren’t bad either. Overall, raw time 109.59, total 142.09. Stage 1 points down and penalties accounted for 22 seconds alone.

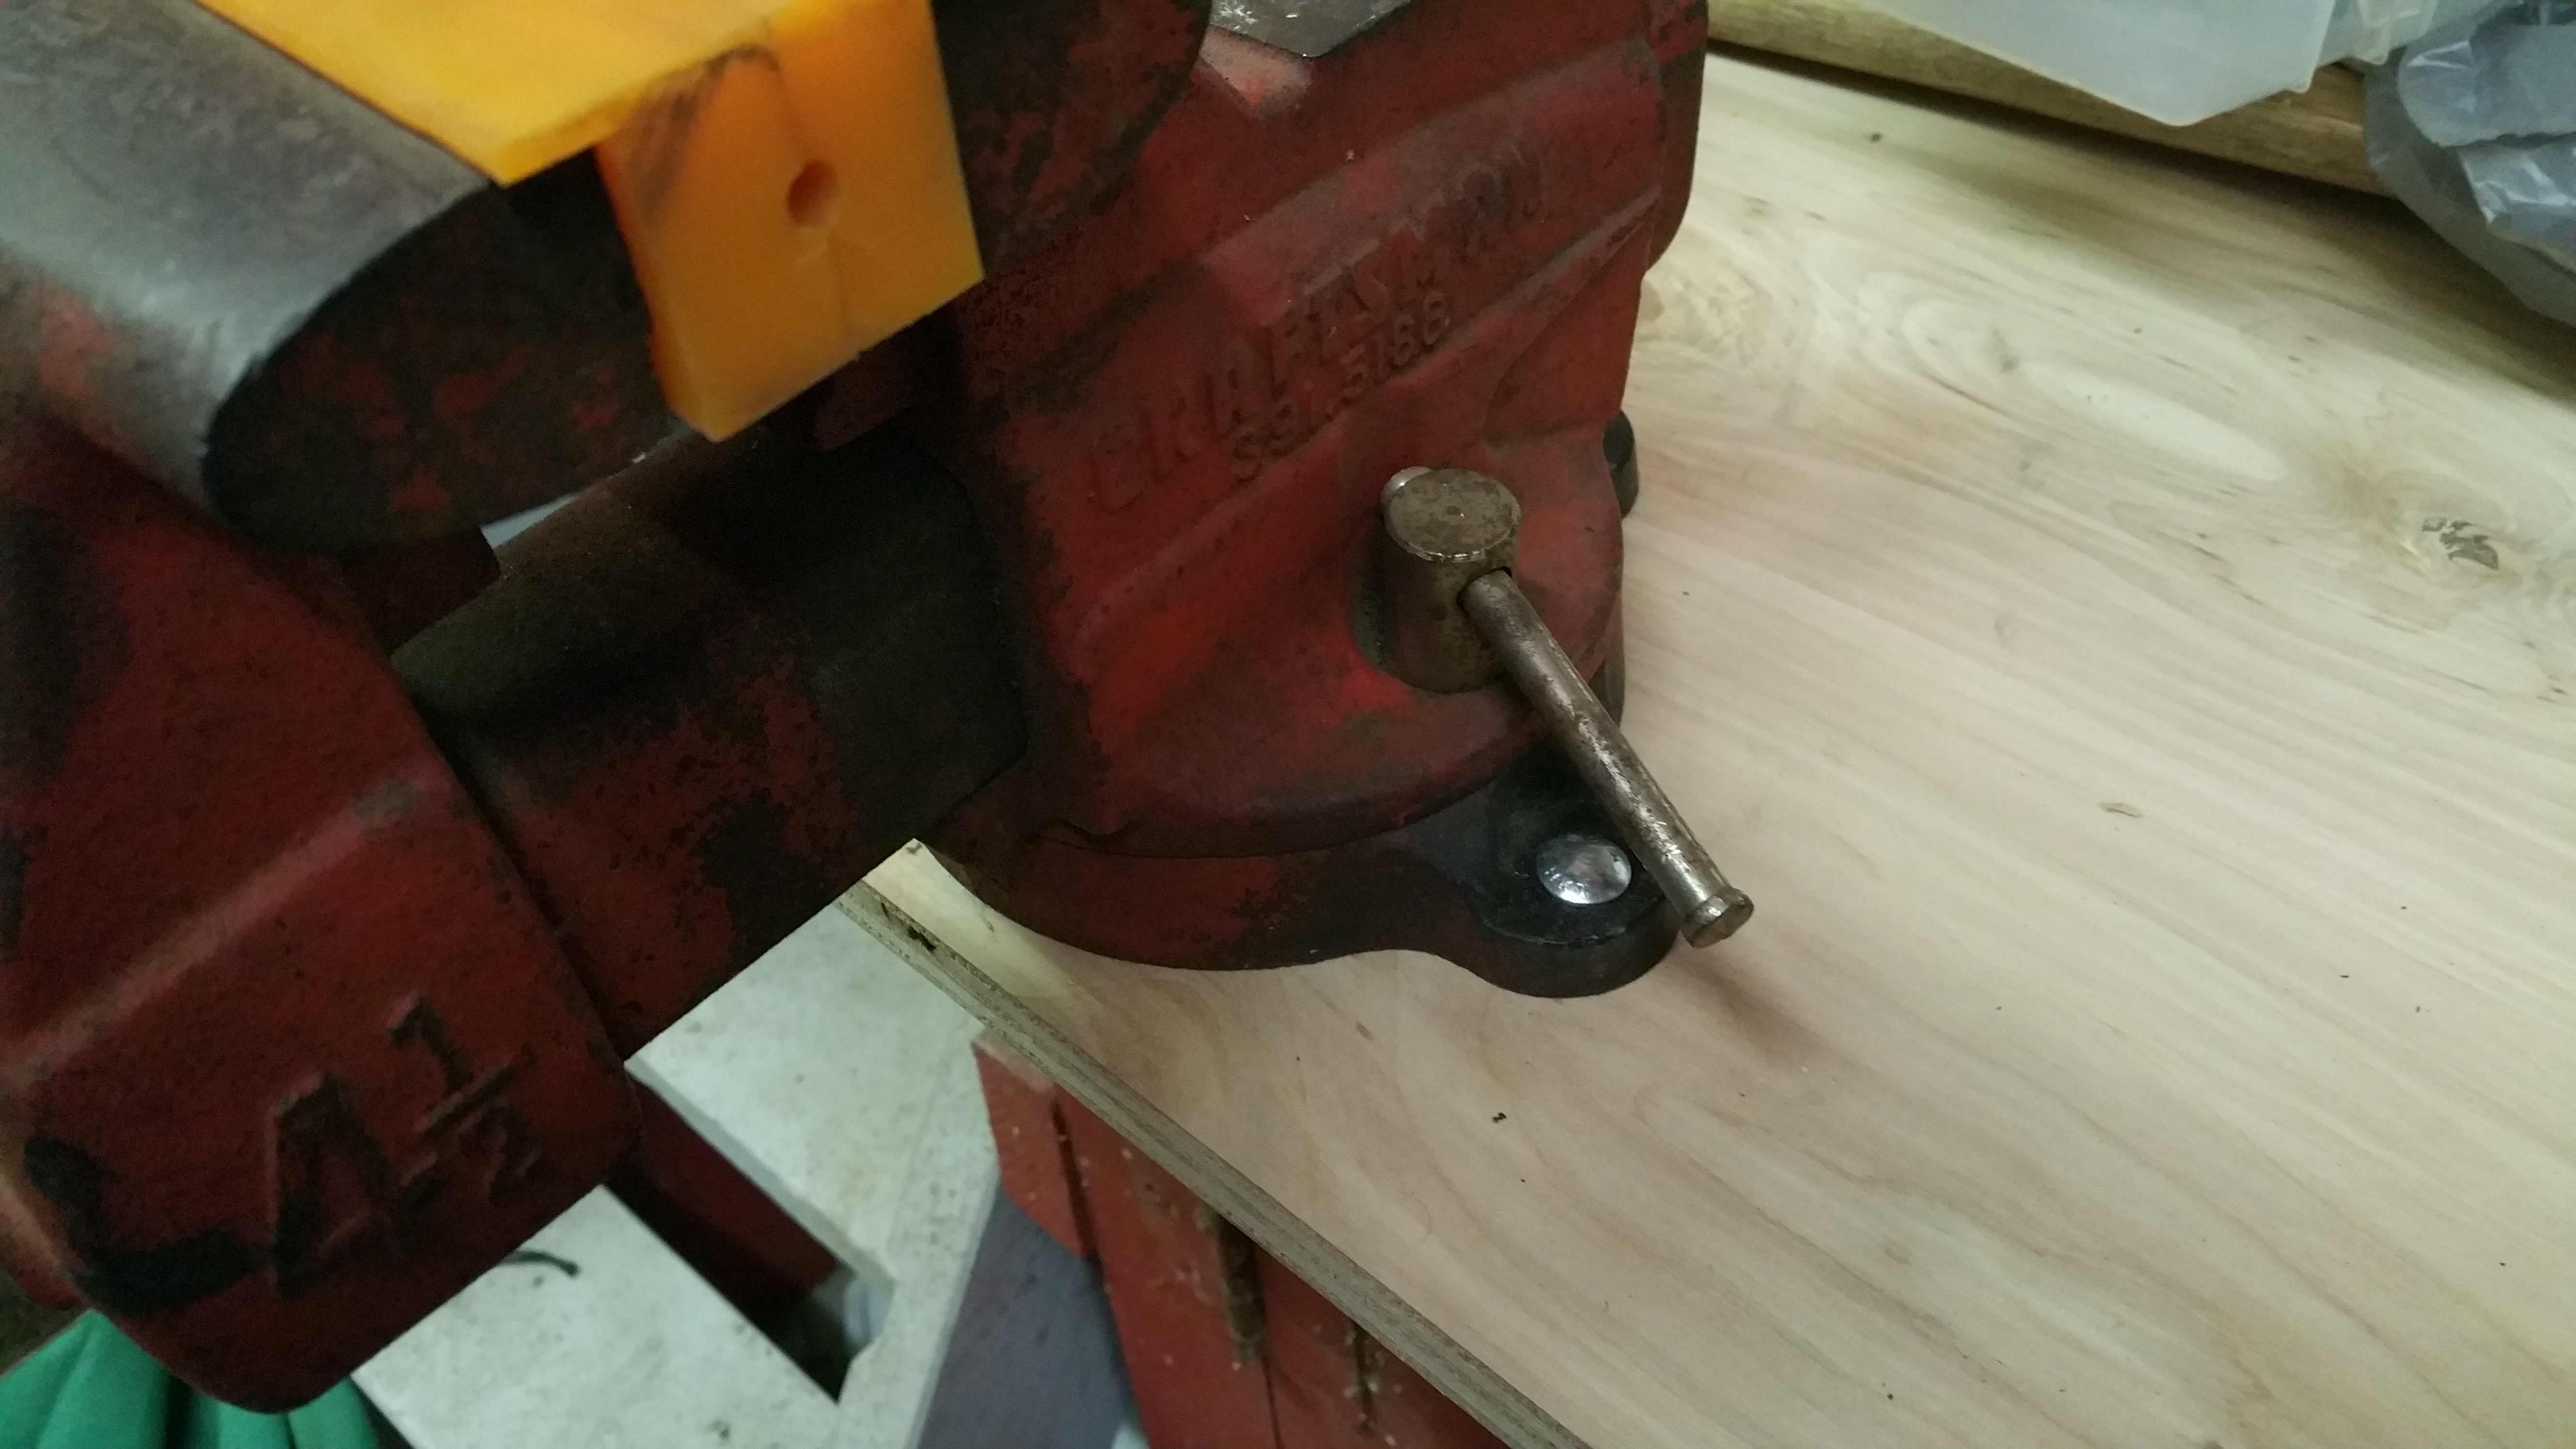
A few days later, I managed to finish the bench top and mounted the Dillon and the bench vise.

20160218_072133

Upon removing the vice, I found that the particleboard beneath it was probably only a few solid whacks from complete separation like the original Lee press did.

20160218_072207

Now the workbench is too pretty to work on…

Sluggy Blogs All The Subjects