Well, the extra bins definitely helped speed up production!
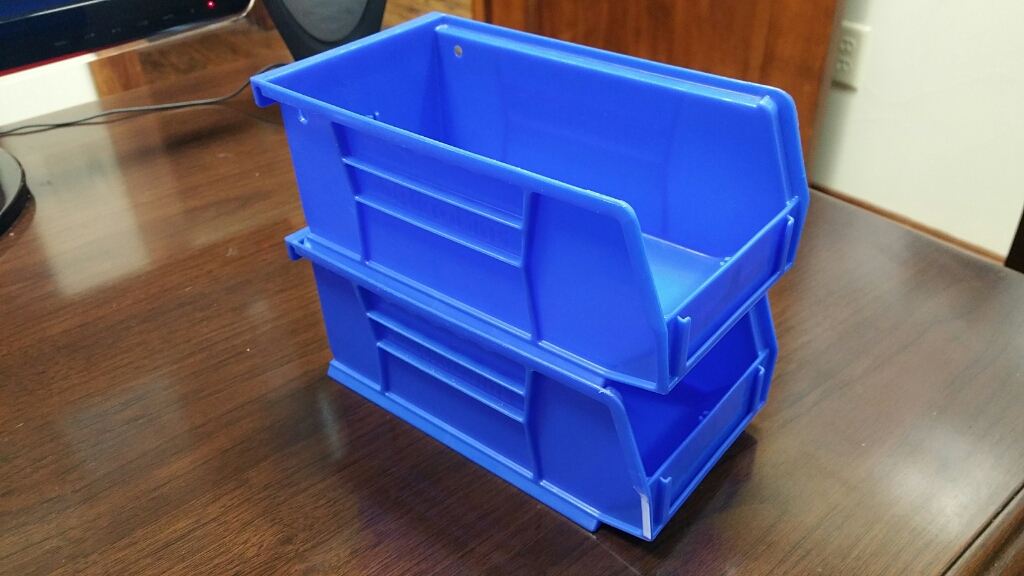
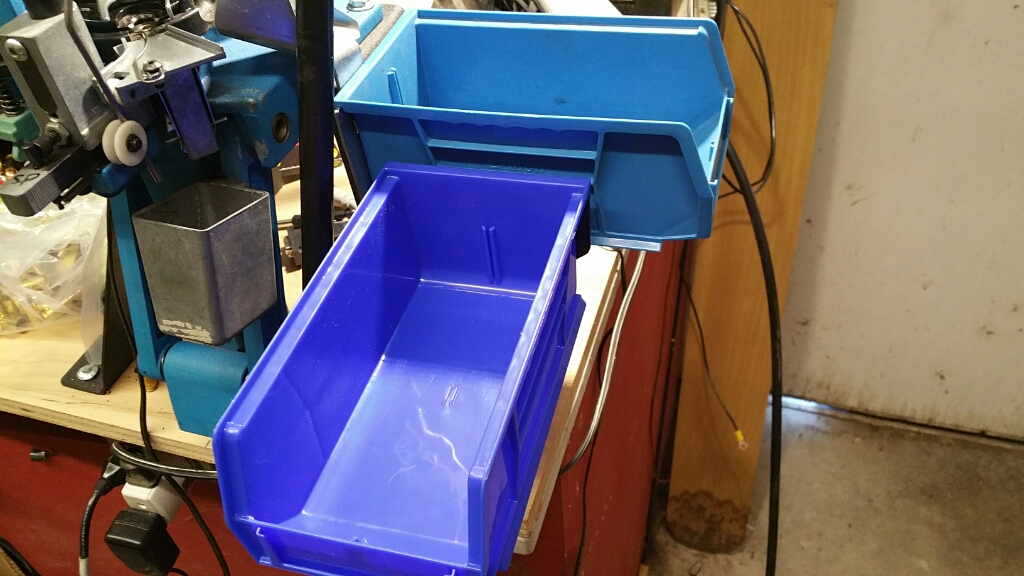
The color difference is fairly apparent here. The bin in the foreground is the Akro-Mills native bin, the background is the Dillon version.
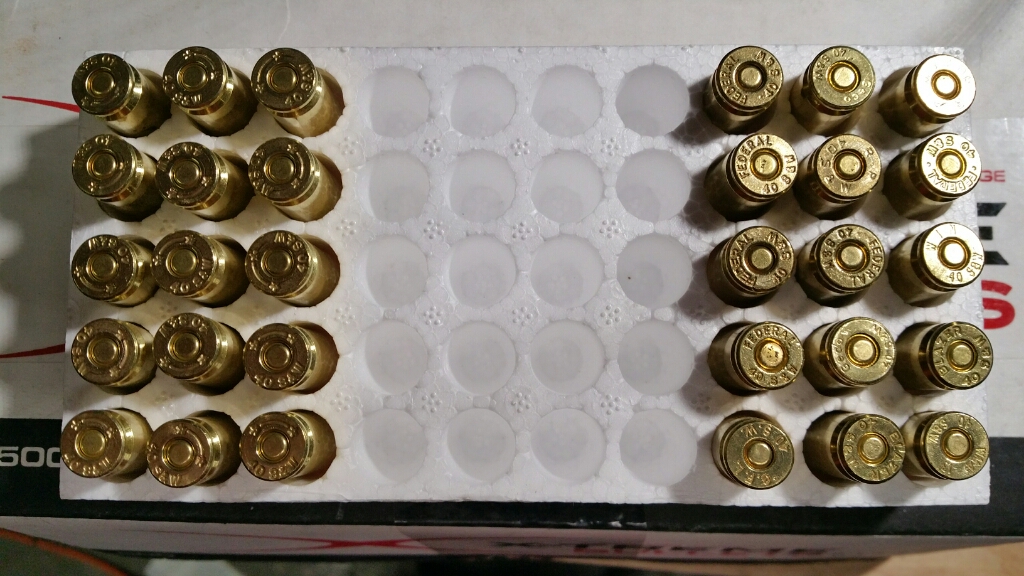
This arrangement with empty brass within easy reach definitely sped up the loading rate. I was able to get well over 150 rounds loaded in a little more than an hour, including some troubleshooting as detailed below. My QA fail rate is about the same, with most rounds dropping unrestricted into my gauge block, a few fitting well enough to probably work in the pistol, but I rejected them to the rework bin (since I now have enough bins to have a rework bin) and a couple that wouldn’t go in well at all. Historically, I can usually get most of those those back with the Bulge Buster, but it is not currently mounted on the bench.
I had two or three rounds where the bullet seating went badly. I probably need just a tiny bit more flare in the case mouth to address that. I set it intentionally close to help keep from overworking the brass, so I have some adjustment range. Cartridge OAL was well maintained in spot checks, 1.125″ to 1.130″ with most checked units at 1.127″.
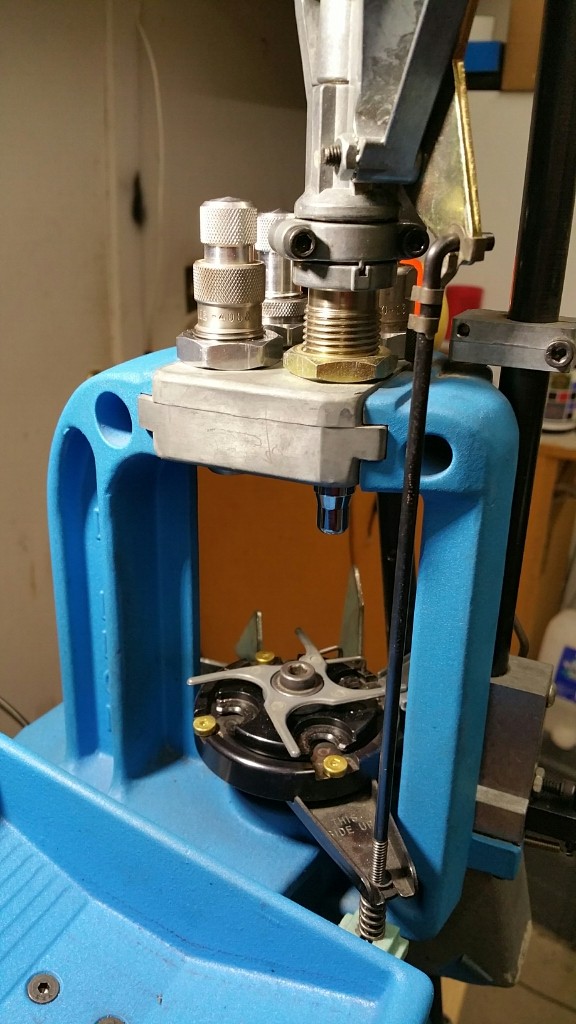
The biggest problem was with primer feeding, mostly due to the spent primer catcher chute not pivoting freely on it’s somewhat damaged cotter pin. This chute is gravity operated. The down stroke of the ram opens the chute to allow the spent primer to fall out, but the chute would bind on the pin and not fall closed on the upstroke. The spent primer would fall into the works, frequently landing where it would prevent the slide assembly from returning forward to align the new primer with the shell plate. I reworked the pin a couple of times before I got the chute working reliably. I will add that pin to the list of minor parts I’d like to order from Dillon.
That left a much simpler issue wherein the slide itself needed cleaning and lubrication. Normally, the slide is operated by a carefully formed steel wire rod and rollers that push the slide out to pick up a new primer at the top of the upstroke. A spring pulls the slide back in, against the rollers and rod on the downstroke. It would on some occasions, snag for a fraction of a second and when the spring would overcome the friction, the slide would move suddenly, often unseating the primer from the punch assembly. This primer would most often land in the works somewhere, either stopping the slide from going all the way home, or landing where it would interfere with the shell plate platform. If by a some miracle of chaotic physics it landed clear of the works, then there was obviously no primer for the next case.
In the course of looking up the proper part names above, I did finally find the Dillon bins, for $2.95 each. 🙂
Having only one bin on the Dillon press definitely slows production. I couldn’t find only the bins on Dillon’s website, but in perusing Amazon, I found the same physical bins, with even the same manufacturer’s part number (Akro-Mils 30220), offered in case quantities. I ordered 1 case of 24, about $50. They arrived today.
Though as depicted here, the color looks like Dillon blue, it’s a trick of my office lighting, for the actual color is more like Pantone 280C.
While I don’t think I really need 24 of these, it does seem as though several would be handy. I think that will make it easier to load a large batch of the same ammo without necessarily stopping to process the output bin.
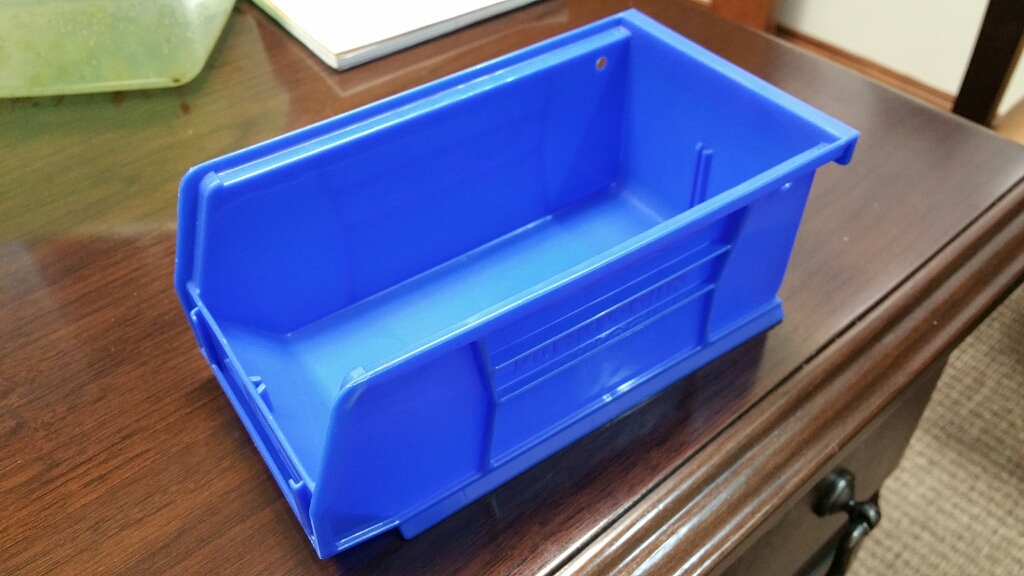
They have a nice slot for a labeling card and they stack nicely.
The good thing is that they stack without reducing the volume of storage they provide. The bad thing is that they stack without reducing the volume of storage they require. Still, the whole case of them is 9″ x 17″ x 15″.
I finally got the Dillon RL-550B press all set up and loading ammo!
I reused my Lee Precision dies, partly because I had them already and partly because the Lee Factory Crimp die is highly recommended, even by many Dillon users.
On the Lee Pro-1000 press, there are three stations with dies, resize and deprime, flare and charge, seat and crimp. The Dillon is a four station press. I kept my Lee resize and deprime die on station 1 and used the Dillon flare and powder die.
For the bullet seating and crimping stations, I elected to keep my seat and crimp die, but adjusted it pretty high up so that it will only seat the bullet. I got a second die for crimping, with the bullet seating punch on it adjusted very high. This separates bullet seating and crimping operations. I may consider the Dillon seating die in the future, for it does have some interesting features, like the ability to disassemble it for cleaning without losing it’s setting. For now, I went with what I know.
I stopped using polycoated bullets, such as BBIs, because I was getting a ring of shaved material right at the case mouth, which was usually caught at the case gauge, but occasionally caused difficulties going all the way into battery. More case flare did not seem to address the issue, and I believe it was likely because the one step seat and crimp is still pushing the bullet down as the die is crimping the case. The harder copper plating on bullets like the Xtreme Bullets are just not as sensitive to it and are essentially just as inexpensive with frequently free shipping, minus BBI’s always included shipping. However, with these operations separated, perhaps I can revisit the poly ammo option.
Compared to the Lee, it is a substantially beefy press. It’s a bit more manual, though. My Lee has an automatic case feeder and the Dillon does not. The case feeder option for the Dillon is very nice, with a motorized unit up top to load loose brass into the press ready to process, whereas the Lee is really just a chute that you fill manually. With the case feeder in place on either press, one hand stays on the handle and the other handles placing bullets and, in the case of the Dillon, also indexing the shell plate.
There is much to recommend the simplicity of the Lee approach. It’s a fairly simple plastic turret with four clear tubes and a shallow funnel collator to simplify filling them, and a simple pusher to position the case into the shell plate during the upstroke of the handle. Each tube holds about 40 empty rounds of 40S&W. As each tube empties, you turn the turret assembly to bring a full tube into battery. Once empty, you reload the tubes all at once with the attached funnel and an agitation technique that causes the cases to drop, head first, into the tubes. It takes all of 20 seconds and you’re back to loading. It’s such a simple and inexpensive approach that it’s not really optional; the press ships with all the but the $12 funnel collator included.
The Dillon case feeder, however, is a large motorized contraption that costs more than the entire Lee press. Not saying I don’t want one, just thinking the $270-ish would buy a lot of reloading components right now. I wish there was an intermediate option, something between having no casefeeder and having the super-deluxe model.
No, for now I will get a few extra bins so that I can have empty brass at my right hand and and thus become the case feeder. 🙂 These trays from Amazon are the exact model provided by Dillon, though they are likely a different shade of blue and don’d have Dillon’s logo on their sides.
Since I have had some feeding problems with some ammo I made recently, particularly bullet setback while feeding, I am starting conservatively. I loaded 180gr RNFP over 4.4g of PowerPistol, 15 each with new brass and range brass. They are 1.125 OAL and crimped to 0.420, +/- 0.002. As I was setting the seating and crimping dies, I tested the crimp (with unprimed, uncharged brass) by compressing the finished round with pliers to verify that it takes substantial effort to move the crimped bullet.
If these feed and shoot correctly, I will see about having a bunch ready to go for a shooting class I am attending this weekend 🙂
This weekend, particularly Sunday, I did quite a bit of work on Kermit, the green trike. The big thing is that the clutch master cylinder leaks down so fast that it’s pretty much undrivable. Certainly unsafe to drive.
Qualitat VW stocks a lot of parts that most shops have to order, so on Friday we went out there to get a rebuild kit of it. He didn’t have the rebuild kit for this size, the 5/8″ piston, but he did for 3/4″. We elected to get a new EMPI 3/4″ master cylinder, but also got a 3/4″ rebuild kit to be used for the brake cylinder. Someone thinking more clearly would have put the new cylinder on the brakes and rebuilt the old cylinder for the clutch. At least I can still do that if I decide to.
After reinstalling the pedal and bleeding the line to the clutch, I began working at trying to make the engine reliable. It’s been bad about getting into a mode where it wont keep running at an idle. It will typically restart without any appreciable difficulty, but it just won’t idle.
Having followed instructions on adjusting the carburetor several times before, I have never been able to get it to act as described.
The entire procedure involves setting everything except the carburetor first. The first two, setting the valves and points, are pretty easy. Well, easy enough to do 100% successfully. Step 3 is setting the timing.
Now, it seems as though setting the timing would be easy, but it’s adjusting the timing that’s easy. Actually setting it to a value that is agreed upon by all the documentation I can find is the tricky part.
Timing involves the distributor, duh. The trouble with setting the timing is that pretty much all the documented procedures are for fairly specific combinations of hardware that are in stock Beetles, running stock carburetors and stock distributors and stock exhaust. Almost none of that applies here.
As for setting the timing, the biggest thing seems to be the vacuum signal from the carburetor to the distributor. Yes, the PICT30/31 is a stock carburetor, and yes, the Bosch 034 is essentially a stock distributor, but the port on the carburetor that is supposed to connect to the distributor has almost no detectable vacuum, certainly not as much as is required to operate the dashpot on the distributor and connection anywhere else maintains a fairly high vacuum at all times and thus has essentially no effect. The distributor is a dual advance model, with both vacuum and centrifugal advance, so it basically ends up running like a 009 distributor.
With the timing running essentially centrifugal only, the problem now becomes adjusting the carburetor.
I did find something interesting while researching a bit on this blog post. Something that apparently happens with some regularity is the diaphragm in the dashpot on the distributor being damaged by connecting it to a vacuum source that is too powerful, particular under certain circumstances where there is a high engine rpm with a closed throttle. Since the dashpot did not seem to respond to the “proper” vacuum port, at one time it was connected to another port and now I wonder if in doing so, I burst that diaphragm. That could explain why advance doesn’t seem to work right and why adjusting the carburetor might be so hard, what with a vacuum leak through at bad advance diaphragm.
I found another related article about air leaking into the engine, generally.
The car acts like it’s not getting enough fuel; i.e., running too lean. Yes…
The car may run well at highway speeds, but the engine dies at idle and will only idle at higher than normal rpm (e.g., >1200 rpm). Yes…
The engine hesitates and dies when you take your foot off the throttle, or hesitates when pulling out of corners at low rpm. Yes…
Difficulty in properly tuning the carburetor (actually tuning will be impossible). Yes…
Since the carburetor cannot be tuned correctly, the timing cannot be properly set. Yes…
You may get engine “looping” (alternating between high and low rpm). Not really…
The engine may backfire. Not really…
It is certainly worth investigating, particularly if the distributor diaphragm turns out to be damaged.
I guess I’m looking sort of seriously at doing this…
Parts required, big things first.
Throttle Body – eBay purchase history doesn’t go back far enough for me to see what I paid for it, and I don’t have any pictures of it, but I have the throttle body from a big ATV, a Kawasaki if I recall correctly, with a bore very similar to the 30/31 PICT carburetor and more importantly, a similar horsepower rating to a stock 1600. This should make it pretty easy to adapt and install to the stock manifold, so… check!
EFI controller – I have the MicroSquirt version of the MegaSquirt II controller. The original plan was to exchange the MicroSquirt for the MSII on the Dragon Trike and use that unit for Sponge Bob. That may still be a good plan. The MicroSquirt is a smaller, weathertight controller with some motorsport friendly features, like built-in hardware for either two-coil wasted spark ignition or even coil-on-plug for four cylinders, etc… check!
Fuel system modifications – EFI requires a high pressure fuel pump, a regulator and return to the fuel tank. Motorcycles, with their really short distance from the tank to the engine, can generally get away with the pump, regulator and return all being inside the tank, with a single regulated high pressure fuel line going to the throttle body. Because of the way Sponge Bob’s fuel tank is mounted directly above the engine and carburetor, that would work pretty well here, too. The tank, however, would need quite a bit of work to make that work. It is currently just a plain cylindrical tank with a little tap on the bottom of it. The question becomes, do I figure a way to use it as is, modify it or replace it? Replacement becomes a decent option because places like Pacific Customs make fuel tanks to order.
Rebuilt engine – Admittedly a rather big item, but I don’t think it’s wise to expend all the effort required to install and tune EFI on an engine that needs rebuilding. This engine should be properly in tune and running perfectly on a carburetor before the switch to EFI begins. The current engine has a freakin’ welded on crank pulley and keeps only most of its oil between changes.
There is nothing major wrong with Sponge Bob Square Trike, but there sure are a lot of little things. As I am writing this, I feel the sudden need to make a list, but it will have to wait…
Last Sunday, we wanted to ride to the monthly club meeting, so I spent some time on Saturday resolving a couple of little things on Sponge Bob and troubleshooting a couple of others.
Sponge Bob has had a few issues with reliability. Seems that he never fails to start, but he sometimes doesn’t make it to the destination. Recently, inspection was due. In the short trip to the inspection station, it threw/broke the one and only belt. In sunlight, the alternator light is very easy to miss, so I was blissfully unaware. Upon arrival, about a 10 mile trip, the engine was seriously hot as the cooling fan is driven directly off the back of the alternator.
As luck would have it, the inspection station is next door to (and owned by) a tractor dealer, so I was able to peruse their selection of belts and find one that worked well enough. However, in the short ride home, the new belt was itself shredded. I think that I chose one that was a reasonably proper length but too wide.
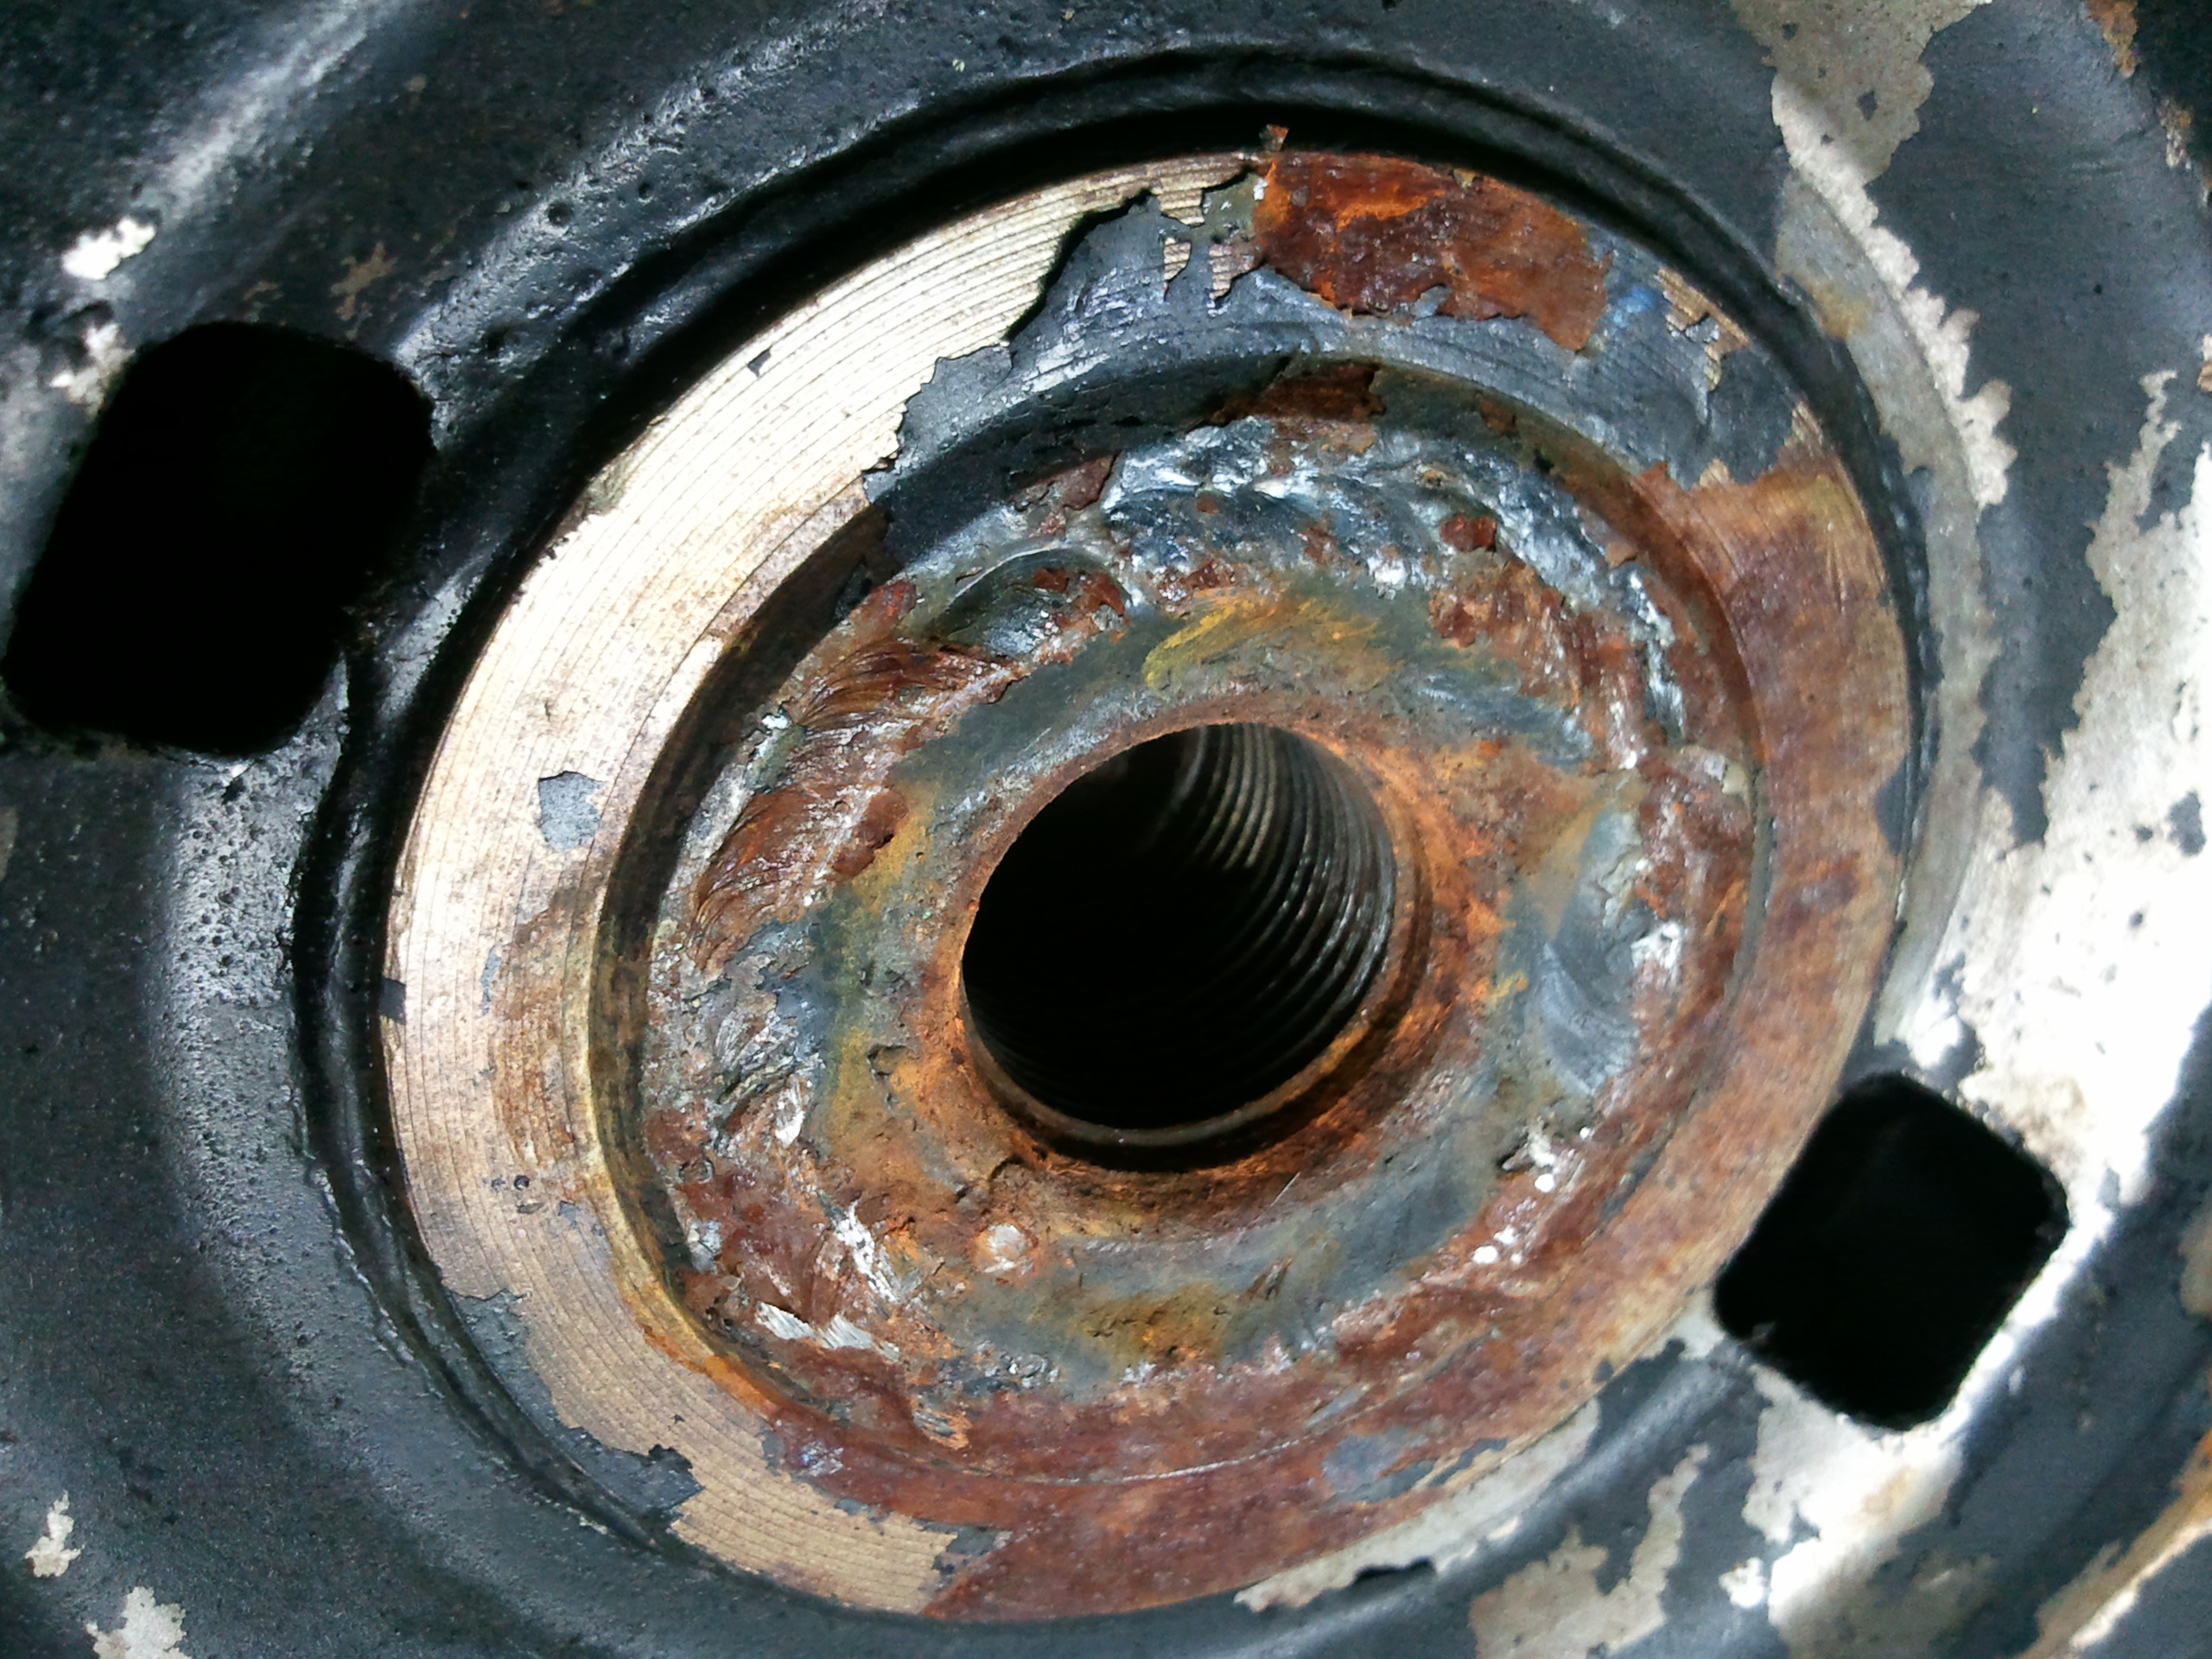
Also, the crank pulley on this engine has had a hard life. At some point the distant past, I was going to change the pulley to dress up the engine. After much struggling, I discovered that it had been welded to the crankshaft, but not before I had bent it trying to remove it.
SAMSUNG
It’s tough enough to straighten a pulley enough to keep it in service on an engine, but try it when you have to do it in place on the engine.
If the distance between pulley faces is variable, it will definitely chew up a belt, which is probably exacerbated by the wrong width or wrong V angle, which seems likely with the tractor store belt. I put a proper stock belt on and rolled the engine manually to see where the wide spots were, where the belt sank deeper into the pulley than it should, then worked on narrowing those areas with a deadblow hammer. I was able to get it where I no longer saw any significant change in the belt depth.
The brakes do a slightly irritating thing wherein they sometimes hang partly engaged, particularly the right wheel. Sometimes, I have to come to a complete stop or even roll backward a bit to free it. In this mode, the trike pulls slightly to the right and you can tell it’s just not rolling right.
I spent far too long searching for but not finding my good jack and ended up using the motorcycle lift (which actually does a pretty good job as a rolling engine jack) to lift the right wheel for removal. There is an adapter plate to let me run Chevrolet wheels on the old four bolt VW hubs, then the big ol’ 36mm nut that holds the hub on the axle. I have on a couple of past occasions, on another trike, had to cut that nut off because it seized badly enough that I couldn’t break it loose. Even without being seized, it is normally torqued to 217 foot pounds. I am very happy I got an electric impact driver some time back. I needed it to change the blades on a BushHog mower, but for this, it made short work of removing and reinstalling the wheel hub.
Inside, I didn’t find anything obviously wrong, but there were two weird things. First, the spring looks like it used to have paint on it and the paint was now a gummy kind of coating. At first, it looked like it was solid and could possible prevent the spring from retracting, but upon closer examination, I don’t think it really would. I cleaned the spring and put a bright and shiny spring back in place. While I had the spring out, though, I found that the brake shoes rub pretty hard on the backing plate, which is in itself how it works, but they seemed to drag pretty badly. I removed them, cleaned the surface rust off the backing plate and reinstalled them. I’m not sure that was enough to address the issue, but regardless of the other difficulties Sunday (described below), the brakes didn’t hang. This will require continued monitoring. It is, afterall, only the brakes. 🙂
I also did a little looking at the speedometer. It’s a VDO speedometer and pickup coil, set to pick up 5 boltheads on the front wheel. It worked very well for a long time, but over the last few years, it became intermittent and finally doesn’t indicate at all. It powers up and does it’s power on self test, but it no longer indicates any speed, actual or imagined. I checked the pickup coil itself; it reads 750 ohms. I have thus far found documentation for the resistance reading for another line of coils, so I don’t know if this is the correct reading for *this* particular sensor, but it is neither open nor shorted. A good place to start. I will put the oscilloscope on it to verify whether or not it is generating a signal.
So, when Sunday came, we headed to Fort Worth. Trike ran great until we got on the highway and tried to go highway speeds. Then the engine would cut out like the switch was turned off. Just slowing down wasn’t enough to restore operation. It needed a minutes or two to “catch up”. That symptom usually indicates fuel starvation, but it hits so suddenly and completely that I don’t think it will turn out to be a fuel issue. Fuel starvation is usually a lean-out condition with backfiring and such.
Then again, I have been fooled before.
It happened multiple times. My first thought is the key switch. It is the stock switch from a Honda CX500, which is what the front forks on the trike came from. The switch energizes a couple of relays in the back of the trike for powering stuff, but to save a little back and forth wiring, I run a couple of things directly off it. I may have thus overloaded it, maybe burning the contacts and making it intermittent. Sometimes, I have to jiggle the switch a bit for the engine to start, which is why I thought bypassing it might help. We stopped once and I tried bypassing the key switch by using a jumper to directly energize the main relay, but the problem persisted. We were running late by then and elected to park the trike in a safe place and ride two-up on the Spyder to get to the meeting.
After the meeting, we met with people for lunch, including one of my trike gurus, and discussed this problem. In conversation, he was describing some of the wiring details on his trike and he said something that tripped a thought… he said his key switch doesn’t have any load on it except for a *continuous duty rated* relay and it occurred to me that the relay I am using is a standard 30A Bosch style relay, but I don’t recall it being “continuous” duty rated. Since I bypassed the key switch, but not the main relay, it could be the source of the problem.
Once we finished lunch and headed for home, we stopped at an auto parts place for some wire and a pair of pliers. How I got away from home without a pair of pliers eludes me, but I have another now. I decided to bypass all of the switched power to the ignition system with a wire directly from the battery to the coil. While finishing up that working, it occurred to me that I needed to include the fuel pump, so I did a little more rework to add a branch to it. I used a spare fuse holder as a “switch”. It looked promising for a few miles, but sure enough, the engine still cut out once got up to highway speeds.
Oh, and another fun note. While doing that work, I noticed that a weld between the body and one of its braces is broken. I thought I heard a noise back there.
As for the engine, I may still be reasonably sure it’s not a fuel problem, but I am beginning to have my doubts. It doesn’t cut out at a specific speed, but it lets you run at a decent speed for a while, then cuts in and out like a bouncing power lead, no matter how much that slows you down. Then you look at it (and stuff gets a chance to cool or otherwise reset; maybe refill the fuel bowl) and you get back underway and it’s fine for a while. The rest of the way home, we took a back roads path that let us run 60 or less and it made it without further incident. That does sound a little like a fuel pump that can’t keep up. As long as fuel consumption doesn’t empty the fuel bowl faster than the pump can maintain, it runs fine, then suddenly it starves for fuel. All of my bypassing *should* have eliminated anything on the positive side of the ignition chain, leaving only the grounding components, which could *still* be it.
I am finding mixed information as to whether or not a stock VW ignition system uses a ballast resistor, but I’d bet it does. The ballast resistor is there to reduce the voltage (well, technically, the current) supplied to the ignition coil primary through the contact points in the distributor. It’s absence in this case isn’t necessarily the knell of doom, but they *did* put them there for a reason. Though not specifically about the VW, this article describes the function of the ballast resistor very well.
You may (or may not) recall that I found badly burned points in the distributor once before, bad enough that I misdiagnosed it as a physical engine problem… scroll down a little to find the points story.
Sooooo… If I inspect the points now, when they have only a couple hundred miles on them and find them burned or worn more than just a little, then ignition system damage and malfunction resulting from this missing ballast resistor could be a factor what’s happening and may particularly to help explain why the wiring changes I made on the road would make zero difference.
Or it might be a fuel problem, regardless of my apparent reluctance to consider that… 🙂
Even if *this* problem turns out to be fuel, the electrical issues that I have mentioned still need to be addressed. The key switch needs to not require jiggling to start the engine. The main relay should be rated for continuous duty. There probably should be a ballast resistor in the ignition chain. And that crank pulley needs to go.
I promised a list of little deficiencies that need to be addressed. In no particular order, of course….
Right brake release needs to be monitored.
Verify that the key switch is not damaged then…
Rewire the front of the trike to not draw power directly off the keyswitch.
Speedometer fails intermittently (more like works intermittently) and …
I have a matching tachometer to install, along with …
Indicator lights on the dashboard for turn signals, transmission reverse, etc.
Shifter needs rework or replacement.
Need front fender; mostly notice when it is raining.
Need rear fenders; mostly notice when driving through mud.
Of course, I could make list of bigger items, too…
Replace front fork with springer or some other front end that doesn’t require impressive upper body strength to maneuver in a parking lot.
EFI conversion.
Body rebuild.
This last one would be a major undertaking, no doubt. So many things that are kind of little in certain ways, but major in others, could be fixed. For example, the actual shape of the storage boxes is best described as squarish. It’s not obvious until you look pretty close, then it’s almost whimsical how not square it is. There are gaps in the seams that are wide enough to see through and I have, in fact, used them for temporary wiring as described above. The storage boxes are also not water proof, though they are surprisingly rain resistant. You might have some dampness at the edges of the boxes if the trike is left out in the rain, but they will definitely get water in them if you drive in the rain. The body is supported by a nearly symetrical crisscross of square tubing braces, almost all of which are badly welded. There was no paint applied to the underside at all.
A new body for Sponge Bob should still be roughly the shape it is, just more refined. I don’t particularly like the diamond plate steel that was originally used. It does hide minor fabrication imperfections, by obscuring them in a veritable forest of intentional imperfections. Still, it has it’s charm.
The only big change I might do is to work fenders into the body, rather than the more common application of trailer fenders. Trailer fenders do have the advantage of being ready to use, however, and they would better done with axle mounted brackets rather than hard mounted to the body like the old ones were.
The EFI conversion begins to sound like the easier project. I think I would accomplish that by converting another engine and replacing this one. That would be one good way to at long last swap out that crank pulley.
This last sentence was to add thirty eight words for a total of 2300. 🙂
The Yaesu BU-2 is a Bluetooth adapter for, amongst others, the FTM100DR. Other than the 10 screws required to get into the radio, it was very simple to install.
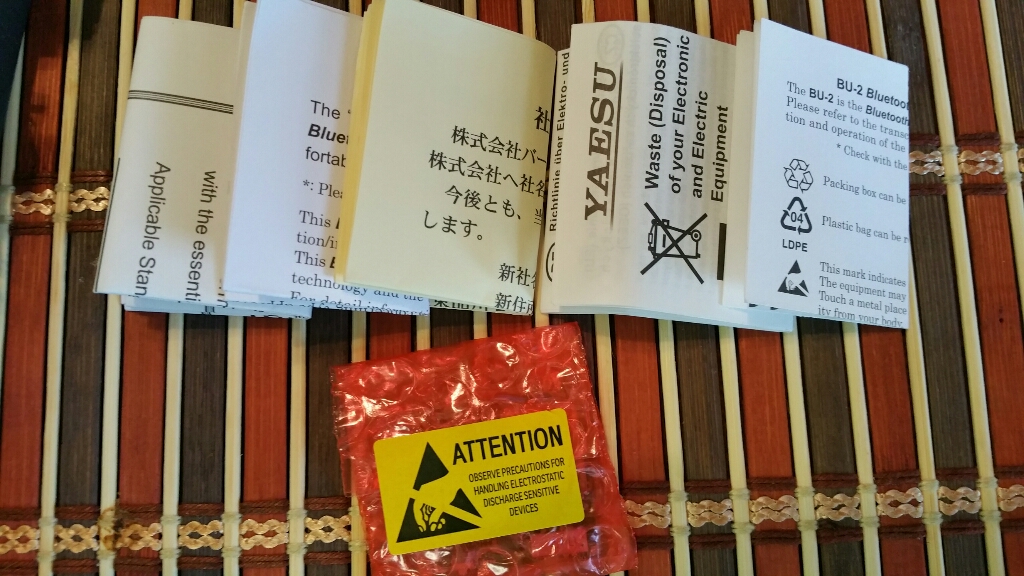
First, you need to get it out of the box. A tiny box.
The box is full, just not with much electronics.
All that paper can summarized thusly: Yaesu made this, it meets all kinds of standards, most of which have nothing to do with the device’s function, and detailed on one sheet, in 22 different languages, “don’t throw this away in your trashcan.”
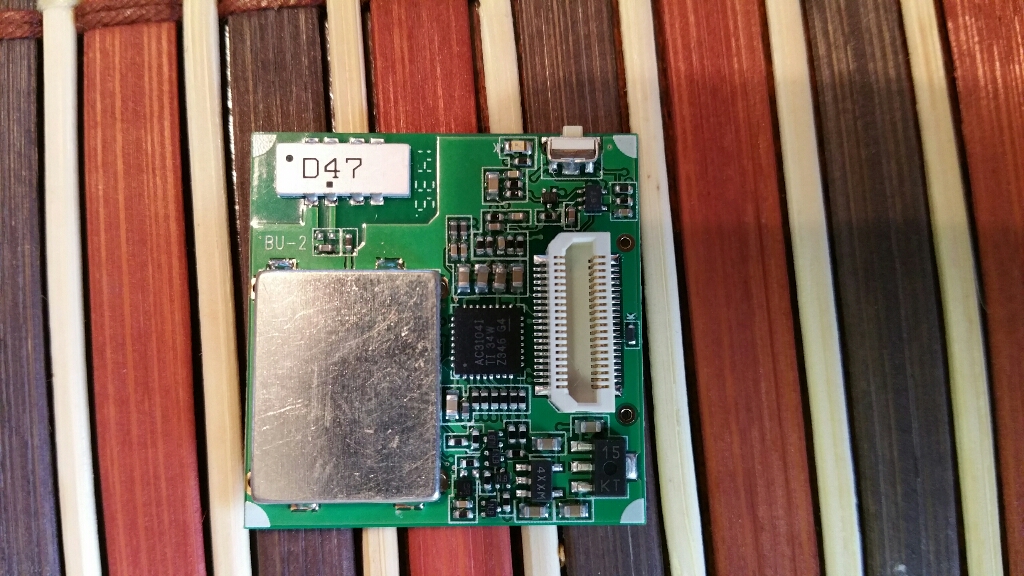
The card itself is a little bigger than a quarter. Curiously, there is a tiny pushbutton on one edge of the card, but it’s not reachable without pulling the front over off and it is not mentioned in the directions. Shrug.
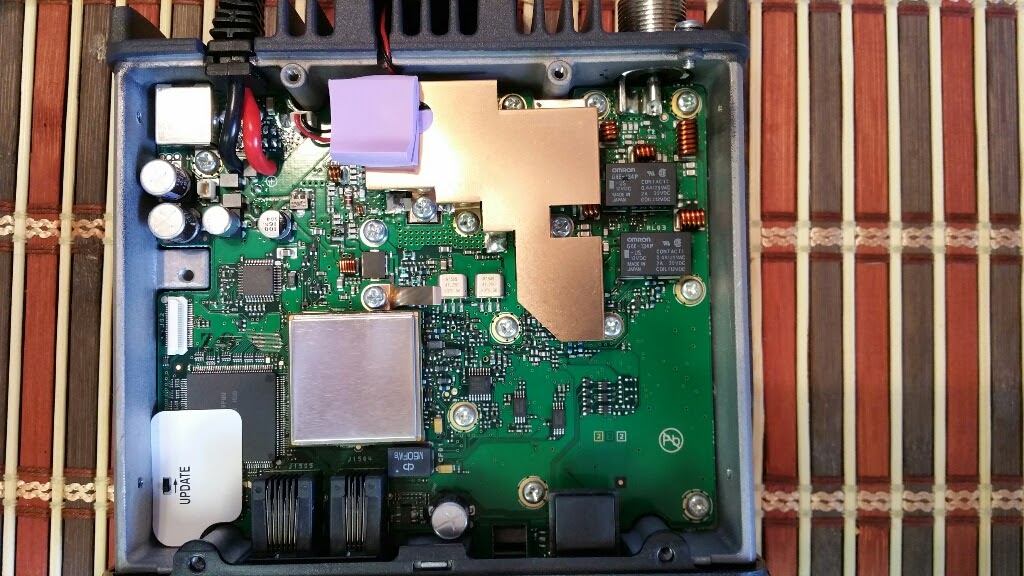
The inside of the radio is nice and clean.
The card plugs in near the front of the radio, where the plastic front wouldn’t shield the signal.
Once installed, the settings (split into two menus for some reason) suddenly work. Defaults seem to work fairly well.
I paired it with my LG HBS-750 headset. I have others, but that one was handy. It paired quickly and easily.
Operationally, the “answer” button on the headset serves to toggle transmit. Press to talk, press again to stop. Interestingly, the current menu option was “Momentary”. The other option, “Toggle”, made the transceiver stick in transmit. I suspect it’s just a difference of opinion between the radio and the headset. I will continue playing with it.
I had never really thought much about APRS. It seemed like the only application getting much attention was vehicle tracking and I think our privacy is compromised enough already.
However, I came across a propagation map website, which was populated using APRS data. It can be argued that it’s not very scientific, basically building a propagation map based on the location and signal strength of received APRS packets but I don’t think it’s completely without merit. In any case, my interest in how this works lead me to experimenting with the APRS settings in my FTM100DR.
Just getting it receiving data is trivial, basically enable the modem and set the frequency to 144.390 simplex. There’s not much more to getting it transmitting beacon messages. After a brief trial last night, I set it up to send every 3 minutes this morning and tracked my commute. As luck would have it, I-35W was shut down for a while and I had to take an alternate route. Also, at one point, I turned it off as I got into solid range for Fort Worth repeaters, but once I was on said alternate route, I put it back on APRS for the fun of it. Between that, the 3 minute update interval and I presume an occasional lost packet, it looks like I went offroad or maybe airborne occasionally.
As I researched APRS, I found a lot of references to it not being just a vehicle tracking facility. In fact, a number of people seem to think it the acronym is Automatic Position Reporting System, rather than Automatic Packet Reporting System. Granted, GPS equipped mobile transceivers make mobile location data easy to share, but that is not all it’s good for, i.e. the afore mentioned propagation map. There is a plethora of information at www.aprs.org, a pretty good starting point.
As for my own homework, the quickie setup I have on my FTM100DR now means it is either doing APRS or voice. In fact, I have to remember to turn off the beacon when I go back to voice, lest I hit voice repeaters with APRS packets. I can’t imagine that’s the only way to set it up. Longer term, I can see it being fun to set up a permanent beacon. Just need a compatible transceiver and a TNC/PC combo. I see another Raspberry Pi project in my future.
Final update: While the commenting on the comments nonsense is kinda fun, I will let it go with an interesting final note. In a comment today, someone’s comment posting script screwed up and posted not just a single comment but an entire “|” delimited file with 198 comment strings, mostly of them just as badly formed as the last. Good place to call it quits on commenting on the comments 🙂
Original post:
There is definitely a lot of comment traffic generated by a new blog, and even though much of the content here is older, the blog itself is pretty new. There have been a couple of nice comments, mostly questions, and I am always ready to help if I can, and at first, I thought they were genuine. However, as I began to notice that the majority of comments are actually clumsy attempts at being stealthy advertising, a comment obviously meant to be looked upon favorably and approved so the commenter’s email or webpage “name” will make it to the interwebs, it became clearer that the once-approved comments were likely the same, just crafted better.
Some of the spam comments are obviously robot generated due to their being very generic and not at all in context with of the post they are attached to. Many of those are also grammatically atrocious:
Comment to post about new SDR radio and spectrum analysis software:
“These patterns for scarring can affect the type of treatment along with the age of the person and the skin-type.”
Comments to post about installing a mobile radio:
“By wearing a tightly tied training corset made of durable product, a female could safely as well as efficiently modify the establish of her bust, waistline, and also ribcage..”
“Using a corset will certainly maintain your reduced ribs at the acquired level throughout of time you’re using the bodice.”
“This article gives the light in which we can observe the reality. This is a very nice one and gives in-depth information. Thanks for this great article.”
“It’s going to be finish of mine day, except before finish I am reading this enormous post to increase my knowledge.”
Comments to a post about a reloading press and pistol match:
“The bacteria are killed by Brewer’s fungus and encourages the creation of bright body cells providing the means for an acne-free skin.”
“Additionally, it is the moderate boost in muscle size-usually as it replaces physique fat-that burns further calories to assist you lose weight.”
“I have been surfing on-line greater than 3 hours nowadays, yet I never found any interesting article like yours. It’s beautiful value sufficient for me. Personally, if all website owners and bloggers made just right content material as you did, the net will be much more helpful than ever before.”
“They can undergo a periodical healthcare check up to ensure that they have not acquired weight due to the fact of any medical situation.”
Comments to a post about electronic fuel injection:
“When a female takes control of her actions as well as reactions in a marriage, she comes to be supportive and also encouraging on all endeavors the other half embarks on. It is human to be self-centered and also sometimes the partner or the spouse can come to be selfish which can tear your home apart.”
Comments to a post about an unidentified source of radio interference:
“you’re really a just right webmaster. The site loading speed is amazing. It kind of feels that you’re doing any unique trick. Furthermore, The contents are masterwork. you’ve performed a great activity in this subject!”
“For this internet site, I’m choosing to concentrate simply on the latex midsection instructors that are prominent with stars today.”
“It is appropriate time to make some plans for the future and it is time to be happy. I have read this post and if I could I desire to suggest you few interesting things or suggestions. Maybe you could write next articles referring to this article. I desire to read more things about it!”
Comments about *this* post:
continuously i used to read smaller articles or reviews whicfh also clear their motive, and that is also happening with this
piece of writing which I am reading now.
And this interesting excerpt from what appears to be a free word associative prose piece, nearly 500 words long, with a long convoluted “you may also be interested in…: ad URL added at the end of it, of course.
You on the other instrument undergone appear to have one particular end goal of besmirching a true love establishment of the good capital of scotland
The first spam ad with a URL for a business that at least looked legitimate came through as a comment on further investigation of the RFI issue.
Our groups are medication free, uniformed, courteous, clean cut, and also ckntinuously learnt security and progressed tree getting rid strategies.
This comment was in reference to a post that consisted only of an image of an evil phonetic alphabet
I’m no longer certain the place you’re gettikng your info, however good topic. I must spennd a while learnig much more or understranding more. Thanks for wonderful information I used to bee on the lookout for this info for my mission.
I don’t think there is even an accidental reference to basketball in any of my blogs over 6 years…
Yes!Finally something about bassketball games tonight.
It would appear that I have been appointed as an internet expert. I didn’t even have to self-appoint…
This is the right blog for everyone who wants to find out about this topic. You know so much itss almost hard to adgue with you (not that I really will need to…HaHa). You definitely put a brand new spinn on a subject which has been written about for ages. Wonderful stuff, jusst great!
Another vote…
You’re so awesome! I do not think I’ve read through something like that before. So wonderful to discover somebody with geuine thoughts on this subject matter. Seriously.. many thanks for starting this up. This web site is something that’s needed on the internet, someone woth a little originality!
Thanks…. I think….
Undeniably imagije that that you said. Your favorite justification seemed to be oon the internet the simplest factor to take note of. I say to you, I definitely get irked whilst folks tuink about concerns that they plainly do not know about. You controlled to hit the nail upon the top and also outlined out the entire thing without having side-effects , other people could take a signal. Will likely be back to get more. Thanks
Maybe my favorite so far. I got two smoke blows in one. I, too, am gonna watch out forr brussels…
Hello there, I discovered your website by means oof Google at the same time as looking for a comparable subject, your site gott here up, iit loks great. I have bookmarked it in my google bookmarks. Hi there, jusst was aware oof your weblog thru Google, annd founhd that it’s truly informative. I am gonna watch out forr brussels. I’ll be grateful for those who proceed this iin future. A lot of otther folks can be benefited from your writing. Cheers!
More Nearly English gibberish…
My brothesr suggested I may like thjs web site. He was once entirely right. This put up truly made my day. You can not imagine simply how a lot time I had spent for this information! Thanks!
There are a couple of free elevation tools on the internet. I don’t like the conclusions, but I guess it’s better to know.
FreeMapTools has an Elevation Finder tool. With it, one can easily check specific elevations anywhere you click on the map. There is also that less intuitive but better suited Hey What’s That website. I did profiles of my path to repeater with both Elevation Finder and HeyWhatsThat. They seem to agree that my 885-ish foot home elevation is no match for the 1000+ peaks between me and the 949 foot repeater antenna.
Note that the highest elevations are within 3 to 5 miles of home.
The only good news is the orange highlighted area, particularly the skyward piece. This is the calculated propagation of a 145MHz signal between these two points. The fact that I can hear the repeater fairly well is also promising.
At this point, more gain may not make nearly as much difference as more altitude.
The calculated altitude needed for a completely unobscured point to point view would be 170 feet above ground on my end, so lets hope it doesn’t take that much.
 The color difference is fairly apparent here. The bin in the foreground is the Akro-Mills native bin, the background is the Dillon version.
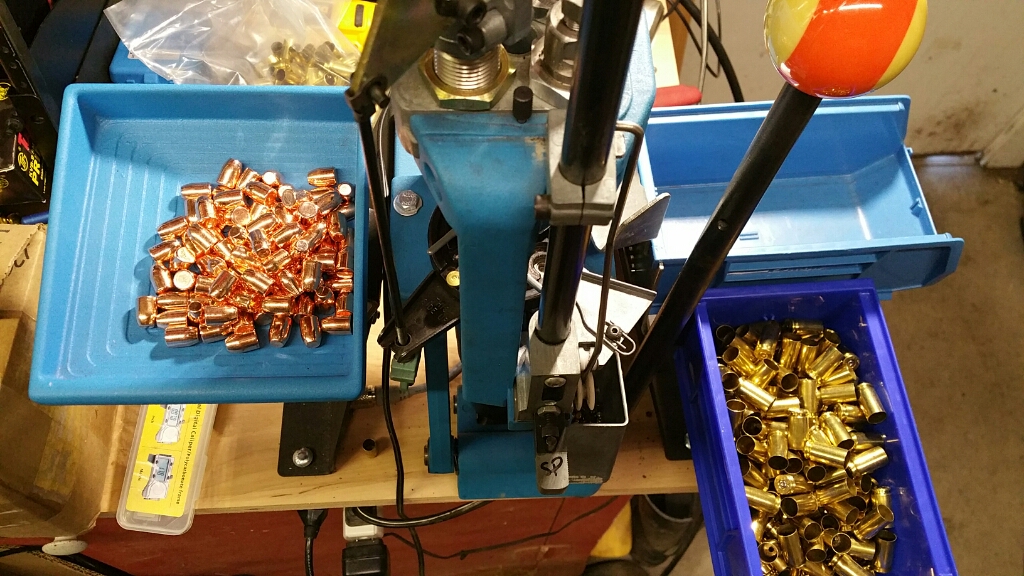 This arrangement with empty brass within easy reach definitely sped up the loading rate. I was able to get well over 150 rounds loaded in a little more than an hour, including some troubleshooting as detailed below. My QA fail rate is about the same, with most rounds dropping unrestricted into my gauge block, a few fitting well enough to probably work in the pistol, but I rejected them to the rework bin (since I now have enough bins to have a rework bin) and a couple that wouldn’t go in well at all. Historically, I can usually get most of those those back with the Bulge Buster, but it is not currently mounted on the bench.