Category Archives: N5HRK Amateur Radio

My ongoing adventures in the world of ham radio

Curious Noise

In a previous post, I noted some EMI in the truck I am temporarily using while mine is being repaired. I have noted a peculiarity to the noise that leads me to think it may not be the truck after all.

Foremost, it occurs to me that I didn’t hear the noise at all during the day in town. If the truck was the source of the noise, I think I’d have heard it all the time.

We are fortunate to live in a neighborhood that is out in the country. The main street into the neighborhood leads to a county road, which itself leads to the US highway.
Last night, I noticed that the noise returned when I got off the highway and onto the county road. It occurred to me that I sometimes have trouble picking up AM broadcast stations when I am on this road, particularly in the evenings and early mornings when the stations are running at low power. I have always thought it was likely due to the power lines along this road. However, I had not noticed it happening with the 2 meter before.
This morning, I was going north on the neighborhood street, listening to a conversation on the 145.33 repeater. I noticed a high pitched background tone that I presumed was coming from the station speaking or maybe a heterodyne from a double, but then the next station comes on, the tone is still there and it really doesn’t sound like a typical double. I also noticed that the pitch of the tone was dropping as I approached the intersection with the county road until I am actually stopped waiting for traffic to pass. There is still some noise, but I don’t hear the tone within the noise. During that time, I unplugged the power to the amp and it didn’t change. I rev’ed the engine, it didn’t change. Since I was stopped, I shut off the engine and the noise still didn’t change.
The traffic on the road passes and I turn onto the county road. A short distance down the road, the pitch of the tone within the noise starts go up again until it is beyond speaker/hearing. Here’s the weird bit. At that point, I was about the same distance down the county road when the tone got too high to hear as I had been up the neighborhood street when I noticed it.
I’m kinda suspicious that the noise is coming from near that intersection, maybe even from one of the houses on that corner. Or maybe one noise source is the power lines and a separate noise that comes over as a superimposed tone is coming from something at or near the intersection.
I am now very curious about it and will investigate further. As luck would have it, I now have a likely suitable tool for just such an investigation.
aliens

Mr Clean

The final (in as much as anything in this hobby is ever really final) piece for making the radio end of my RemoteRig setup neat and tidy arrived today, a RIGrunner DC power panel.
upload_-1.4

I have a tabletop 19 inch rack, a couple of shelves for it and plug strip with individually switched outlets. I will place into this rack all the equipment out in the workshop, the IC-706mkIIg, IT-100 tuner and RemoteRig.

I also hope to put my ethernet switch and VeraLite home automation controller in there as well, though such close proximity to the transmitters might be an issue for those devices.

This panel is kinda overkill for the three devices run off the one power supply (really only two since the tuner is powered from it’s connector to the radio) but I am almost certain that the VeraLite runs on a 12V supply and it’s quite likely that the ethernet switch does, too.

Ironically, the toughest part of this project may be moving the station ground rod. The rack will be installed on a countertop that is on the other side of a door from where the current location is. To keep the ground wire short, it would make the most sense to pull the 8 foot ground rod and move it to the other side of the door as well. While I have a great tool for pulling with adequate force to remove the ground rod, it is driven really low to the surface and I will need to adapt a chain or some such to get it started. Plus, it’s really close the wall.

Friction

Well, no in-depth second ride report for the new mobile rig. I spent most of my drive home last night expecting a front wheel to fall off of the truck. I have ignored a humming wheel bearing for too long. Yesterday, the noise upgraded to rumbles of distant thunder punctuated by the screech of a pterodactyl. Well, what I imagine a pterodactyl might have screeched like.

So, I’m back to the HT/amp combo in a different truck today. With the now available mag mount, I put the antenna I had on my truck before I got the Comet SBB-7. I didn’t even know exactly what model it was, so I went out and looked at it just now. It’s a Comet SS680SB, a compact dual band with a bit of gain, 2.15dBi on 2m and 4.15dBi on 70cm.

The bigger uglier problem with this truck is EMI. It’s a Ram 2500 with the Cummins diesel engine. With no spark plugs, you’d think there would be less noise. I need to investigate farther, but I suspect it’s alternator noise introduced by the connection to the amplifier.

It’s temporary in any case, but I do get to remain on the air while my truck is repaired. Expecting to be back in it by Friday evening, maybe Saturday.

First Ride Review

My new Yaesu FTM-100DR seems to be working well. One of my biggest concerns was whether or not I could hear the speaker and it is loud and clear where it is.

In the driveway at home, after installing the radio, I could not hit the 145.33 repeater. Now is seems that I may have been hitting the repeater, but not hearing it.

With the 35 watt HT/amp combo, I could hit the repeater, but reports were that I was noisy while still a few miles from home, with readability dropping to essentially unusable by the time I got home. Last night, reports were that it was still clear all the way to my neighborhood road. A little more power (50 watts) seems to have made a difference.

Receive-wise, however, the Yaesu did not seem to hear the repeater as well as I got closer to home, especially once I was off the main highway. However, we had also had a little rain and there could have been some propagation issues, particularly at the fringe. Receiver sensitivity, as measured by the ARRL labs in their reviews of both the FTM-100DR and the ID-51 (two years apart) indicates only a 0.01 microvolt difference in favor of the Icom. I’m not sure that figure alone is enough to account for the perceived difference between the two radios, particularly since the ID-51 in my truck had a coax jumper to the amplifier, the amplifier itself and a different coax to a magnetic mount for the same antenna, versus the Yaesu’s much simpler direct connection to a new coax to the same antenna. I will just have to see how it works over time; that was only the first day.

Thus far, however, I really like the radio. I can hear the audio, it reaches out and the display is large and clear enough to see. Well, when I can see it.
upload_-1

The steering wheel spoke is in the way.

So, as I was planning anyway, I will remote mount the head, but I can leave the main unit where it is, with the mic still plugged directly into it. There is no need to extend the mic as well.

Also, there are firmware updates for all pieces that can be updated, the control panel, the main radio and the DSP. Updating the radio and DSP requires flipping a switch on the main board, accessible from a rubber covered hole in the top of the case and the control panel has it’s own update switch, too. I may make a video of the process since I haven’t found where anyone else has.

BTW, I have not chased down a Fusion digital signal at this time, so no review on that yet…

A Proper Installation

I took the time today to install the new radio, a Yaesu FTM-100DR.
upload_-1.48

Due to this angle, it looks like it’s closer to my leg than it really is.

Although my truck is a 2007 model and has nearly 160K miles on it, and it’s hardly pristine, it was still pretty hard to take a holesaw to the roof. However, it finally has a properly installed NMO antenna mount and I can return the mag mount to temporary use.
upload_-1.20

The sharp-eyed will note that the dirt ring left by the mag mount is off center. The new antenna is very carefully centered. The coax remains hidden until it comes out under the dashboard.

Power was very basic, direct to the battery.
upload_-1.44

Once I had it up and verified that I could hit a nearby repeater, I used RT Systems FTM-100 programmer to fill in the memories with a bulk picked list of repeaters from RepeaterBook, which FTM-100 does natively. It’s definitely the easiest way to program a radio, though I am somewhat saddened that you must buy a separate program for each type of radio you might own. In any case, I sorted and grouped together the machines I frequent in the first few channels, then sorted the rest by callsign. The software can work with either a data cable or an SD card, which for me today was the best way to handle it. I could take my laptop out to the truck, but writing to the SD card and reading that into the radio was very quick and easy.

Let Me Check My Schedule…

… nope, sorry, no room.

So, I got another project anyway. Well, not so much a project as a gateway to projects.
upload_-1.24

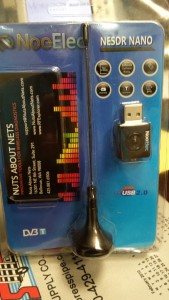
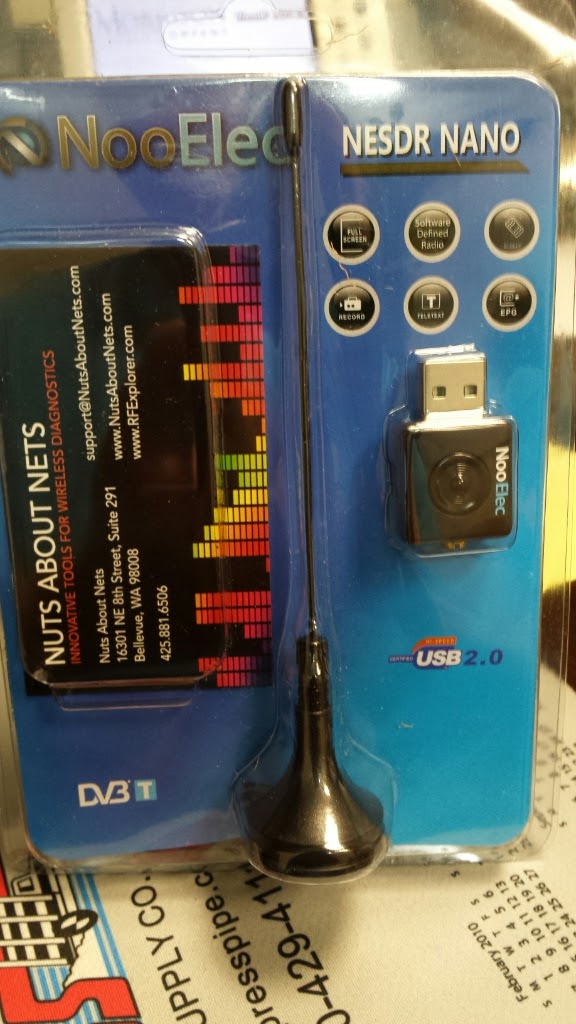
This is the NooElec NESDR, an RTL2832U based SDR (software defined receiver)… module, I guess. Calling it an SDR receiver is technically redundant.

I am interested in SDR in general but what made me jump on this one was that it came with spectrum analyzer software, specifically Touchstone Pro. More precisely, it came with the license to unlock the free downloadable software.

Installation is a fairly simple affair, but definitely follow the directions. The device needs to be physically present for the driver installation to work right. Furthermore, I found that I could plug it in to a USB3 slot on my laptop and it was discovered, but it would not operate there. I had to move it to another port. This is not the first time I have had trouble getting hardware to operate in that port, though. What tripped me up the worst is that the directions say that the first time the software runs, it will ask for the license key, but mine didn’t ask. It just kept going into demo mode. That turned out to be because with the hardware in the USB3 port, the driver was not loaded. Once I moved the dongle to another port, it asked me for the license info and works correctly now.

My initial review of the software is not exactly raving praise, but I will work with it a bit before I am too hard on it. My first complaint is that it doesn’t seem to let me scan only a 4 MHz chunk of 2m bandwidth. I can’t initially configure it to scan 144 to 148 MHz; it kicked it back saying it had to be minimum 10MHz bandwidth. I had to set it to run 144 to 154, then use the zoom feature to zoom in on desired band. Then, it would show bandwidth to be approximately 4 MHz. Don’t forget and try to zoom twice, though; it will crash.

By default, it has a peak hold display enabled. It is implemented as a red trace *in front of* the live green trace. To turn that off, you right click on the screen then toggle a checkbox. However, doing that while it was actively scanning usually, but not always, made the menu hang. You can’t turn it off before you begin scanning because the toggle isn’t on the menu at that point.

To be fair, I spent a total of about 30 minutes playing with it between tasks at work, so there may be some basic configuration that I can do to avoid these pitfalls, such as the default bandwidth limits and the peak hold feature.

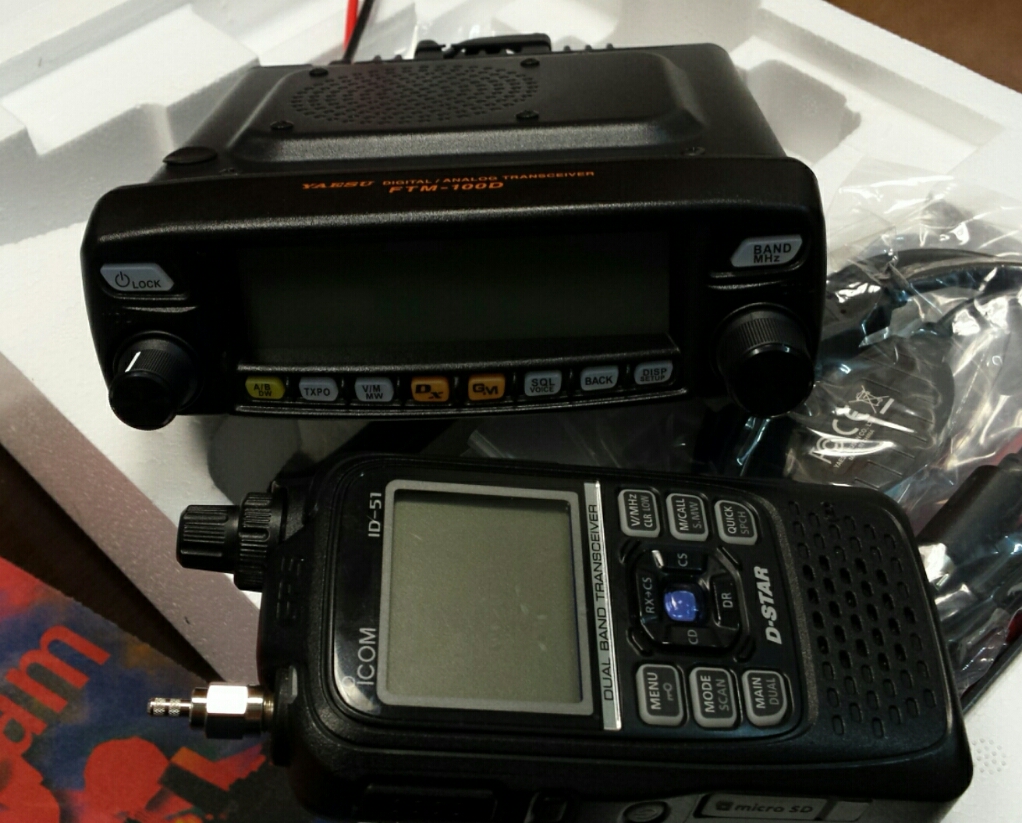
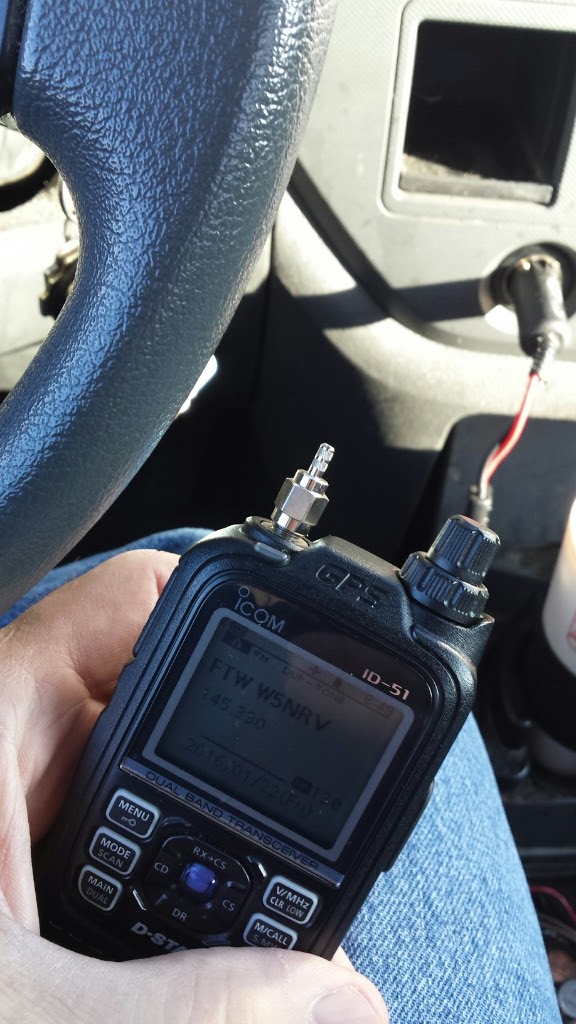
The other thing was an issue I kind of expected. The SDR is sensitive enough that transmitting nearby with my Icom ID-51, even on the lowest power, completely swamped it. It could see the .33 repeater tail with that tiny antenna from inside a concrete building, so even 100mW in the same room was way too much for it.

I am quite intrigued, though. I hope to use SDR technology to explore the RF world around me.

Oh, That Explains It….

On my commute this morning, I could not help but notice that the .33 repeater was very quiet. When I got to work and was gathering my stuff to go in the office, I think I found the problem:
upload_-1.25

Yep, that’ll do it.

I use an SMA to PL259 cable to connect the output of the handheld to the input of a Mirage BD35, but that is the third cable I’ve had on the radio in only a few months. They just don’t hold up. They don’t appear to be suitable in an application where it gets moved around a lot and are disconnected and reconnected a few times a day.

All the more reason I am so happy to see this notification in my email this morning 🙂


North American QSO Party

Today was my first non-Field Day contest, the NAQP.

 Total Contacts = 83
 Total Points = 3,569

 Operating Period: 2016/01/16 19:02 – 2016/01/17 05:42

 Total Contacts by Band and Mode:

 Band       CW   Phone     Dig   Total       %
 —-       —   —–     —   —–     —
   40        0      46       0      46      55
   20        0      33       0      33      40
   15        0       4       0       4       5
            —   —–     —   —–     —
 Total       0      83       0      83     100

The Icom, of course, suffered it’s transmit weirdness and delayed my start. I pulled the cover off and tapped around on the main board unit it started working and it kept working all day. Maybe that magic will last beyond today.

I worked in the comfort of the dining room, via RemoteRig.
upload_-1.19

Last Field Day, the RemoteRig would sometimes disconnect from the WLAN. I never really found out why, I just rebooted the Control-RRC. Today, however, no issues. Then again, it was only 30 feet from the router.

CI-V and Code Warrior Update

I did a bit of work trying to get CI-V up with RemoteRig. In the Radio Settings page, there is a pulldown menu for Program Mode. Option 1 is Icom CI-V and Option 2 is IC-7100, IC-706, IC-703. This implies that I can run either CI-V or control head, not both. I will need to dig into it a little deeper. The power of being able to choose either the control head or the laptop/cellphone option would be *greatly* enhanced if I didn’t have to choose before I left town. I know that the comm ports can be set up to carry other data, such as rotator control, while the control head is operational. I presume that CI-V can also be set up thusly. It will take a little experimenting with the laptop and both RemoteRig devices on the bench.

Meanwhile, I got some brass hardware and made the contact blocks on the Code Warrior better.
upload_-1.2

This is the stock stainless steel hardware, a screw directly in the contact block and through the wire lug. Note that the wire lug would rather stay with the screw than with the nylon insulator. With three or more hands, I could hold the lug and the block while tightening the screw, but I’m picky that way.
upload_-1.5

After, the block is held by the first nut and the wiring by the second. As expected, the new assembly is taller than the rubber feet, so I will have to get some taller ones to fix that. I did have the proper application of flat washers, but the entire assembly was even taller, making the rubber feet problem worse.

There is still one more minor improvement needed for it to be called finished, namely to fill the hole though the base so that the blocks only go in one place.