All posts by admin

Flow vs Batch

I have a couple of handloading books, most notably the 18th edition of “Handloaders Digest”, wherein there is an article by Patrick Sweeney, “Reloading in Volume”.

The big takeaway for me was the need to kind of abandon my batch-like loading limitations. I got the Lee Pro 1000 specifically to load faster, then I end up still working in a kind batch mode, loading one box at a time, just faster. I tended to sort out 50 alike headstamps, load 50 rounds, put 50 rounds in a box and do the next 50 rounds.

Following much of the advice in Sweeney’s article, I instead loaded the press up with 200 primers and a full powder measure. I had all the components close at hand. I cranked out rounds until my plastic output bin was full. Having at this time just the one such bin, I stopped and transferred two and a half boxes, labeled them with the load info. I topped off the powder and primer hoppers and resumed cranking them out until I reached a reasonable stopping point.

In the end, I had loaded 5 full boxes and had about 1/3 of box in the output bin in just under an hour. With the “one box at a time method”, I could finish a box in 13-15 minutes, but I didn’t time the preparations done between boxes.

The Lee Case Collator makes loading the case tubes much faster. Putting 200 primers in the primer hopper mean that process stops less often. I found that having very close, the box of fresh bullets, the output bin and the press, arranged in a gentle arc meant I could watch the press for problems, such as the primer chute not staying full or approaching the end of a case tube while blindly reaching for a bullet. As the carrier assembly approaches the bottom of the stroke, I check to see that the column of primers moves at the proper point. At the bottom of the stroke, I feel the primer set, visually verify that the right powder charge was dropped, sweep out the occasional completed round that didn’t fall all the way to the bin, set the bullet, turn the case feeder if needed and begin the cycle again.

The only interruption was to reload the case tubes and the occasional primer glitch. Most often, this was because I missed that the chute was not being replenished from the hopper and got too low. If the column of primers is not high enough in the chute, it does not feed the primer. Actually, it most often misfeeds the primer by half, meaning the priming stroke crushes a unit under the shellplate, requiring a full stop to clear the damaged primer out before resuming. Consequently, I am irritated with myself when that happens.

The hour worth of reloading I did was in two separate 30 minutes sessions, performed while I was waiting for horses to eat. I intentionally reached a stopping point and just stopped, walked out of the shop and returned hours later to feed the horses again and resume where I left off, with no specific preparation for the 2nd session. I imagine that I can streamline the operation a little bit more if I have a couple of continuous hours. And a bigger output bin.

I want to cycle through all this 40 S&W then set the press back up for 10mm and run through that batch. By then, I expect to have a 9mm batch to load.

10mm uses a large primer… ’til it doesn’t….

I’ve shot a lot of 10mm. Probably not a lot compared to, say, the FBI, but quite a bit of it. I’m also familiar with the story of the development of the round, as well as it’s shorter brother, 40 S&W. The 10mm utilizes a large pistol primer, much like the 45ACP.

When I was sorting and measuring the 10mm brass, I stumbled across a few cases with small primer pockets.

Note the “NT” on the headstamp. Turns out that Federal Cartridge makes the a line of non-toxic ammo. Seems counter intuitive to think of non-toxic pistol ammo, but they mean non-toxic to the shooter, especially frequent indoor range shooters. Lead free (or at least completely encased) bullets, powders, primers, etc. I’m not sure what the small primer advantage is, especially since the product webpage above indicates that the round uses Federal 150 primers, which are large pistol primers. Shrug.

There is also some discussion on the ‘net about manufacturers finding that with today’s primer and powder chemistry, there is no particular advantage to large primers. If you have to buy a few million of two sizes when could get by with a few more million of one size, it starts to make monetary sense.

Once I got through all the brass, there was just barely short of 1 box of these particular cases. I’m gonna load’em.

Note that the small primer was crimped in. I will need to ream the primer pocket, but I have the technology.

back in ’84…

Ages ago, I did a little handloading…

I had always been interested in firearms, particularly pistols. I eventually purchased a S&W Model 28 with an 8-3/8″ barrel. It was a tack driver. My wife acquired a Model 19 and we became the Magnum couple hehehe

I loved the Model 28, but I wanted a 1911, too. I eventually saved and purchased a Llama IX-A, a workalike clone of the 1911. It was not a bad pistol, thought it could have used some work that I wouldn’t learn how to do until after it was traded off.

I vividly remember the day my buddy Buddy and I went out to shoot the Llama the first time. We lined up a few plastic jugs filled with water. I shot one of them, a half gallon size laundry detergent bottle and was disappointed to the point of dismay. The magic all-powerful 45 knocked the jug over without penetrating and to add injury to insult, a piece of the copper jacket hit my left shin. It was with the force of a thrown saltine, so there was no actual injury except to my soul. Other shots fared better, but none actually had the effect I was looking for. That moment made it clear that I needed to handload.

Being young and only a notch or two above broke, I got a very basic Lee single stage press and dies for 38/357 and 45 ACP, and those yellow scoop powder measures. I had the Hornady reloading manual, which I could every nearly quote after a few weeks. I worked up a couple of  45ACP loads using Unique (which was then “Hercules Unique”), though what I really did was make 10 rounds with an entry charge, 10 rounds of the next higher charge, etc, until I had about 100 rounds of 230gr hardball and 50 rounds of 185gr hollow points, each ramping up in power. It was time to go shoot.

I took it pretty seriously, recording the feel and examining the brass for each of the 15 loads. I did not have a chronograph. Luckily, that first round of handloading worked up to a decently hot load that I would later verify was just almost as hot as I could go before I started getting some signs of over pressure. Even then, slightly flattened primers was the only sign. However, the same essentially undamaged detergent bottle suffered the appropriate degree of damage for an estimated 1000 fps 185gr hollowpoint. My faith in the 45 was restored.

Handloading with a single stage press is an exercise in repeating details in groups of 50. Set out 50 ready-to-load cases on a reloading tray. Prime each case, placing it back in the tray. Throw a powder charge into each case. Press and crimp a bullet in each case. Box’em up. Shoot.

Handloading/reloading allowed me to shoot much more than I would otherwise have been able to afford, even then. Unfortunately, various influences took more of my time and eventually, the reloading equipment was scattered or damaged and discarded.

Today, ammo is more expensive, and frequently, the shelves are empty, particularly of popular types. Handloading components are also higher and frequently out of stock. For the casual shooter, it’s hard to beat some of the bulk ammo prices. As I write this, Cabela’s has PMC 40S&W for about $21 a box. I can’t buy the new components and handload them for much less. Some types are cheaper than that.

However….

My favorite round these days is the 10MM Auto. At $32 a box for commercial ammo, I can start to make a difference handloading, especially with once fired brass.

I found a seller on Gunbroker that had a couple thousand once fired 10mm cases for about 15 cents each. I gathered the other components and a Lee Pro 1000 press from various sources. At the time, primers and powder was the thing everyone was out of, but having a local Cabela’s that is not very far out of the way home meant I could essentially stop there every day and eventually, they had the stuff.

I’m not quite as broke as my younger self was, so I have a few other non-critical but very nice tools and resources such as a digital powder scale, a vibratory tumbler for cleaning brass and a chronograph for tracking my results and a home on 12 acres in the country for shooting

I deprimed and cleaned the 10mm brass shortly after receiving it. Various things delayed the actual commencement of handloading, but in the last couple of weeks, it is finally underway.

No, I didn’t forget I own this trike…

… but you probably couldn’t tell by the activity level…

It seems likely that I have missed pretty much all of the mild spring season for working on the trike. It’s so stupidly close to an actual stopping point that I feel like a bum for having not finished it yet.

Between an especially rainy spring and a pretty major remodeling project in the house, followed quickly by a long-planned vacation trip, I find myself at a point of nearly being ready to take up the reins again and get this thing permanently on the road.

The big thing left is the replacement of the shifter. I have a dune buggy shifter that I need to install. It will be slightly tricky because I need to preserve the current mounting attitude and position, and yet replace the current shifter with one of a completely different design. I have a cunning plan.

After the shifter is in place, the trike will be rideable and thus tunable.

Stay tuned….

A Solid Afternoon of Attempted Tuning

It was an eventful day, tuning wise.

First, I found that the serial cable extender had come loose regardless of the almost heroic efforts to prevent it.

Then, I found that in at the least the last of the dozen or so cycles of removing and reinstalling the engine whilst working on the clutch, I swapped the IAT and CLT sensor plugs. So, it would have been adjusting for 150 degree air on an engine that just never would warm up…

After that, I found that I was getting no usable signal from the LC-1. A bit of quick troubleshooting showed that the controller itself appeared to be working. I connected (semi-permanently) the LC-1 LED output to an LED on the speedometer/dash. It indicated error code 2, which is a bad heater circuit. I was able to locate a sensor at a nearby O’Reilly Autoparts (O’Reilly part number 17014, in case somebody needs that) for $52. It’s working correctly now.

On the way to the parts store, I suddenly remembered that I wanted to verify the actual Bosch part number against the information I had looked up. It is indeed the Bosch sensor part ending “7057”. Perhaps more importantly, though, I discovered physical damage to the sensor that I had not noticed when I removed it. Upon further investigation, the baja bumper has not yet been pinned to it’s lower mounts after all the clutch work. I think when I was towing the trike around, the bumper hit the ground and was pushed upward where it struck the sensor. So, gotta pin that bumper down so it won’t cost me $52 every time I have to tow it somewhere.

So, with the EGO sensor working, I was able to get a little observable EGO correction to take place. I’m sure I need to tweak some parameters. It seems to react slowly, which is probably not a bad thing overall, but it also doesn’t seem able to dial in the target AFR. It gets pretty close, just not there. I presume there is some other enrichment factors in force and will need to find them.

I spent the most time trying to dial in some usable acceleration enrichment. While the trike has been drivable and throttle response while under way is decent, it stumbles pretty badly right off idle. It’s kind of like the infamous dead spot these engines experience when equipped with the ubiquitous Bosch 009 distributor, a unit with centrifugal advance. There are a few of people running these distributors that are very happy with them. For racing applications, the engine is either idling or running WOT, so the stumble isn’t a big deal. For the street, these distributors can be tuned with the appropriate springs so that the advance is full on at a fairly low RPM, which largely eliminates the flat spot, but it’s always at least somewhat there, ranging from minor annoyance to killing you when you try to pull out onto a busy street.

Armed with this background knowledge, I spent a couple hours today trying to tune in the spark advance table. First, I verified that the trigger offset of zero is appropriate for my EDIS ignition system with a timing light. Dead on. Then I tried scaling the table because the values in it seemed low across the board. With the 009 distributor, for example, one sets the idle timing to be about 7 degrees BTDC and by the time the engine is spinning, it’s running 28-30 degrees. So, I scaled my spark advance table to correspond with that.

Well, the first minor thing is that the nature of the EDIS module is that 10 degrees BTDC is the least advance it will allow. By having a lower number in the table, it made the *displayed* advance dither around in the 7-9 territory without affecting the actual timing at all. I manually moved all the lowest values up to 10 degrees.

After than, it seemed to be adjusting ignition timing pretty much as I would expect it to need, but the stumble was still full on, so I started looking at fuel.

Armed with a working EGO gauge, I was able to tell almost immediately that it went just about dead lean on acceleration, sometimes as high 22.

I tweaked on the acceleration wizard and was able to get a pretty nice rev out of it. I was not able to make much progress on MAP based acceleration. Seems whenever I had any percentage of control as MAP, I could not satisfy whatever basic settings it wanted and I couldn’t keep it running. So, with all TPS based numbers, I was able to rev the engine nicely, so long as I wasn’t extremely gentle.

Then I started playing with EGO correction again and somehow lost the rev. As it sits now, Accel Enrichment is pegged at 100% and never responds to TPS input. I am reading a lot….

Long overdue update

The trike has been intermittently road worthy. It spent a LONG time sitting after some clutch trauma that I thought was going to be much much worse. It’s drivable enough to do a little shakedown cruising in a big parking lot….

This shakedown was partly to have fun on the trike after all this time waiting to get it rolling, but also to run out some oldish gas. Sadly, we did a little too good a job at that and I ran out on the way home from this parking lot. My wife went on home on her trike and brought back the truck and a full gas can, but sadly happened to get about the only can that can’t reach the filler, which is under the fender. One of the many tasks left is to add an external filler cap…

I had taken the laptop, but neglected to check it’s state of charge, so I wasn’t able to log any of this driving. I am hoping to get started with that tonight…

Buzz Sold

Buzz has been sold.

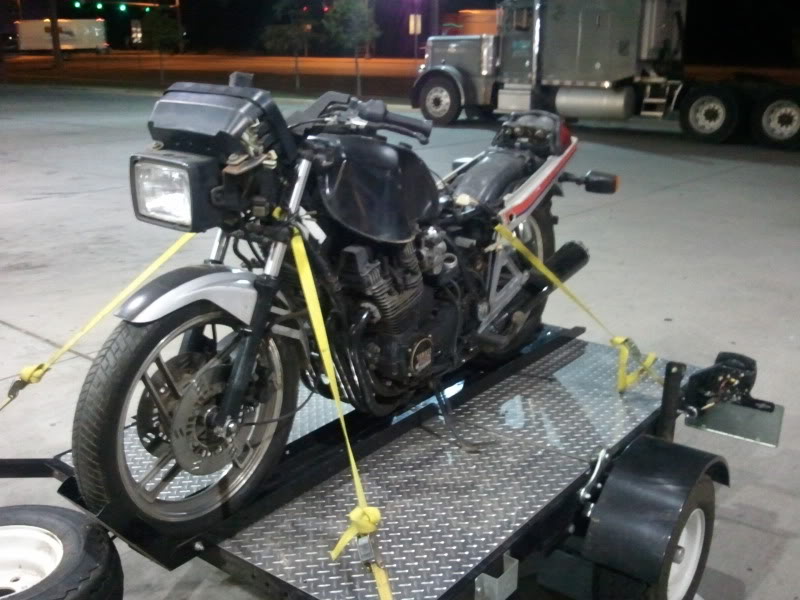
But, Buzz’s sale helped finance what I’m sure will eventually be another MegaSquirt project, a 1982 Yamaha Seca Turbo.

SAMSUNG

In the mean time, I am still working on my VW Trike. I resolved a mechanical issue with the clutch, so I will have it on the road enough to seriously pursue tuning.

Update

Wed Jun 02, 2010 5:36 pm


There has been little engine work because I need the trike on the road first, and while I did have it on the road briefly, the transaxle exploded, so it’s back in the driveway. I will be getting a replacement transaxle and I hope to have the trike back on the road by this weekend.

In the 15 or so miles I managed to put on it before *that* happened, it ran tolerably. I had troubles getting the IAC stepper to be consistent, so warmup is kinda manual. Once warmed, it has a flat spot off idle, which I kind of expected, but it pulls pretty hard up to about 3000 RPM, where it feels like it leans out. For a set of pretty much default tables, it seems to run ok. Obviously, I will still be tuning on it, but it is drivable now. Well, except for the transaxle sounding like ice cubes in a blender.

Anyone interested in the rest of the build, including lots of pictures, can check out the build at the build blog.

Turn four executed

I have tomorrow off work and because of the other trike work being done, I am nearly ready to put this thing on the road and get an inspection sticker!

One quick note before I head to bed…

The surgey idle I was experiencing during my last log capture may have been a result of unnoticed fuel starvation. Yep, it was outta gas. Though I have not seen any normal evidence of a leak, while I was rerouting the fuel line, I noticed that the bottom of the tank was wet with fuel. Turns out there is another tiny pinhole. I applied some of that emergency gas tank repair epoxy stuff on it.

With a little luck and no trauma, I should be ready to get it inspected tomorrow, probably early afternoon…

Things are Afoot

Tuesday evening, I got to play rescue ranger for a friend who’s dying battery had stranded him. When I got back, I didn’t do much on the trike, not really wanting to do the 15-20 minutes of preparation I generally need to get started when I was only had an hour or so total. I did replace the throttle spring on the yellow trike with a lighter pull spring. I have not yet ridden it with the new spring, but it seems like it will work well and significantly reduce throttle hand fatigue, which is a big issue on that one. I use a cramp buster, but I rest the heel of my hand on it and still have press down to maintain highway speeds.

I digress.

[updated 5/21/2010]
Last night I took a little video of the engine running with a Canon compact digital. The sound and picture are way better than the Blackberry video, taken in the dark with sound apparently set to “extra crappy”, and the new one has no irritating narration.

I also did some work on the handlebars, needed to begin wiring the chassis and body, and I mounted a fuel pressure gauge.

Tonight I have a prior commitment, but tomorrow morning, I pick up the body with new upholstery!

With all these pieces coming together this week, I hope to be able to take it around the block sometime this weekend, at which time I can really begin to tune on the engine.

Speaking of tuning, I heard back from SpeedTek about the dyno thing. The 6-pulls-in-2-hours deal has to be scheduled well in advance. At any given time, they need 2-3 weeks lead time since the pretty much dedicate a technician for 2 hours. There is a chance I may be able to get on the schedule for the week of my vacation in June, but I will probably wait till after that.